Leaderboard


Popular Content
Showing content with the highest reputation on 01/10/2017 in all areas
-
5 points
-
I think it worked
 4 points
 -
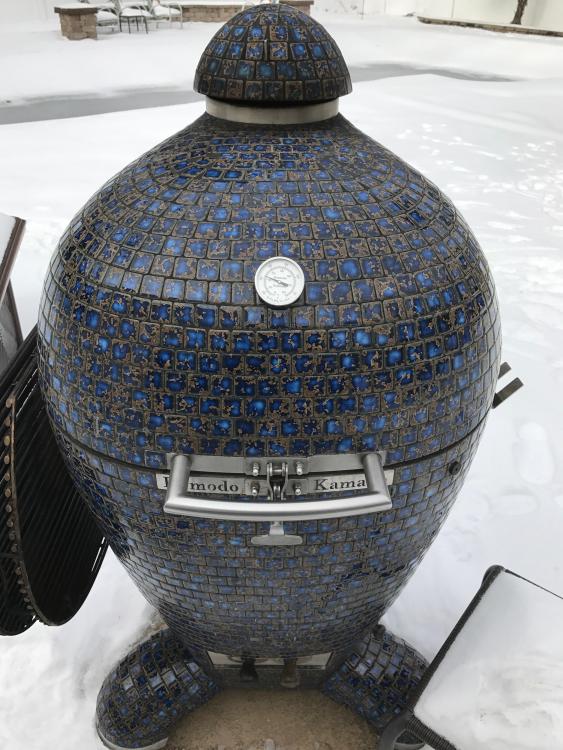
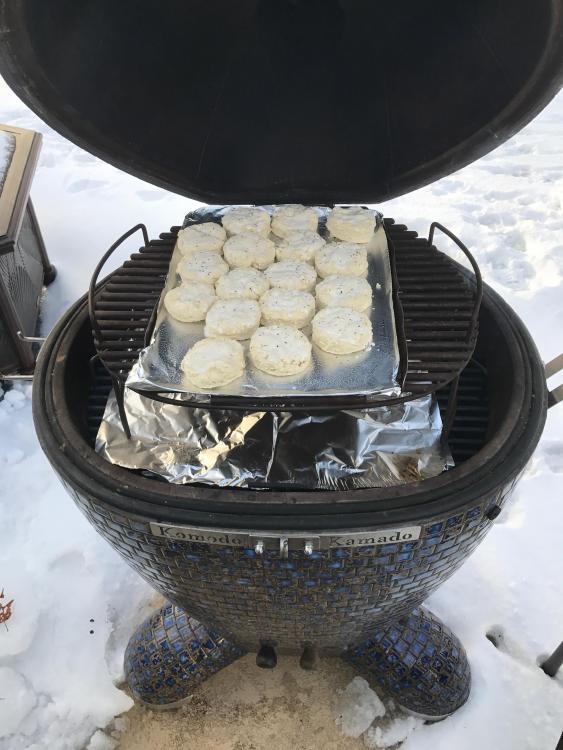
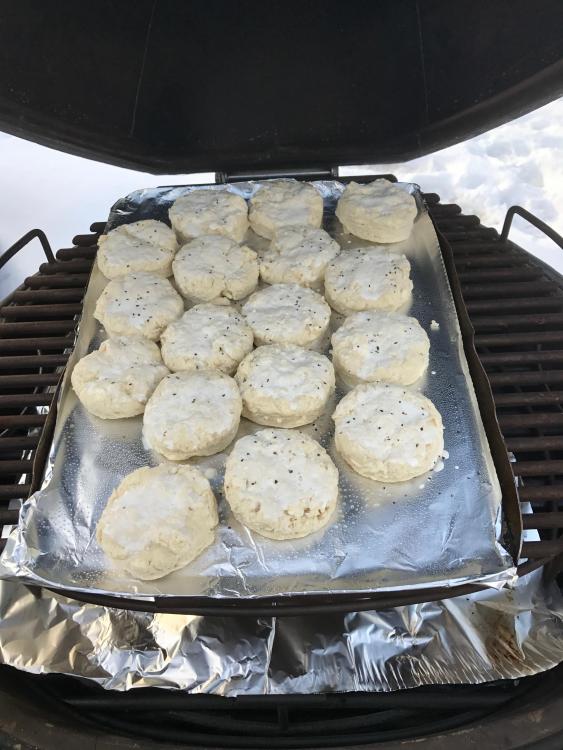
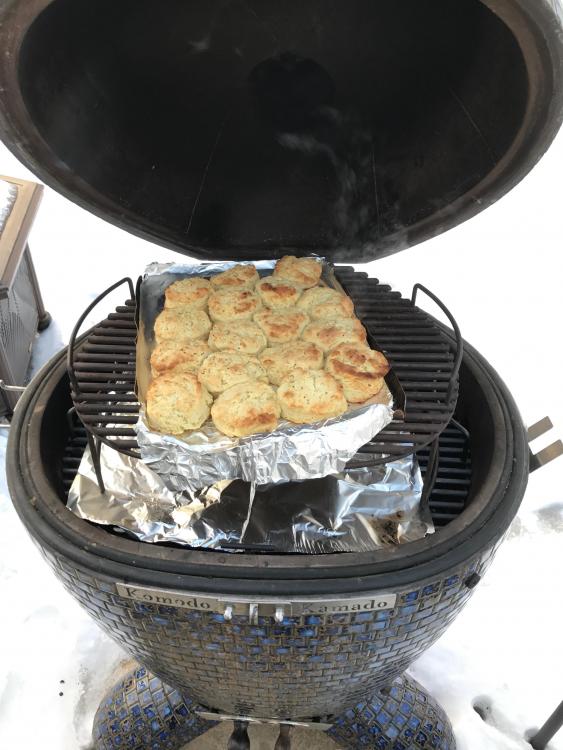
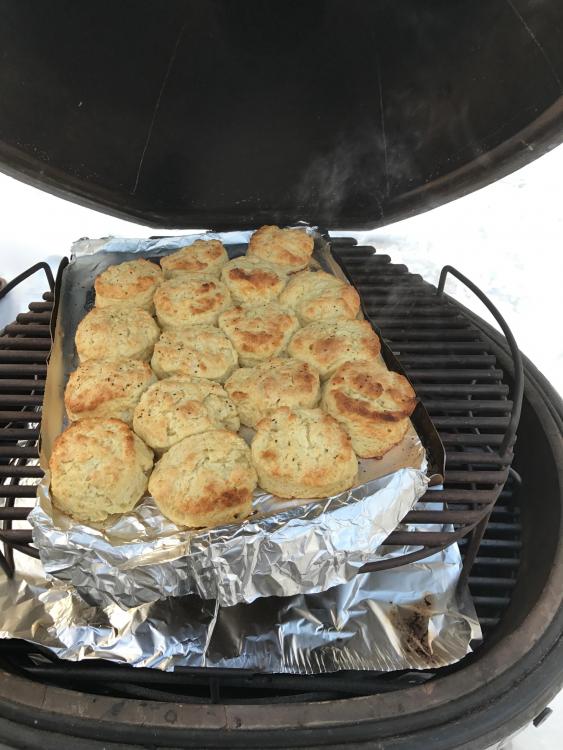
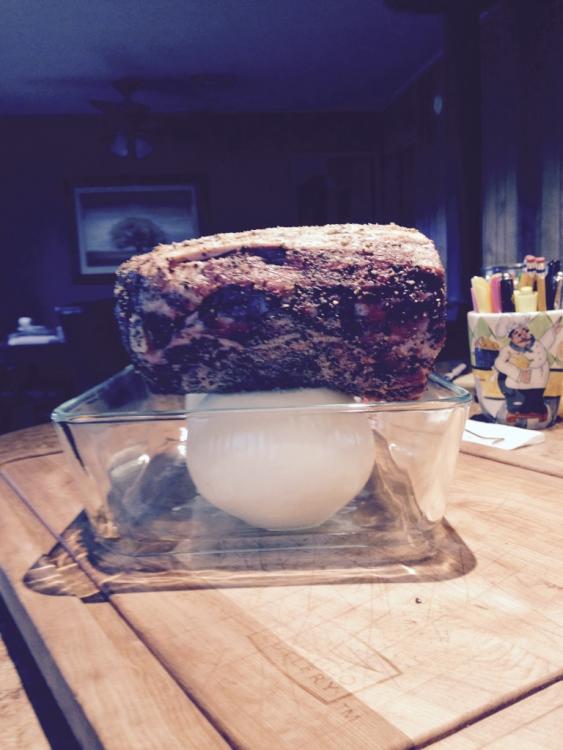
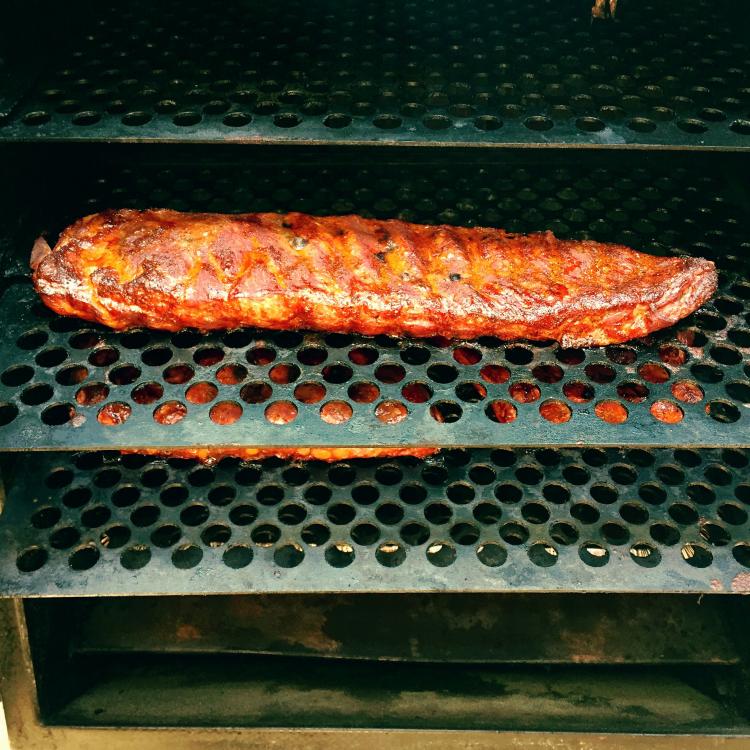
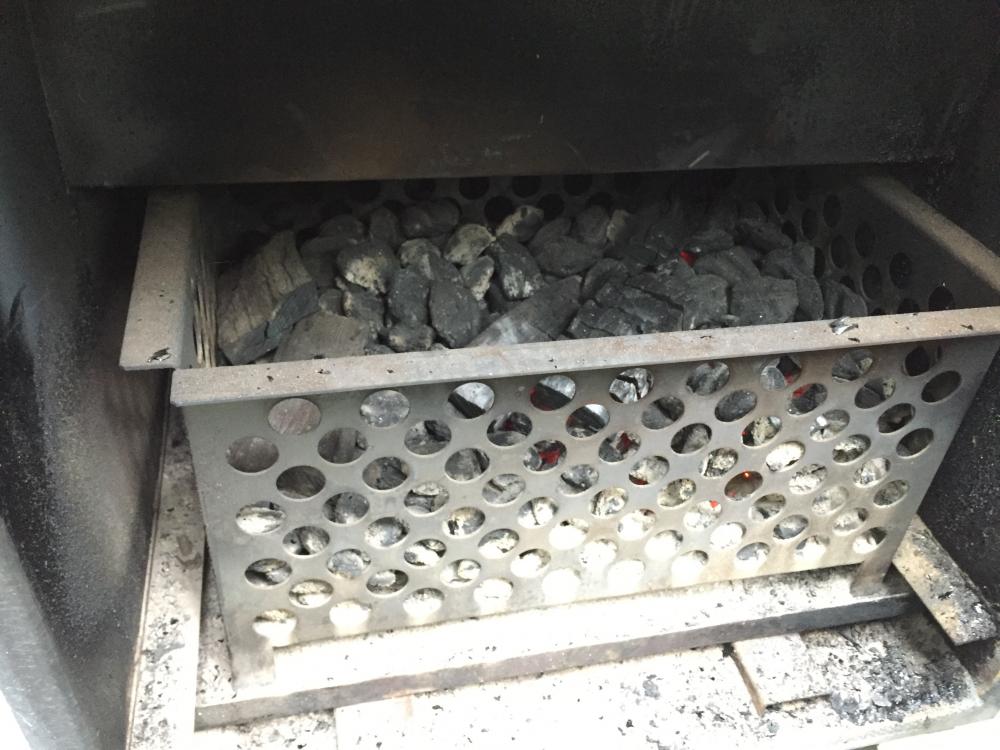
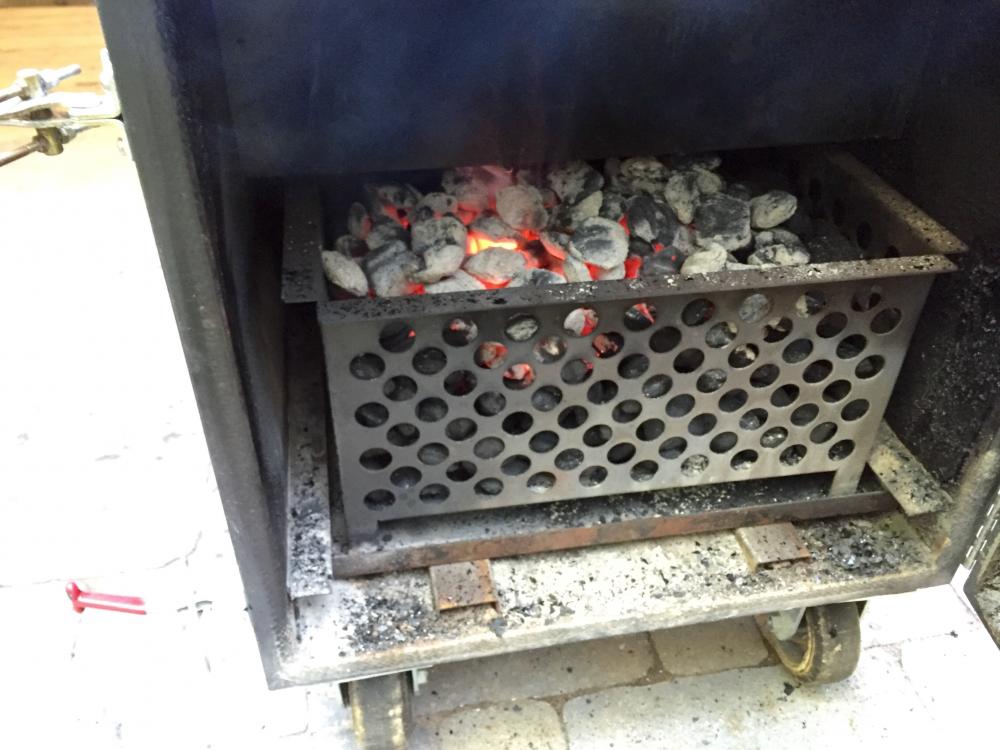
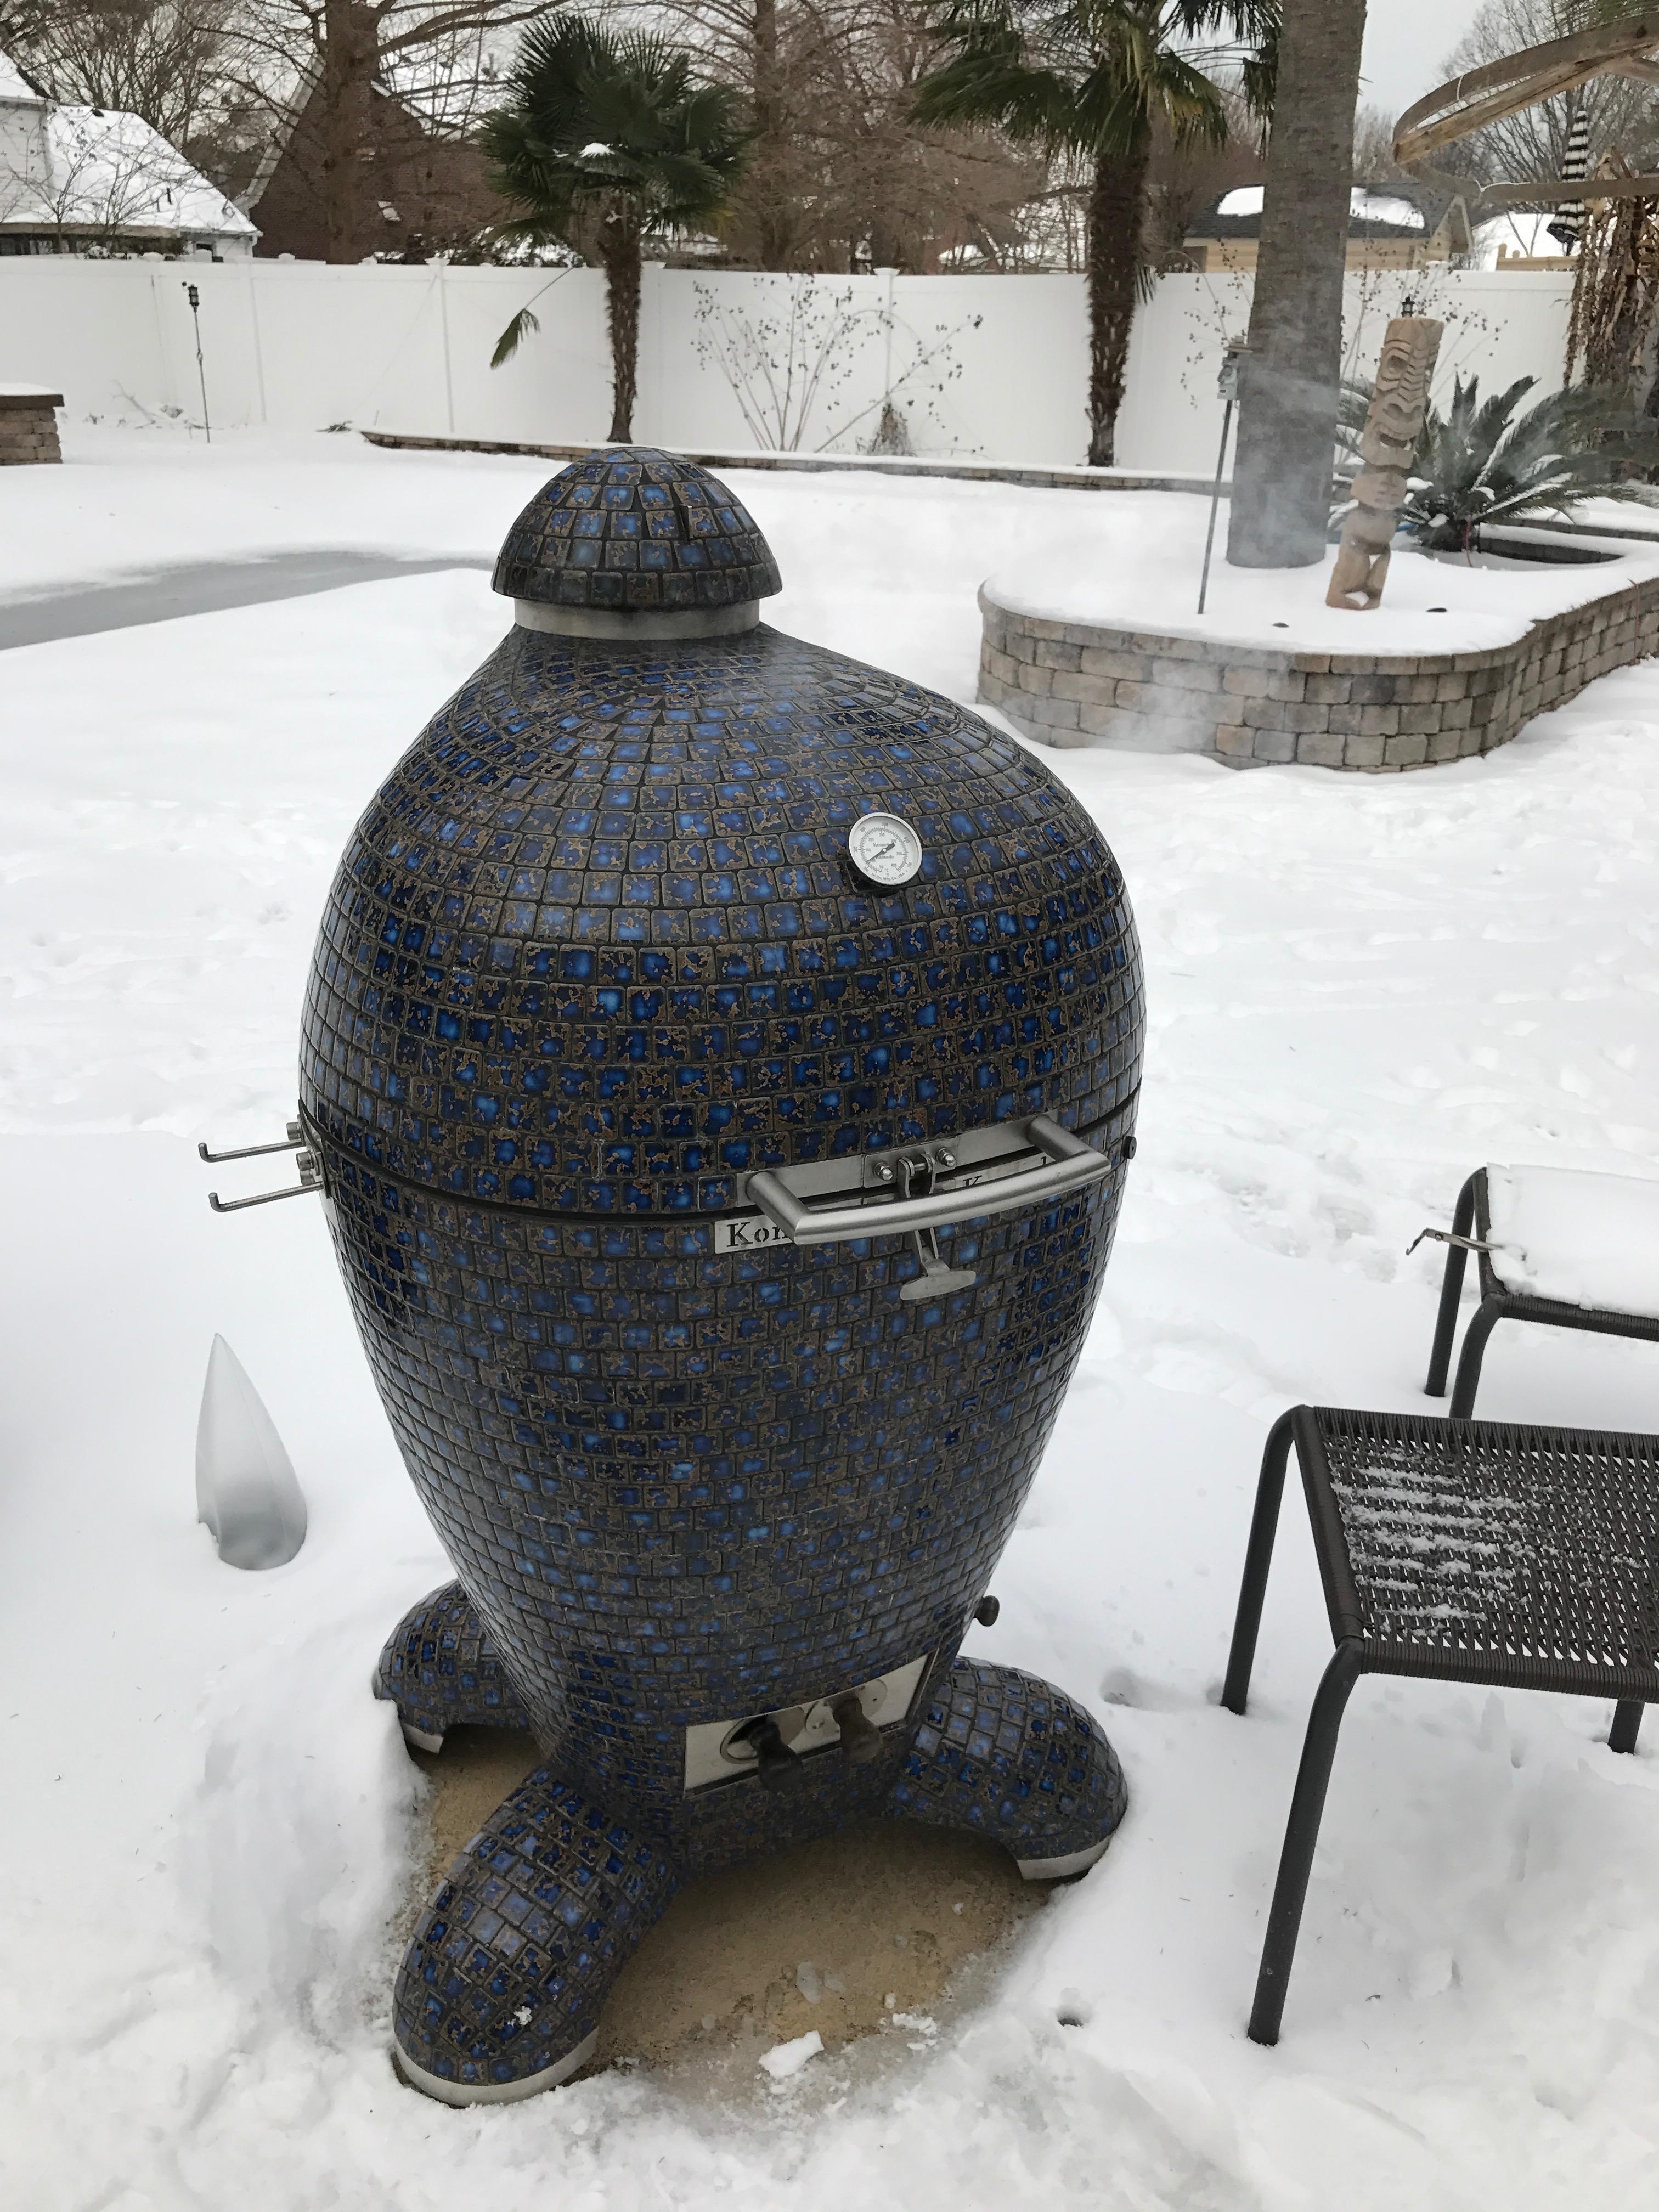
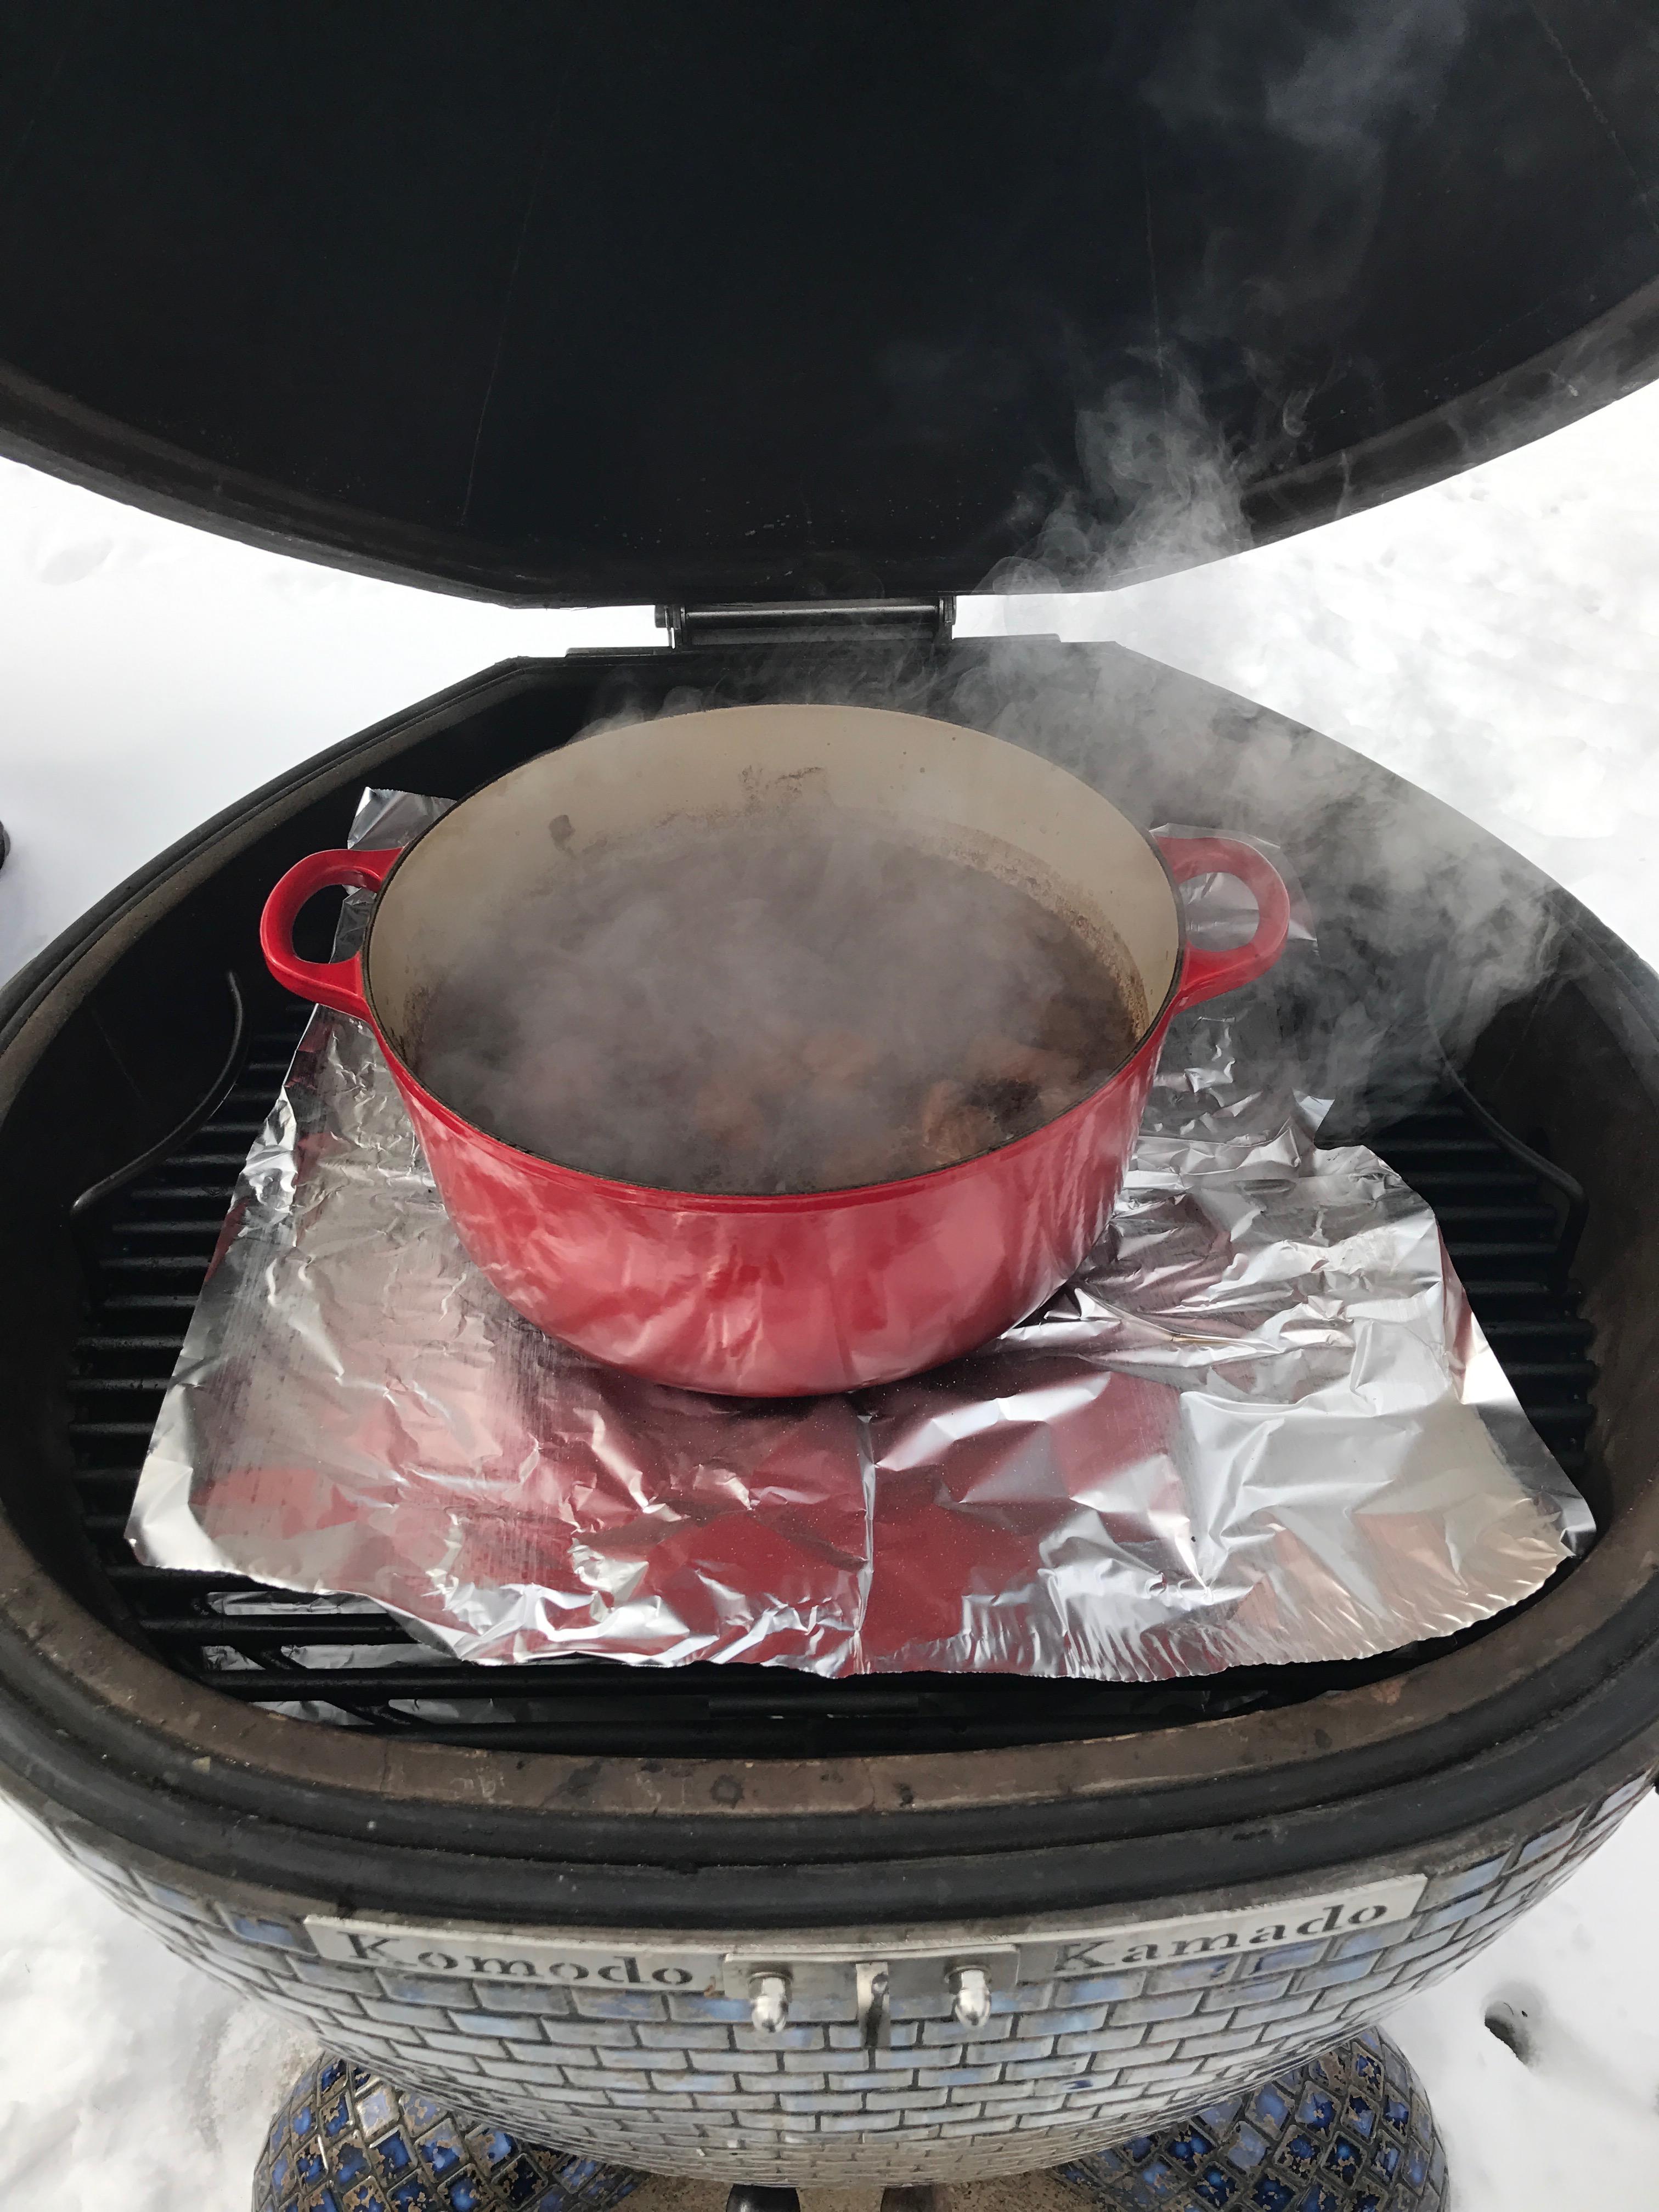
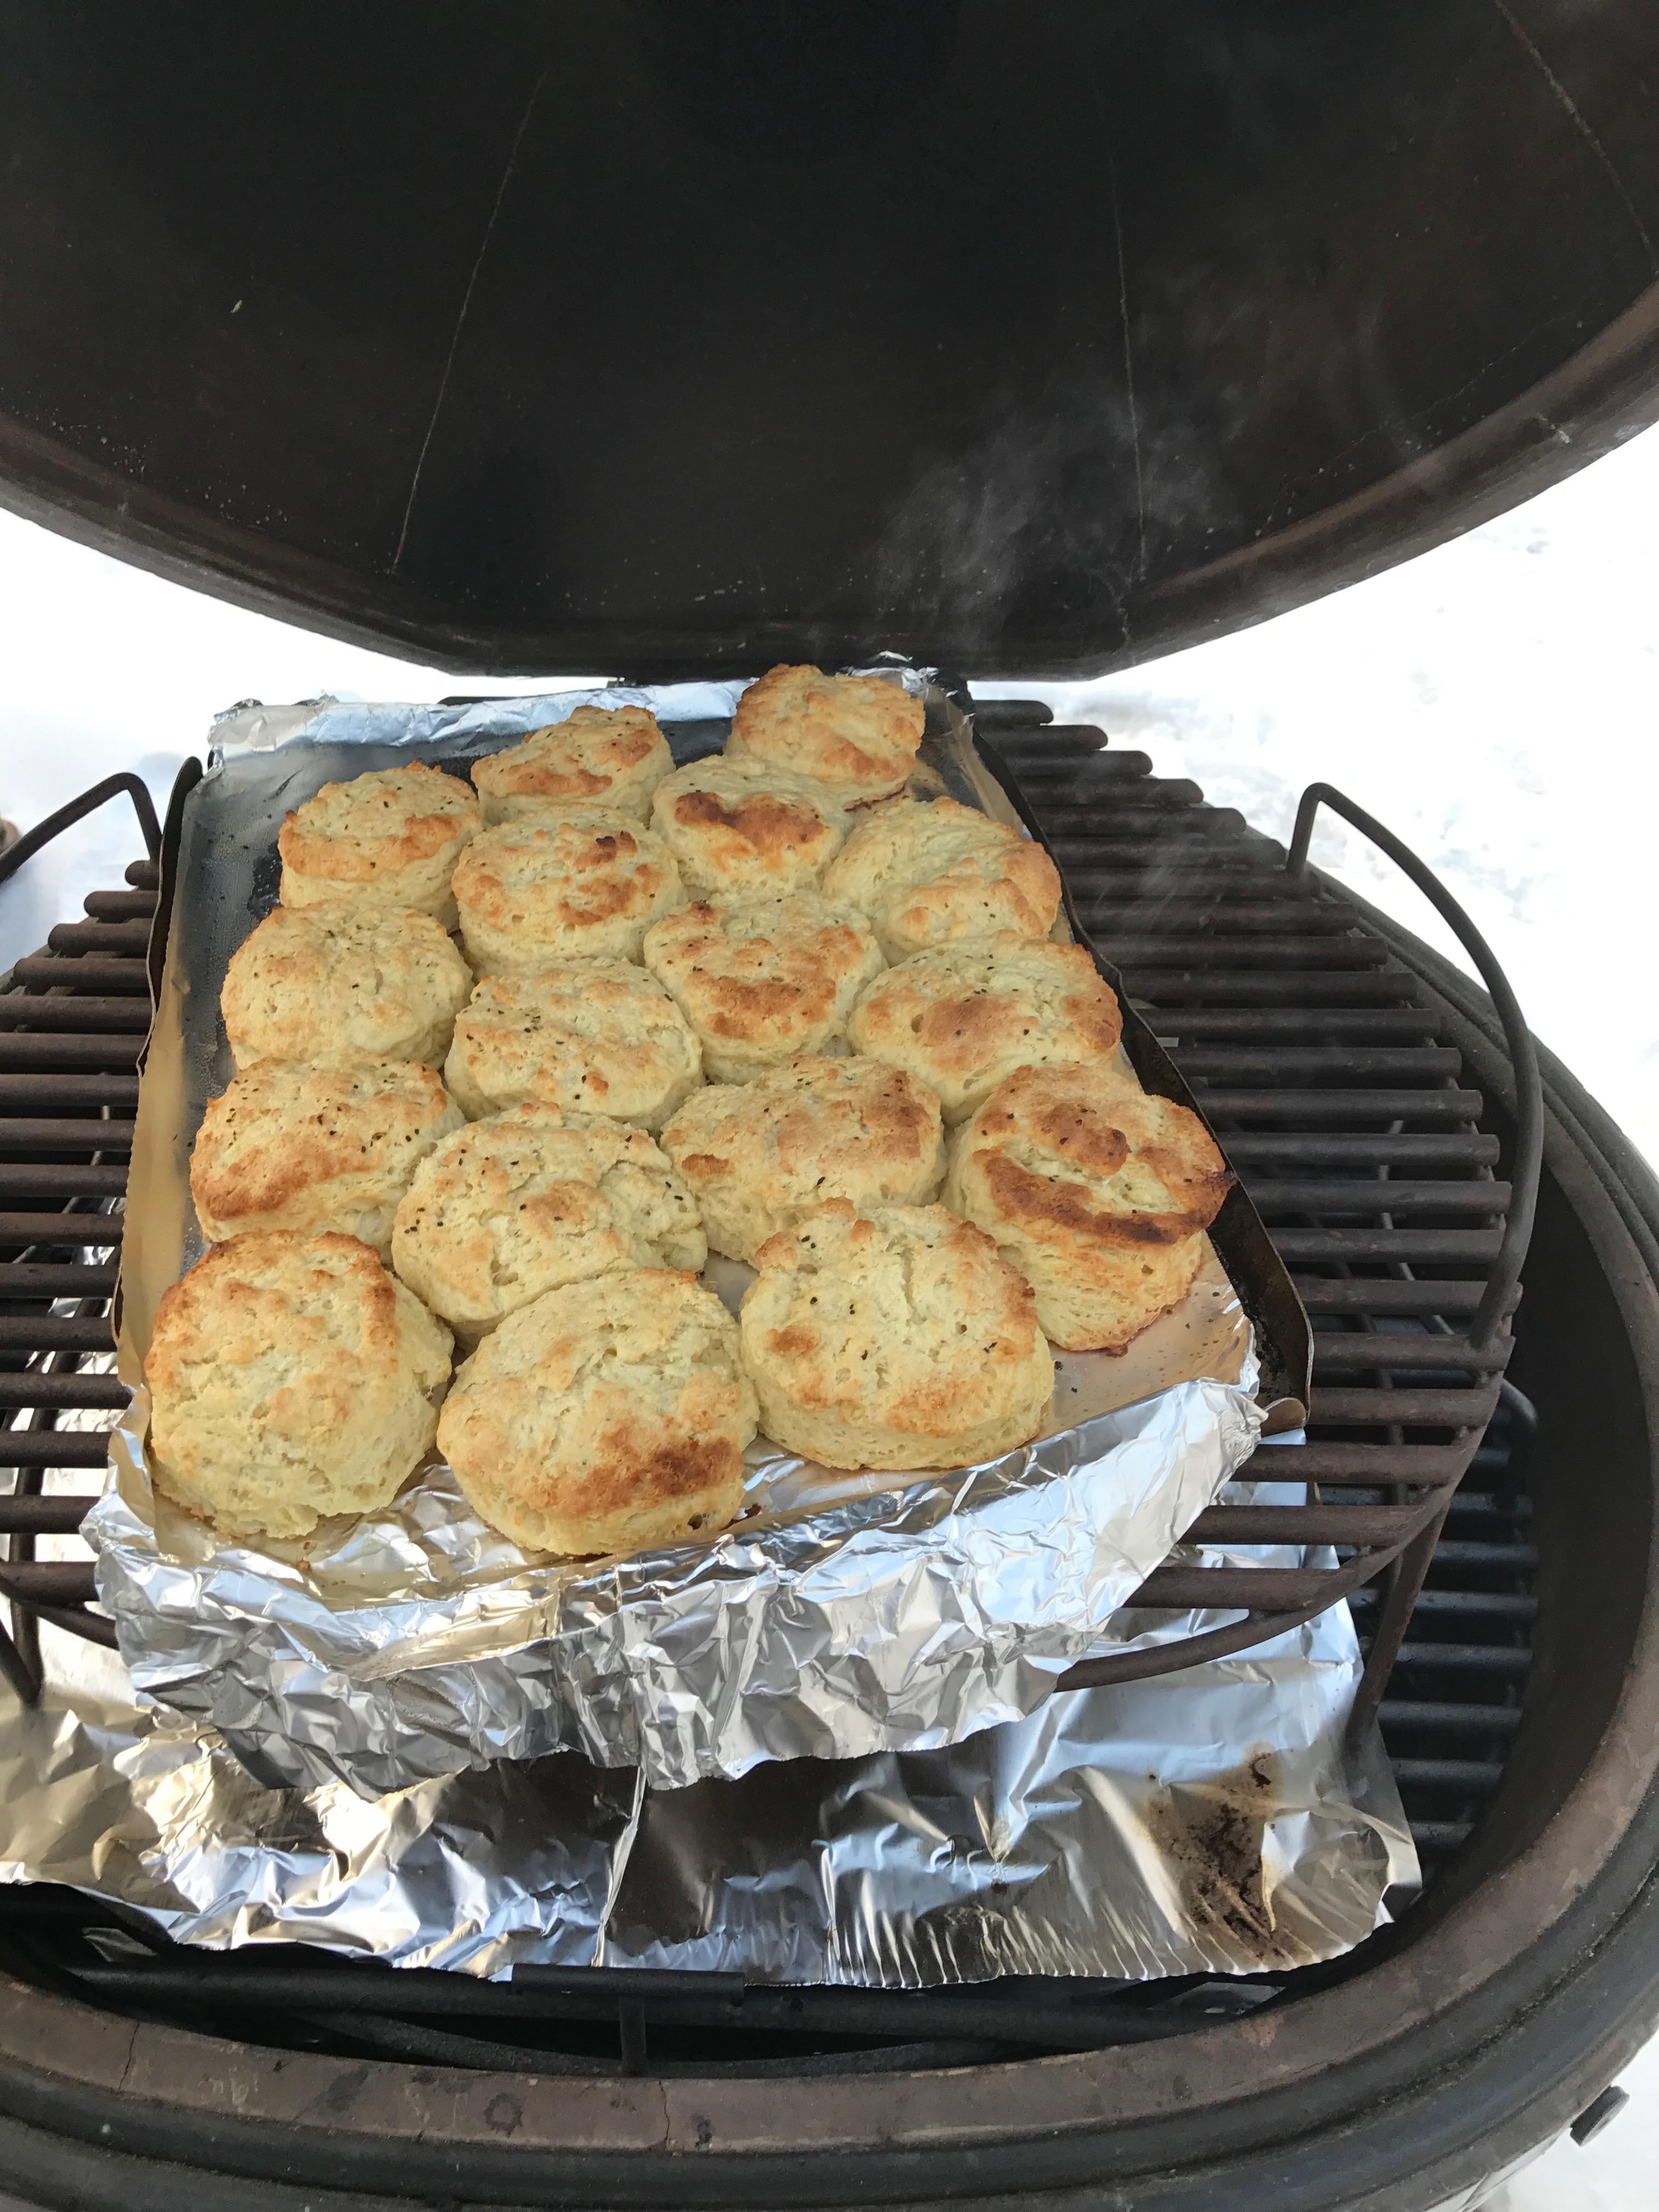
I had to work the weekend while we were under blizzard conditions and off today. I thought it would be a good time to enjoy the snow and give the kk a chance to warm up. If you don't mind the back story on this cook, it is a recipe that I tried to recreate from something my grandfather used to make. When I was a kid, he used to make a really simple beef stew in his fireplace. I have no idea exactly what he did but in my mind at least, it tastes exactly the same and it is delicious. It is the most simple thing I have ever made. He used to raise black angus cattle for his own use and our family. my recipe uses a black angus boneless beef center cut chuck roast, beef broth, onions, 2 cloves of garlic and salt and pepper to taste. I first cut the beef roast into small chunks and add salt and pepper and brown them in my dutch oven. then I take them out and cook the onions followed by the garlic in the leftover beef juices. Throw the beef back in, add beef broth to cover everything and put it in the oven at 325 for about 3 hours or so. He used to put it in his fireplace on a arm that swung over the fire logs. Since I was cooking in the kk, I decided to leave the top off for the first hour to see what the coffee char would add. then I covered everything and went another 2+ hours. The temp outside was around 25 degrees F when I started. It was surprisingly fast to get the kk up to 325 and heat soaked. On goes the beef stew. Happily cruising along now. When the stew was done, I took it inside. I take the extra step here to remove the beef chunks, throw the liquid in the vitamix and blend it so I don't have any chunks of onion or garlic. maybe unnecessary but I couldn't remember ever seeing onions in my grandfathers beef stew. Now it is time to throw on the buttermilk biscuits. I bumped the grill up to about 450 and added the upper rack. After cutting them out and putting on a greased pan, I brushed some heavy cream on top and added pepper. I think this was a Bobby Flay recipe that I tucked away. About 15 minutes later I usually cut a biscuit in half and put it in a bowl, cover with broth and add some beef chunks. They are seriously tender and flavorful. One of my favorite winter meals. Now if I could just perfect my grandmothers corn bread....

 3 points
 -
What a crying shame. I went out and hugged my KK just now. I would kiss it, but the cold would make my tongue stick to the tiles.3 points
-
I think I was married to that lady once........................3 points
-
Outback Kamado Bar and Grill3 points
-
When you really want to hurt a guy take a hammer to what he loves!3 points
-
Total weight of 2 lb, 10 oz for $150 = $57.00/lb plus shipping. I can do a lot better than that for dry-aged beef from my local Whole Foods. Their dry-aged tenderloin runs about 25.99/lb if i remember. You can get 8 lb, 8 oz. of Aukushi/Angus Wagyu for $365 from Heritage Foods, that's $43/lb for some of the finest beef you'll ever put in your mouth: Steak Lovers Package Plus shipping, of course.2 points
-
I expected to see this...........................................................
 2 points
 -
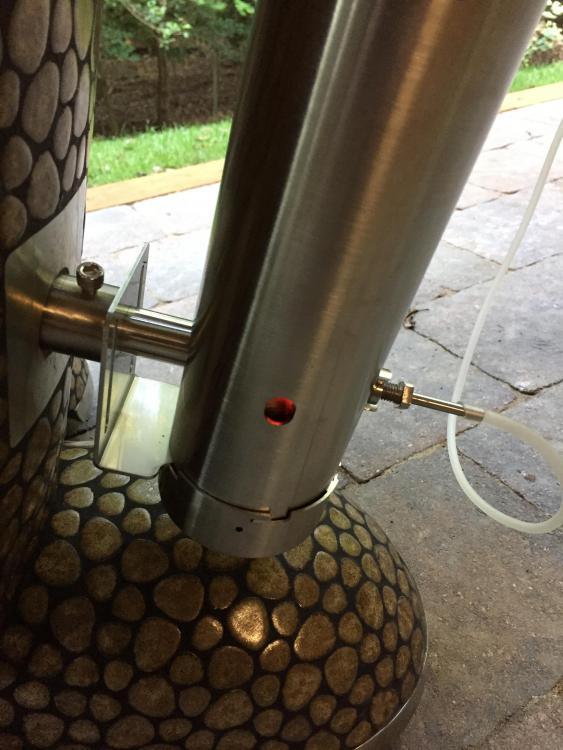
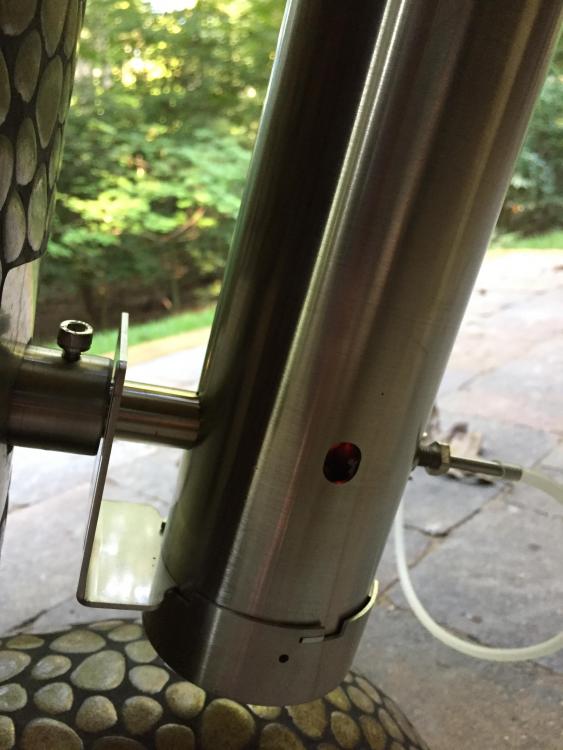
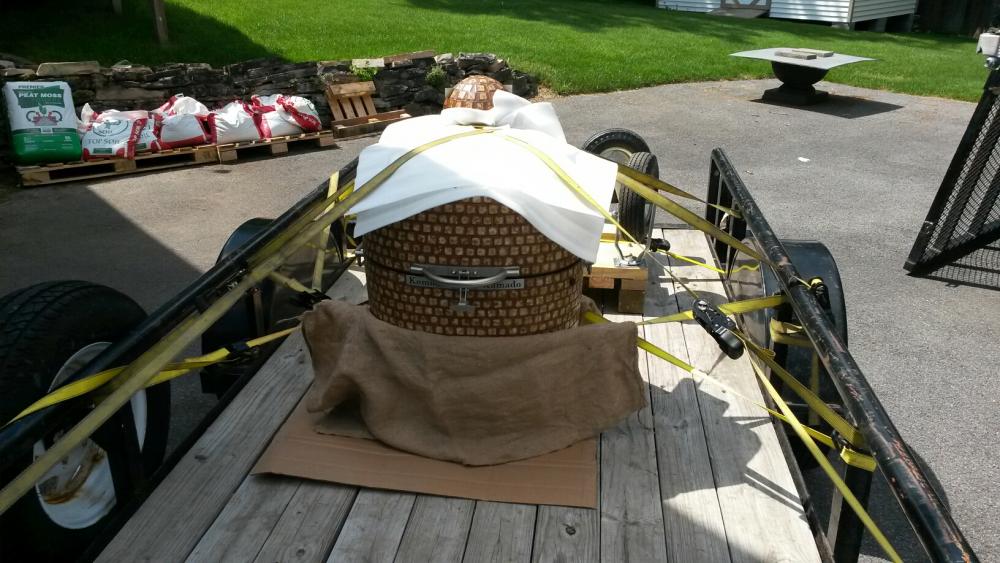
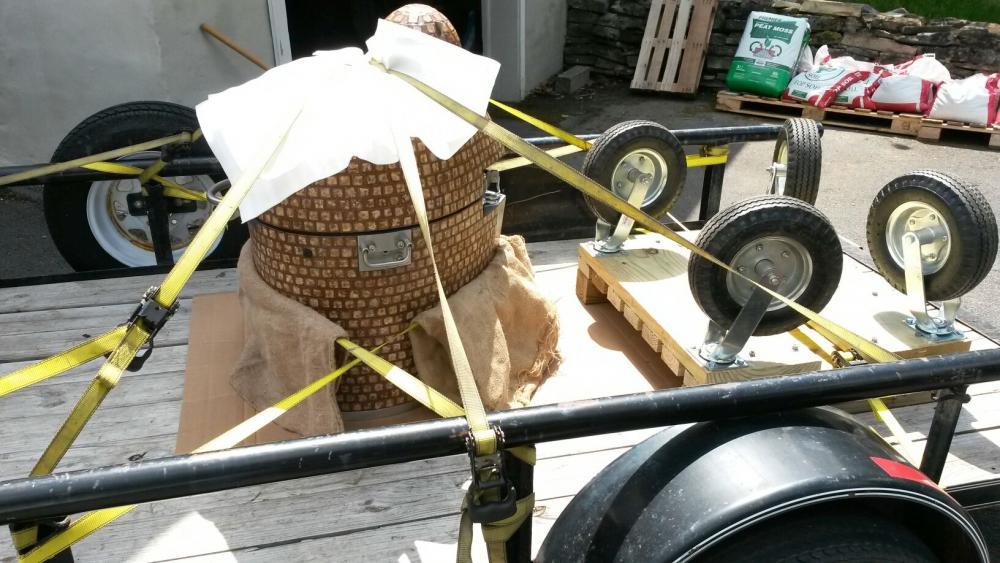
Yes that grate has not been used. All of the accessories are on the inside of the grill. There is another grate on the inside that has not been used. Also there is a large grate that has the foldable sides as well as a pizza stone and heat deflector. One of the shelves looks new and the other faded by the sun. in regards to the damage it was done with a hammer but as I said on the brethren site the man deserved every bit of it for what he did. Personally he should have been tied up and stoned. I called Dennis and left a voicemail in regards to parts and removing tiles. How soft does the grout get? Also in the pictures you will see what looks to be a black mat like substance under the tiles is that the grout or a layer. Wondering if I need to remove that to get the tiles to lay level with one another. I know Bosco asked but yes I will be going into detail on this thread for the whole rebuild. I will make sure I include plenty of pictures. CK & CS if you could direct me to how you fixed the latch that would be great. If no post could you send me a message. I was just going to heat with a torch then slowly bend back. Wondering if I have to do it while it is fully latched so it wont mess up any alignment. Still trying to figure out how to strap this into my trailer2 points
-
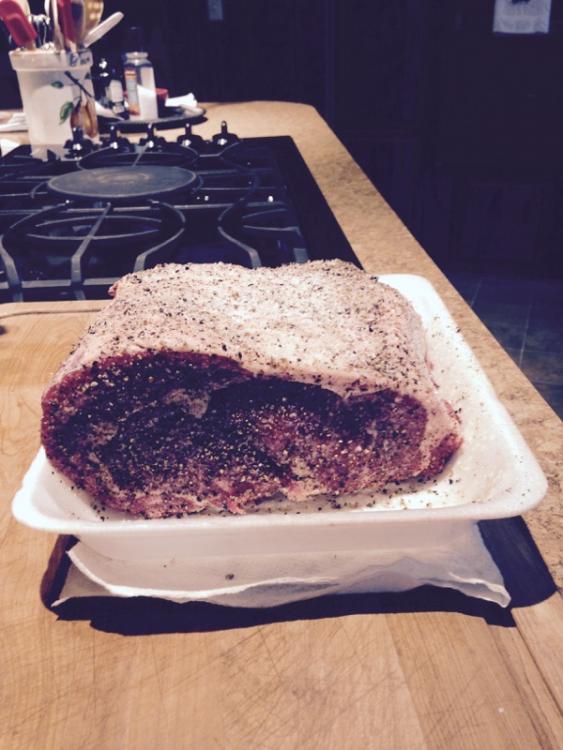
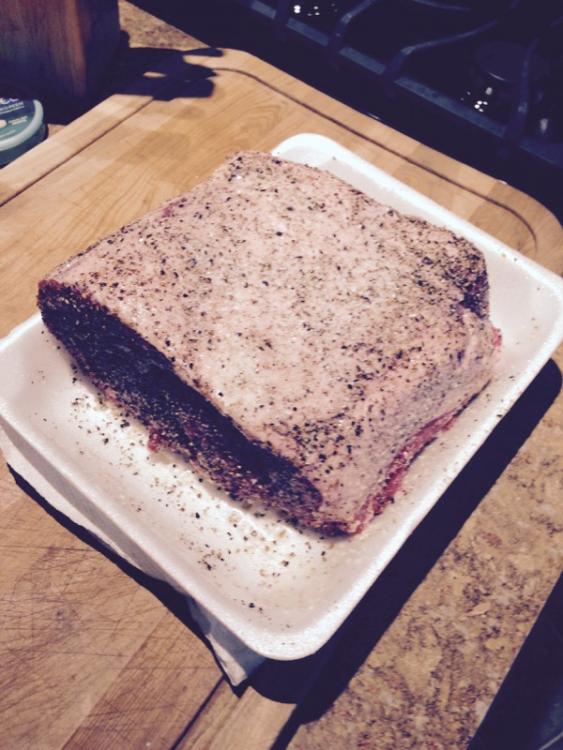
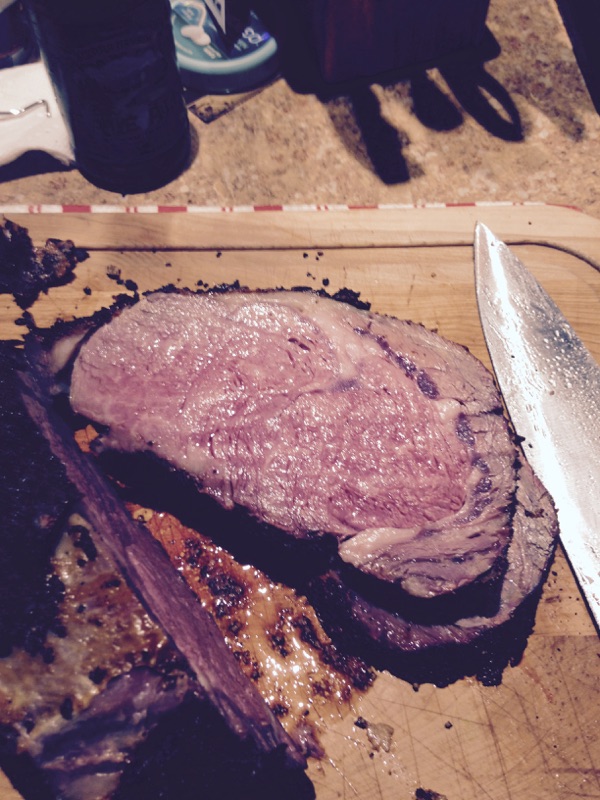
I picked up a 4.5 lbs. small rib roast. The roast was seasoned with salt, pepper, onion and garlic powder Monday morning. It was then placed in a well-stocked beer cooler. The temps in my area have ranged from a low of 25* to a high of 42*. I’m thinking there’s no problem holding the meat outside as long as I can keep the critters out of it. I did regular checks on it…might as well grab a beer while I’m here. It remained in the cooler until Saturday when I cooked it. I wanted to get some drippings for Au Jus so I elevated the roast above a glass dish using onions. This put the roast higher in the lid so it cooked quicker than I thought it would. I was shooting for a 225* temp but Bob settled in at 250*. Three hours later the IT was 115*, perfect. Wrapped in foil and towels and into the cooler. An hour before we were ready to eat I raised Bob to 450* and finished the roast. There wasn’t any drippings for Au Jus but the flavor of the meat was good. No KK or plated shots. Bad planning on my part.
 2 points
 -
Give it a try guys. A really easy revipe/technique that produces great results. There are a few people out in Internet land that have tried and like this tutorial. Only thin crust I use at this point.2 points
-
Must have been a really pissed off significant other. I was the one who did a latch fix. It was a really bent up latch. I'll post again tomorrow morning. Time to go to bed. Charles2 points
-
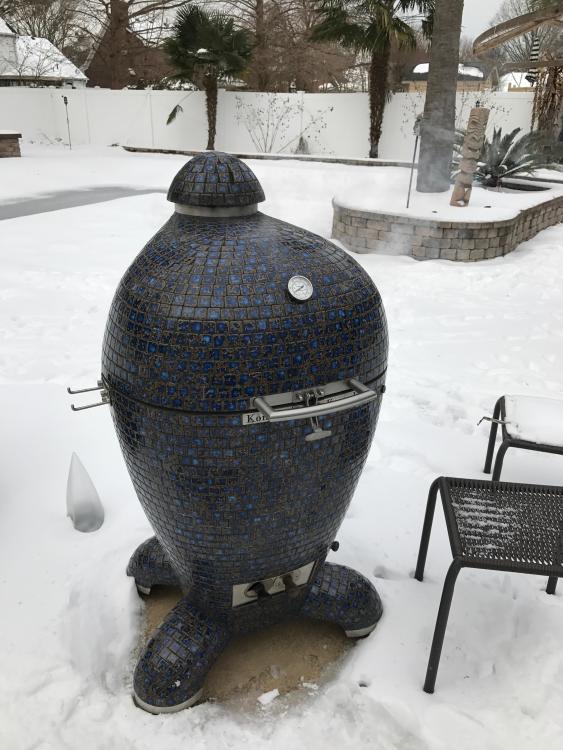
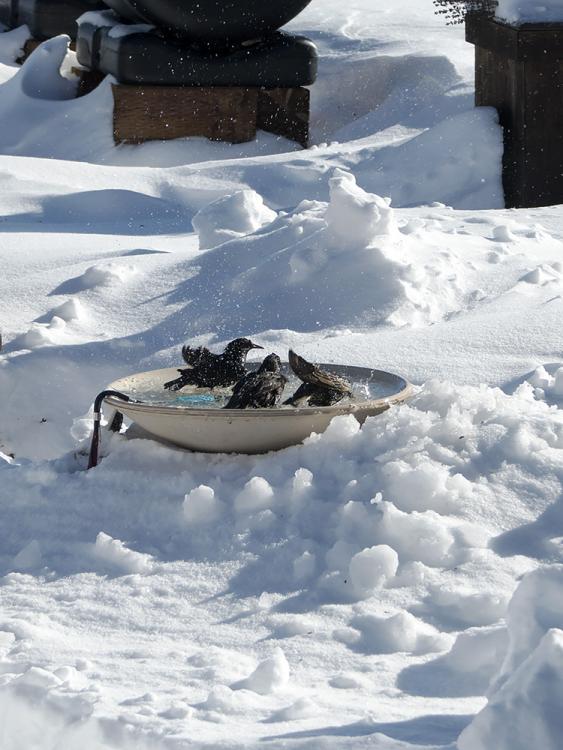
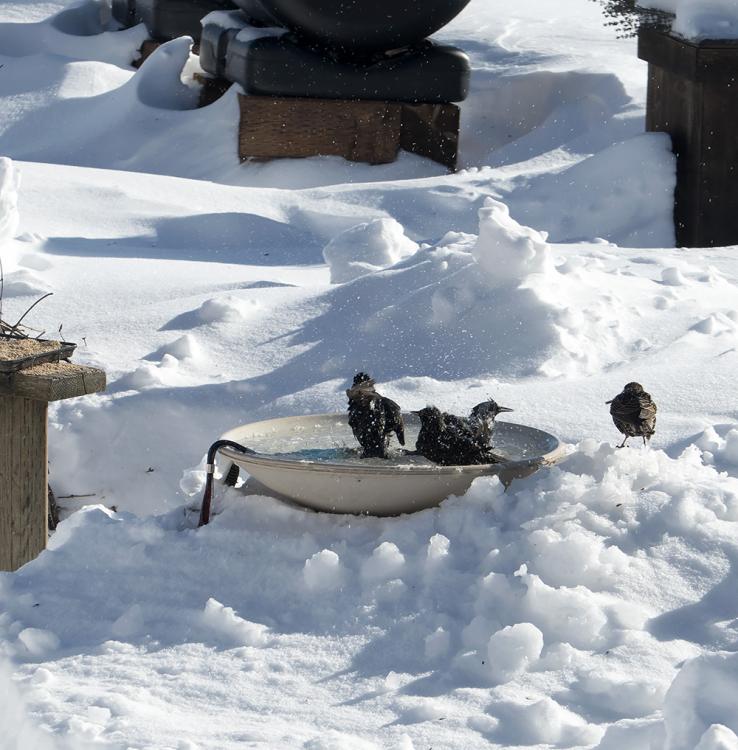
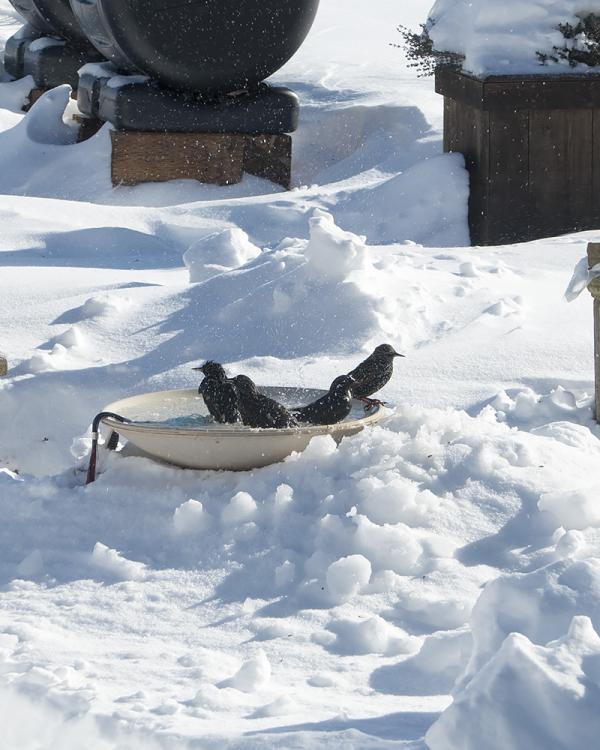
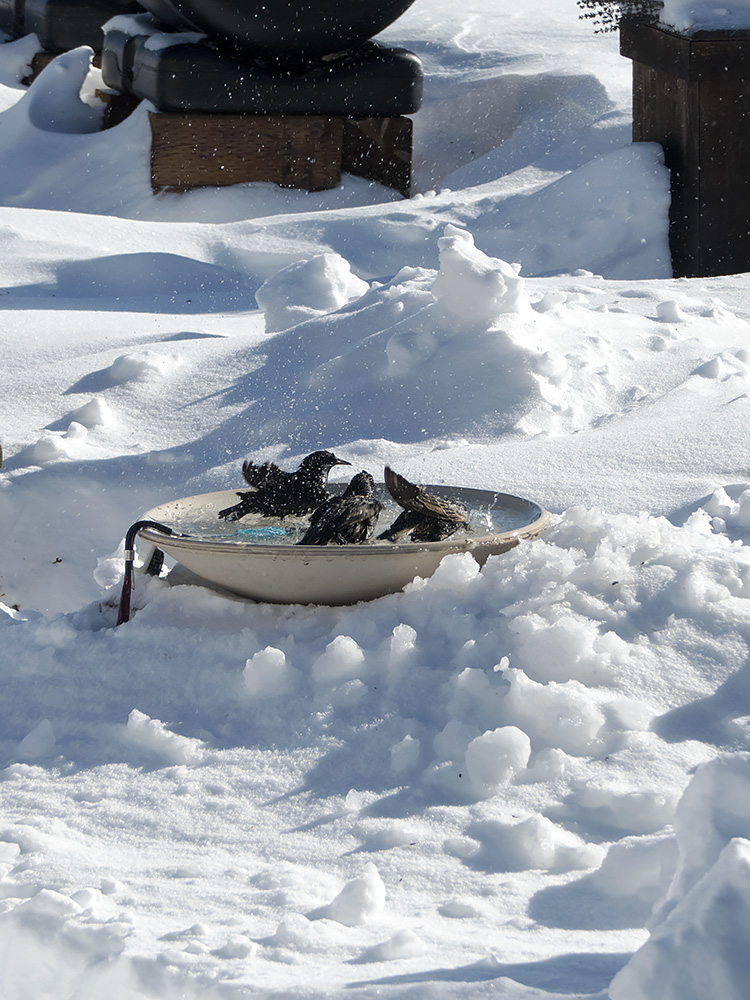
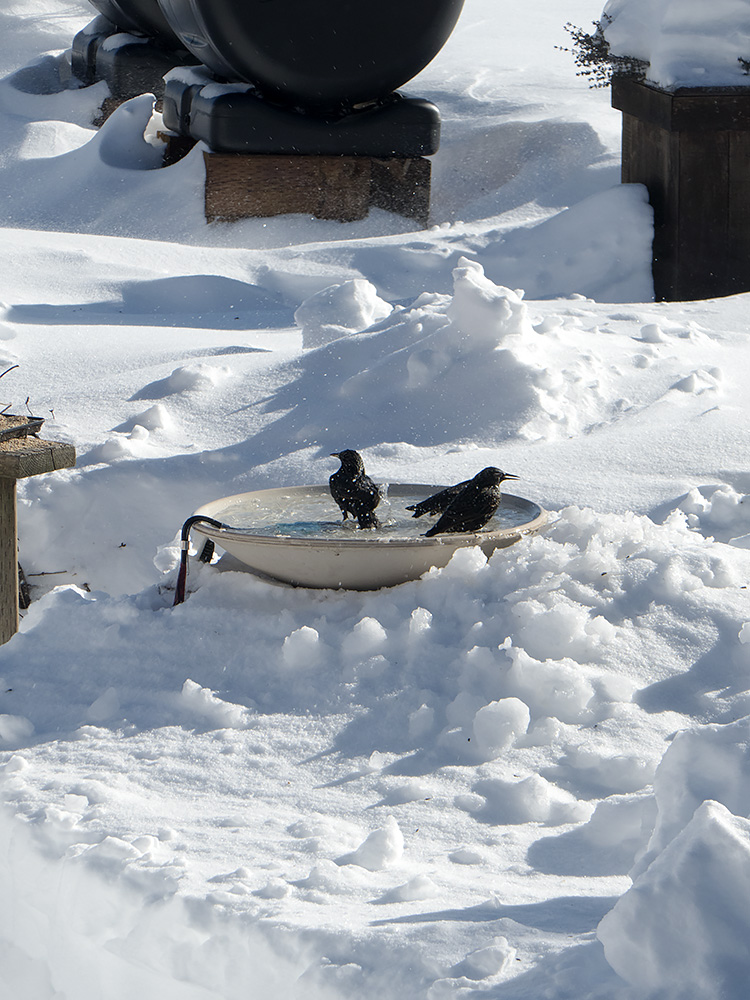
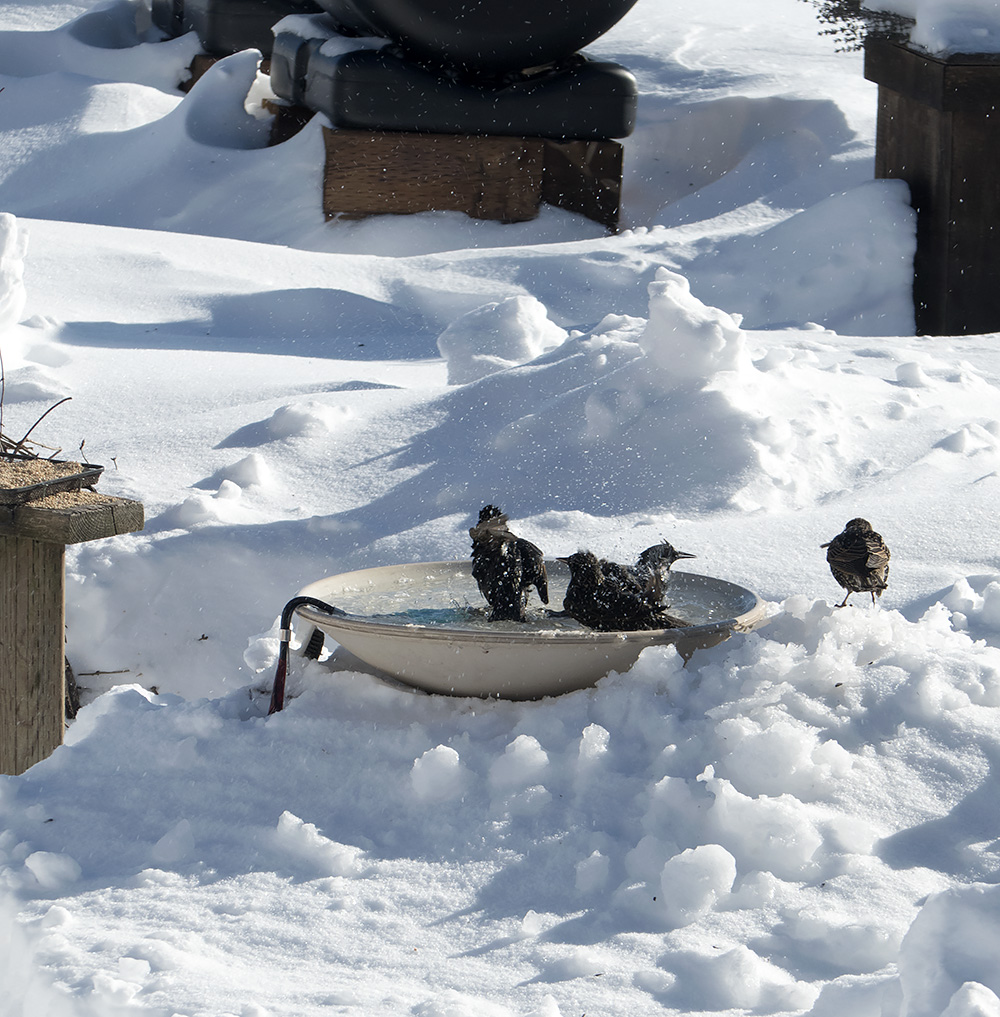
See how much fun you can have out here in the clean, bright, fresh snow and sunshine. Managed to capture through the kitchen window these little critters have some fun in the sun. Looks like I need to add more water.

 1 point
 -
Definitely don't leave it in place unless in use. I haven't actually done the rubber washer thing because mine doesn't turn on its own anyway. Just surmising that if you found one that could take the heat, that would likely do the trick. Maybe something like this: https://www.amazon.com/HIgh-Temp-Silicone-Washers-10-Pack/dp/B01J1V7RCM1 point
-
Count me out of that deal.1 point
-
Do the math - that weekender package is only 5.25 lbs of meat for $310 - that's $59/lb. Even the smaller one is no bargain either - 2 5/8 lbs for $150 or $57/lb. At those prices, that box of meat better be delivered by a chef who cooks it for you!1 point
-
Found this article about Paul Newman in Food & Wine and it mentions the burger. http://www.foodandwine.com/articles/paul-newmans-next-act Found another article that says the restaurant closed in 2014. http://www.ctbites.com/home/2014/1/31/dressing-room-in-westport-closes-its-doors-after-8-years.html Can't seem to find an actual recipe anywhere?1 point
-
My controller didn't have an adapter that fit the guru port on the KK, so I went and got a pipe nipple. That was slightly too small and would pop out of the KK. I gave it a few wraps of paper and now it fits snug. Hey, you asked for a solution, you didn't ask for an elegant one.1 point
-
My smoke tube is gunked up enough that it doesn't want to separate from the main cylinder easily as it is. The flange is coupled to the main cylinder in such a way that they are a solid unit, so wrapping something through the slots and around the cylinder wouldn't do anything. The simplest answer might be something like a rubber gasket that you could wedge between the flange and the sleeve. Push the sleeve up tight and lock it down. The gasket should act like a lock washer.1 point
-
I can get a prime strip loin or ribeye primal at Costco for less than $10/lb, butcher and dry age my own. So in short...NO!1 point
-
Here are some pics that should help you visualize:
 1 point
 -
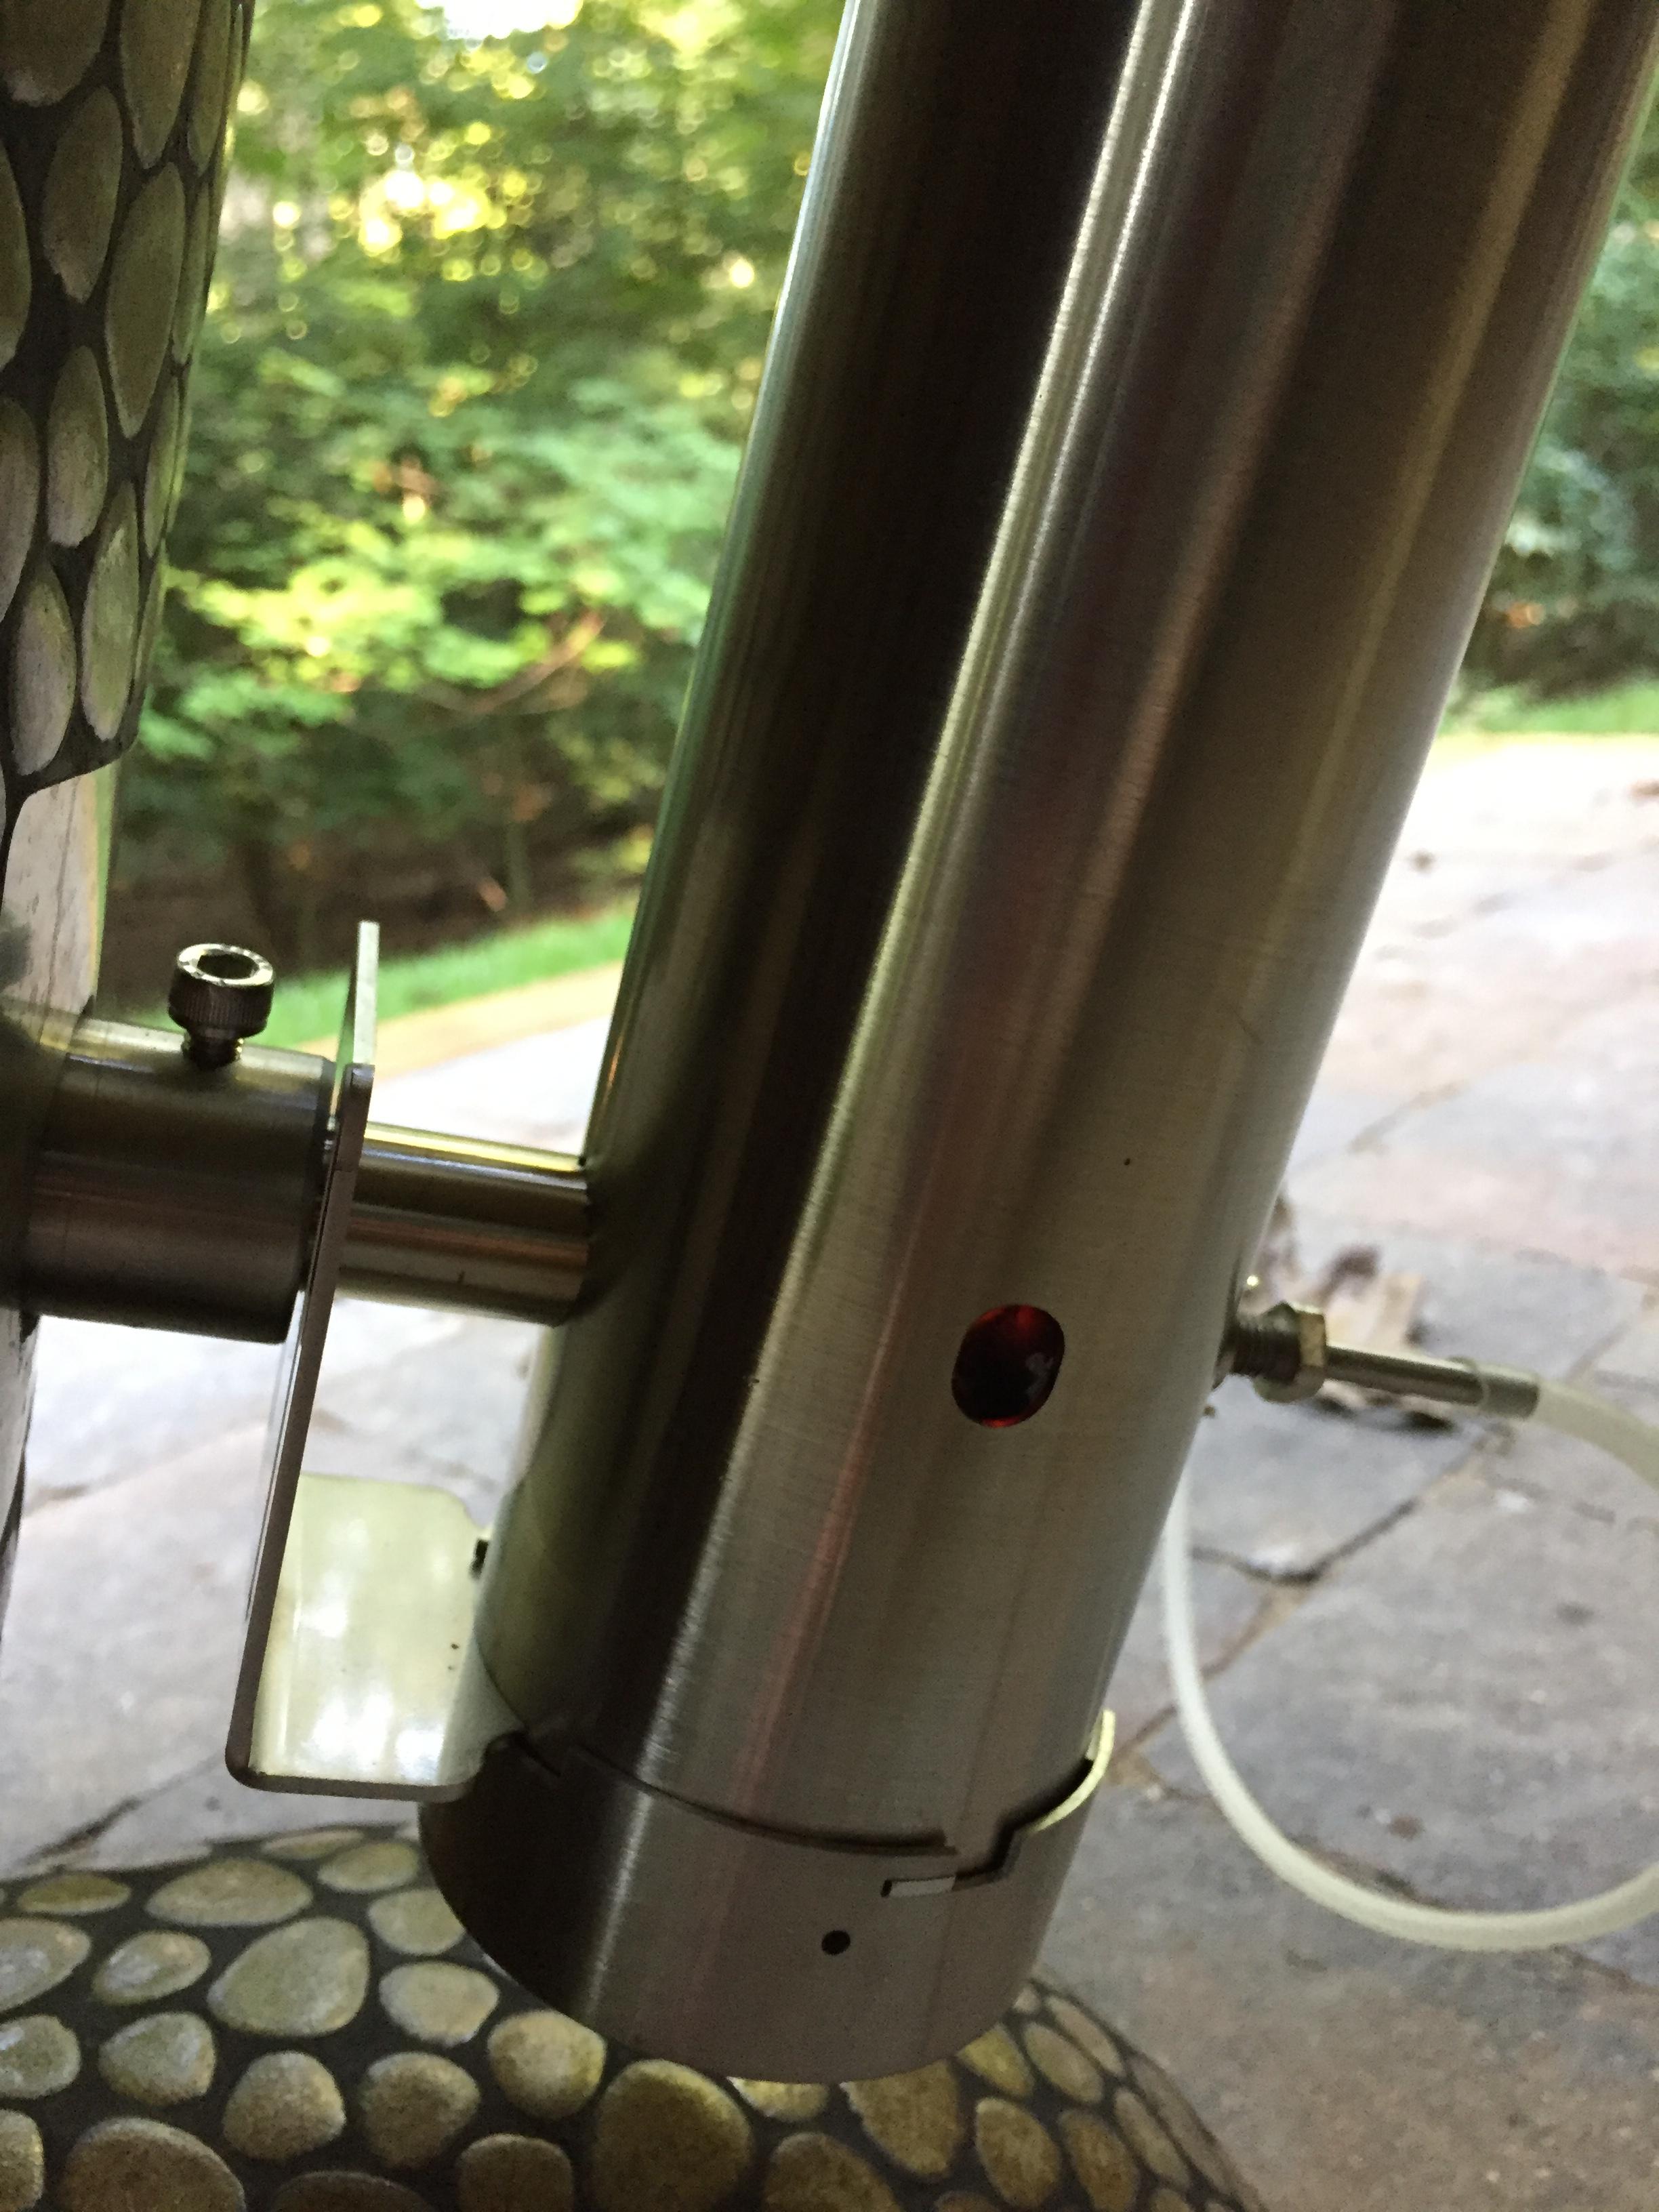
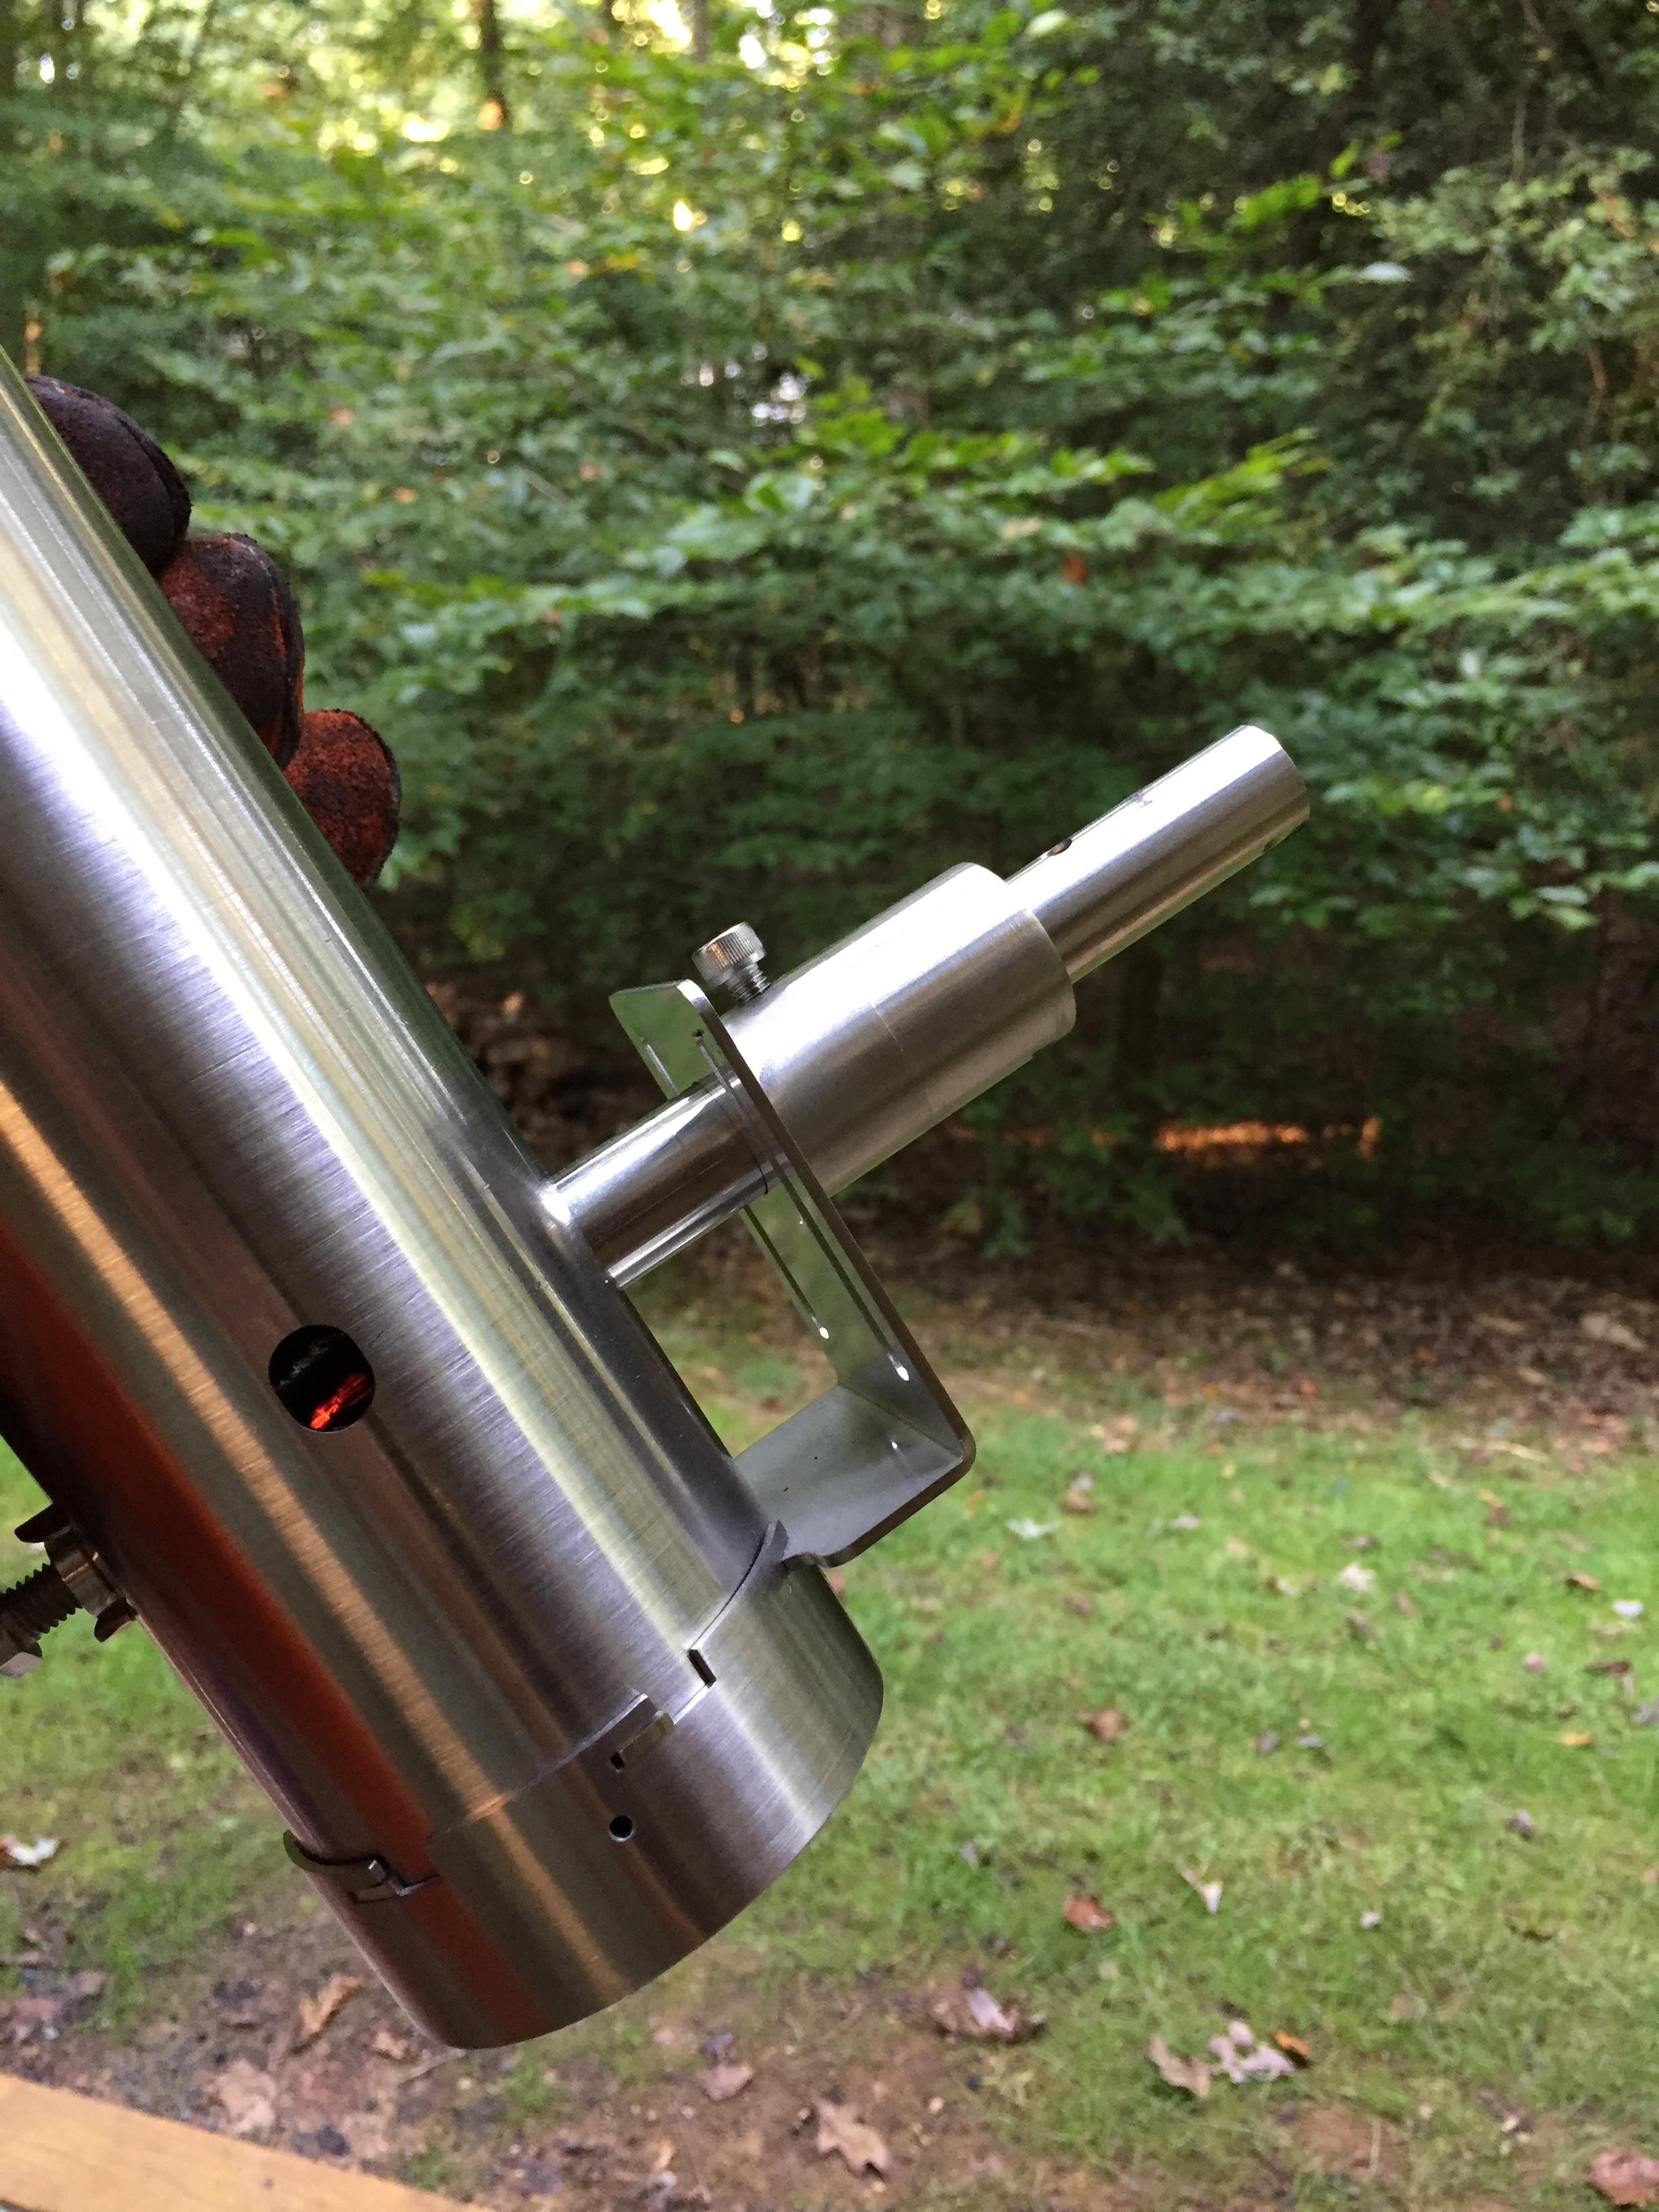
Yes, that sleeve is on backward. I do not have the set screw engaged in a hole. It locks against the tube. The sleeve butts up against the flange on the cold smoker. There's a lot of tube protruding. Make sure that air tube opening is facing down within the larger cold-smoker tube. Mine arrived slightly mis-assembled as well.1 point
-
We'll be living this restore with you, @golfpro2301 Yes, that is a layer of the grout - you'll hear it called the 'jacket'. It's kind of like the shampoo/body wash combo - the grout performs the functions of both grout and mastic. In my experience, which is admittedly limited compared to a lot here, the grout gets soft enough that I think you could pop the tiles off of it with a small screwdriver. As I said before, don't just take my word for it, Dennis is the ultimate expert.1 point
-
That looks like it would warm you right up. Sent from my iPhone using Tapatalk1 point
-
even mine are not that clean.1 point
-
That's the Upper (reversible) grate hanging on the side, but I agree, it doesn't look like it's ever been in a hot grill. Either that, or they followed @MacKenzie's cleaning methods. lol1 point
-
Looks delicious. I have some bison Stew meat in the freezer I need to cook soon.1 point
-
Love this whole meal1 point
-
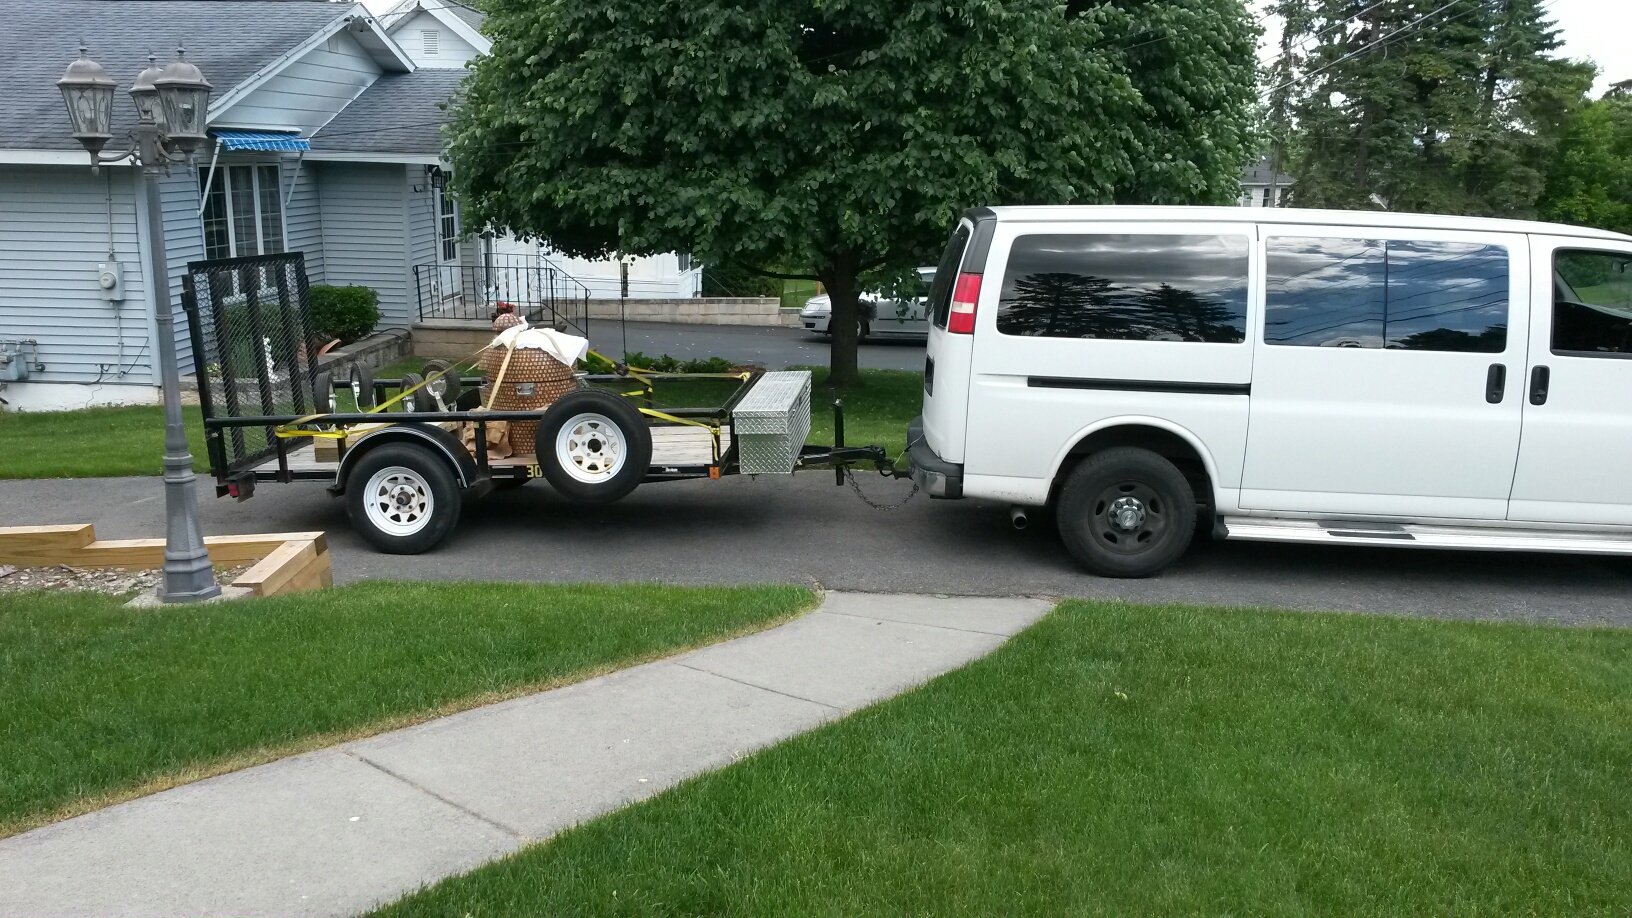
This is how I moved my 19" TT KK (twice).........................You can't see it but I screwed 2x4's to the trailer in front and In back of the grill to help keep it from sliding. It didn't move at all. I

 1 point
 -
What a fun day of cooking and such a great reward at the end of the day, beautiful.1 point
-
I raised all three of my daughters in the Catholic church and found this 5 minute video super funny. Rated G (for real this time Bryan ) . How a four year old boy views God!!!!1 point
-
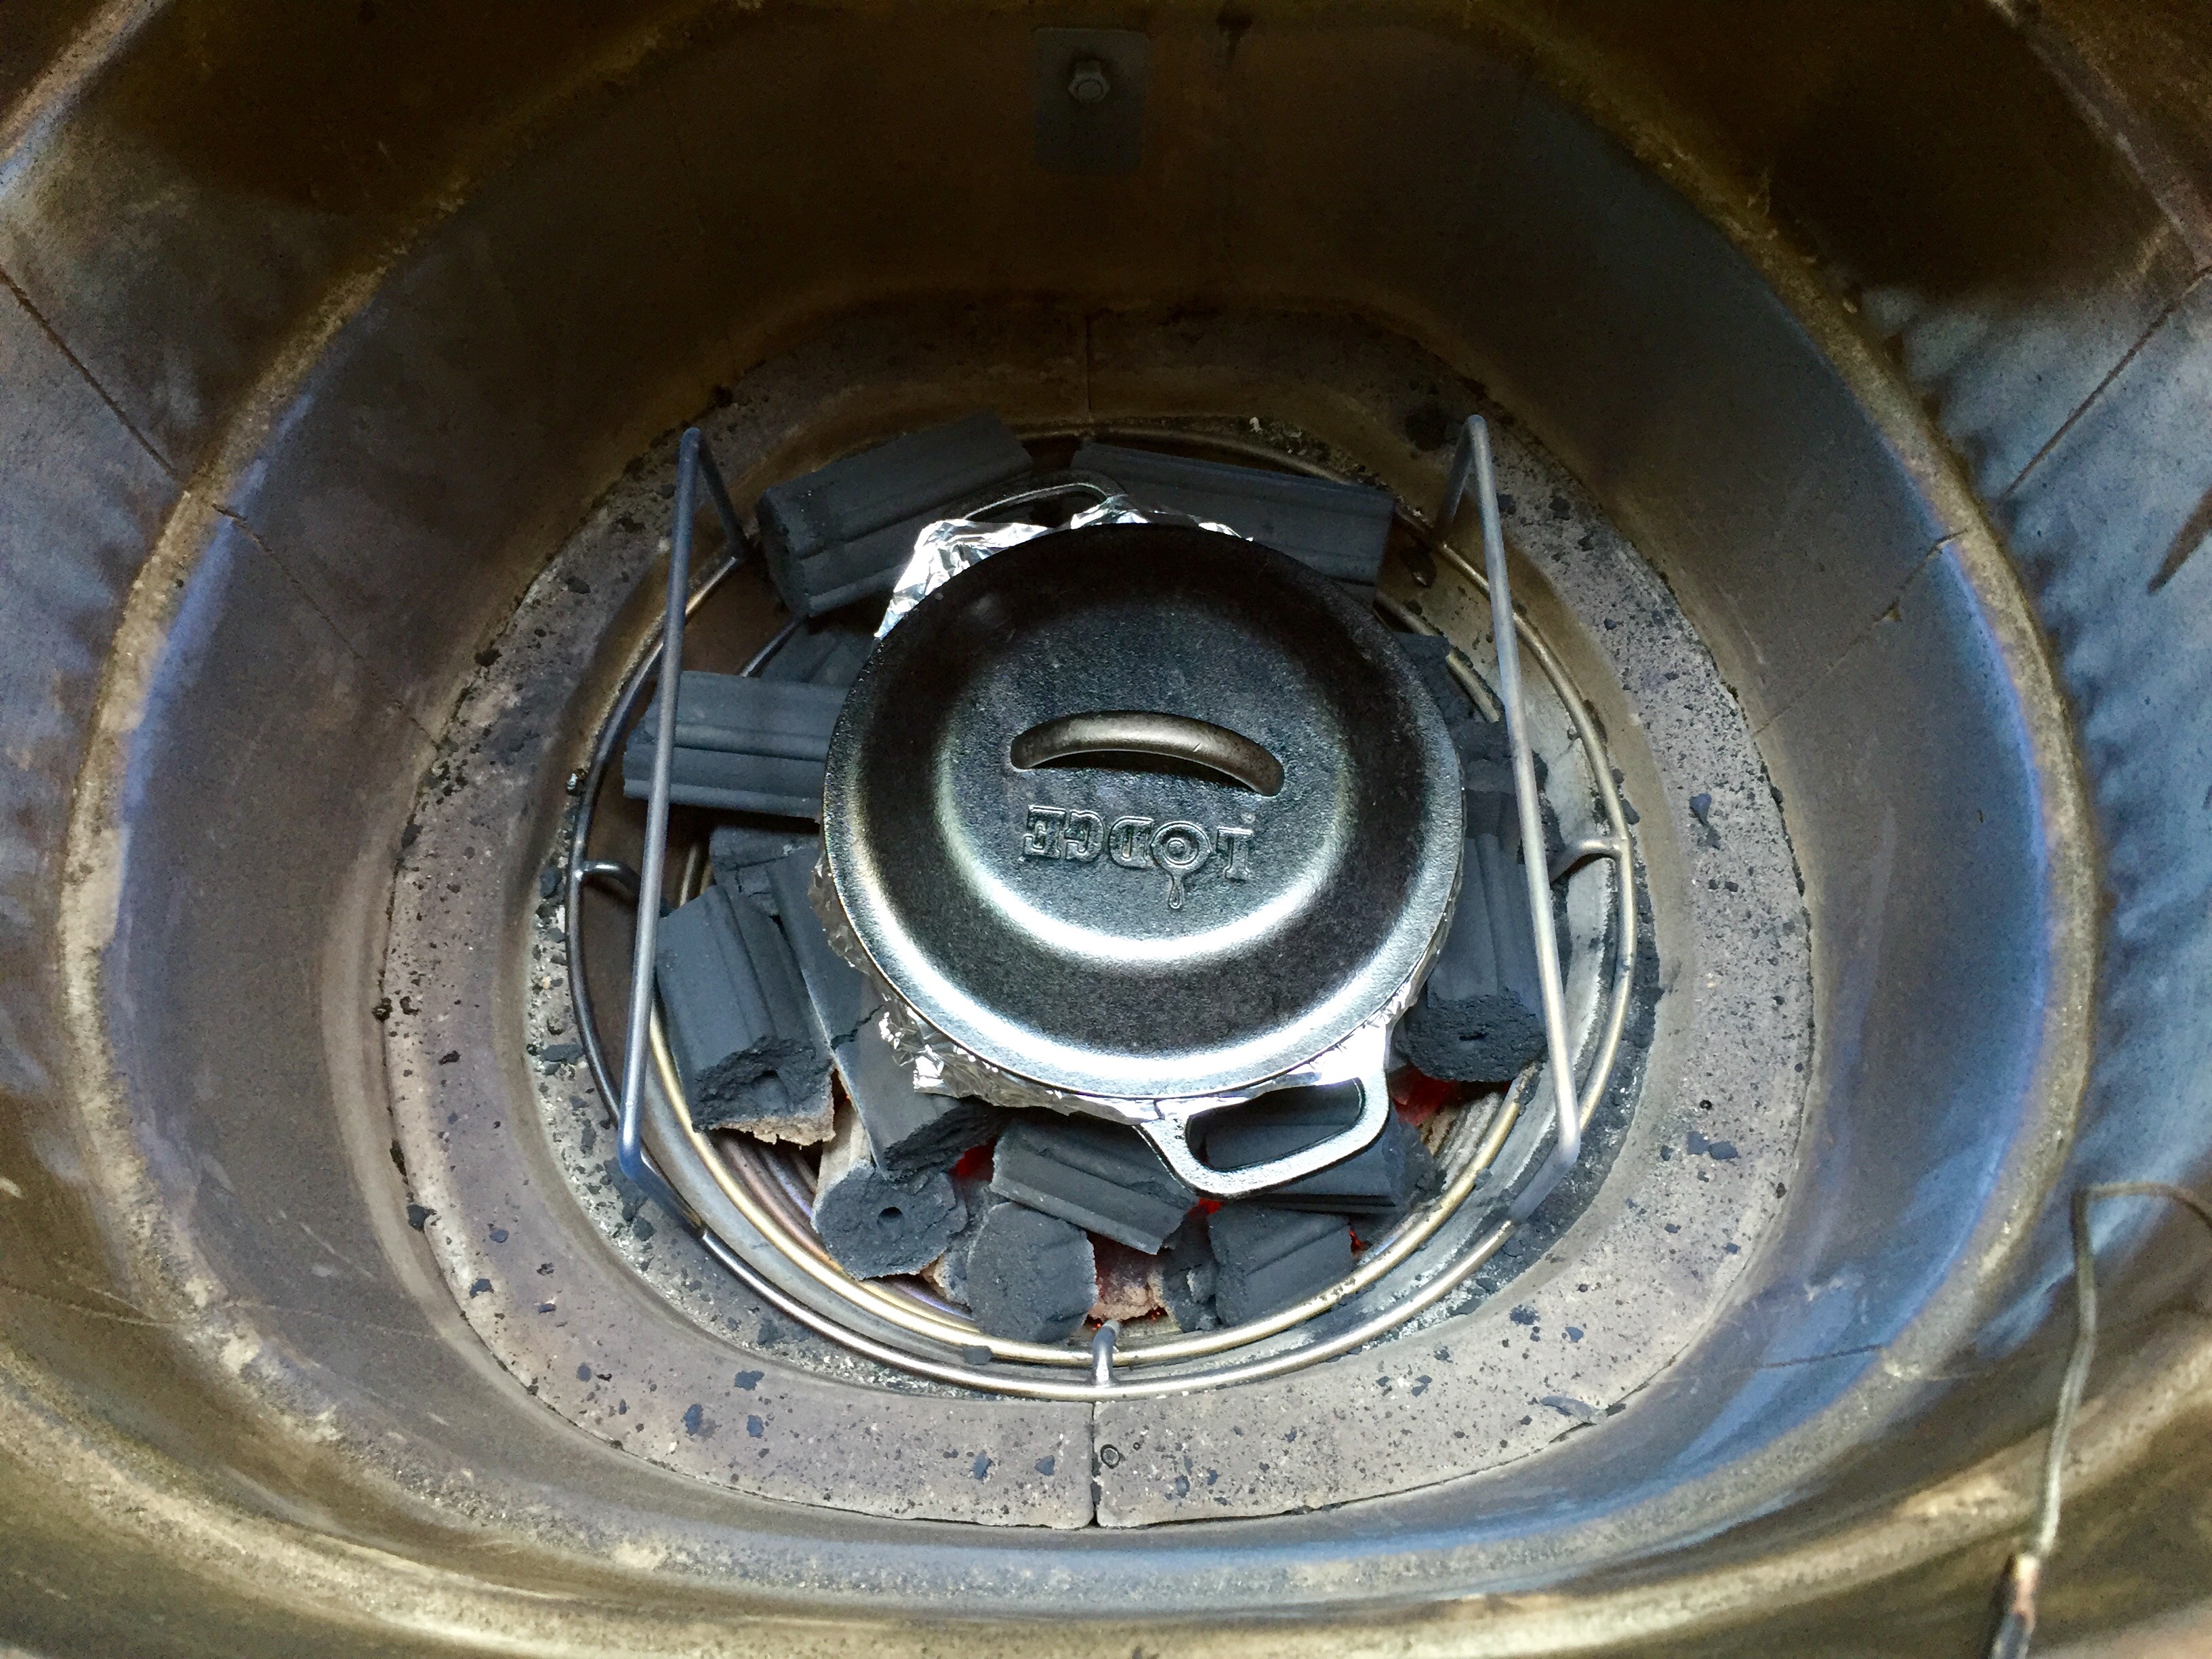
Impressions… As I mentioned I have drooled over these cookers and followed the forum for years. I must say I was very surprised the first time I fired Bob (as in Marley) up. Filled the charcoal basket and opened the vents. I watched the temp rise to 300* then I shut the top vent to ¼ turn open and just a sliver opening on the bottom. The temp dropped to 225*-230* and settled in at ~250*. This was just playing around and I was able to hit the 250* target temp first try! Too easy. The dreaded burn in… It wasn’t bad at all. Fill the basket, open the vents, and lite it off. Started at 300* and increased in 50* increments with hour holds. Nothing happened till around 500*-550*. Only two areas vented and there wasn’t any tile bubbles. Held it at 600* for an additional 1.5 hours after the smell and venting stopped. I have to tell you my wife was really into it. I explained the burn in process and why it needs to be done. She was outside checking the progress as often as I was. Later in the day some friends came over and she walked them through progression flawlessly. I'm going to have too keep an eye on her. Summary… With the exception of one cook I have had no problem hitting the target temp. And that one cook was only off by 25*. I think the temp increase was due to more smoking wood in the charcoal basket. Doesn’t smoking wood burn hotter than charcoal? I am surprised by how much the cold grates and deflector suck the temp down. I think a big part of it is the fact it’s only a 16”. Not nearly as much thermal mass. Taking into account this is my first ceramic cooker I think things are going well and will only get better. I haven’t received any complaints so something going right!1 point
-
that's some batshit craziness right there. hope it was worth it1 point
-
This is painful to look at!!! It’s as disturbing as Wounded Warrior and neglected animals commercials. Just not right.1 point
-
The beef sounds simple but really tasty and the biscuits or rolls were terrific looking. Put the beef and the broth over the rollls and that sounds like a very good and tasty winter meal.1 point
-
My unpacking only showed me moving the KK from work and onto my mobile cart. skreef has an excellent unpacking thread HERE IT IS. You are welcome to visit anytime that fits your schedule. It would be nice if you could see it in person before you hit the order button. I have seen Bosco's 23" & 32" KK, so I can give you my impressions of those and how they compare to the 19".1 point
-
Happy New Year ! I was in Brazil for the holidays and one thing I look forward to having are the Brazilian French Rolls. When they are opened up they are nice and soft inside. With a little butter they are delicious. RECIPE - Brazilian-style French Rolls ( Pão Francês Caseiro) makes 20 rolls 8 cups (1 kg) all-purpose unbleached flour 1 cup ice water 1 1/2 cups warm water 2 Tbsp dry active yeast 1 tsp granulated white sugar 2 tsp salt 1 Tbsp neutral vegetable oil ----------------------------------------------------------------------------- Sift together the flour, the sugar and the salt. Place the sifted flour in a large mixing bowl. Proof the yeast in the 1 1/2 cup warm water, then add the vegetable oil. Slowly add the mixture to the flour in the bowl, mixing in each addition before adding more, using a wooden spoon. Then begin to add the ice water, again in small amounts, incorporating each addition before adding more, using your hands. When the dough becomes smooth and elastic, stop adding water. Turn the dough out onto a floured working surface. Using floured hands, knead for 10 minutes. Alternatively, use a Kitchen-aid or similar home mixer equipped with a dough hook. Stop kneading when the dough is smooth, non-sticky, and springs back when poked with a fingertip. Form the dough into a large ball. Put the dough in a clean large bowl, cover with a clean towel, and leave in a warm, undraughty place for 30 minutes. Return the dough to the floured work surface. Divide into 20 equal-size portions. Roll each portion into a ball, then flatten it. Roll the flattened ball into an elongated, spiral shape. When finished, put the rolls on one or two non-stick baking sheets, well-separated, then cover with clean towels and let rise until they have doubled in size (normally about one hour). Meanwhile, preheat the oven to 425F (220C). As soon as the rolls have doubled in size, using a razor blade or very sharp knife, cut into each roll in the long direction. Put them in the hot oven. Fill a clean spray bottle with water. As soon as the rolls begin to brown, quickly open the oven door, mist the rolls lightly with water, and close the door. Continue to bake the bread until the rolls are nicely browned and, if tapped, sound hollow. Remove the rolls from the oven and let them cool on wire racks. Create new content1 point
-
With the tabletop you might drop that into the wash. But if you got a standalone unit it would be impossible LOL just saying1 point
-
Aussie, just don't call me late for dinner.1 point
-
She is the stealth model and is very quiet when she wants to be. Otherwise she tries to do this, the table is off limits, especially she has grown since this photo was taken!

 1 point
 -
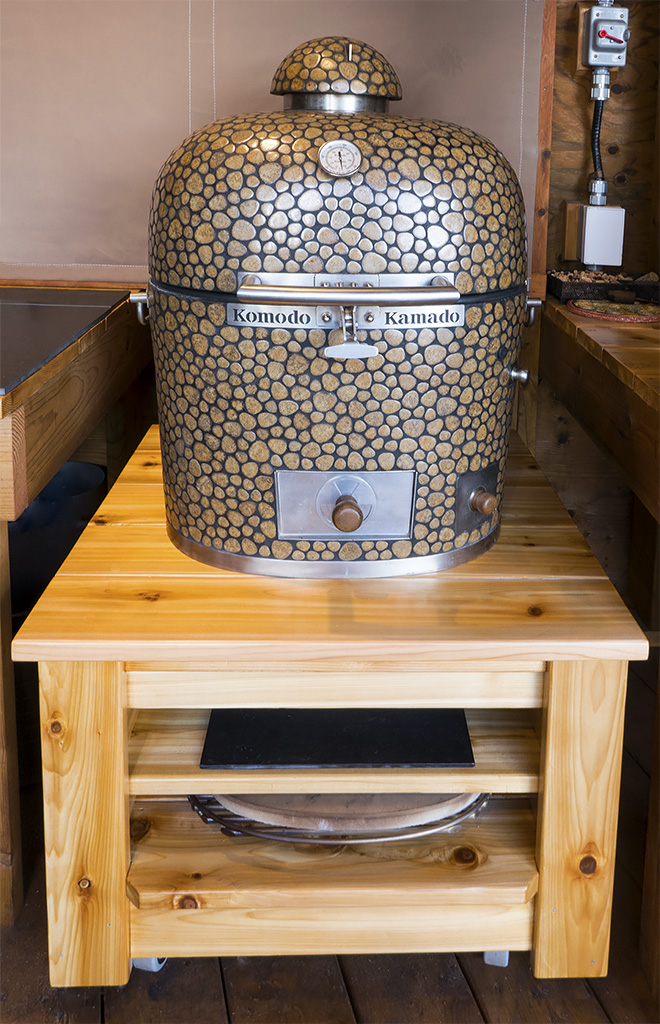
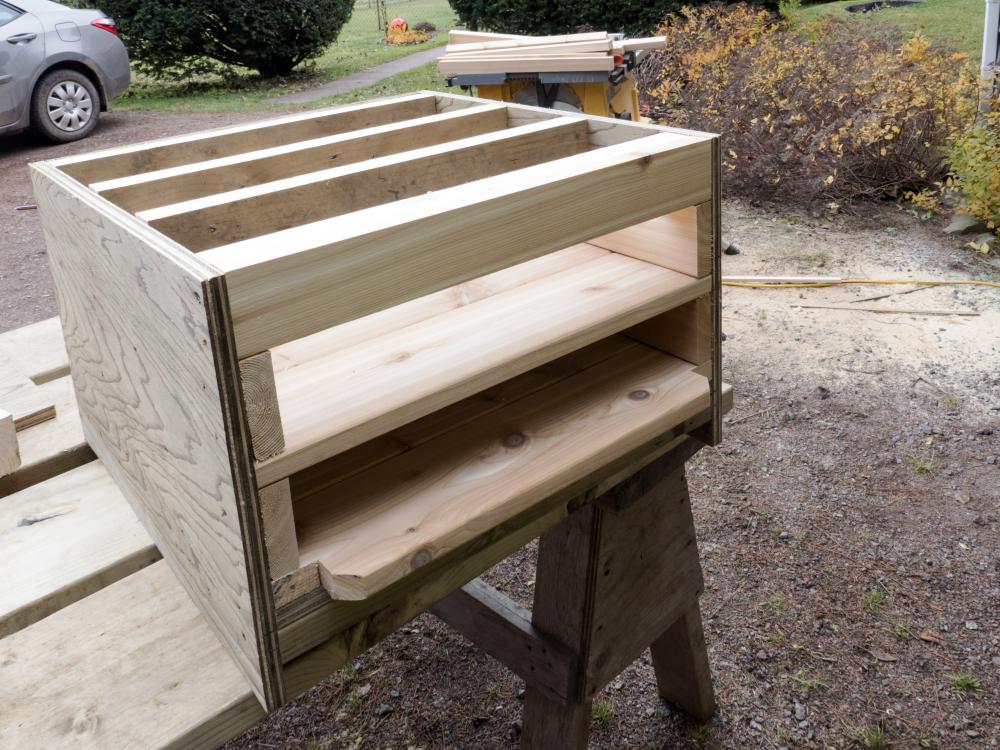
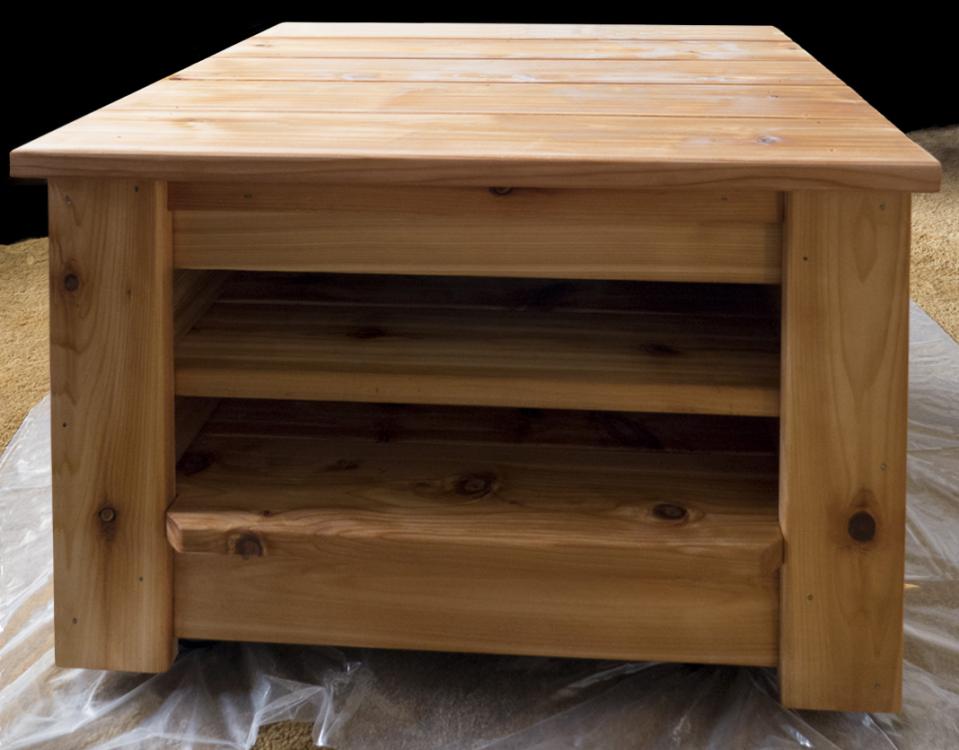
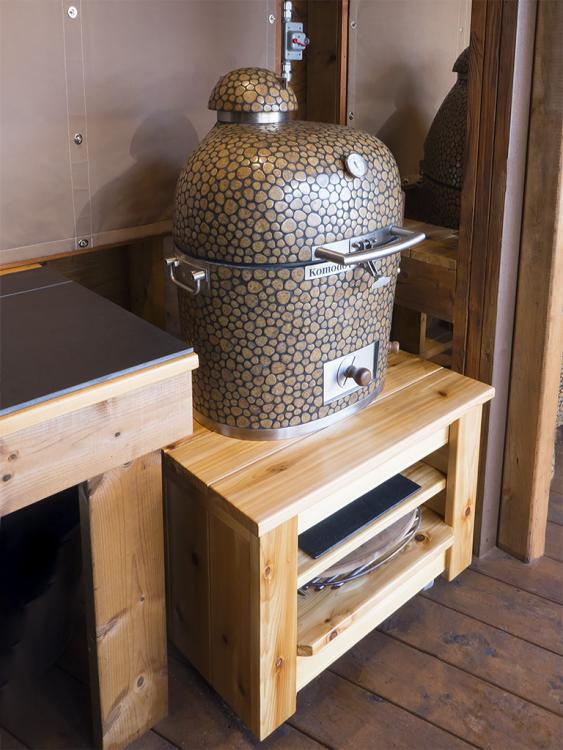
Finally have a stand for my little 16 inch KK. Rolls around like a charm using just use one hand and the handle. This is a heavy duty cart- It is getting dark but we are nearly done. It is too cold to do the finish outside so we dragged it into the living room. YIKES. Here it is with one coat of varnish 2 more to go. So far no accidents. Today we put it on the deck and topped it with Little Ms. Pebbles sister to Pebbles. Let's pull it out into the light. View from the dining room sliding glass door. You just know where LMP is going to be when the snow arrives, yes, right in front of the door. I have most of the shutters and shades up to keep the snow out of my ODK. I need to find some tiles to put on the shelves to keep them from getting all marked up.


 1 point
 -
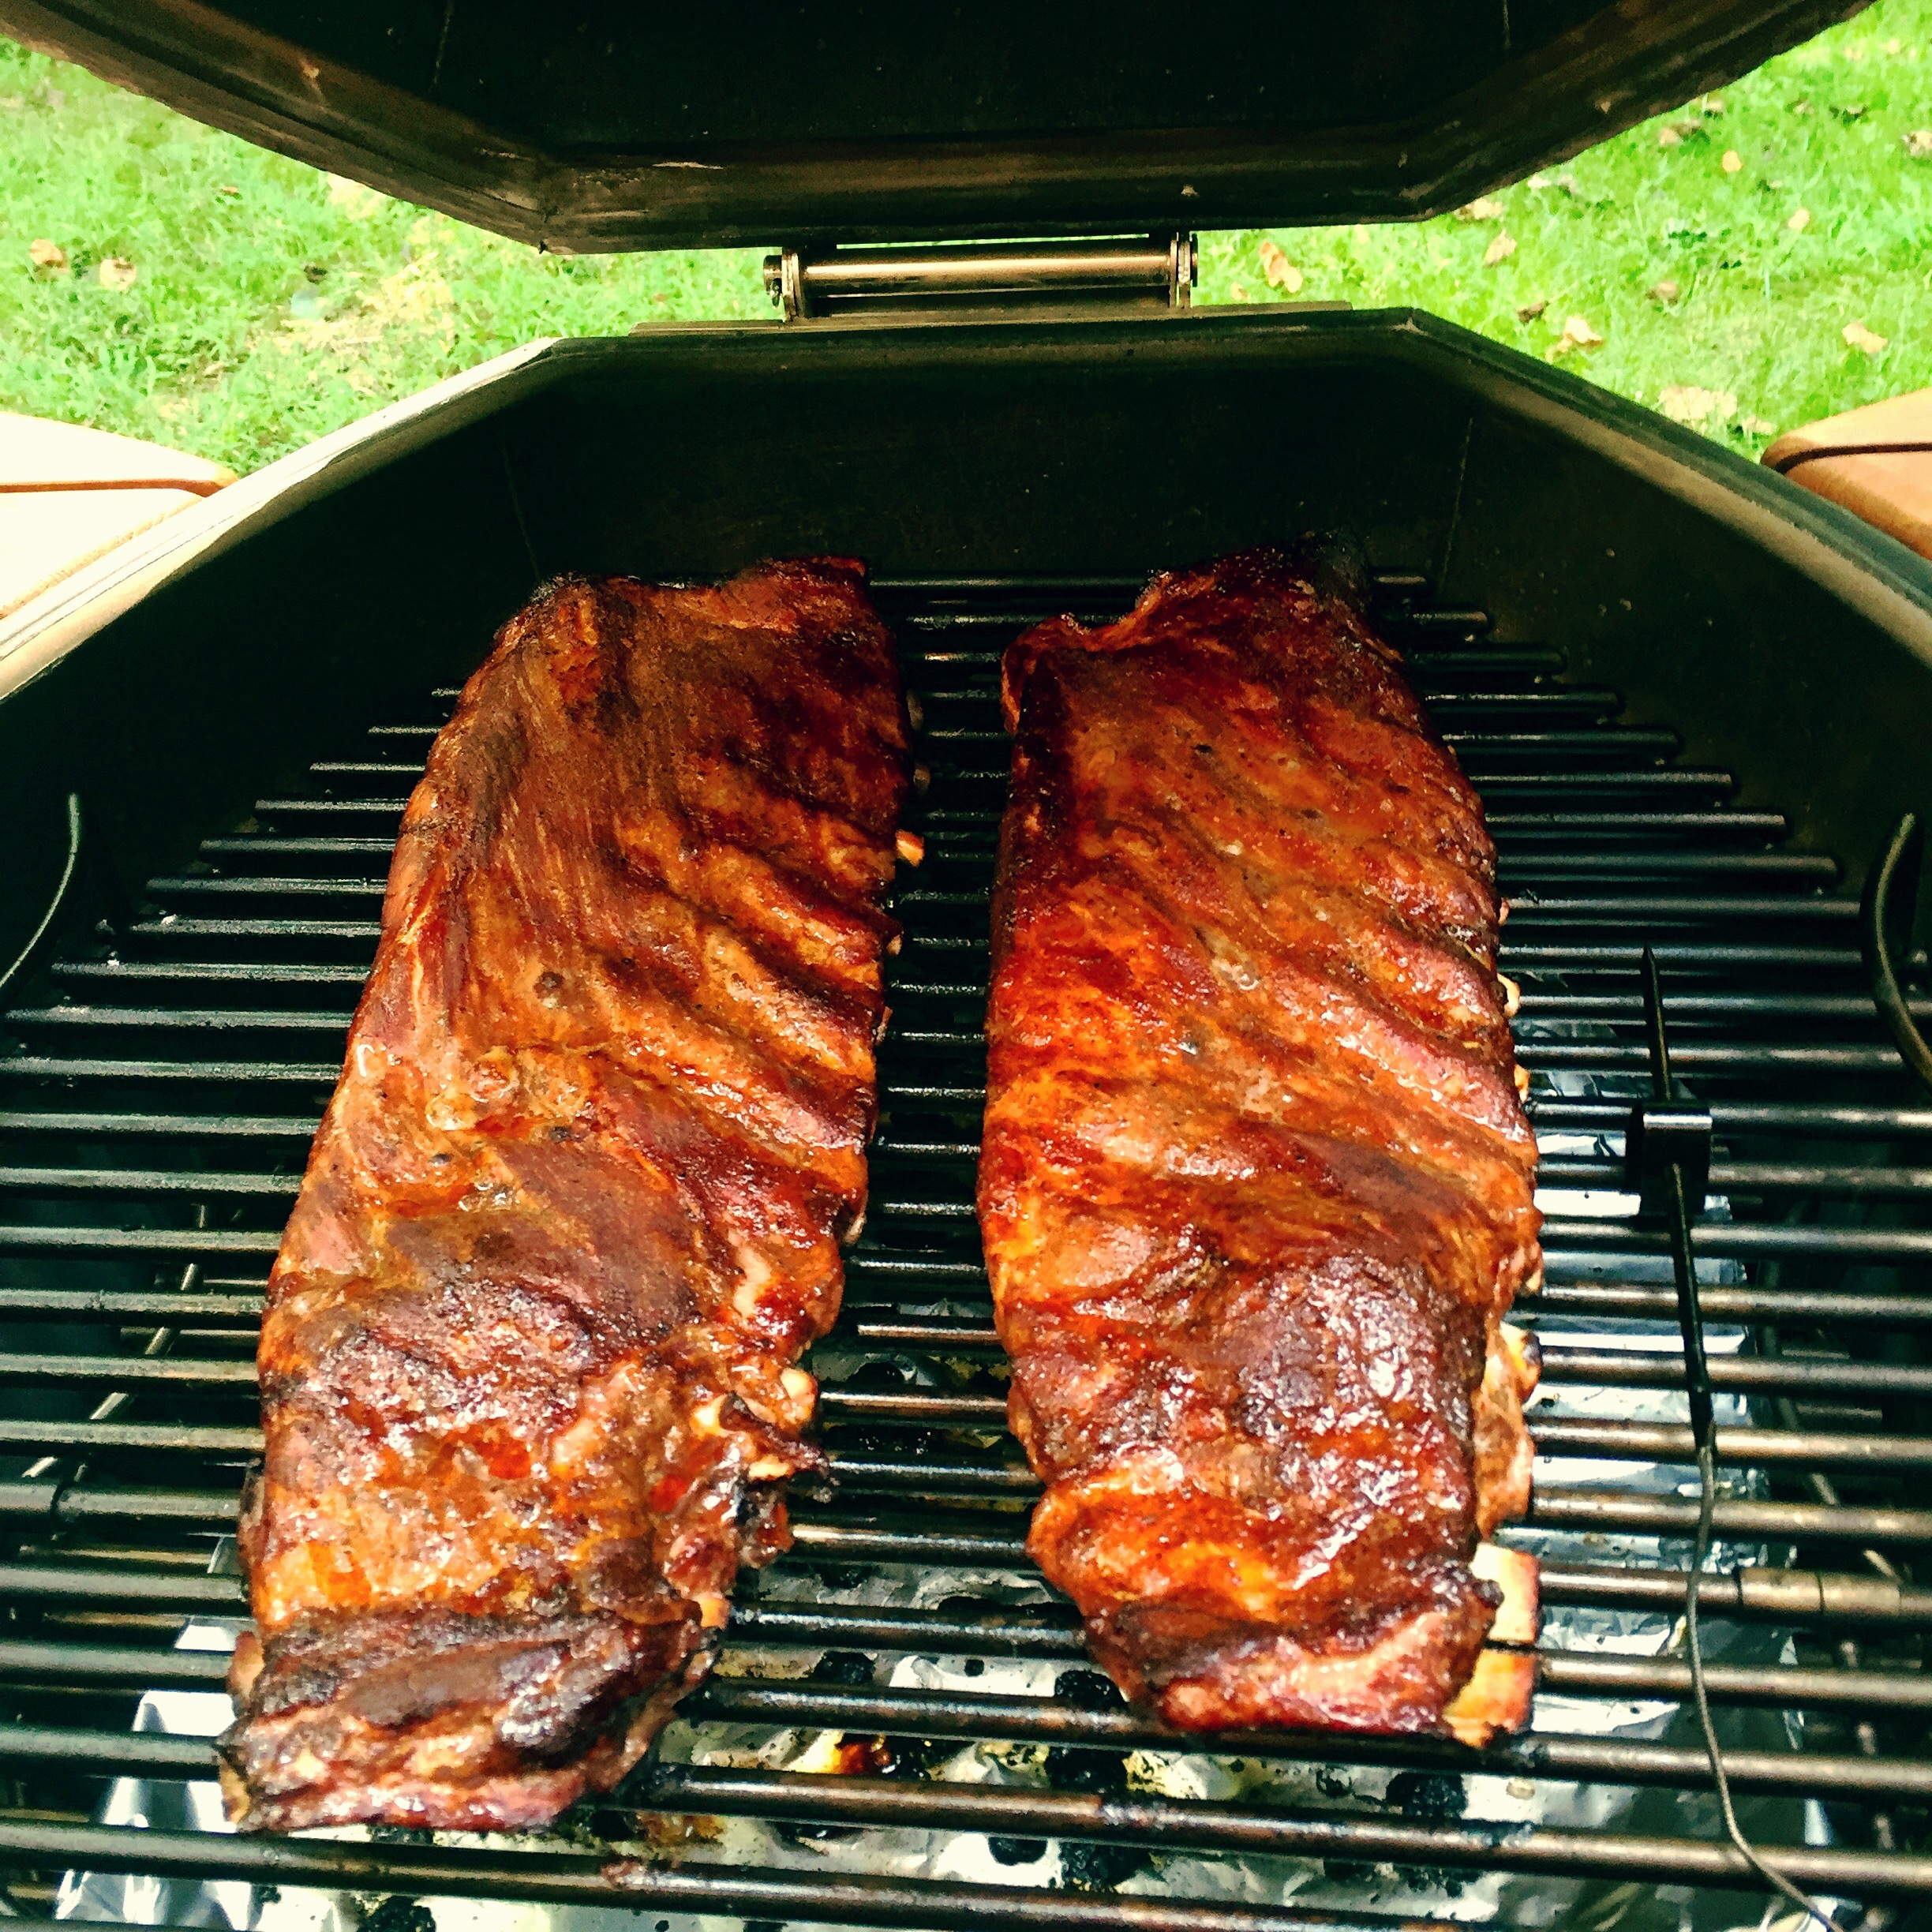
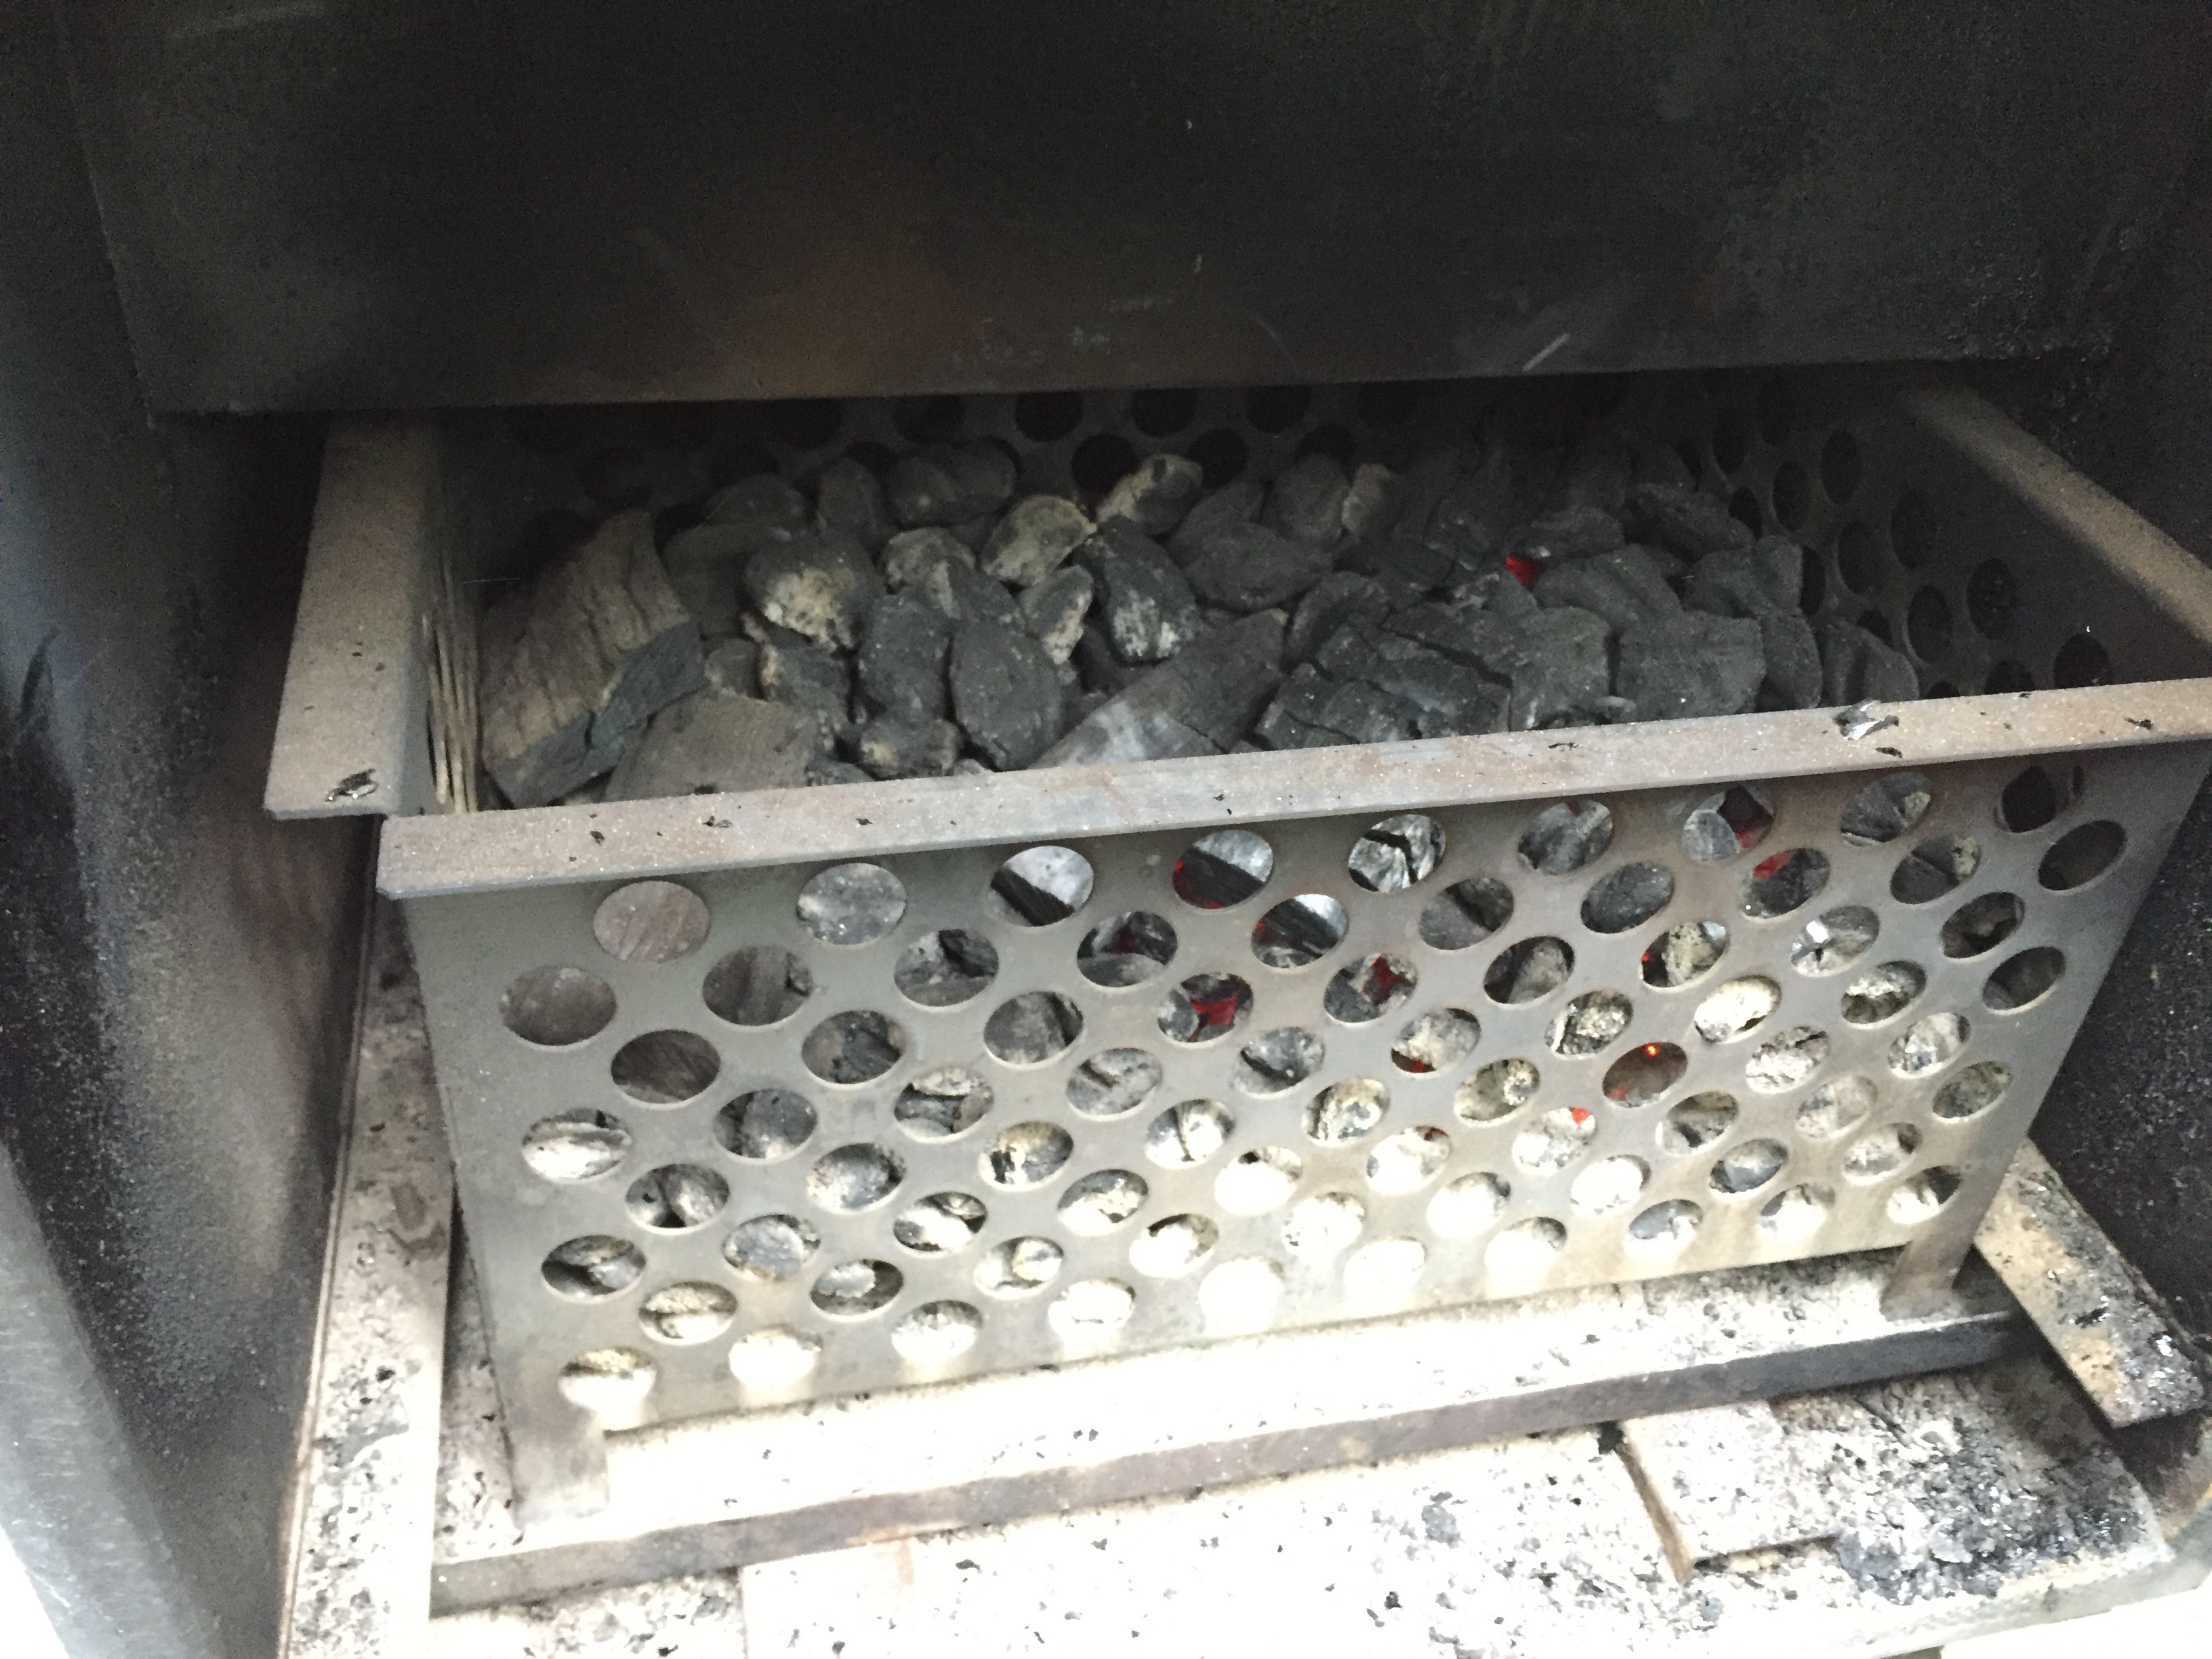
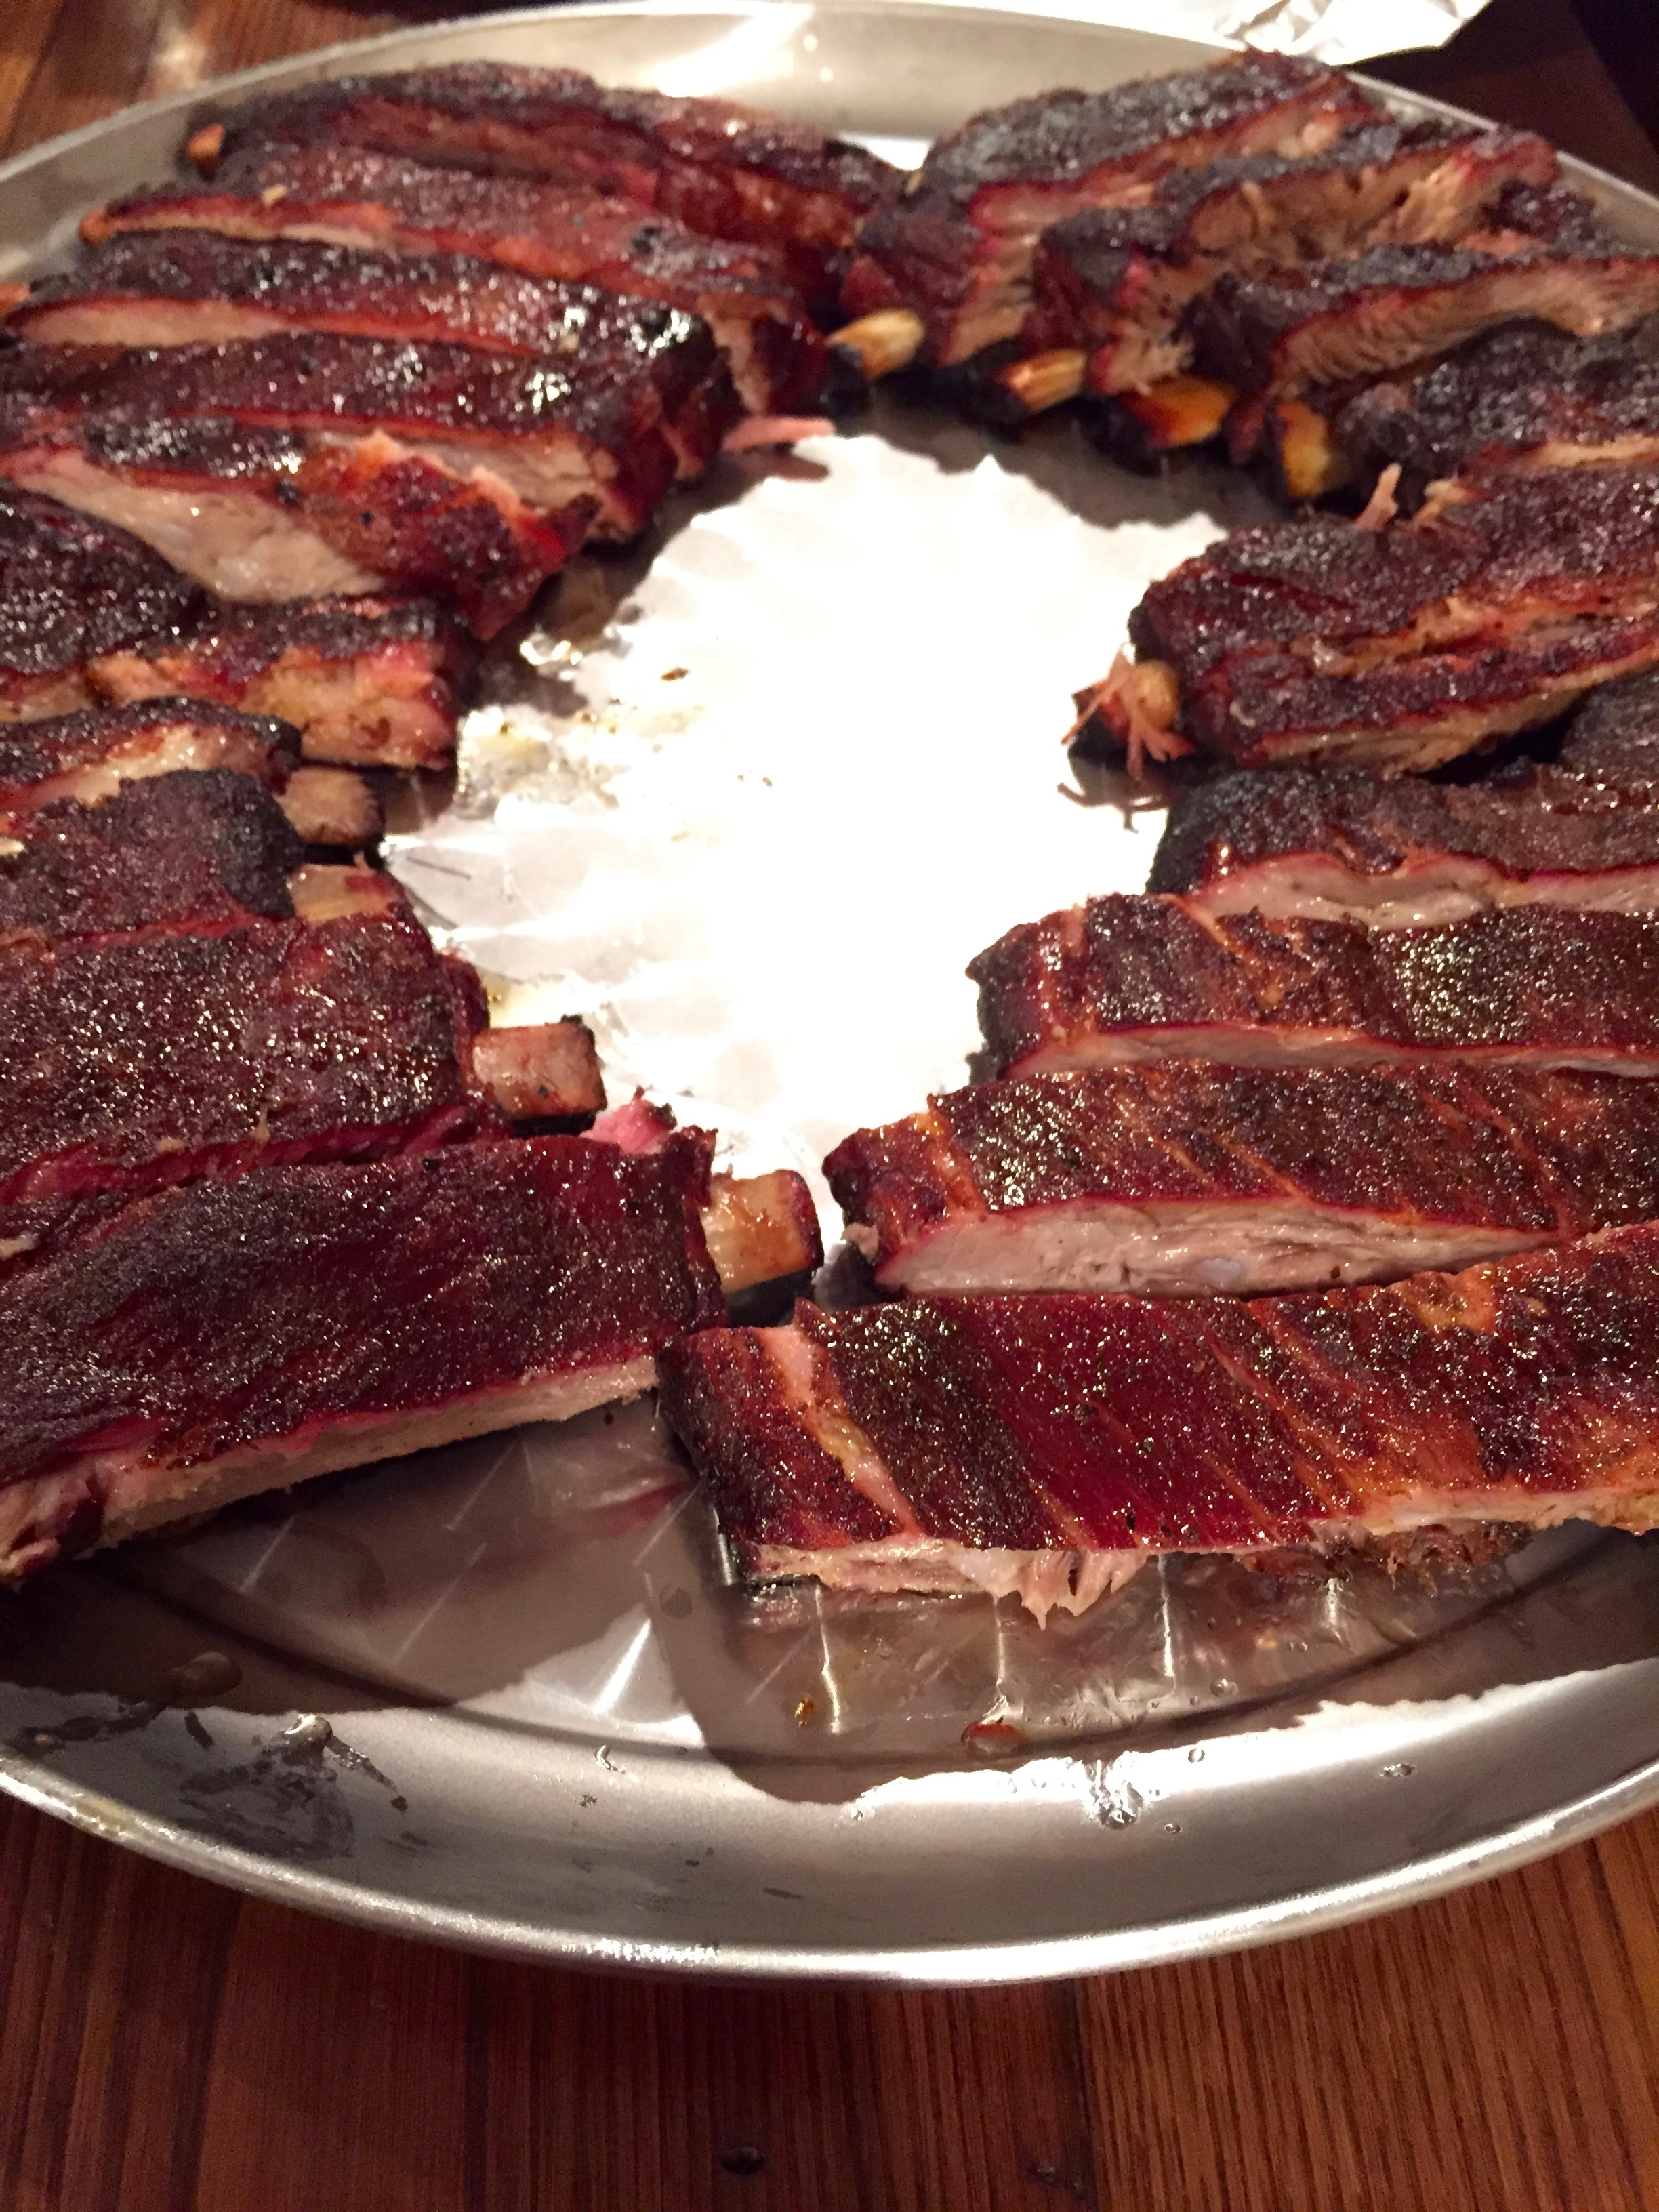
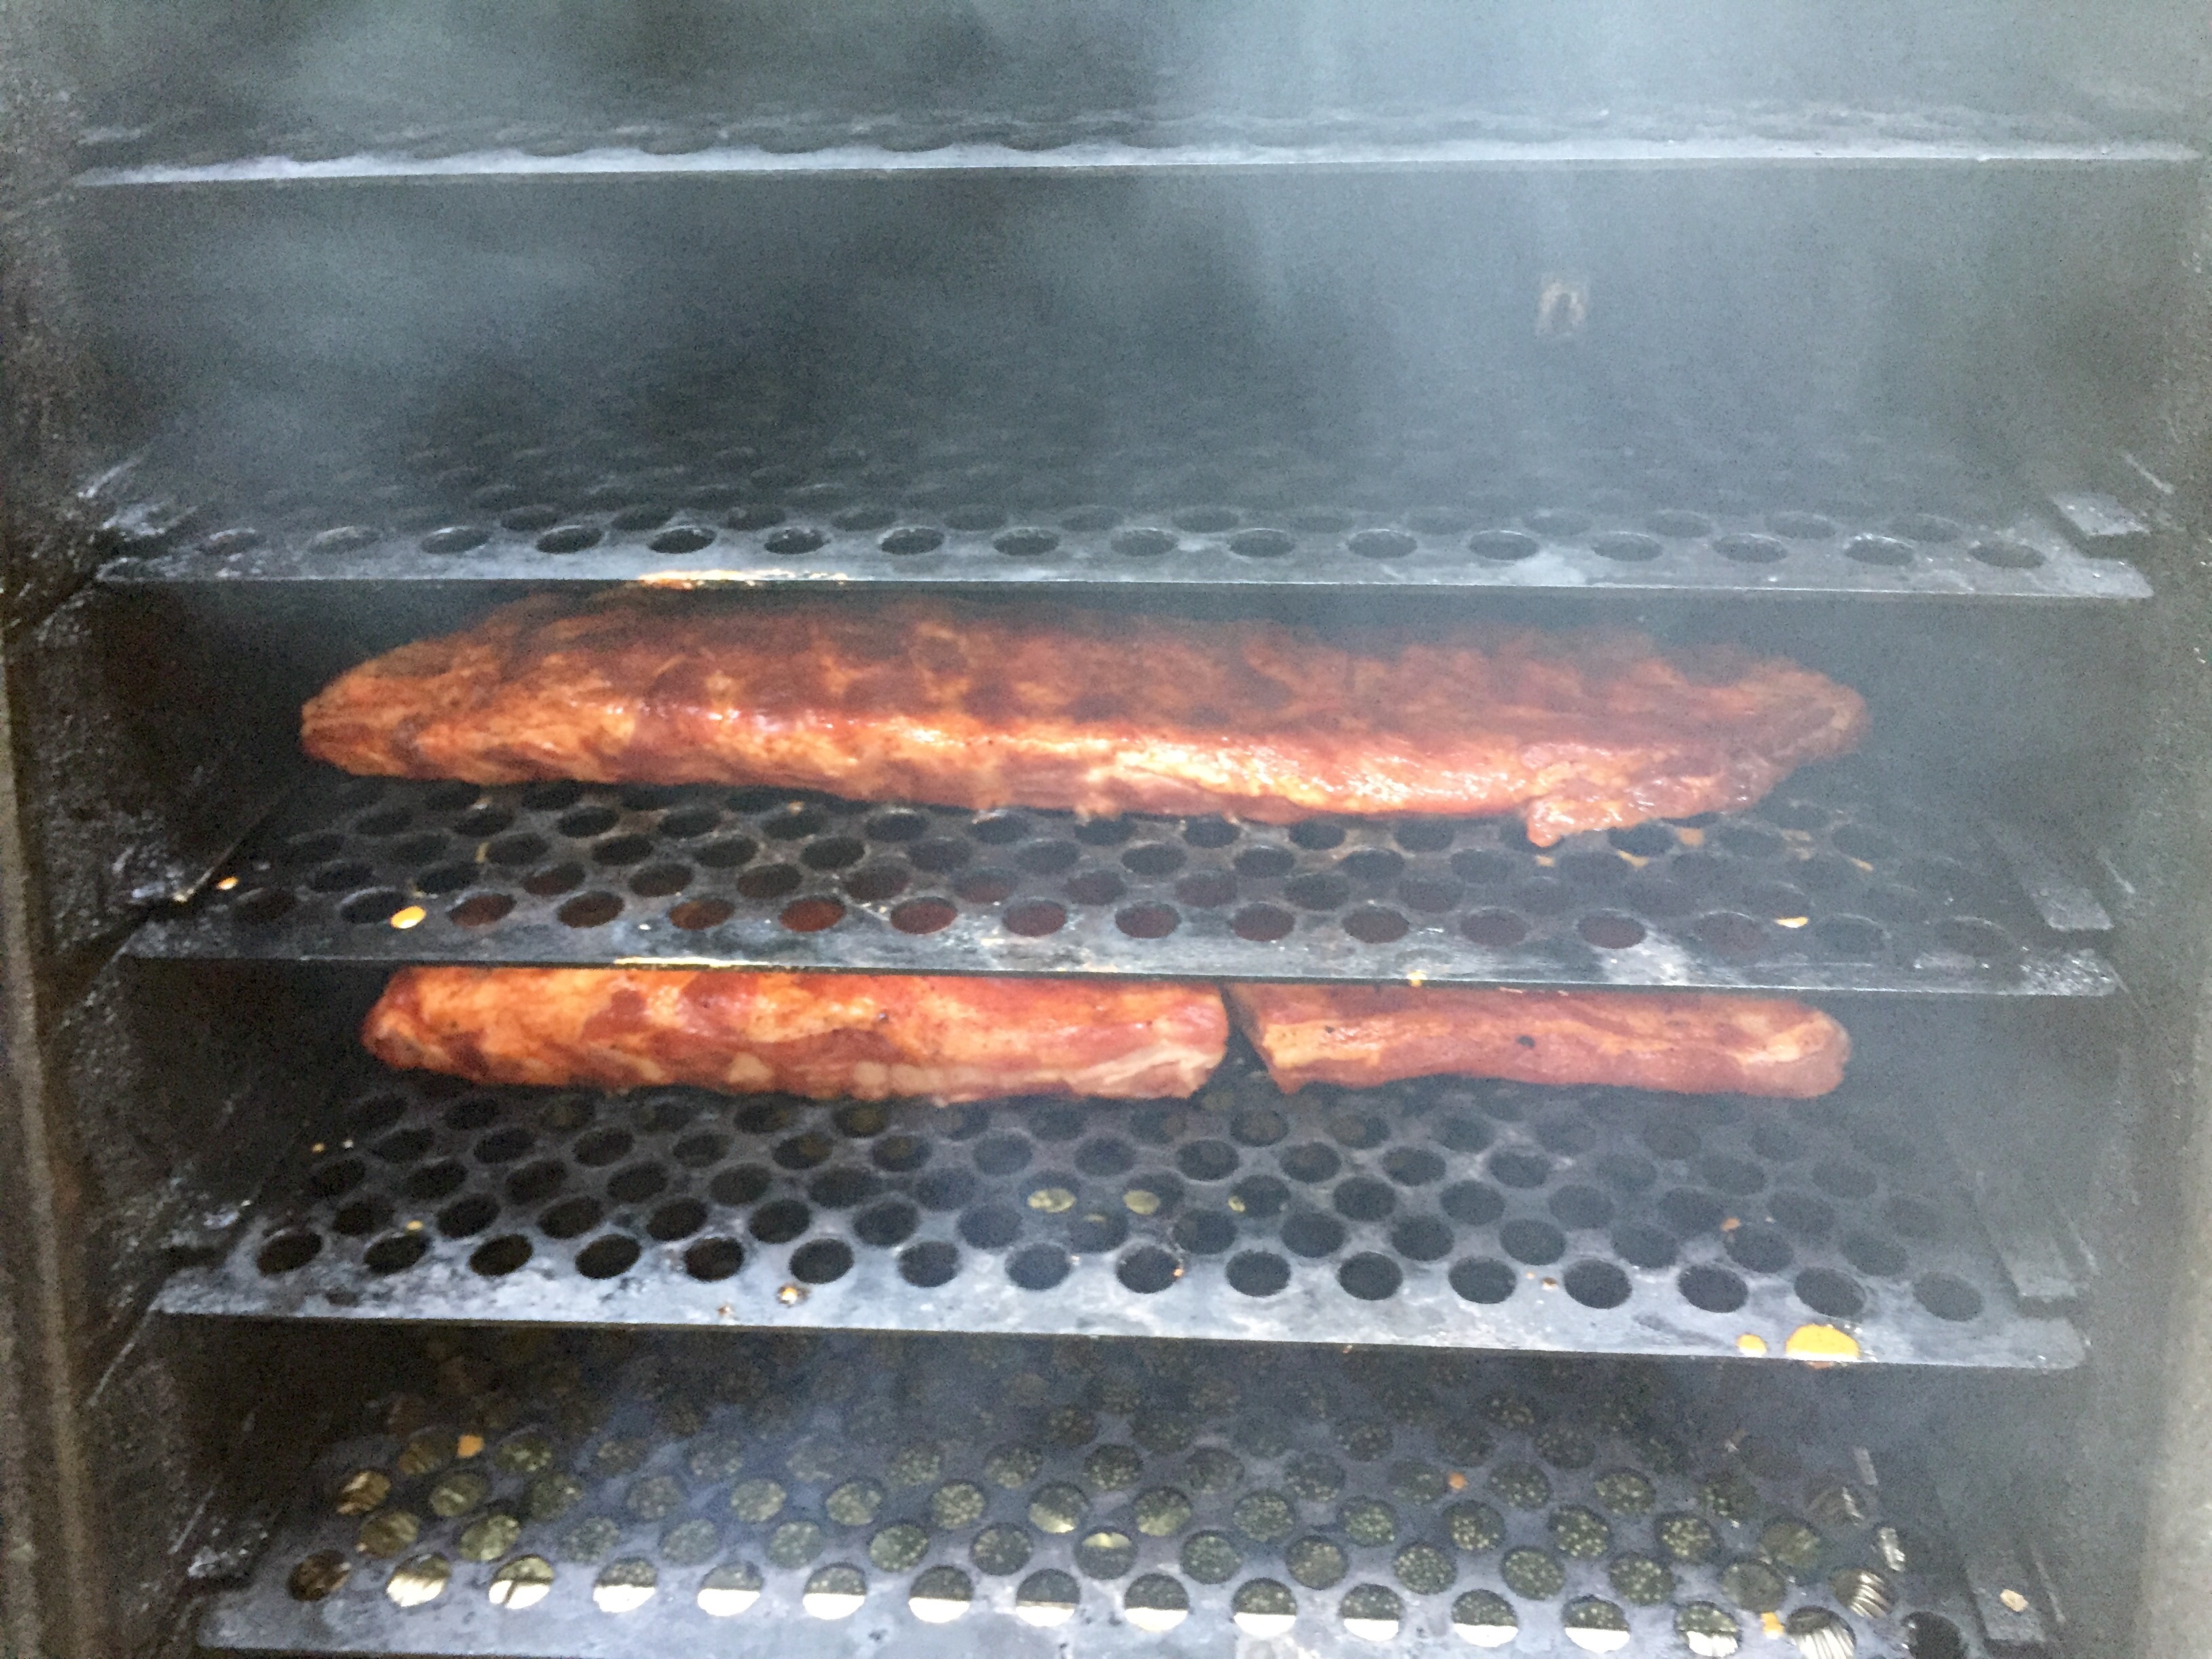
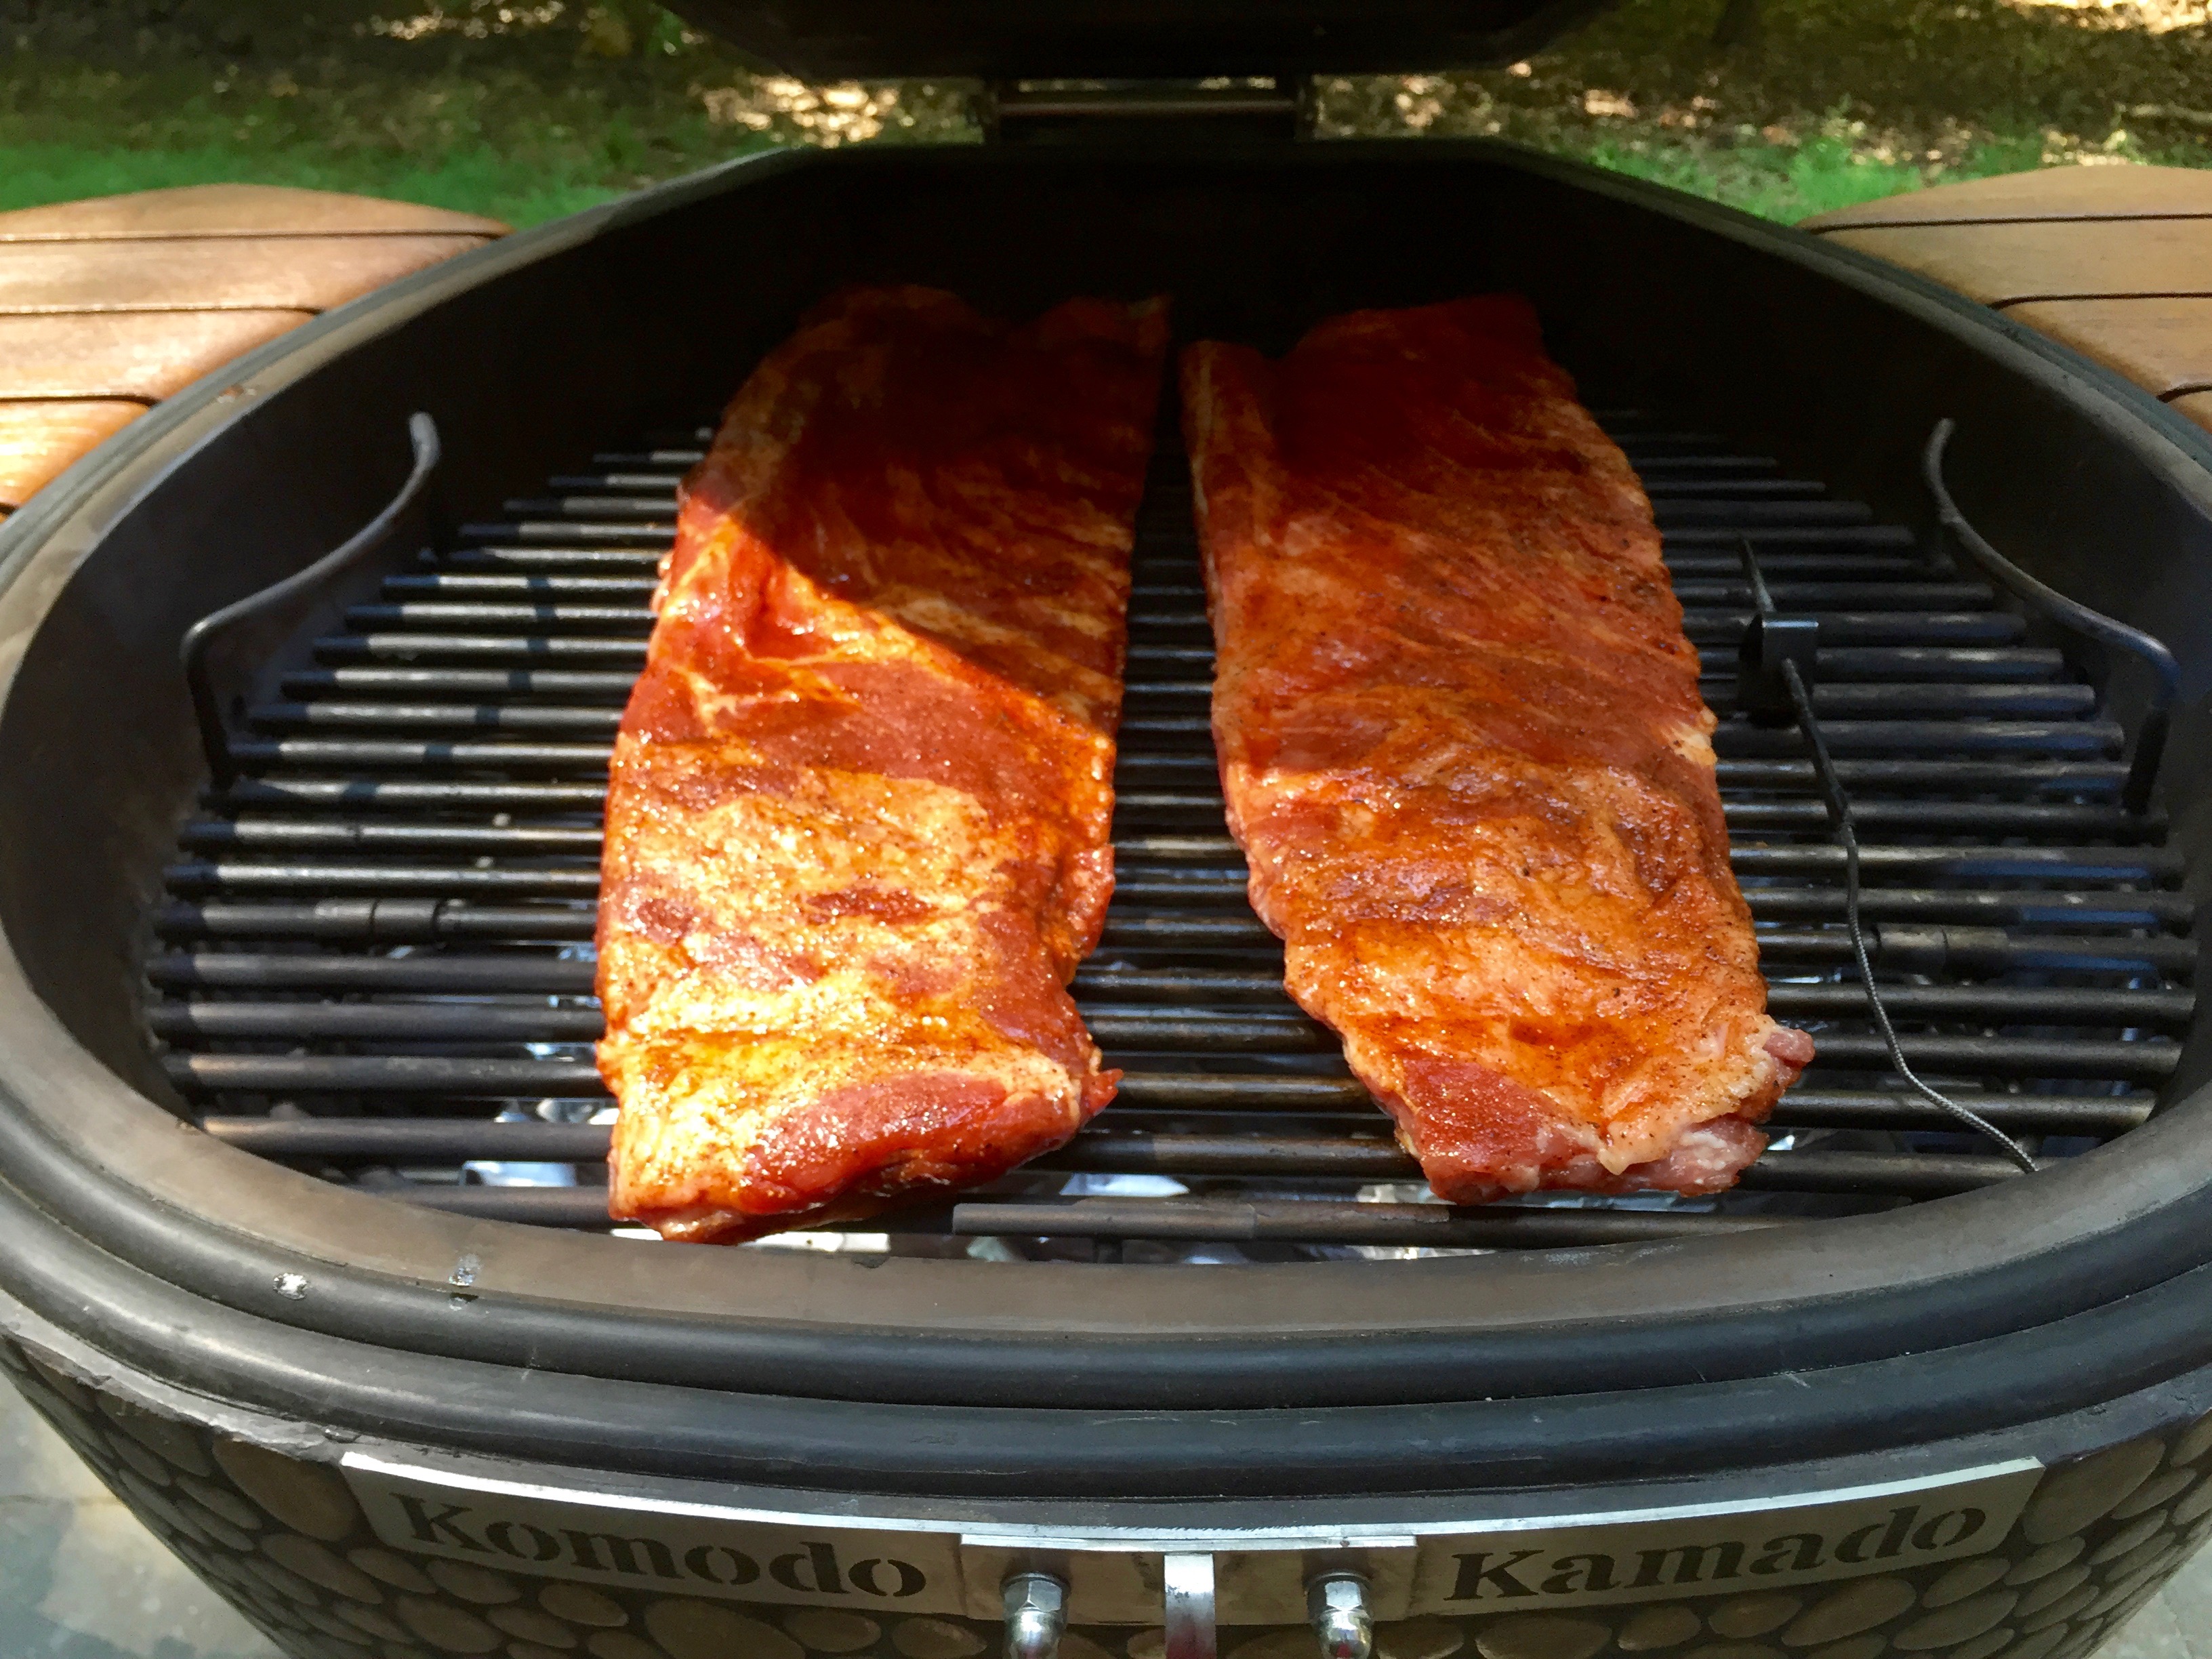
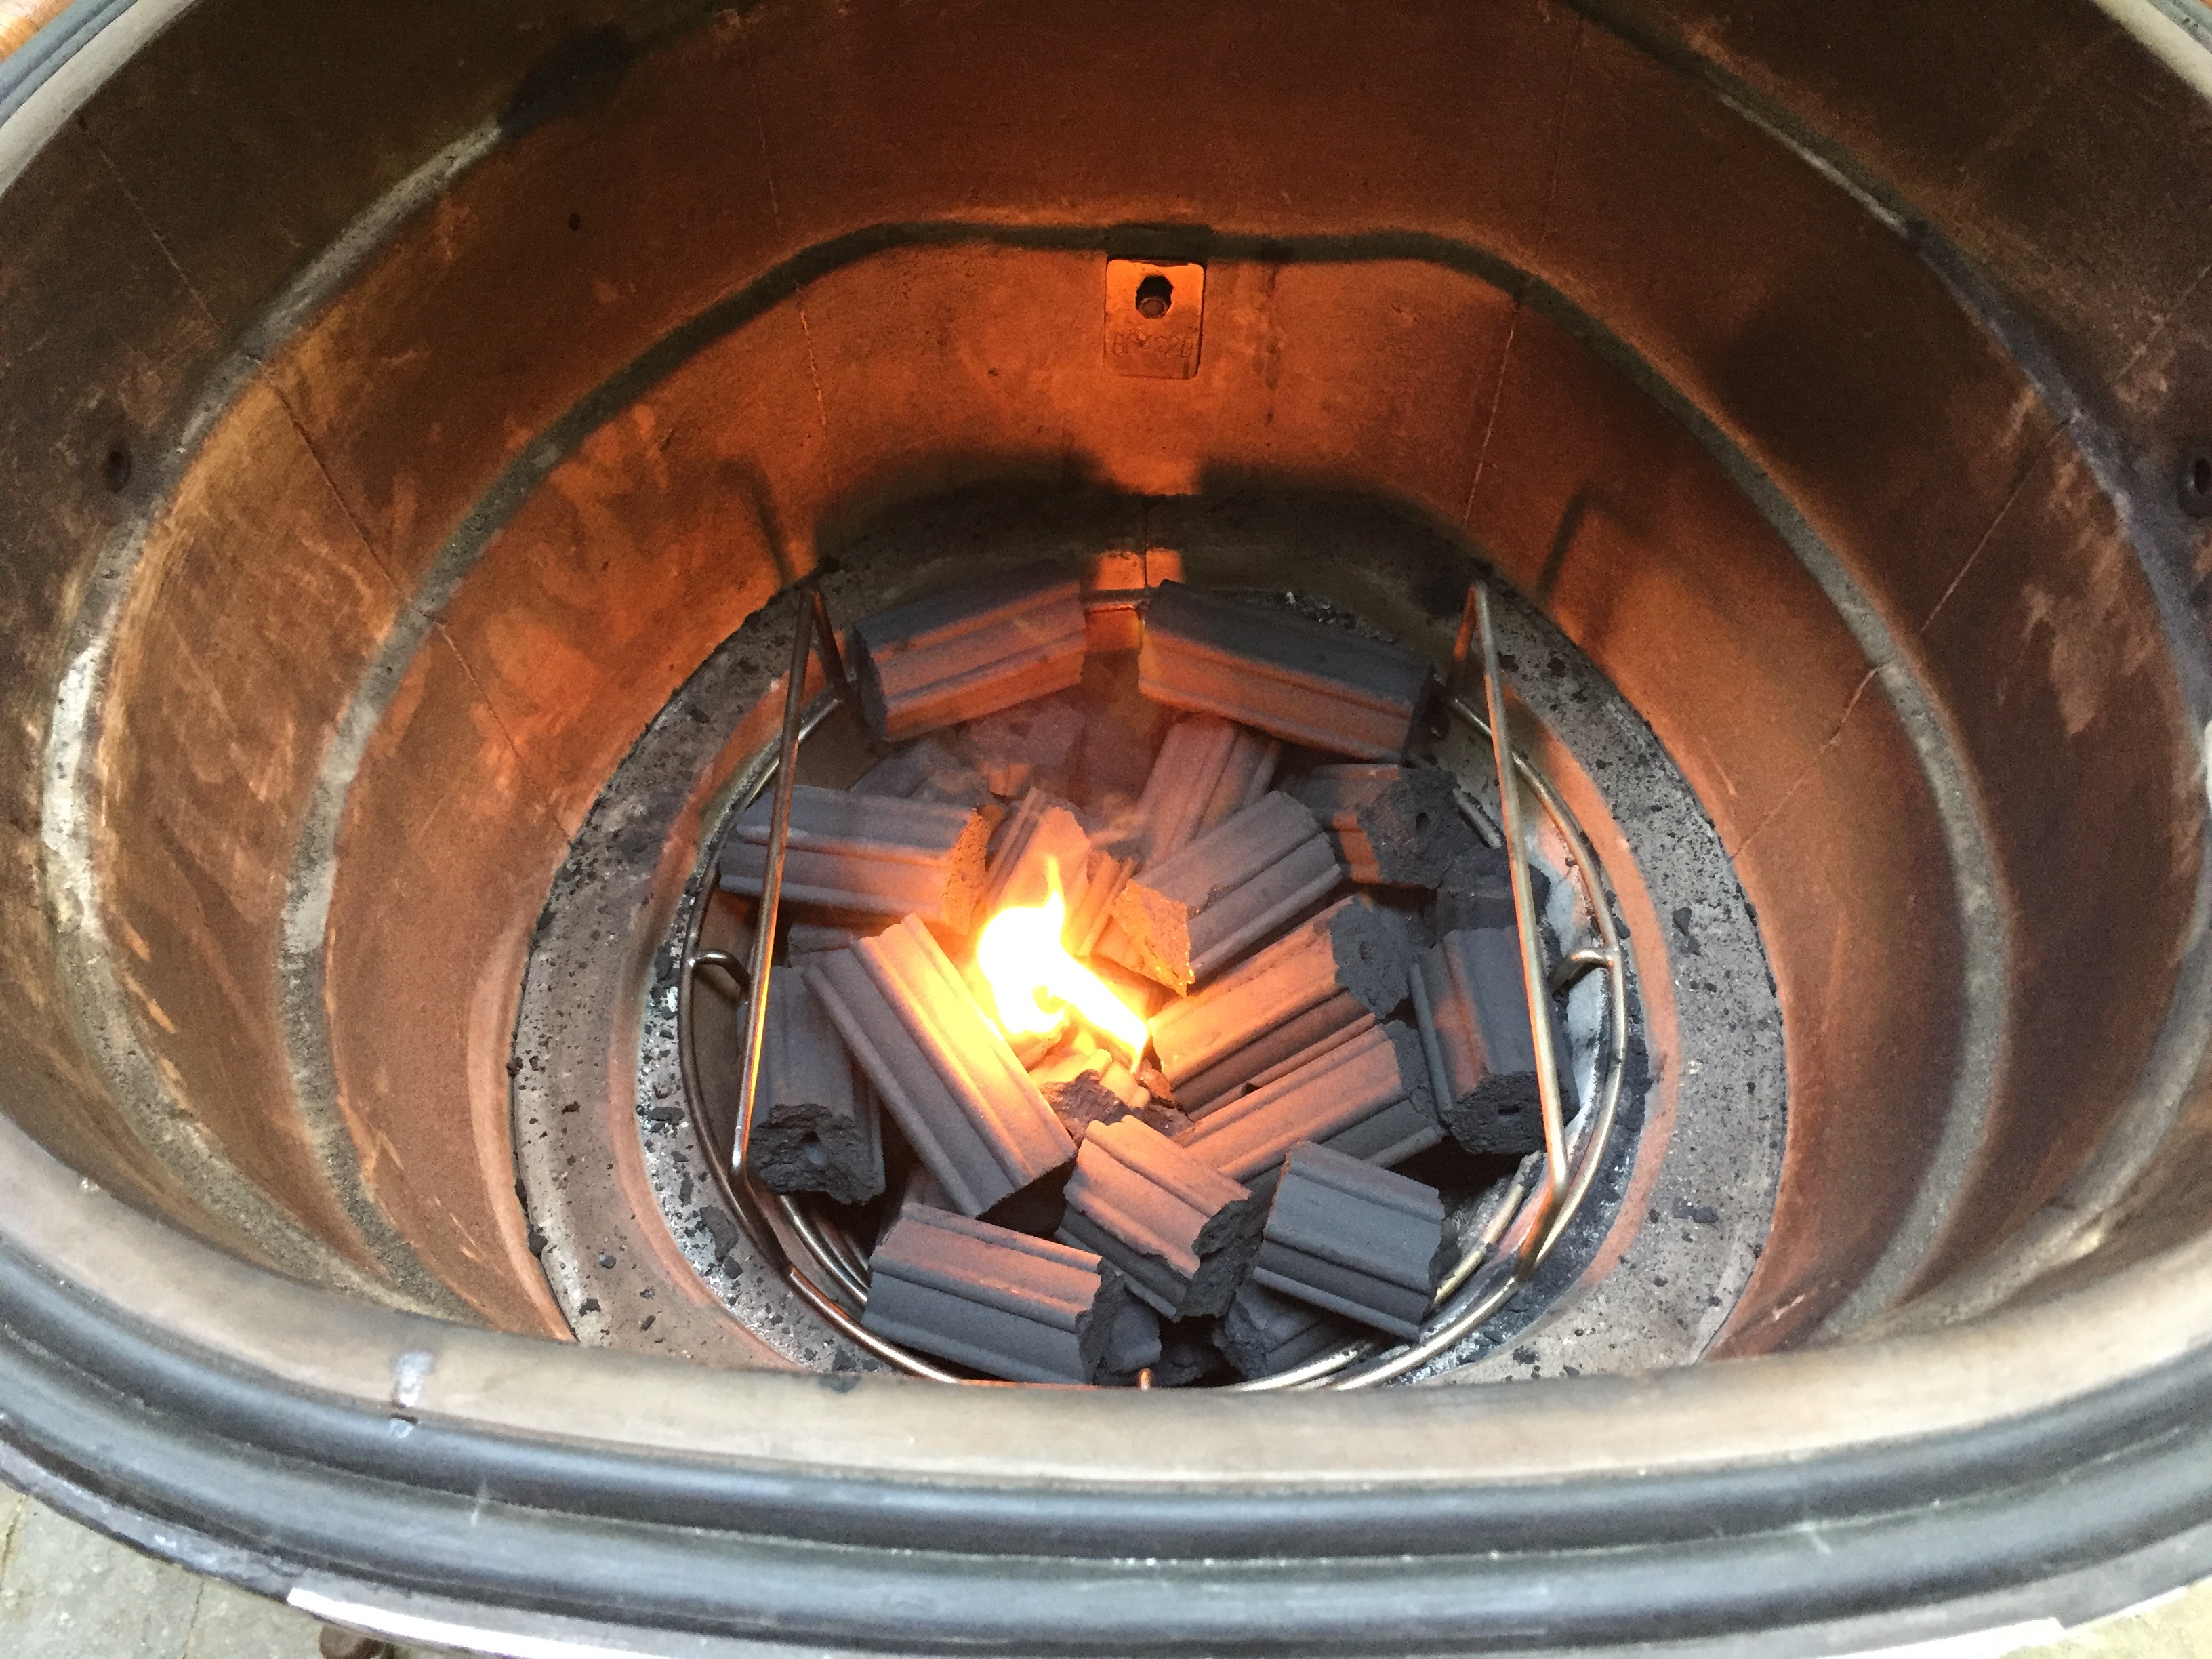
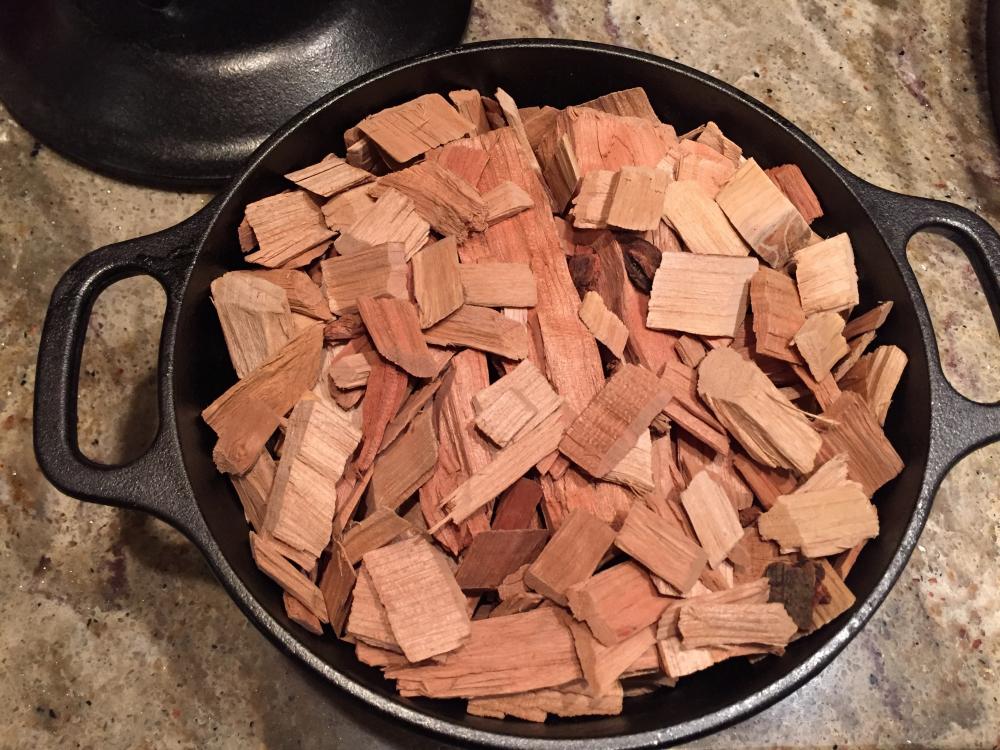
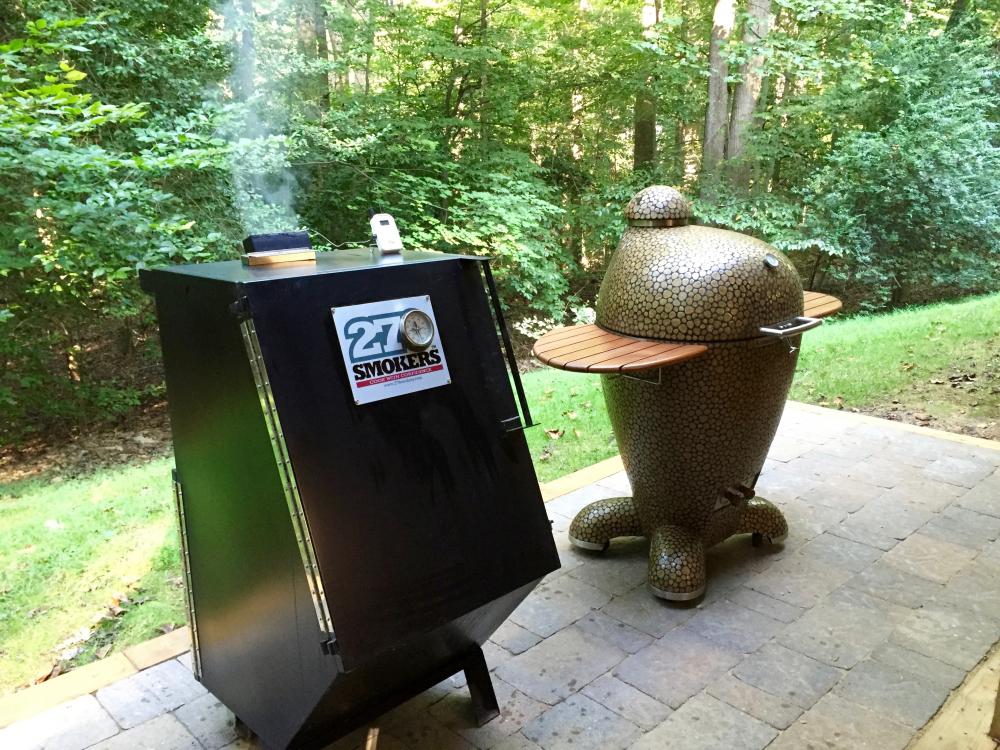
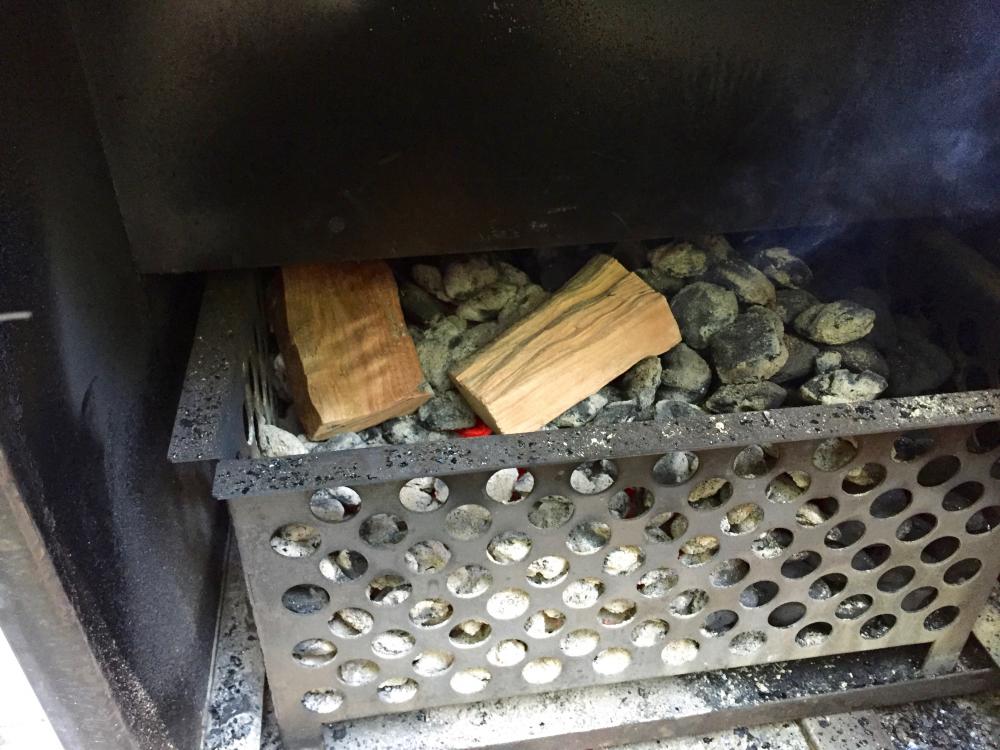
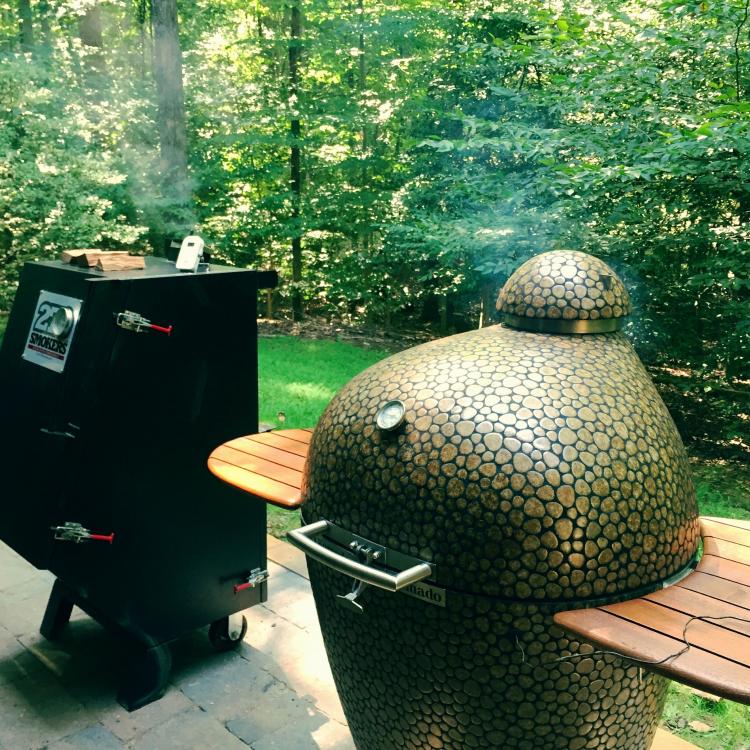
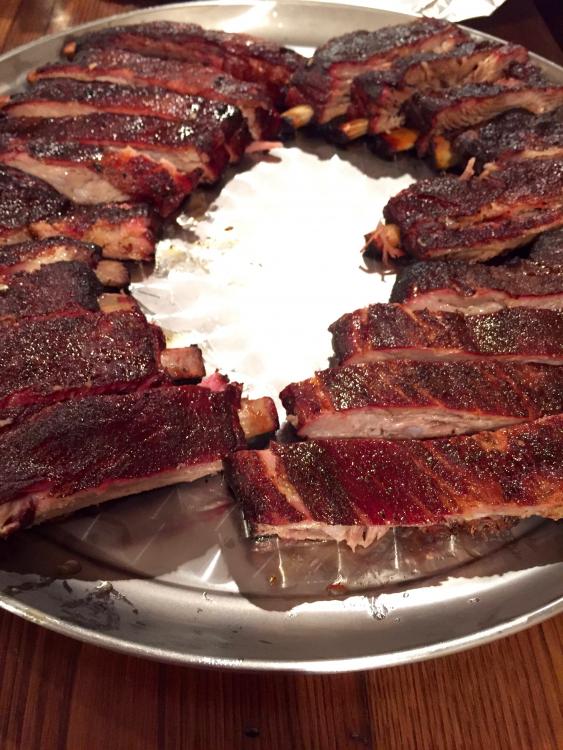
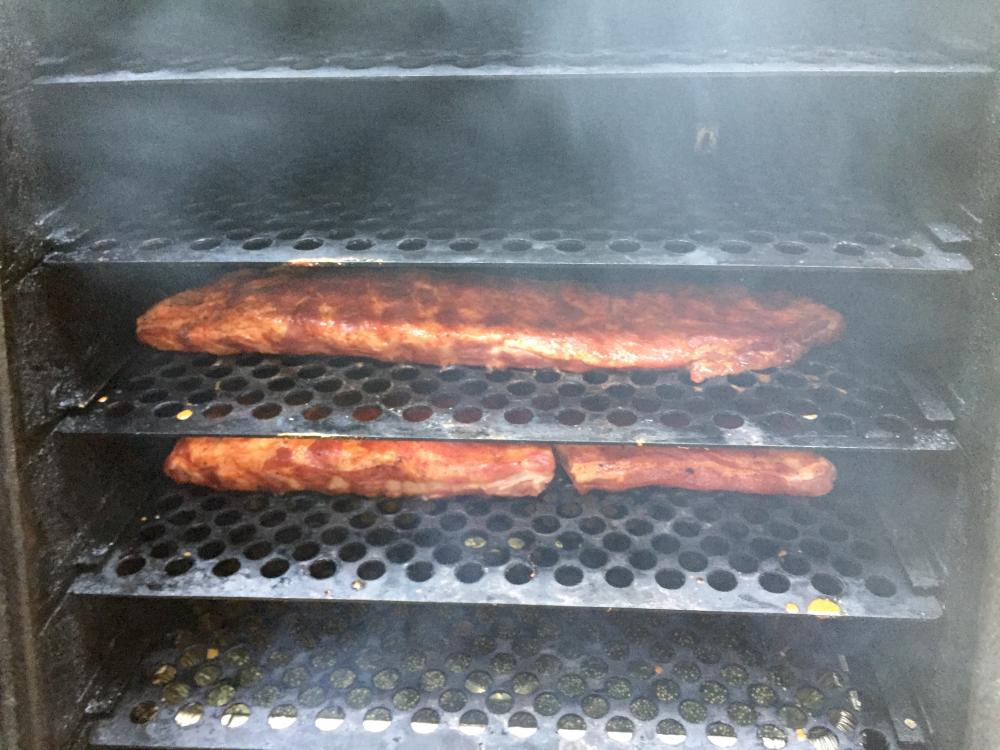
When I bought my Kamado Joe I had a word with my insulated cabinet smoker and reassured it that it was still the champ. With my KK’s arrival, no such reassurances were made. This time, the title of "Champ" must be earned. The competitors. On the left is the reigning champ, my 270 Smokers Standard. Boxy but good. On the right, the challenger who needs no introduction. 270 started as a regional brand based in Lexington, VA that made inroads on the competition circuit and is now sold throughout the US and Canada. I was an early adopter, posted a review at BBQ Brethren, and still field IM’s, emails and even occasional phone calls from owners and prospective buyers. It's an insulated cabinet with a unique design known as heated draft. I'll spare you the details, but the bottom line is that it is a convection smoker whose design amps up the flow, promoting very even temps and smoke distribution. Water pans are optional but recommended. Couldn't be more different from a KK in terms of airflow and the means by which it manages temps and moisture. To sustain that air movement, the 270 burns a lot of briquettes. After running my KK for 10 hours at 275 the other day I only needed to add two coco char sticks to reload the basket for today’s cook. The 270 excels at cooking the big four proteins popular on the KCBS circuit, so this is stiff competition for a KK. I’ll be using each cooker with my best practices for each. Here's a view of the 270’s firebox loaded to the brim. I’ll burn a fair amount of that today. Lighting procedure is ½ chimney of lit coals laid on top, burning down Minion style. The ever familiar KK lighting procedure for low and slow. One spot lit. Fifteen minutes before the ribs go on I put the smoke wood in each. One chunk of hickory and one of cherry go in the 270. You can see significant fuel consumption already. We'll add more chunks as the cook goes on. Just how you roll with this thing. And the smoke pot with one chunk hickory, two chunks cherry, and the gaps filled with cherry chips. That's it for this cook. No refills. The ribs: four racks of Costco St. Louis cut spares. Four racks seasoned with Meat Church Honey Hog, with two of those seasoned with a second layer of Honey Hog Hot. One of each will go on each cooker. After two hours, both are looking good: Both cookers are struttin' their stuff, smoking their little hearts out: Maintained a steady 275 on both cookers throughout. For the KK this was effortless. For the 270, I had to actively manage the vent because as the coals burned down, the ash was starting to affect the burn of the remaining coals. Whenever I opened for spritzing, the KK recovered immediately to the same temp. The 270 required 5-10 minutes to recover. After 3-1/2 hours the ribs in both cookers were passing both the bend test and the toothpick test. Here's the fire box of the 270 at the end, full of ash and burned down quite a bit. The final product. The KK ribs are on the right. The 270 ribs are on the left. Don't tell my blind taste testers. The Test: I had four blind taste testers. Three are my wife and two daughters who have eaten plenty of 270 ribs. The fourth is Mr. Qua, my eldest daughter's friend, who helped me move my KK to the back yard and is now pleased as can be to be eating ribs. The Results: Wife and daughter the youngest decided both were equally good, although my wife did pick up on a "smokier" note in the 270 ribs. As we discussed it, we concluded that note was the flavor of the briquettes underlying the wood smoke. Not unpleasant, but distinct. The KK ribs cooked with CoCo Char lacked this note. Daughter the eldest and Mr. Qua both picked the KK ribs without hesitation. When asked why, they both stated immediately that they were more moist. I'm the fifth vote and noted that as we continued to eat ribs (Wife and daughter the youngest finished early, so didn't notice this), the KK ribs retained their moisture as they cooled, while the 270 ribs seemed to dry up a bit. The Verdict: With 3 votes for the KK ribs and 2 votes neutral, the new champ is my KK. The KK was both easier to use by far, and also produced more moist ribs. Look for my 270 on Craigslist soon.


 1 point
 -
I keep a Meco Swinger II around, thinking I will use it for quick grilling, but I never do... If we have a big party I'm going to break it out and use for something, anything, just because we have it. It has a real sentimental value, I learned to cook with charcoal on it. https://www.walmart.com/ip/Meco-Swinger-Series-21.5-Square-Charcoal-Grill-Adjustable-Cooking-Grid-w-2-Folding-Side-Tables/124413161 point
-
It's been 24 hours time to build some pies. . Get your proofing station ready. Regardless of dough used in the recipe I use plain all purpose flour for this. A wooden work surface sticks less. A dough scraper helps a lot. 2 floured plastic bowls. . The dough after the 24 hour counter rise. . Using a spatula coax the dough out of the bowl onto the floured counter top. . Sprinkle the top with flour then using the dough scraper divide in two. . Transfer half to the board. . Start with well floured hands. Stretch and fold from the right then stretch and fold from the left. . Give it a 1/4 turn then repeat the above stretch and fold procedure ending with this. . Flip it over into your hands so the bottom is now the top. . Form a proper dough ball by using your fingers to curl the edges over and under the ball. . Place in a floured bowl. Repeat with the other dough half then cover with cling wrap. . This needs to proof for a minimum 1 hour but 2 hours is OK. Now is a good time to fire up the kamado and get it and a pizza stone heat soaked at 600*. Also a good time to get your toppings together. . Setup your building station. Parchment paper tucked under a wooden peel for now. (scared to try launching straight from peel due to high moisture content - LOL) . Put a dough ball onto the work surface and begin to stretch starting from the middle and working out. Very important not to disturb the outer edge. . Flip it over. . Stretch a little more then repeat the flip and stretch. Stretch a little at a time. . Using the dough scraper lift an edge and get your well floured fists up under the middle. . Lift it up and transfer to the parchment paper allowing gravity to do a little stretching. Don't spread your fists or you'll stretch it too much. This lifting/transferring procedure only takes 10-15 seconds. . Now you can do a little more stretching and a final shaping. Once again don't disturb the edge. . A thin layer of sauce and hard cheese (parmesan, Asiago etc....). . Add mozzarella cheese and toppings then cut the parchment paper as close to the edge as possible. For thin, hot, fast pizza I limit it to 2 toppings (not counting cheese). Too many topping and the top doesn't cook correctly. . Two pies ready to go. . Cooked in the Blackstone at 600* for less than 3 minutes. The Blackstone is a much different beast compared to a kamado. In a kamado at 600* I imagine it will take 4-6 minutes. I left the parchment paper in the whole time. If you want to pull the parchment paper make sure the edge is done rising first (about 2 minutes). . One money shot (not sure how many pictures I'm allowed to post at once) . As an added bonus I'll pass on this final yummy step. Save some of that soft delicious crust for afterwards and serve with some honey for dipping. Awesome pizza desert. (got that from Ozark Mountain Pies in Idaho Springs, CO.) . Any questions please feel free to ask. Although this seems like a long complicated procedure it is not. Once you get familiar with it you'll stretch and build a pie in 1-2 minutes. . ............................................. . A few final pictures and thoughts. . . Of all the flour combinations I've tried the one I like the best is 2/3's KA Pizza Blend and 1/3 '00' flour. Better color and taste. . They say after the 24 hour rise you can refrigerate for up to 6 days. I've tried that but it seems to stretch better if used right after the 24 hour counter rise. If you are going to do a few days in the refrigerator allow it to come to room temperature for 4 hours before stretching and folding. . Even if you use a different dough recipe there are a few techniques that could apply to that recipe. . Stretching and folding. Proper ball formation. Board stretching. Air stretching. Final shaping. Leave edge undisturbed. . .......................... . I would say this post is "Pic Heavy" even by my standards but if you've made it this far I guess you know that already - LOL Reef's Bistro1 point
-
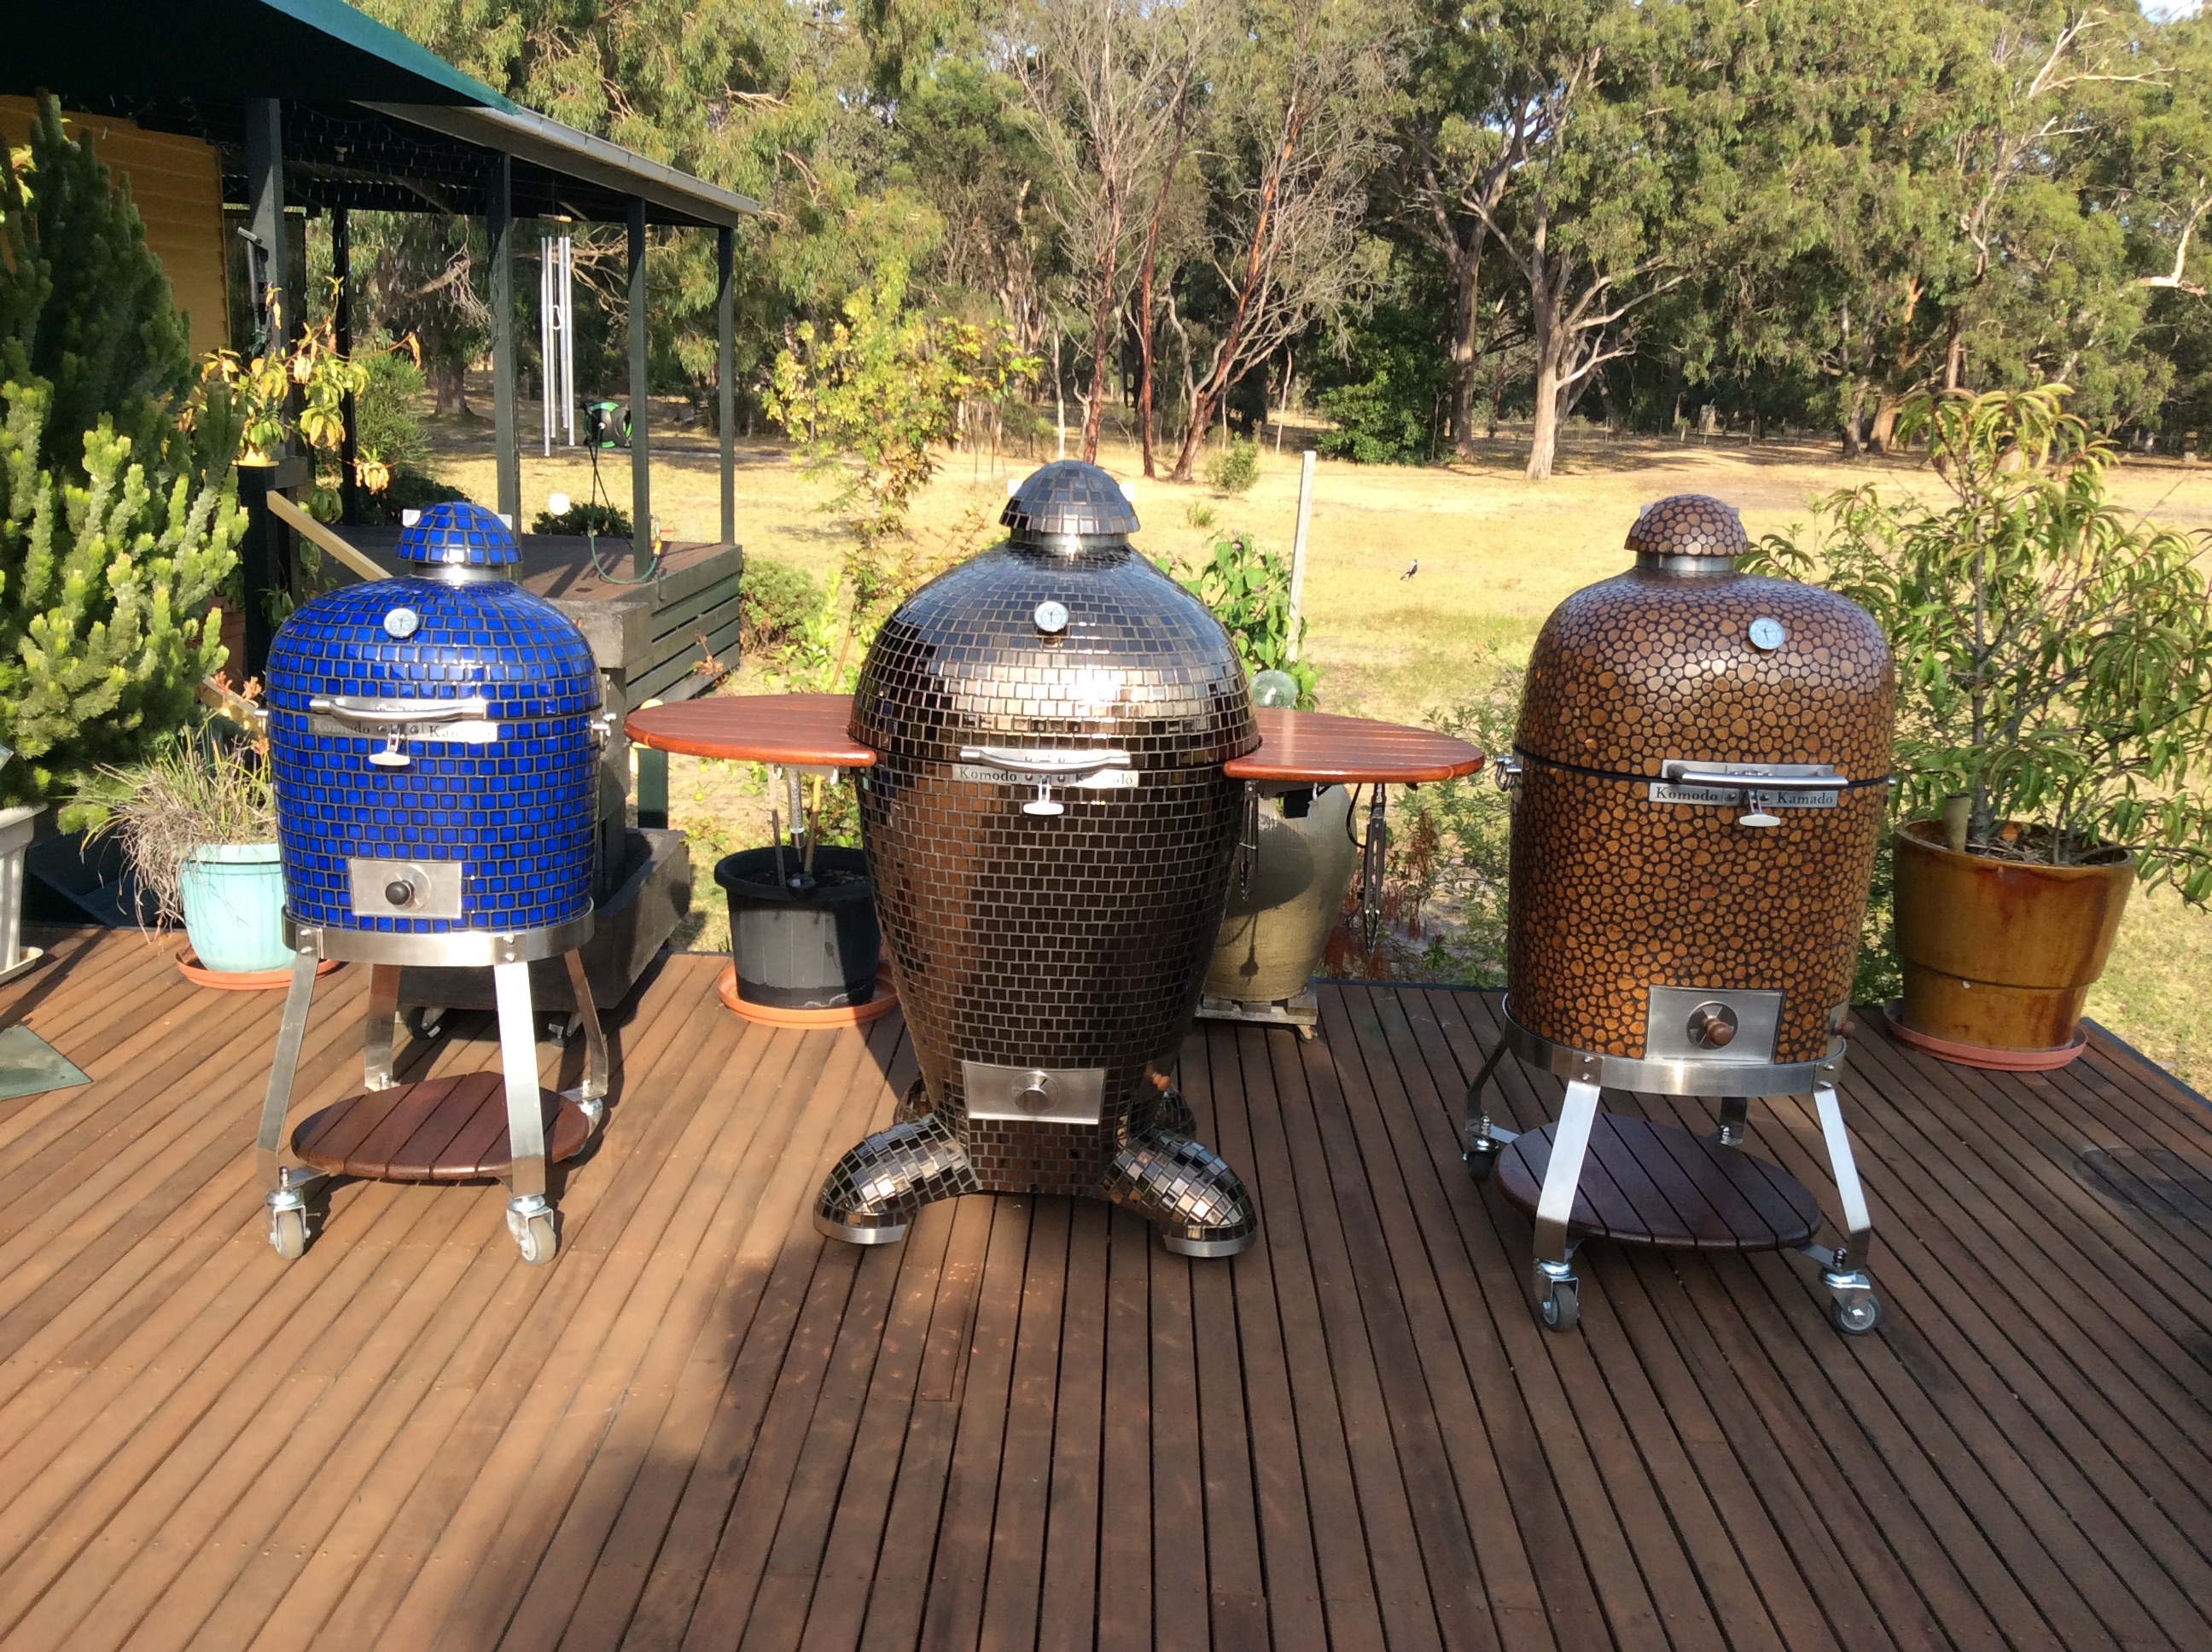
Big Bad 32" Colbolt Blue1 point
-
2011 Harvest Gold Pebble Gen II OTB, 23"
 1 point
 -
My 23" in Dark Autumn Nebula.
 1 point
 -
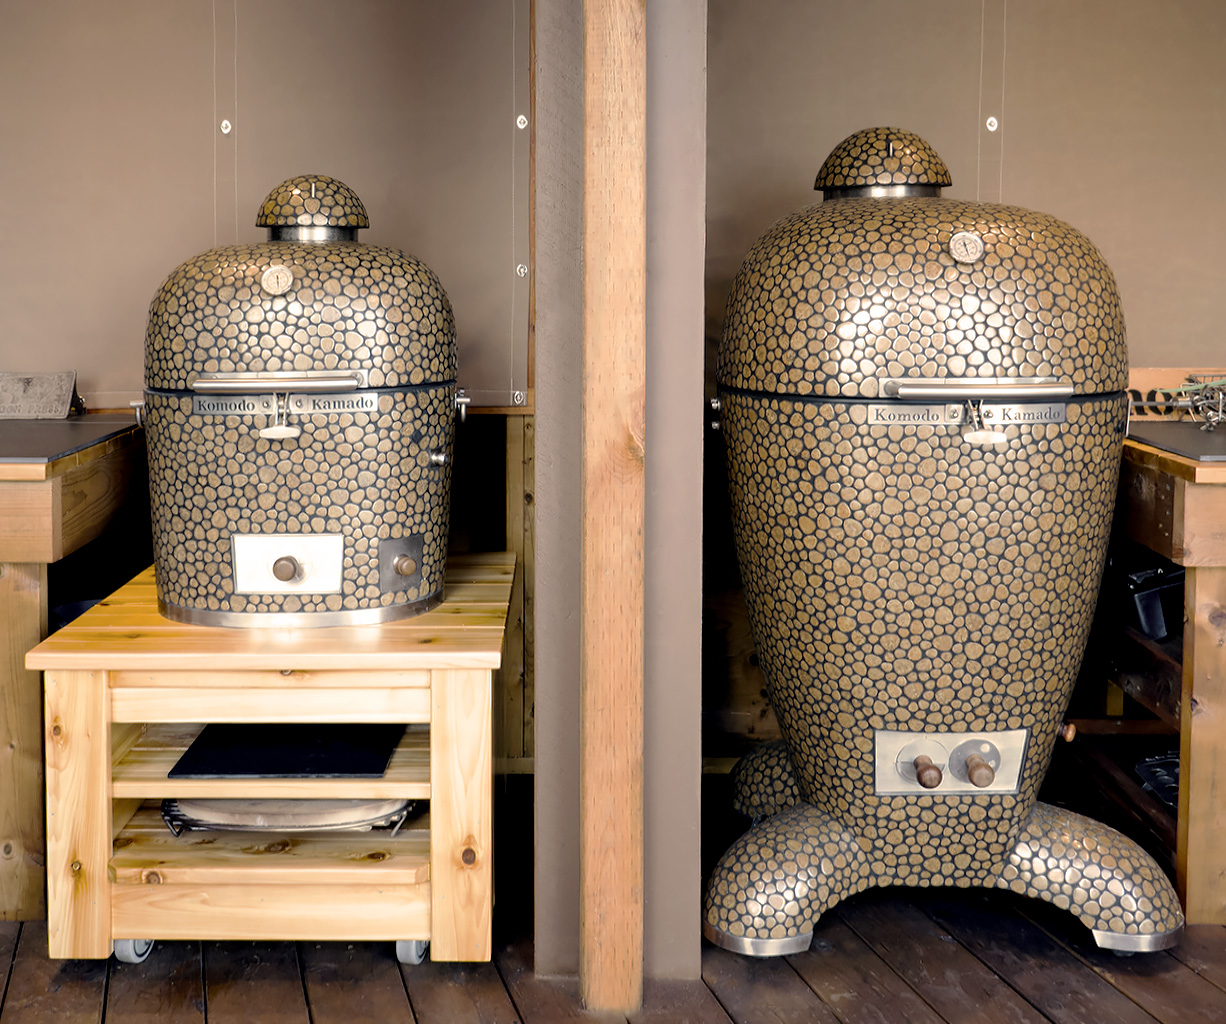
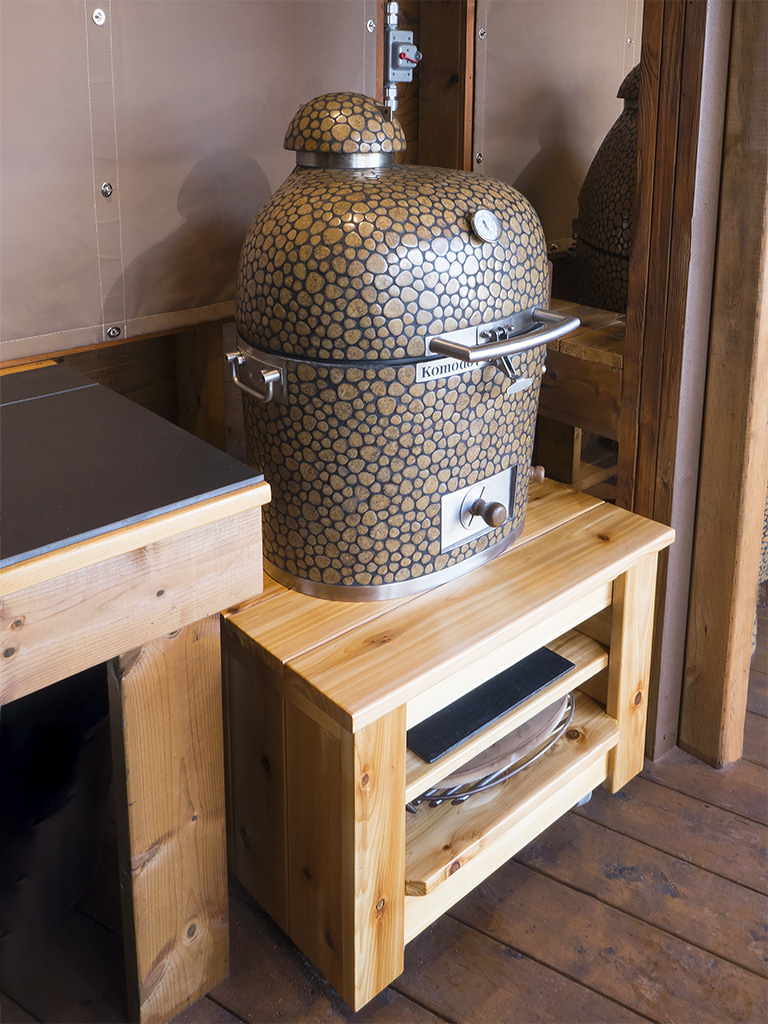
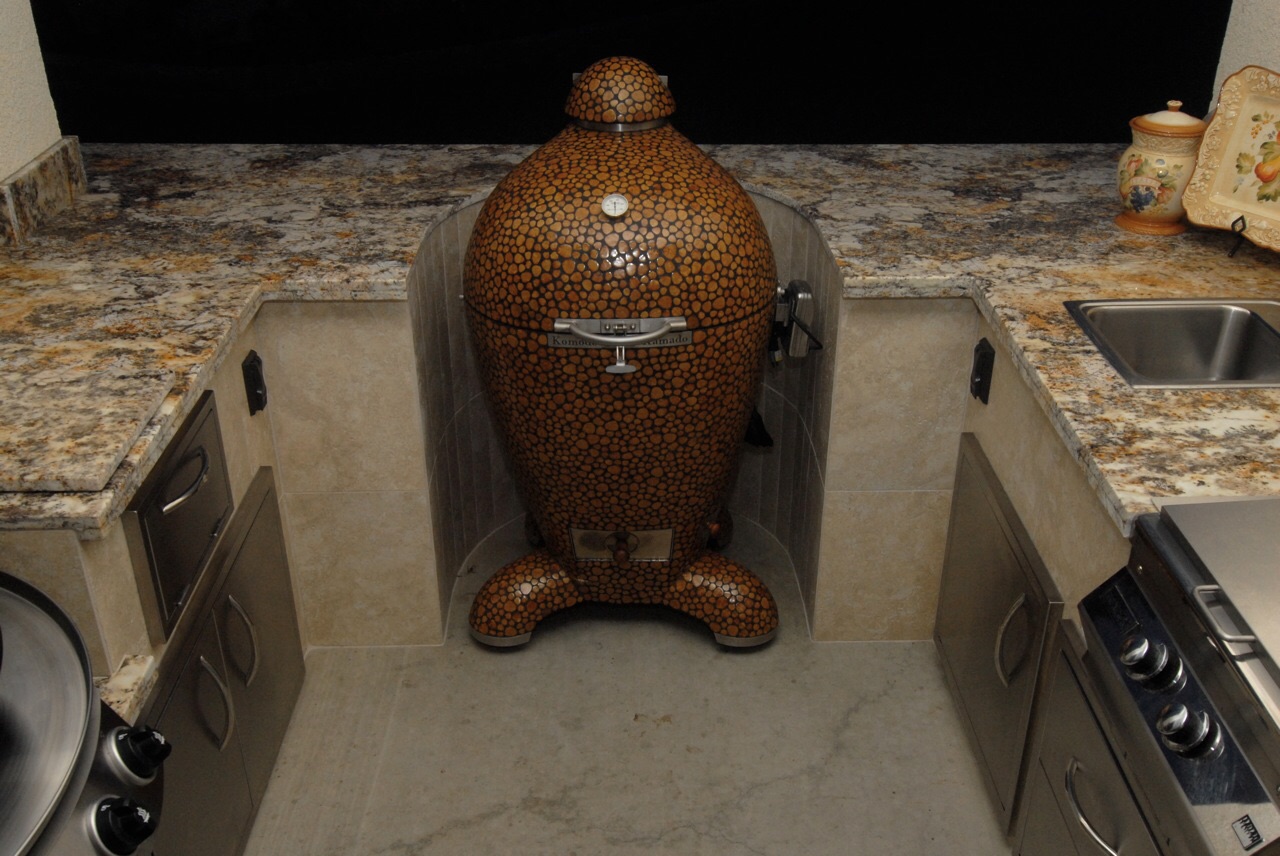
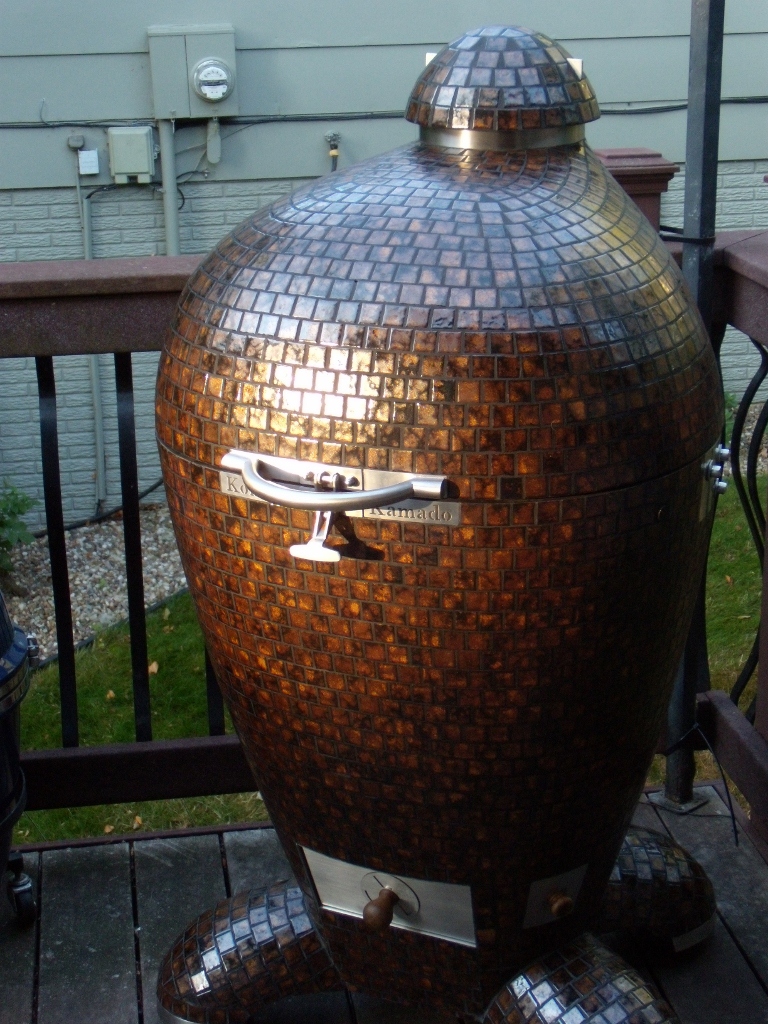
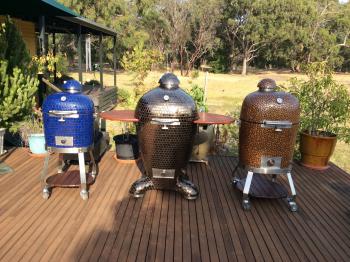
23 ultimate, 19 table top, 16 table top.
 1 point
 -
23"ultimate, 19" Table Top both in Metallic Bronze.1 point


.thumb.GIF.006d23b9323146d2dd9055f4e195bc2a.GIF)