


jeffshoaf
-
Posts
423 -
Joined
-
Last visited
-
Days Won
22
Content Type
Profiles
Forums
Events
Posts posted by jeffshoaf
-
-
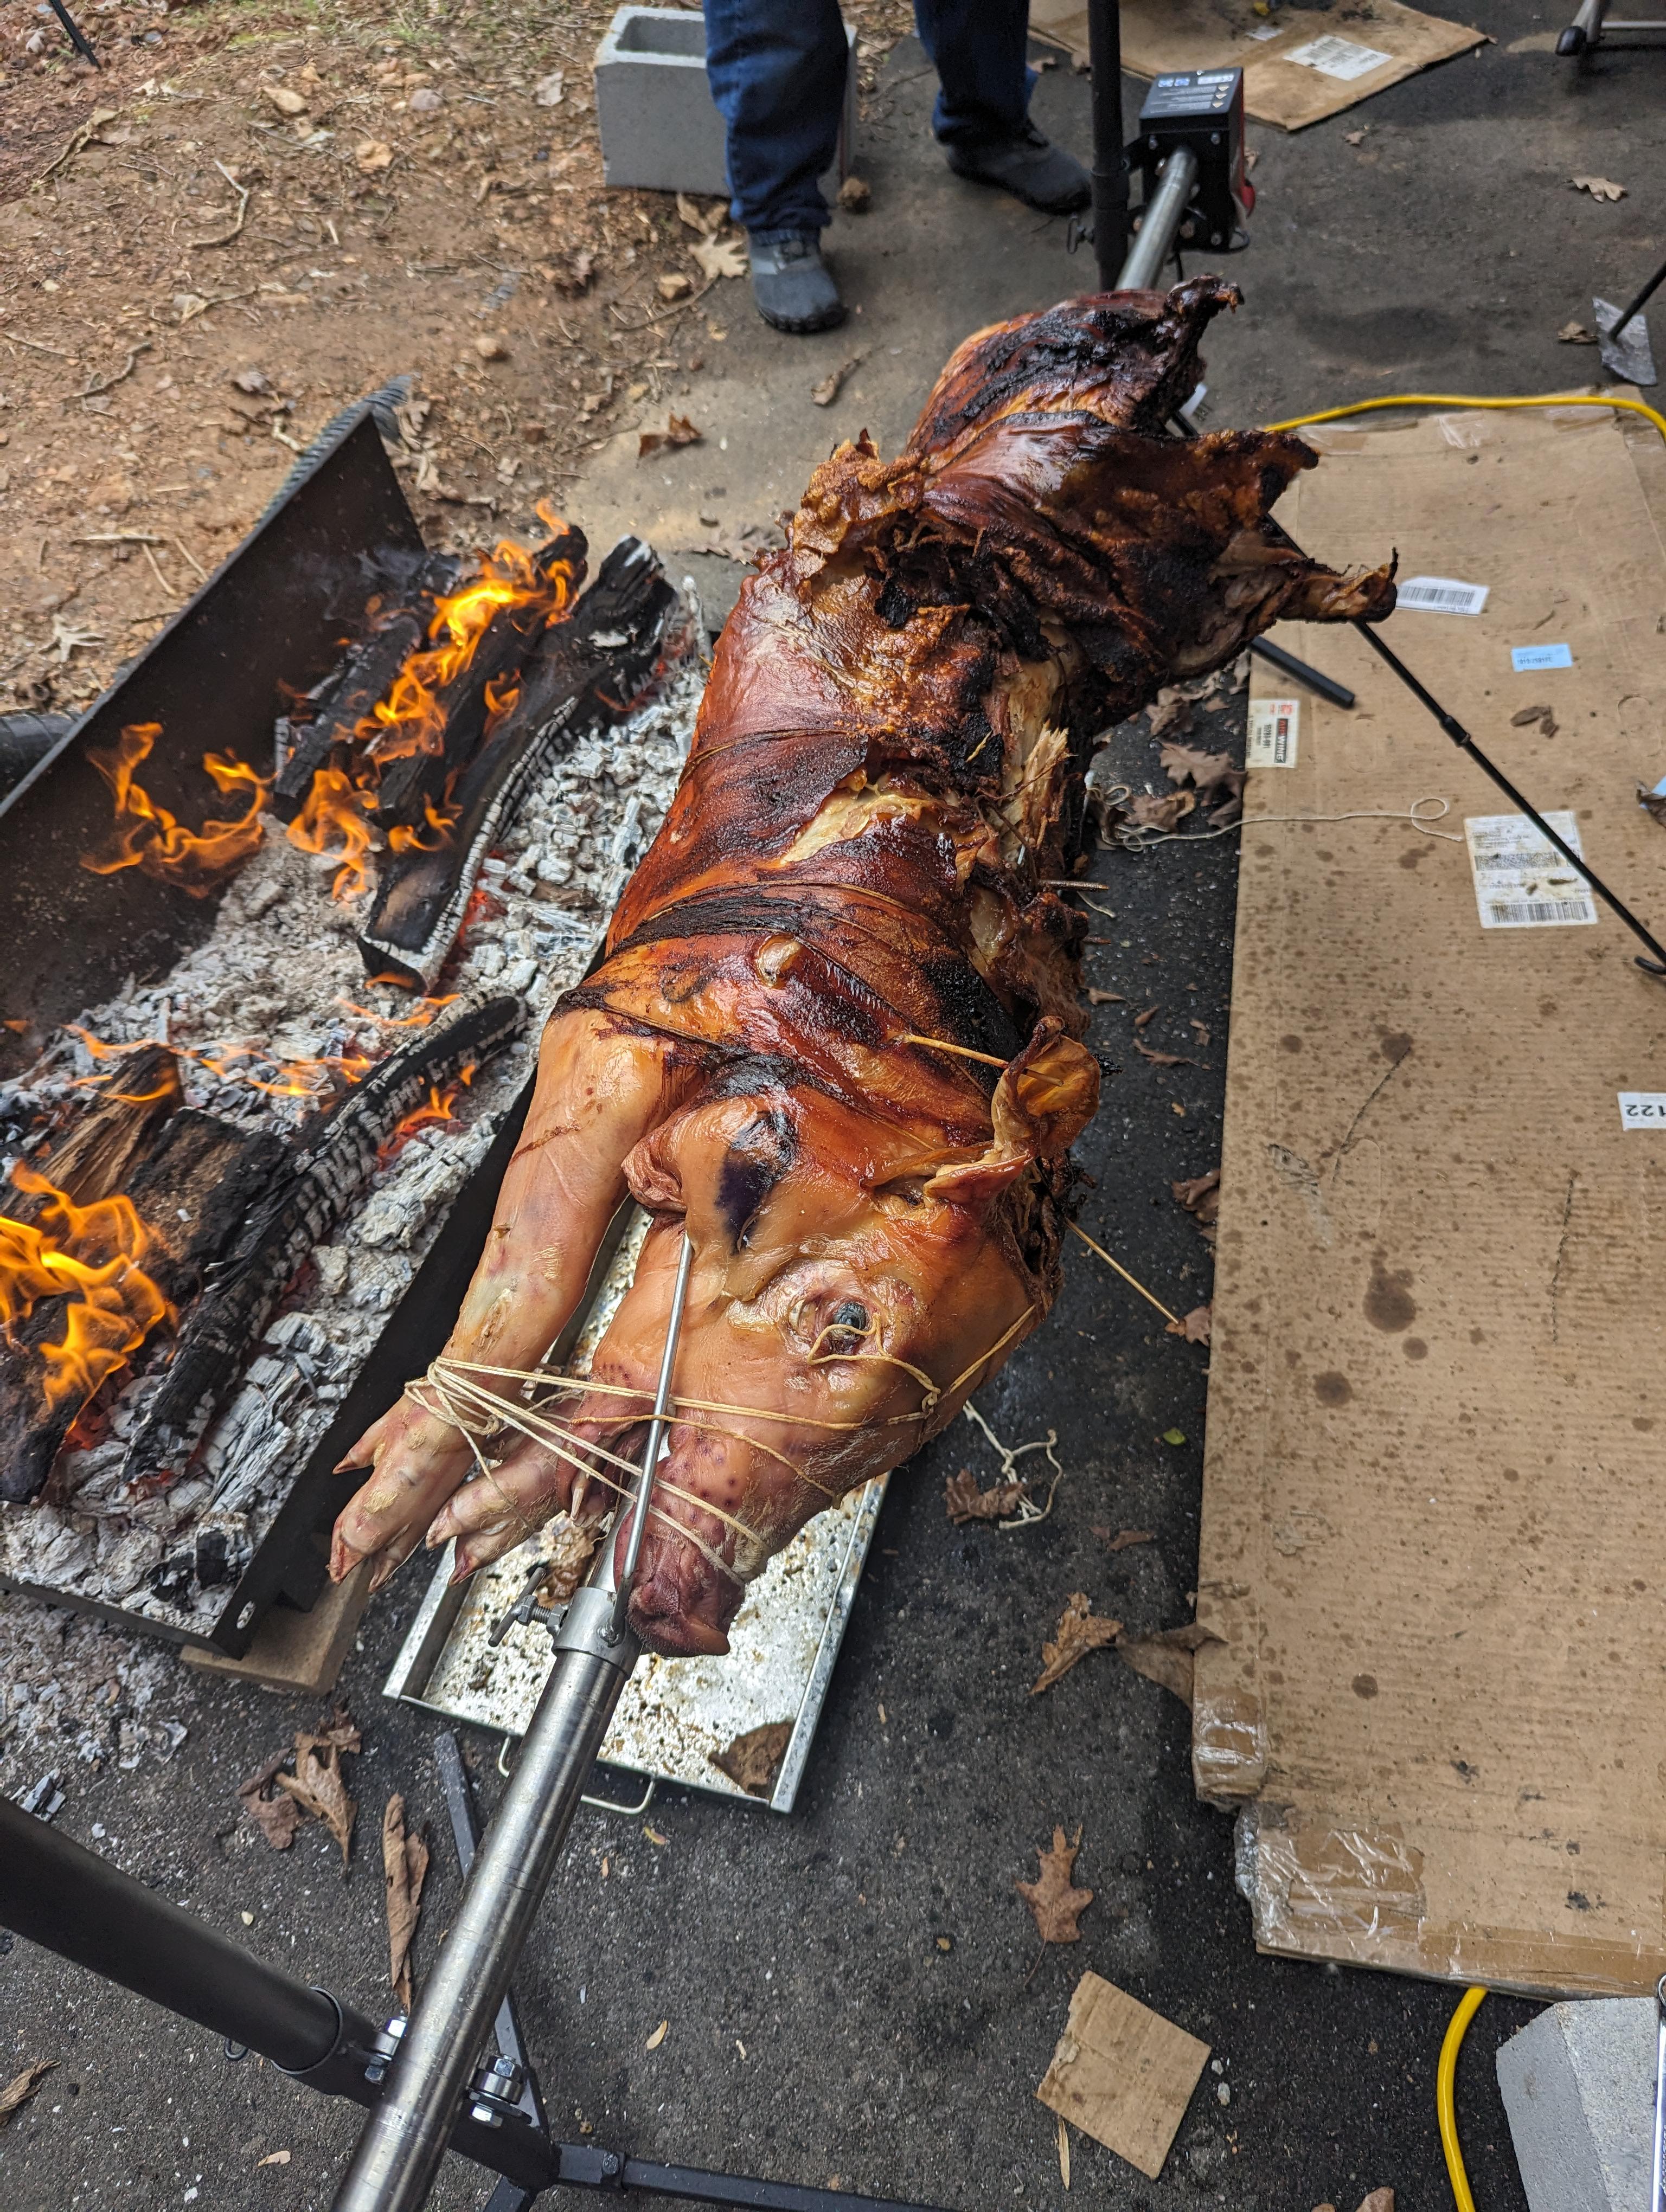
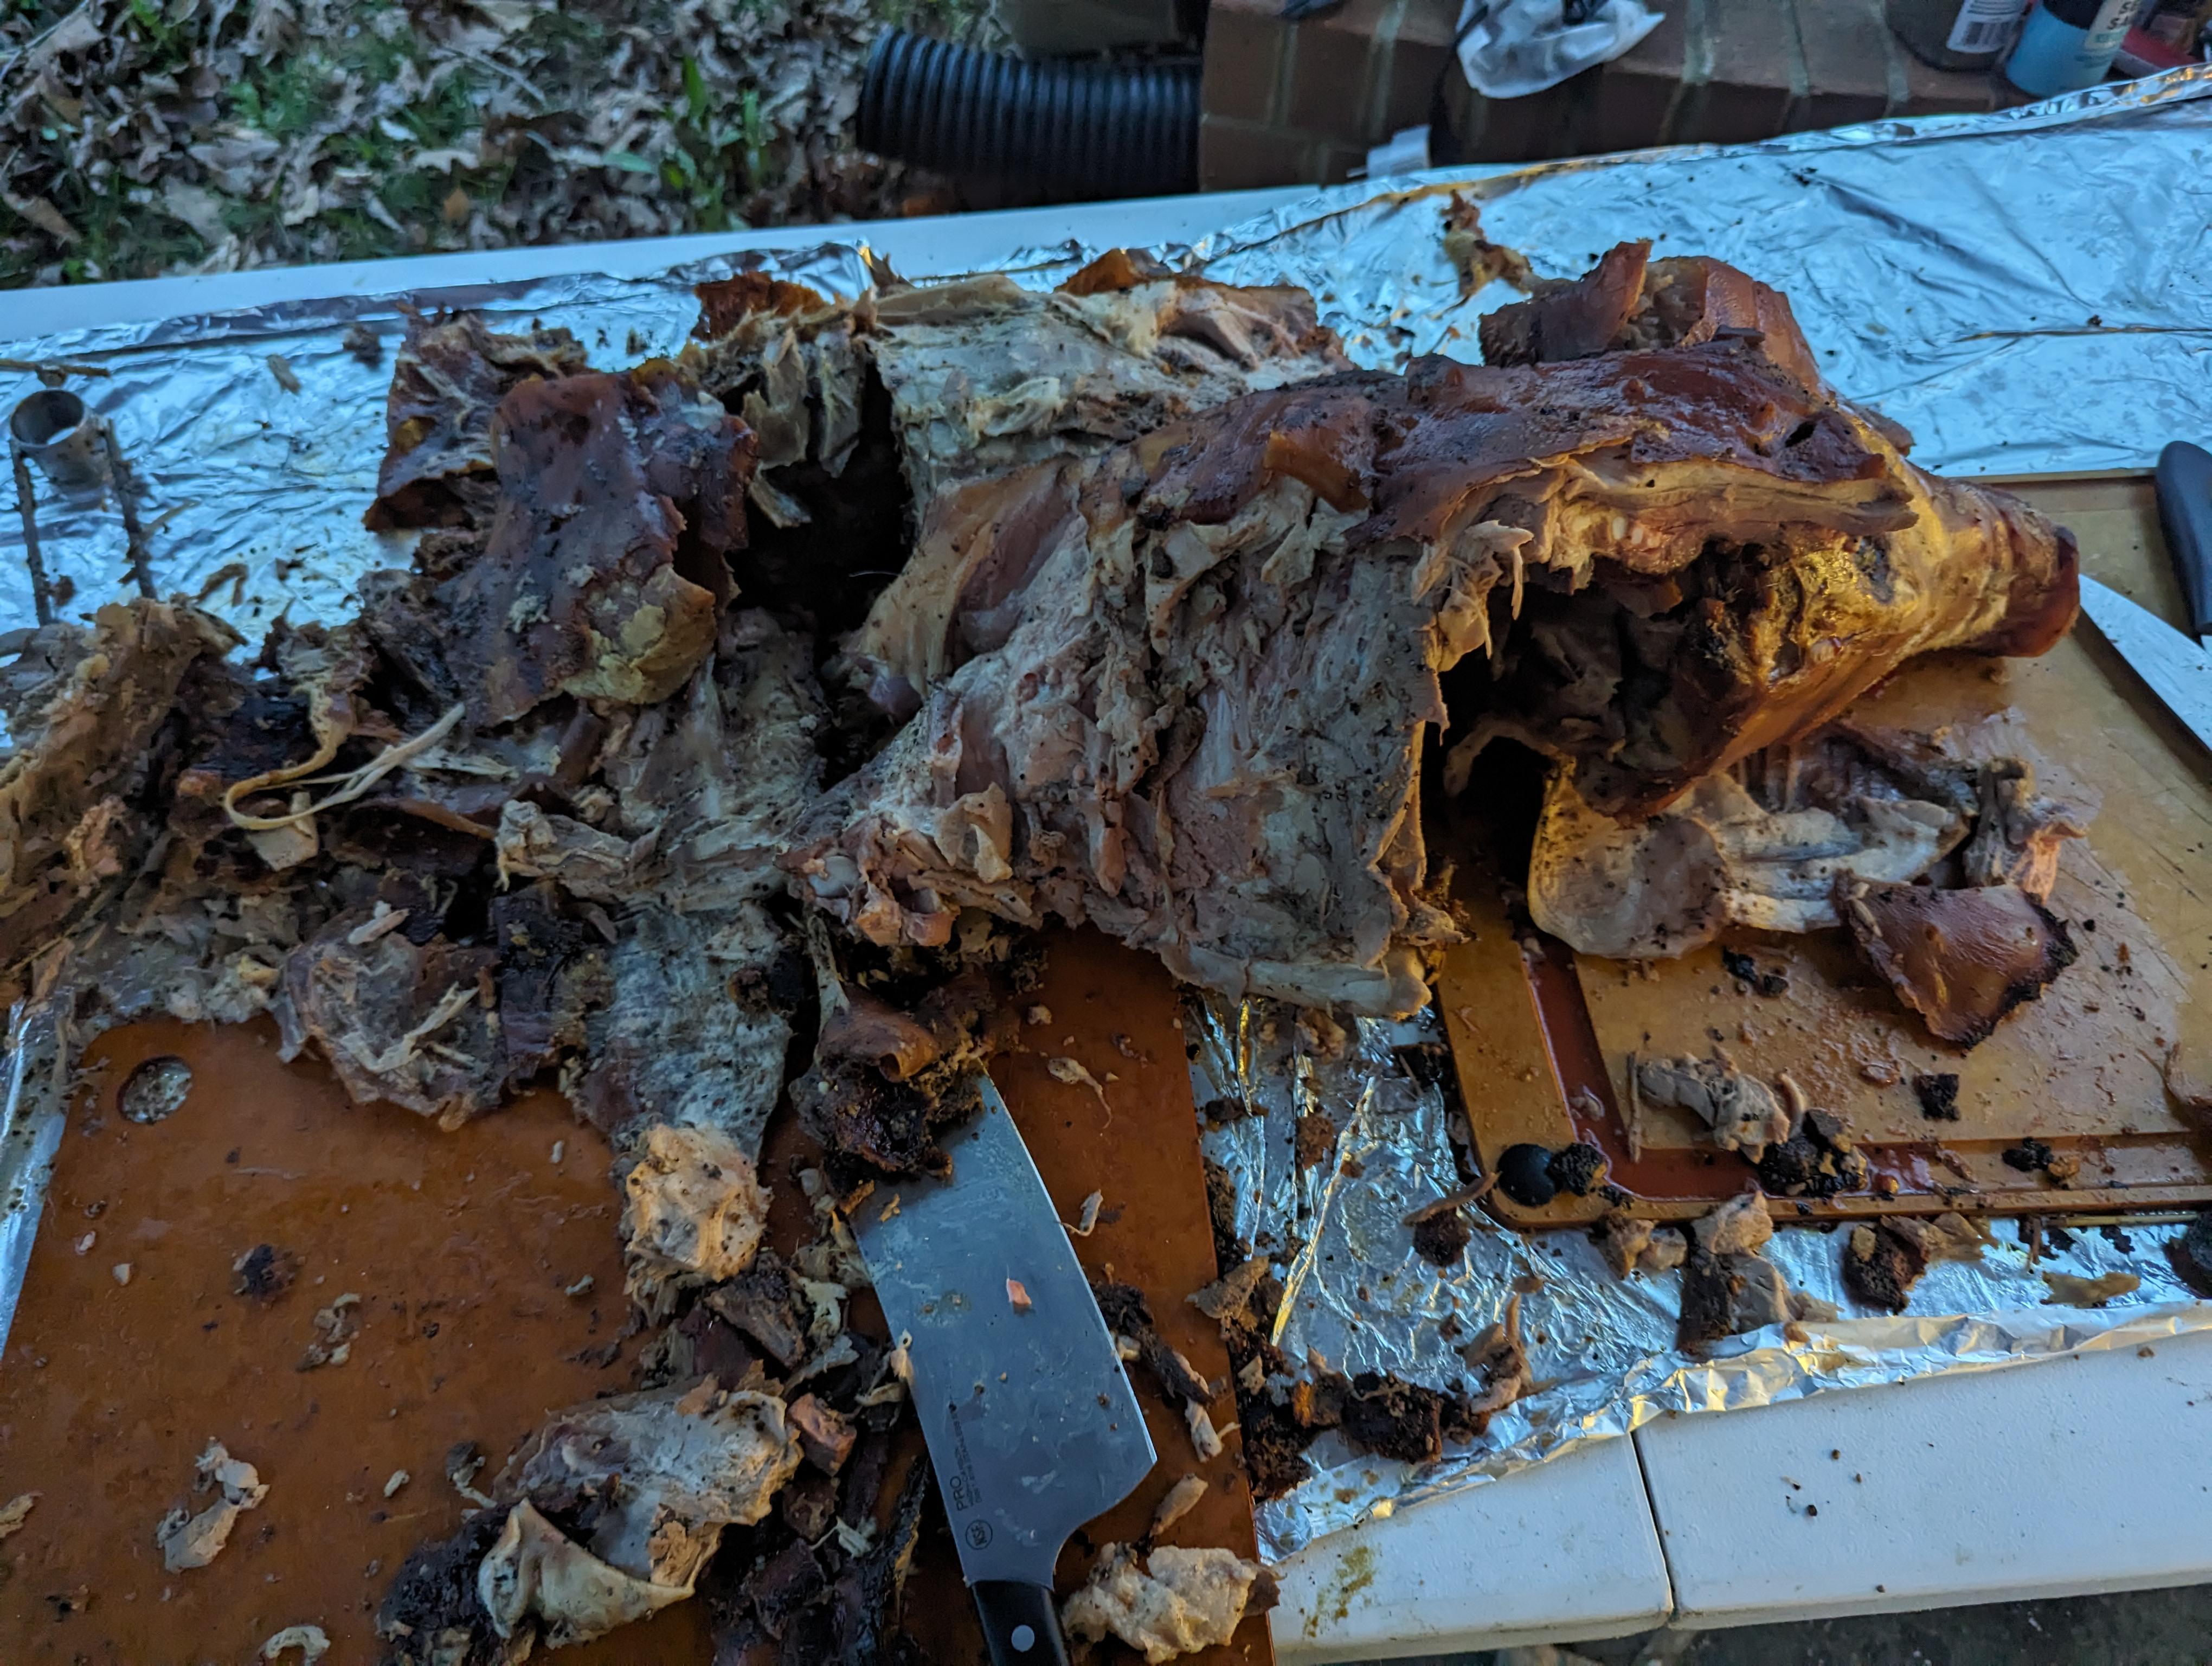
I'm hoping to rotisserie roast a whole hog for a family gathering this summer, but since I'd never done one I decided to do a practice pig. I ordered a 70 to 80 lb one from a local meat shop last week with the plan to pick it up Wednesday afternoon, dry brine it overnight, and have it roasting by 10 am yesterday (Thursday).
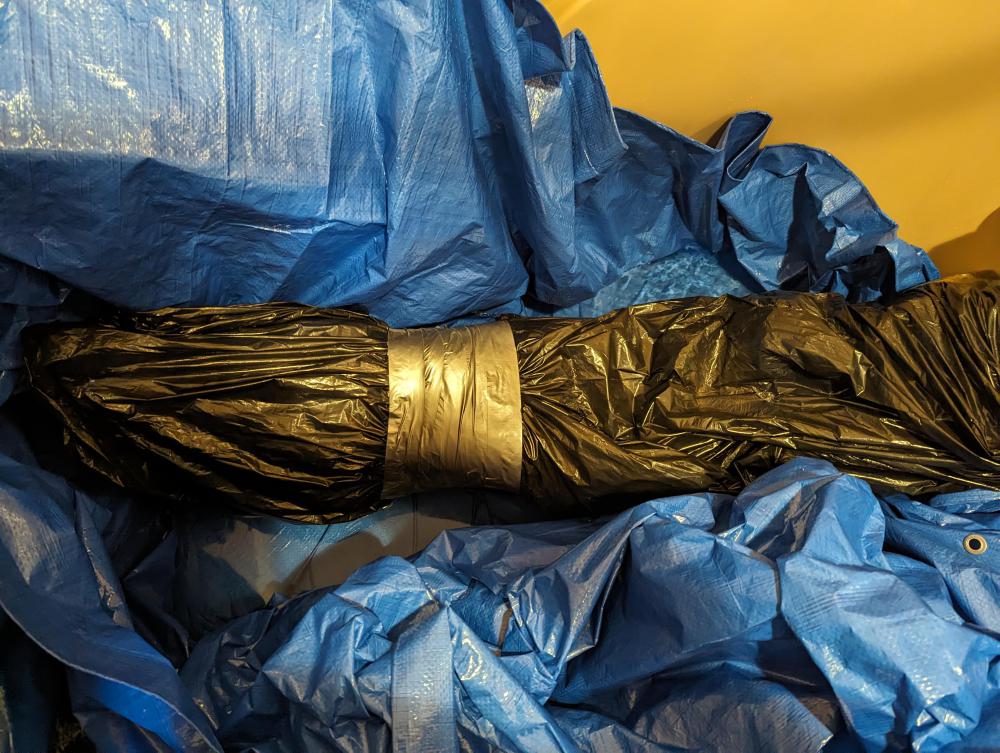
My brother and I went to pick it up and things went a bit awry: not only was the pig 93 lbs - it was also frozen solid. Evidently, the supplier didn't have any pigs ready to slaughter in the sight range I'd requested, so they sent the closest thing they had. The front legs were frozen straight out by the head and the hind legs were straight out from the back of the pig so it didn't fit in any of the coolers we had available so we loaded it in the back of my pickup truck and carried it home.
It was wrapped up tight in plastic; when we got it home, we suck it in a couple of industrial garbage bags (one over the front end and the other over the back end tapped the open ends of the bags together with duct tape, and lugged it upstairs and dumped it in the bathtub on top of a tarp, then filled the tub with cold water.
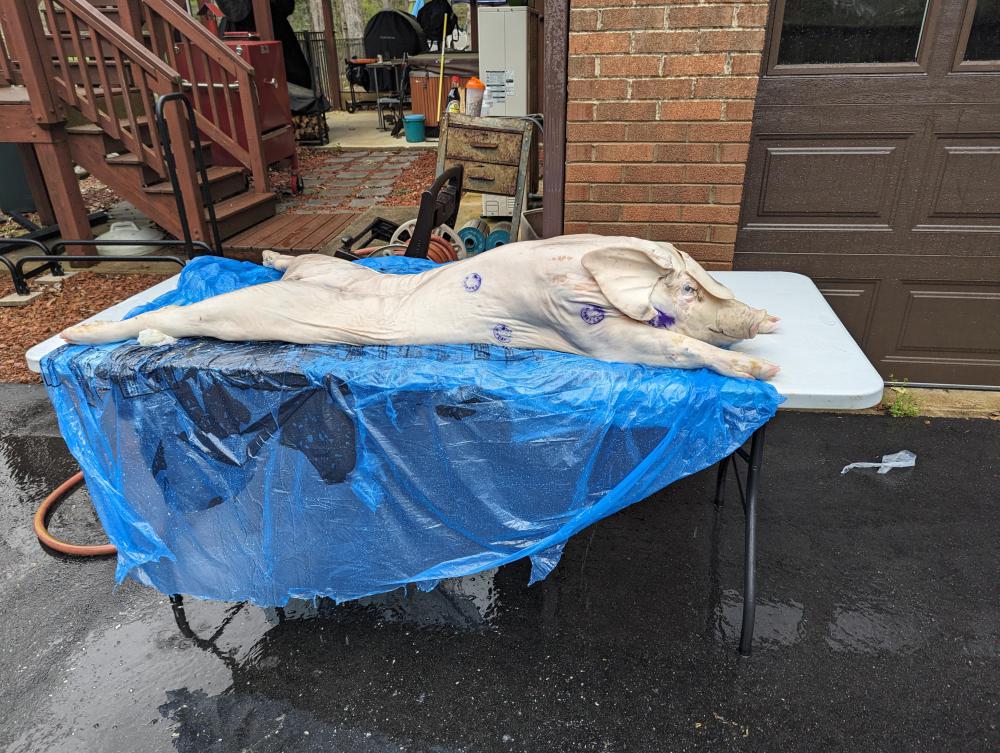
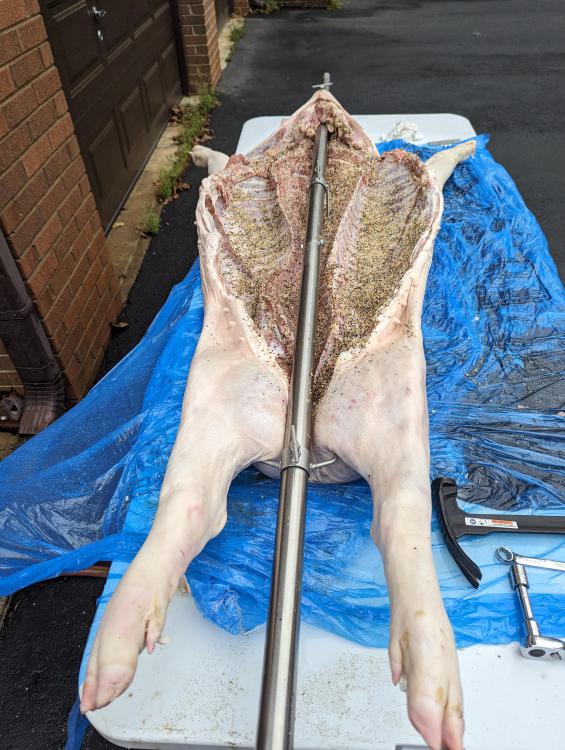
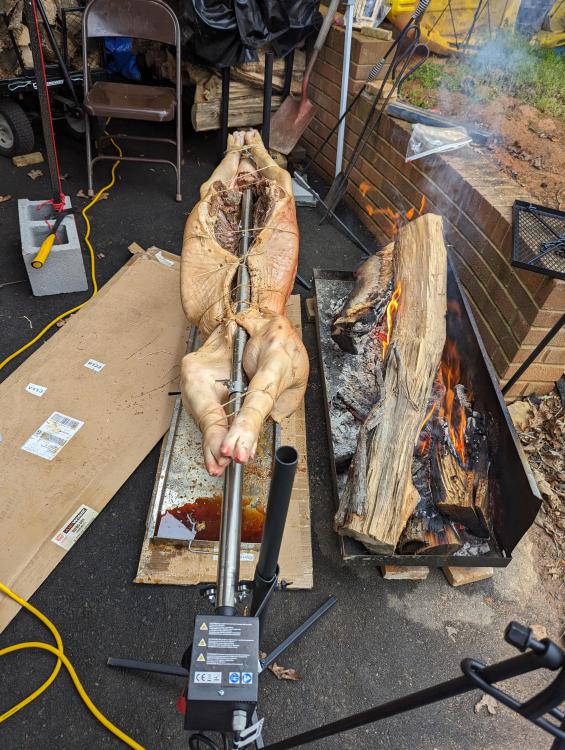
My brother got to my house before 8 am Thursday morning and the pig was thawed so we lugged it back downstairs and opened up the plastic to discover that the pig has been butterflied - very good if you're wanting to smoke it in a smoker or open pit, but not for spit roasting. The spine had even been split open on the inside so it would lay nice and flat. We cleaned it up and washed it, then seasoned the inside and got it on the spit the best we could, tying it on with heavy twine. Neither of us is good with knots so we tied a lot. Got the motor mounted on the spit and the spit on the tripods. It was very damp here so I started two chimneys of lump charcoal to establish a good bed of coals while my brother applied soy sauce to the pig's skin. When the charcoal was burning good, I dumped it in the fire pit, added hickory, and we started up the rotisserie at around 9:15 am (about the same time a couple of cousins showed up to help).
Most of the pig was done by 4:45 pm or so, so we stopped the rotisserie and focused on getting heat on the areas that weren't quite to temperature. We took it away from the fire about 5:15 pm and let the pig rest while I hunted for a 10 mm wrench to remove the spine clamp; the wrench had evidently wandered off on is own adventure after I'd used it that morning.
Due to the pig being butterflied, it flopped around a lot and because of that and shrinkage, we had to stop and add additional twine to secure the pig to the spit. Also, with the legs tied up stretched out in front and behind the pig, the pig was wider than the firepit so the legs didn't cook very well. We also burned a few patches of skin.
I had invited friends and family to come by and get pork to go; the general consensus was that it was very tasty except for the burnt patches of skin and the undercooked legs. I fire up the big grill to finish up the legs after most everyone has left.
So, the verdict: I think things went pretty well considering it was my first attempt; I certainly learned a lot. A lot of the issues we encountered were due to the pig being frozen and butterflied; I have some ideas for handling those issues if they reoccur. I think we can handle the undercooked legs by bringing the hind legs up under the pig to shorten up the total length instead of leaving them stretched out behind.
Oh - we also had a major grease fire when the oil in the propane deep fryer my brother was using to fry french fries at lunch caught fire, but that's another story. We also had a few rain events and some pretty strong wind gusts, plus a tornado warning after the cook was done.


-
 4
4
-
-
I'm waffling back and forth about getting a flattop griddle to add to my arsenal of cookers. I have a griddle plate for my grass grill and another for my big Santa Maria/Argentinian grill but really use them since I have to remove a cooking grate to install the plate, plus the great management isn't great on either.
So, anyone here a griddler? Whatcha got and pros/cons? If I get one, I'll want to convert it from propane to natural gas and not all of the manufacturers order a conversion kit, so that'll be a factor in which ones I'll consider.
Thanks!
-
6 hours ago, Dennis said:
Thanks @David Chang @jeffshoaf for the intel.
I forgot to mention that if you go with the billows, be sure to get the optional damper - the billows moves so much air that it'll overshot your target temperature. The damper is under $5 and resolves the issue.
-
2
-
 1
1
-
-
If you Google Bbq Guru, you'll most likely see that their wifi controllers have been very problematic for the last several years but few complaints about their fans.
I have one of their CyberQ controllers and the 25 cfm fan; I gave up on the controller - it was always aggravating to use, but a few firmware updates made it pretty much useless and it sometimes took weeks for them to provide any fixes - but I had no issues with the fan. The fan wiring didn't have any strain relief and that worried me, so I used some electrical tape to tape the wiring to the fan housing to provide some protection from accidentally yanking the wiring out of the fan.
I switched over to a Thermoworks Signals and Billows fan and have been much happier with that setup.
-
15 hours ago, David Chang said:
@jeffshoaf do you find ice crystals in the mix often? do you find to need to respin a few more times to get the consistency you want? thanks! 🙏
I've not had problems with ice crystals in the mix, but the machine does leave a thin layer of unprocessed frozen stuff on the sides of the container with some recipes; if you scrape some of that off when scooping. I've also had a few times when I used real sugar and didn't get it dissolved well before freezing - the frozen sugar crystals didn't get ground up during processing and could be mistaken for ice crystals.
Full fat/full sugar recipes generally don't require a re-spin, especially if you do a mix-in. Adding a bit a liquid before a re-spin tends to cut down on the additional re-spins. I processed a container of Torani coconut syrup and half-and-half with 1/8 teaspoon of guar gum last week: past attempts with this recipe required several re-spins even with a splash of half-and-half, but based on a tip I saw on a Facebook Creami group, I ran a mix-in process instead of a re-spin without actually adding anything as a mix-in and it came out great.
I think freezer temperature has an affect on need for the re-spins as well; typically, the recipes that I've done that required a lot of re-spins were powdery and dry looking after the initial spin. I think the re-spin melts the mixture a bit and that adding a bit of liquid has a similar effect.
-
1
-
-
-
1
-
-
On 2/17/2024 at 10:43 AM, tekobo said:
Yeah, it is great. Had some ice cream from it just this afternoon. That said, it @jeffshoaf bought the ninja creami and was v happy with it. See here for his expose if you have not found it already!
Yup, I'm still happy with the Creami. I'm partially blaming it for my regaining half of the forty pounds I lost. I created a very simple recipe that the creami turns into one of the best non-meat things I've ever eaten: one 15 oz can of peaches in natural juice, one 14 oz can of sweetened condensed milk, dash of cinnamon. Freeze overnight, process in the Creami on "ice cream" mode, add 3 graham crackers and processed in the Creami on "mix-in" mode.
It ain't healthy but it's very tasty!
-
 2
2
-
-
@MsTwiggy, I missed the post about you leaving the lid open. I only leave the lid open long enough to make sure my starter is burning.
-
1
-
-
I think your issue may be lighting from the bottom. I use the Weber paraffin cubes and either put 2 right next to each other tucked down into the lump on top of the basket (with basket in place in the KK) or I'll light just a minimal amount of lump in a charcoal chimney and then do it on top of the charcoal in the basket (again installed in the KK). Using the cubes in the basket has failed a few times with the lump not getting started well but I don't recall the chimney starter method ever falling.
My vent regimen is similar to yours unless I'm using a temperature controller.
I used a weed burner torch to light the lump for the 1st few years of. KK ownership but I'm pretty bad at keeping a spare can of fuel on hand. I use the paraffin cubes to start my other outdoor cookers (Weber kettle, big Santa Maria/Argentinian grill, insulated gravity feed smoker, plus a new offset stick burner that was delivered just yesterday) and can get them next day from Amazon, so I almost always have them on hand.
-
1
-
-
I generally get well over 12 hours cook time plus several hours of preheat time at 225°F and have lump left using B&B in my 23" - and I've been known to pull the charcoal basket out to fill it so the lump wasn't much of the top of the basket. Where are you measuring the temperature?
If you describe your lighting process, vent settings, etc., we may be able to help you. KKs are so well insulated, it doesn't take a lot of fuel to keep them at that temp.
-
1
-
-
I haven't used it on my KK but I have found that Dawn PowerWash works pretty well on pretty much everything.
-
2 hours ago, Cheesehead_Griller said:
I have been watching their site for a discount. Seems like they just had a 20% not too long ago. I am using my Yeti now to hold briskets for a few hours. A holding oven will be one of my next purchases.
If you just need it as a holding oven, you can get a cheap electric smoker and save a lot of money. I've been using one and have held briskets and pork butts for over 24 hours. Mine doesn't hold the temperature as constant as the Anova but it does hold steadier than my kitchen oven and can hold a lot more than the Anova; when set to 150°F, it'll swing between 142° and 168°.
They do have a reputation for the controls to crap out so I monitor with my Thermoworks Signals; if/when the controls crap out, I'll replace them with a PID controller. From what I've read, the aftermarket PID controllers are more precise and reliable than the OEM controls as well - I tried to find a broken used one for sale but got tired of waiting and got a new one when it was on sale.
-
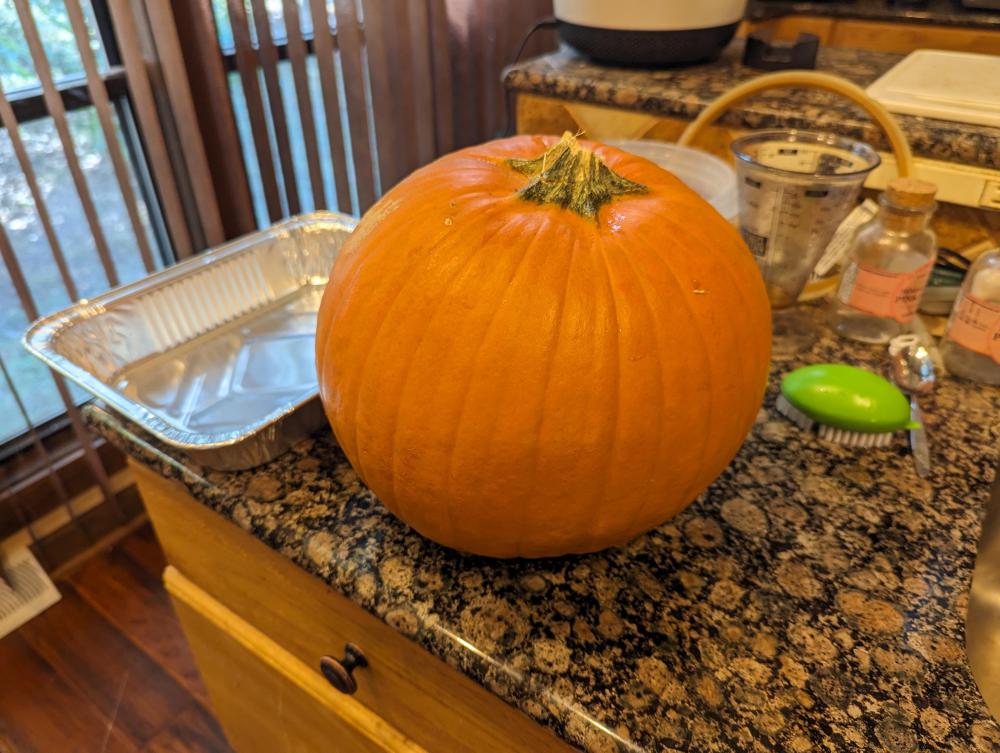
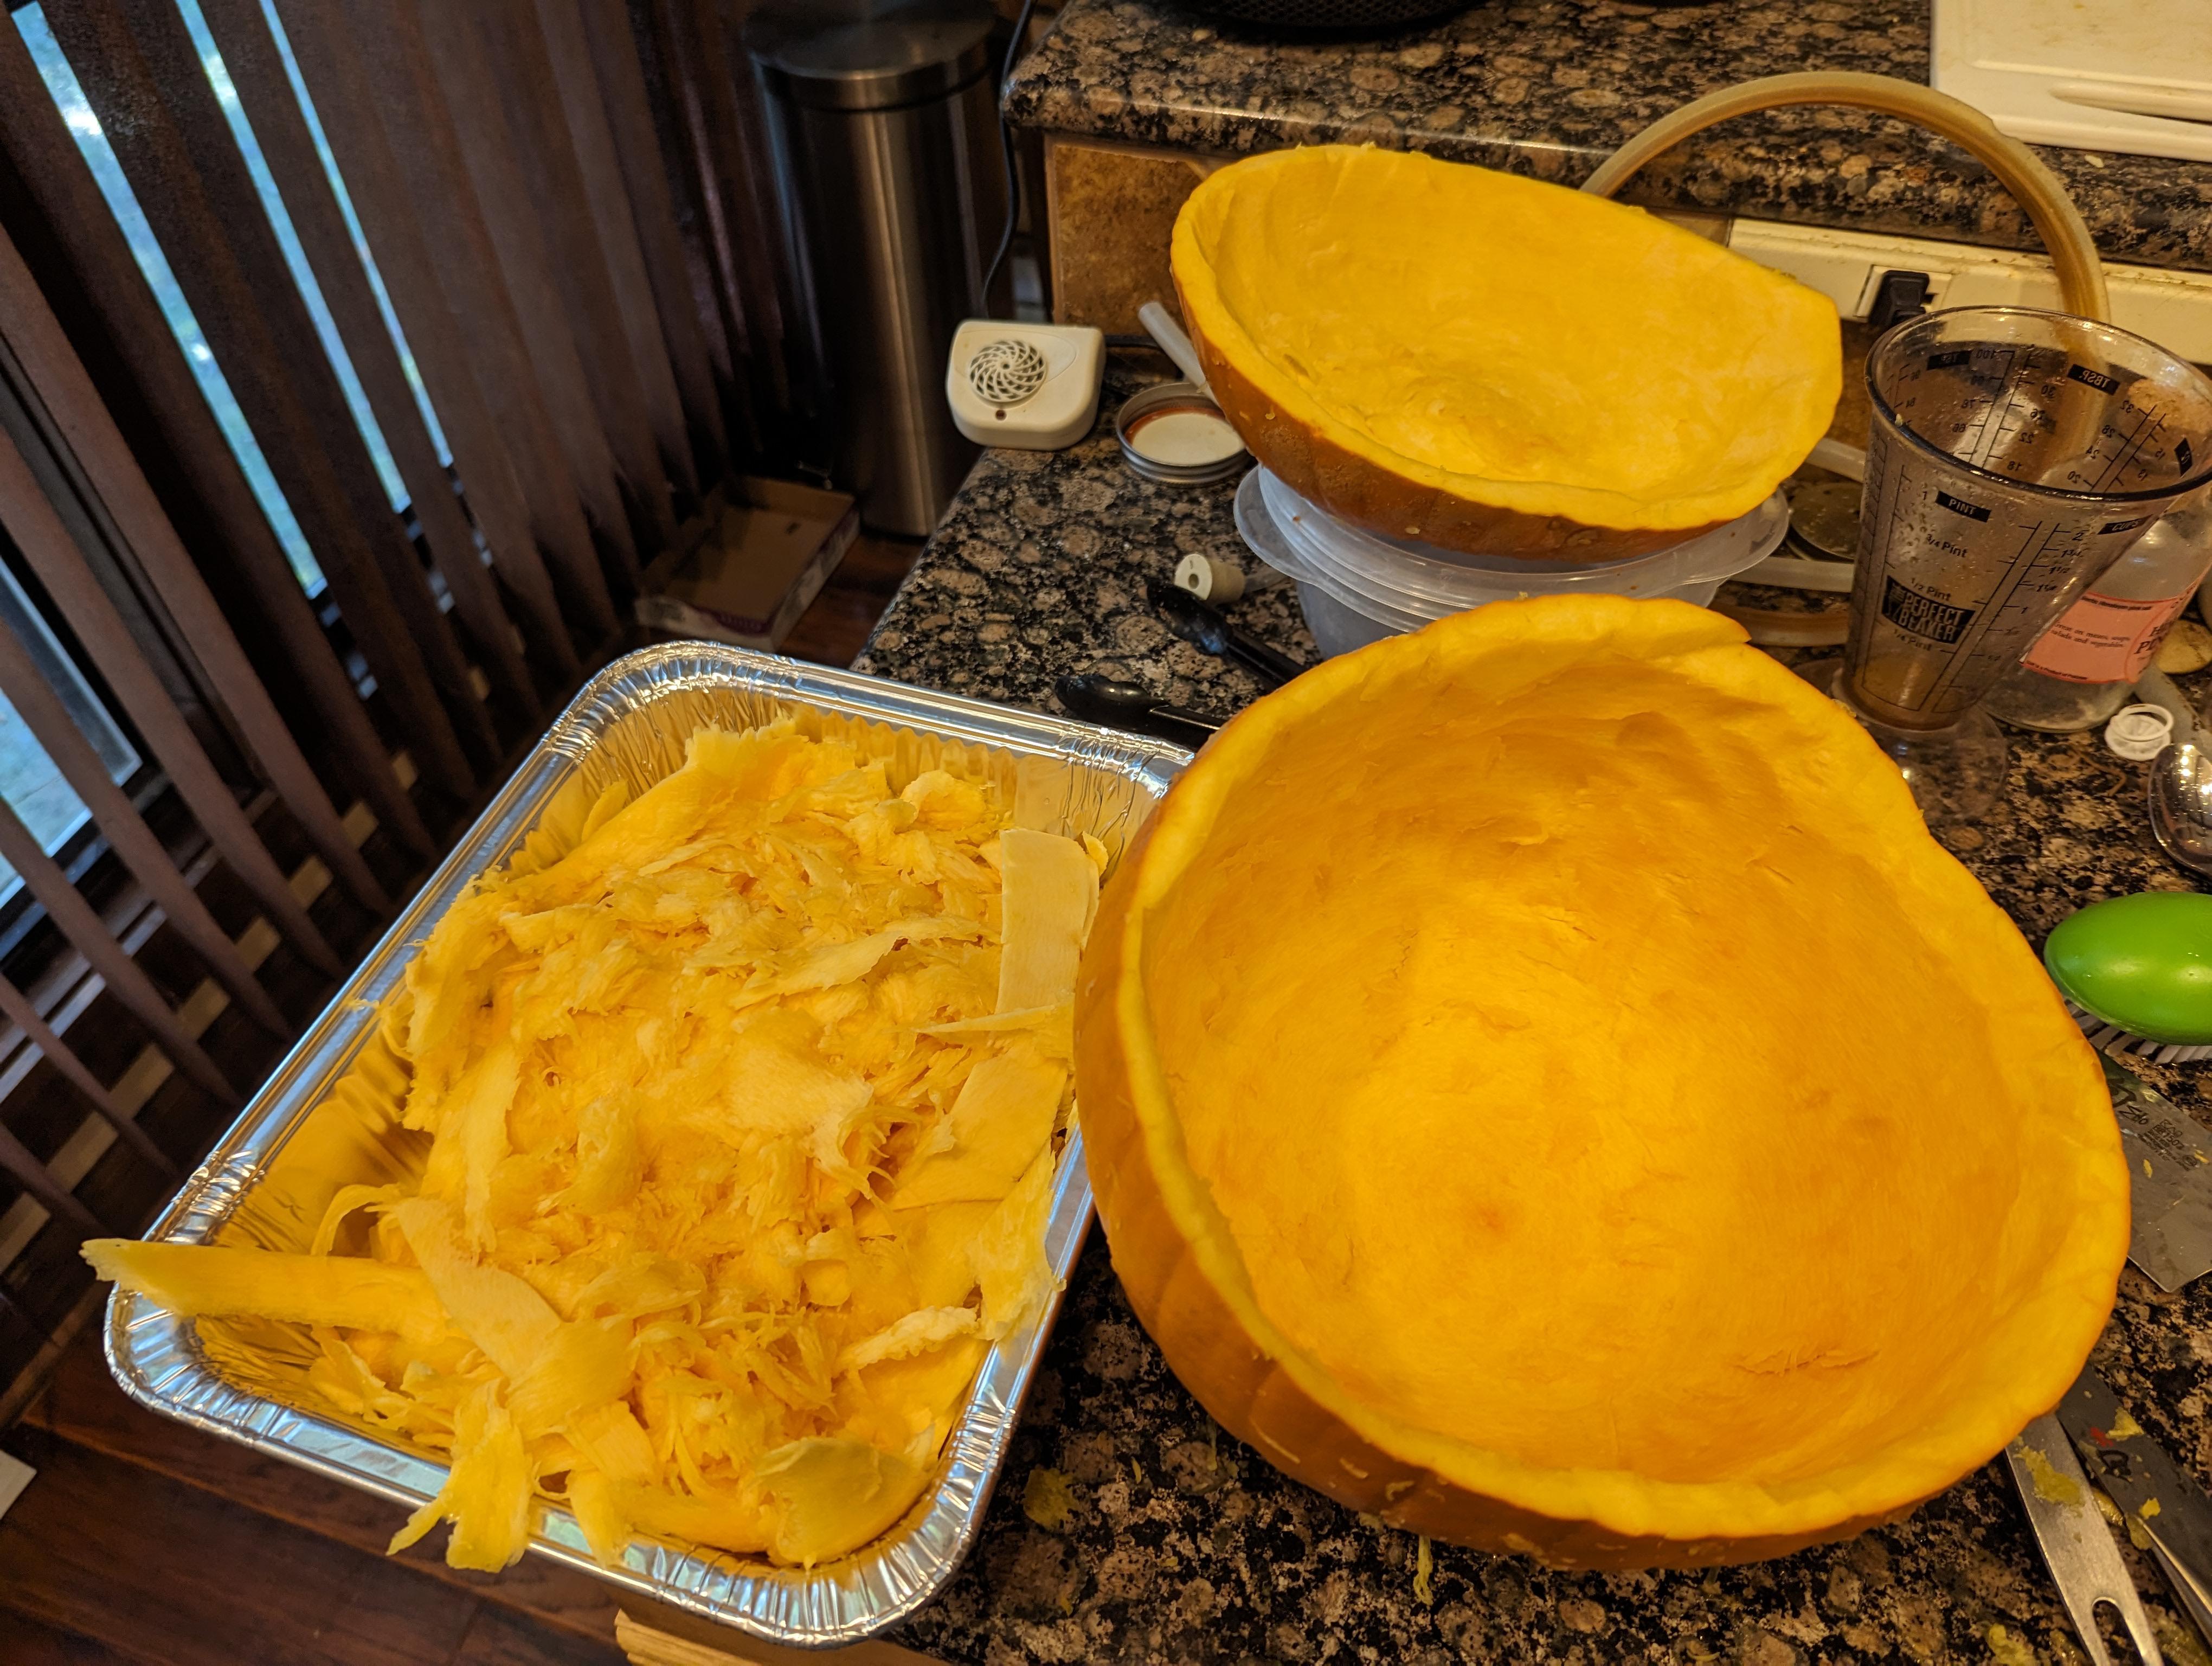
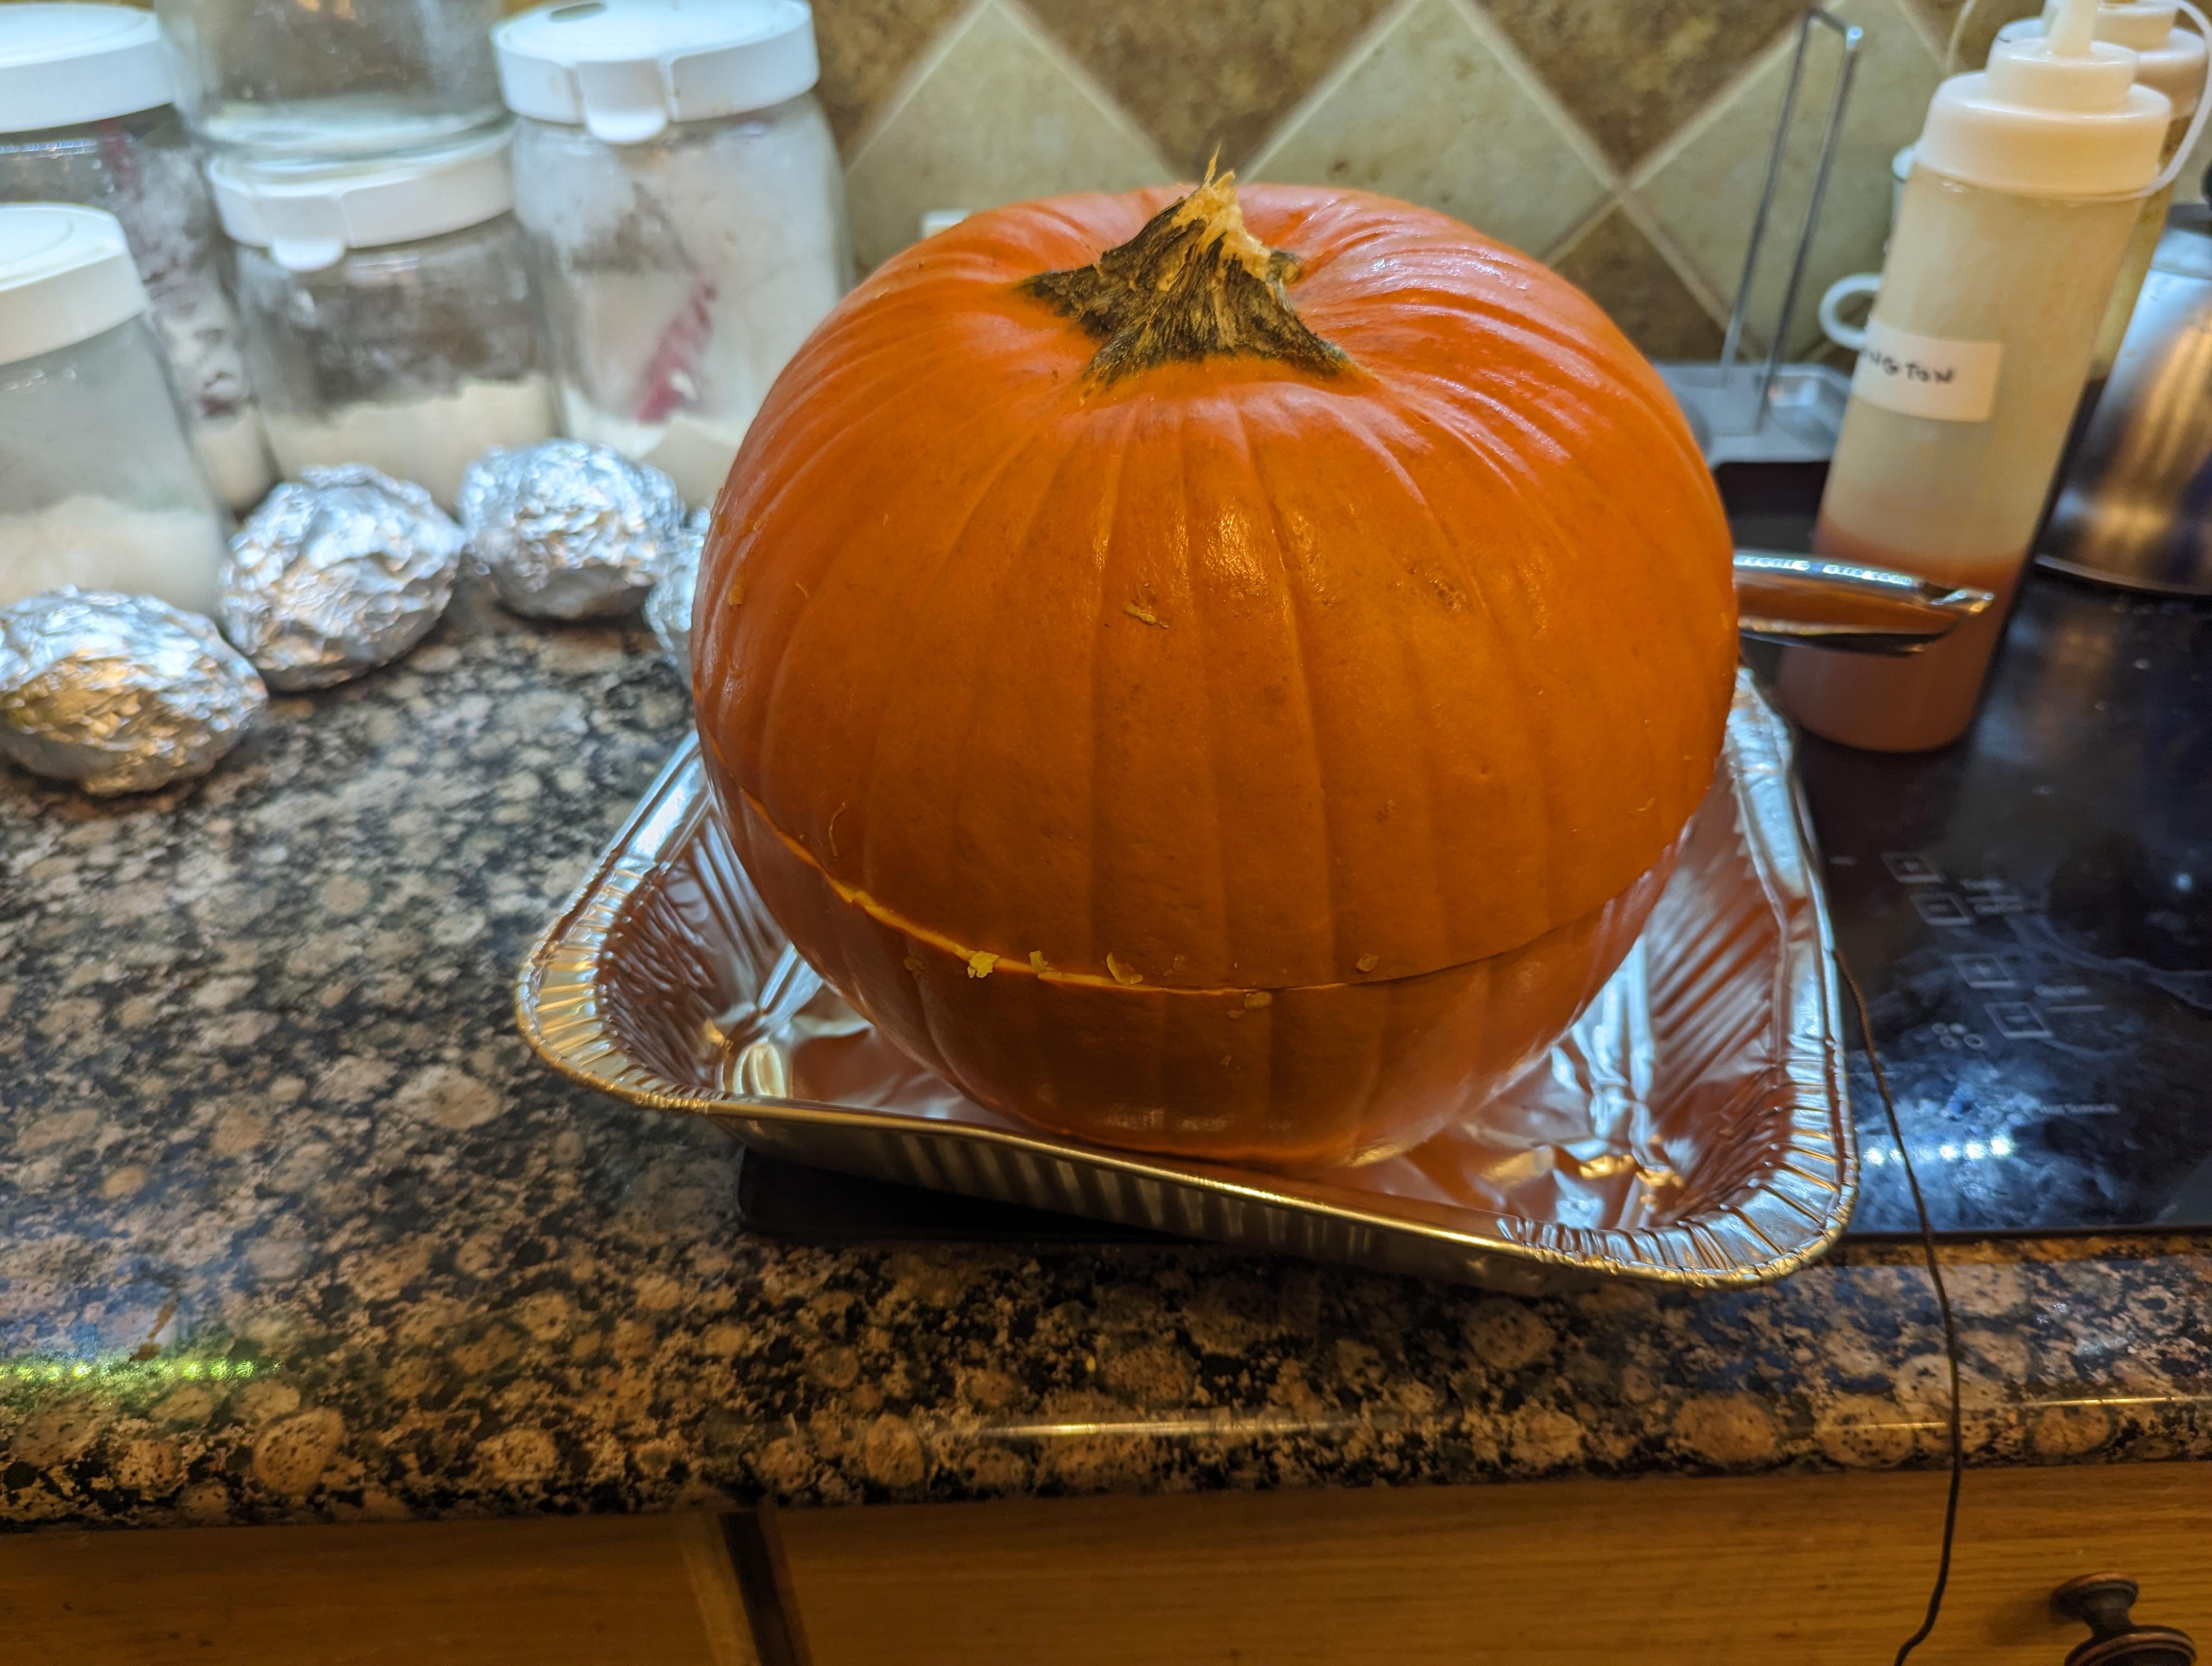
I finally managed to try something I've wanted to do for a few years - pumpkin pie, only instead of being in a crust, it's in the pumpkin shell for scooping out. I was sure I saw an episode of Good Eats where Alton did one but searching on the interwebs only found his recipe for pumpkin soup served in the pumpkin so I was on my own. Side note - I've actually never made a traditional pumpkin pie with a crust so this was a totally new adventure.
I was wanting to get a locally grown pie pumpkin but life intervened and I ended up getting one from the grocery store. I cut the top off, scooped out the seeds, and cut and scooped as much of the flesh as I was comfortable doing without compromising the shell strength. I ended up with about 2 pounds of pumpkin. I considered smoking it but decided to go a bit simpler and roasted it in the oven.
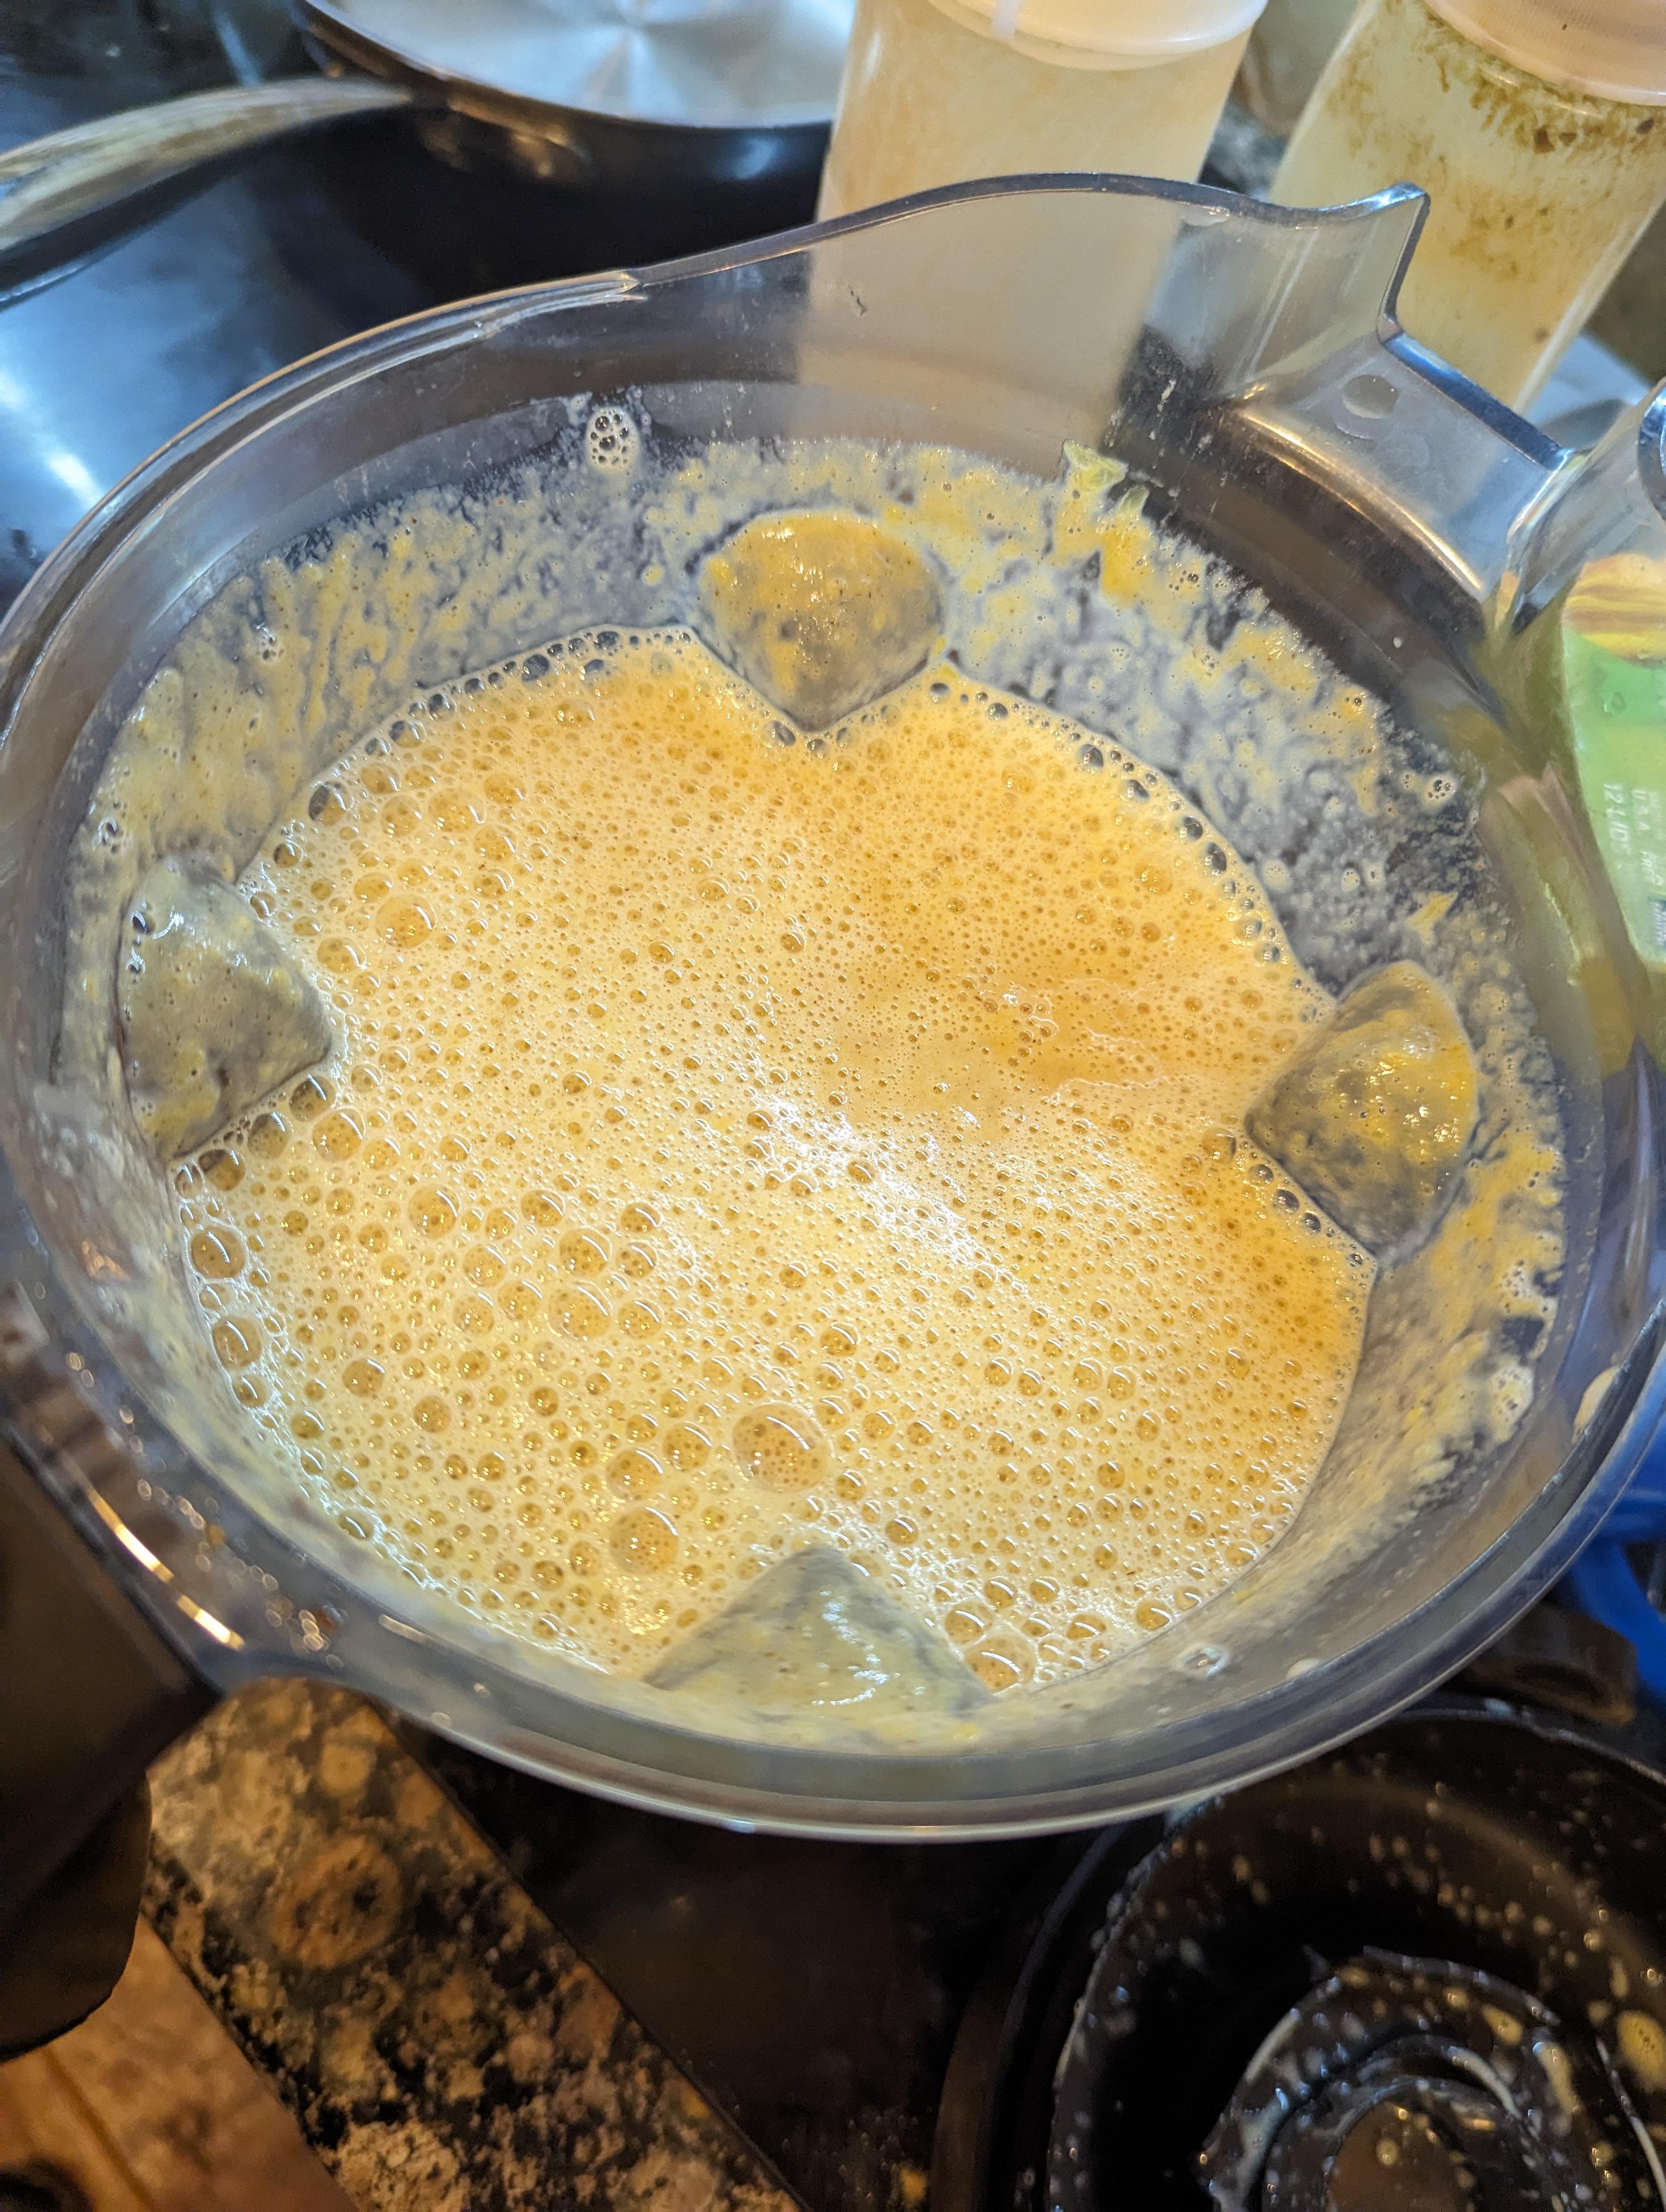
Since I had several cans of sweetened condensed milk on hand, I found a pumpkin pie recipe that used it; the recipe has a 15 oz can of pumpkin puree, so I doubled it. It also called for pumpkin pie spice which I didn't have so I found a recipe for that on the interwebs as well. Tossed the roasted pumpkin and other ingredients into the blender and pureed it, then poured it all back into the pumpkin shell after a taste test - it was tasty!
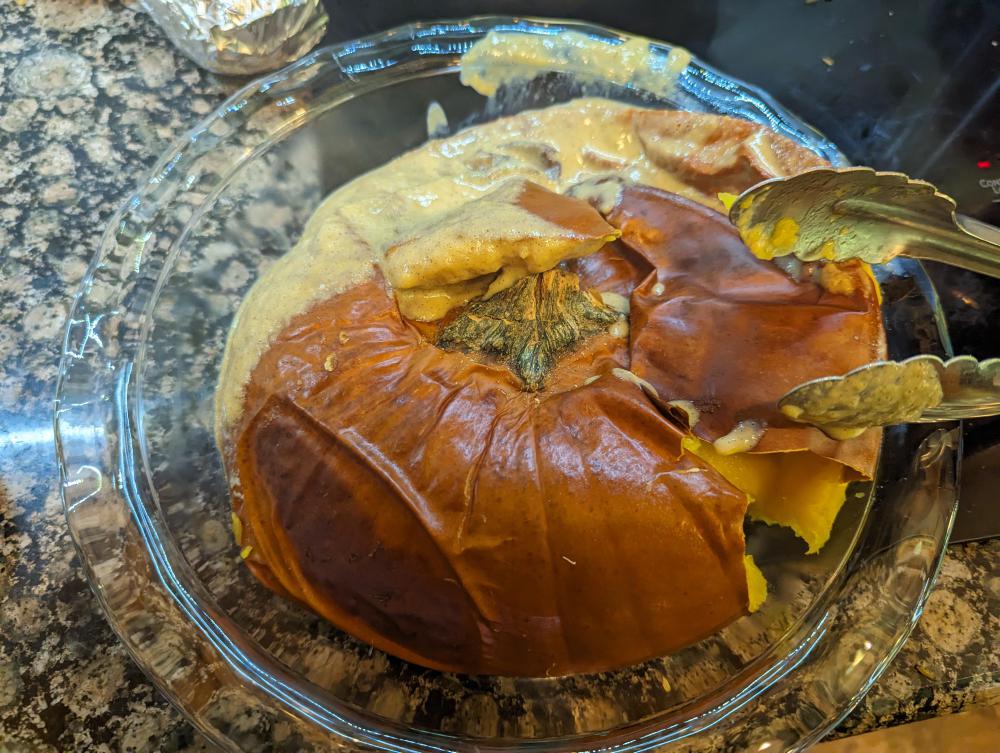
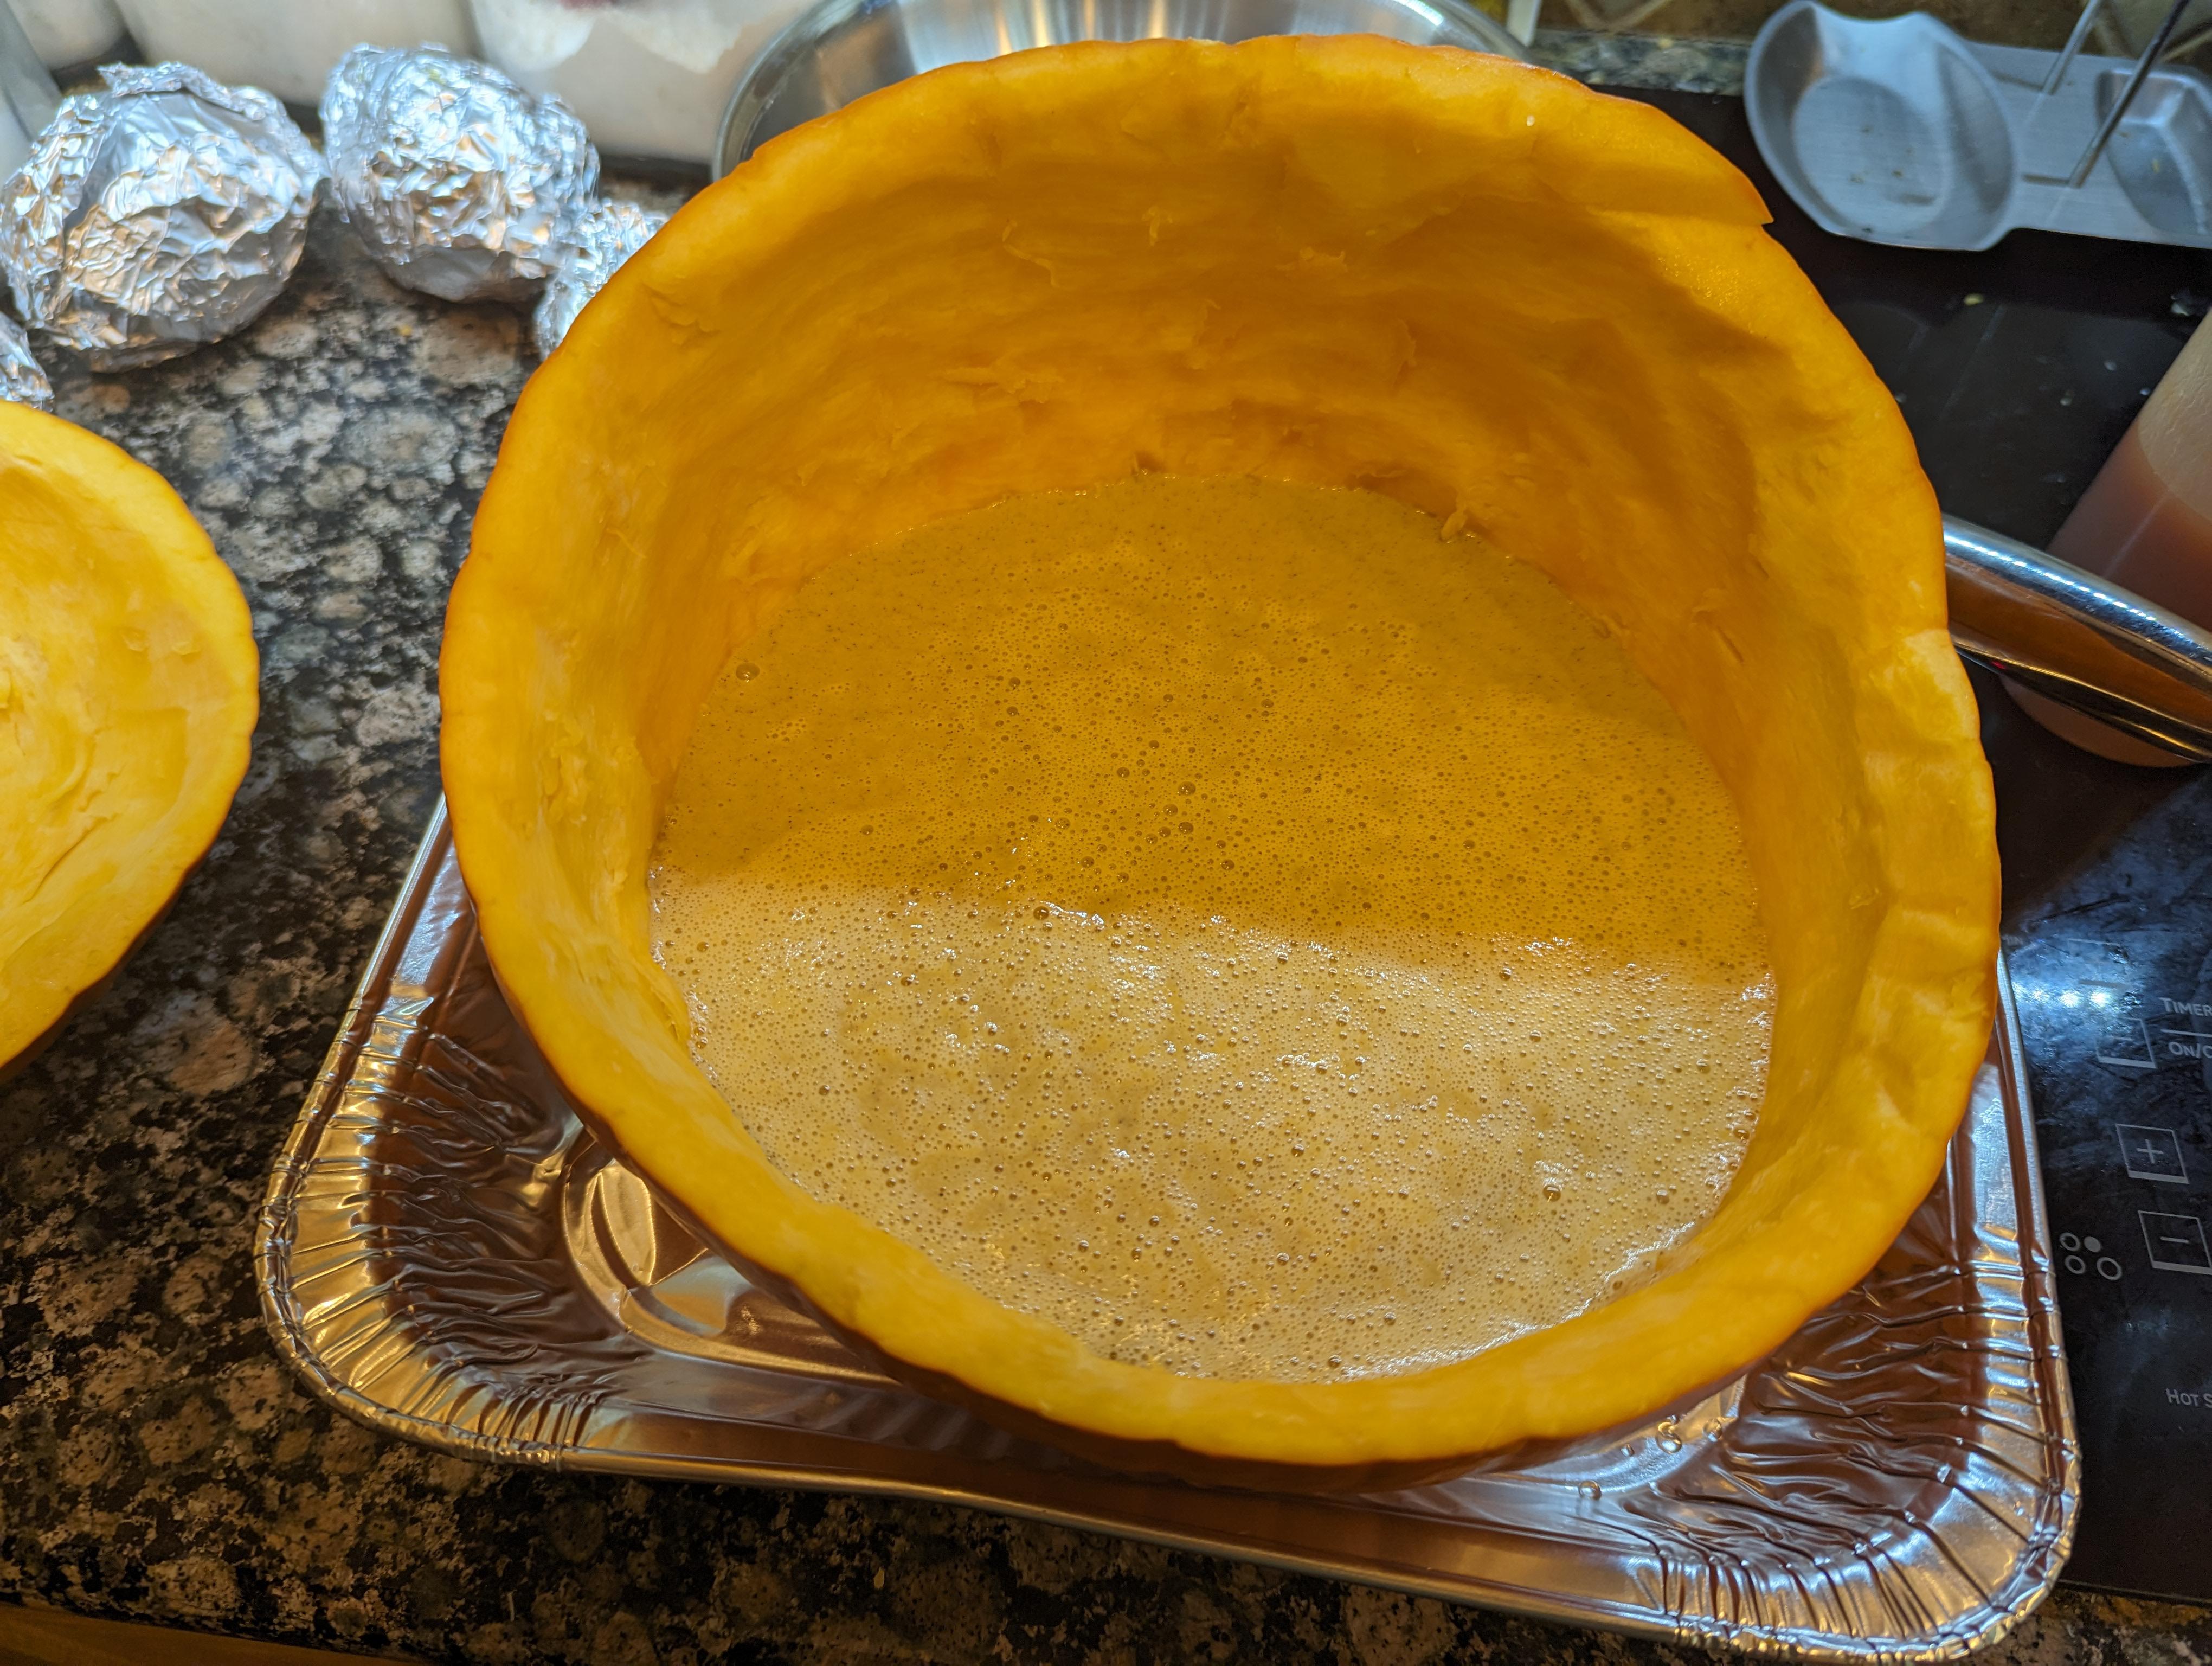
I put the pumpkin top back on the pumpkin and put it into the preheated oven in a foil pan. I had no idea on how long to bake it since it was encased in the shell and was much thicker than the average pie, so I monitored the filling temp using my Thermoworks Signals. After a while, I got an alert from the Signals indicating the temperature had shot over my target temp; the shell had softened up enough that the top had fallen into the filling, pushing the thermometer probe into the pumpkin shell. I tried to salvage the top but it came apart when I tried to pick it up out of the filling, so I put the pumpkin back in the oven without the shell after repositioning the probe.
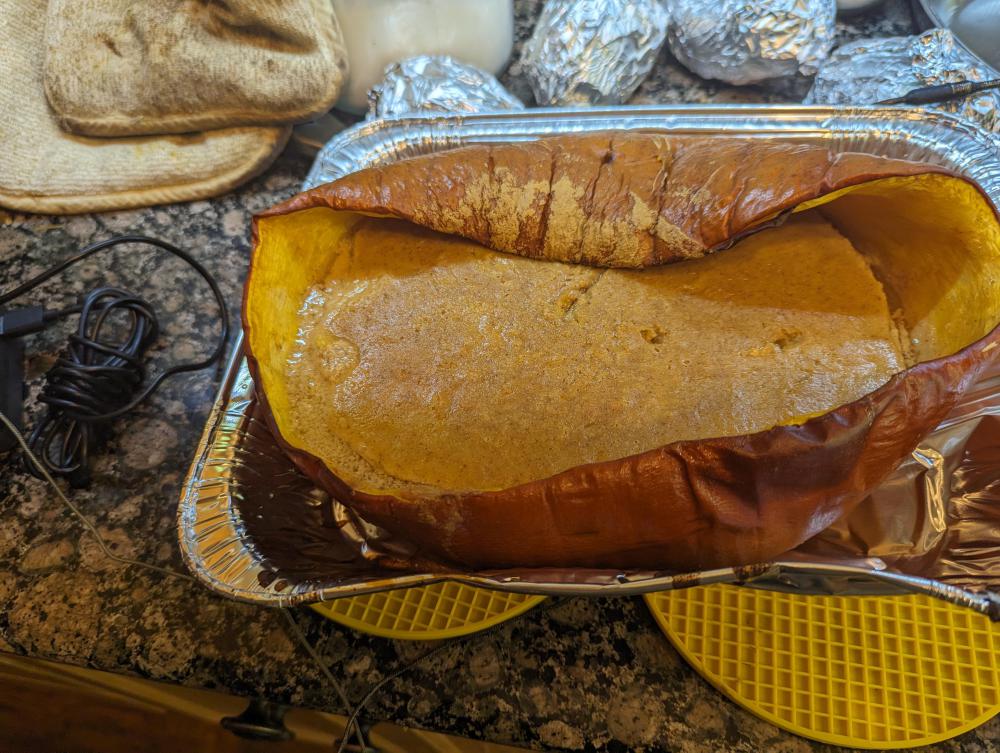
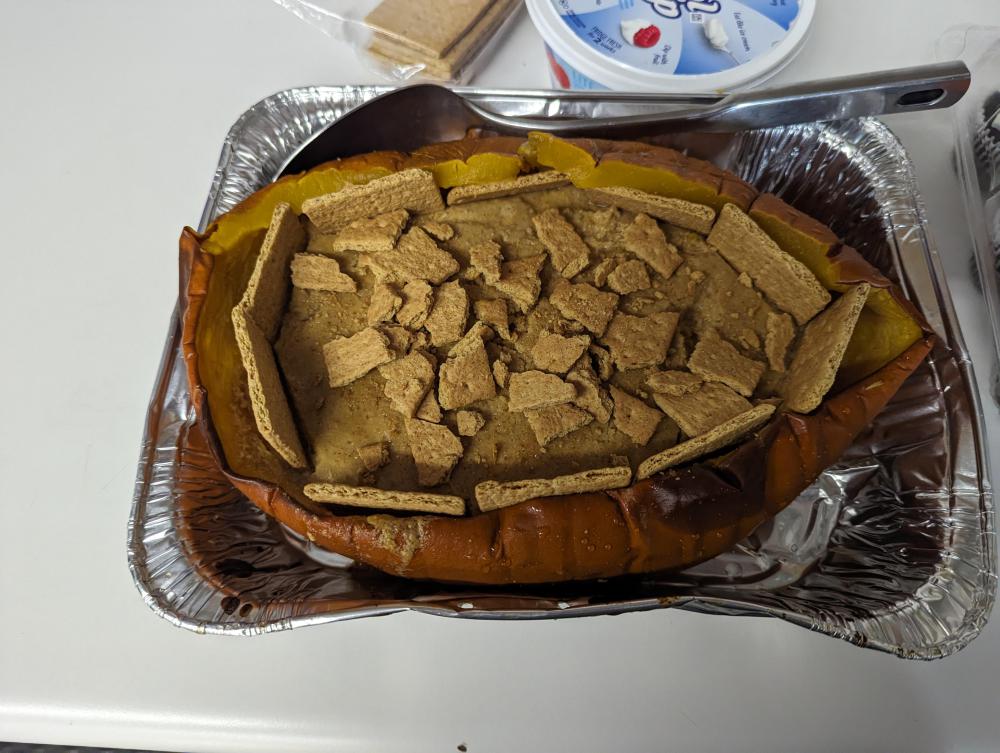
Once the filling made it to the proper temperature, I took the pumpkin out of the oven and let it cool before refrigerating overnight. The shell was very soft and was sagging into the filling so I trimmed it some before serving. I stuck some graham crackers around the edge of the filling and crumbled more on top.
Other than the issue with the lid and the shell getting too soft to easily transport, this was a success and very tasty. If I do this again, I'll bake the filling for a while before putting it in the shell and bake the shell just looking enough for it to soften just enough to not taste raw as well as baking the lid separately to allow more heat into the filling. I may try smoking it as well. I think this would be a good dessert for a party or holiday meal, especially if it can be presented with the intact pumpkin top. I've attached pics chronicling the whole process.


-
3
-
-
On 10/27/2023 at 9:56 PM, Tyrus said:
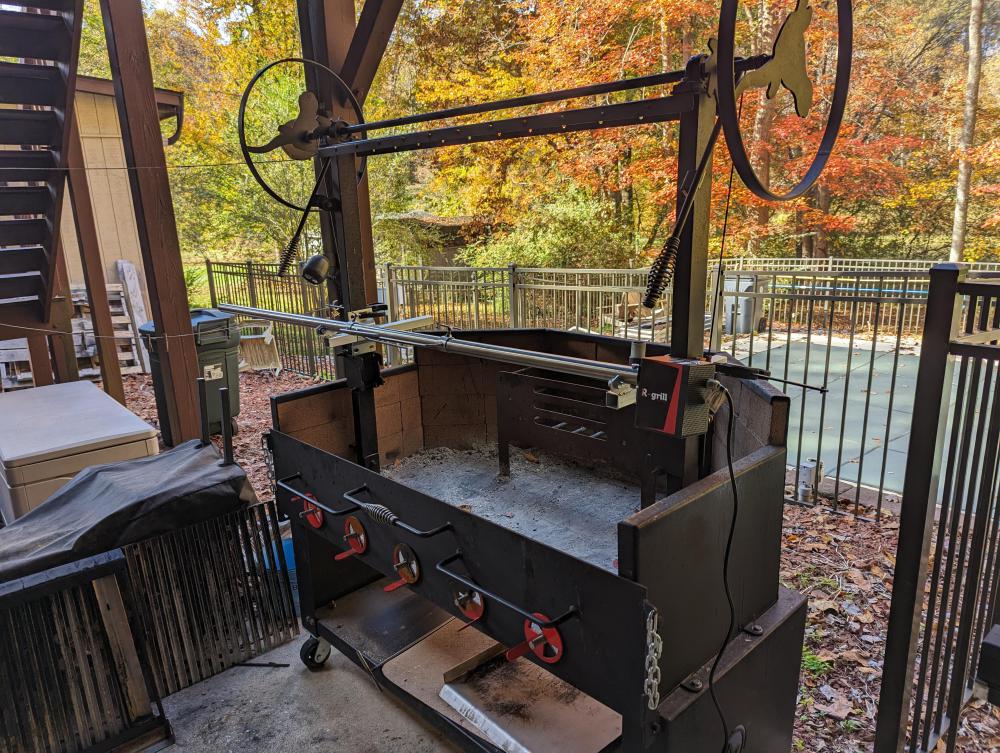
That's great Jeff, you'll be spinning bigtime soon. I see the motor just outside the perimeter wall, it is a fragile component and subject to heat, unlike the KK having the motor mounted outside it might be a concern for a deflector plate maybe. Spinning the entree' is definitely a game changer and a sight to watch, I'm sure you have a good plan.....nice foliage.
I have plenty of spit to work with so I hope to move the motor further outside the fire box when I work out a better mount.
-
2
-
-
4 hours ago, Tyrus said:
Portable, I mean you could set that above the fire pit and have good results. Interested in how you set it up to the Santa Maria. You might need some extra forks to sit in the belly if you do a pig and they always come in handy for other things, you have the room
It came with two additional sets of forks that are double ended (prongs pointing in both directions), so I can secure 3 chunks or have an inner and outer fork on each end of a pig. I'll probably order two more of the double ended forks so I can spin 5 chickens or turkeys at the same time. They're also supposed to be working on baskets; when I asked about them, they indicated the baskets were big so the may be good for ribs or other large flat cuts that would be difficult to put on the spit.
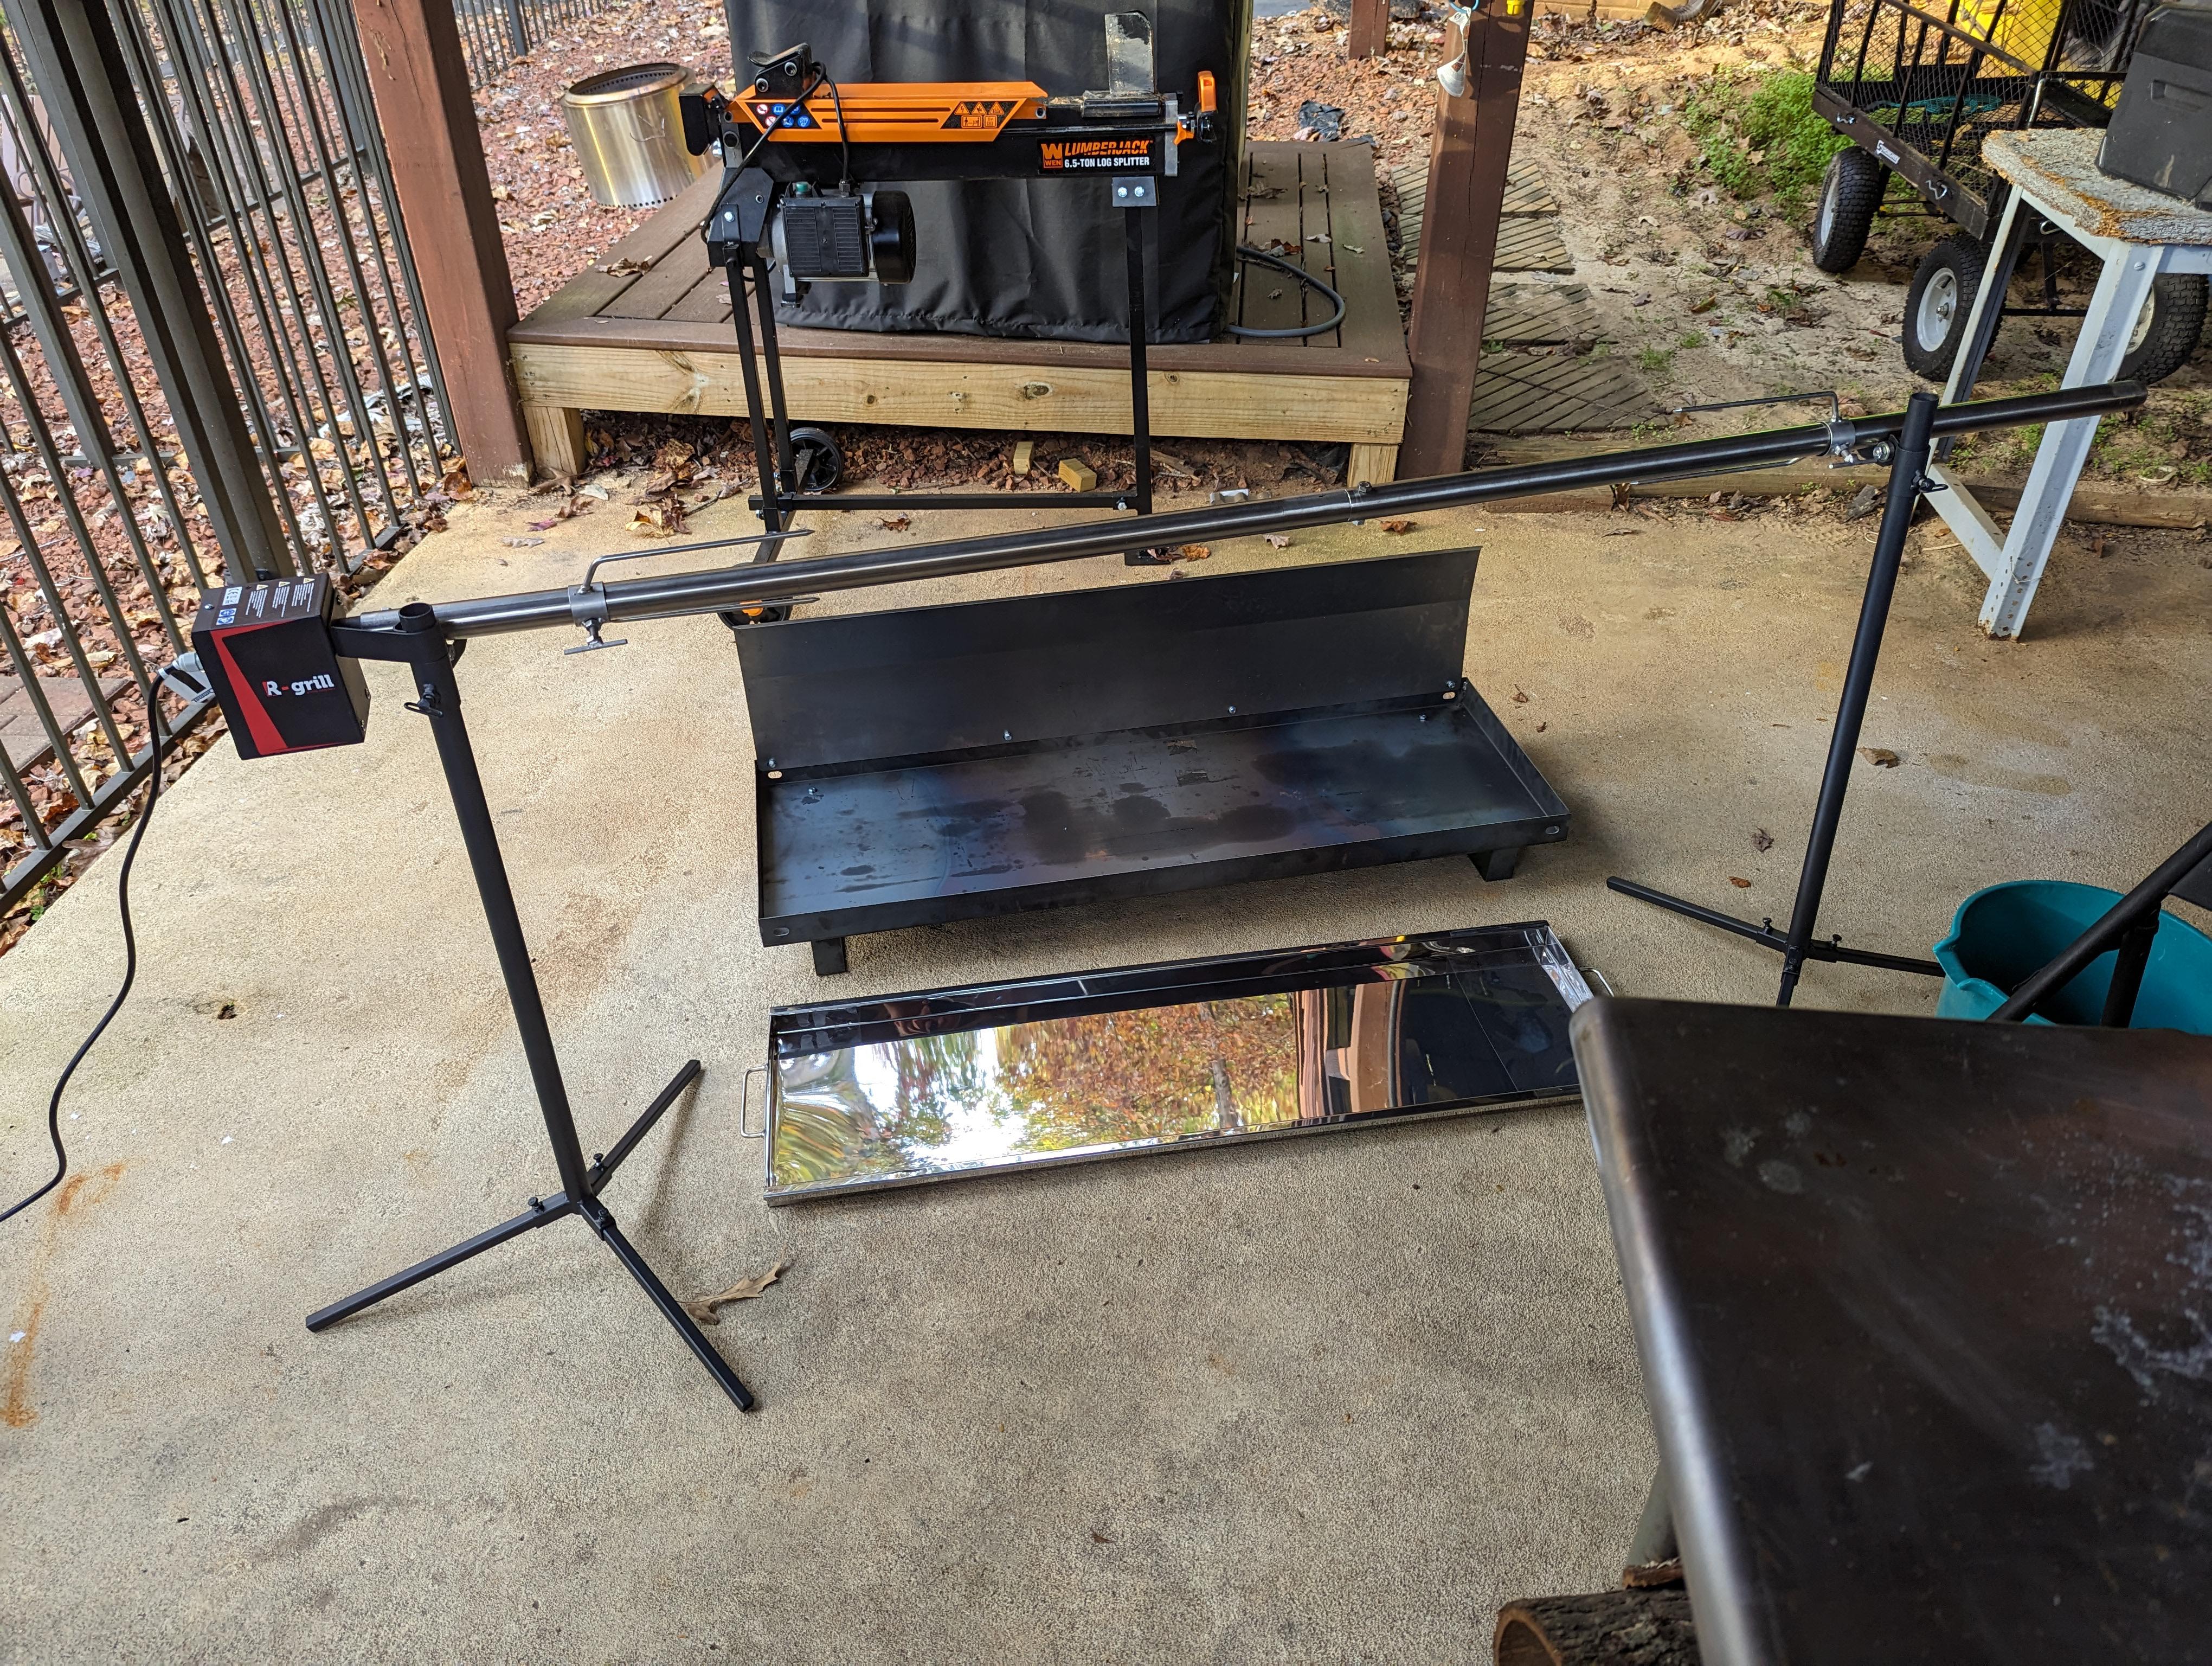
I figured out a temporary mount for my grill this morning; this will be at a fixed height, but should suffice until I get some brackets fabricated to attach to the grate mounts. I have some different clamps ordered for the temporary mount since the ones I had on hand really aren't appropriate for this.
-
2
-
-
I was looking for a rotisserie for my Santa Maria grill and, per usual, I went overboard with a spit rated at 125 lb along with a fire pit and drip tray. They threw in their fireplace mounting kit; I hope to use that to mount the rotisserie to my grill. Hope to spin a chicken some time next week.
Its made in and shipped from Germany; I ordered over the weekend and received it today.

-
2
-
-
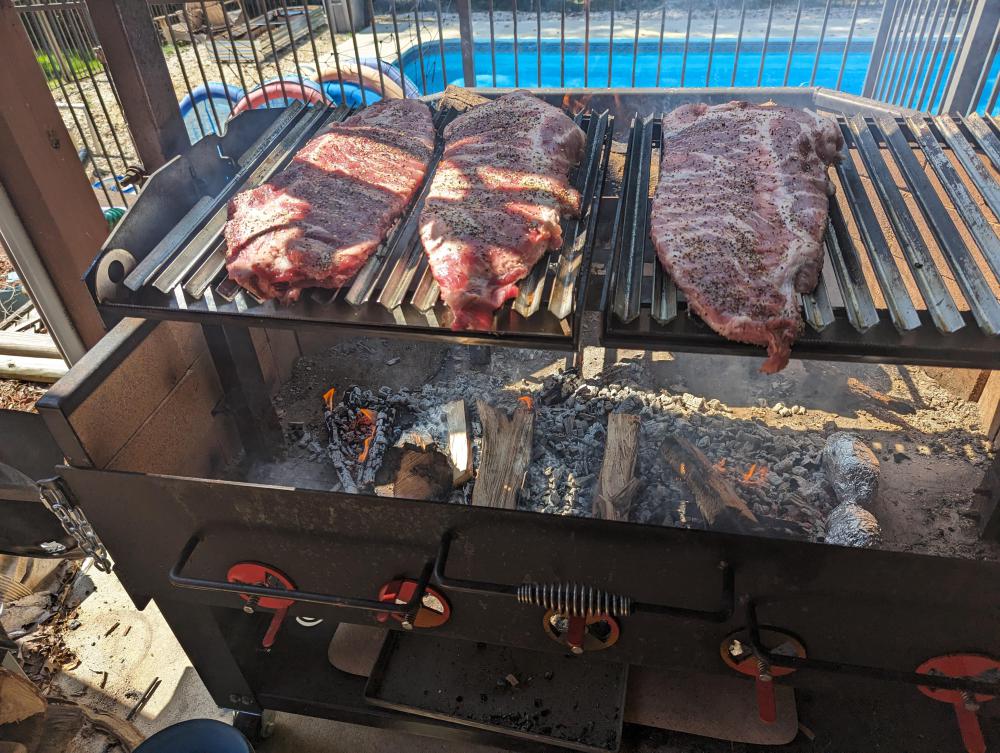
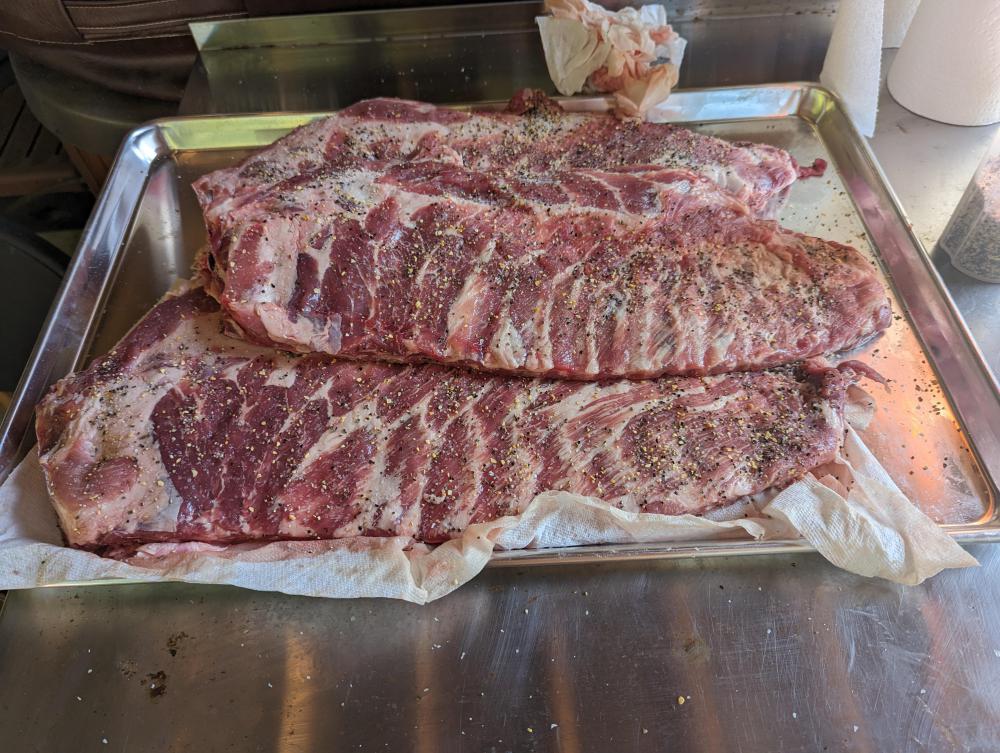
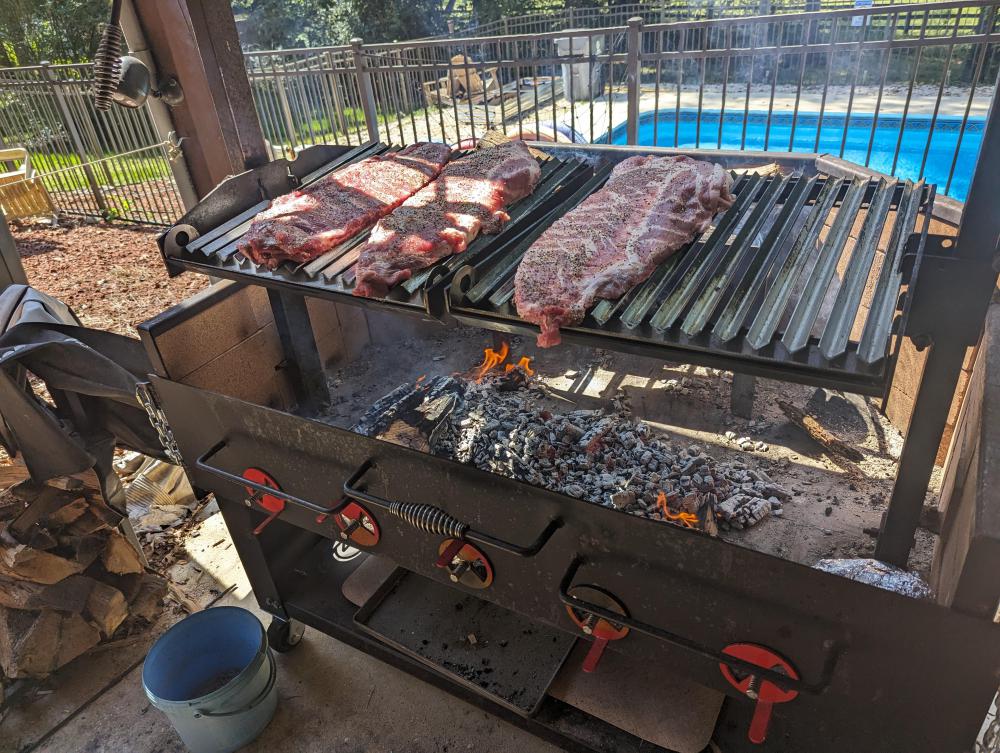
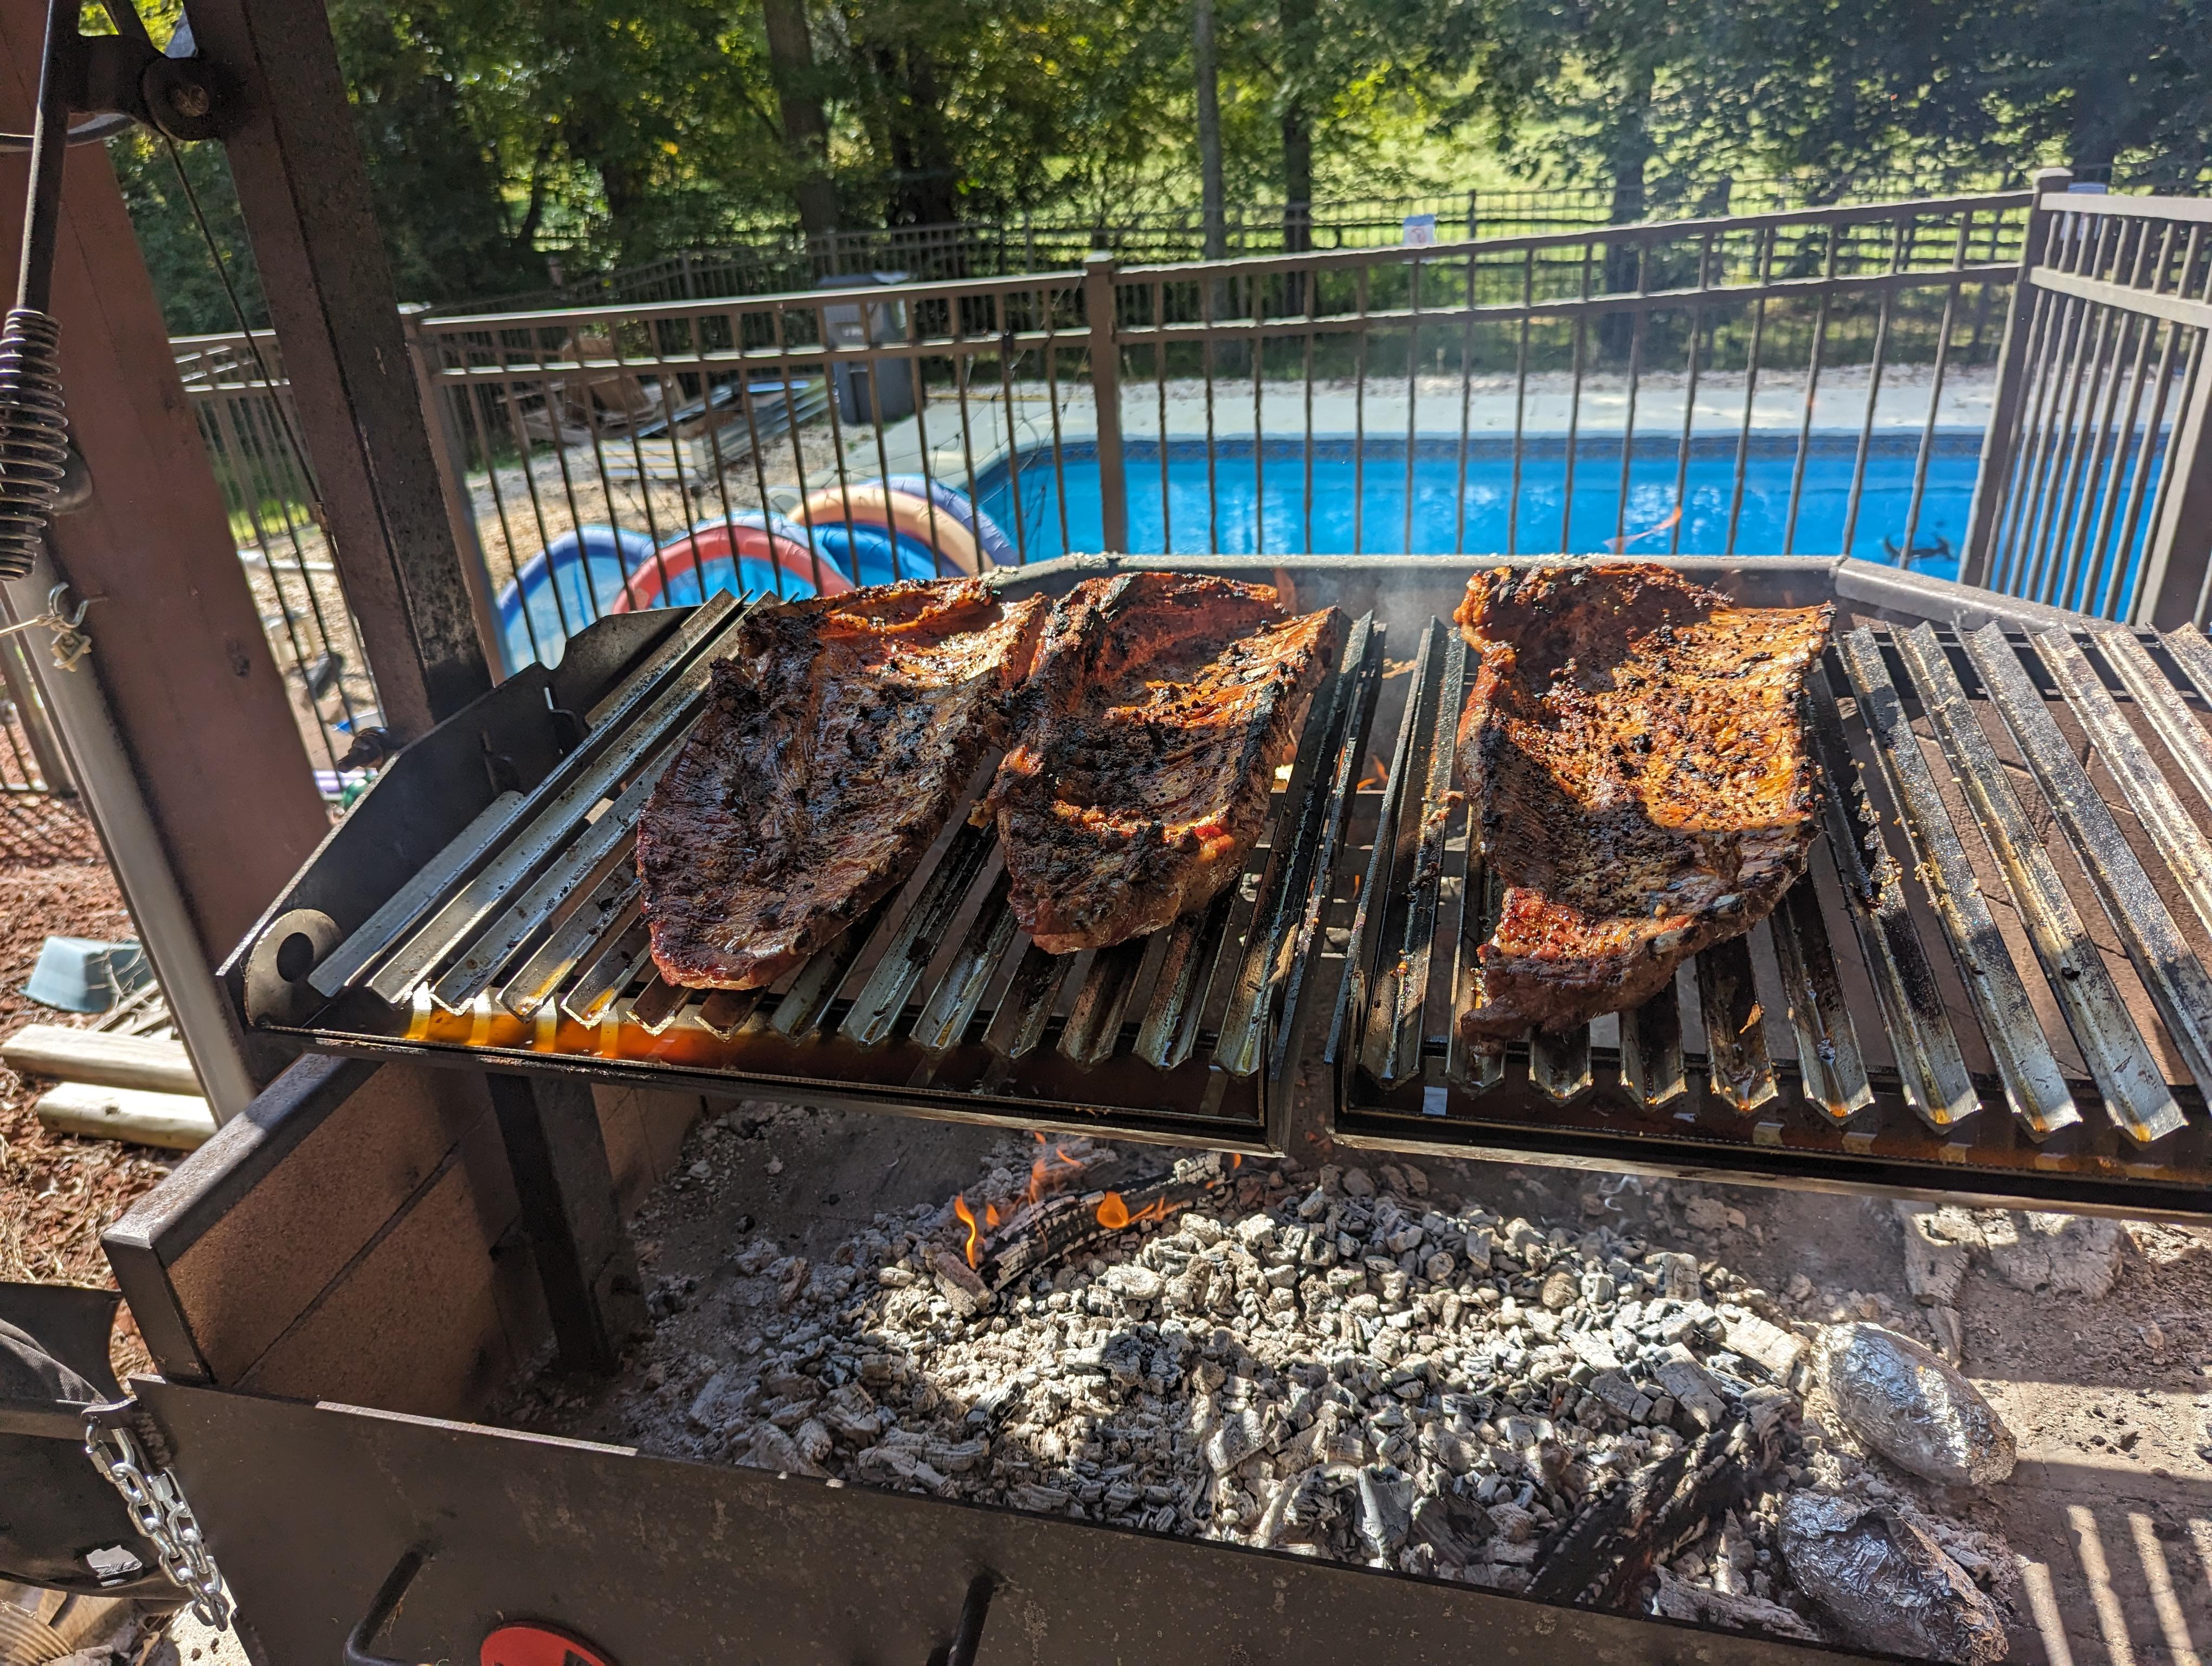
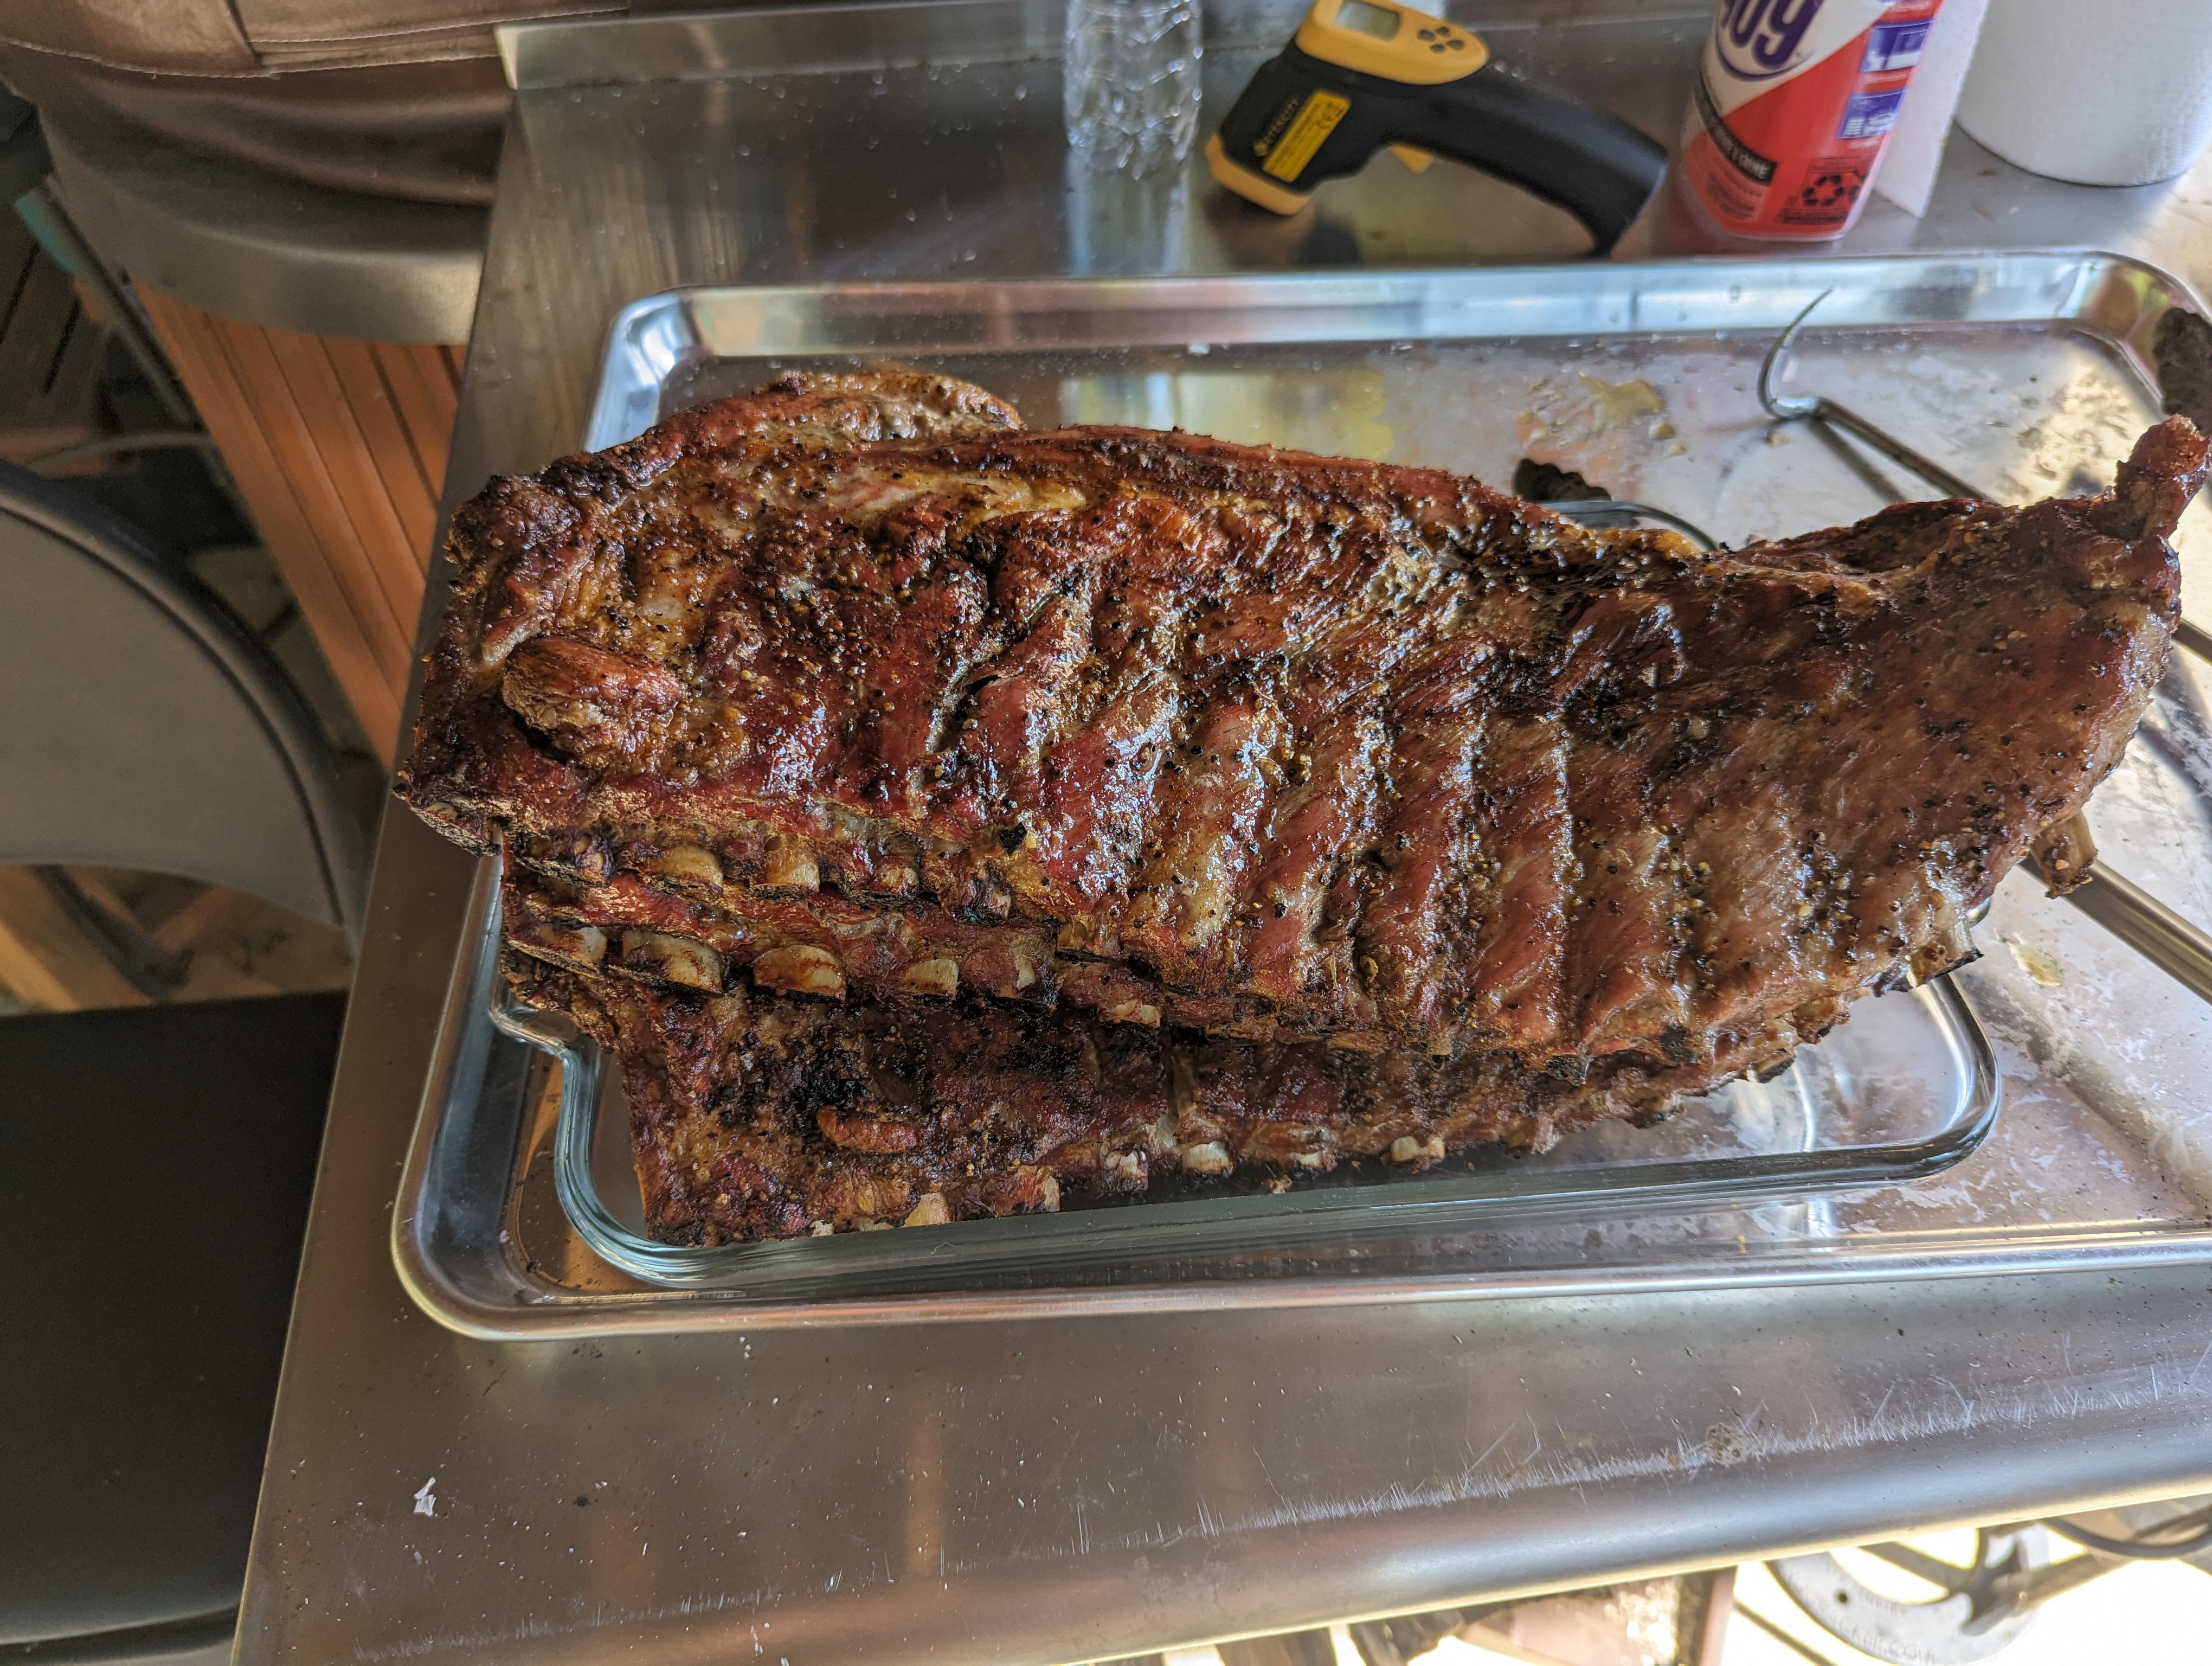
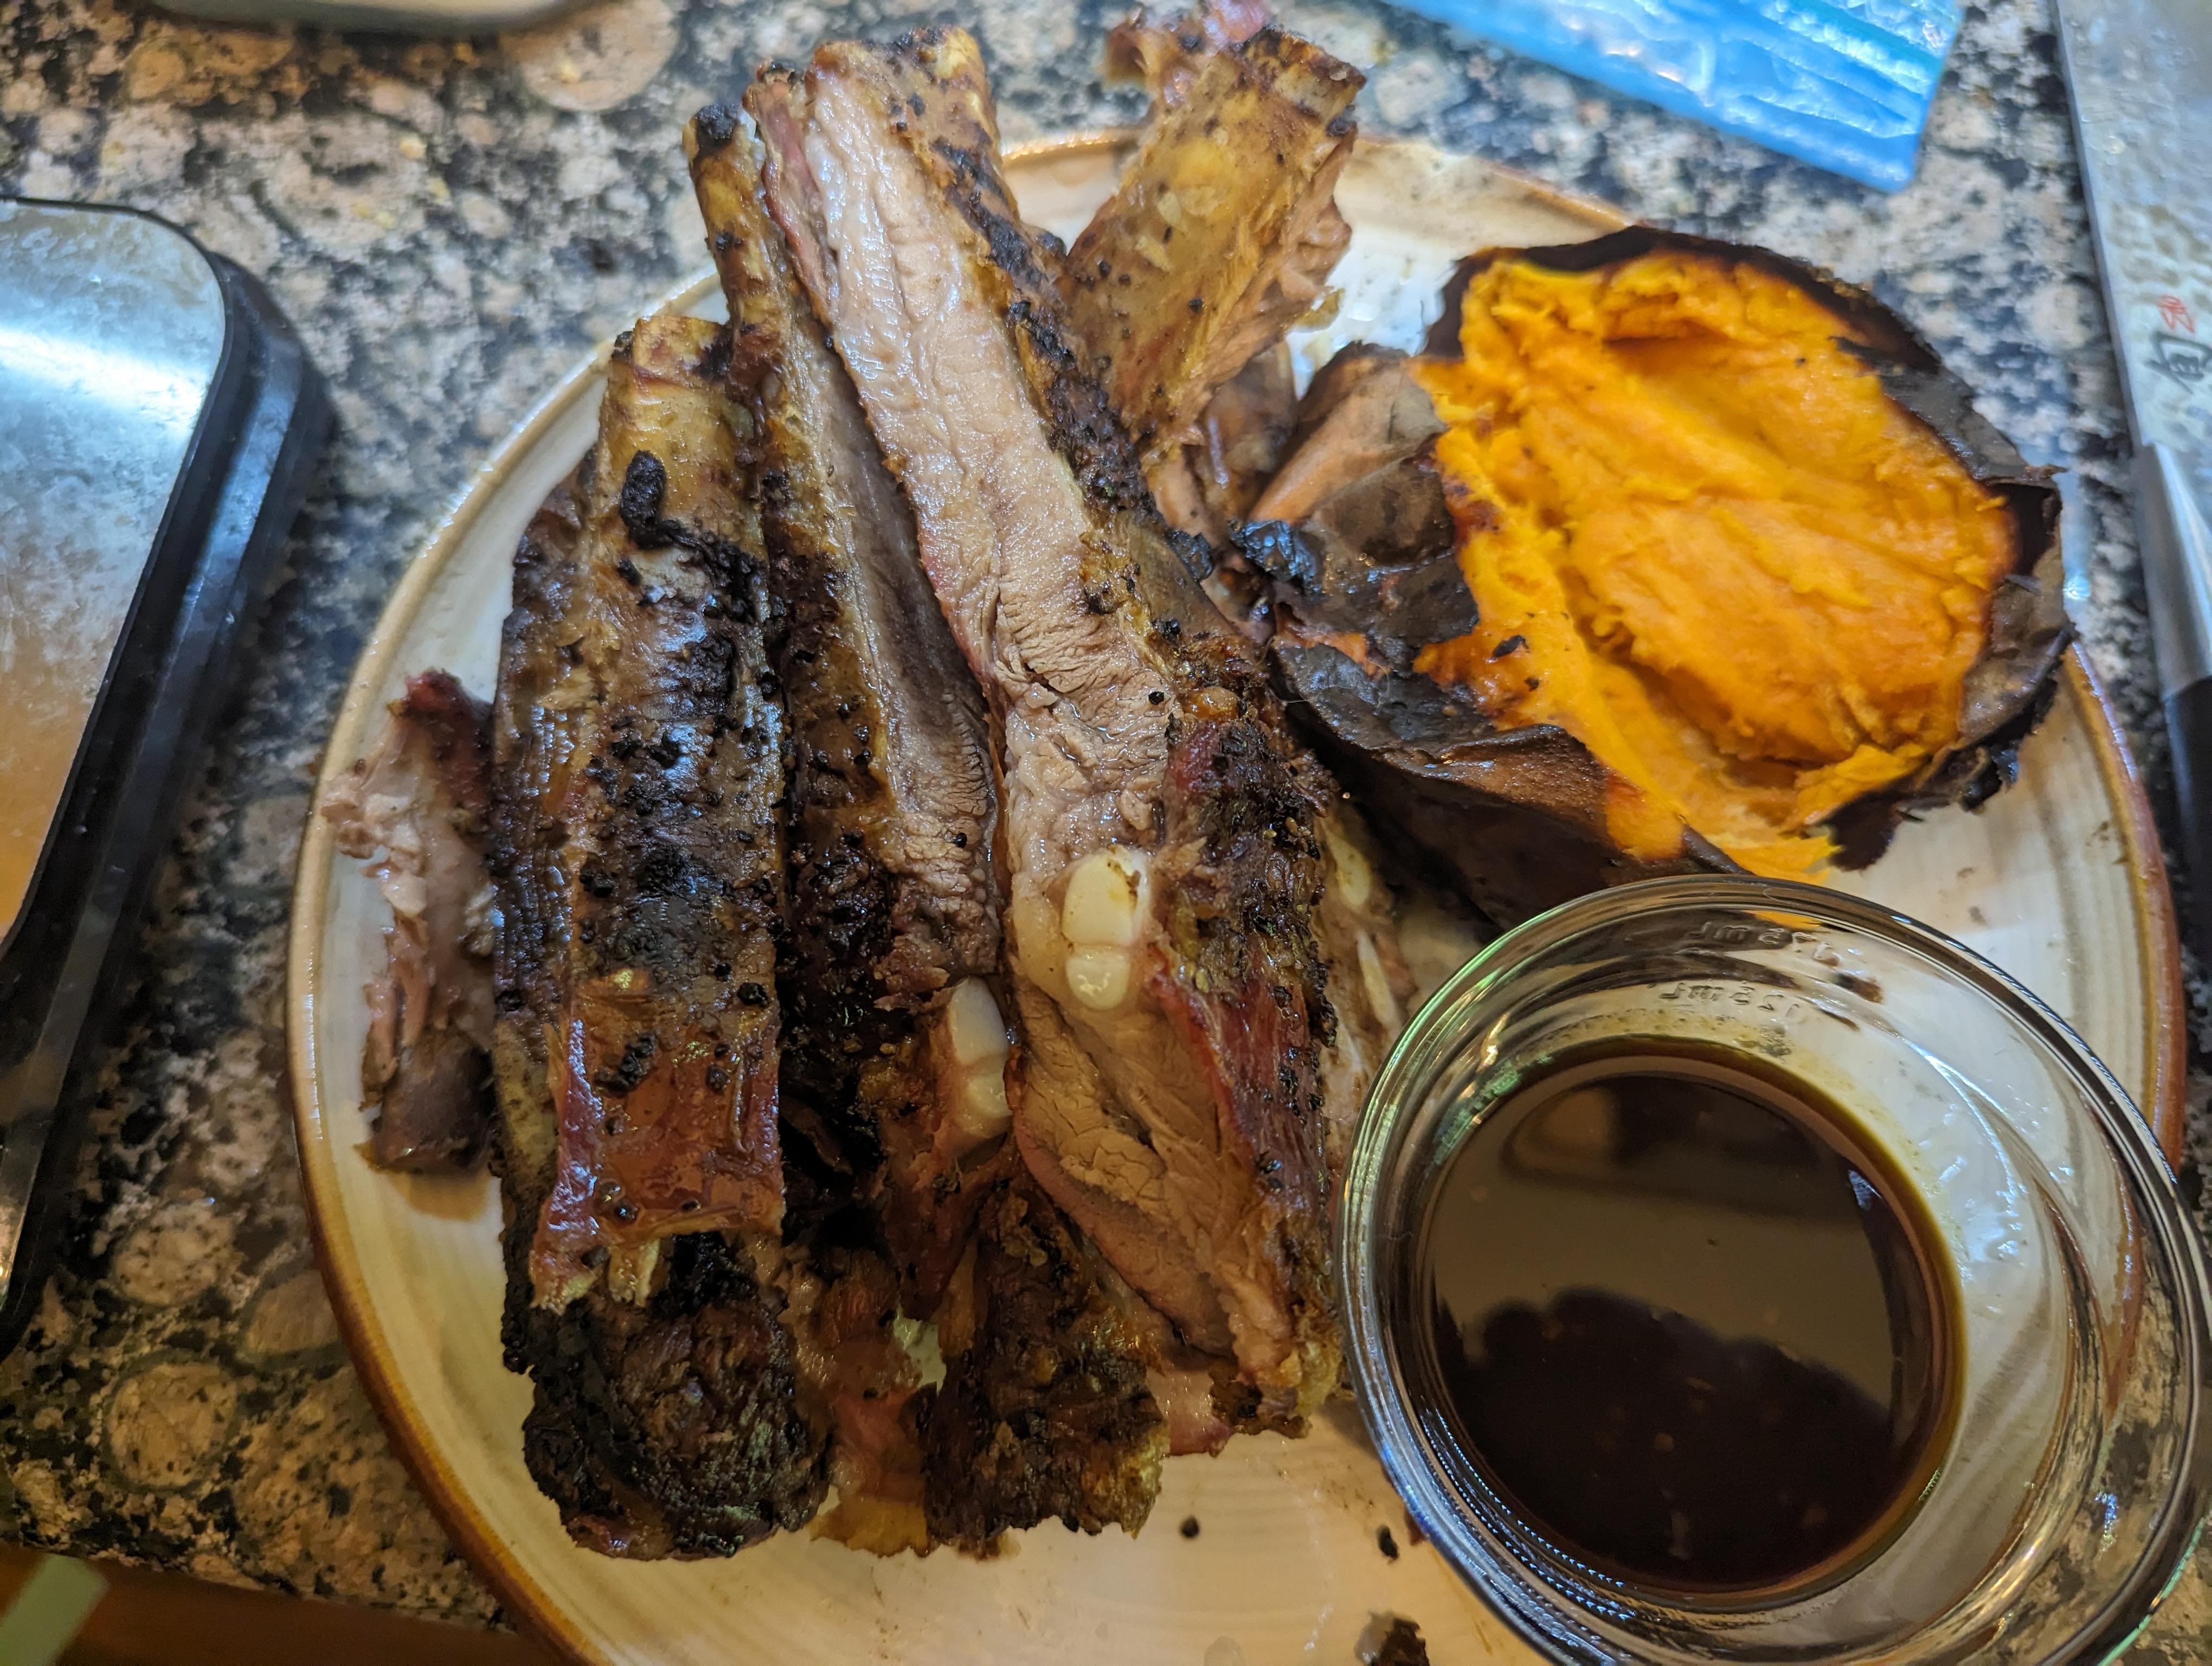
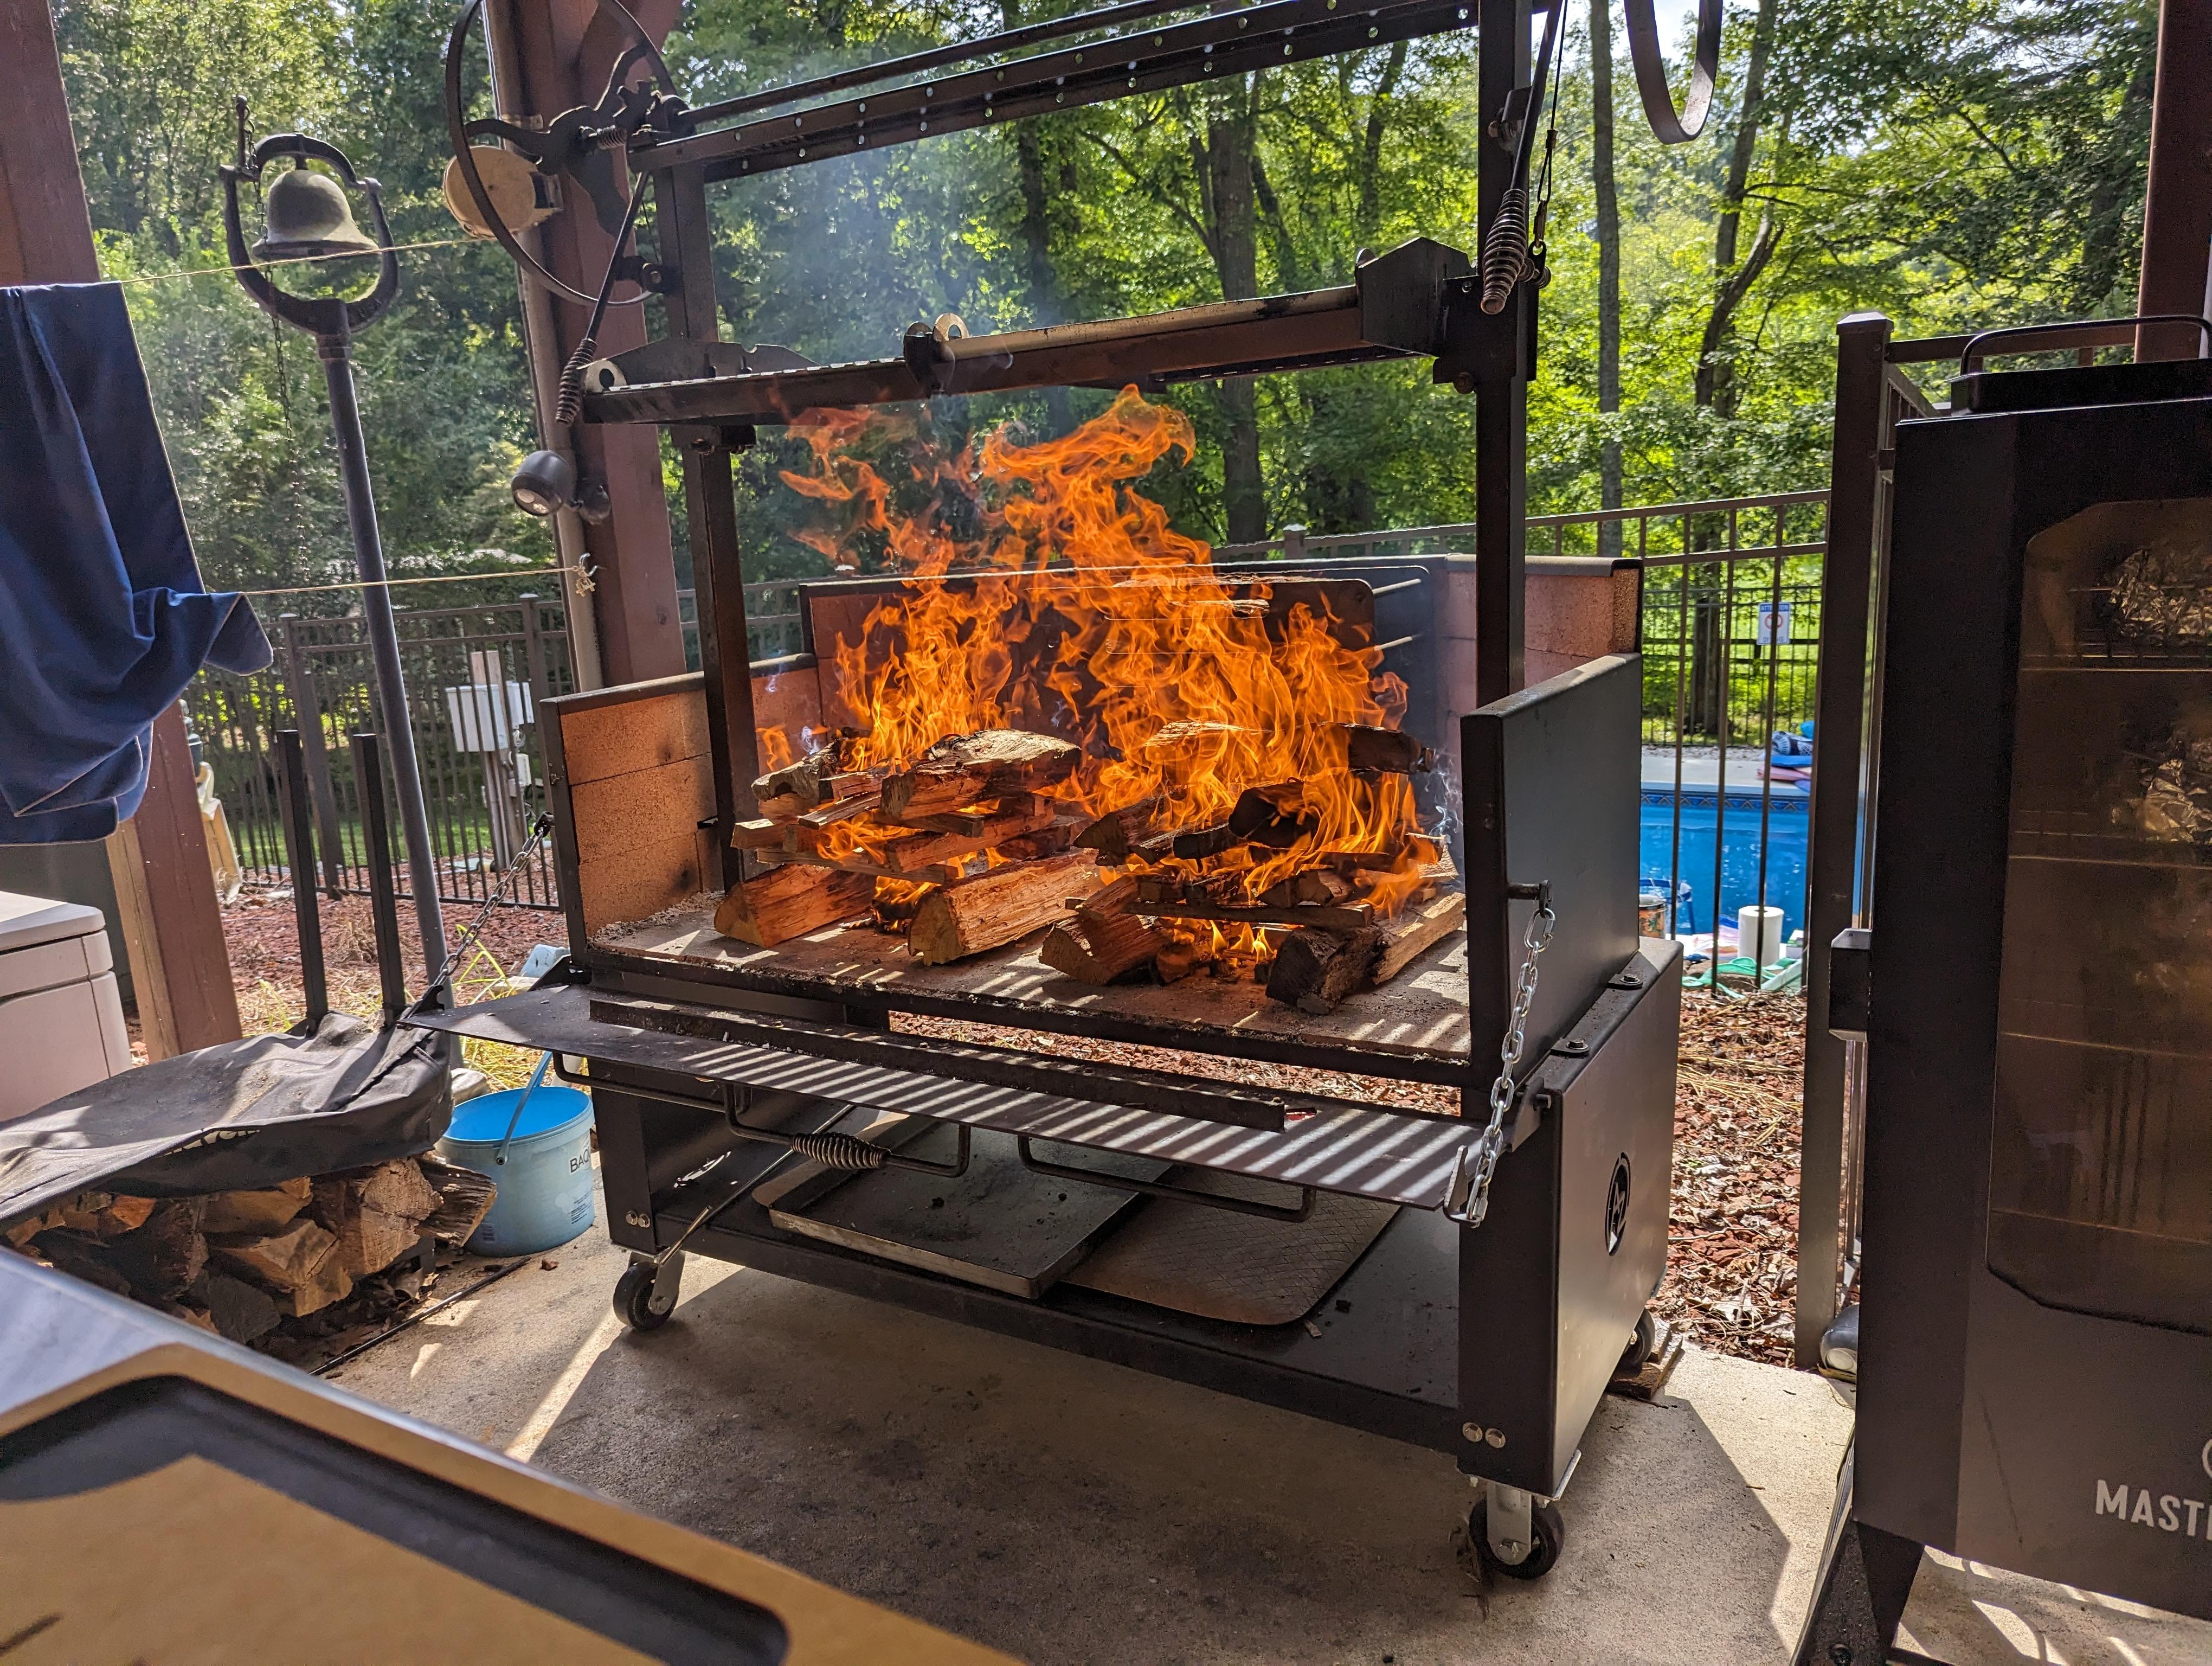
Spare ribs on the big grill over hickory. I haven't grilled ribs in over a decade but it was a nice change from smoking them. So good i ate a whole rack and then felt miserable. Also baked some sweet potatoes down in the coals.


-
11
-
-
18 hours ago, Mcdddy said:
When are people starting their ATC’s ? After a desired temp reached with manual vent control or from very early on after coals lit and lid closed? ?
I usually start the controller as soon as I light the fire but I initially set the temperature 75-100°F lower than my actual target temperature and then step it up as the KK approaches the current set temperature. This helps keep the fan from blowing fill blast and getting too much charcoal burning during the preheat and/or overshooting my planned cook temp.
-
1
-
-
The references to too much charcoal are referring to how much charcoal you have burning, not how much you have in the basket. The kk's are so well insulated and efficient that you require very little burning to get to lose and slow temps. It's tempting to start a big fire and get to temp quickly but you really need to light just a few pieces of charcoal and bring the temp up slowly. Having a full basket is just insurance that you don't run out of charcoal mid-cook; it doesn't go to waste since you can easily kill the fire at the end of a cook by closing all the vents and then reuse it for your next cook. The basket splitter is useful for making it easy to switch the type of charcoal between cooks and to create direct and indirect cooking zones.
If you have too much charcoal burning, your temp controller is most likely smothering it to keep the temps down, so when you open the lid the sudden in-rush of air fuels all of that smothered charcoal and let's it flare up, causing the temperature spike - it's the back draft affect.
Regarding a deflector, if you only have a little charcoal burning, you rarely need a deflector in a kk; I only use one if I'm using a drip pan to catch drippings for aus jous or gravy.
-
2
-
-
That's just volume 1 in a 10 volume set.
-
3
-
-
12 hours ago, Tyrus said:
You know what you need Jeef, it's a good wood box. Where'd you find that cool lookin bell, that's awesome? the chicken too
My folks got one of those bells for each of their 4 children during their travels after my dad retired. It's been over 25 years but I think they got them on one of their week-long drives in the mountains of NC, VA, and TN - maybe Gatlinburg or Pigeon Forge in Tennessee. I need to move it to a bit more accessible location - maybe by the steps down to the pool.
-
1
-
-
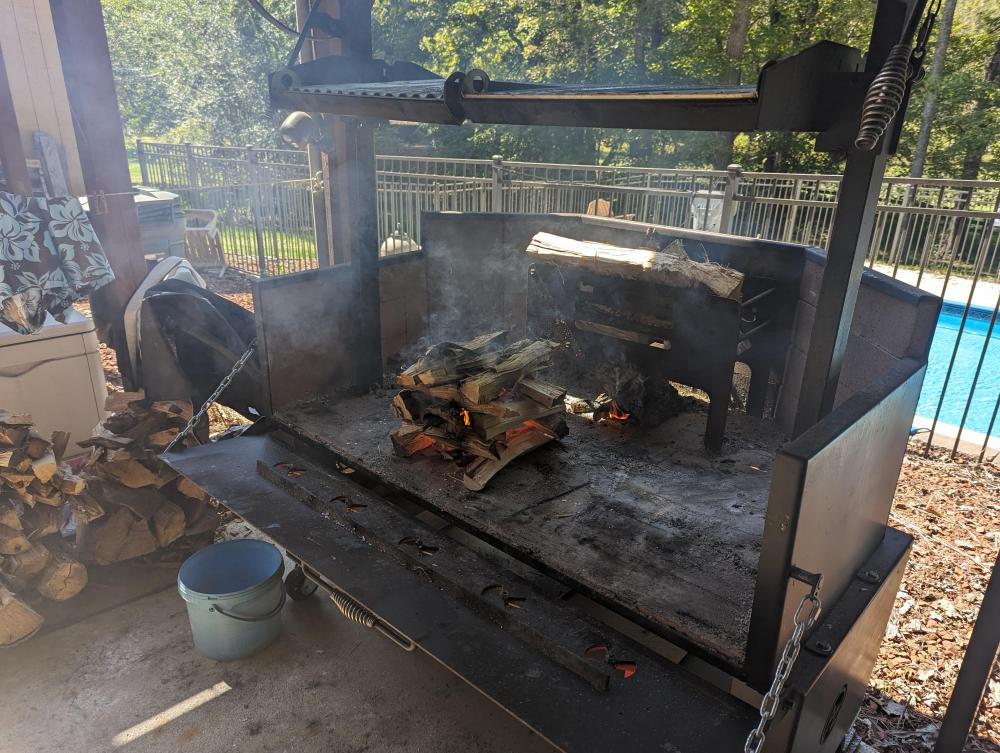
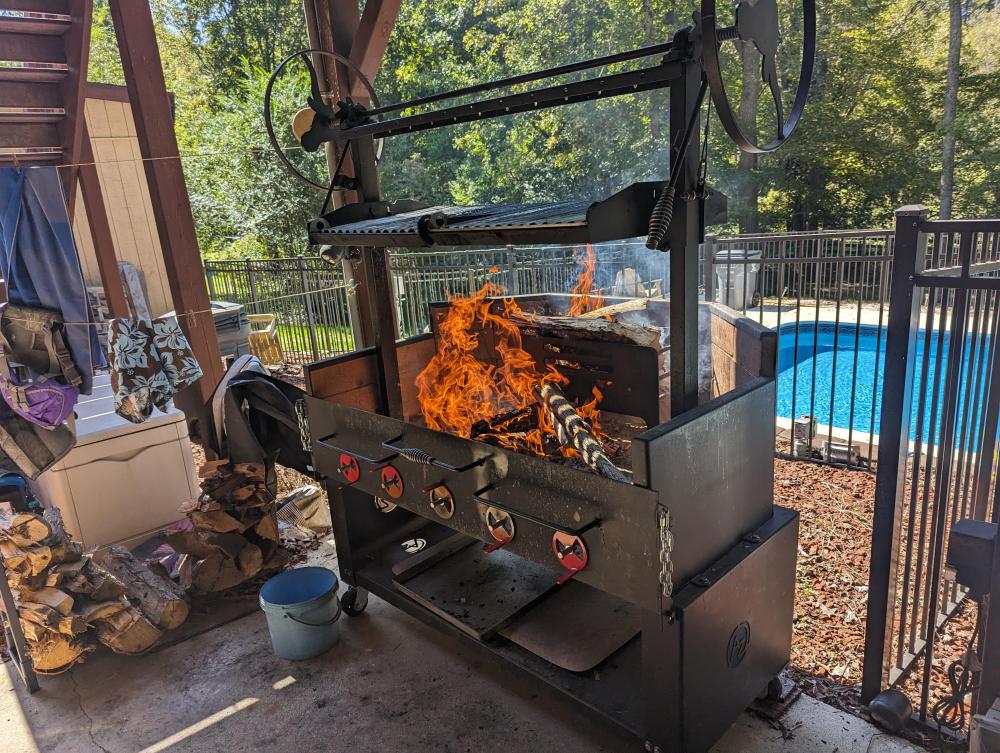
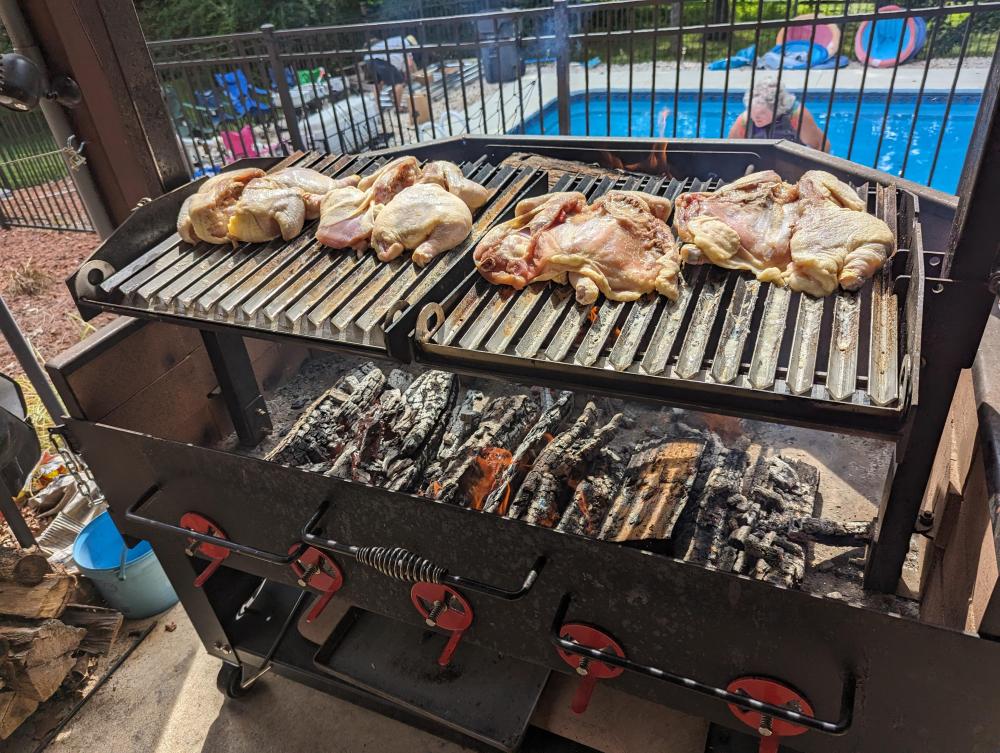
I tapped into my inner pyromaniac Saturday for a gathering of extended family. It was 88°F without my fire so I was hot and tired when the chickens were done and didn't get any pics of the finished cook but they were very tasty after an overnight dry brine with salt and garlic powder.


-
4
-
-
I didn't realize you pitched.... I'm hoping you have a successful surgery and which recovery!
-
3 hours ago, C6Bill said:
I've tried and failed at vac sealing bread before but just putting it in a plastic bag and freezing it has come out fine after a few weeks
I've frozen bread and was happy with it when I tried it after a few weeks in the freezer but much longer than that it gets hard bits. SinceII don't be finishing the buns within a few weeks I was hoping that vacuum packing it would prevent that.
I asked the same question on Avid Armor 's Facebook page before posting here; they responded last week; they apologized for the late reply and explained that Facebook has stopped sending them notifications. Their recommendation was to freeze it for a day or two before vacuum packing and to use just the seal function; since the machine uses vacuum to close the seal bar, it pulls a minimal vacuum when just sealing. I tried the without the pre-freeze and still smooshed the bread but I don't remember if I tried it after freezing for a day. Its a little late note since it's been over a month but I'll try it the next time I'm facing the same situation.


Non KK cooks
in Lagniappe Photos
Posted · Edited by jeffshoaf
Accidently duplicated post
.