golfpro2301
-
Posts
62 -
Joined
-
Last visited
-
Days Won
2
Content Type
Profiles
Forums
Events
Everything posted by golfpro2301
-
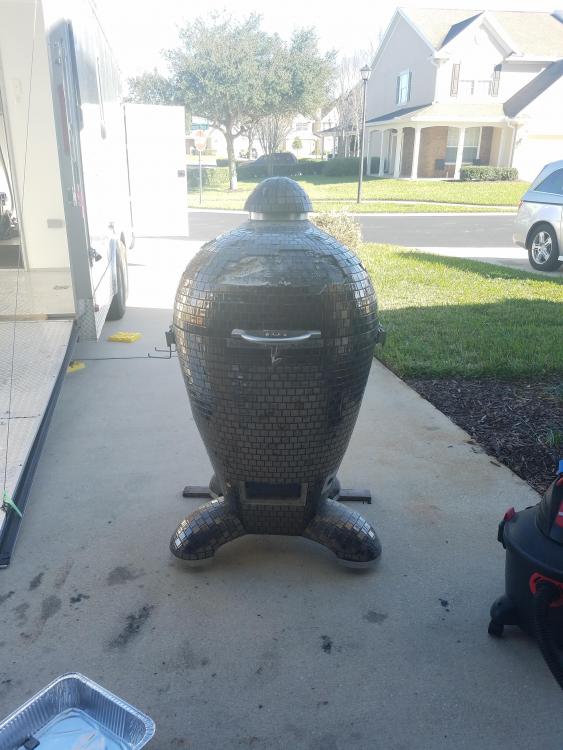
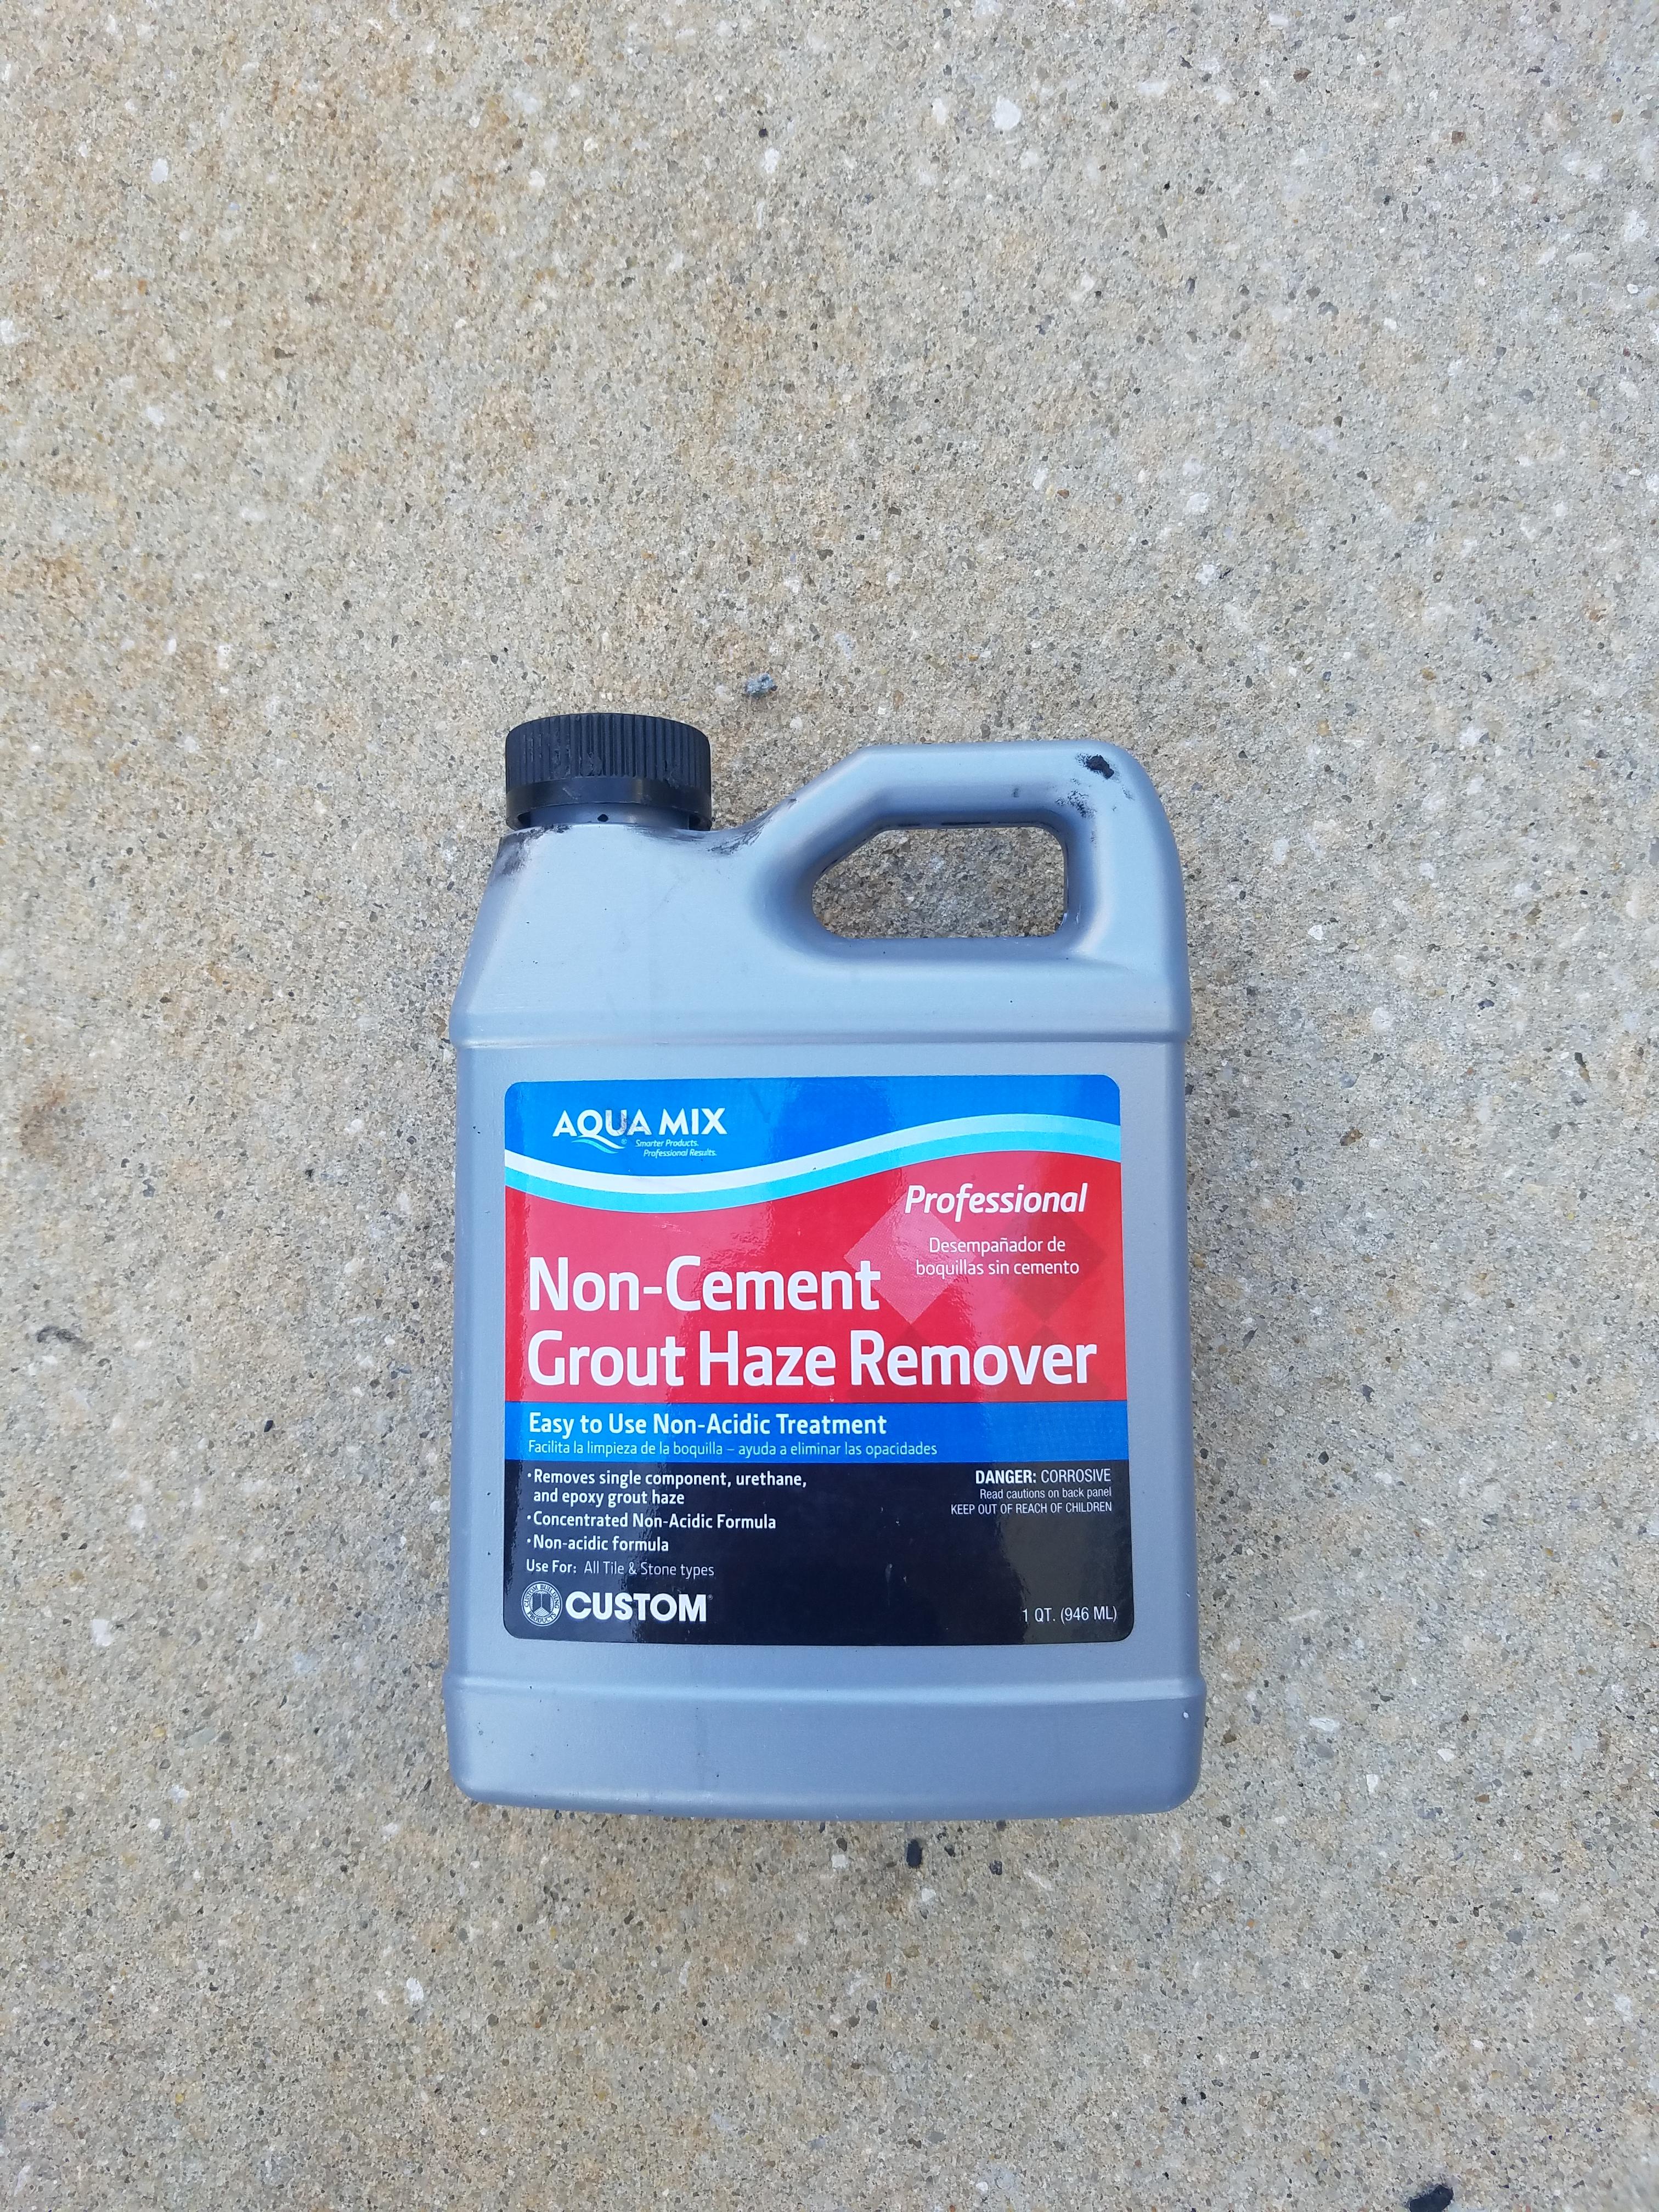
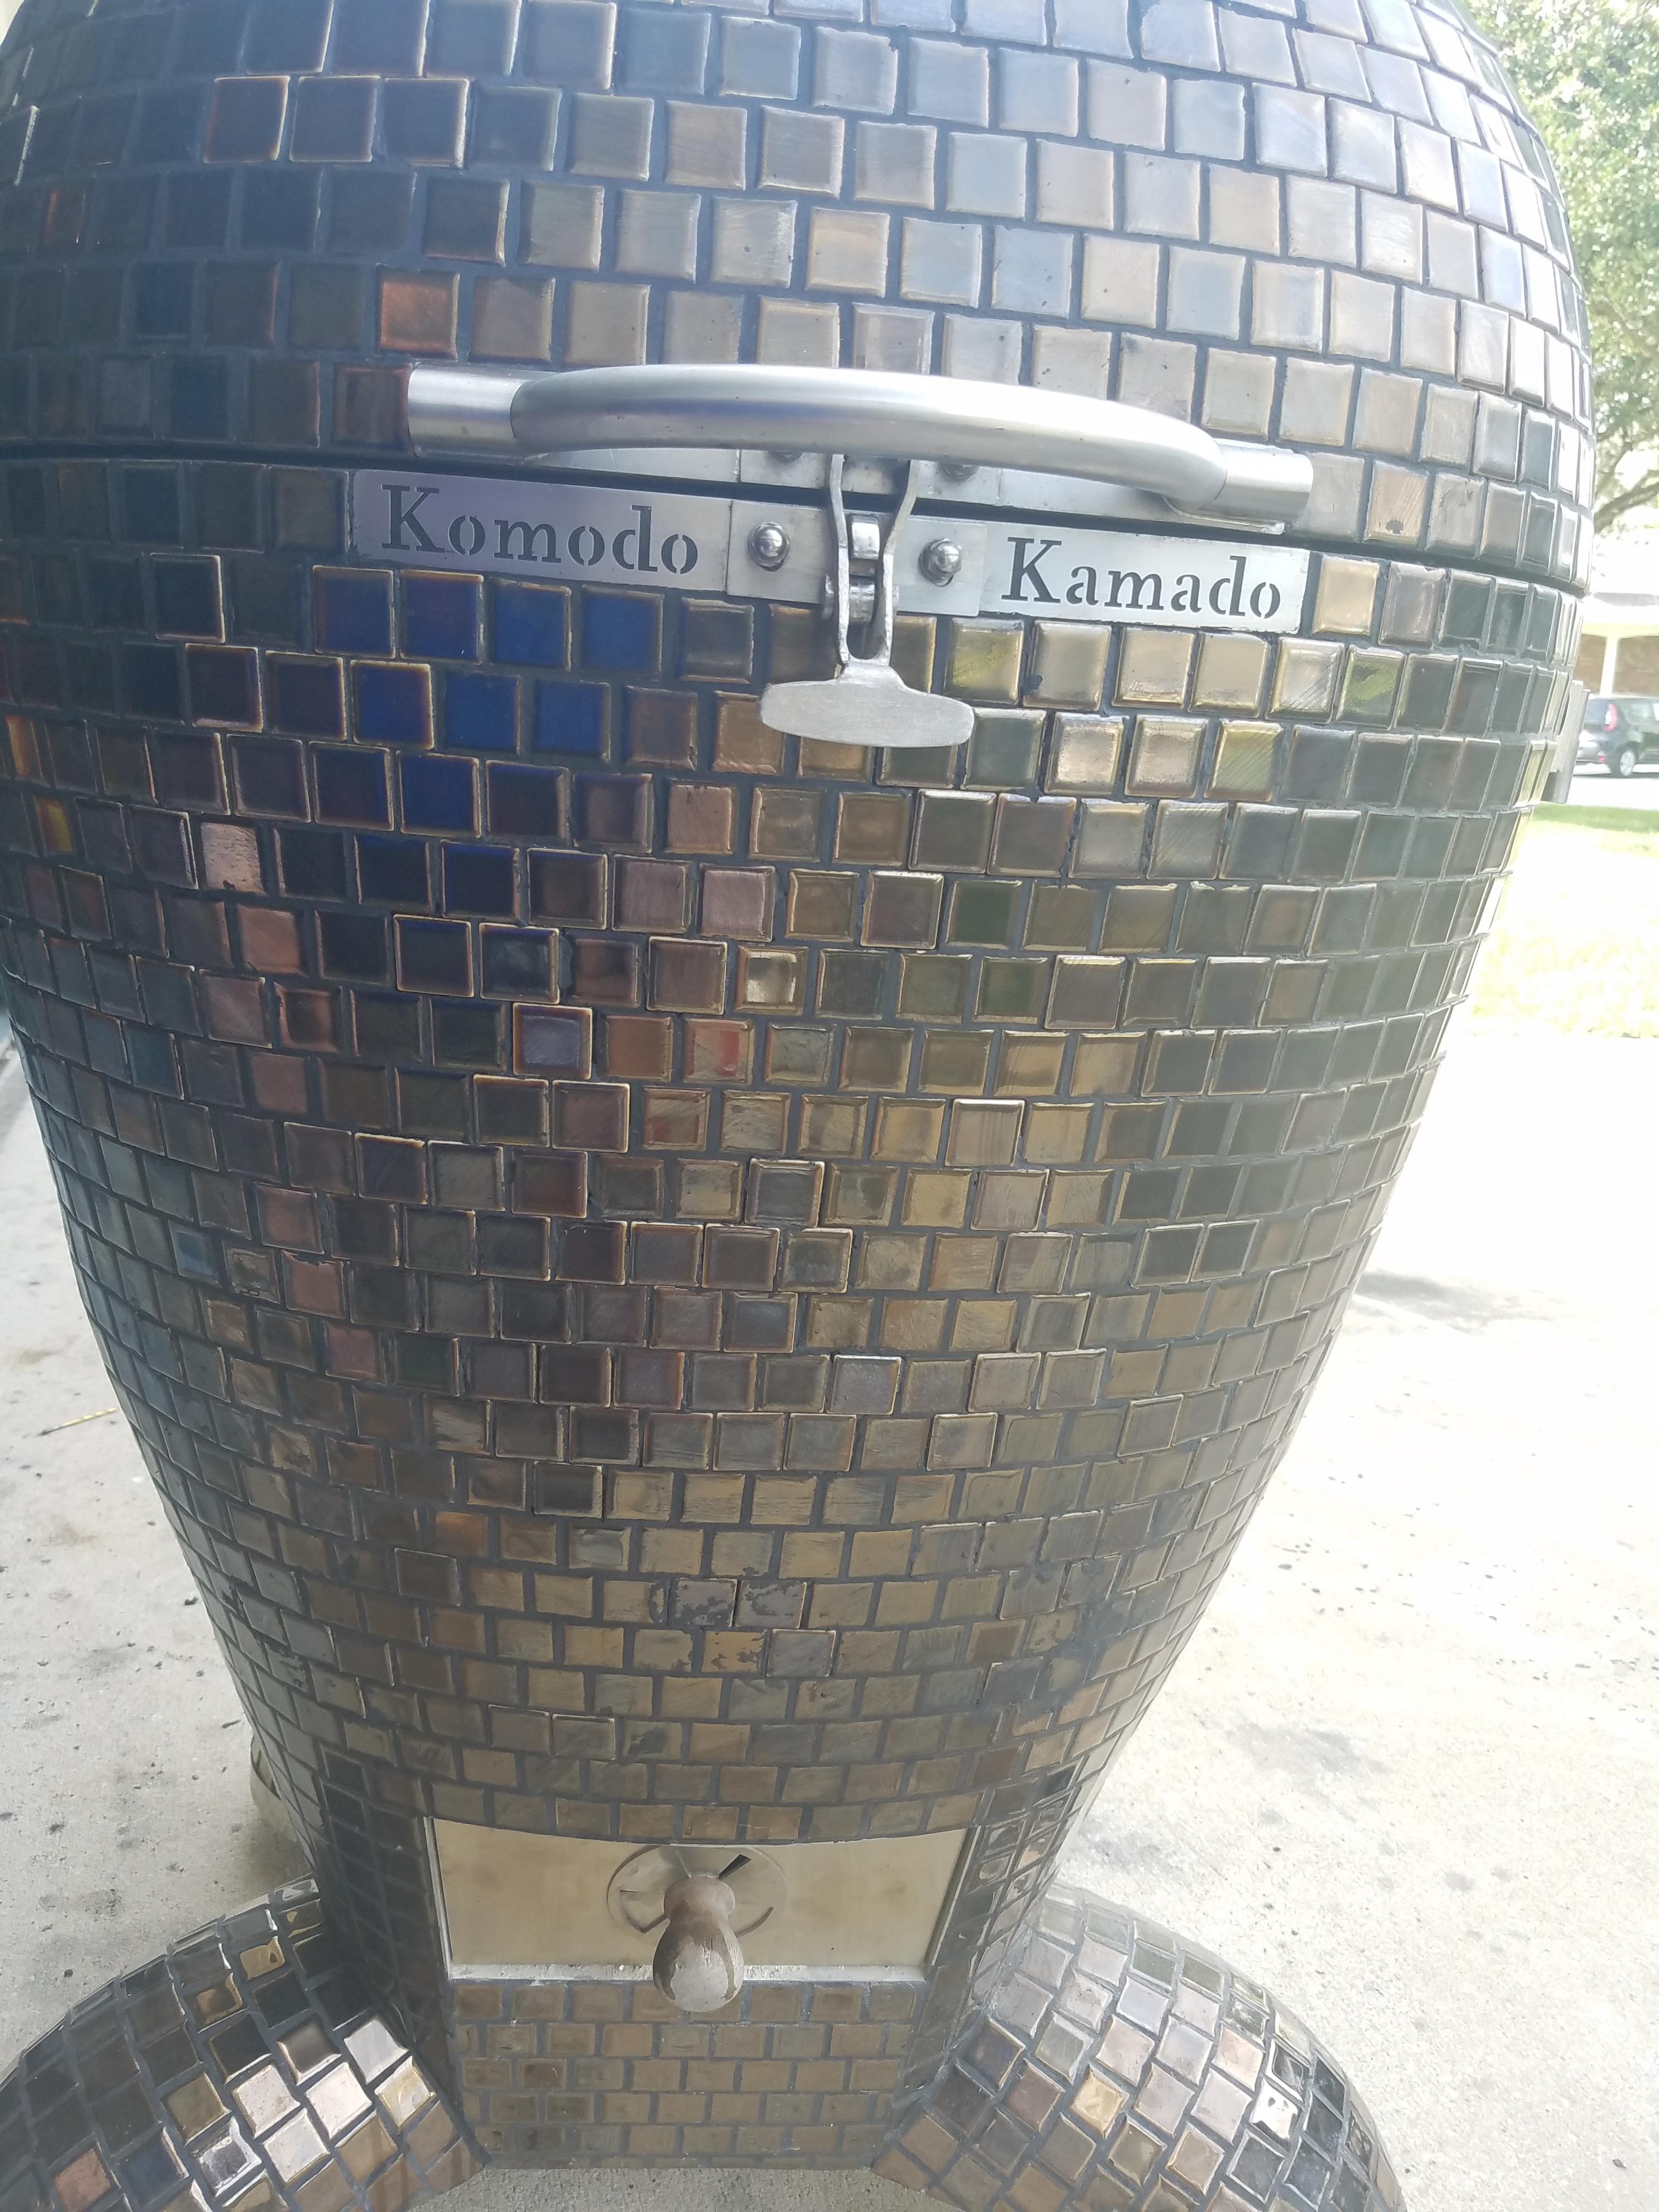
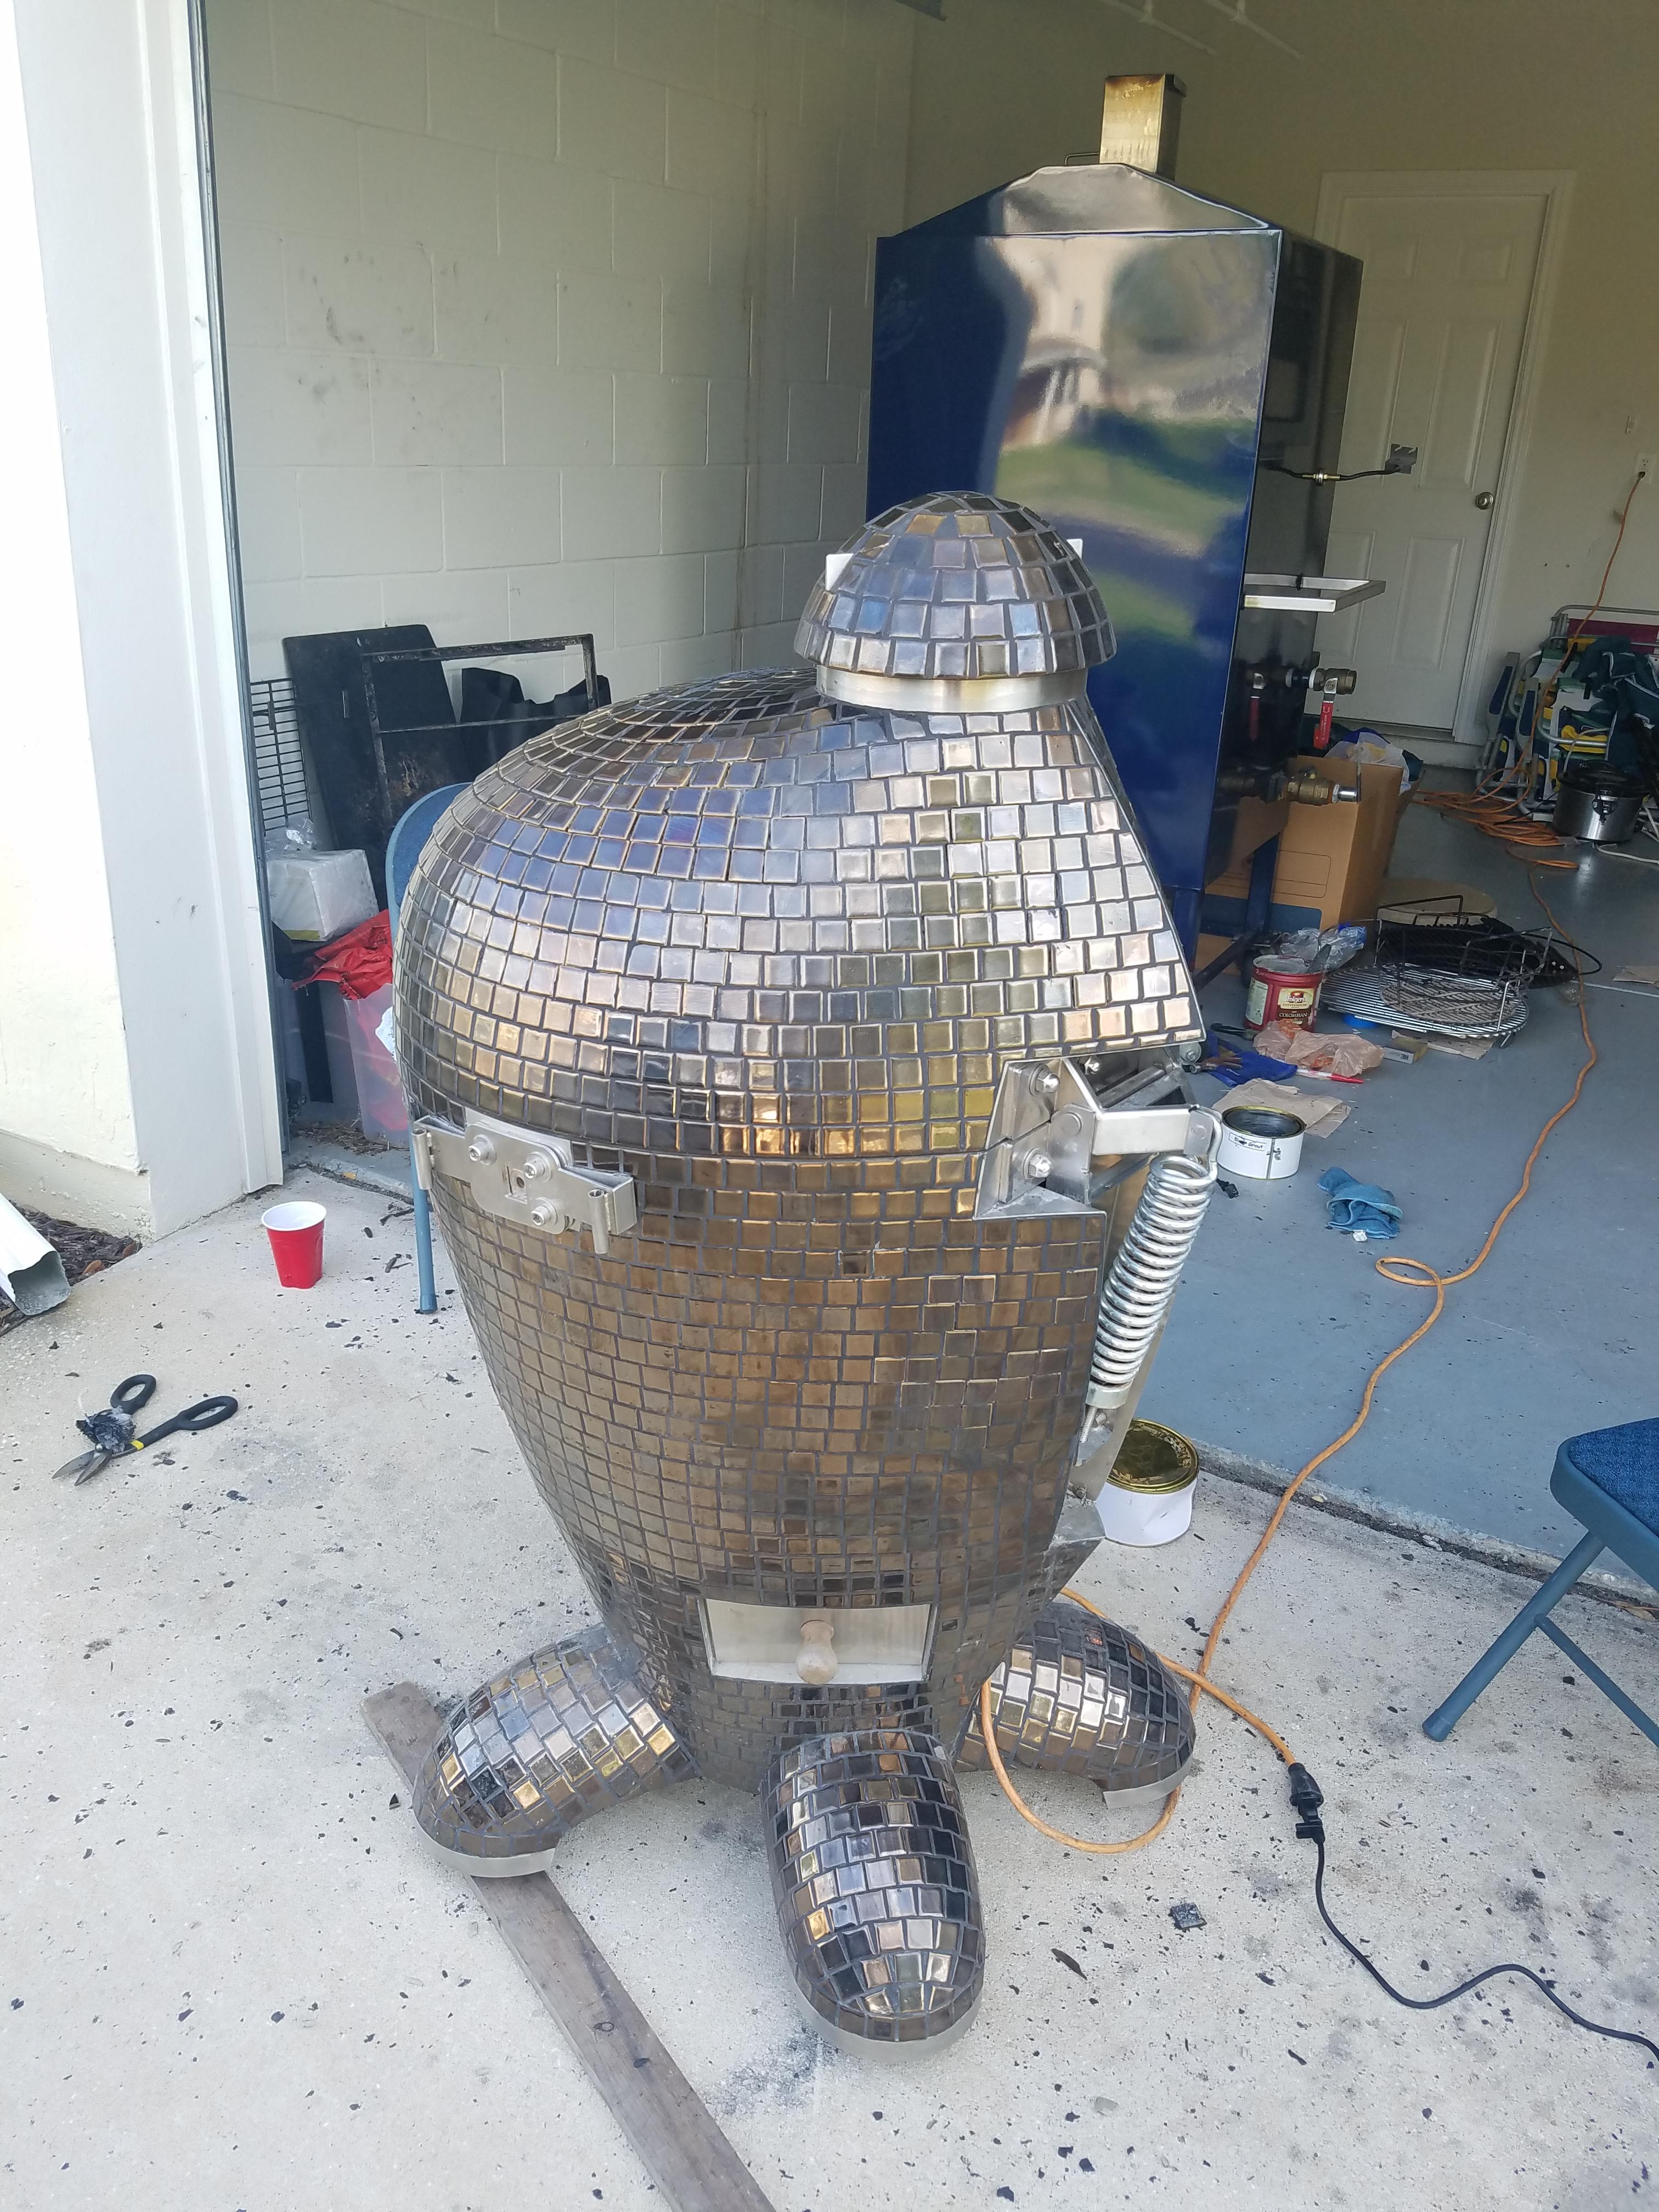
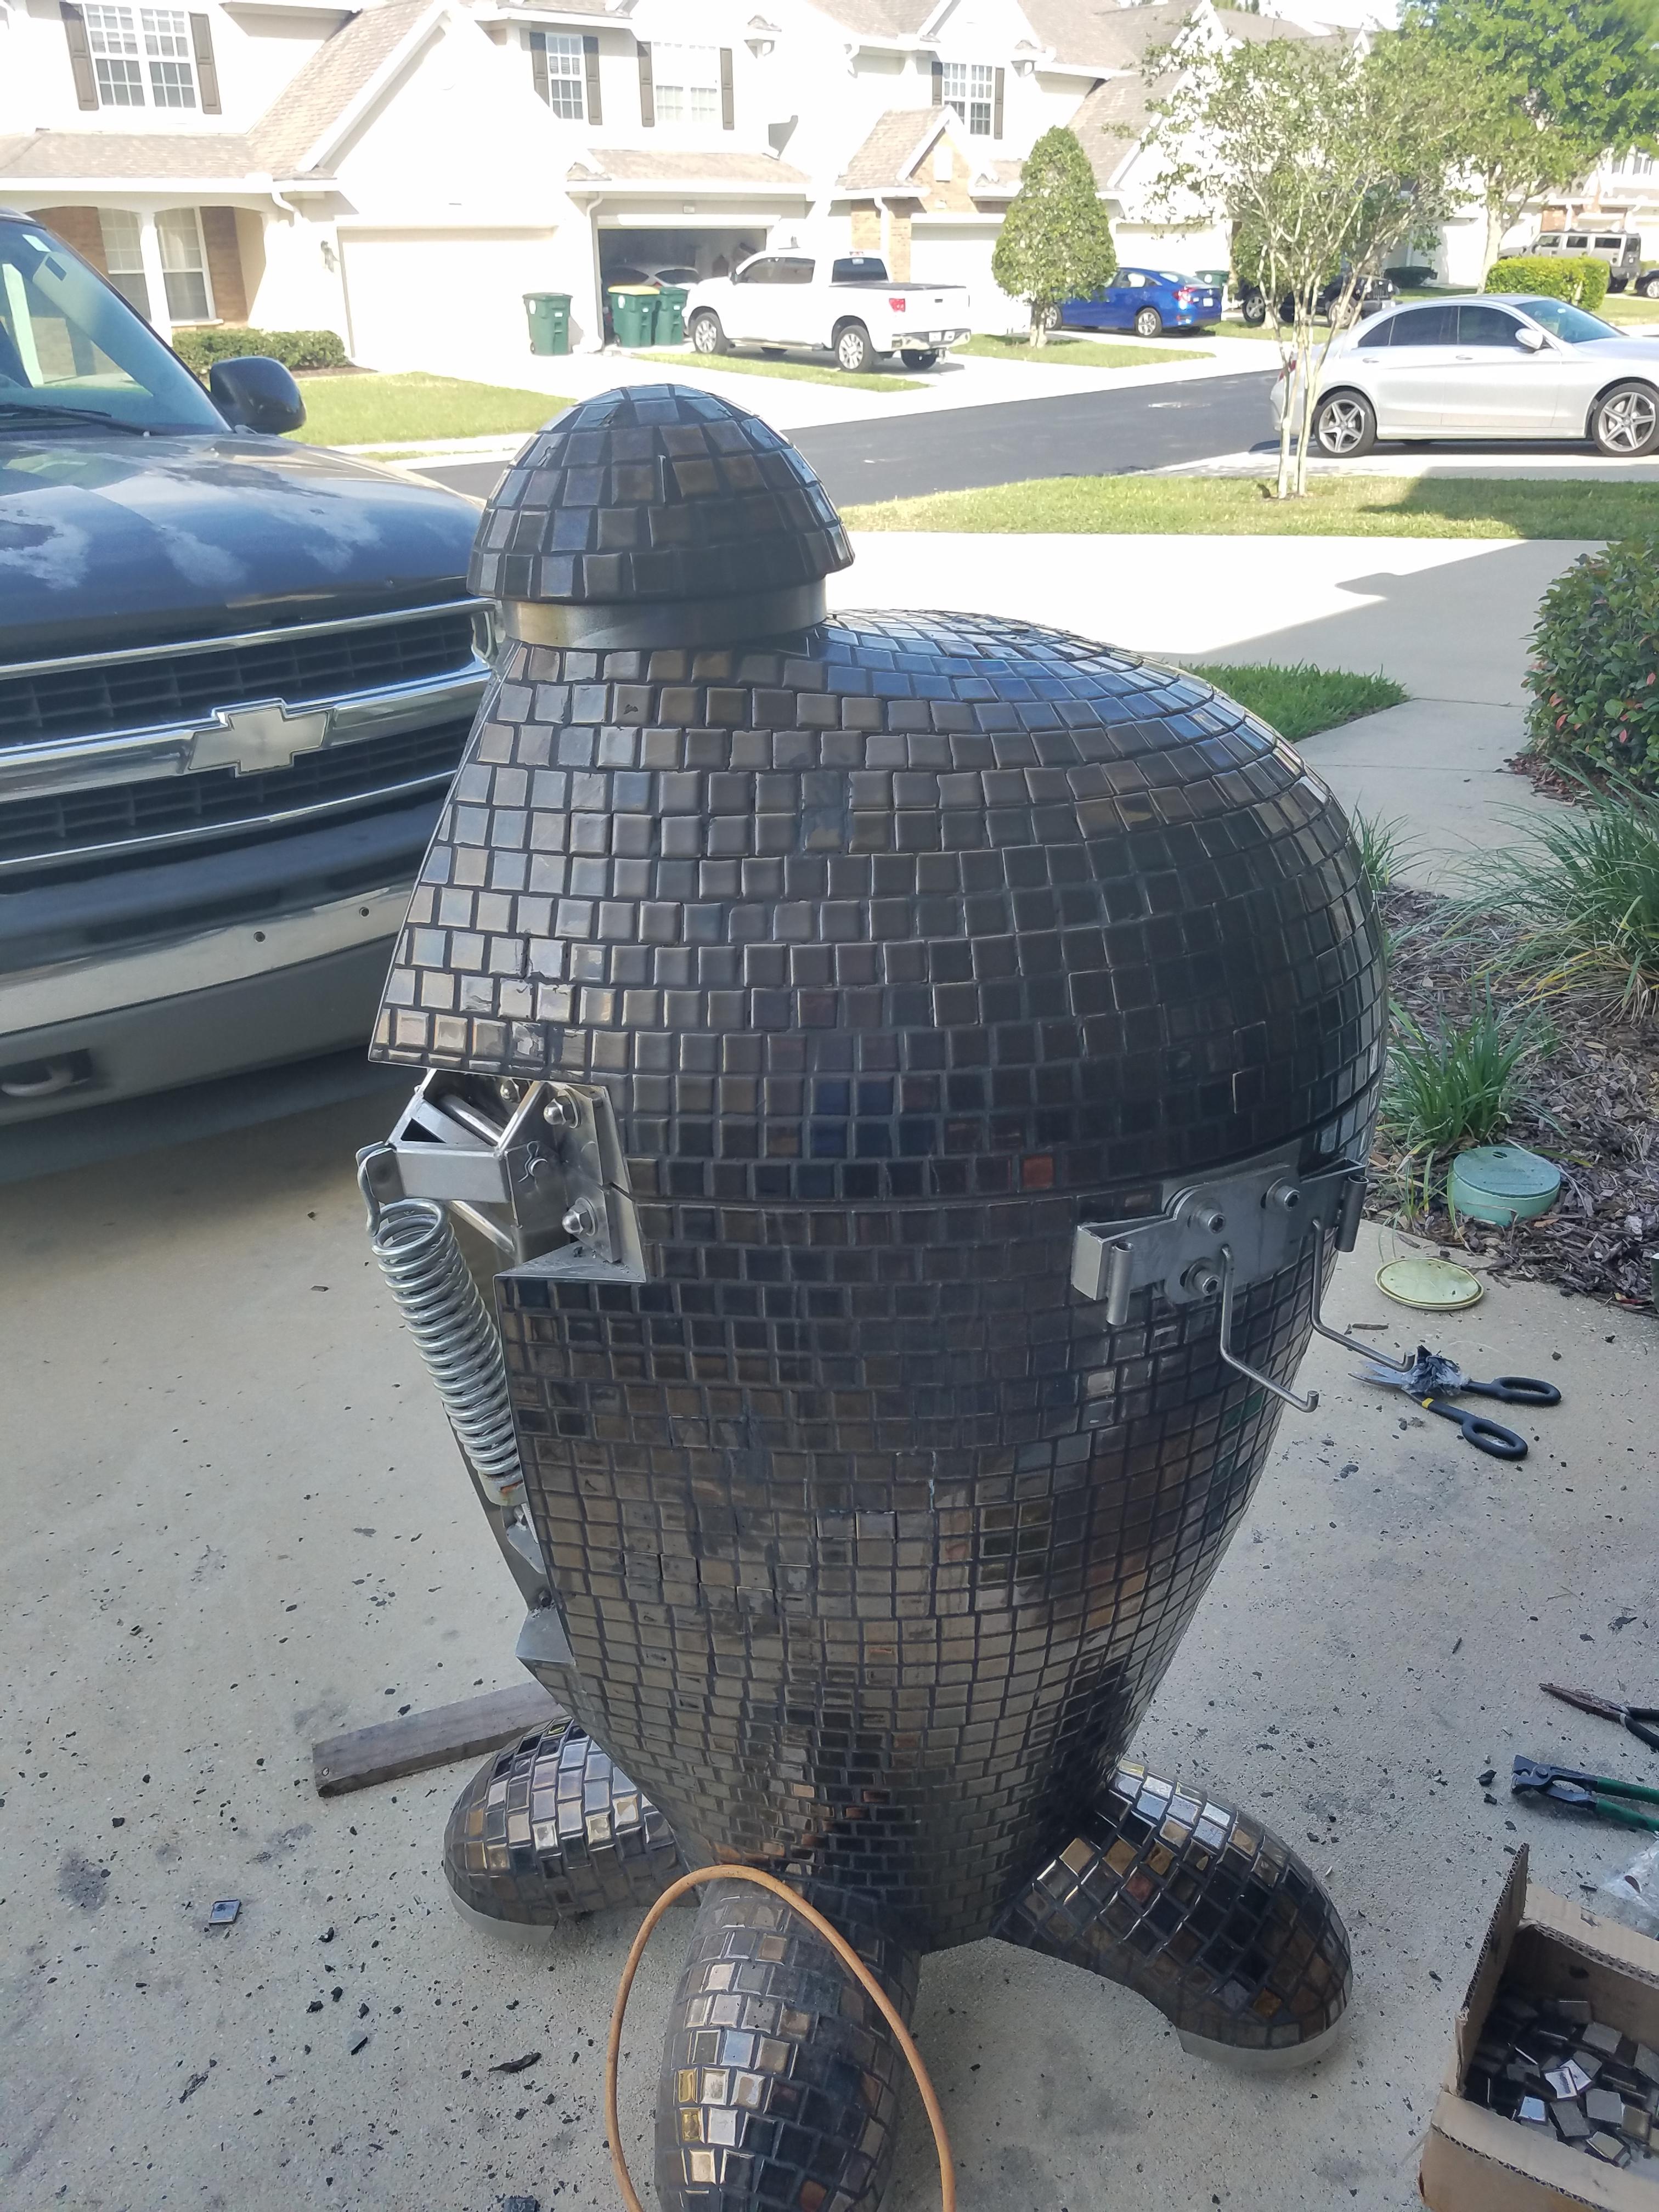
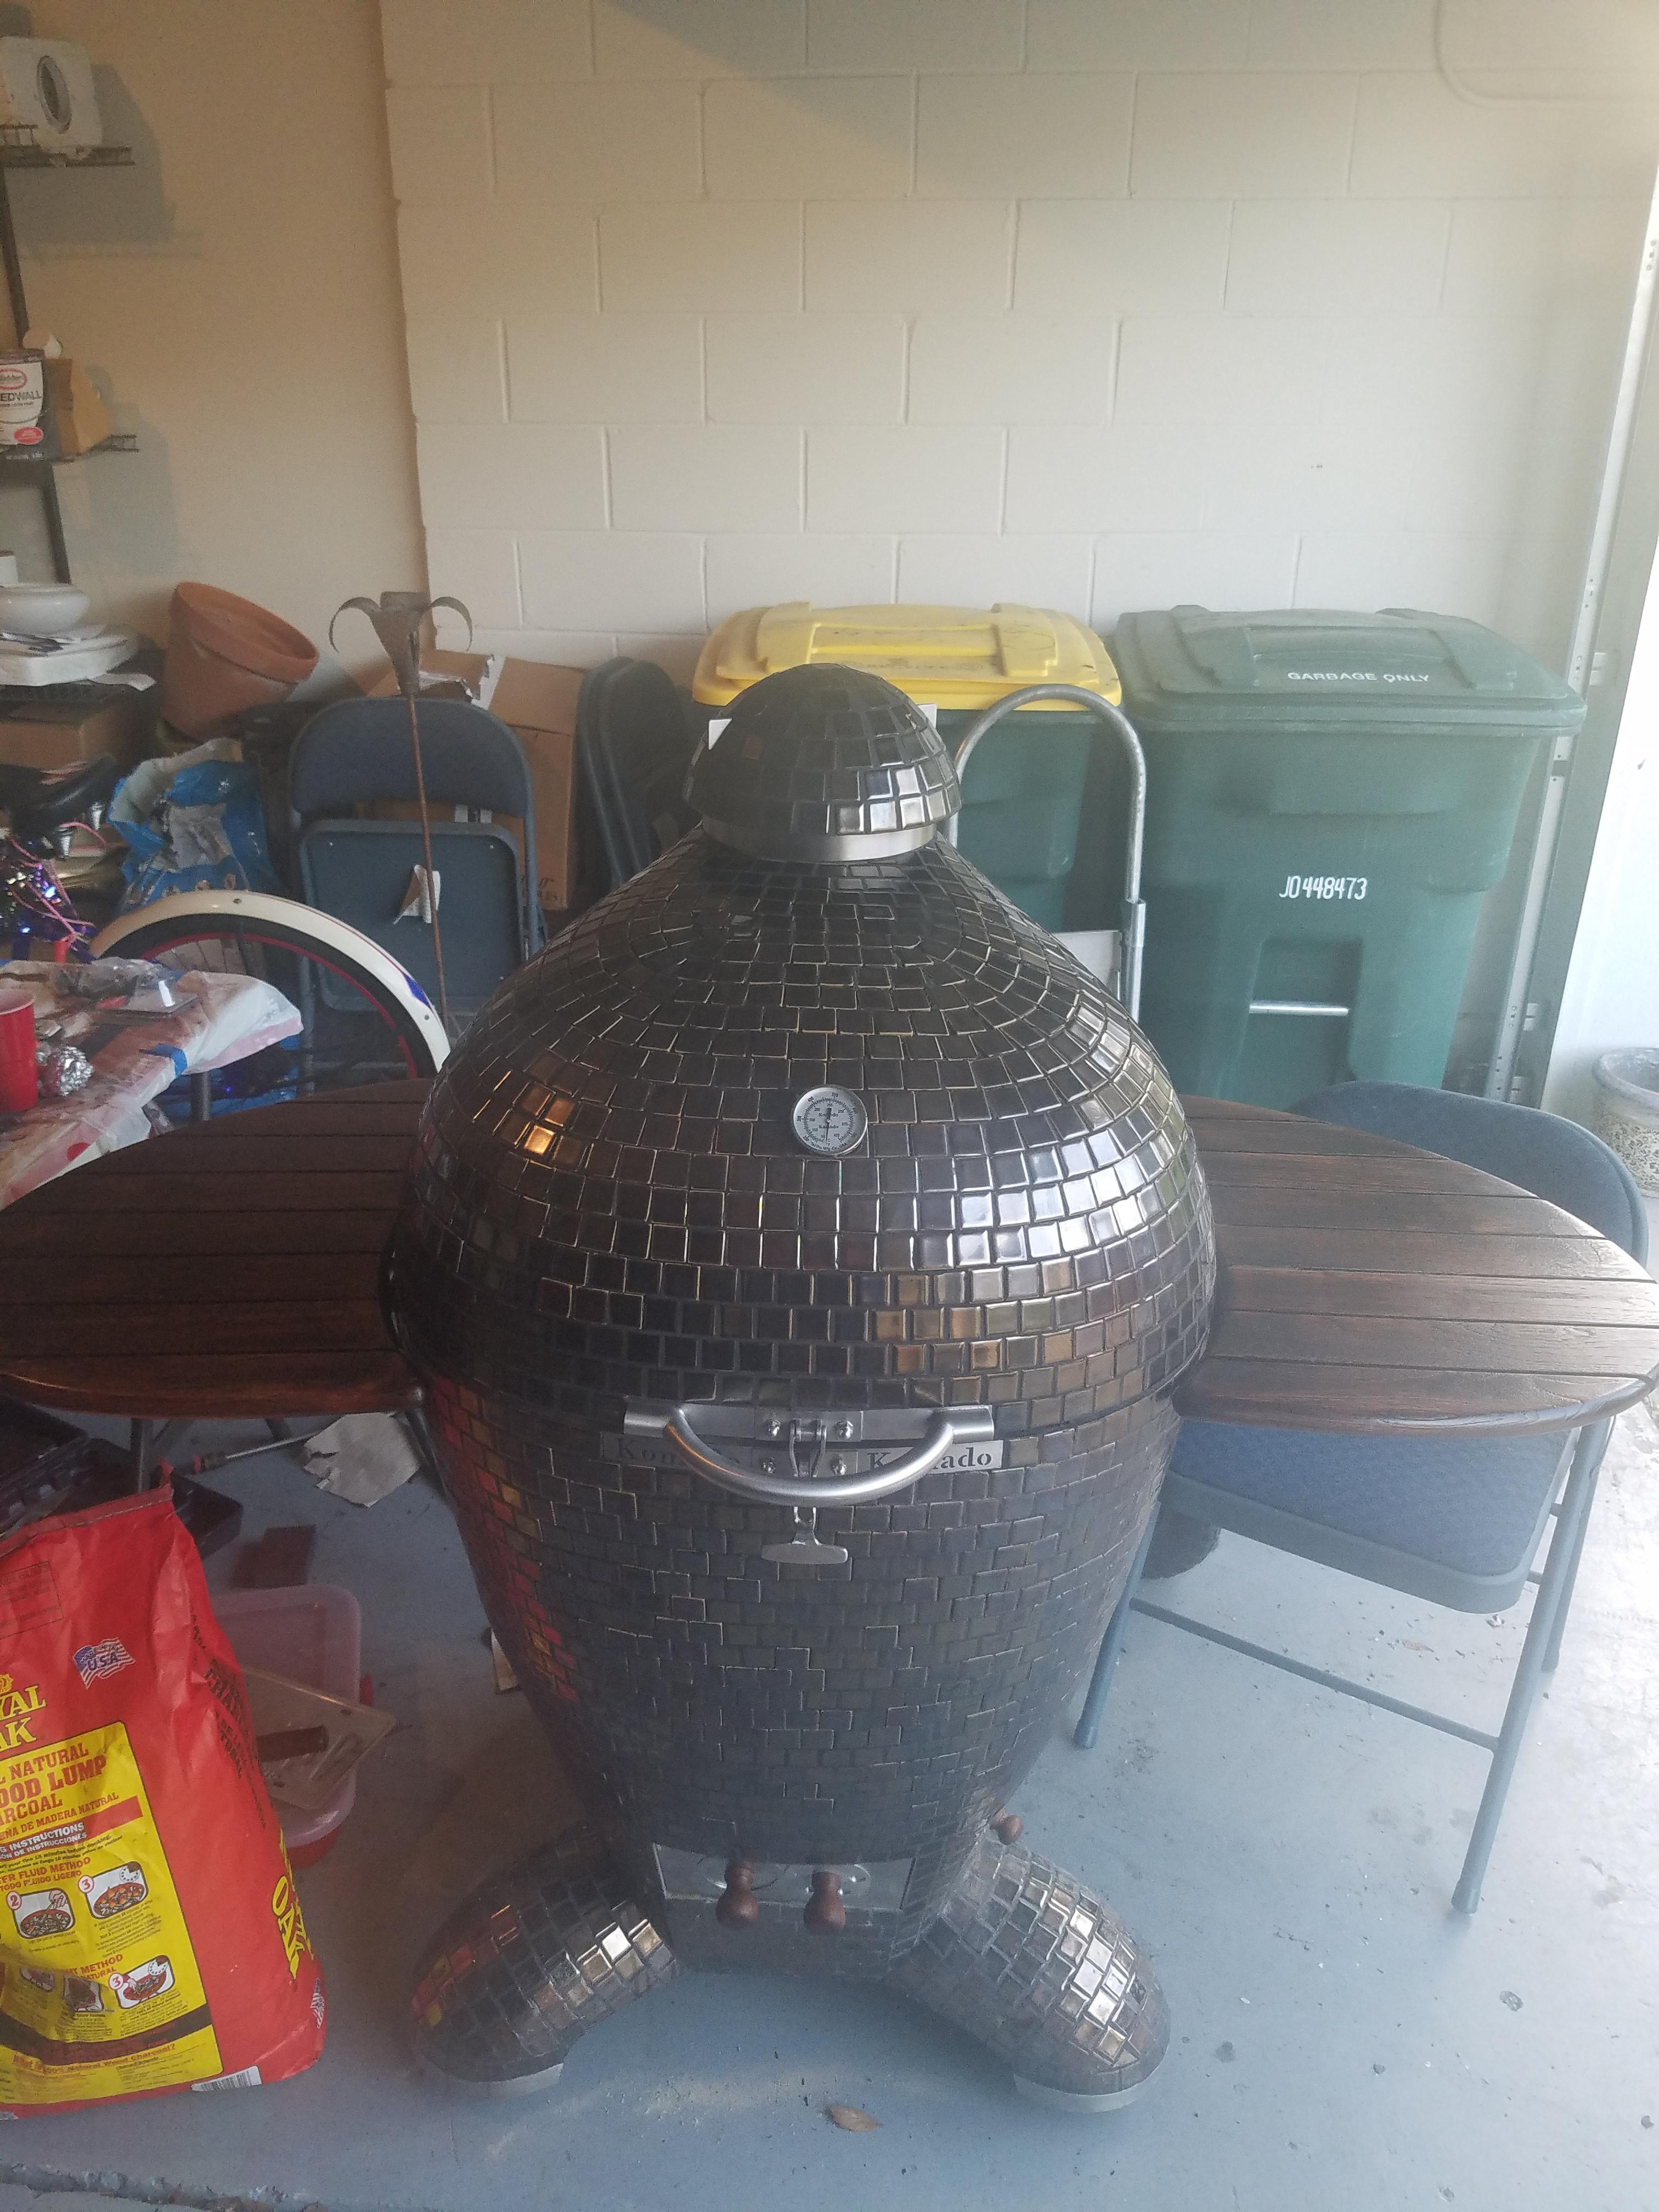
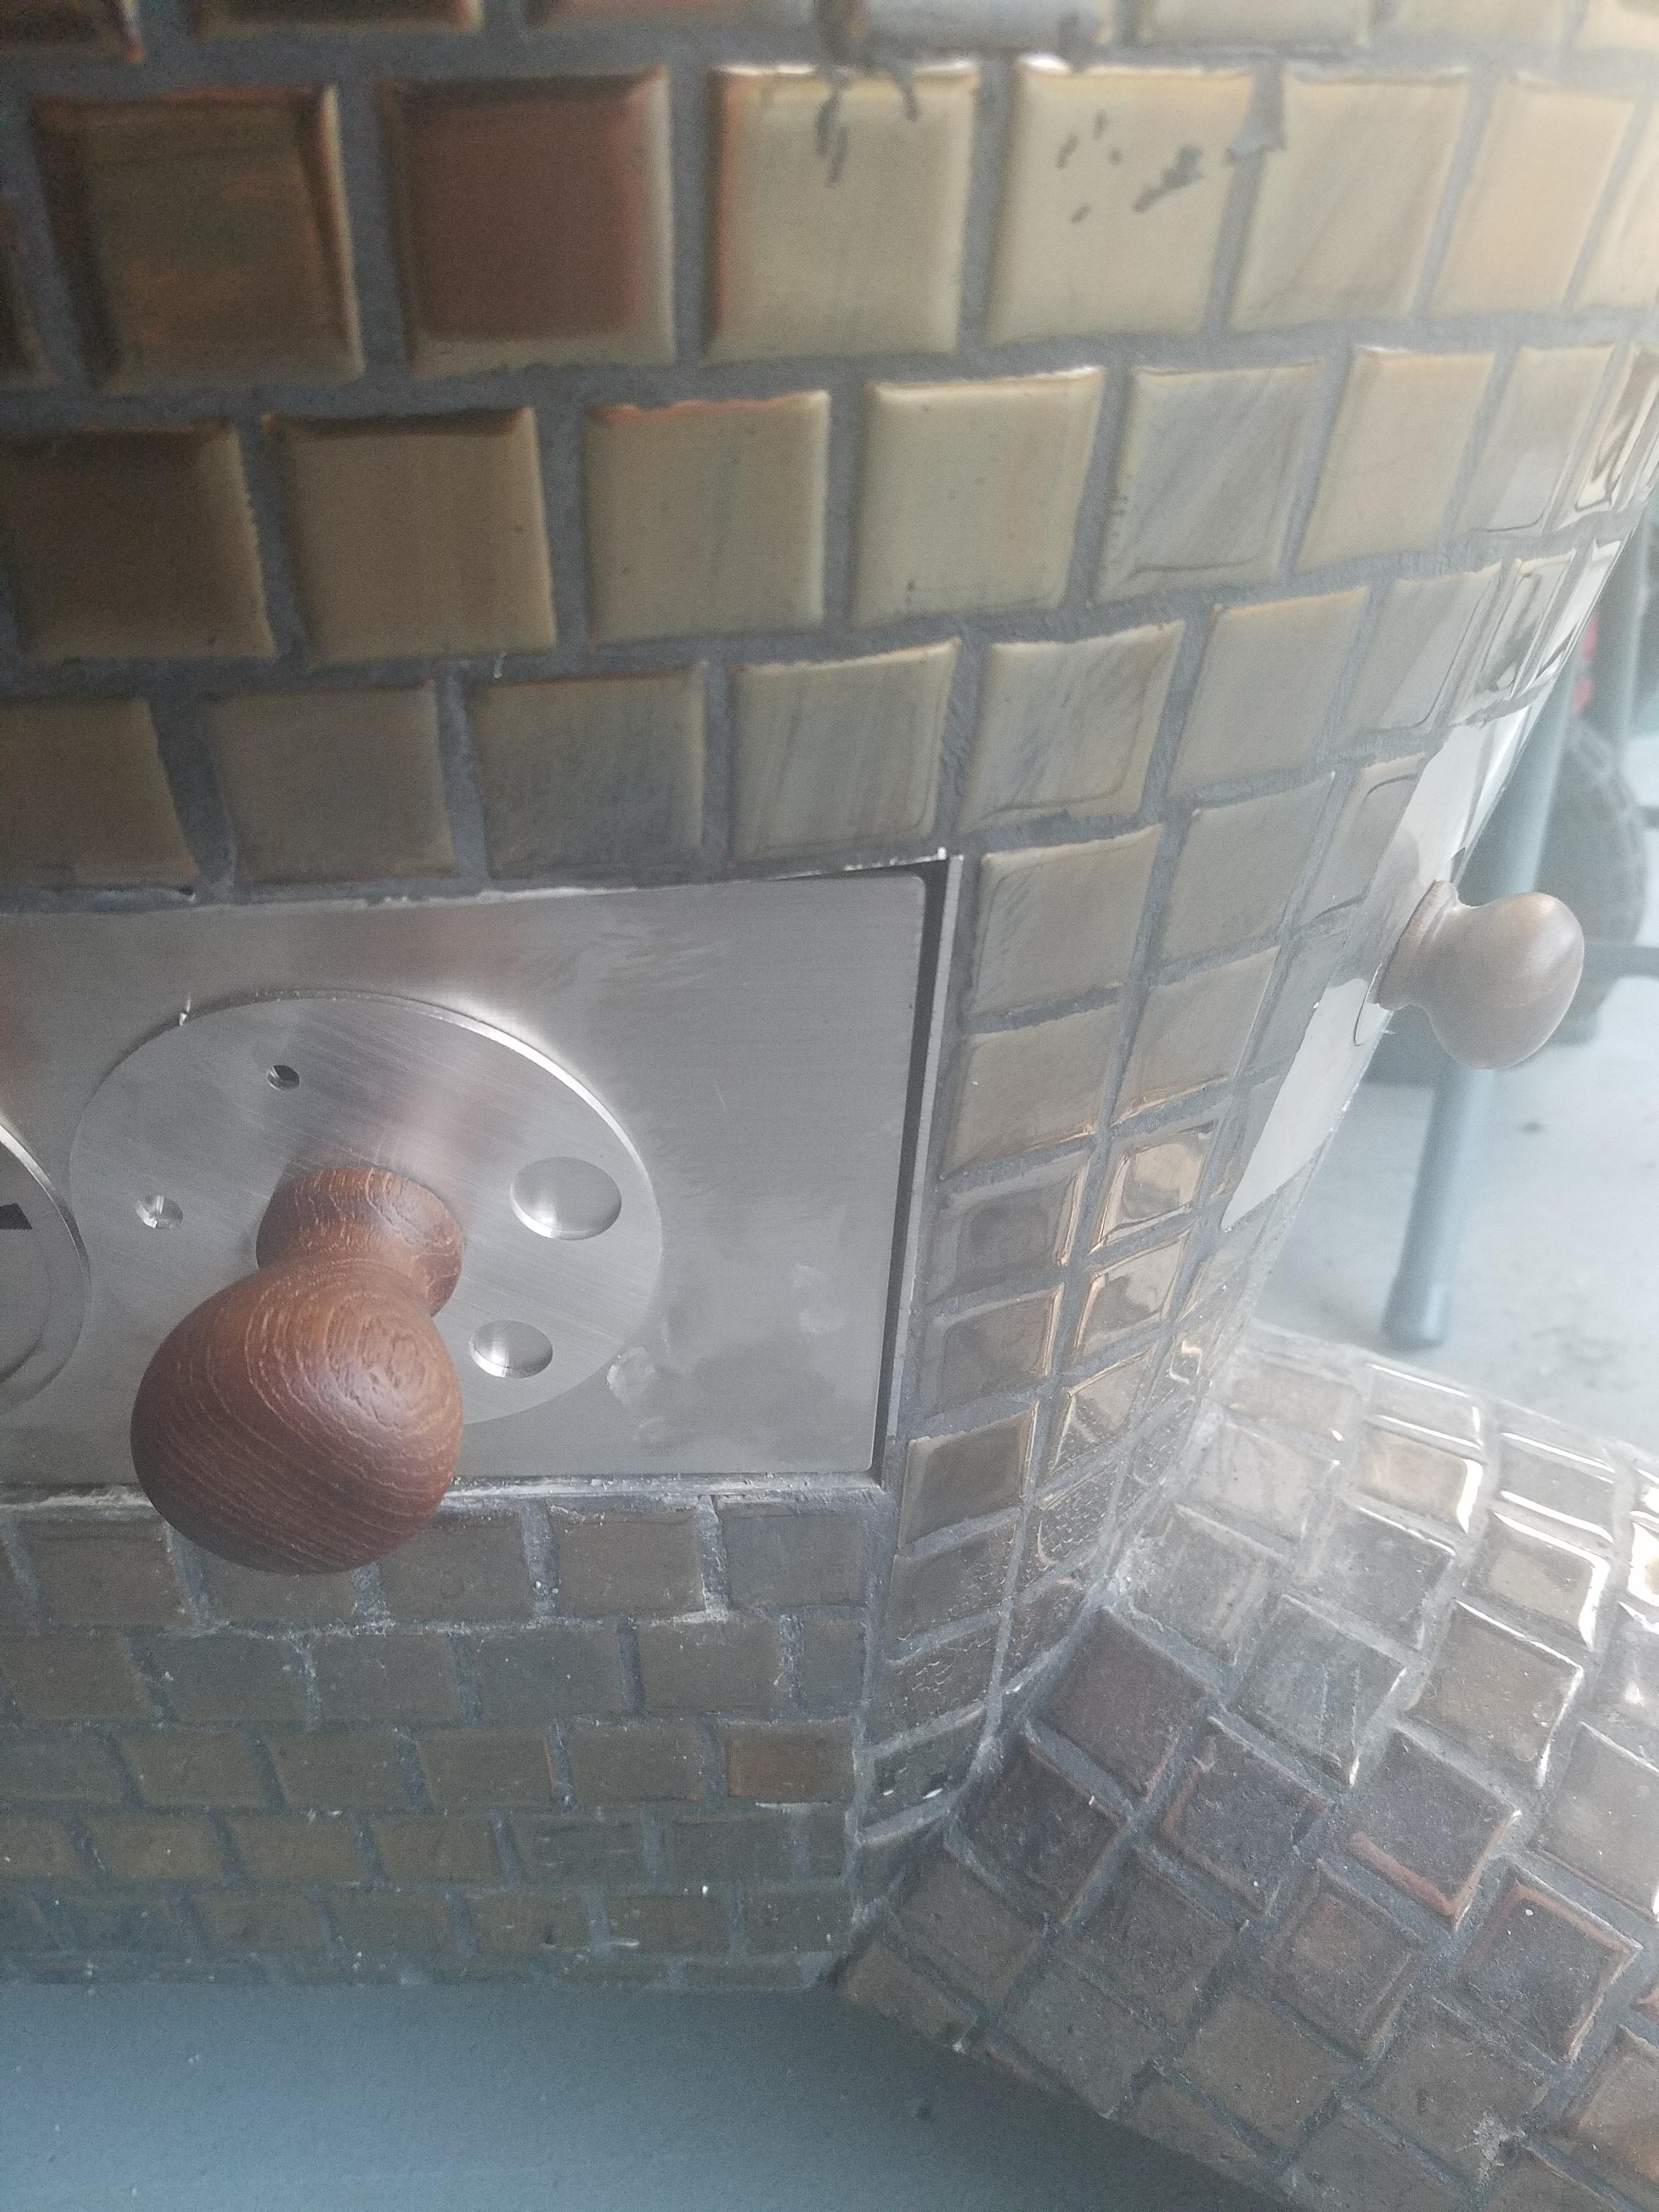
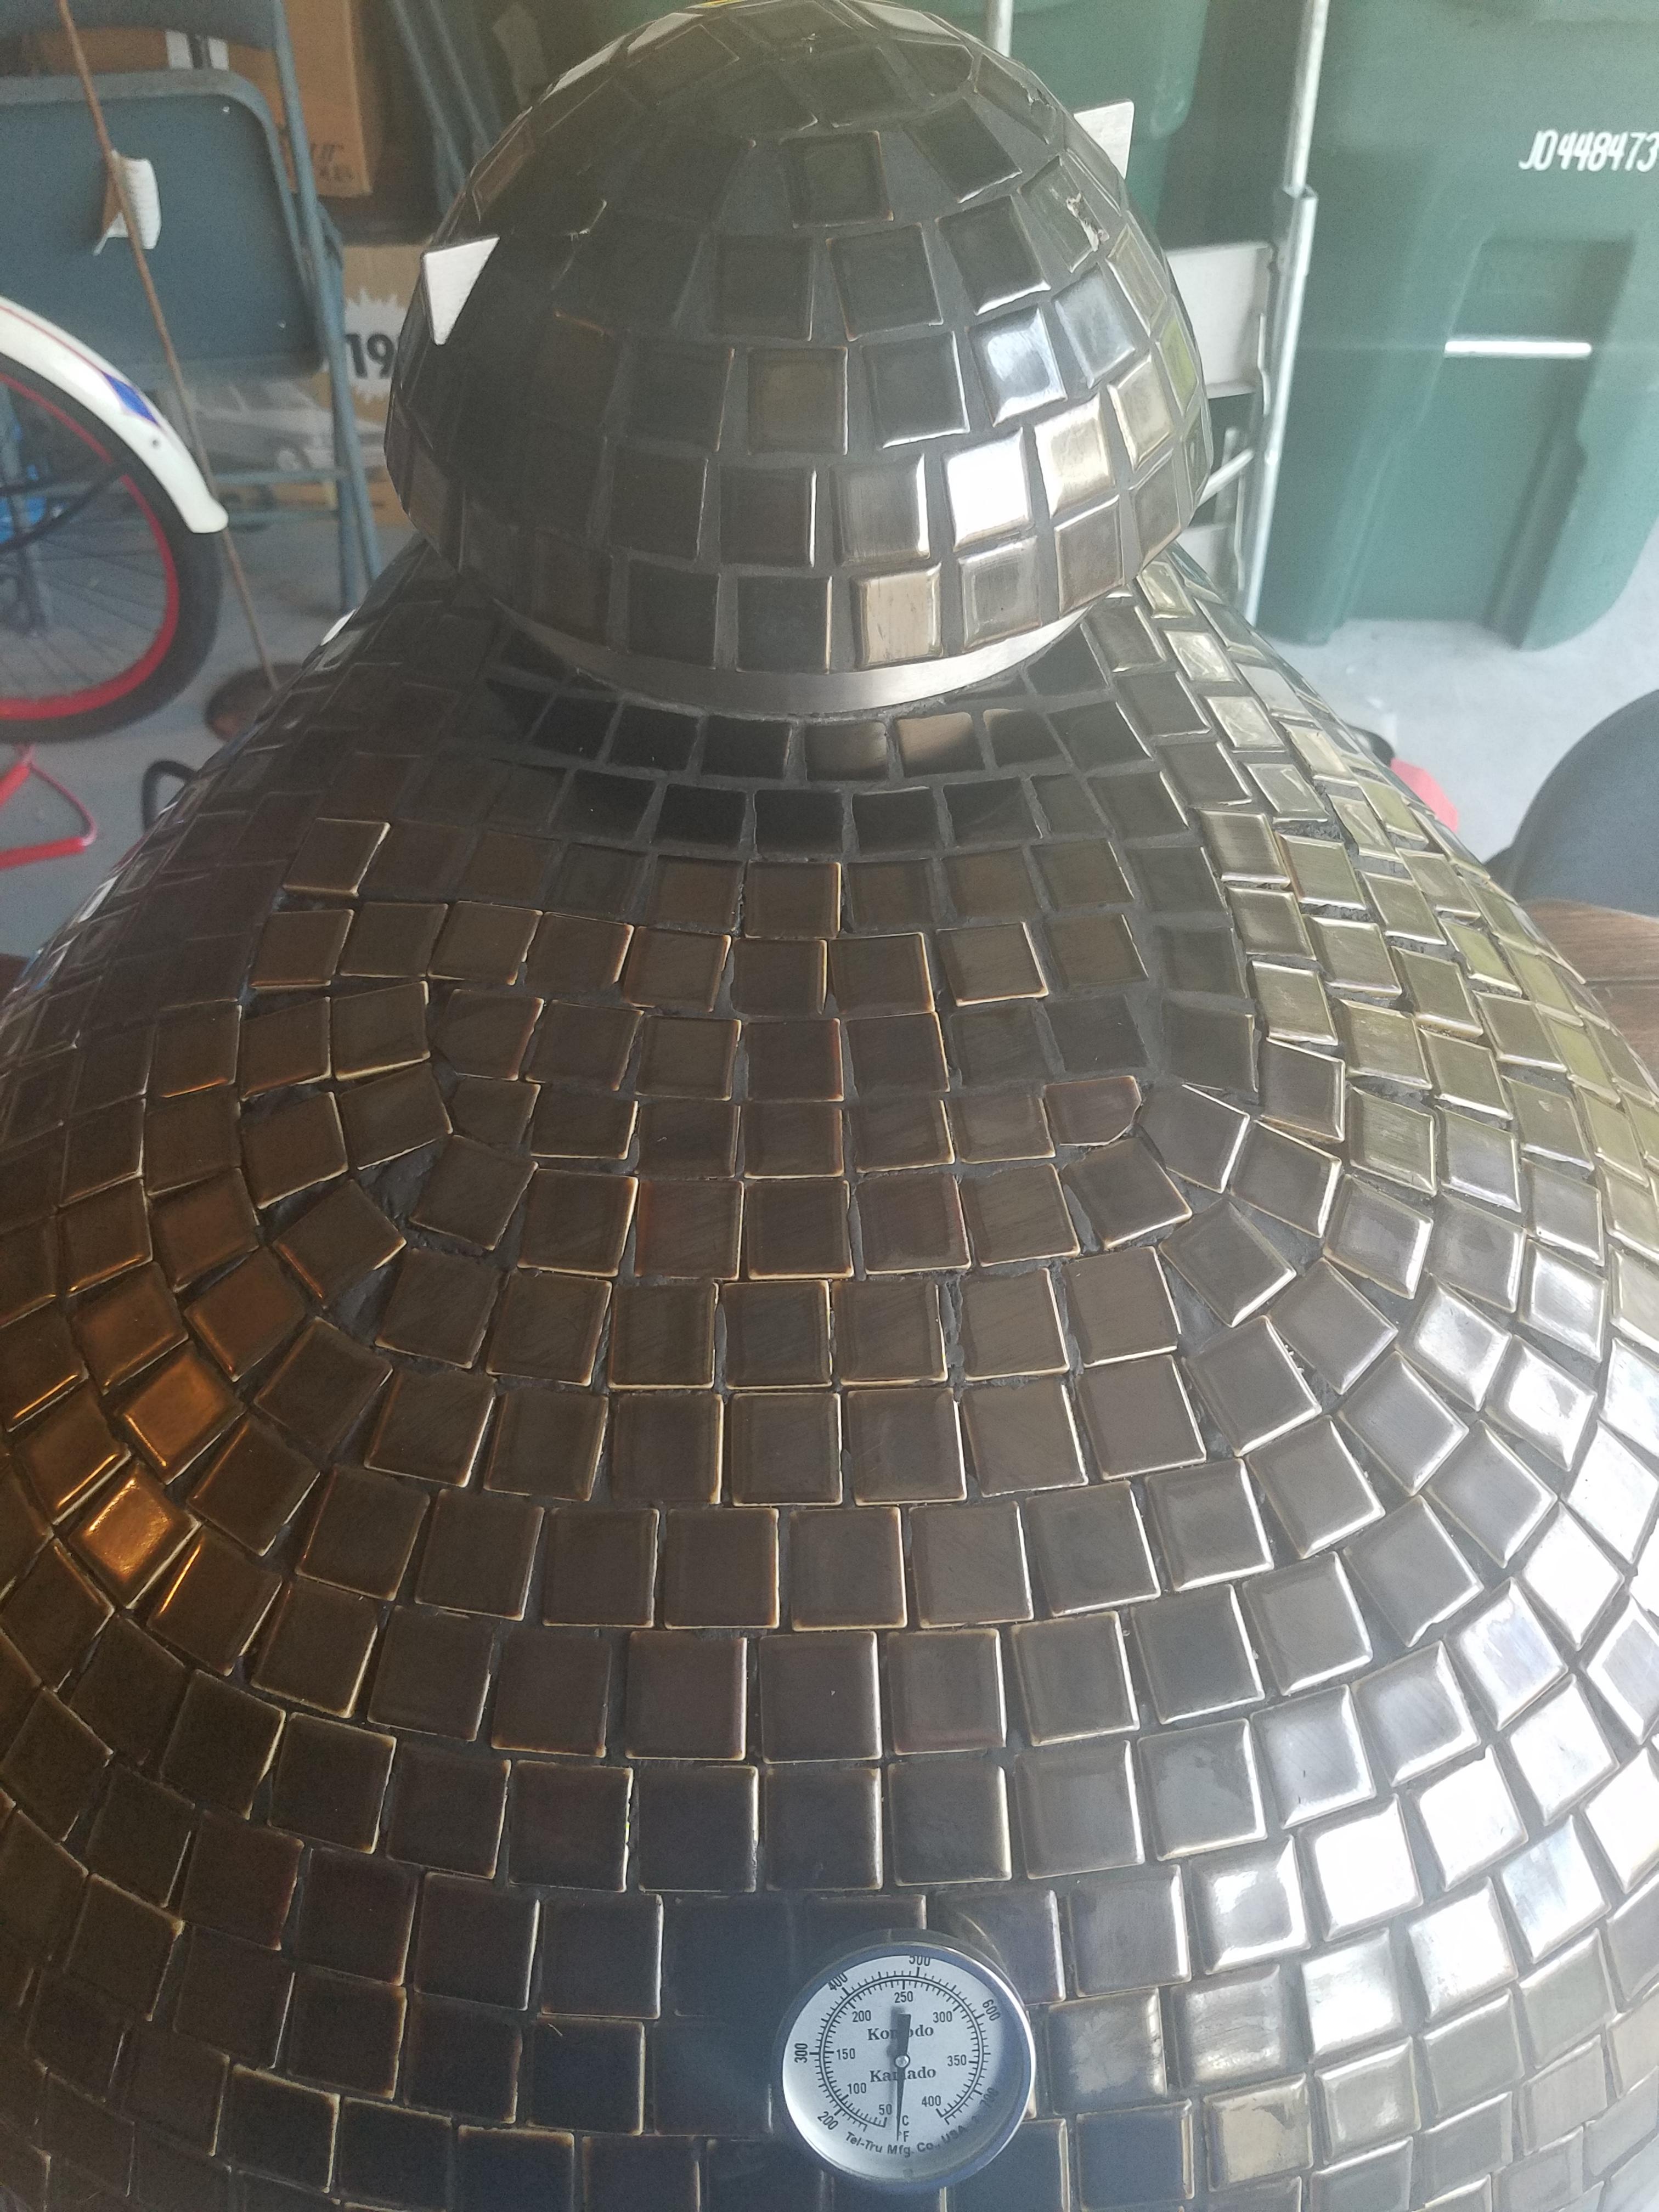
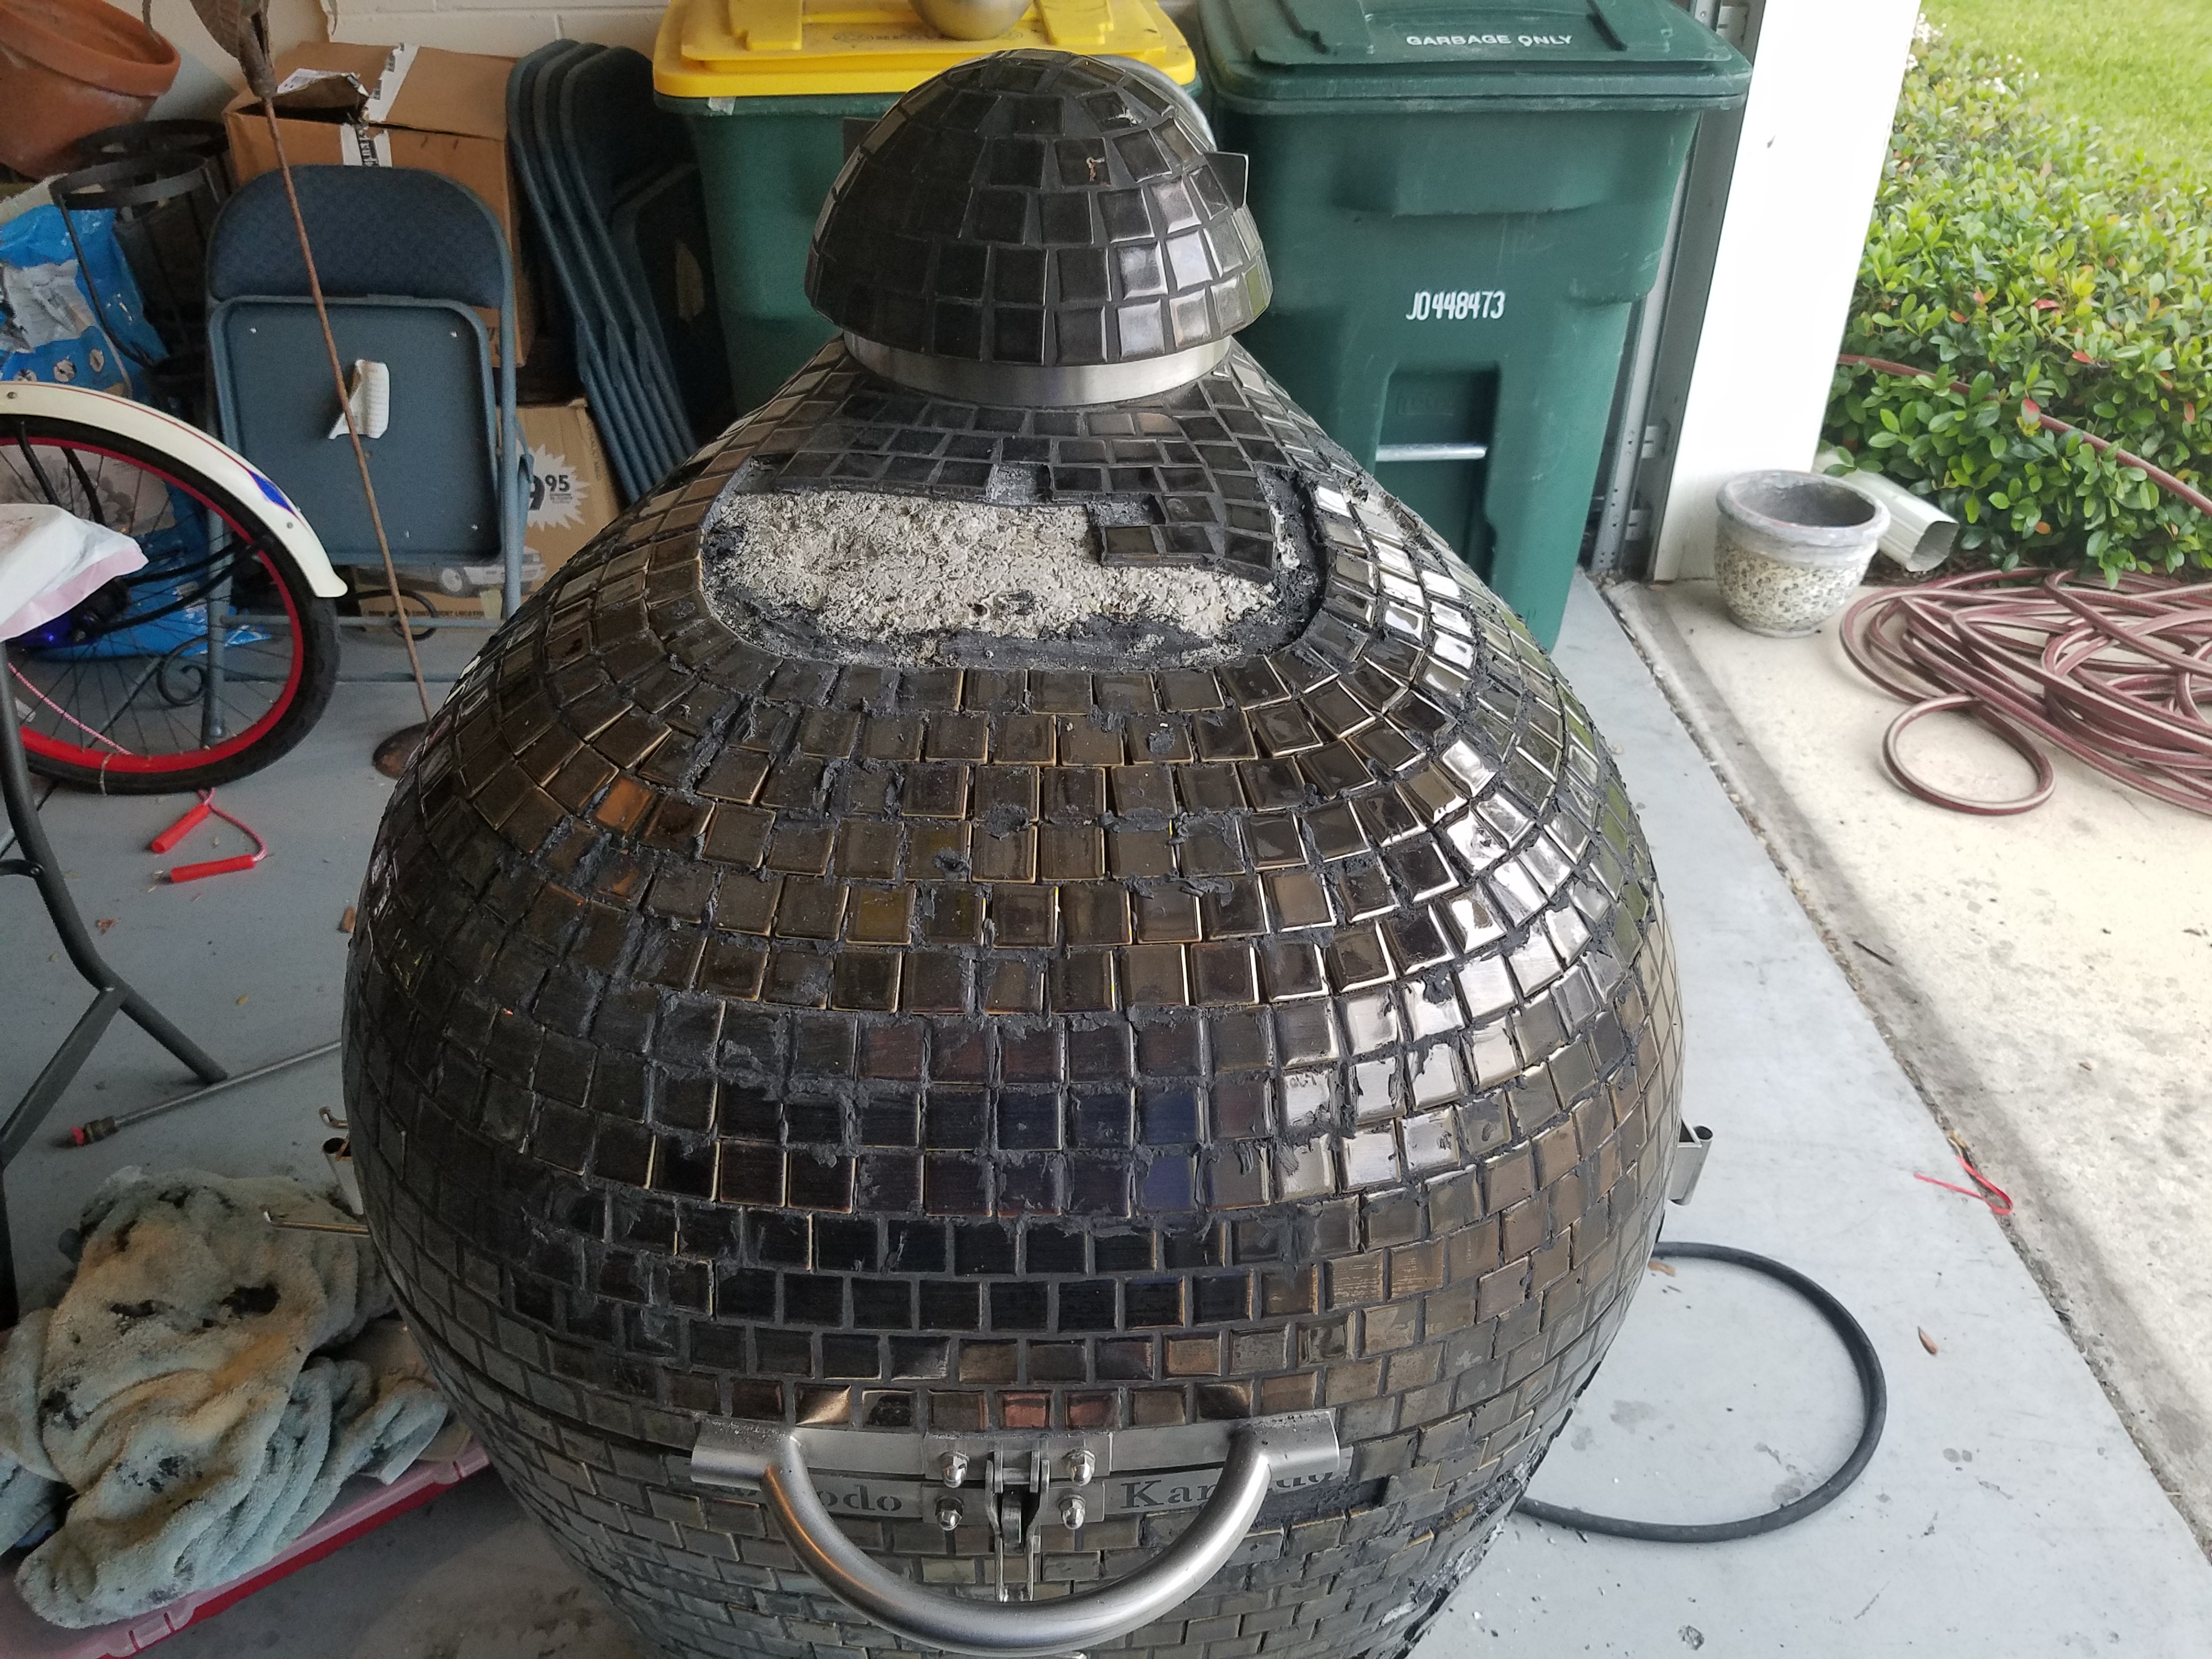
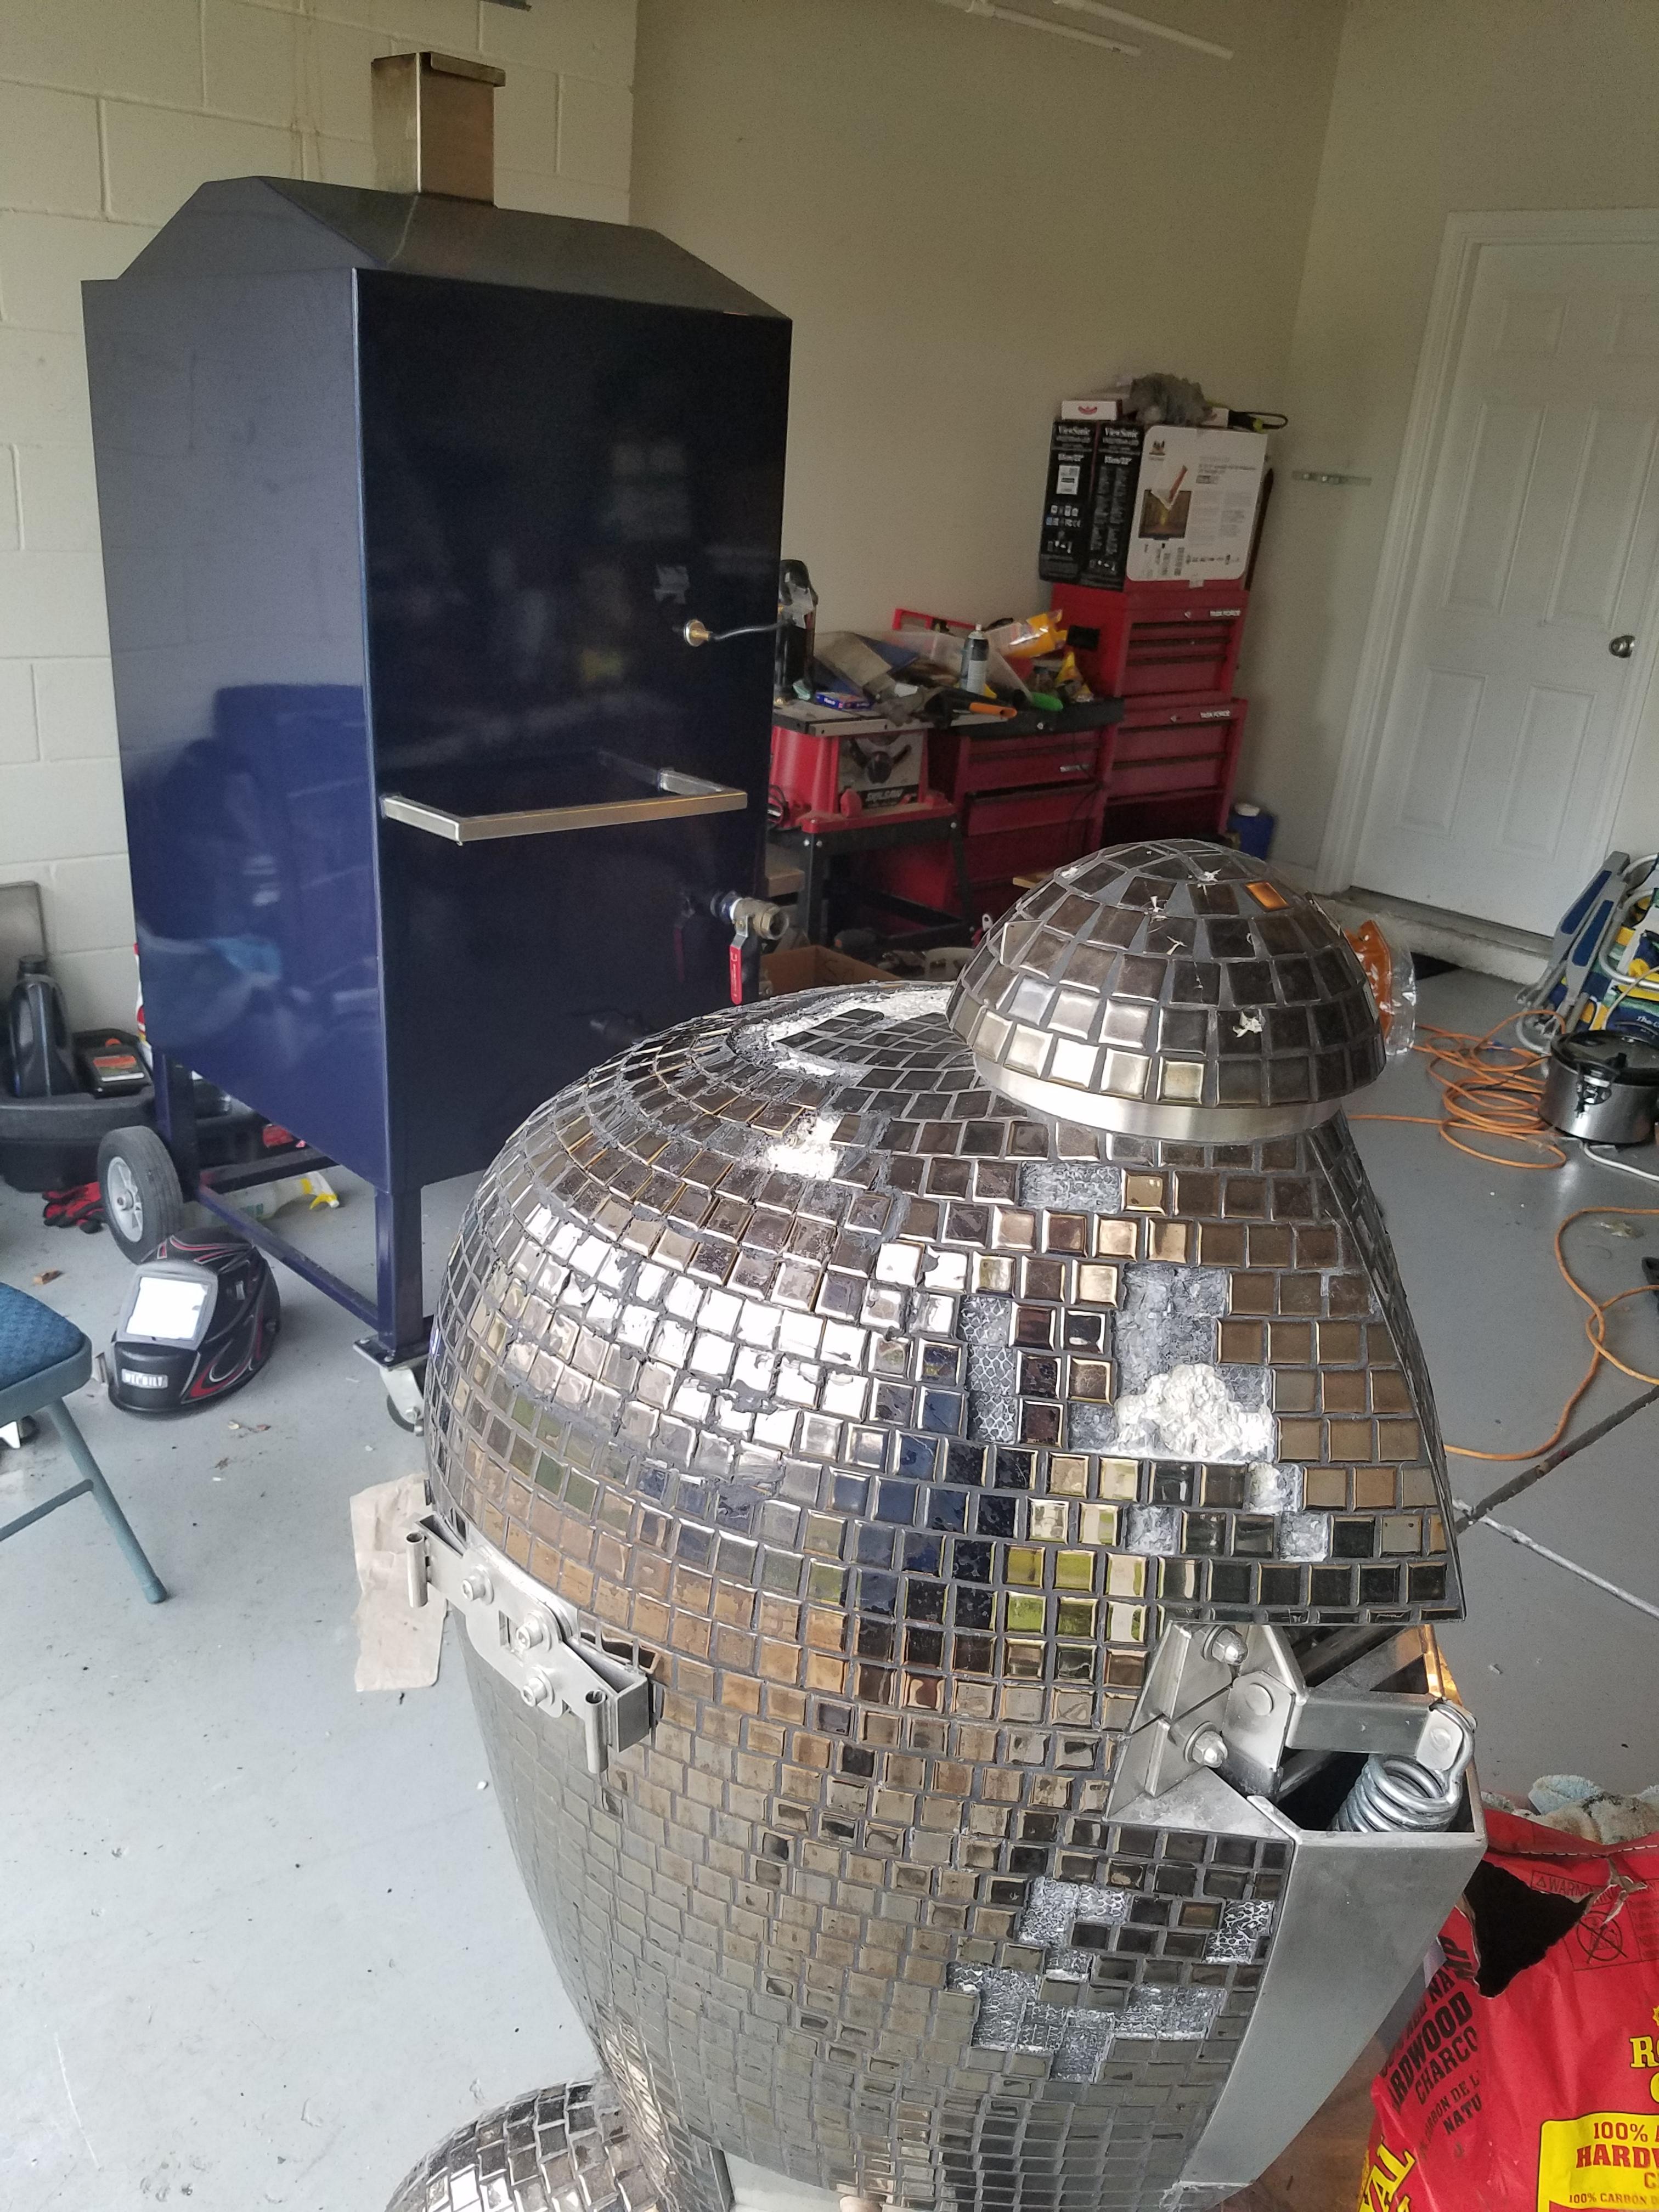
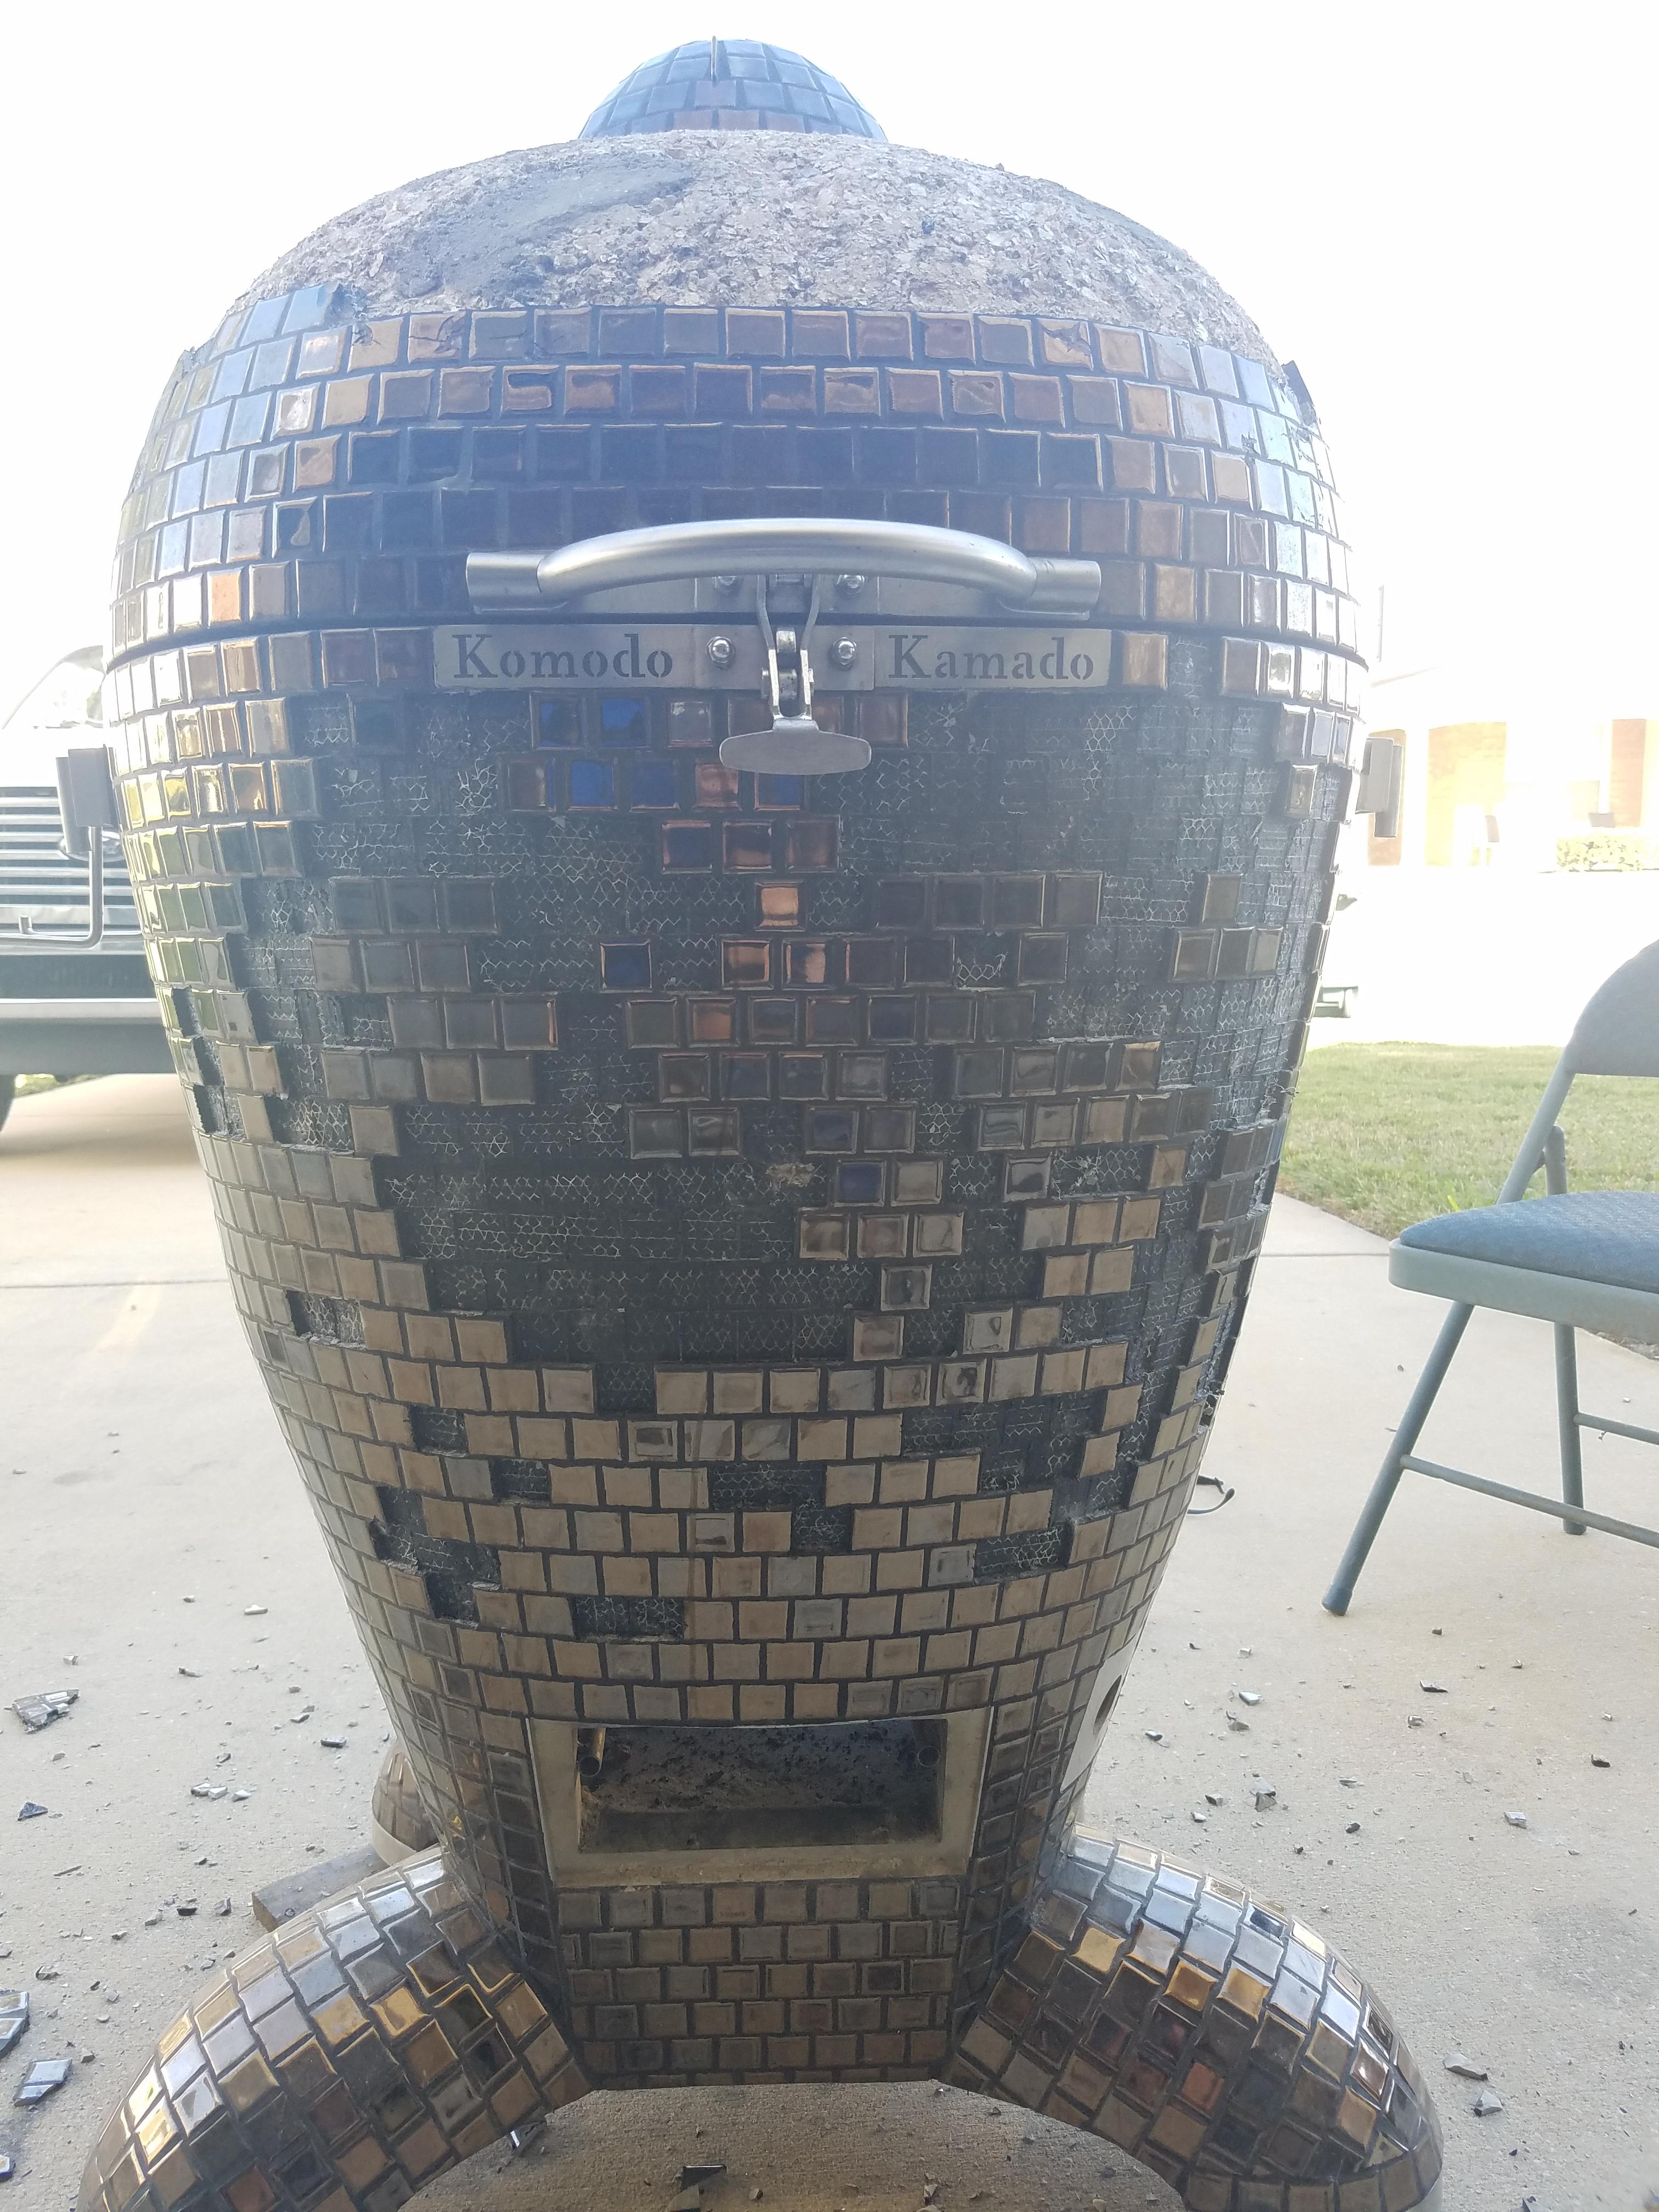
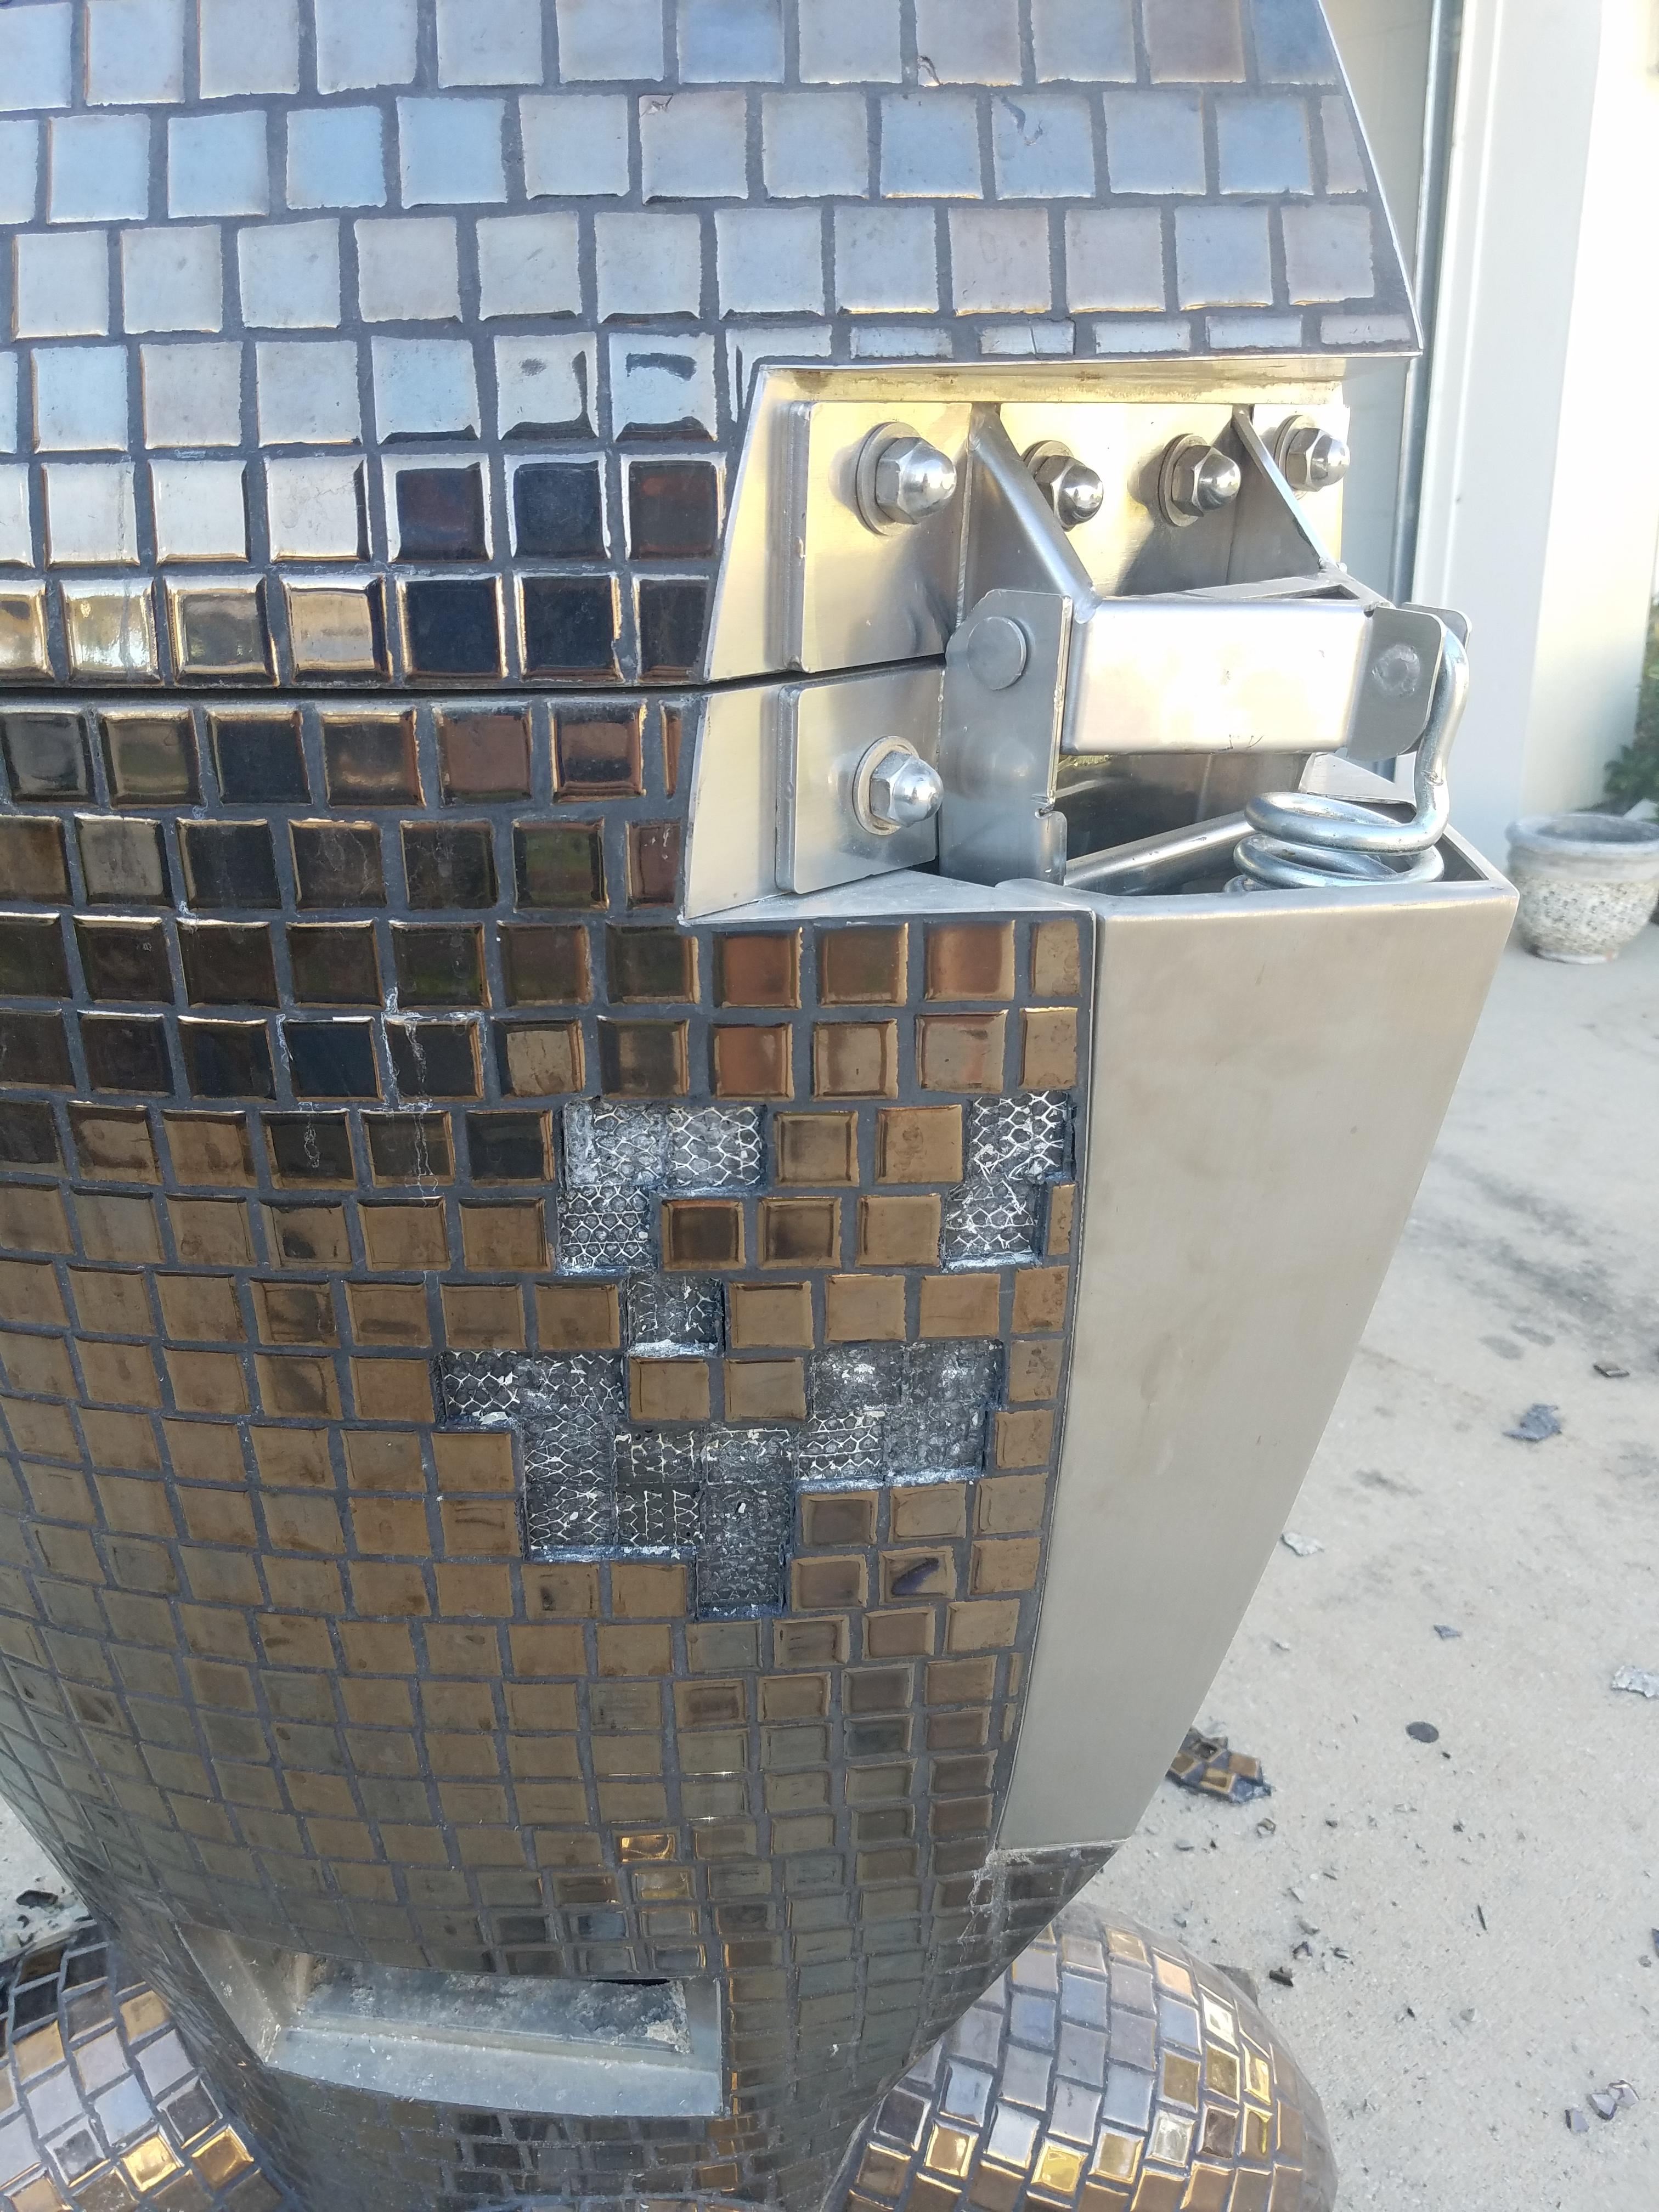
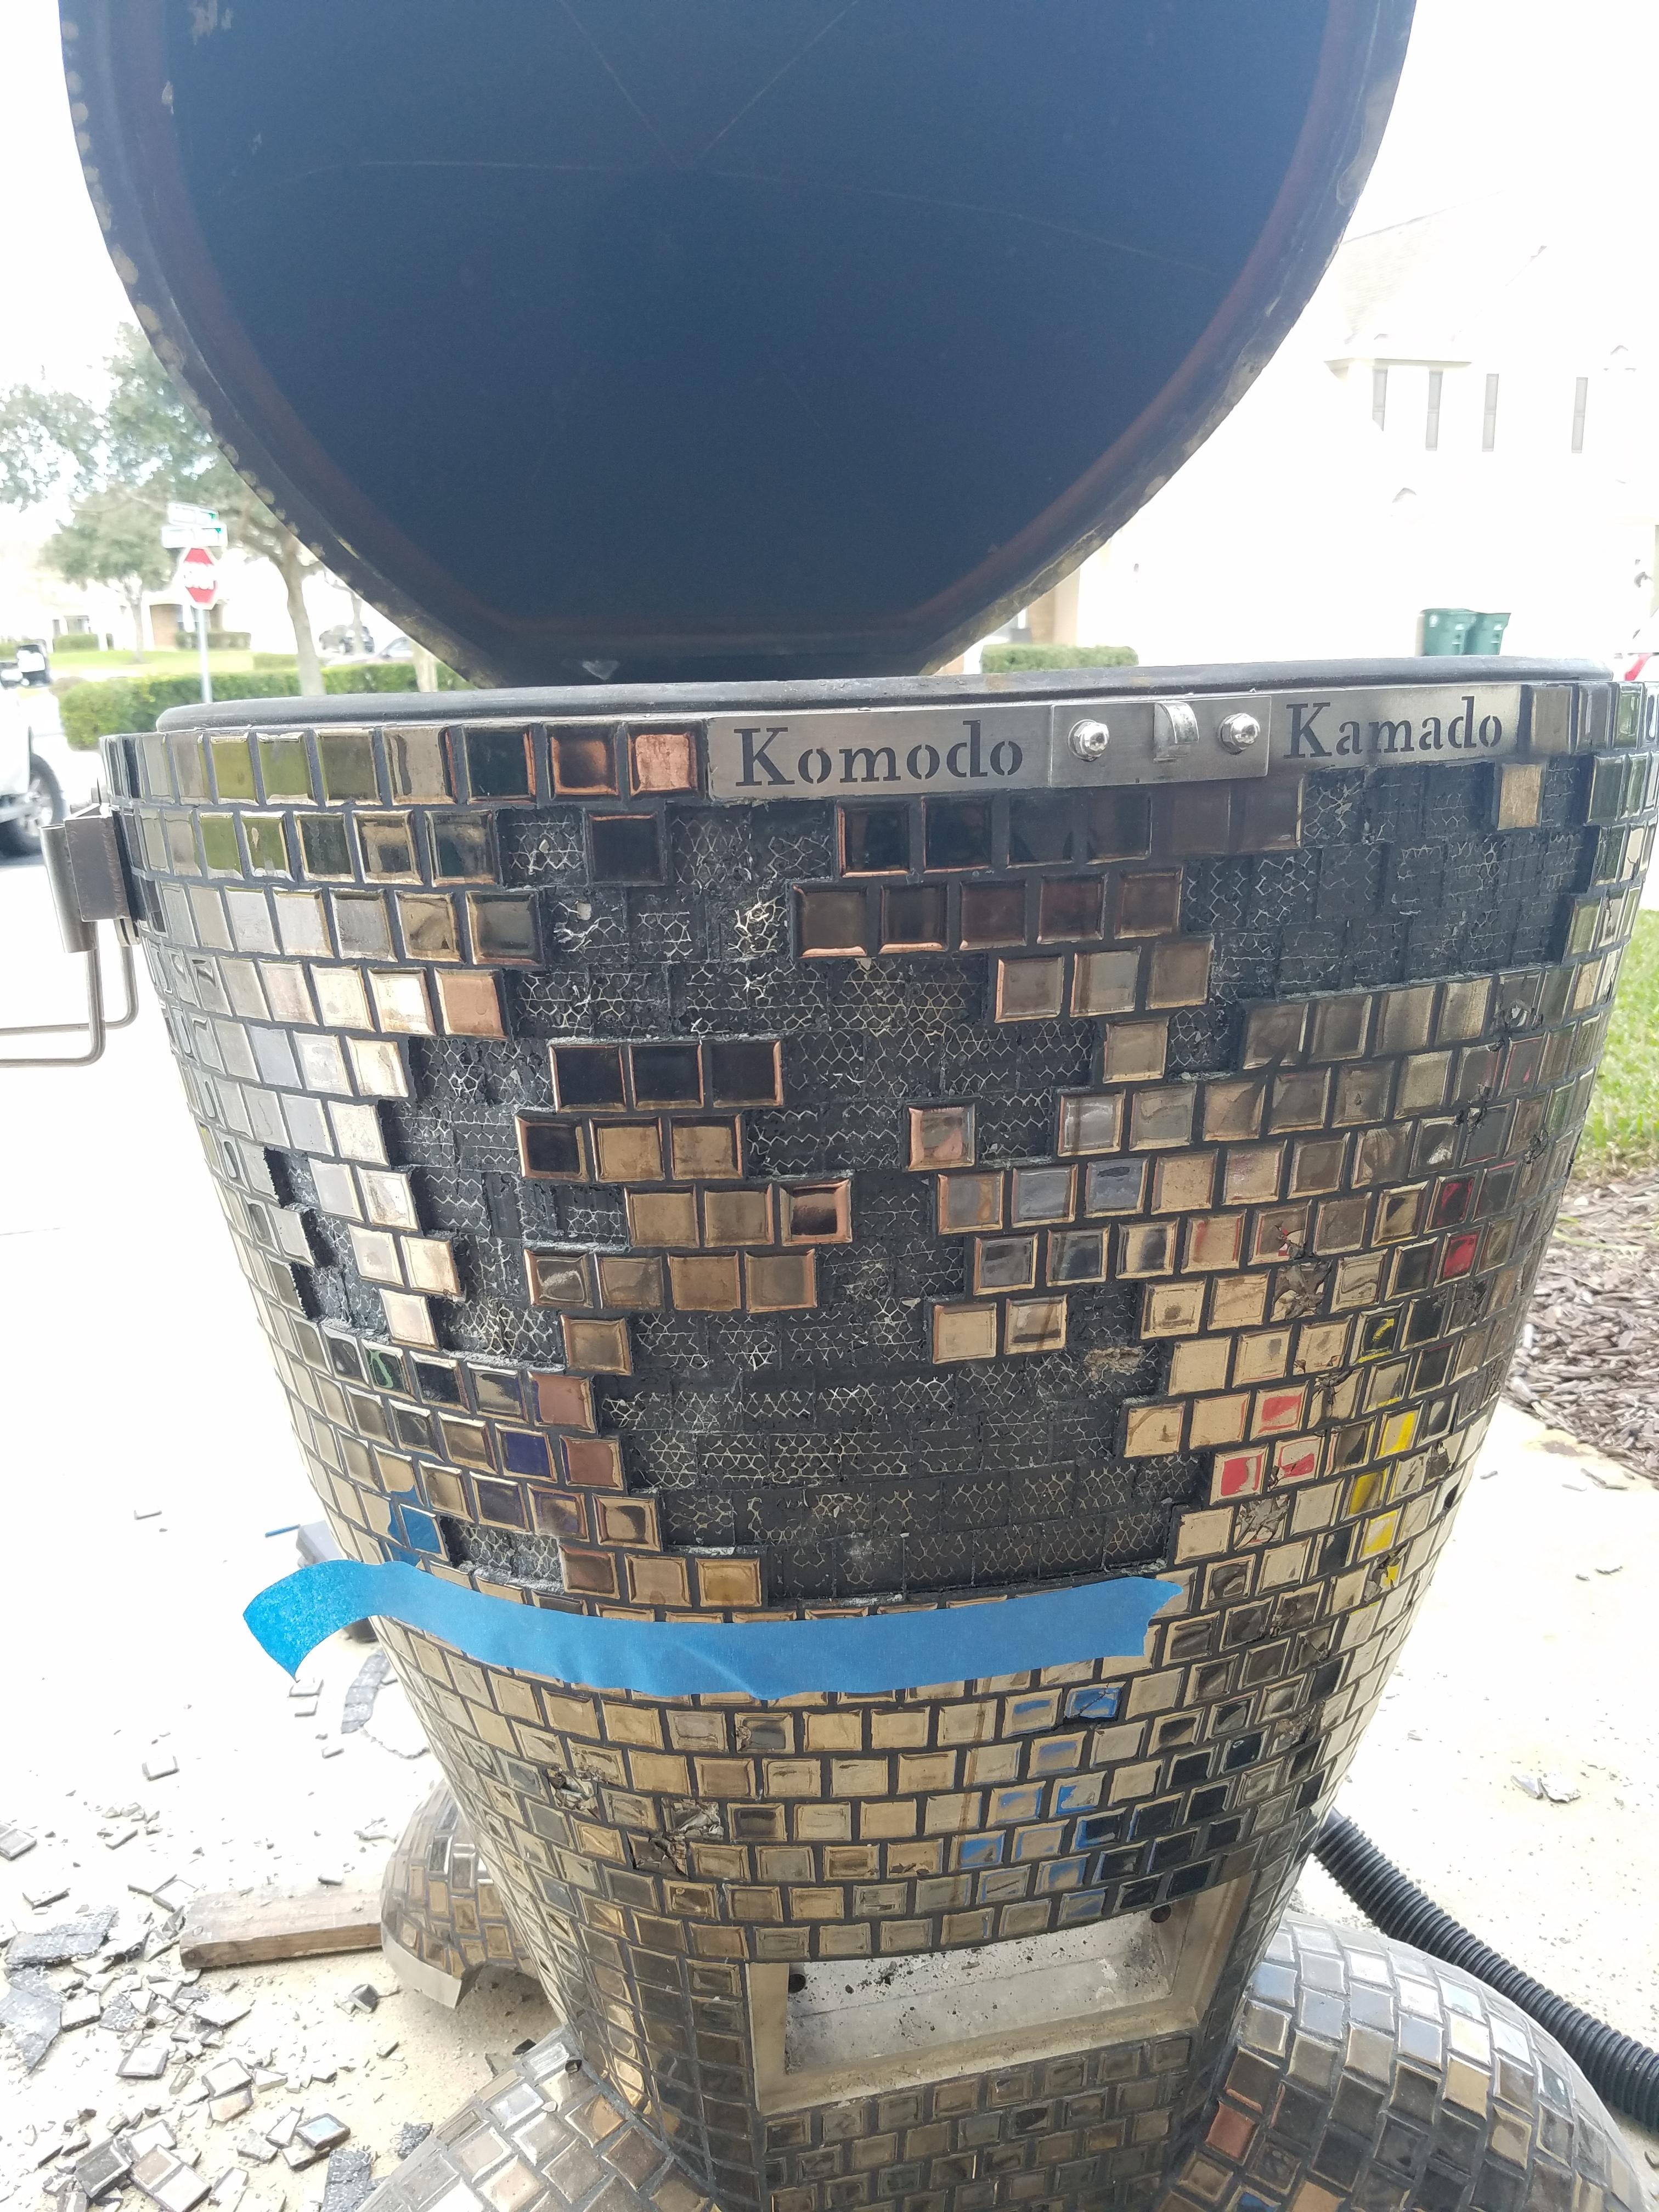
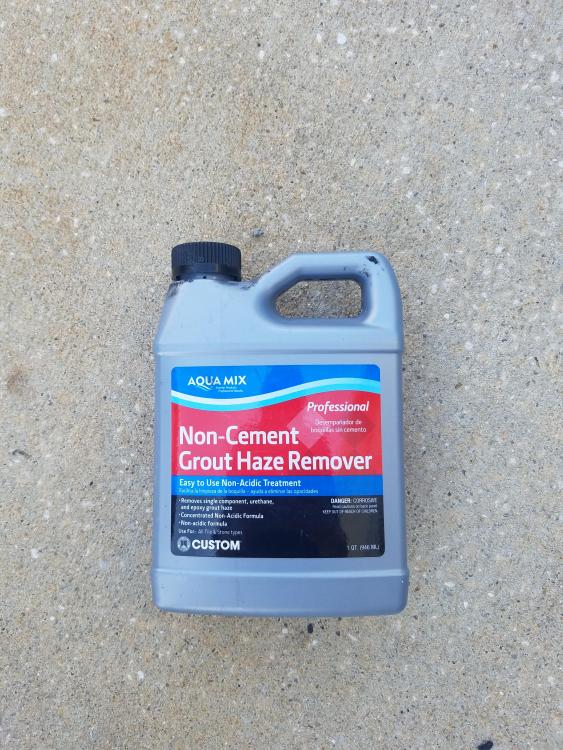
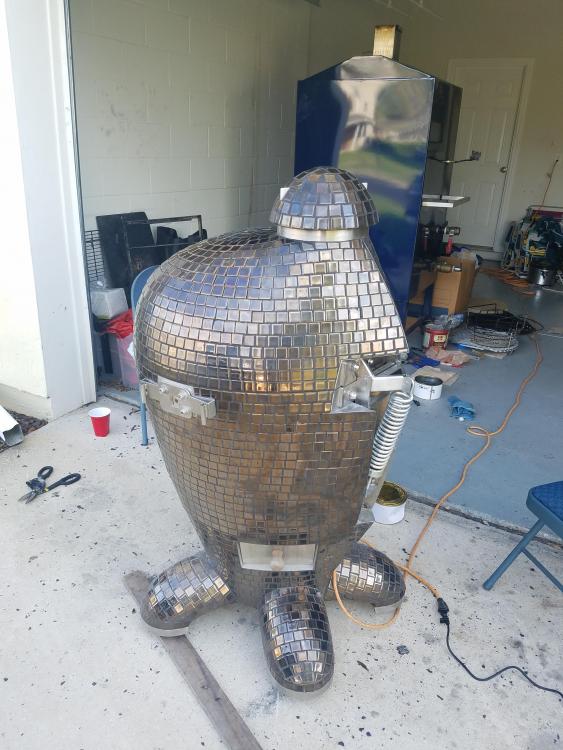
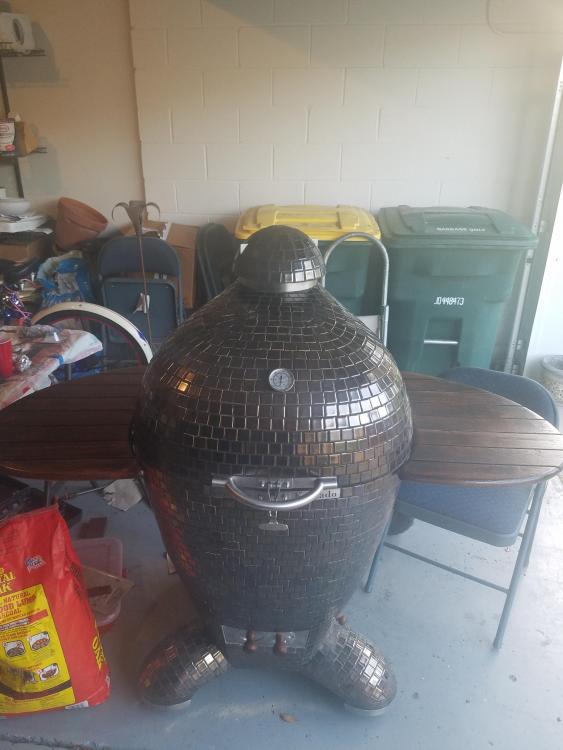
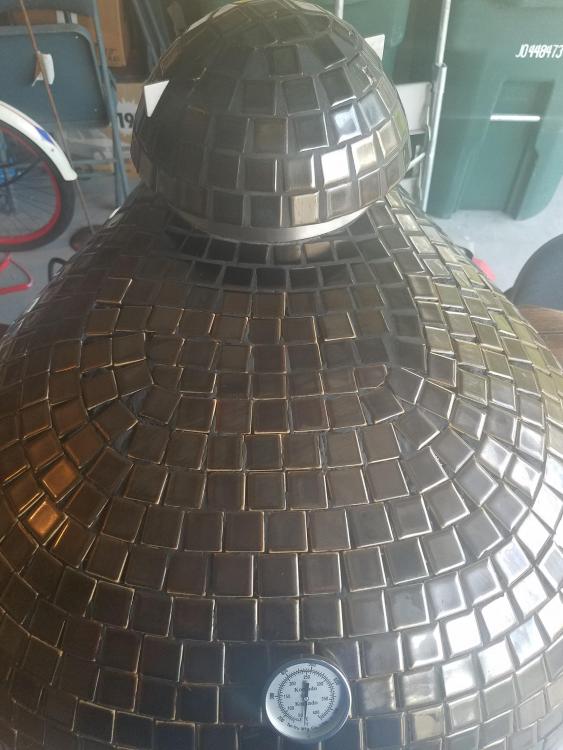
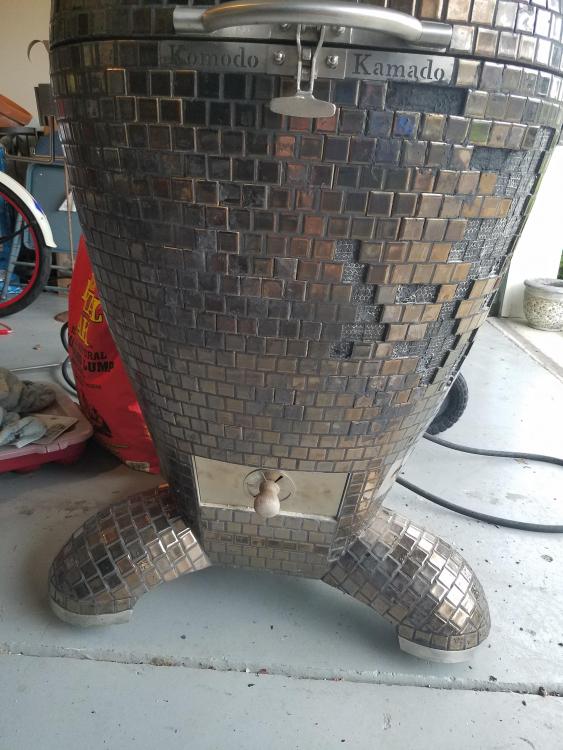
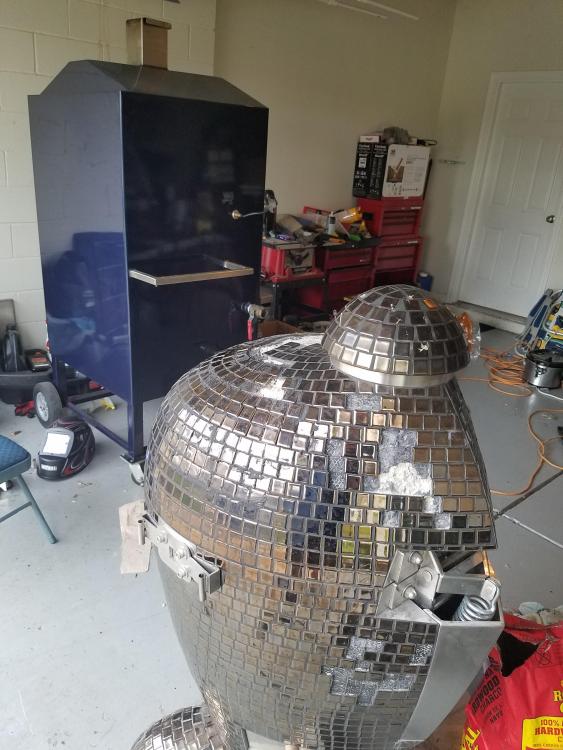
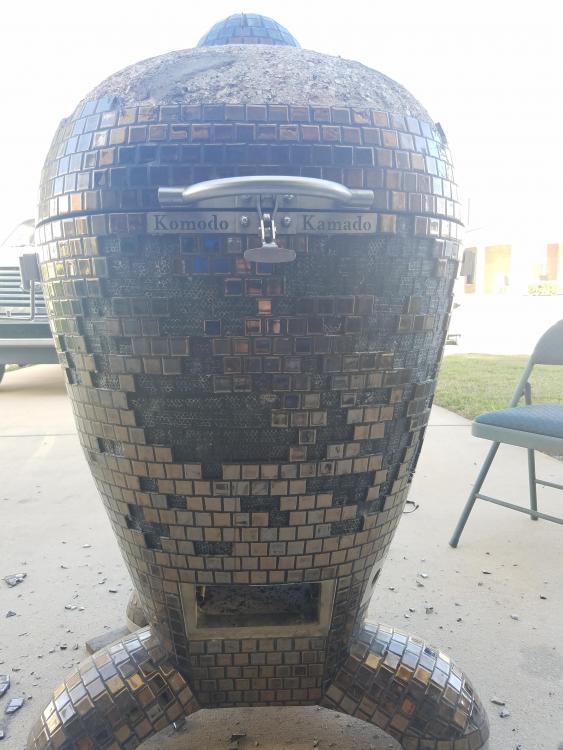
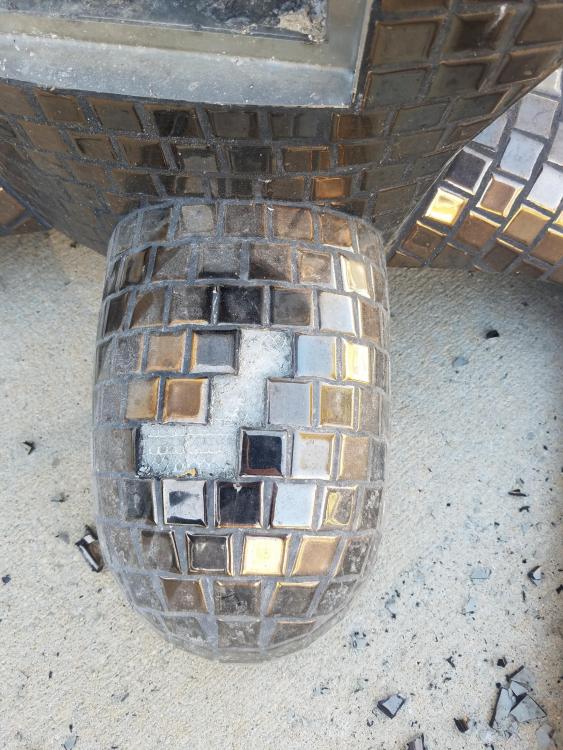
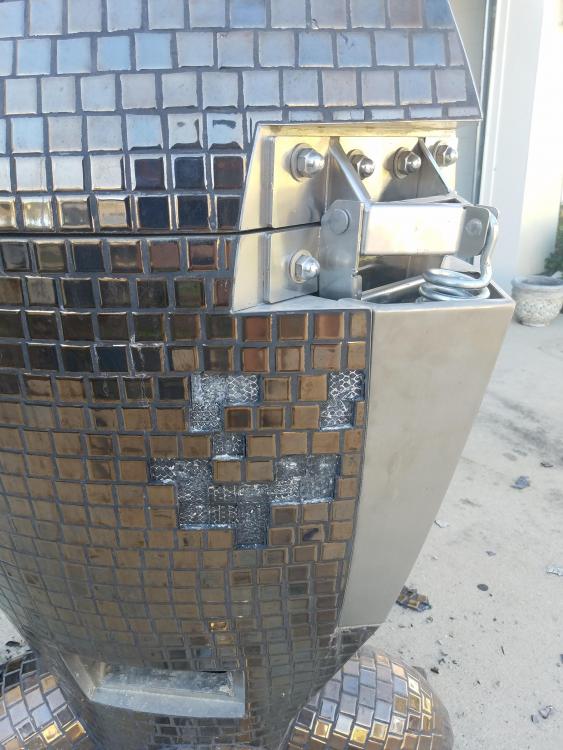
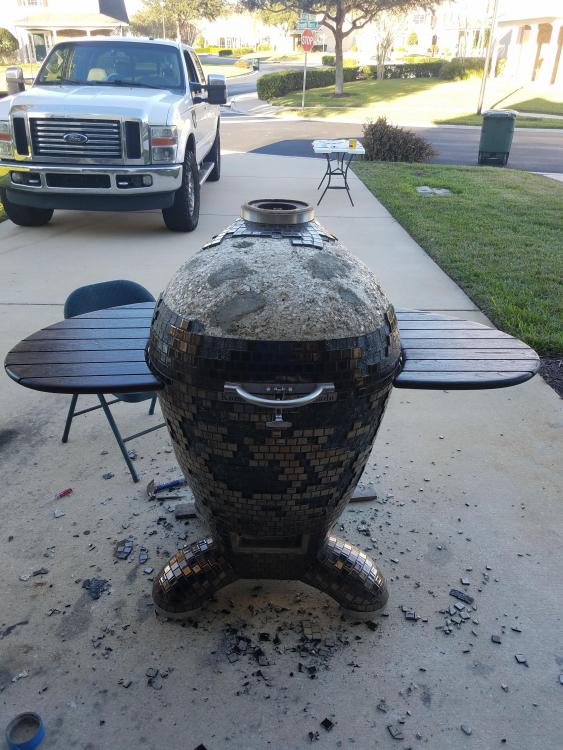
Nice to have a day off with nothing to do so decided to get in a quick 18 holes in the morning and try and finish up all the tiles with my dad in the afternoon. The biggest issue I was having is removing the dried acrylic material holding the tiles on. Doing some research on the internet they said to use water as a lubricant when using that nylon brush drill attachment. I stopped by Home Depot and they had a non-cement grout haze remover and with that and a little elbow grease everything came off. Here is the substance I used After removing all the leftover residue from the first day of laying tiles I went about adding the remaining ones. After a few hours I have finally finished with all the tiles. I didnt want to mess with the cap so I am leaving that as is with a few broken tiles on it. I ran into some gap issues and used heavy duty wire cutters to cut tiles in shapes that I need. The only thing left now is filling in some large gaps on the lid and polishing up the tiles to make a nice shine. I just ordered the permatex off amazon to install the gasket. I will do this last thing. I got the new thermo installed and the shelves put back together. One thing I need to adjust is the new dual damper door. The bottom right corner doesnt sit flush with the frame. It sits out about 3/16". I am so close to finishing this project. I think 1 or 2 more solid days of work and she is good to go. Here are the pictures with all tiles on. It is not an expert job but unless you are close you really cant tell. Alot of the tiles that sit out will be smoothed over with added acrylic grout. here is the gap in the draft door. The bottom right corner almost comes out flush to the edge. When I push on it to sit flush with the frame behind it it moves that 1/8"-3/16"


-
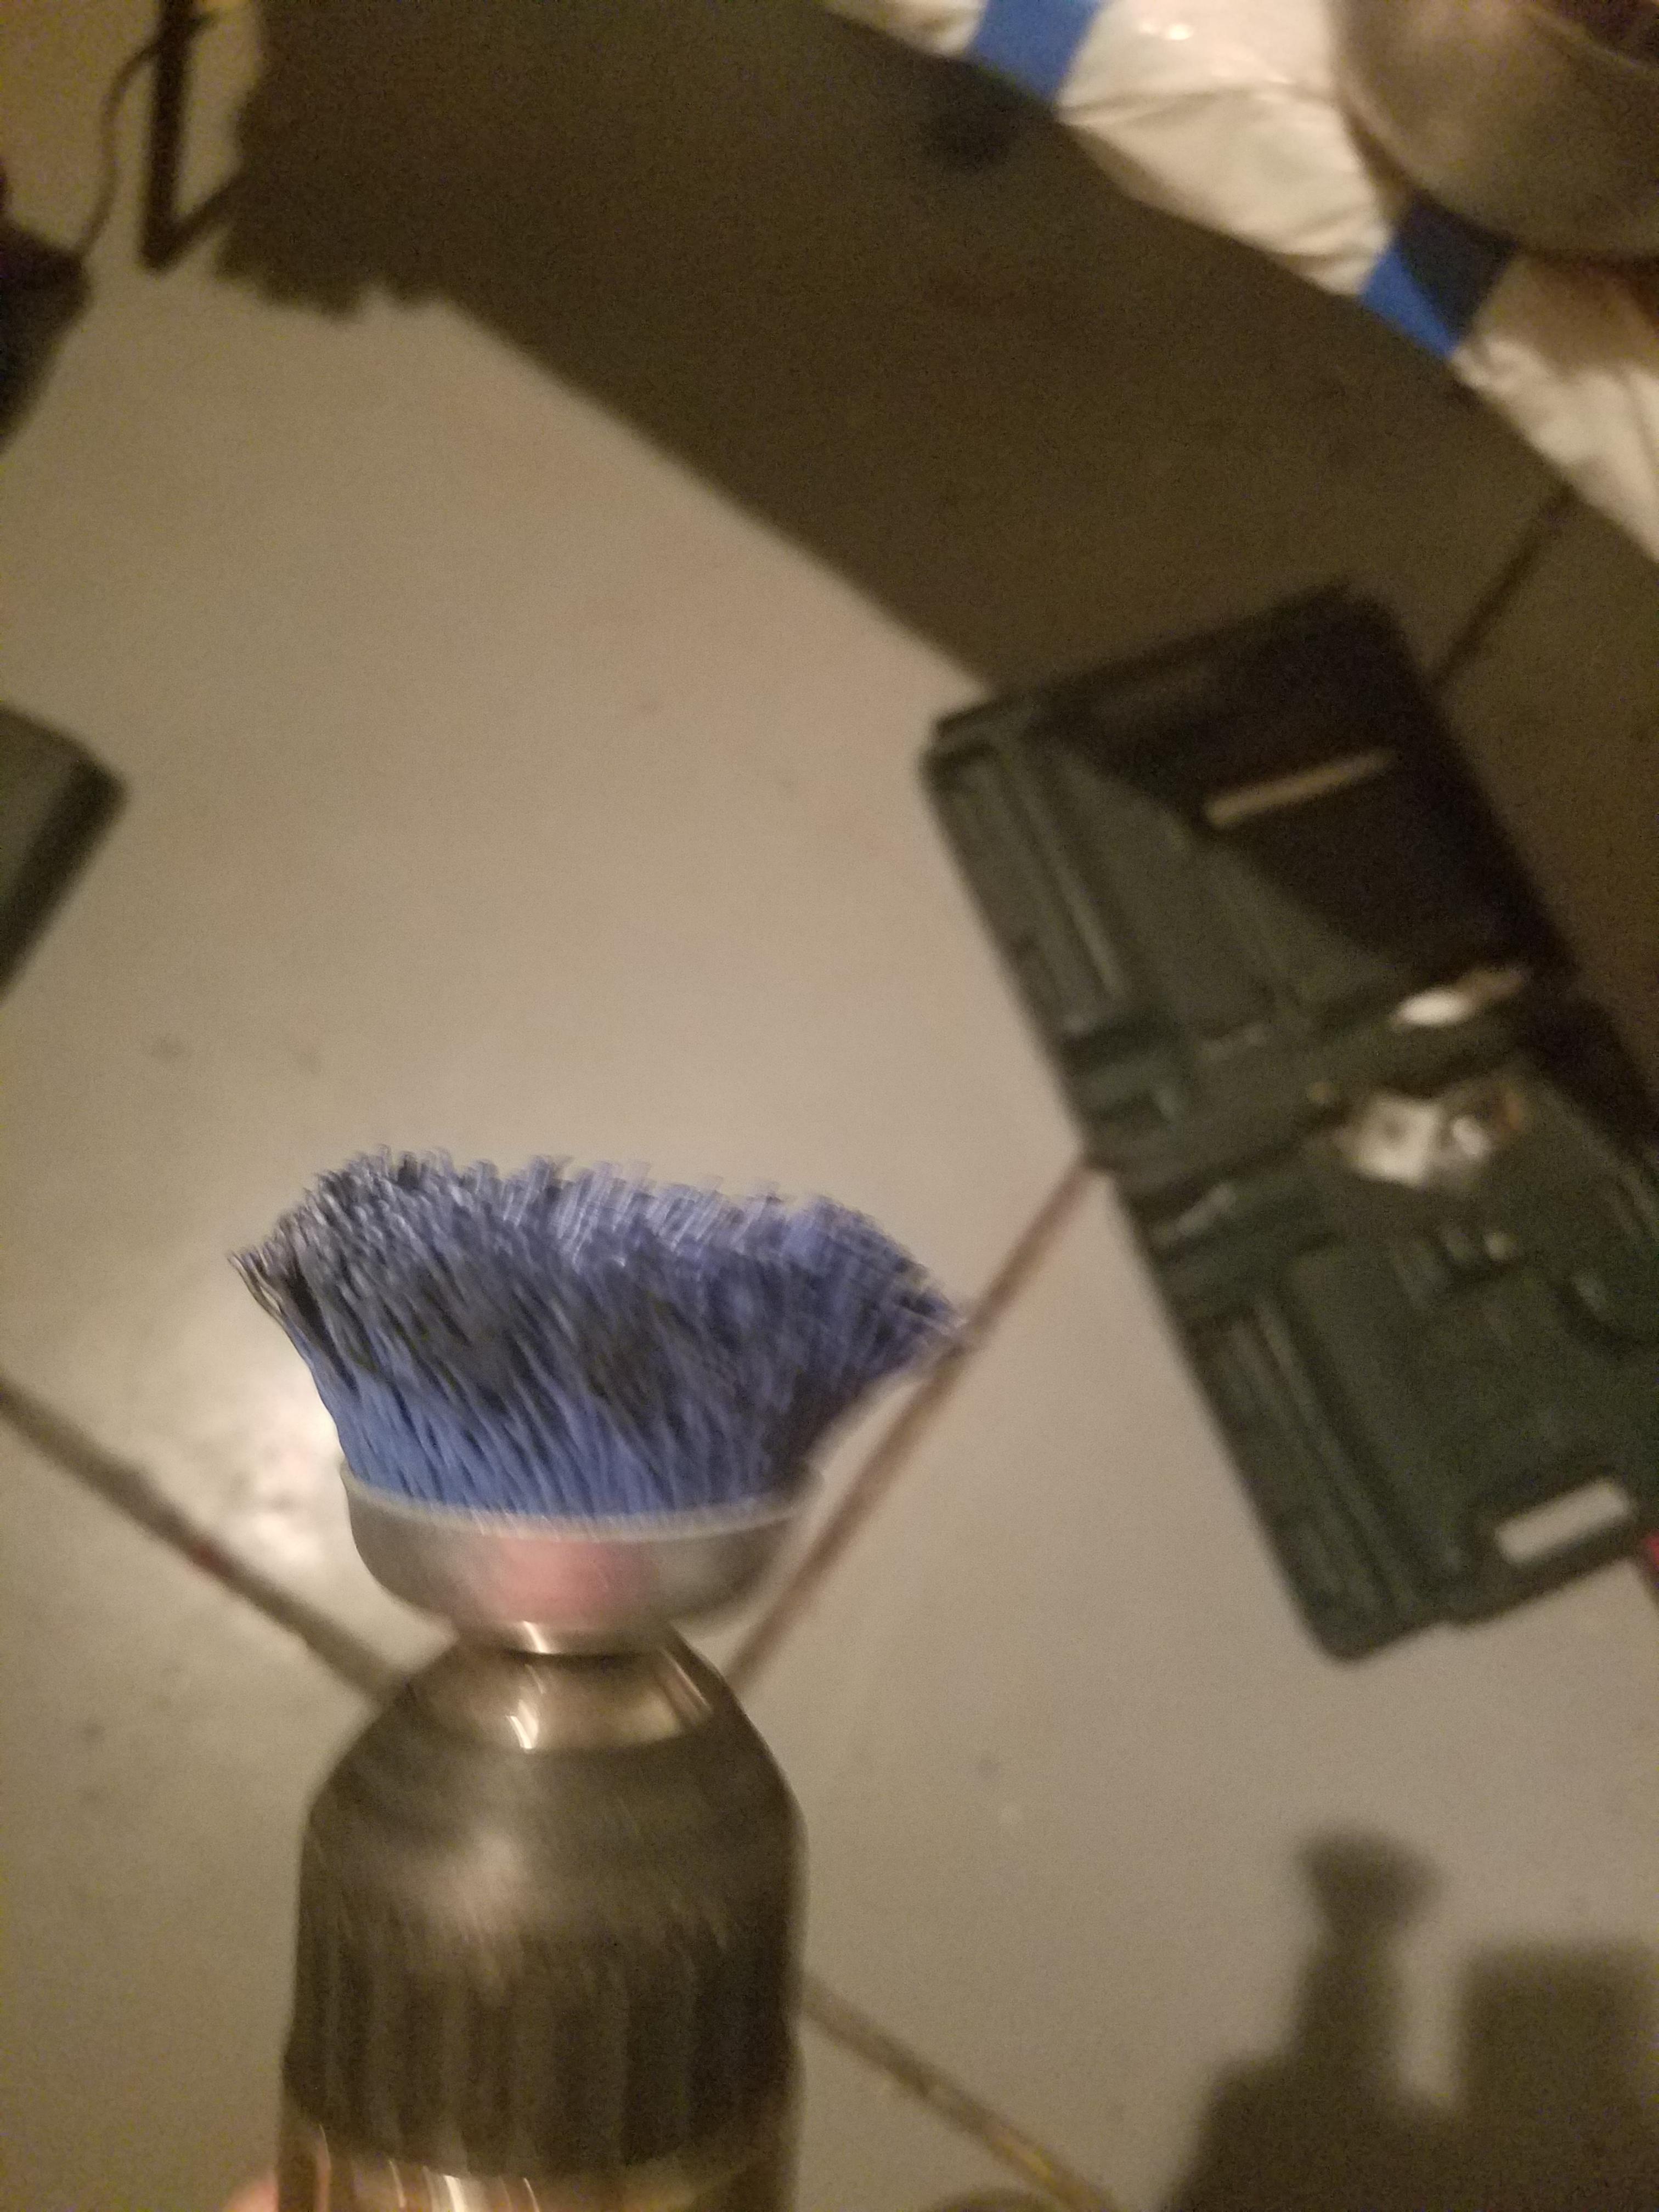
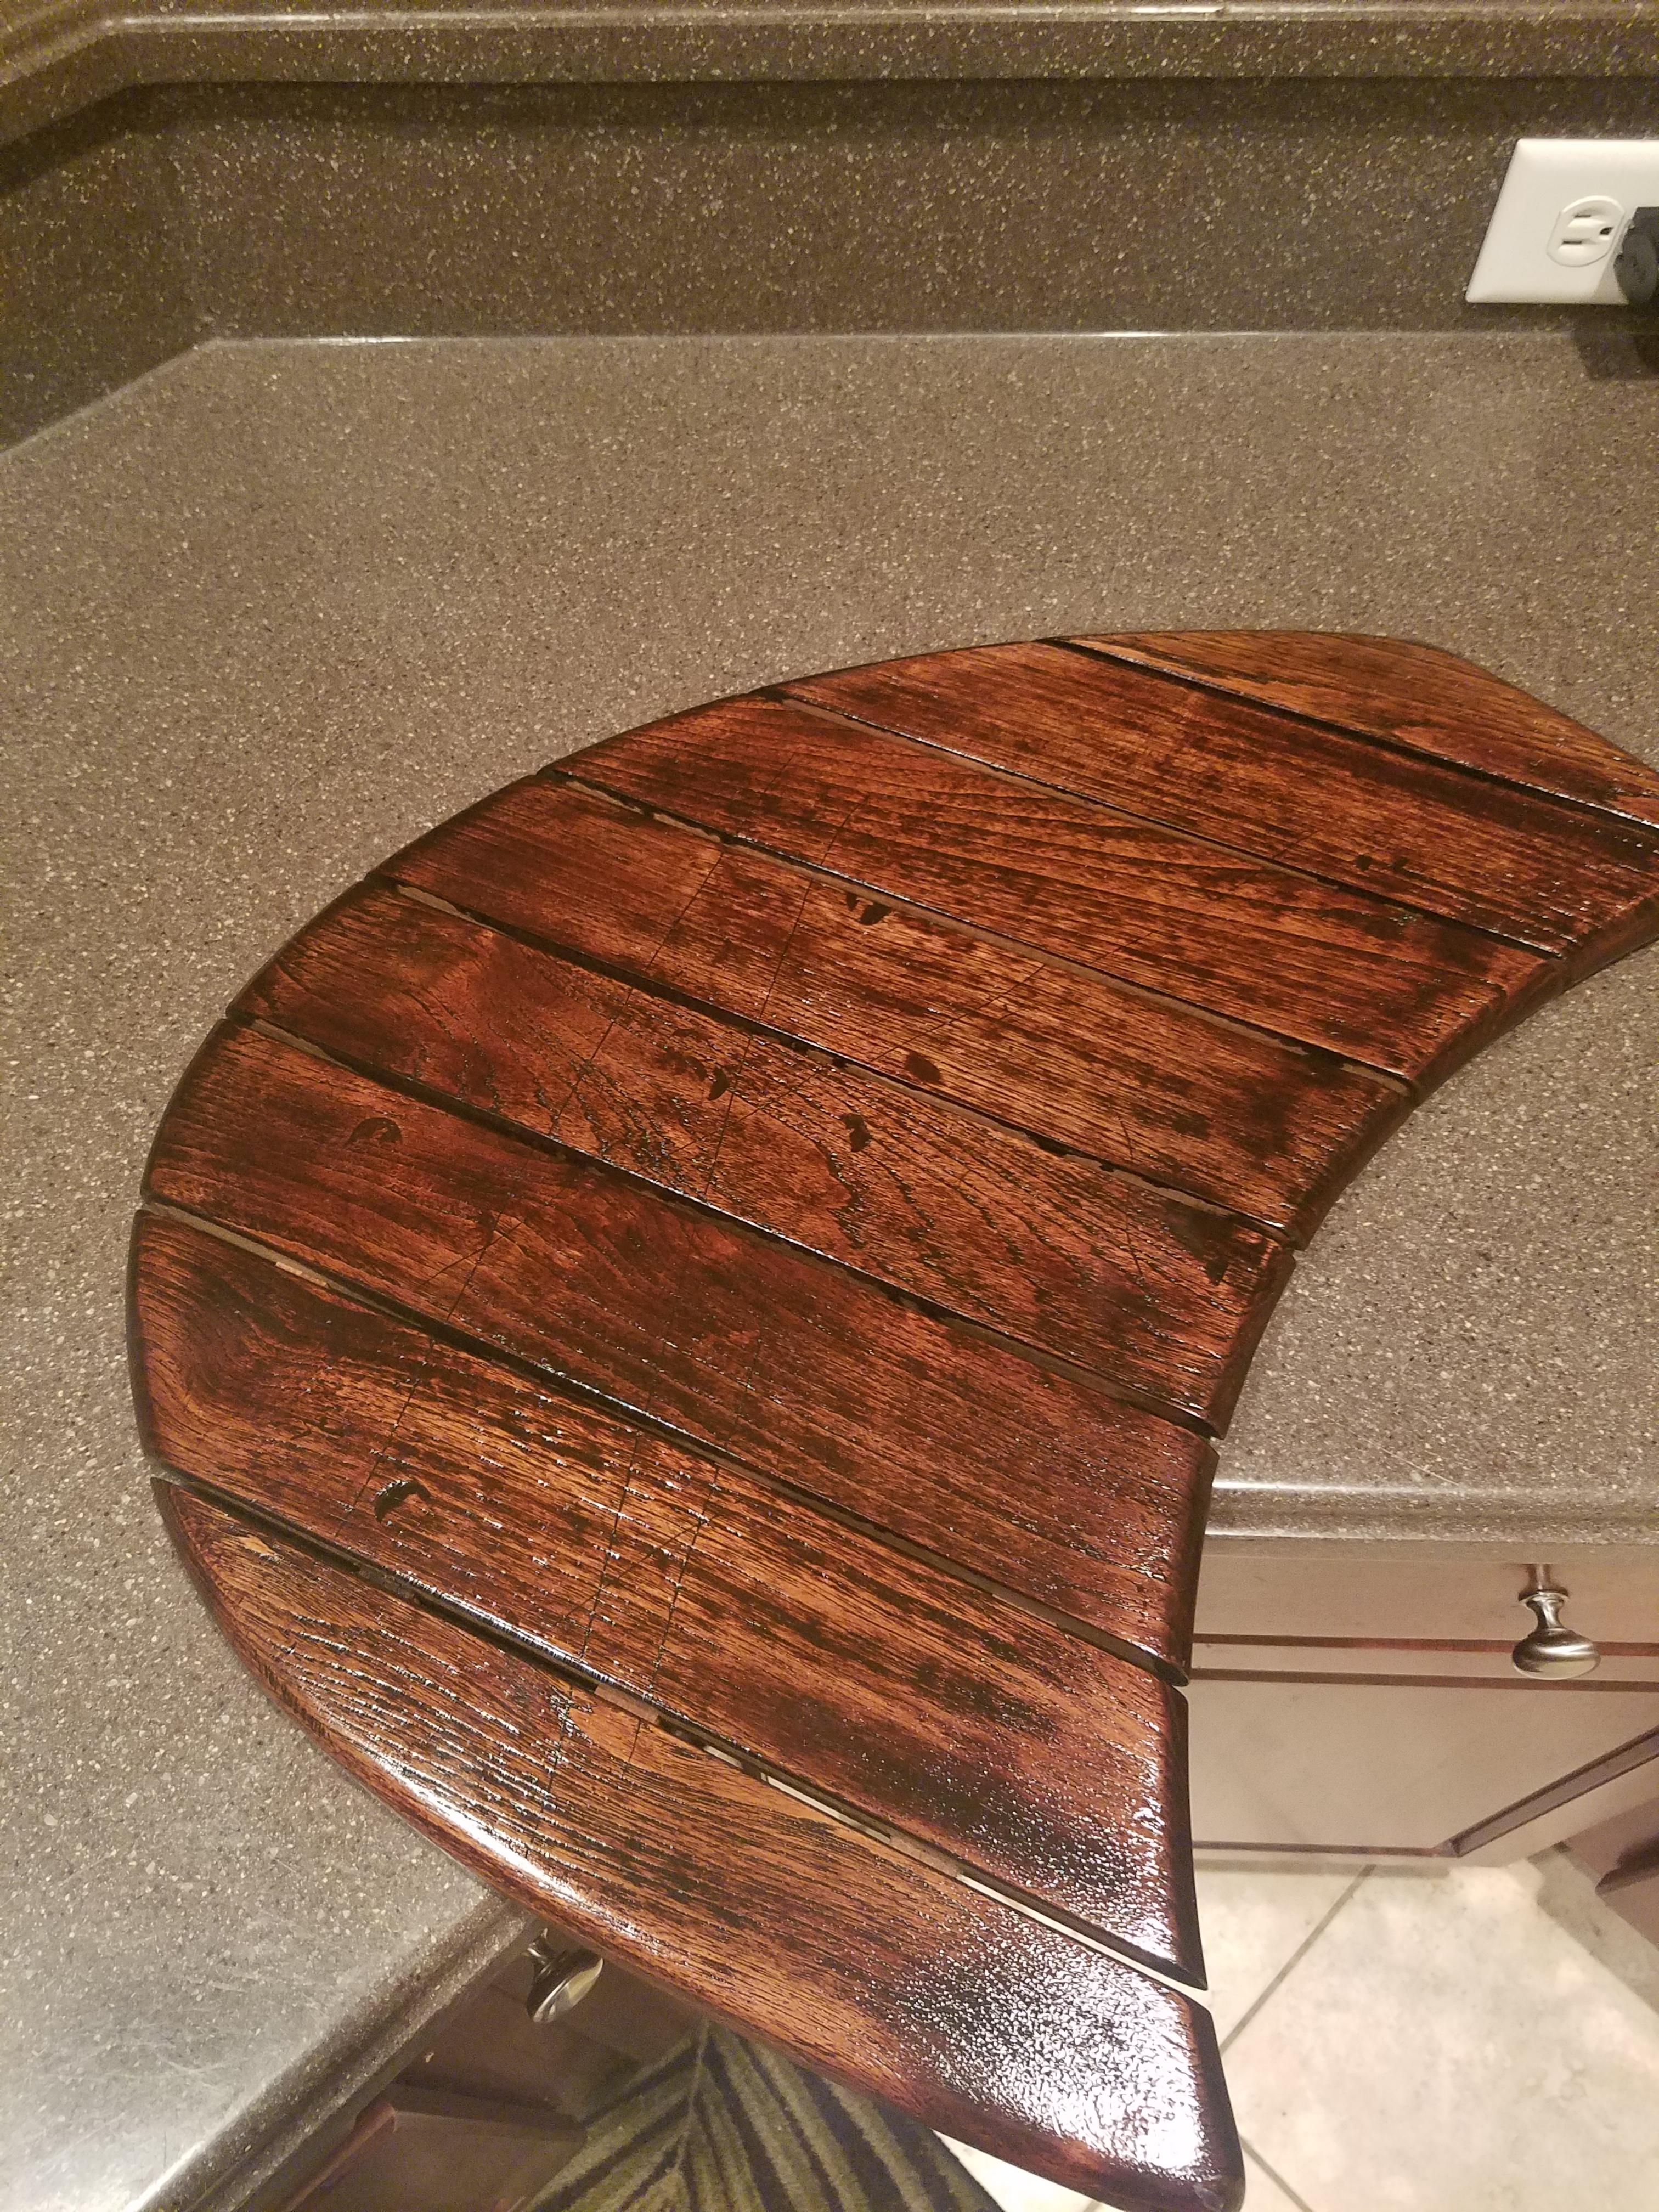
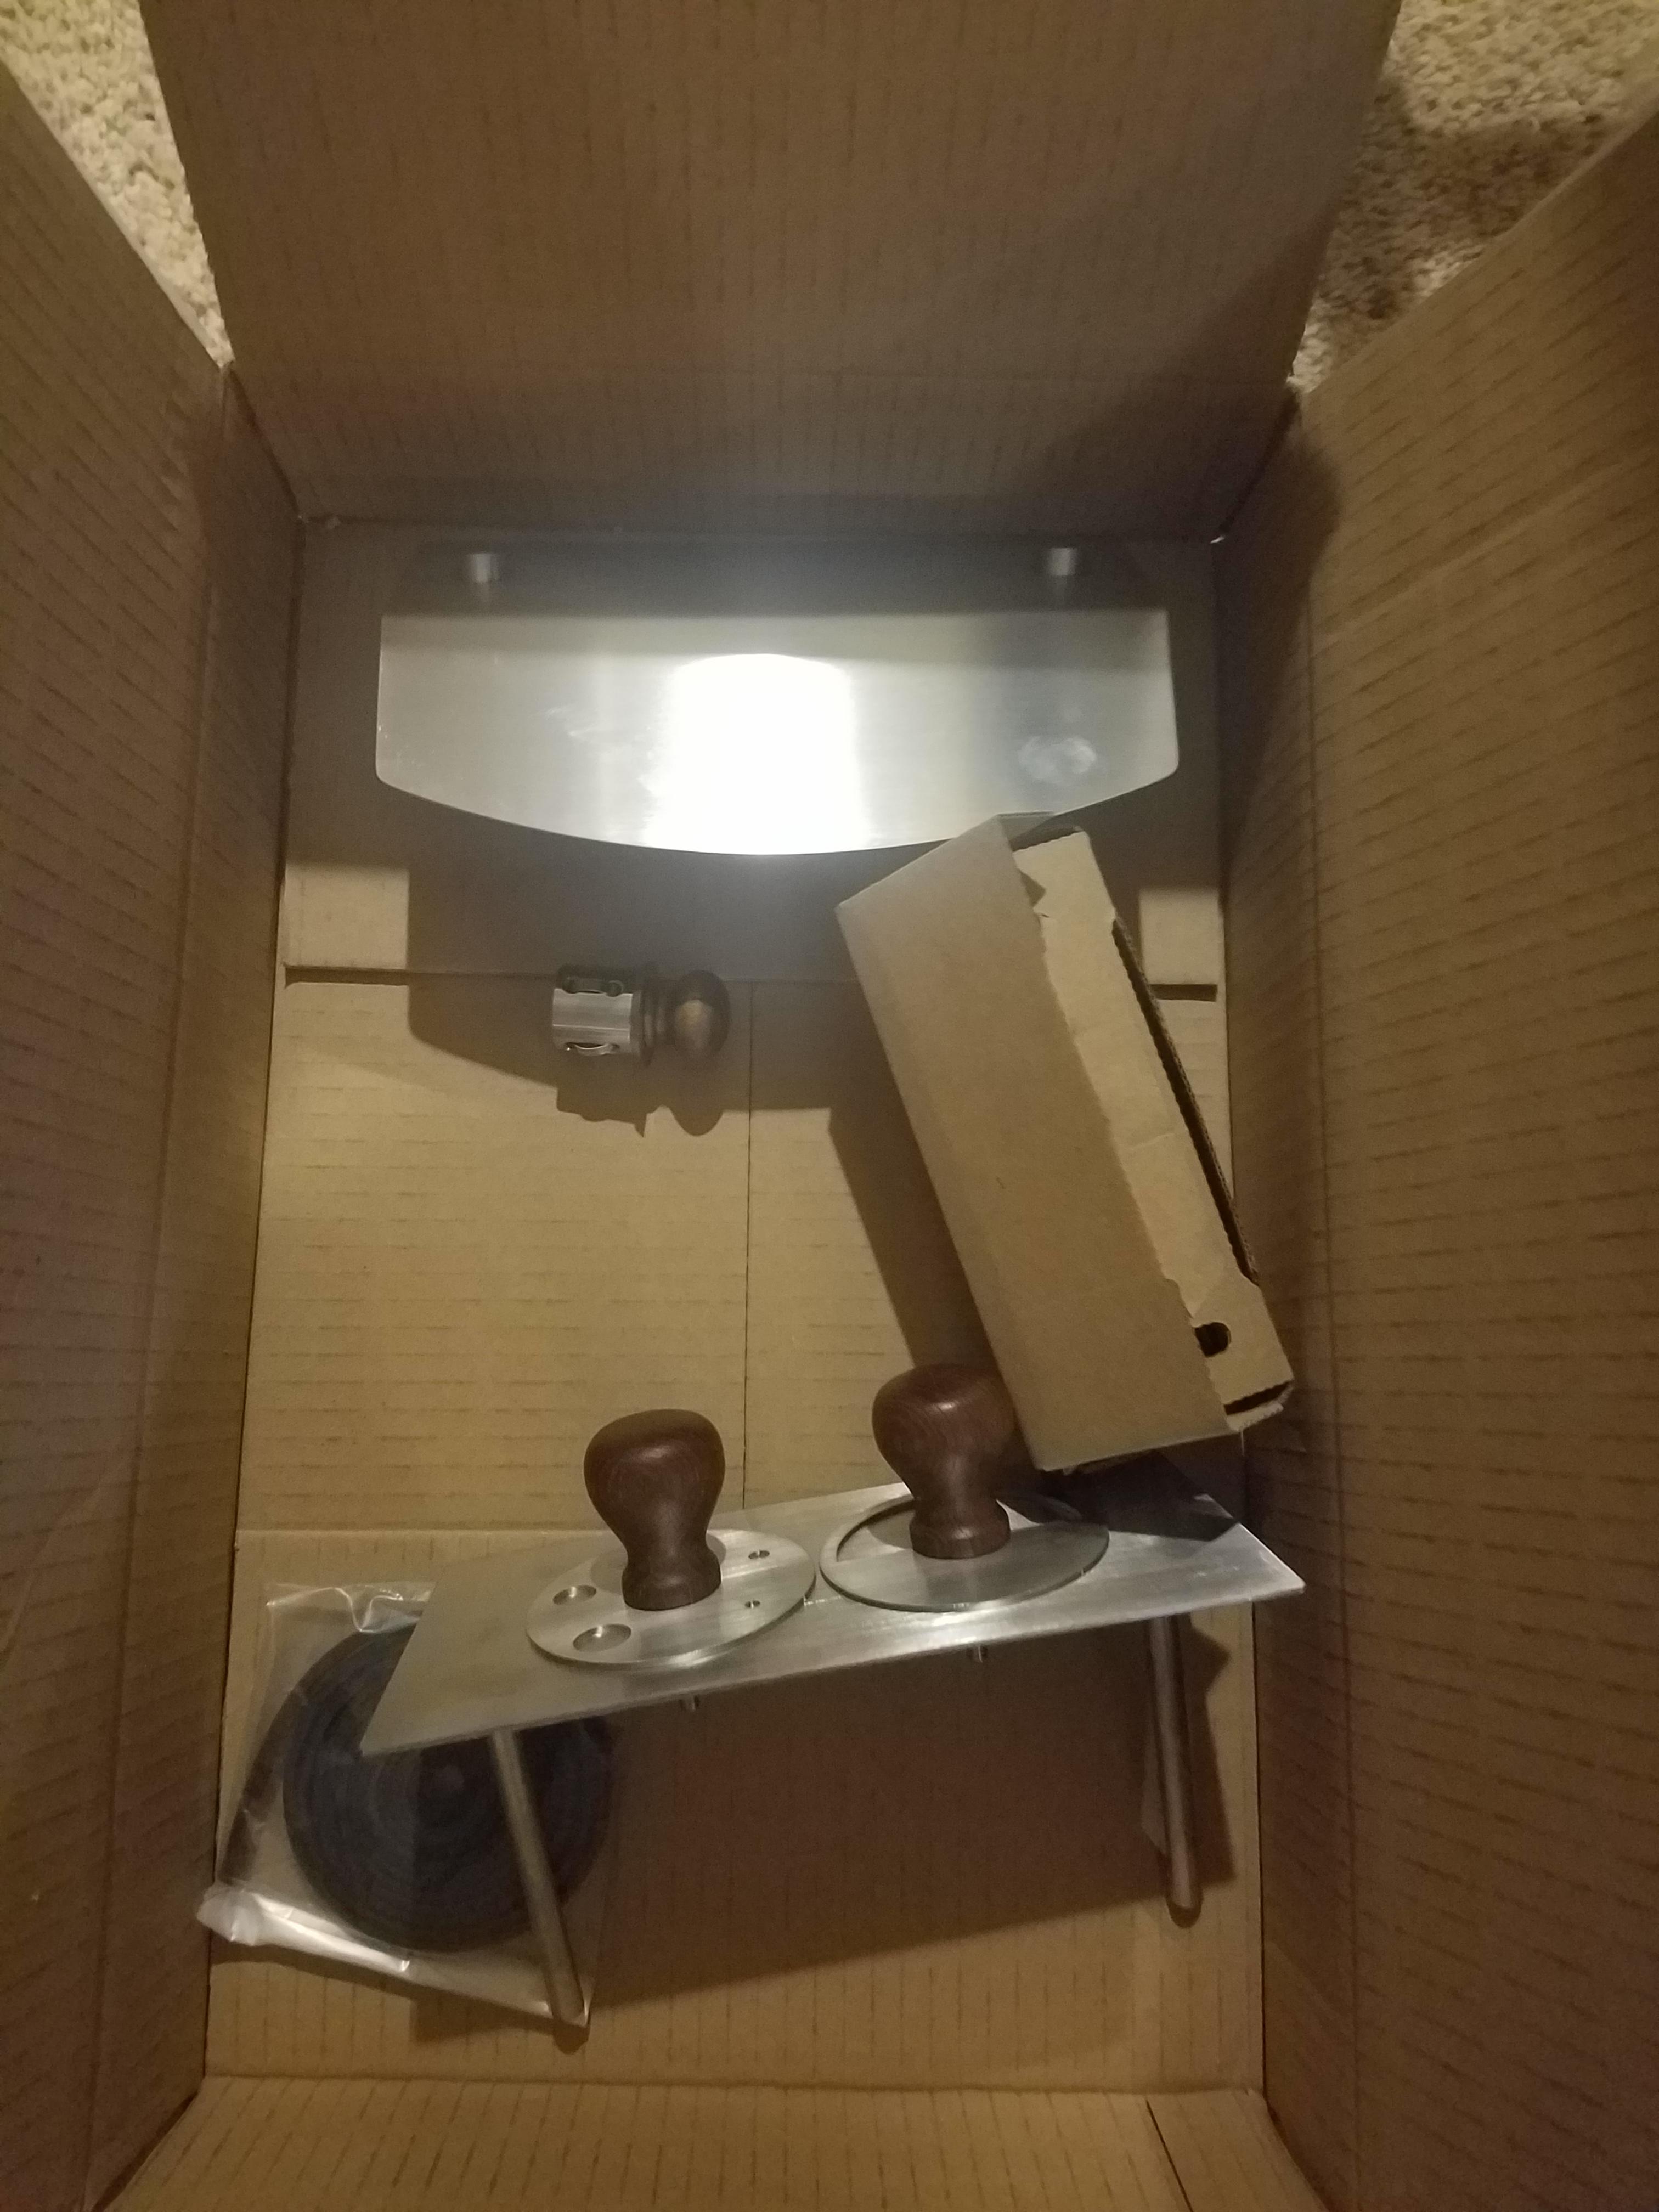
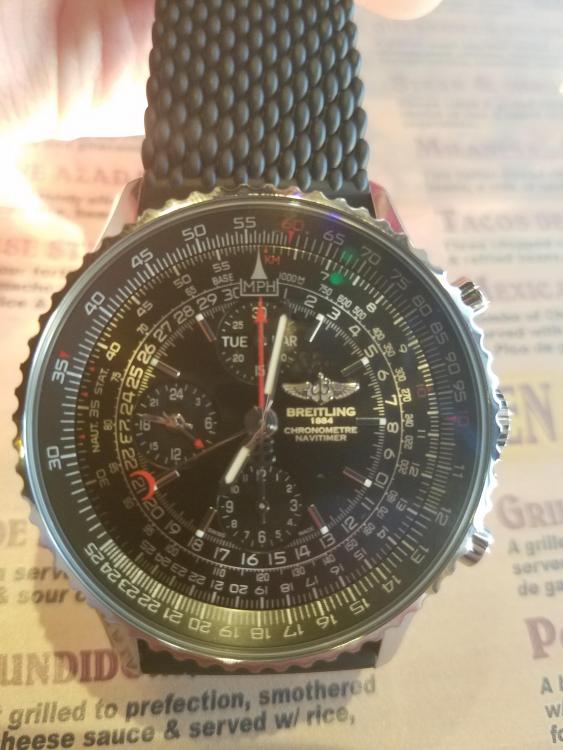
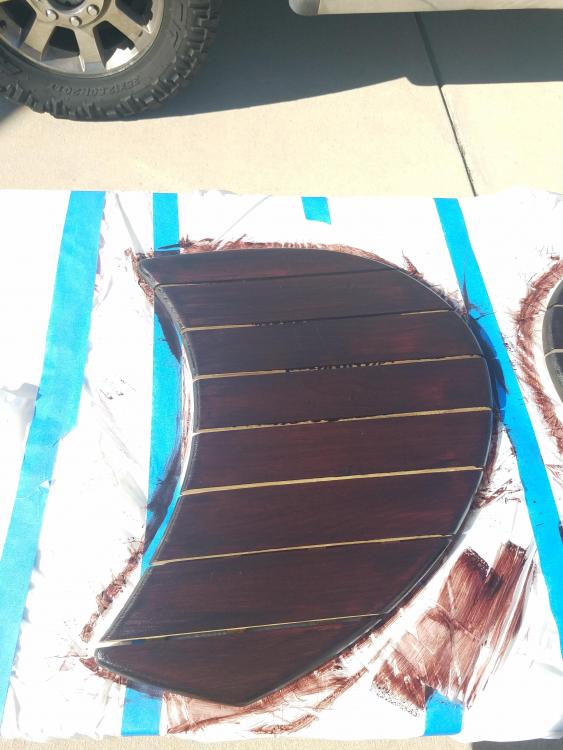
I know I keep forgetting to take some pics. Had to take a TV over to my parents house tonight where the KK is located so grabbed a few. Couldnt get a pic of where I sanded down the grout as my phone was dying and couldnt use flash. Here is the nylon attachment I am using. I ordered 3 more that should be here Sat. All the extra parts came in today. Heat deflector, Guru Plug, Thermo, New Dual Draft Door, and Larger Gasket I cant remember if I posted pictures of the finished shelves. I grew up building antique style cabinets with my pop. We used the distress look a lot so that is what I did. I used a red mohagony stain. Put on 3 coats then used 120 grit sand paper in random spots. Then covered with 5 coats of clear. And here is a random picture from a gift I bought myself this past weekend in the Bahamas. I had two nice Eco Drive watches that was stolen out of my truck a few years ago and havent had a watch since. I have always wanted a Breitling Navitimer but as an avg cost of $7k+ It was more of a dream. Well one of 50 Breitling boutiques is located in Nassau so decided to stop by and take a look. That is when I saw this 1884 limited edition Navitimer. Only 1884 in the world ans this is number 1150. Couldnt walk away from it so I picked her up. Between the Pitmaker Vault, 2 pellett cookers, KK, Watch, and the competition BBQ trailer I have been cut off from the Mrs. Lastly an update on the pup. This is main reason why havent been getting much done. Taking care of her with cleaning wounds, pills, etc has taken all my time. Got call from vet this past weekend and 2 of the 3 tumors were benign and the largest one came back as a very rare tumor that is usually only seen a few times a year. Luckily they only grow back 4% of the time and they gave her an 85% chance of living full lifespan so I am very relived to hear that now. Will get more pictures of tile cleaning this weekend.


-
Sorry for delaying this so much. Been crazy busy with golf lately and just got back from a cruise a few days ago. Was able to get some more work done today. All of my time now is spent cleaning up the grout. Once I get this all cleaned up there is less than 100 tiles left to be installed. I had a 240 grit nylon drill brush overnighted as well as 10 nylon dremel brushes. Figured the large drill brush would remove large chunks and can use the higher RPM of the dremel to do fine cleaning. The 240 grit worked well but not well enough. The dremel ones worked fantastically the only problem is the nylon brush wears down after about 30 seconds. So based on having to clean 500 tiles I would need to purchase 500+ and that is a no go. I just jumped on Amazon and purchased 3 smaller 120 Grit brushes to cover smaller surface area and that is a little rougher. Going to use water as a lubricant. Parts should be delivered Sat. The thermo, guru plug, front door, and heat deflector should be here Friday as well.
-
Was planning on putting on the rest of the tile today but was in the 30's this morning and with leaving for a cruise tomorrow just didn't have the time. I went over and took a look at it for the first time since putting on the batch of tiles and they are secured very well. Just need to cleanup a lot of the excess insulation. Looking around online I found that a lot of tile guys will use a nylon brush wheel attached to a drill. They use it on glass back splash tiles in the kitchen so figured it wouldn't damage these tiles. Got the email today that the remaining parts shipped so hoping we can get her done and fired up soon. I just put a brisket in the freezer that I had wet aging for 45 days in the fridge. That may be the inaugural cook.
-
Thanks for the well wishes for the pup. Surgery went well and they removed the 3 tumors. Now just have to wait 5 days for the diagnosis on them. I was able to get a lot done today. I decided to start on the bottom as that had the fewest tiles that needed to be replaced and thought that would be the easiest section. I WAS WRONG. Some of the tiles are a little bigger than others so trying to fit them in between existing tiles was a major PIA. After spending a few hours on the bottom I decided to move to the top where everything became much easier. I filled in the areas where there were a few missing then just started lining them up. There is no way I can get it back to exact and tiles evenly spaced and looking like the original but unless you get down close to it you really cant tell. Problem was that even after the grout set some of the tiles were still loose and I loaded them down with grout. Because of this I decided to let it all dry for a day before trying to clean it up. May have to use an sos pad to clean off the tile before filling in the spaces or something that is rough that wont scratch the tile. Also when I started wrapping the tiles around toward the top I had a few areas where there was an empty row between old tile and new tile. The empty row was not big enough for a tile so had to use a dremel and grind down about 1/16" on a few tiles to get them to fit. I am pretty happy with progress. I know it will not look like a KK that is from factory but should be able to get it to a 9/10. Figuring my total cost in all the parts will be around $1200 I am ok with that. Any suggestions on tile clean up feel free to let me know.

-
Yeah I actually looked into some names and probably going to go with Osiris - god of resurrection. Figured that was a fitting name. Looking forward to tomorrow and getting started on it again. Only down side is I have to take my pit bull I rescued 8 years ago in for surgery. They found 2 cancerous tumors on her so will be thinking about that most of the day but hoping to get a lot done.
-
Figured was time for another update. It took a while for the package to clear customs in Indonesia but is not safe here in Jacksonville and going to go get it tomorrow morning before work. Based on the pics Dennis sent it is 1k tiles and a boat load of grout. I have the day off Wed and cancelled the tee time to work on the KK. Anyone know if there is anything special to do in regards to laying this tile? I read a lot of posts about tiles popping off during the burn in but didnt know if it is similar to regular tile and lay the grout down, Install the tile, and wipe off with damp sponge.
-
A little update on status. After talking on phone with Dennis I was WAY off on the 300 tile estimate on top. Looks like it is going to be 900-1000 total for top and bottom. I will be laying tile for a while. Should take about a week to get shipped here so should be getting everything in soon. Looking over the install of gasket threads I noticed permatex is mentioned the most. Is there enough in the 3OZ tube I see on Amazon to install the larger gasket or is there another material I should look at?
-
So I ordered: BBQ Guru Plug, Second Gasket, Thermo, Heat & Ash Shield Qty (2) - I am assuming that this will fit both the front and back doors at the bottom. Next thing to order in a month or two is Dual draft door and Baking stone (want to see how well the 3 I have work first). Also want to get rotisserie but can only find the basket and spit in the store not the motor. Any idea where I can find this or price of it. Seems like everyone on here likes this accessory and would like to have it as well.
-
Aussie that would be a cool idea. Maybe down the road I would consider doing that. Got email back from Dennis on tile and grout so should be getting that here in a few weeks. It amazes me that being half way around the world that he responds so quickly even when its 2 or 3AM his time. Can definitely tell he cares not only about his product but the happiness of his customers and no way I could have done this without his help. I am going to purchase the remaining parts from the store on the site. Quick question for those of you with the newer models. I am definitely adding the second gasket as well as the missing BBQ guru plug. I see that there is a piece of stainless steel piece that blocks the ash from getting close to the door. Is this a useful piece? Also, mine has the single damper on the front door. Do you all see a benefit of the dual damper and worth it? Lastly, I thought I had the original KK baking stone but I have 2 small chef ones and one larger one that is about 1.5" thick. Do you all use the stone or the pan for the heat deflector? Wondering if I need to by he pan as well.
-
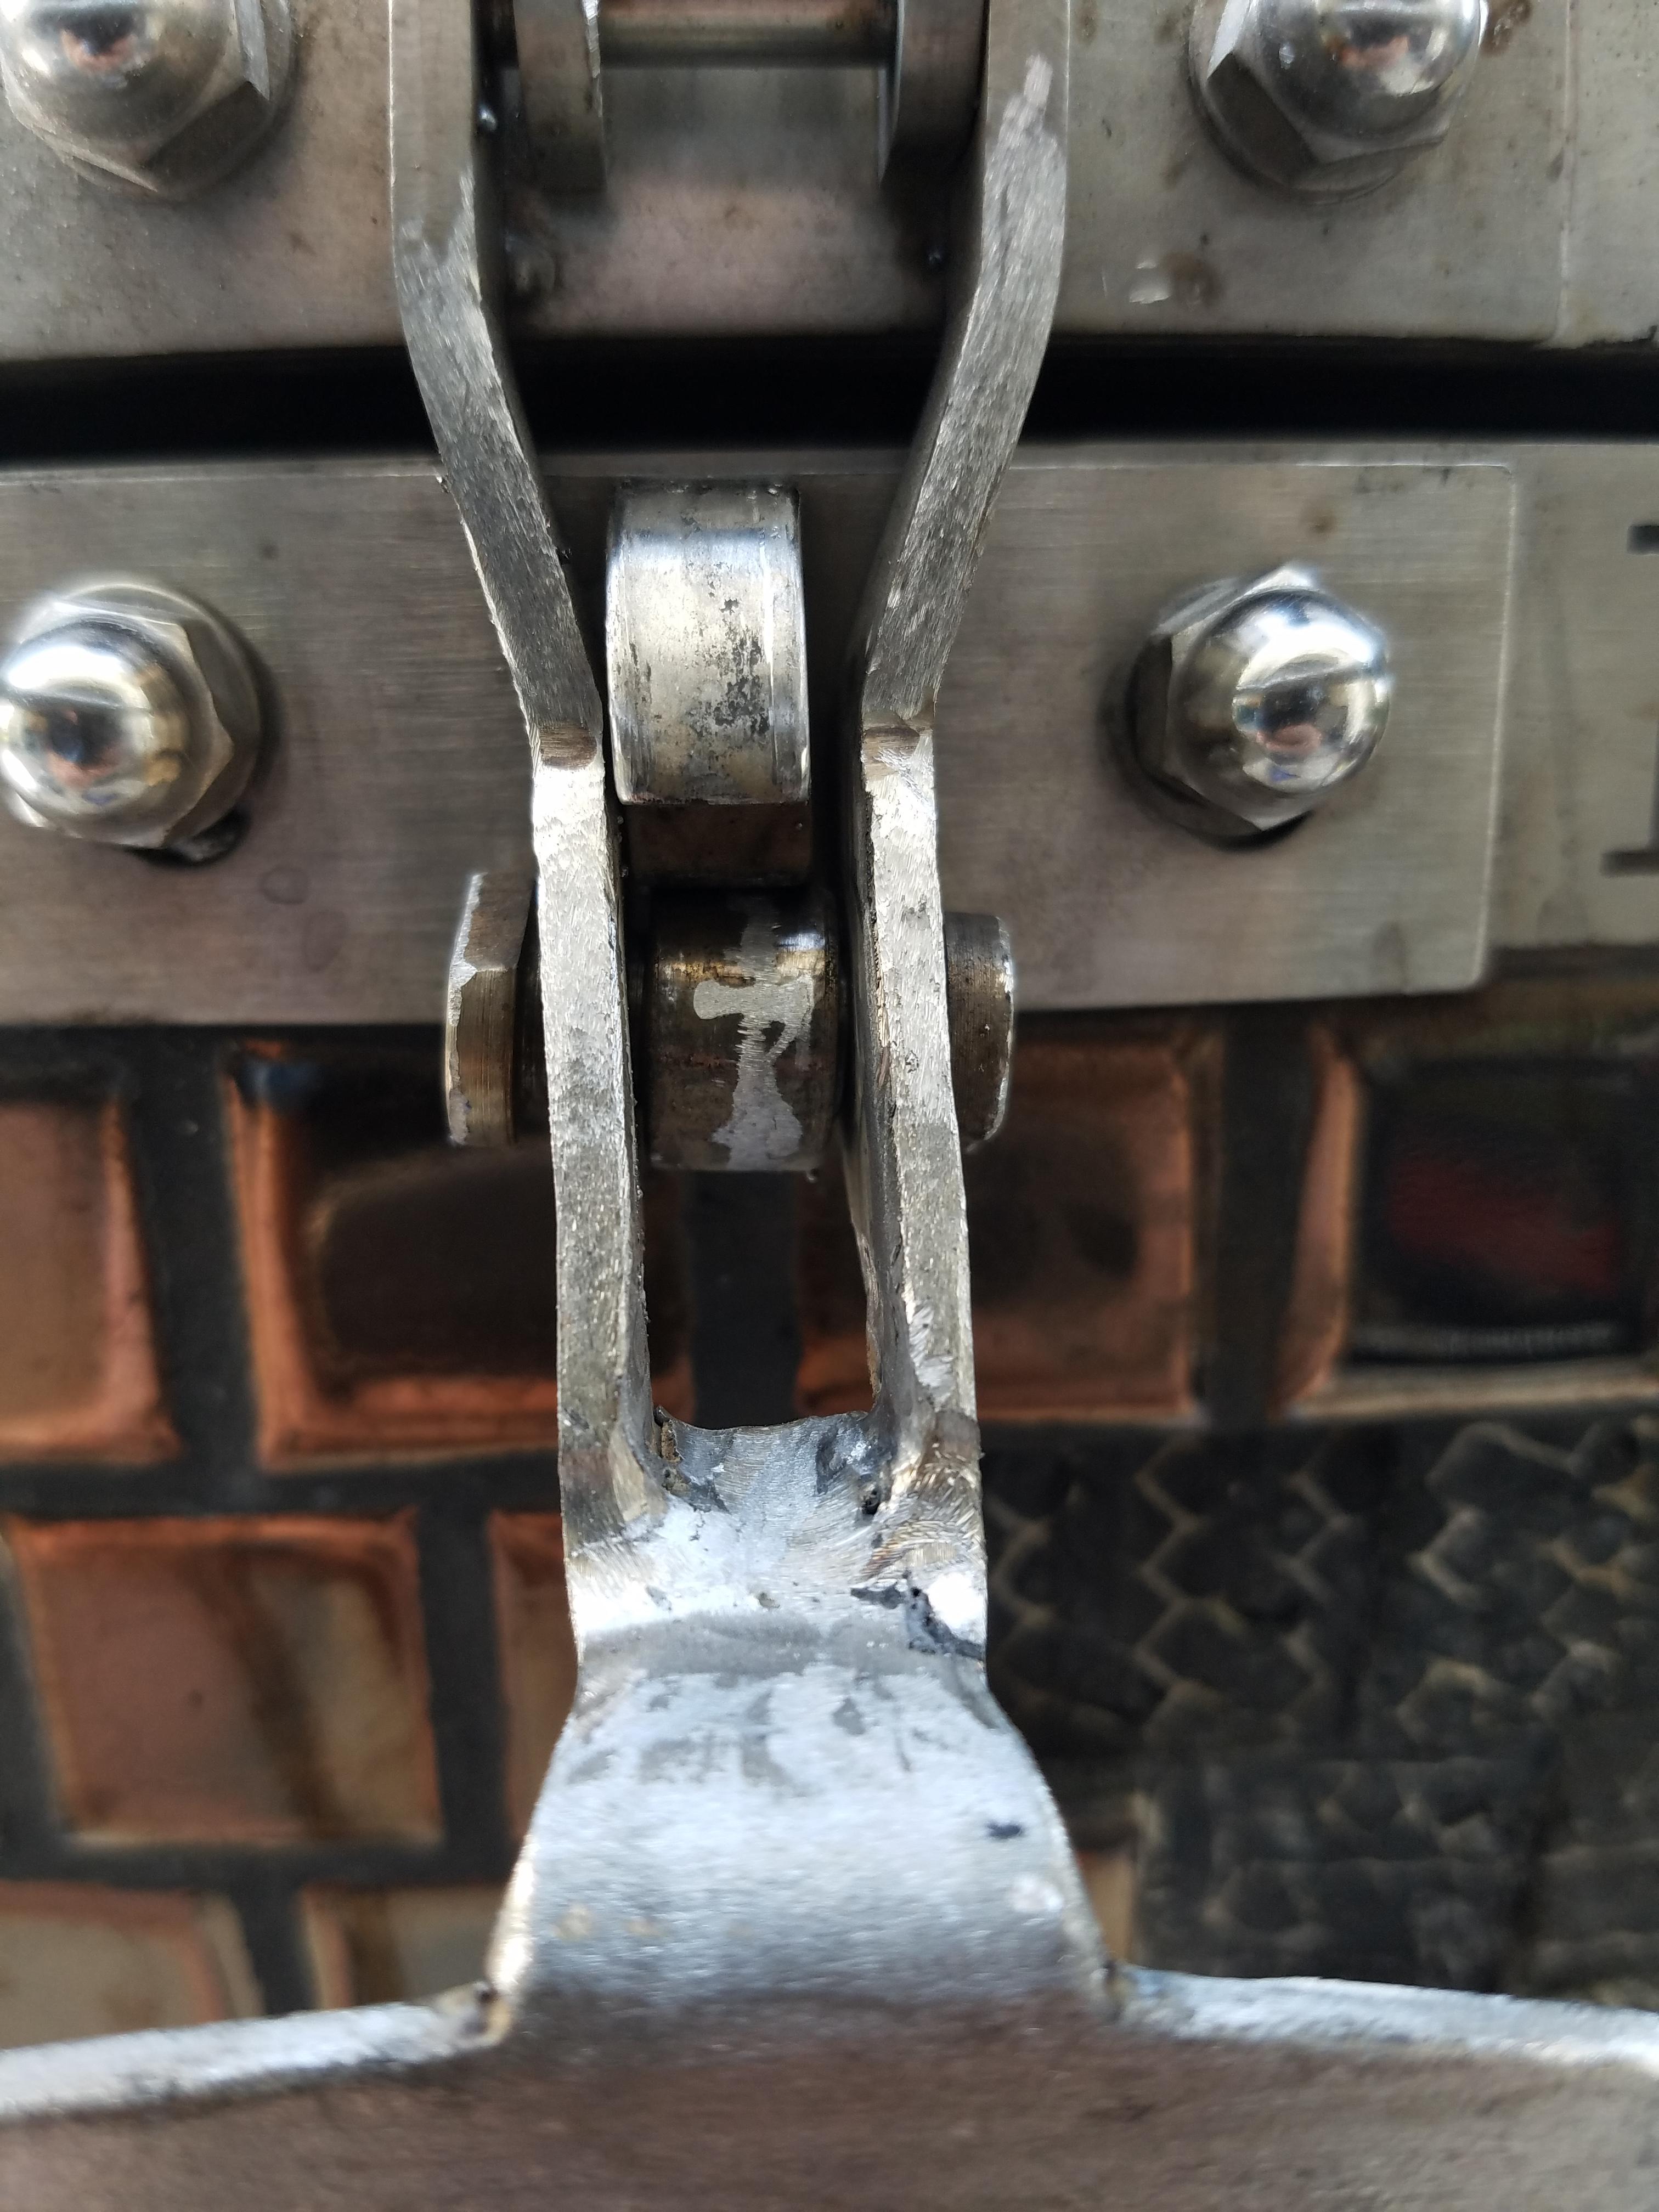
So I took a look at the latch tonight and yep the bracket moved when I was lifting up on the handle. I lowered it to the lowest possible setting and there is no more play in the lid. I think it could be more snug but I think it is the gasket that is the problem. The complete front of the gasket is rock hard now. Looks like I am just going to replace it and add the secondary. I am sure this will tighten up the latch and make it air tight. So the items I need as of now to finish the restore is: Tiles, Grout, Black mat under the tiles, Both Gaskets, Thermo, and BBQ Guru Plug I am heading out of town this week for a golf trip to Scottsdale and will be back next week late. Waiting to here back from Dennis for tile pricing and if it is best to order other parts thru store. Do the parts and accessories ship from within the US or are they overseas as well. Hoping to get everything in in the next 2 weeks to continue. Want to get it done, burned in and start learning how it cooks. The Jacksonville BBQ Championships are in April and I took 2nd last year and am still pissed off about that. Hoping to take the KK with me to show it off.
-
Thanks guys. Didnt know that lower latch was adjustable. I Will look into doing that when I get home today. Also will order the second gasket.
-
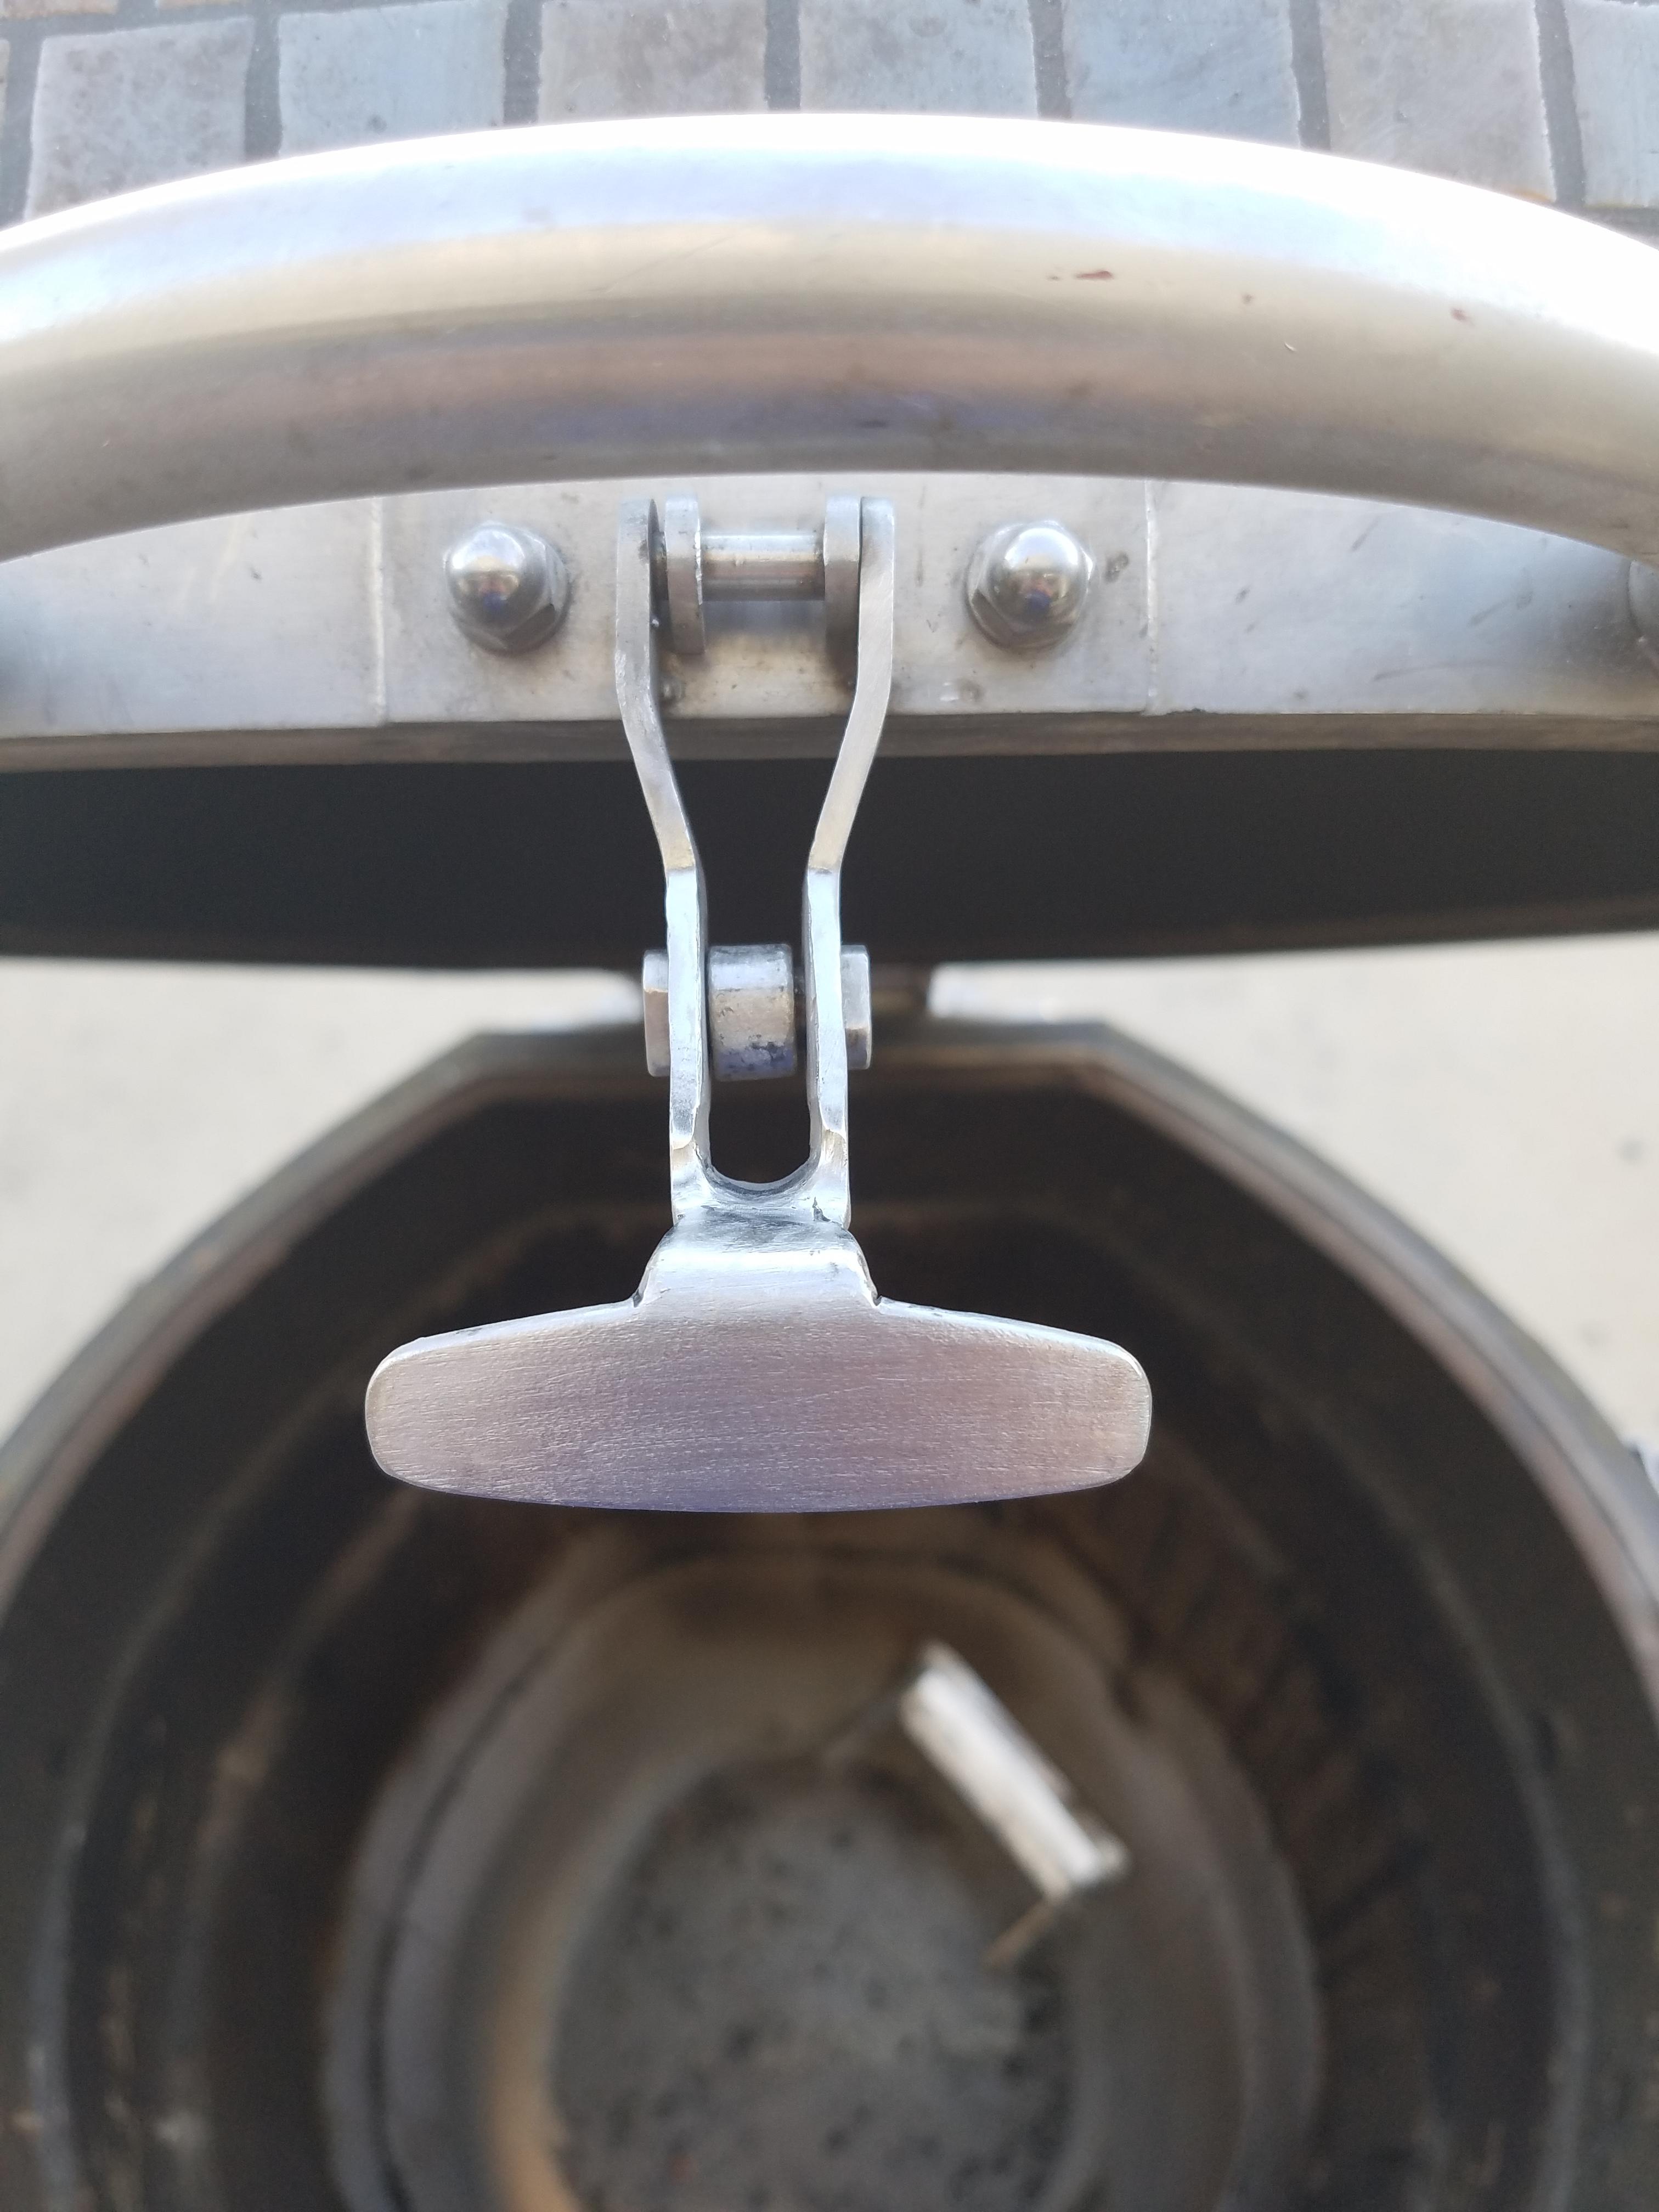
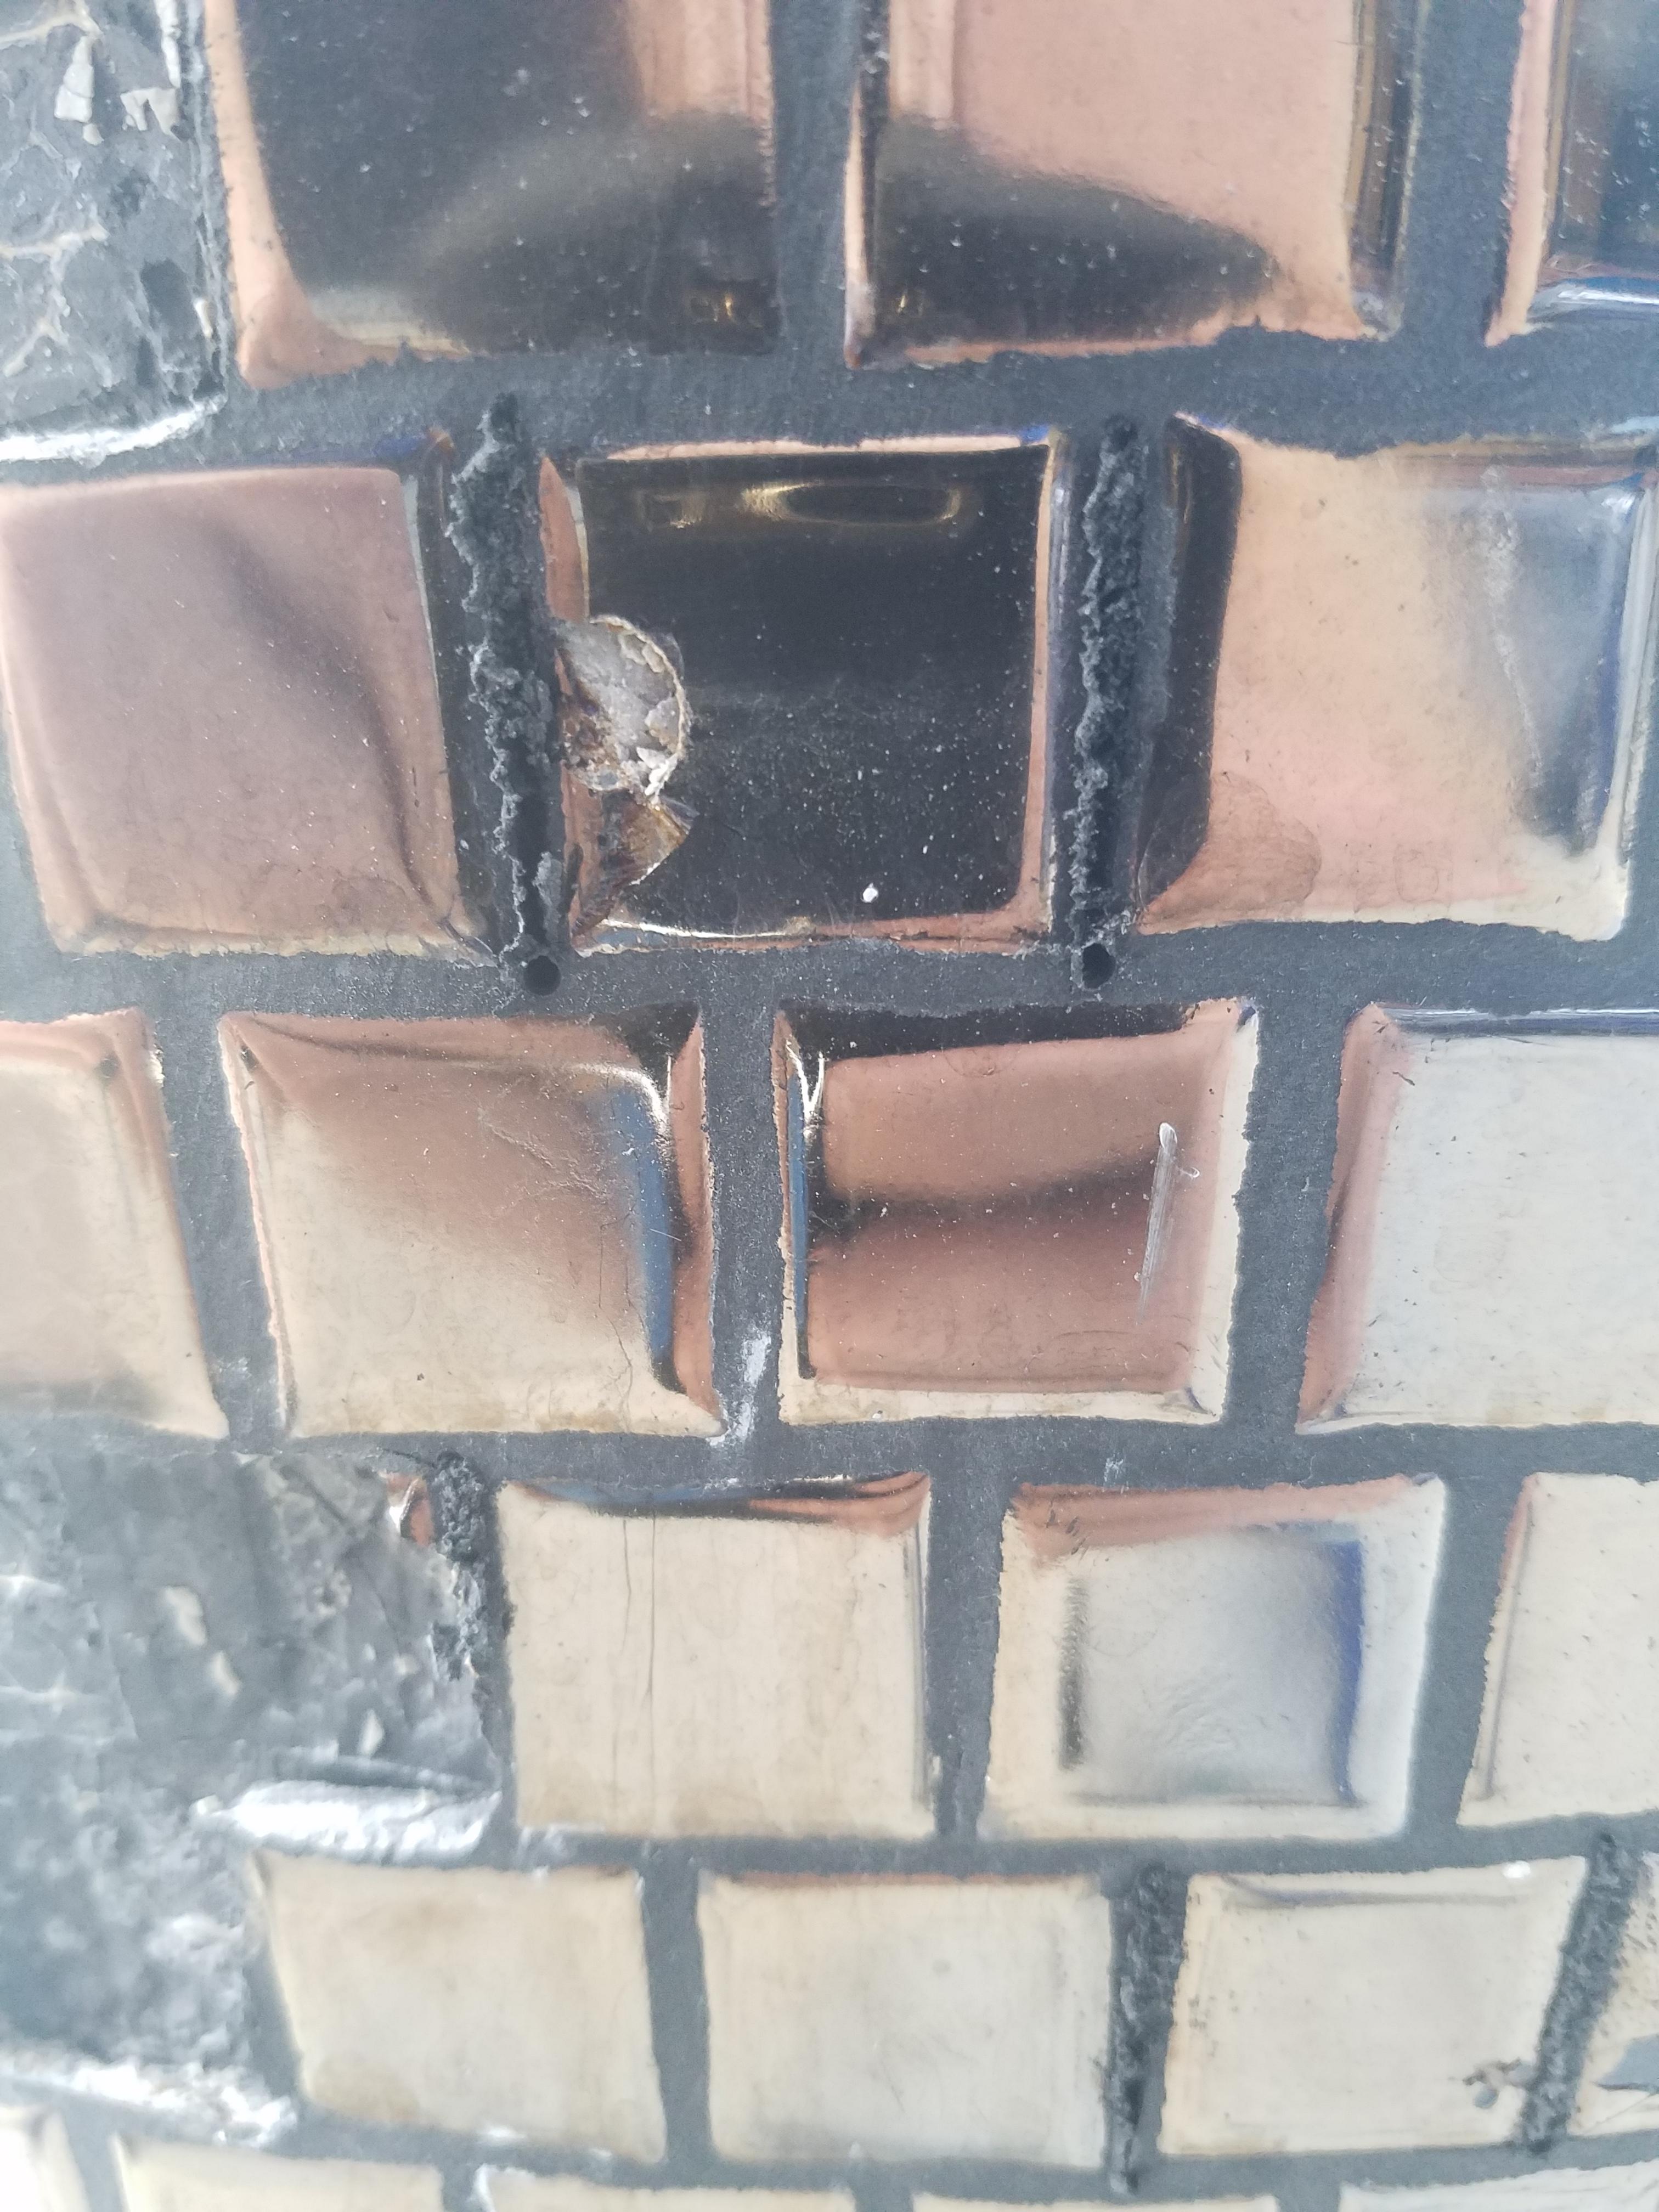
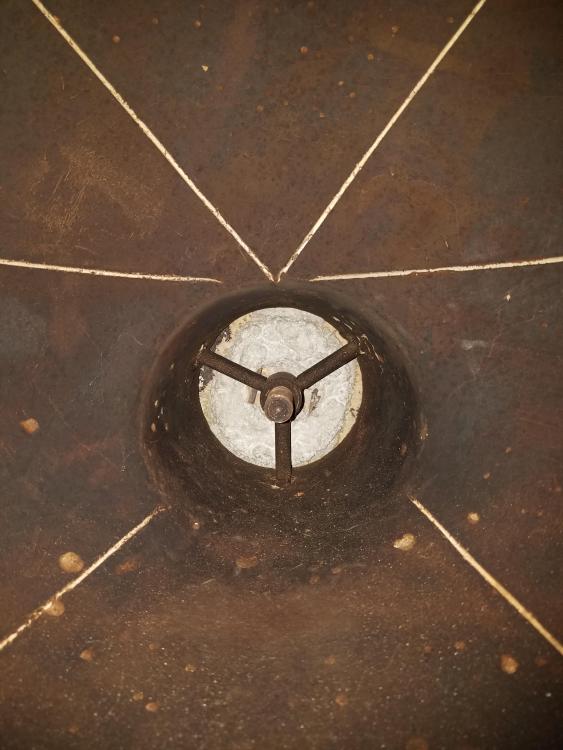
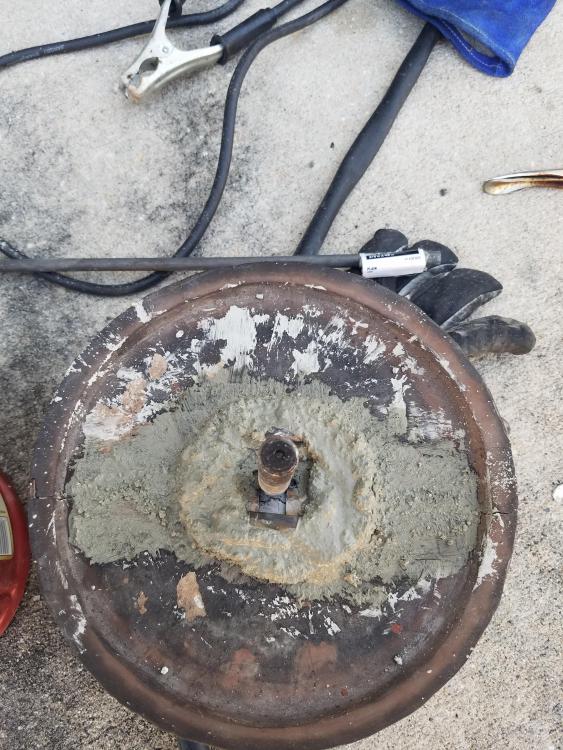
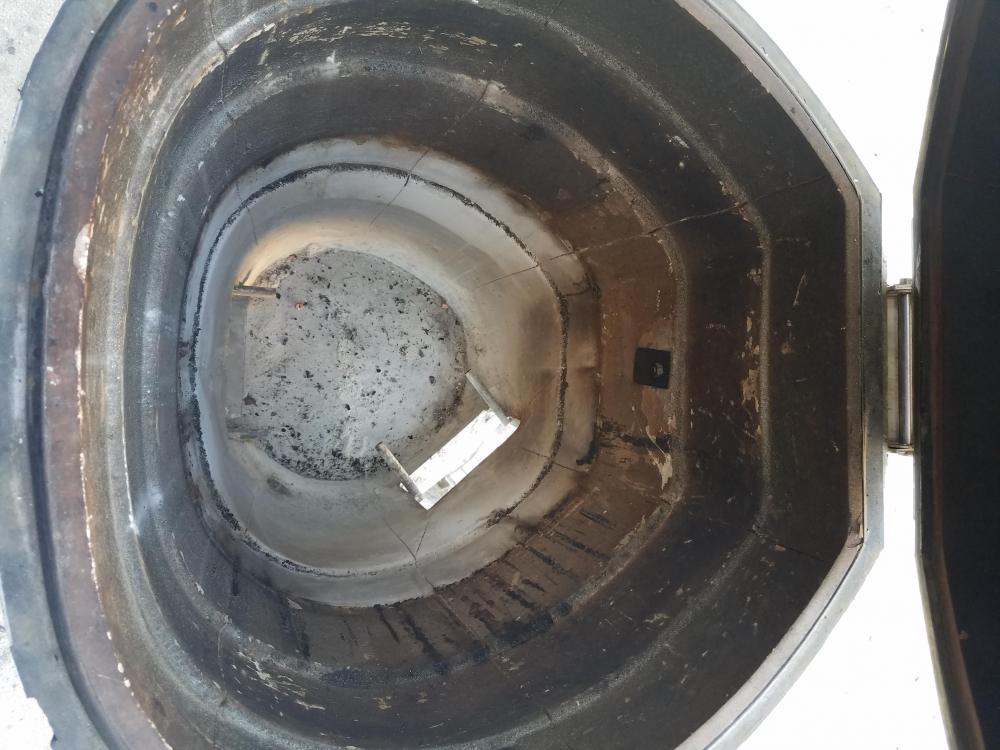
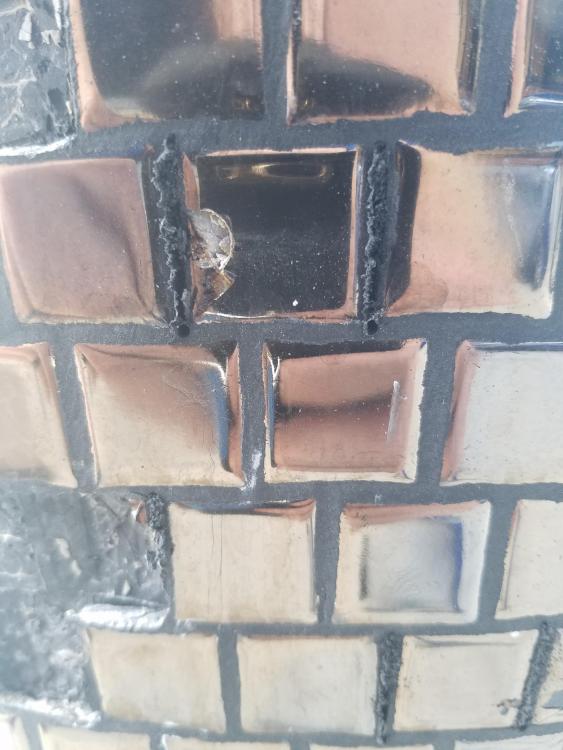
I fired it up tonight and did some burgers and man were they tasty. Cooked them around 350. Didn't have a thermo but the ol' hand test said 350ish. Few things I noticed and thought about. First when I was driving home from work today I was thinking about things that needed to be done with the KK. I realized that I may have fubar the cap underneath as if the cement I put on sat to low inside the dome it would restrict airflow leaving the top. I started to get pissed at myself for not thinking about this. Below is a pic from inside the dome looking at the cement circle. There is plenty of room around the outside so I thought I would be fine but wouldnt be able to tell until she was cooking. After getting it to temp smoke was flowing out very nicely so I figured I am good on that one. so problem I thought I had is not a problem. Next is not a problem but just a design aspect I have noticed in previous grills I have had and wondered if it is ever thought about. When you go to flip burgers it is much easier to have your spatula running with the grate. The KK grate bars run sideways causing the spatula to catch sometimes. Really no biggie just something I have realized with all the grills I have owned. Next problem is when moving it in and out of the garage there is a lip in the concrete. The only good leverage to lift the front is with the handle and that is a no-no. So I need to come up with a solution for this problem. I think I am going to weld on a piece of steel tube on the side table brackets where I can throw a steel bar thru when I need to lift one side over a lip in the ground. This will distribute the force over all bolts on the bracket evenly and the tube wont be seen as the tables will always be on. Finally I now have a lid problem in that it doesnt close tightly. If I close the lid the latch moves all the way to spot #2 and it is not snug when I go from latch #1 to #2. you can easily move it. This causes the lid to have about 1/8" play in it. Adjusting the lid down wouldnt solve problem as the latch would be even more loose I would imagine so I decided to come up with a aesthetic fix. I will remove the center bolt thru the latch and replace with a modified piece with an outer coat of polished copper. I will make it roughly 1/8" wide in diameter to give me the extra leverage to pull the lid down all the way and giving it a nice touch of creativity. I think it would look good against the bronze. Also, looking at parts online is it worth looking at adding the 2nd gasket? I only have the one gasket and the only place that doesnt have any play in it is about a 2 inch section at about the 7 o'clock position on the grill. All other areas you can press on the gasket and it has some play in it. Do you think this needs to be replaced as well?
-
Cs I was thinking Osiris as well. Fitting for journey this KK has gone thru.
-
Thanks Bosco. I believe Dennis is getting back to me on price for tiles hopefully tomorrow. Looking forward to keep the progress going. You think it is good to cook some burgers in it tonight around 350*? Also, reading through posts is is customary to name your KK? Looks like it is a right of passage for owners.
-
Finally had time to go thru most of this forum and read a lot on maintenance. Couple questions is the manual available somewhere to download? As far as burn in goes I am going to do it again as I dont know if it was done correctly with first owner plus I have added new cement and dont know if it needs same procedure. My question is does the odor and vapor come from refractory cement or the grout material? If from cement would it be best for me to do it now with so much exposed and a lot of tiles off allowing to escape easier? Was going to cook some burgers tonight.
-
Aussie - Parents are used to it by now. I love to have my projects ans my dad enjoys helping when he can as well. I am the baby of 3 and still in my 20's so momma is fine with it. Tucker - You are close. I live in Bartram Park right next to Julington Creek. I already stained the tables with a dark red mahogany. Personally I like the look of darker wood more. Just waiting on tiles, black fabric layer, and grout from Dennis now. He is getting me quote based on how many tiles I need which is around 400-500 on safe side. I counted and the bottom alone is 174.
-
I was worried about that to foton. I did quick taps and let weld build up. Once Dennis sends me tiled if I have enough ledt over I will remove everything and inject a high temp sealant in the crack then re tile.
-
Thanks Bosco. A little more work on latch and will be good. I plan on just following tile around and match up best as possible. I have few photos of top. I plan on doing bottom first. 5698 yes I have rear door.
-
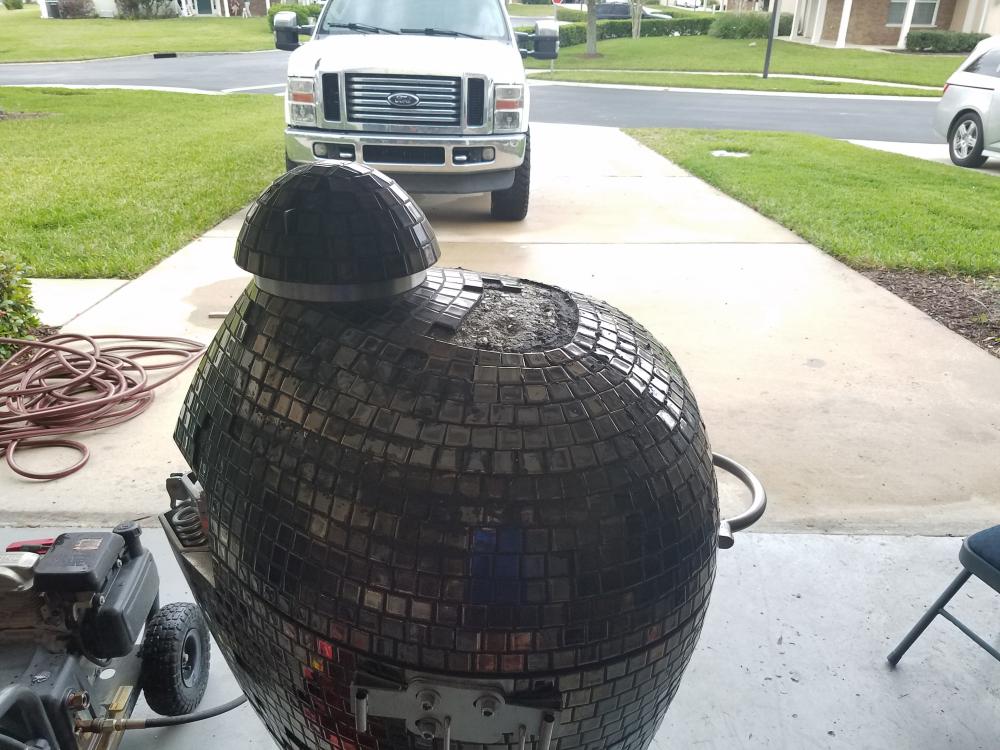
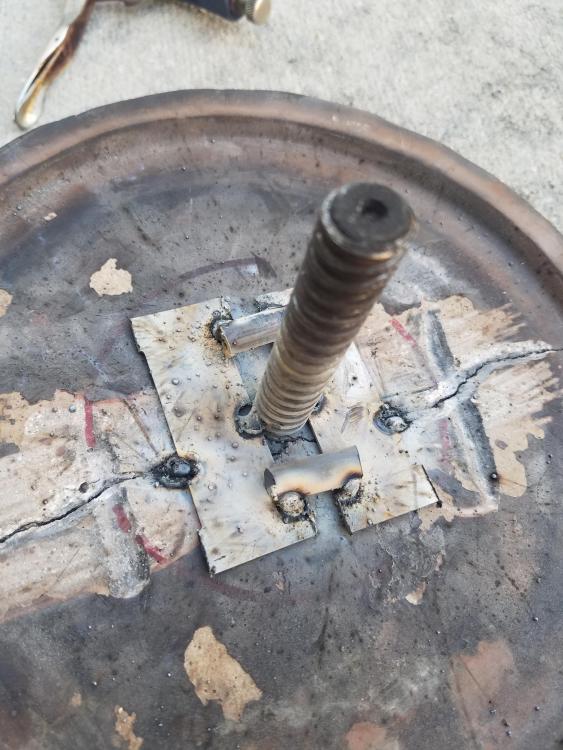
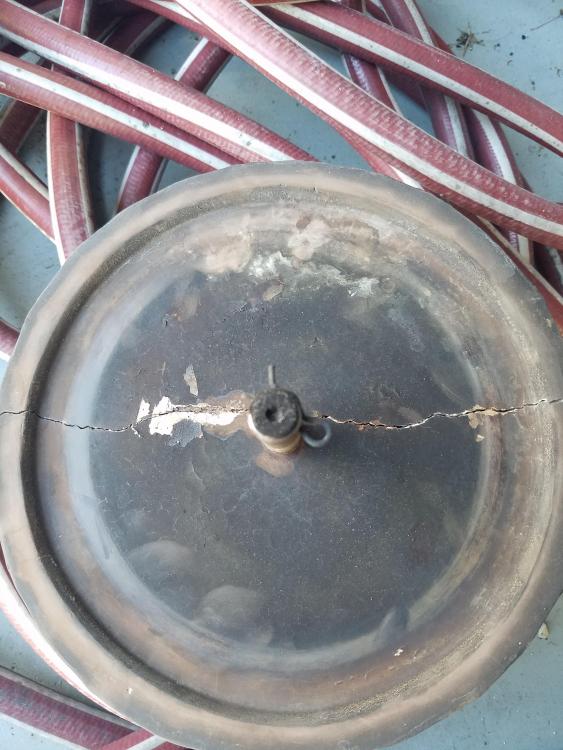
Well today was a hell of a day. Total hours spent in last two days came out to around 16. The cap was the first real problem I ran into . I came up with my own fix that I detail below. If it ends up braking in the future I will make my own mold out of silicone then crack my current top removing the inside piece. I will then put this in the mold along with metal shards and pour in the remaining rutland refractory cement I have left. Bosco sorry I didnt see your post until after I stained them. I dont believe a treatment would have worked as 1 looked brand new and the other looked as if it were sitting in sun for 10 years. I went with a dark red mohagony as I like red and bronze together. As far as the rest goes all of the tiles are now removed. well almost all when I was wiping down outside with damp rag I found 2 that had fine cracks in the but all in all its ready to be re-tiled. I spent another 30 min or so shaping the handle and polishing it up. Still not 100% satisfied. Need to throw in a few pop welds in some gaps and grind away at it again but as of now it will pass. Cap Fix - so as you can see in the previous photo above the crack was very small. The refractory cement is quite sandy and doesnt fill small voids. So the fix was to make the crack bigger. Yes I know dumba** idea but I am glad I did. When grinding out the crack I managed to hit part of the metal bracket that sits inside the mold. This led to another idea. I ground away all cement until I could get access to alot of the metal. I then used flat metal bar and tack welded them to the rod in the center. I then tack welded them to the metal frame that sits within the mold. I connected both strips together with small metal rods. I then filled up the crack and the metal brace I made with cement to match the circular cut out in the top. Looks much better but still not to my standards Is this normal or should it be cleaned somehow I need to get a small brush to go between the boards and do the under side Here is how I removed each tile. I used a diamond tip dremel tool (well it had a diamond tip for the first 10 min but after that it was just sharp metal) I then hammered out the center of each tile. I realized that the more broken the tile the easier to remove so the fix for the hammer damage was to cause more hammer damage Added some more cement in areas as I had it already mixed and figured why not


-
Thanks Jon. I don't think mine has as shards in it. It was built in 2012. If it doesn't looks like Inneed to come up with solution as Dennis said in that post it is probably to late. I had a crazy idea that may work. I ,Amy cut a long rectangle piece out on bottom roughly 1.5 in wide and 1/2in deep. Then scoop in a small amount of refractory cement then a piece of metal flat bar and cover it all back up with cement again. I saw this done with ceramic pots and copper wire.
-
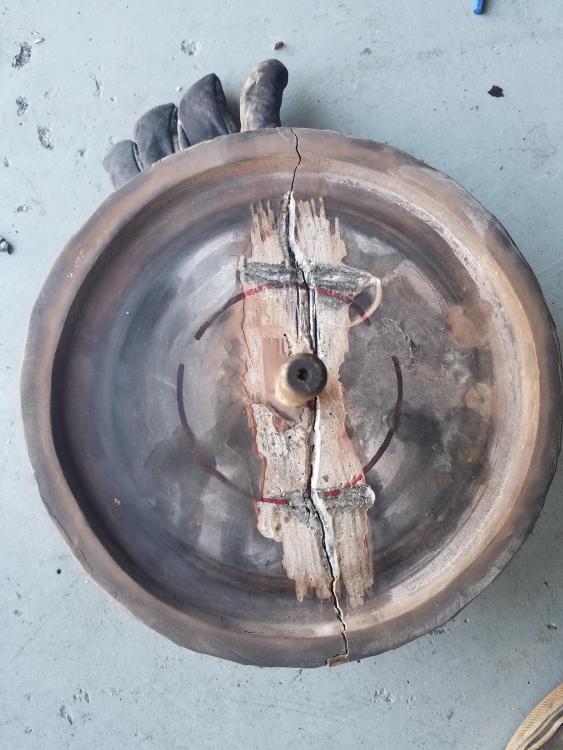
Cement fully cure 24hrs. I ran into a problem that I need your guys help with on best solution. I was emaximining remaining broken tiles on top and noticed the camlp these was a crack at bottom of grout. Checked under cap and the whole thing is cracked all the way across. I have been hammering out center of each tile to remove but am afraid to do it on this. Wondering if I spread coat of cement covering both halves if that would help
-
Quick question. I was reading thru a broken tile thread where water was escaping when heated up. Since I just layed down new refractory cement on top should I crank it up to high heat to get out any water or is that not needed?
-
Yes I have the charcoal basket and every rack. Only thing missing is the plug on the side.
-
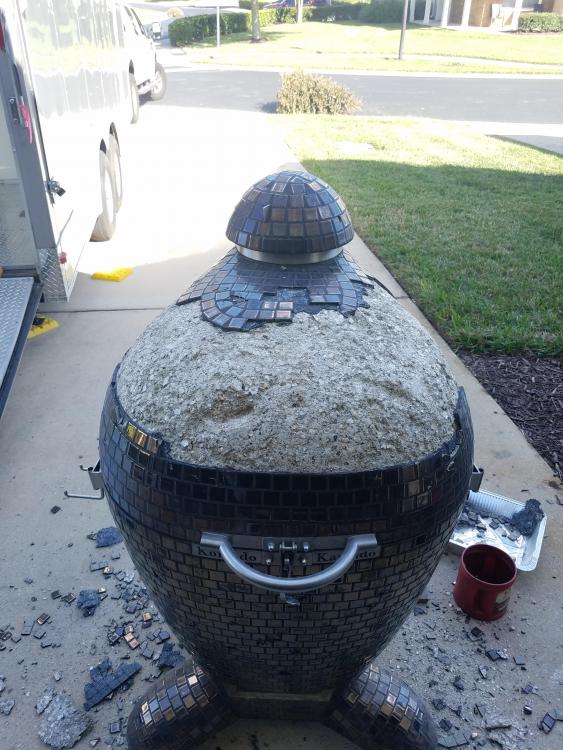
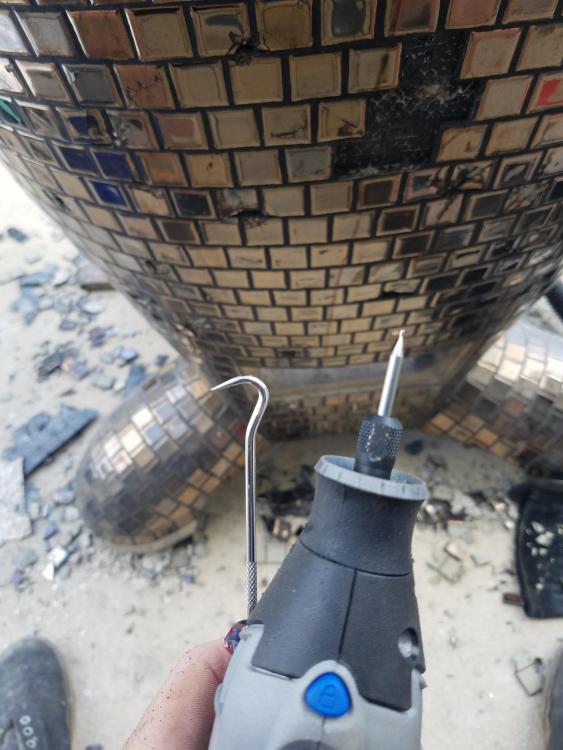
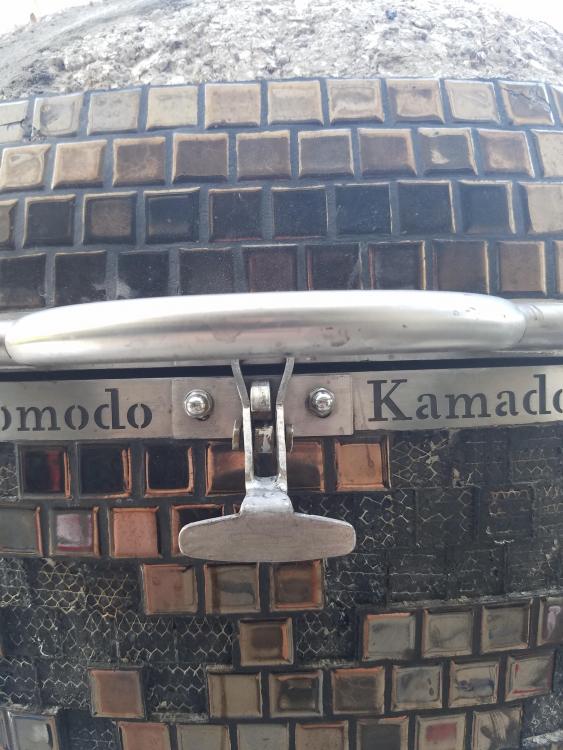
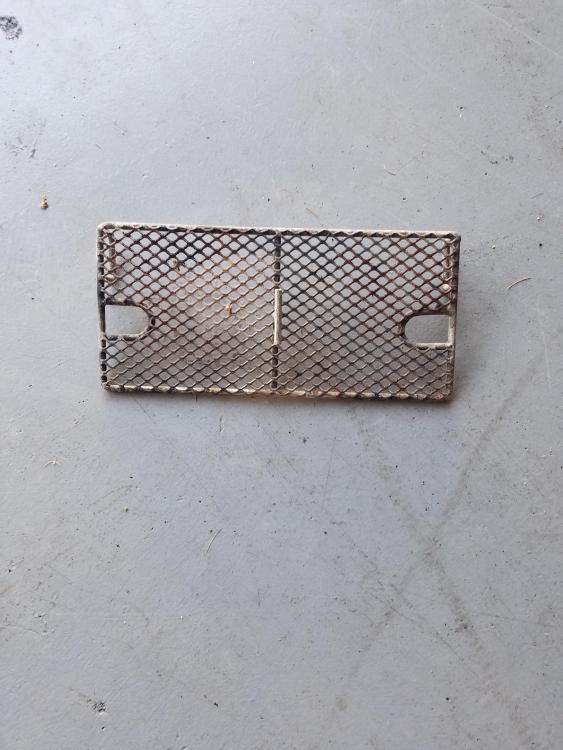
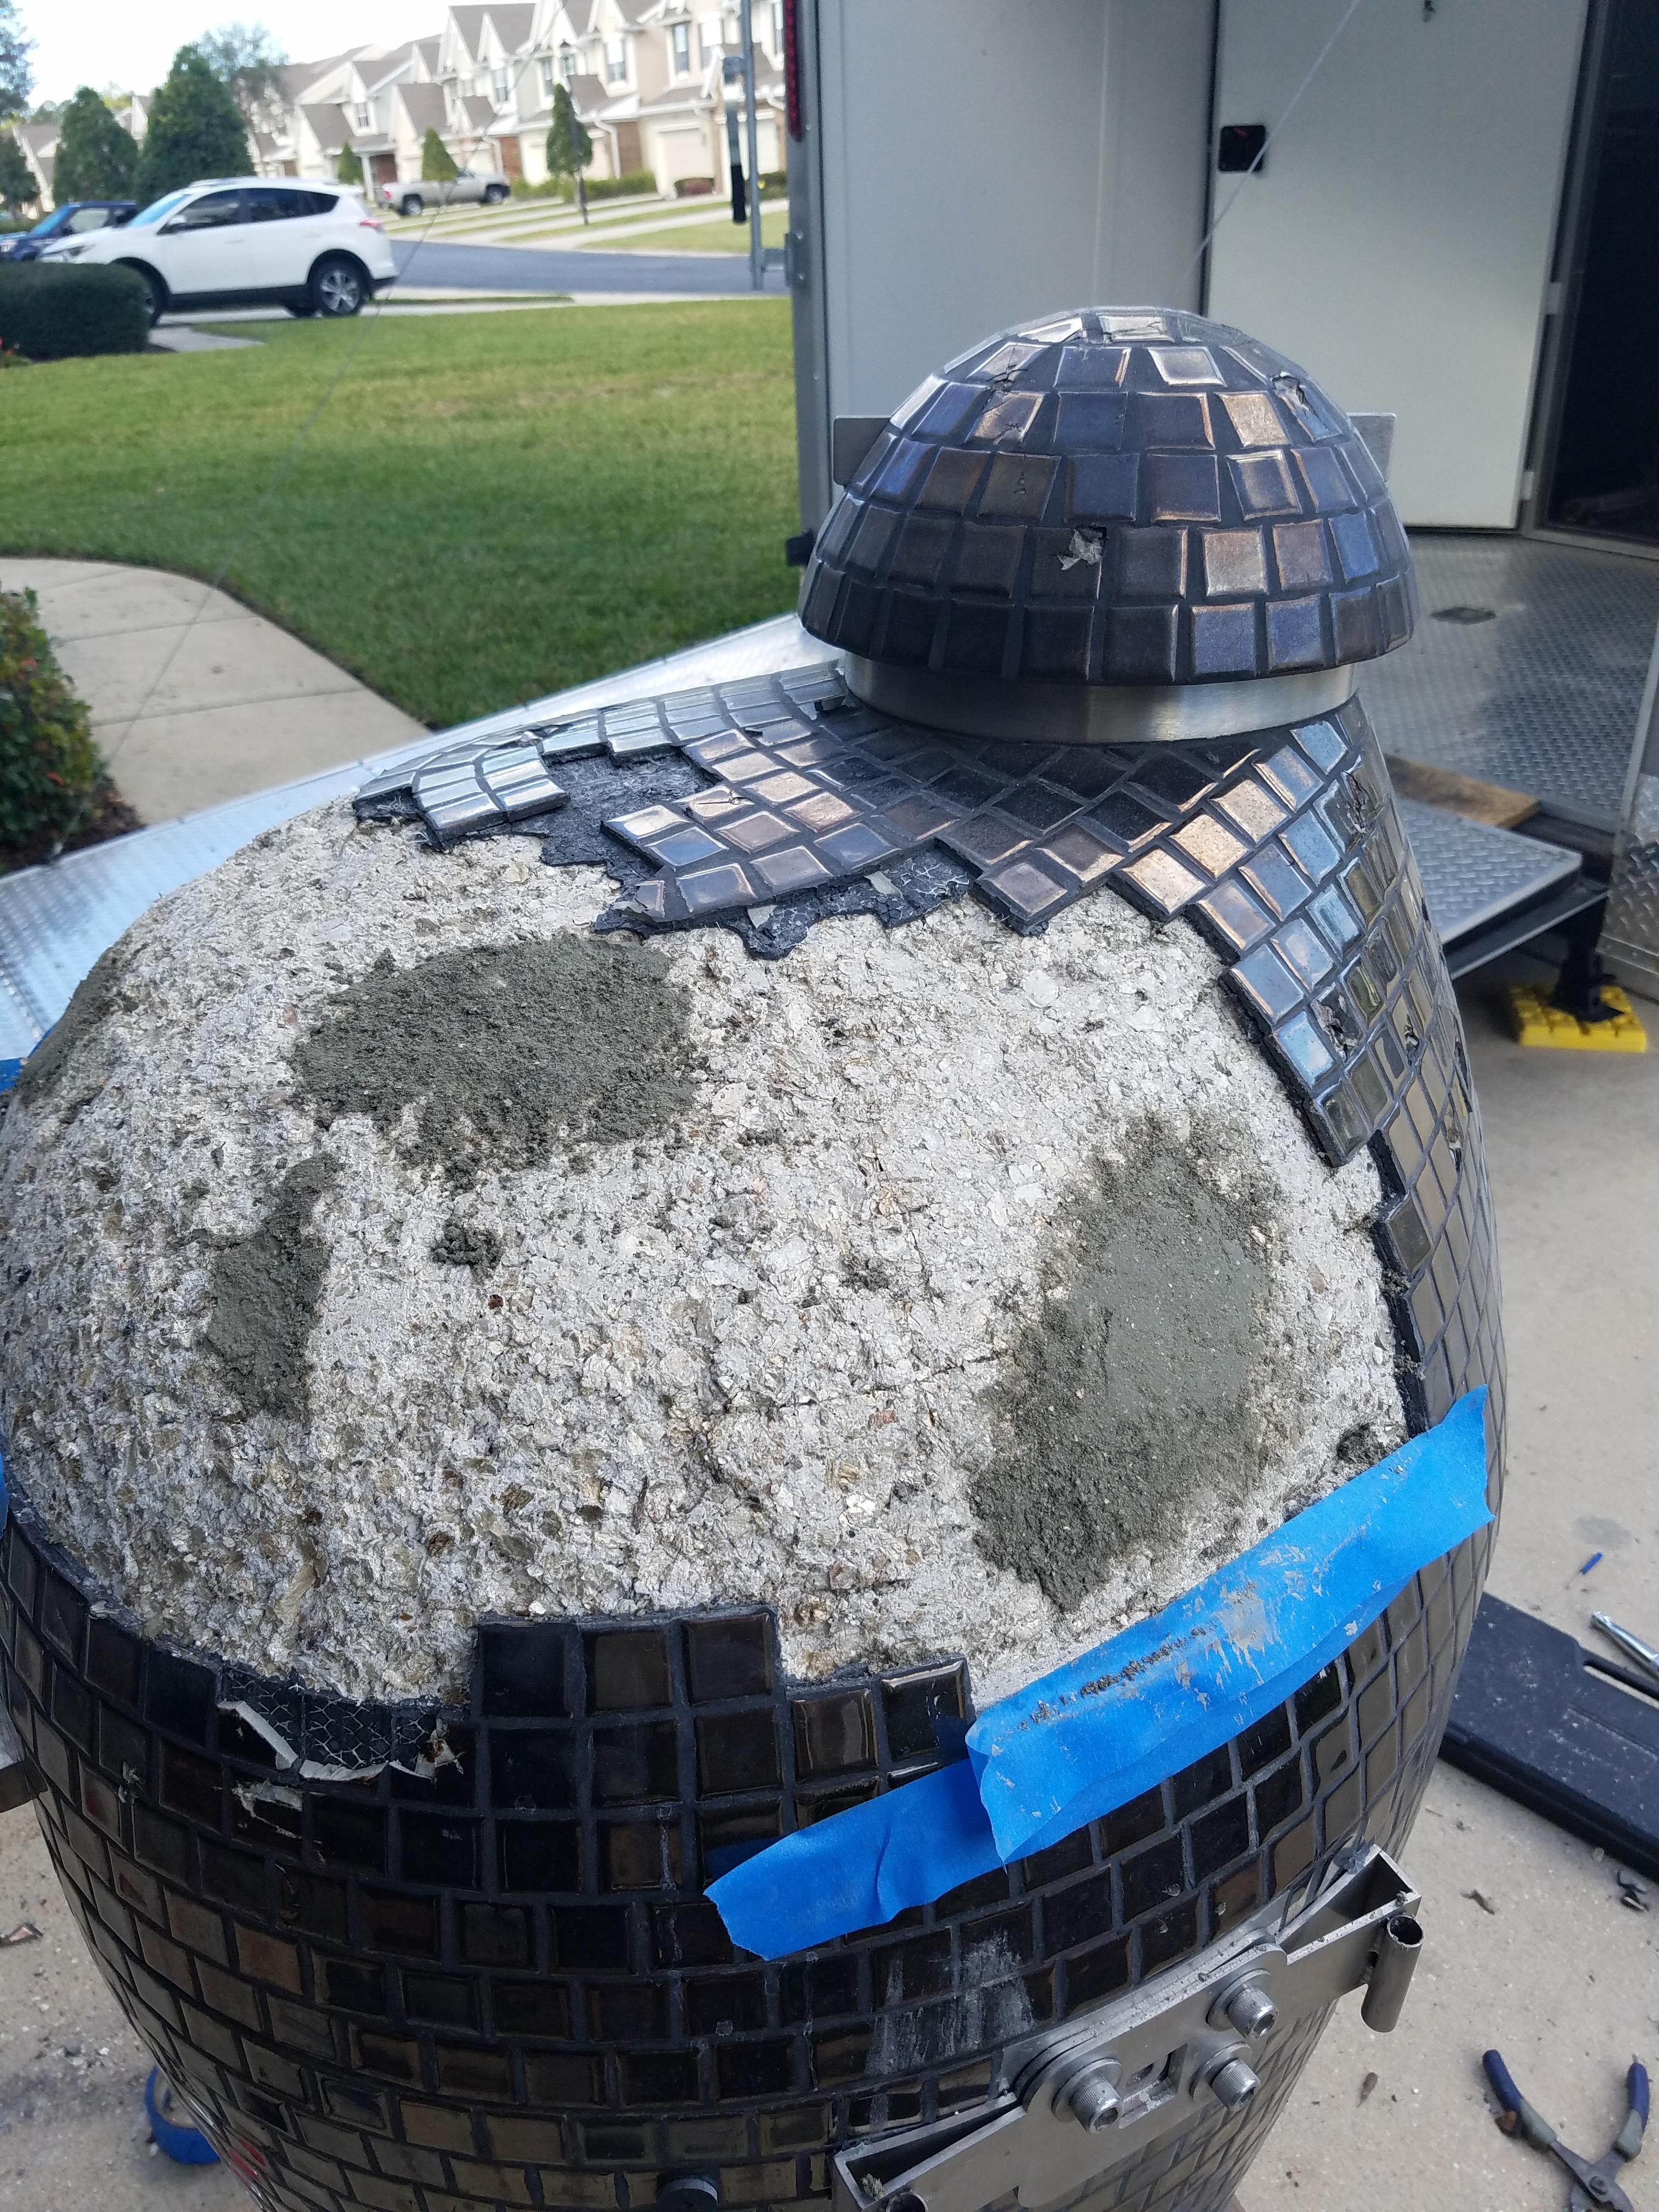
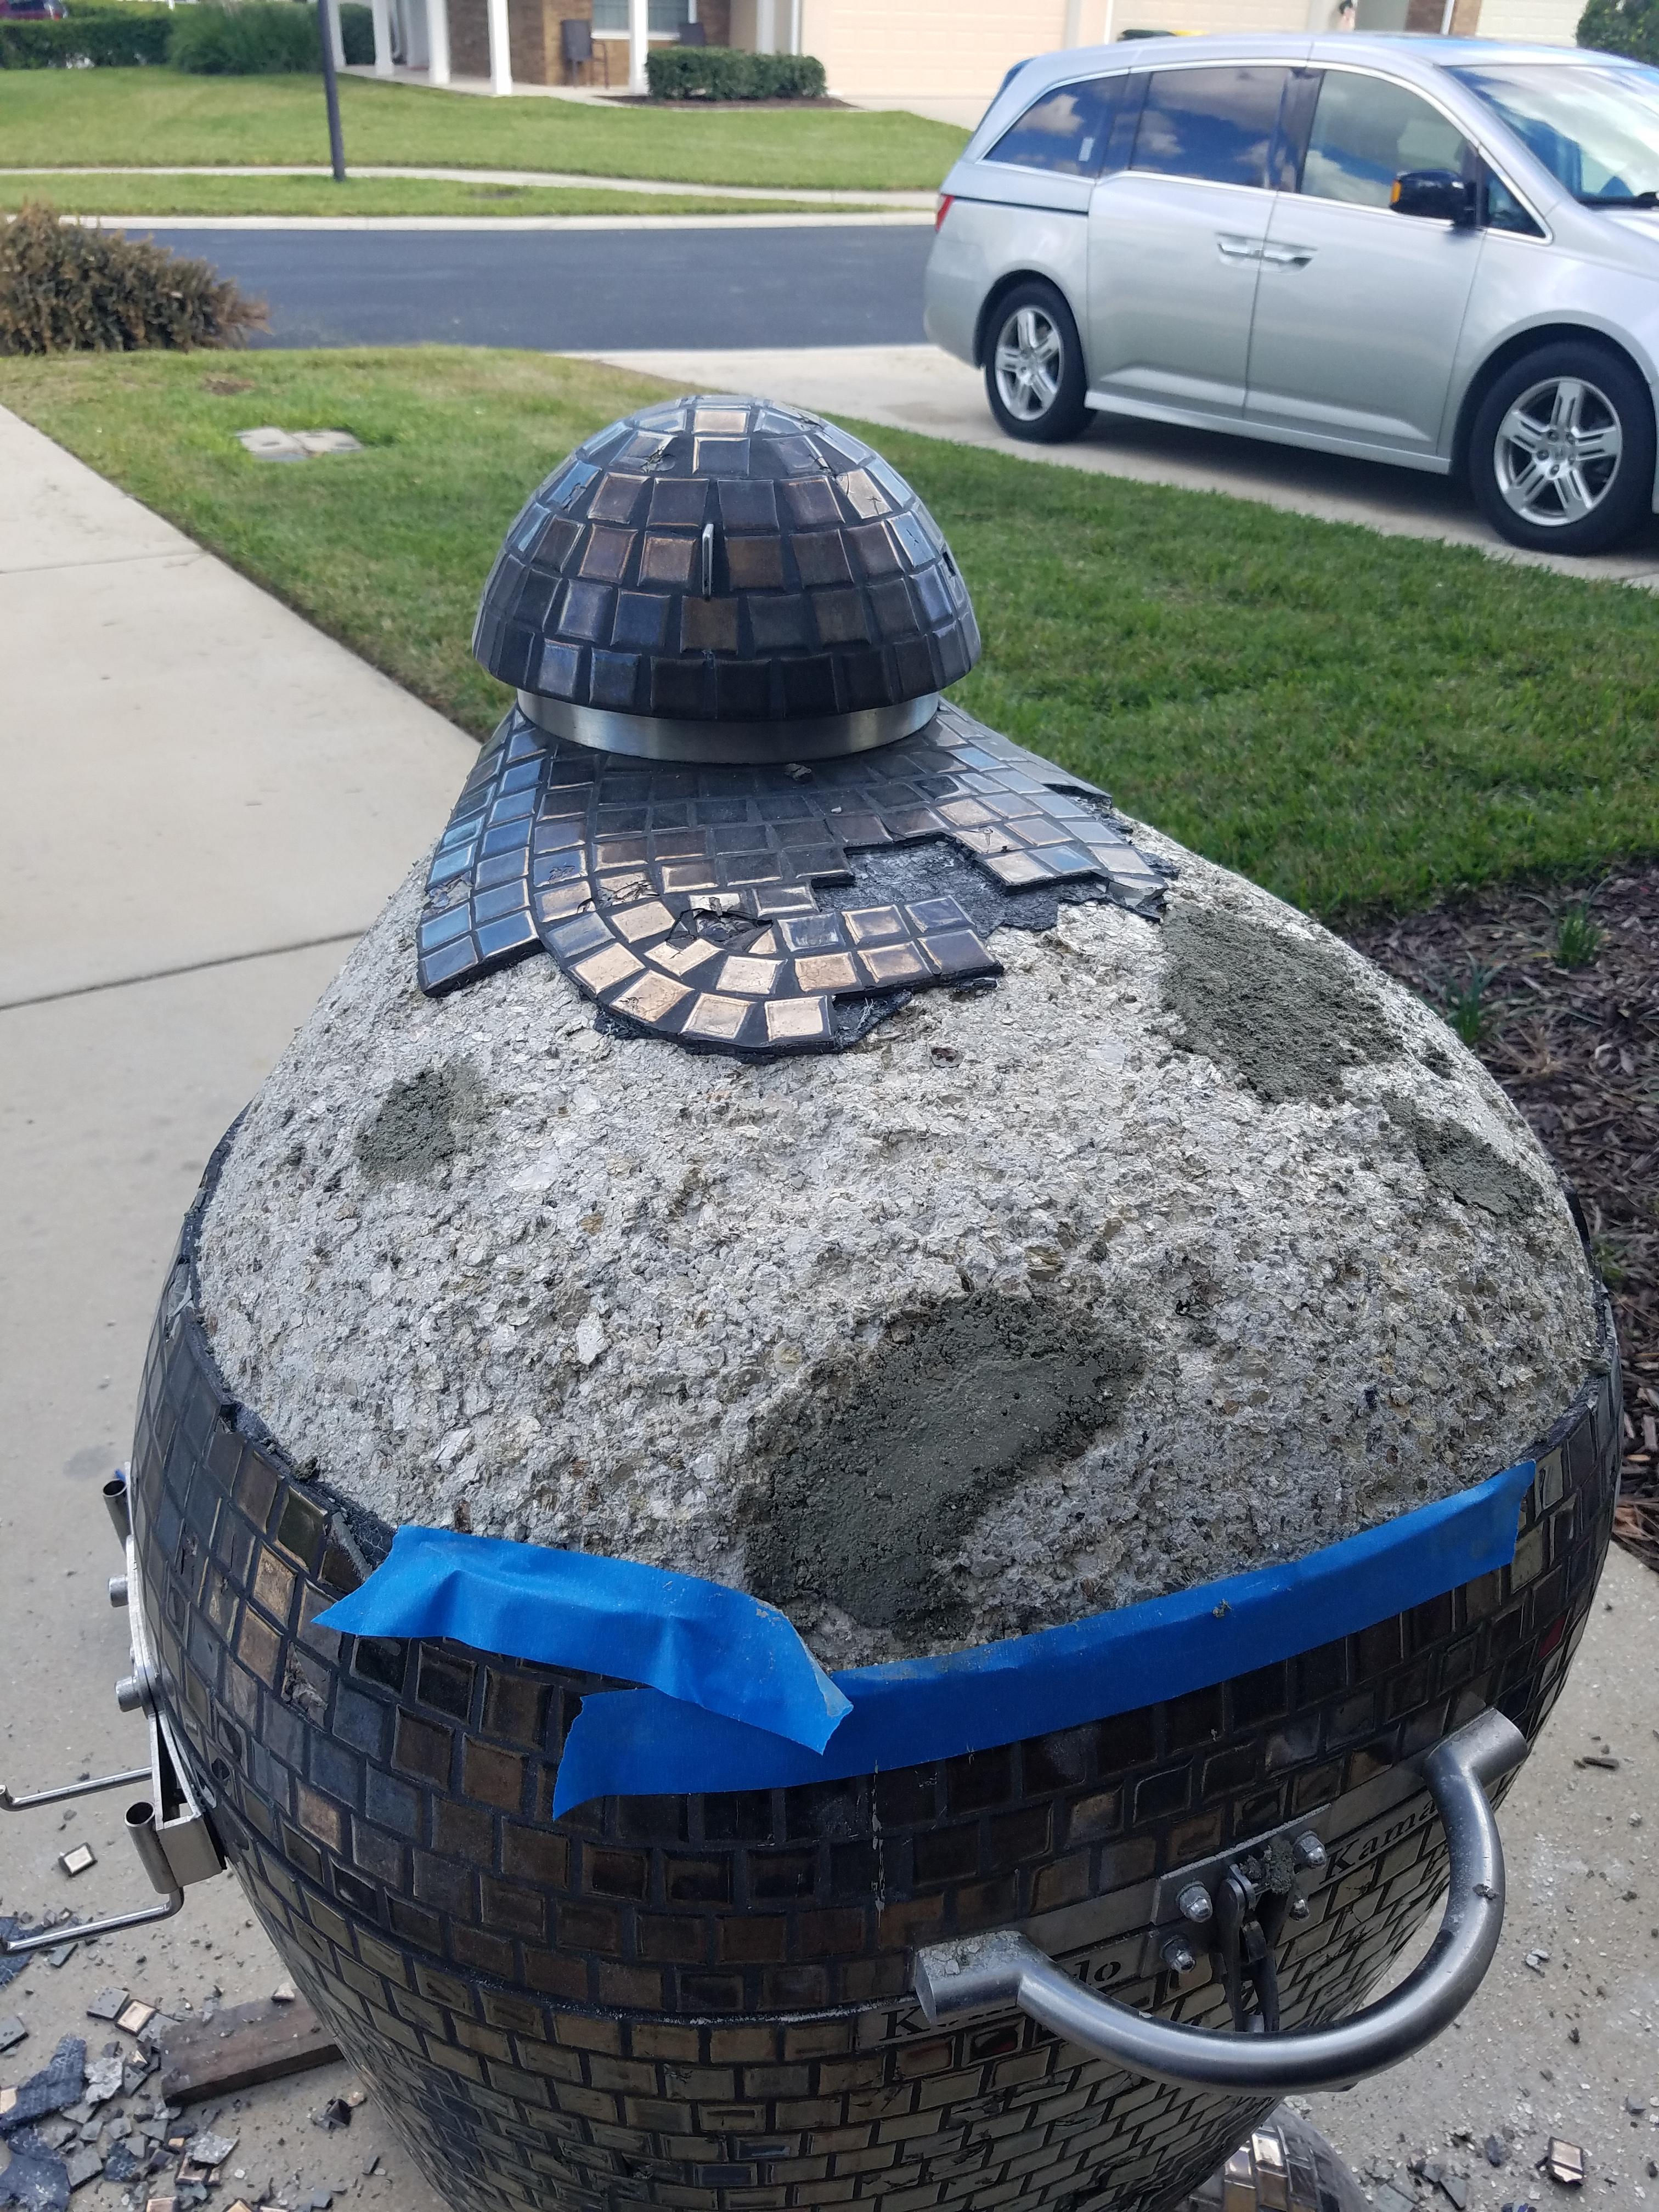
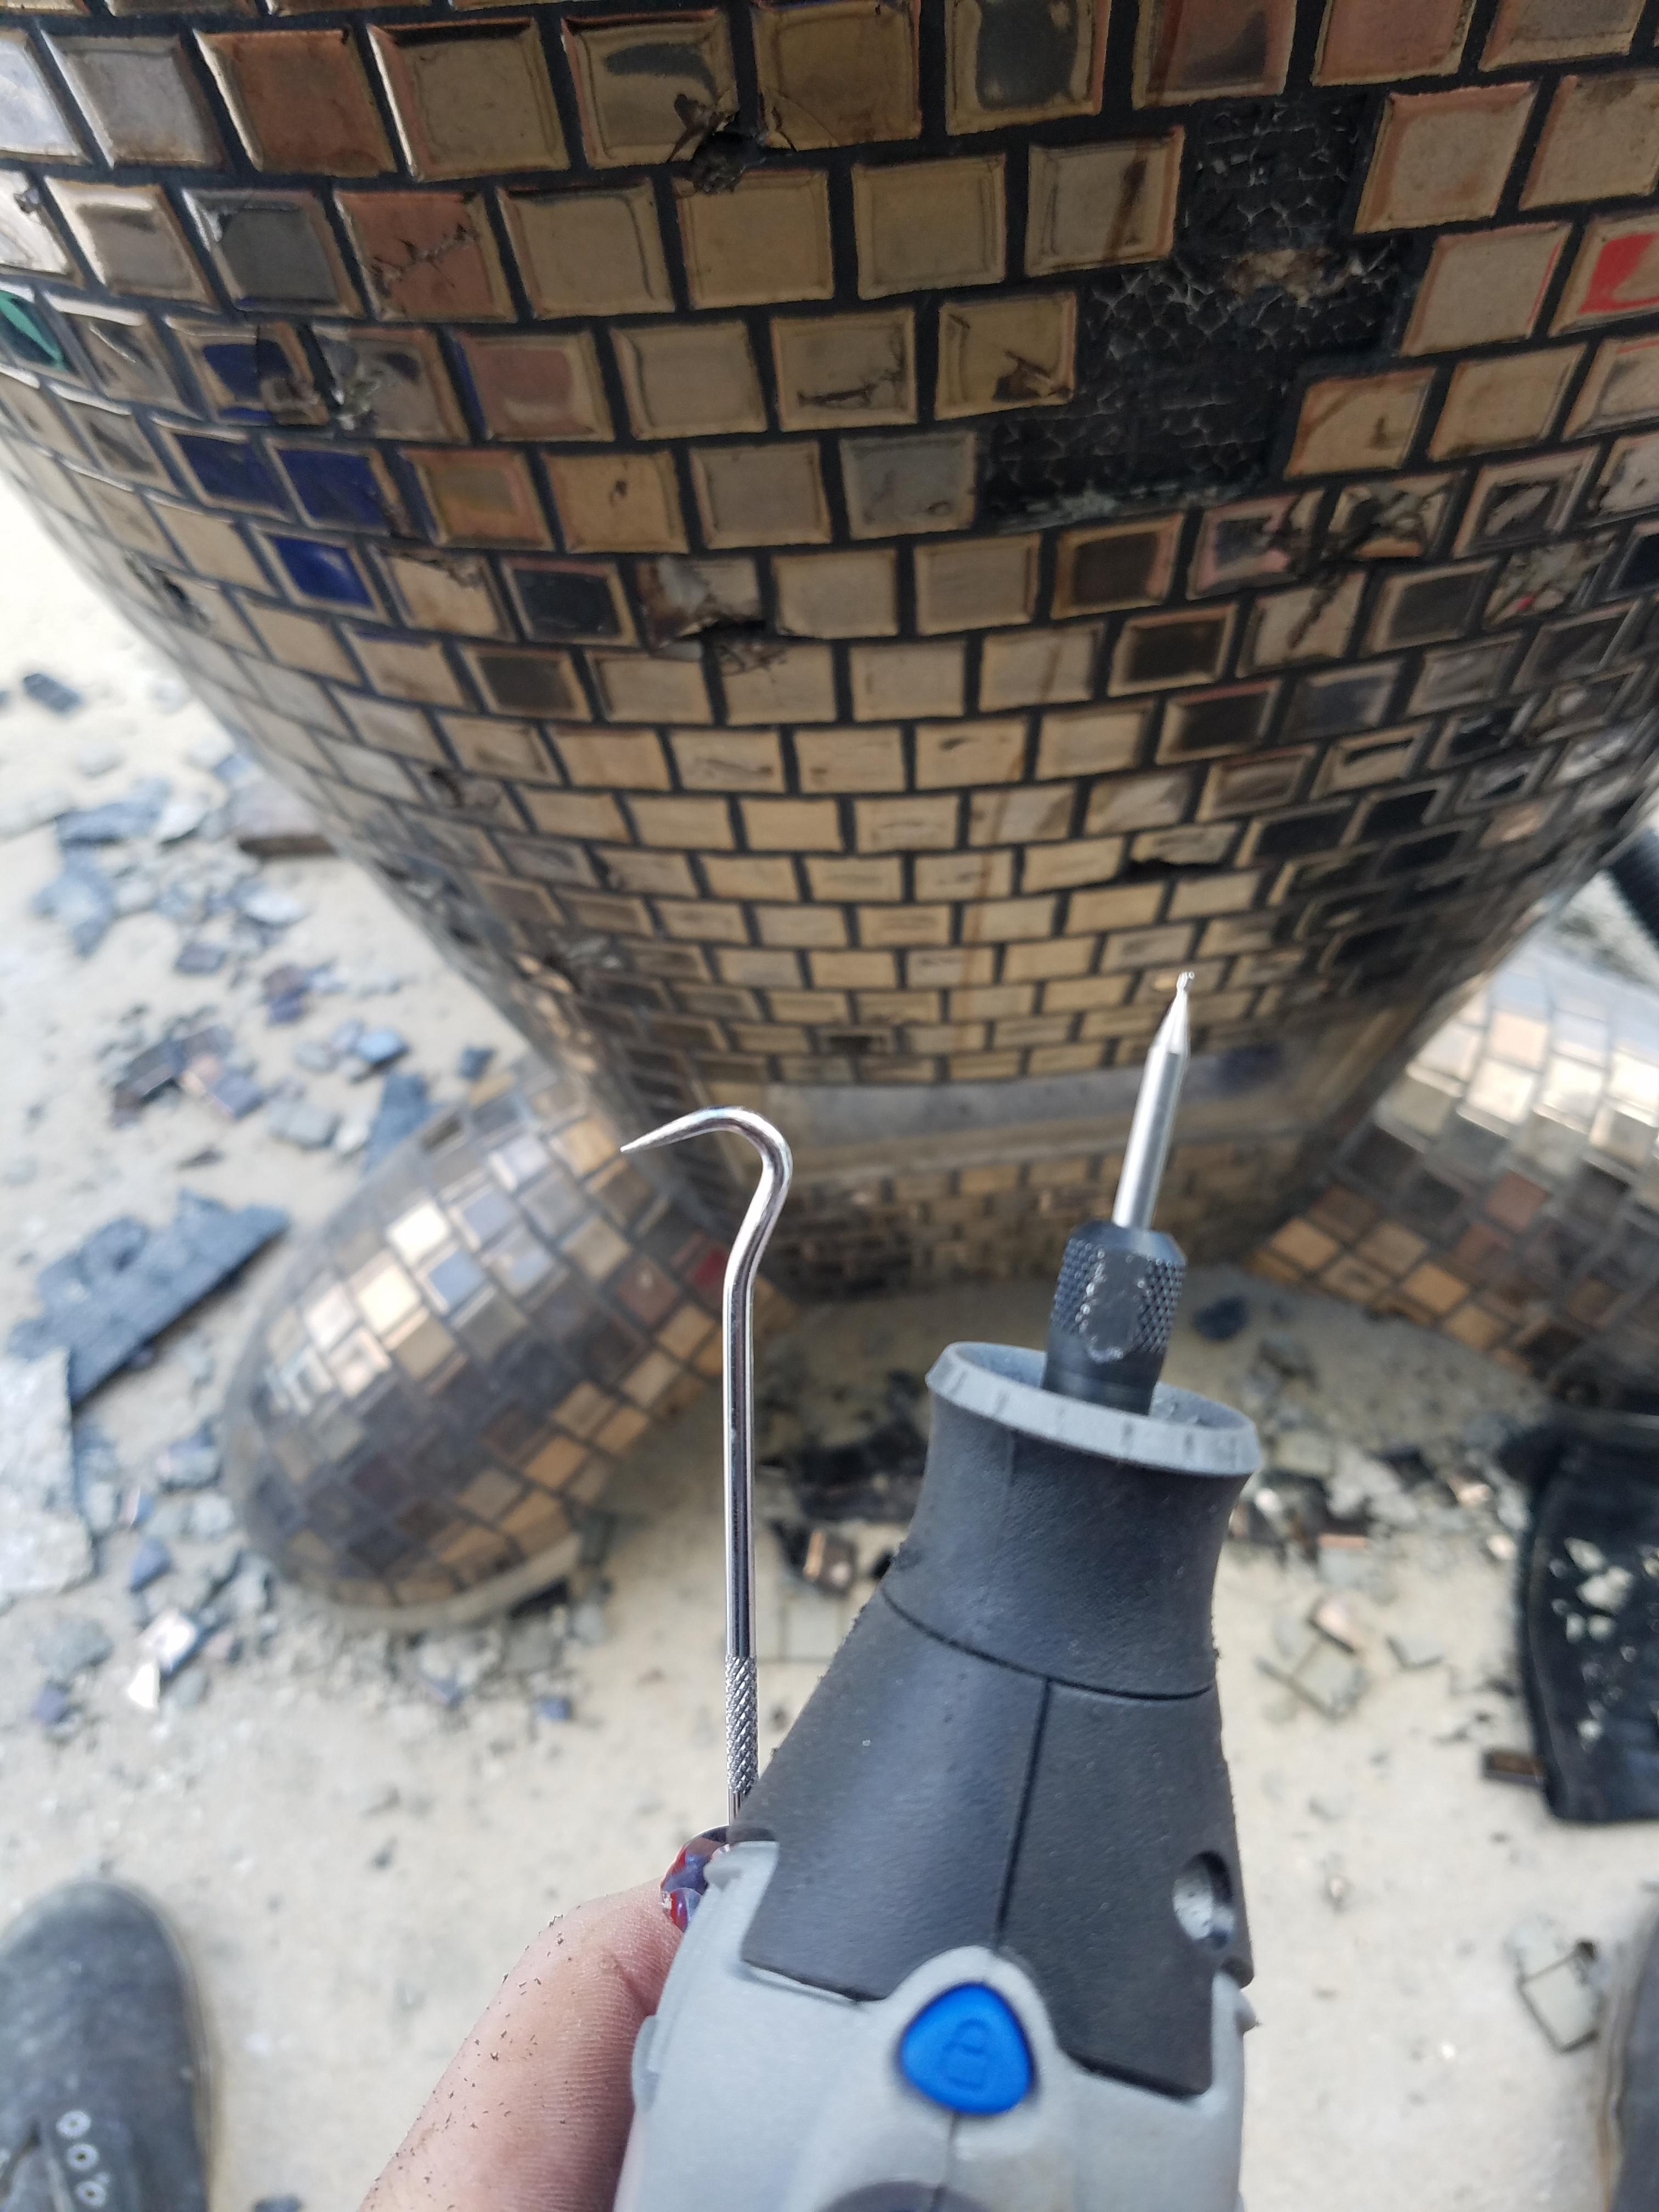
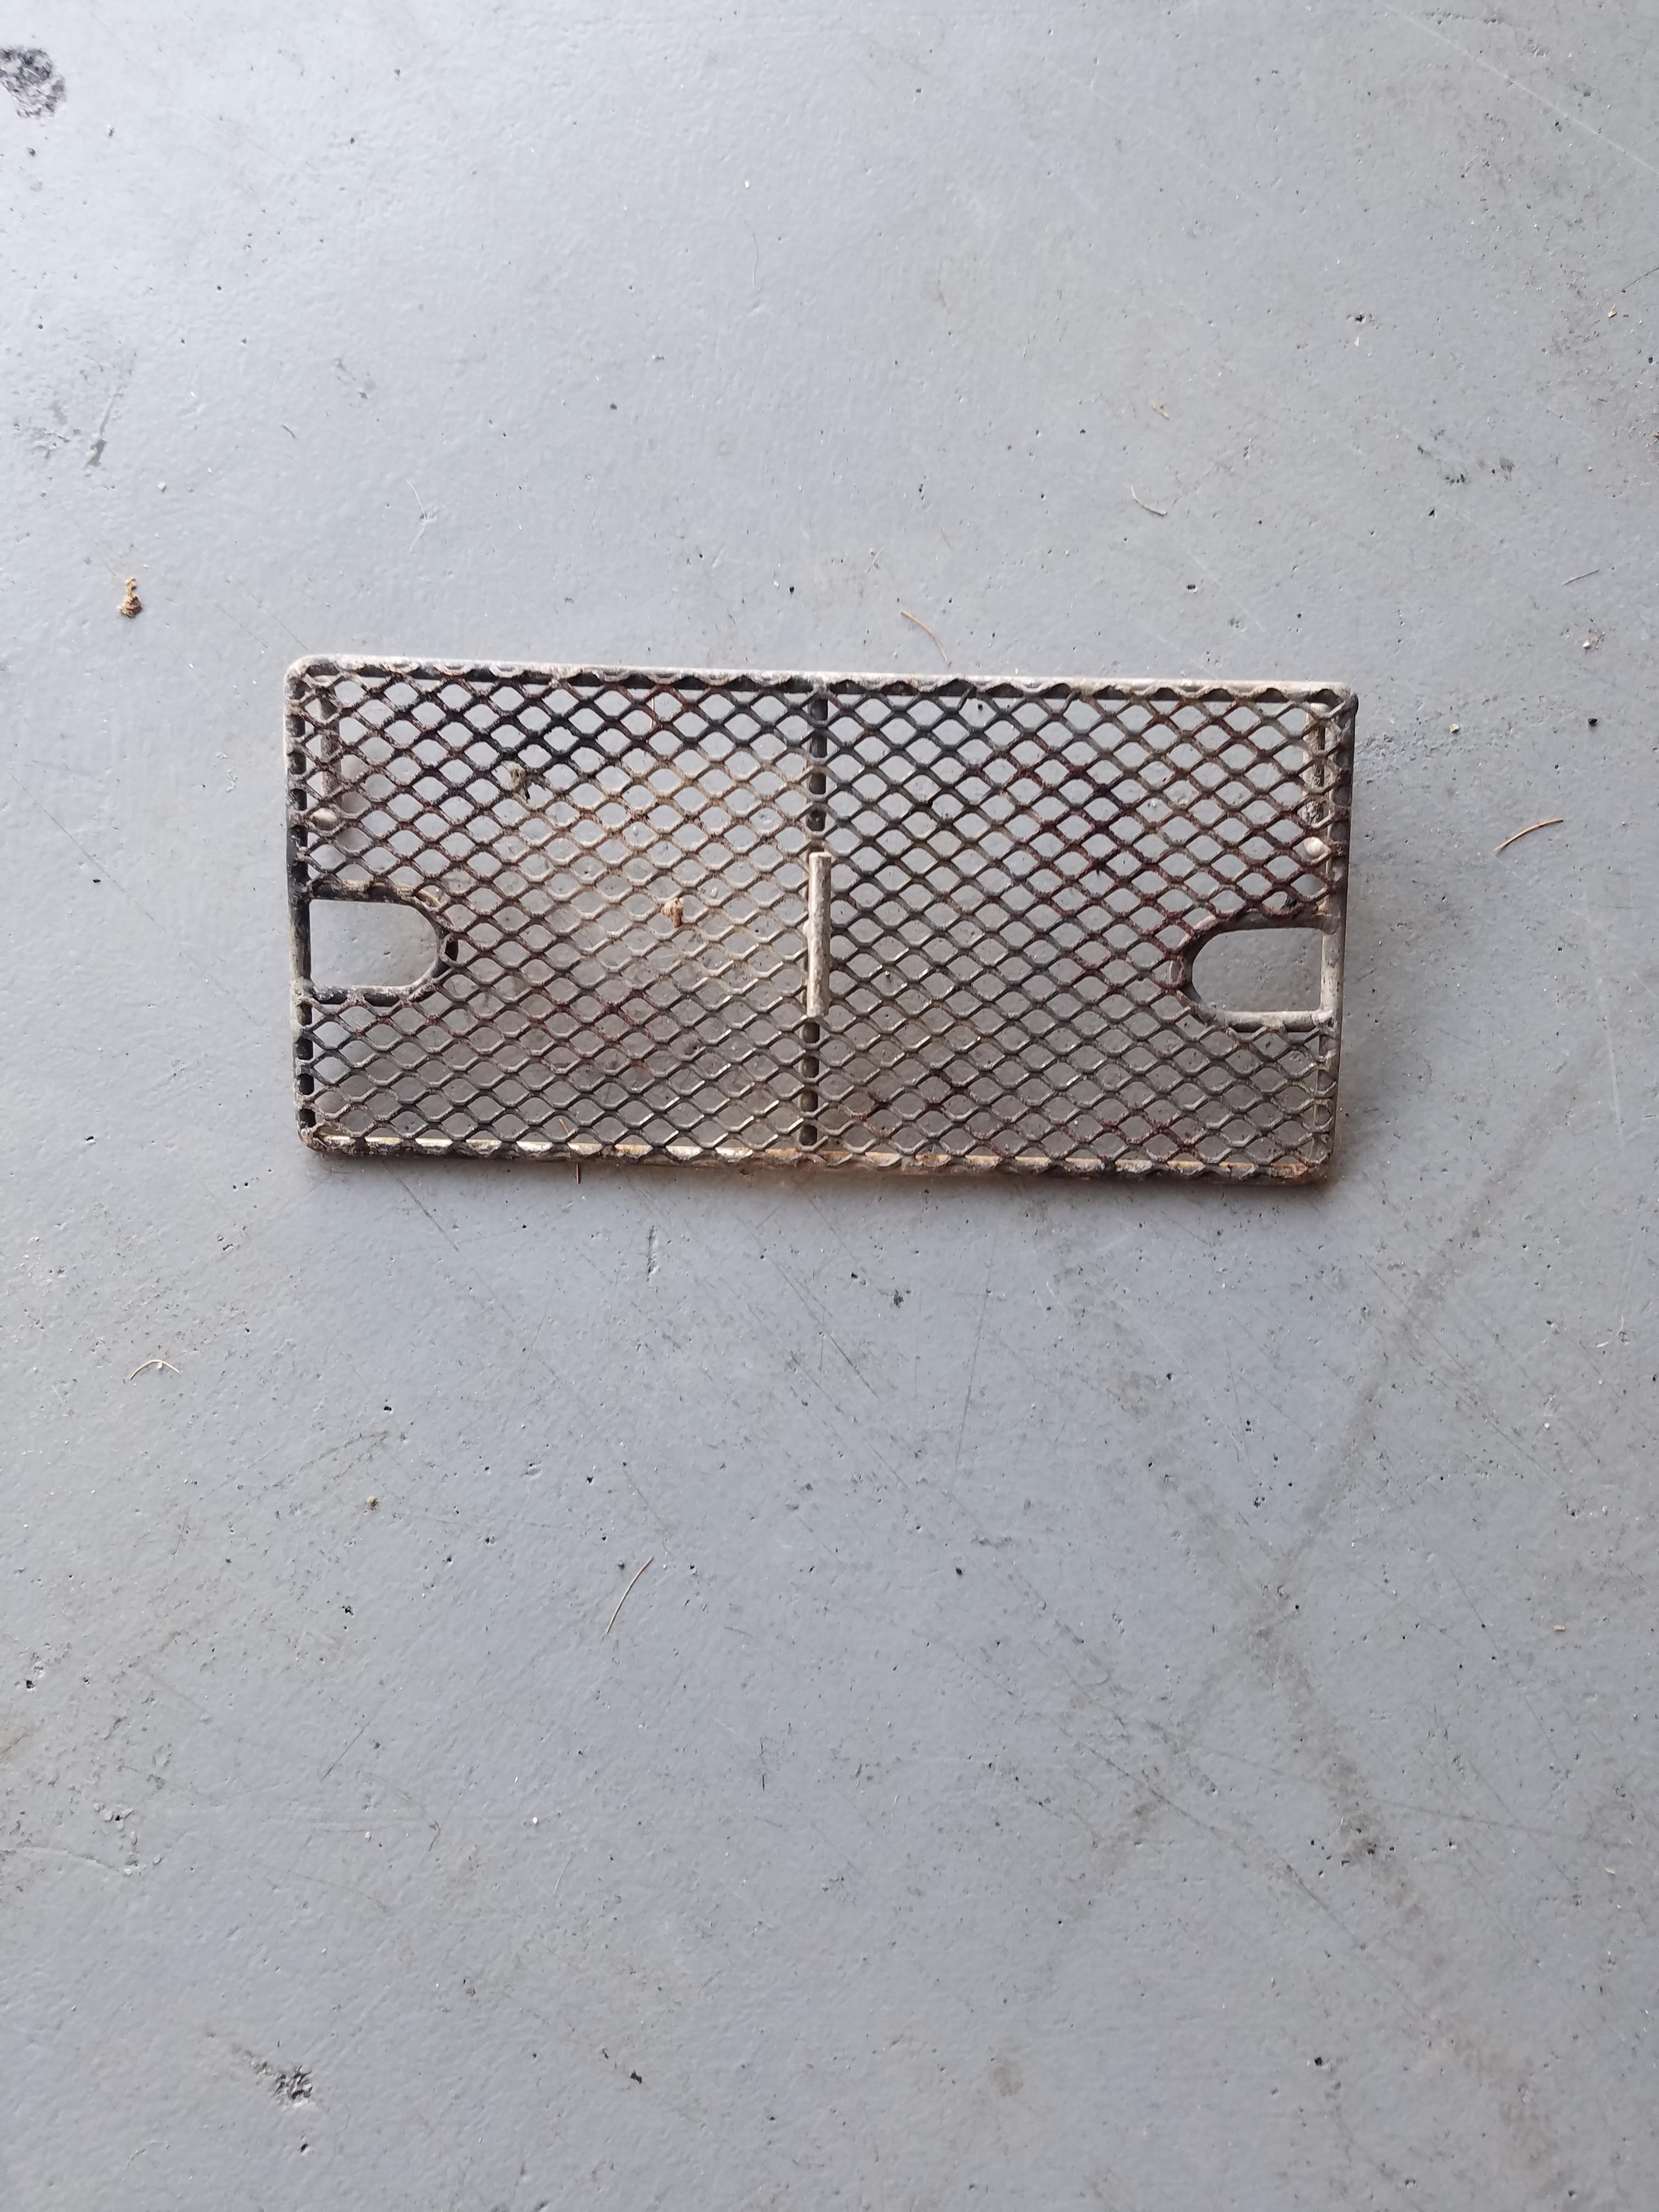
Alright day 1 of KK restore/rebuild is complete. At some points today I wish I would have just bought a brand new one. Here is how it looked before I started removing stuff. Its hard to tell but there are a boat load of broken tiles on the bottom. Most of the damage is up top as well as most of the broken tiles. I started with clearing out the damaged areas on the lid seen in the pictures I posted earlier. The insulation layers is a soft layer of what looks like a sand and sea shell mixture. I dug around the damage area with a chisel to square everything off and to take the cut all the way down to the cement. you will notice in my first picture above you will notice what looks to be chicken wire. This is where the cement is so you can see how much of an insulation layer there is. Once I cleared out enough area to pour in the refractory cement I noticed that most of the tile up top were loose or had very small cracks in them. Decision was it all had to go. I removed almost 50% of the top tiles and the black material under the tiles. This allowed me to see all damaged areas that needed to be filled in. I then mixed up some cement and filled the cuts. This stuff dried pretty quick. Was rock hard in about 30 min. While it was drying I decided to start working on the bottom. I used what looks like a dentist pick to help remove the tiles. These things are a PIA to remove as when I removed a lot of broken tiles ones there were not broken came off to. I used my dremel with a very fine cutter to cut into the grout on the sides of each tile as there was space there. The top and the bottom I believe the tiles are touching so couldn't really get in these locations. Some areas I managed to get all broken tiles off then on the last tile a large chunk of tiles would fall off. It was at this point the F bombs and every other word came flying out. I decided to move from tile duty to rebuilding the latch. I heated it up and started bending it. Problem was that the part that you open the lid with fell off when bending back to straight. More swear words came out. After calming down I got out my welder and aligned the latch best I could. I tacked it in place on top and bottom. I then spent about 30 minutes with dremel grinding down welds and shaping it to look nice. As you can see it is almost done. I broke all my grinding wheels so I couldnt finish it. Will pick some more up from Home Depot later. After this I went back to removing tiles on the bottom. As of now I believe I have 80% of the broken tiles removed. Tomorrow I plan on removing the remainder of the tiles and finishing up the latch as well as sanding and re staining the side tables. What color stain would go best with Bronze?. After all this is done I will be ready for new tiles which Dennis is working on for me. Lastly this was laying inside on the bottom. Looks to be some sort of ash grate. Anyone tell me where it goes?