


the biffer
-
Posts
39 -
Joined
-
Last visited
Content Type
Profiles
Forums
Events
Posts posted by the biffer
-
-
Congrats on the KK! Funny I was just making a few shouts on the forum regarding the rotisserie....sorry to hear the motor kind of konked out. On my end (KK 23) I just got my "missing parts" for the rotisserie basket that never were sent to me such as the mounting bracket, shafts and springs. What a tease.....I did buy th One Grill motor though and today I was attempting to get this thing up and running but having big problems. For starters the mounting bracket will not align with the hole (too high)...also not sure of the rest of the assembly regarding the springs and shafts. Anyhow if you feel you can pass on any advice to me I would appreciate the help as I am brand new to the KK world as well. Again all the best with yours and many happy cooks.
-
Finally tried out the Guru and was pretty impressed how well it worked and easy install. Nice to have it plug & play ready. Not sure if I mentioned before I bought all the rotisserie attachments and motor recently however the basket assembly came with missing parts such as the shafts and springs and mounting bracket. Well it finally arrived today and much to my dismay I cannot get this thing to mount properly and the bracket does not align with the hole to the motor for starters. Is there anyyone who can share their advice and experiences with me what my next steps are.I think Dennis must be tired of hearing my gripes by now...thanks.
-
Great advice. I have yet to test fly it yet-maybe this weekend?
-
Can anyone tell me their experiences with the BBQ Guru? I have one here ready to go...the one with the 20 CFM fan DIGI-Q. Does it perform as advertised?
-
Grills should be vented max 625-650ºf The temps have gone up as we added more aerogel now starts about 525-550º
The vapor at 750º is much too explosive.. much too much pressure. Will always dislodge or cause a bubble..
New heat deflector is grill shaped..
If it's polished it's a baking stone
HeatDeflector
New 23 Baking Stone
Dennis just sent me an updated PDF manual suggestng the stone doubles as a baking stone as well as a heat deflector...at least the grill shaped one I have.
-
I'll ask this here, "How easy it to roll the KK 23 on a deck? Just want to know if it's reasonably easy to do. I'm getting the 21 but it weighs the same as the 23 and the base unit is the same as the 23. In the winter especially I will want to put it out a few feet to use it. Do you think I'll be able to do that?
If you have a deck already then the KK23 is a piece of cake to roll....just requires a hard lean to get it going...make sure someone is steering though! Mine is on a concrete patio which is typically rougher than a patio deck so you should be in great shape.
-
Thanks! I agree with you just using a good quality lump and adding mesquite would be the best method but for some reason I need to satisfy my curiosity by trying the mesquite lump first. Yes I m familar with the Naked Whiz reviews and it certainly does highly rate it. Next problem I have is WHERE does one buy it?
-
Regarding lump charcoals....I will probably go with a shipment of the koko soon but I wanted to ask the members their thoughts and comments on how I can get my hands on some good quality mesquite lump-for some reason this stuff is difficult to get a hold of.
-
I installed a GE 27" induction cooktop about a year and a half ago....very slick and easy to use. Yes I had to replace cookware with "induction" ready utensils etc which is basically anything magnetic. Never really thought of it but my cast iron pans work great with it. Induction is lightning fast to pre-heat and fast to cool too. Being a glass top care must be taken at all times to prevent cracking. I really wanted a gas range but we aren't plumbed with gas lines where I live...nothing beats a flame for heat and speed-this is where the induction falls a bit short as it can never achieve the temps of a flame.
-
???
-
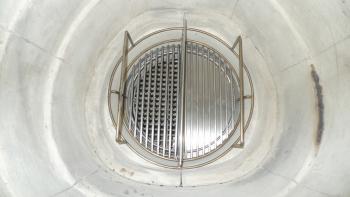
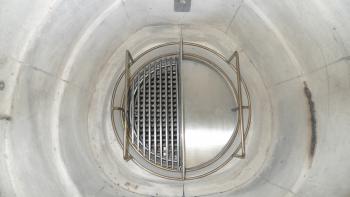
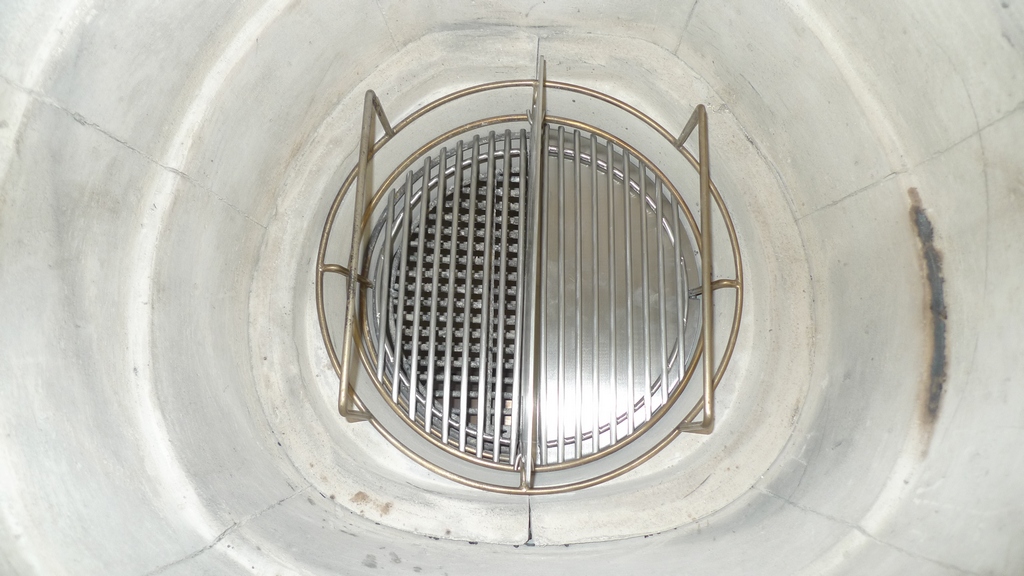
Help-just put together the basket splitter. Easy enough however what is the purpose of having two half moon grills when I (think) I want one side for indirect heat? Pictures of setup?Or would it be a configuration whereas I could remove the baffle and just have a complete grill THAT close to the firebox?More stupid questions to come...sorry. Also the round stone that comes with it....is this another baffle or heat diffuser or the actual baking stone? Thx.
-
I'm sure somebody out there has a full rotisserie setup? Can you please tell me a bit about it and does it perform well with the KK23? Do I order directly from Dennis? Thanks.
-
I can't stand the thought of covering it. With all of the pictures on the site, I have yet to see a faded KK. If mine fades in the hot Texas sun, it will serve as justification for another one.
Touche'
-
Living in Iowa, with our harsh winters, I have a cover for mine. I have one of the original Johnny Boy covers. Dennis sells them now, also made with Sunbrella, about the best stuff out there!
Being in So Fla, you should protect it from sun fading. Not sure anything will protect it from the hurricanes, though?
NOTHING stops a "hoocaraine". Anyhow I have the KK living under the shade of the flat roof off the patio. If we get hit I am not worrying too much about losing the KK no matter how hard the wind blows!
-
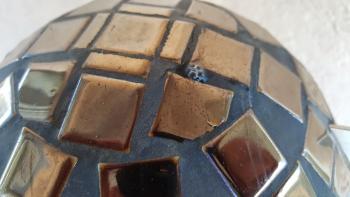
Biff, I will defer to Dennis, but I do believe you should repair areas that look like your top hat. See the line that looks like a tear in the grout? Water can get in there.
Your grout likely came in a white tube. It used to come in a little bag, thus the "cut off the corner" reference. The grout and liquid in the tube may have separated a little, so squish around a little to reincorporate.
Clean the white residue off the tiles and grout. I use Simple Green cleaner for stone surfaces. Wherever you see those rips in the grout, squeeze a little grout on your finger and rub it in in a circular motion. It will fill in the affected area. Don't worry about getting it on the tiles. Rub it in until you don't see the line anymore. Let dry completely and wipe the excess grout from the tiles with a wet cloth or paper towel. It comes right off.
I live in Texas, so the weather that my KK is exposed to is moderate. I believe the concern with any breaches to the grout is water getting in and freezing resulting in potential damage.

Great information...thanks for clearing that up as I could not understand what the "bag" reference mean't. I think before I apply any grout I will keep the white streak marks to easily spot where the venting holes are along with my pics. I will pickup some of the Simple Green at my local Home Depot. I live in South Florida but I am lucky to have placed the KK under the protection of the flat roof in the patio. Do you protect your KK with the a cover?
-
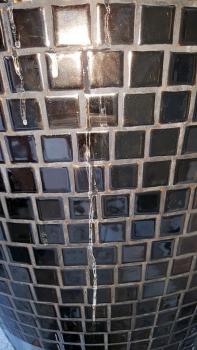
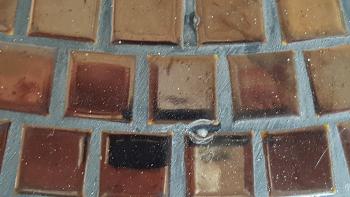
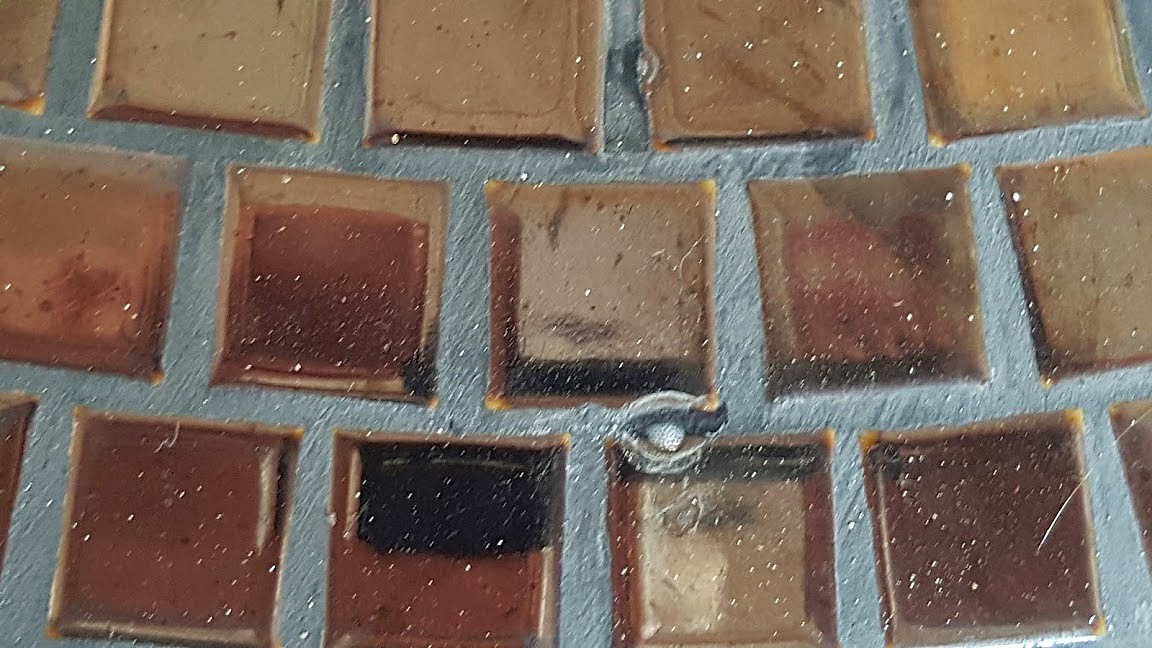
So here are the results of the hot burn in today.....hope you can see some of the bubbling and white streaks. The high-hat vent sprung some good "spit sizzles" too. She is doing a very slow cooldown now which is exactly what I want. Should get back outside just to make sure the small area of tiles that lifted slightly is sealing okay. Still unsure if I need to apply some dabs of grout on those areas....hmmm.
-
I had the smell, but no tiles bubbled up on my burn in, just a couple of spots of white residue. YMMV.
Just don't freak out, it's normal and no harm is being done to your new baby!
Yup, she smelled alright. It's almost the same odor I get once in a while from my motorcycle exhaust pipe on a hot day when it is parked in the garage. BTW a few tiles started lifting so I have to monitor the cooling process now and make sure thay are firmly in place.
-
Ok, no hotter. Start closing the bottom vent, then the top. As it cools, just press the tile back into place, once it stays just keep an eye on it. Once it's cooled with tile in place, you're good.
Sent from my iPad using Tapatalk
Is the grout not necessary then? I just snapped a few interesting pics where you can see some bubbling in a few places (I will post shortly). It looks like spit bubbling....yes a few tiles have gently lifted so I am now going out to the KK and start slowly shutting her down as you suggest with bottom vent first.
-
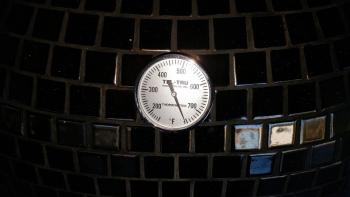
Here I am with the OK pegged at 750 degrees… I do see some venting as advertised with white streaking. When Dennis suggests closing the holes/ vent is he implying that I use the supplied grout? Is there a method to so this I assume after cooling? If you read his instructions there is a paragraph that states "close the hole/ vent with applied grout by cutting a small corner off the bag and then folding it over and taking it closed". This is confusing me, what bag? HELP!
-
Kinda like drivin a Ferrari 55 MPH.
Sent from my iPad using Tapatalk
I have had that experience as well...hard to keep the 12 cylinder prancing horsies under 100...all you wanna do is bury the needle. Today is a miserable rainy day here and I just may fire up the KK to initiate the "hot burn".
-
I had the smell, but no tiles bubbled up on my burn in, just a couple of spots of white residue. YMMV.
Just don't freak out, it's normal and no harm is being done to your new baby!
Okay.....I am one of those doting types and think it may feel pain!
-
You need to get it hotter. Let it stay there for an hour ish, then let it come up about 50° every thirty minutes. You really want to see 550°-600° for a period of time, it takes that to get the grill hot enough to cook the residual moisture. It'll have a chemical smell, that's normal.
Should you see fluid actually dripping from a spot, stop the grill from getting hotter, let it cook for about thirty minutes, then start shutting in down. As the grill cools, press the tiles where the fluid leaked into place, making sure they stay in place as the grill cools. You'll be set at this point.
Sent from my iPad using Tapatalk
That is the plan on the next cook. Just cause I like doing things slow I am just happy to see the KK come to life with the "small" cool burn. What I have discovered thus far is how precise the temp control is! Upon your recommendation as well as the KK manual I will let the temp get up to the 550 degree range and vent the solvent in order to cure it. Over an approximately two hour burn I will increase the temp in 50 degree segements every hour up to around 660 degrees. As stated will I actually smell the off gassing and see bubbling?
-
Okay everyone...it's Sunday late afternoon and today is BURN IN BABY! As prepared as I can be I put enough charcoal in the basket and so far I am maintaining exactly 350 degrees with almost pinpoint accuracy. From what you have all suggested as well as the manual this is a good break-in temperature. I will let it go for several hours while enjoying an adult beverage. Just as a coincidence I happen to have a gi-normous ribeye ready to go on the grill for the "virgin cook", I'll see how it goes...don't want to push things. No worries, I have been documenting every step of the procedure with photos which will be posted in a bit.
-
Like I said, Dennis had made some enhancements since I got mine, so the manual might be dated. I upgraded from the screen to the baffle a year or so ago. Like it MUCH better.
Sounds like you might be confused between the charcoal basket (Metal) and the firebox (Ceramic). NEVER take out the firebox - those ceramic pieces wedged in the bottom where the metal charcoal basket sits.
I take the charcoal basket out all the time, as I own 2 - one for doing full baskets of charcoal and the second one has my basket splitter in it for doing smaller cooks where I don't want to burn through a lot of charcoal. Works great for searing a couple of steaks, as it forces all the air through half the surface area, so it gets super hot, super fast!
I also take the basket out to clean out the ashes. I just use a metal scoop and just reach down and scoop it out with that.
Don't be afraid of asking more questions. That's what this forum is all about - plus sharing pictures of the amazing food that this grill
Appreciate it and thanks!


Happy Birthday Dennis!
in Jokes, Ribbin' & Misc Banter!
Posted
I never get much Birthday recognition any more so you should bath in the celebrity status and wishing you a great one!