


Lannoos
-
Posts
49 -
Joined
-
Last visited
-
Days Won
1
Content Type
Profiles
Forums
Events
Posts posted by Lannoos
-
-
Pocket Aces seemed like a good analogy for twin 32's!
Hard to beat!
and yes CC, I have been seated at a few poker tables.... wouldn't exactly say that I 'play' as yet. I'm always a welcome contributor it seems....
-
 2
2
-
-
Looks like 'pocket aces' to me.
I bet the neighborhood is in for a tasty July 4th given you new found capacity!
What's for dinner?
-
1
-
-
Now you've done it....1
There is no turning back.
You are familiar with cooking over coals, but you have no idea just how GREAT your life will soon become! I'm no expert, but my 23" KK is my BEST FRIEND and once you understand the cooker's personality, you will be nothing short of humbled by what these insanely cool cookers can do. Set it, forget it and in the end probably the most elegant, beautiful, stout and long-lived thing man has ever created. I trust that you consulted your heirs and have reached accord as to what you bequeath. if not, I want to be your son!
-
Gotta be the 23!
-
Parchment is a good friend in the kitchen, never thought of using it on the stone. I'll give'er a try.
Picked up some rice flour today, so next pizza bake will tell the tale of two new techniques!
Thanks all for your suggestions.
-
TinyFish,
I've never used Rice Flour before, could be just the thing I'm looking for. Edible ball bearings....
Perhaps my Napolitano attempts will be more successful going forward. Thanks!
-
Thanks Ceramic Chef!
those are some kind words indeed. Much appreciated!
-
1
-
-
CC,
I understand your point on the CyberQ (I said DigiQ, but I incorrectly Identified it, sorry about that.) It is not indispensable, but I work from home and often get interrupted while prepping to entertain (which my wife and I do frequently).
I use the DigiQ with an app on my iPhone called 'CyberCook'. This app lets me keep a record of my cooks that I can refer to allowing me to make small tweaks on subsequent cooks. I also find it useful to monitor temp remotely via 3 independent probes (think 3 roasts or 2 pork butts and a chicken cooked concurrently). I can increase or decrease my pit temp and maintain it via the guru fan (to +/- 5 degrees) when I'm away from the house and need to cook a few Briskets. It gives me a better sense of when the cook will finish if I'm running errands while cooking Low n Slow. Sometimes I find myself cooking overnight and the alarming lets me know if something is going awry or is finishing faster than expected, and it will wake me up just before the cook finishes. It is not for everyone, but in some circumstances it provides assistance when assistance is either unfeasible or inconvenient.
-
3
-
-
I'm going to list my favorites for you, you will need to prioritize as you see fit. I personally cannot live without any of the following:
- Dual bottomed Drip pan. Why? It preserves juices without burning them to a crisp, captures dripping perfectly during a turkey cook. Fantastic for low and slows that tend to shed a lot of fat (brisket, ribs, etc.)
- Large baking/pizza stone. Nothing like cooking your own pizza or baking fresh sourdough bread
- Teak Side tables, absolutely beautifully built, sturdy as can be and certainly required if you do not have a table near by. They look great too
- extra basket with splitter. very convenient and works great for Reverse sear cooking. Minimal reconfiguration of hot grates, etc when using the basket splitter
- A non KK accessory that I truly love is the CyberQ Wifi with the Guru Fan, makes long cooks effortless and allows me to fine tune low n' Slows remotely
- KK Cover, mine is in Persian Green and fits like a glove to protect my investment
- Map gas torch for lighting charcoal, really effective and efficient. takes about 90 seconds and you know you are good to go
- grill floss for keeping the grates free of gunk, inexpensive and highly effective
- ultimate Rib Rack, really lets you maximize your baby back affliction, if you suffer that way...
I think you will find that having a lot of friends is pretty good to. you'll want to cook a bunch of deliciousness often and without those friends to help you consume the amazing food you may need a physician to help manage the side effects. I think the friends are a better investment than the physician (no disrespect to the medical professionals among us)...
Ed, I can tell you one thing for sure:
You ARE going to have MORE FUN than you ever thought possible COOKING ON A KK!
Welcome aboard
-
2
-
Heal quickly Dennis, I wish you well. As I approach my 1st anniversary with my KK, I cannot imagine cooking without it.
On the bright side, even the vision of a visionary is improved when the cataracts are gone. I hope your surgery went well and your physical therapy is not too difficult.
After all: There is a 42" birth to attend to
AND the new cold smoker will need your attention soon!
-
Hello fellow KK aflicted home cooks,
I've been experimenting with Pizza using my sourdough starter as the base and am starting to get some rather good results, IMHO
thought that I would share my technique and see what refinements others may have to offer.
My sourdough starter has been 'alive' for about 10 years now. It is an excellent base for sour batard, baguettes and numerous other rustic breads so I thought "Why not make a pizza?"
If you have access to a sourdough starter, my dough building recipe is as follows, yield is about 3 pizza's with a medium thin crust. These are not Napolitano style pizzas, those I have yet to attempt due to difficultly getting the pizza to slide off my peel with the amount of ingredients I like to put on them. So think 'thin crust' pizza here.
for the Dough Combine these ingredients in a bowl and mix/knead into a dough ball and knead it until it has formed a good gluten structure and looks Silky (2 minutes on medium speed in a kitchenmaid mixer with a dough hook is about right for me):
- 8 oz. Sourdough starter at (166% hydration)
- Add 9 oz. fresh water
- 18 oz (by weight) bread flour
- 1/3 oz Olive oil
Let the dough rest for about an hour, then knead in (by hand) about 3/8 oz. of salt (use good salt like Pink Himalayan Salt). Salt inhibits the gluten formation of the dough, so it is best to let the gluten form without salt and then knead in after the dough fully hydrates by sitting for the mentioned hour. If you don't have an hour 30 minutes is fine.
Once the salt is kneaded in, form a ball and place into a Stainless steel bowl to rise. Depending on how vigorous your starter is and the temperature of your environment, you will then wait till the dough doubles. Then you can portion into smaller balls of dough ( i used 12 oz. per pizza crust) to complete their rise (again doubling) before you form your crusts. I roll mine out on a floured wooden peel to about 14" in diameter, roughly 1/8" thick.
Obviously it is easier to make the dough a day before. In this case after you knead in the salt, you can put the dough ball into an oiled Stainless steel bowl, cover with plastic wrap and then place it into your refrigerator. Then when you get up in the morning, you can take the amount of dough you want to use for tonight's bake, form a ball and let it come up to temperature and rise. It will rise a surprising amount in the refrigerator overnight believe it or not. You can hold this dough in the refrigerator for up to a week and it just gets better with age. At some point you will find that the dough is fully risen in the fridge and you must then use it, but it takes a long time and the sourness of the dough increases as it "ferment's" under refrigeration.
KK preheating regimen is as follows:
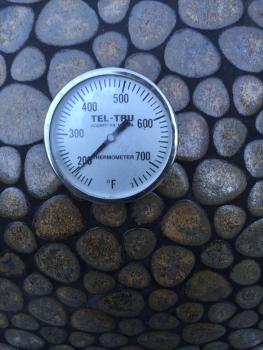
Fill charcoal basket and light in 3 locations equidistant from each other. Use the upper grate with the sear grate with pizza stone on top, (longer legs bearing on the upper grate so the pizza stone is way up in the lid dome. This keeps the shorter handles upward facing and the stone rides at about that height. open from draft and rear clean out door so lots of air is flowing. Dome lid is screwed open about 3 revolutions allowing for free flowing draft. It takes my KK, a 23 OTB about 90 minutes to heatsoak the stone to 400- 425 degrees. I have found that any temp of 450 will cook the crust faster than the toppings resulting in too much char for my taste. If you have fewer toppings you can use a thinner crust (Napolitano style) and cook at higher temperature resulting in a cracker like crust, but I've not yet achieved consistency with this style of pizza.
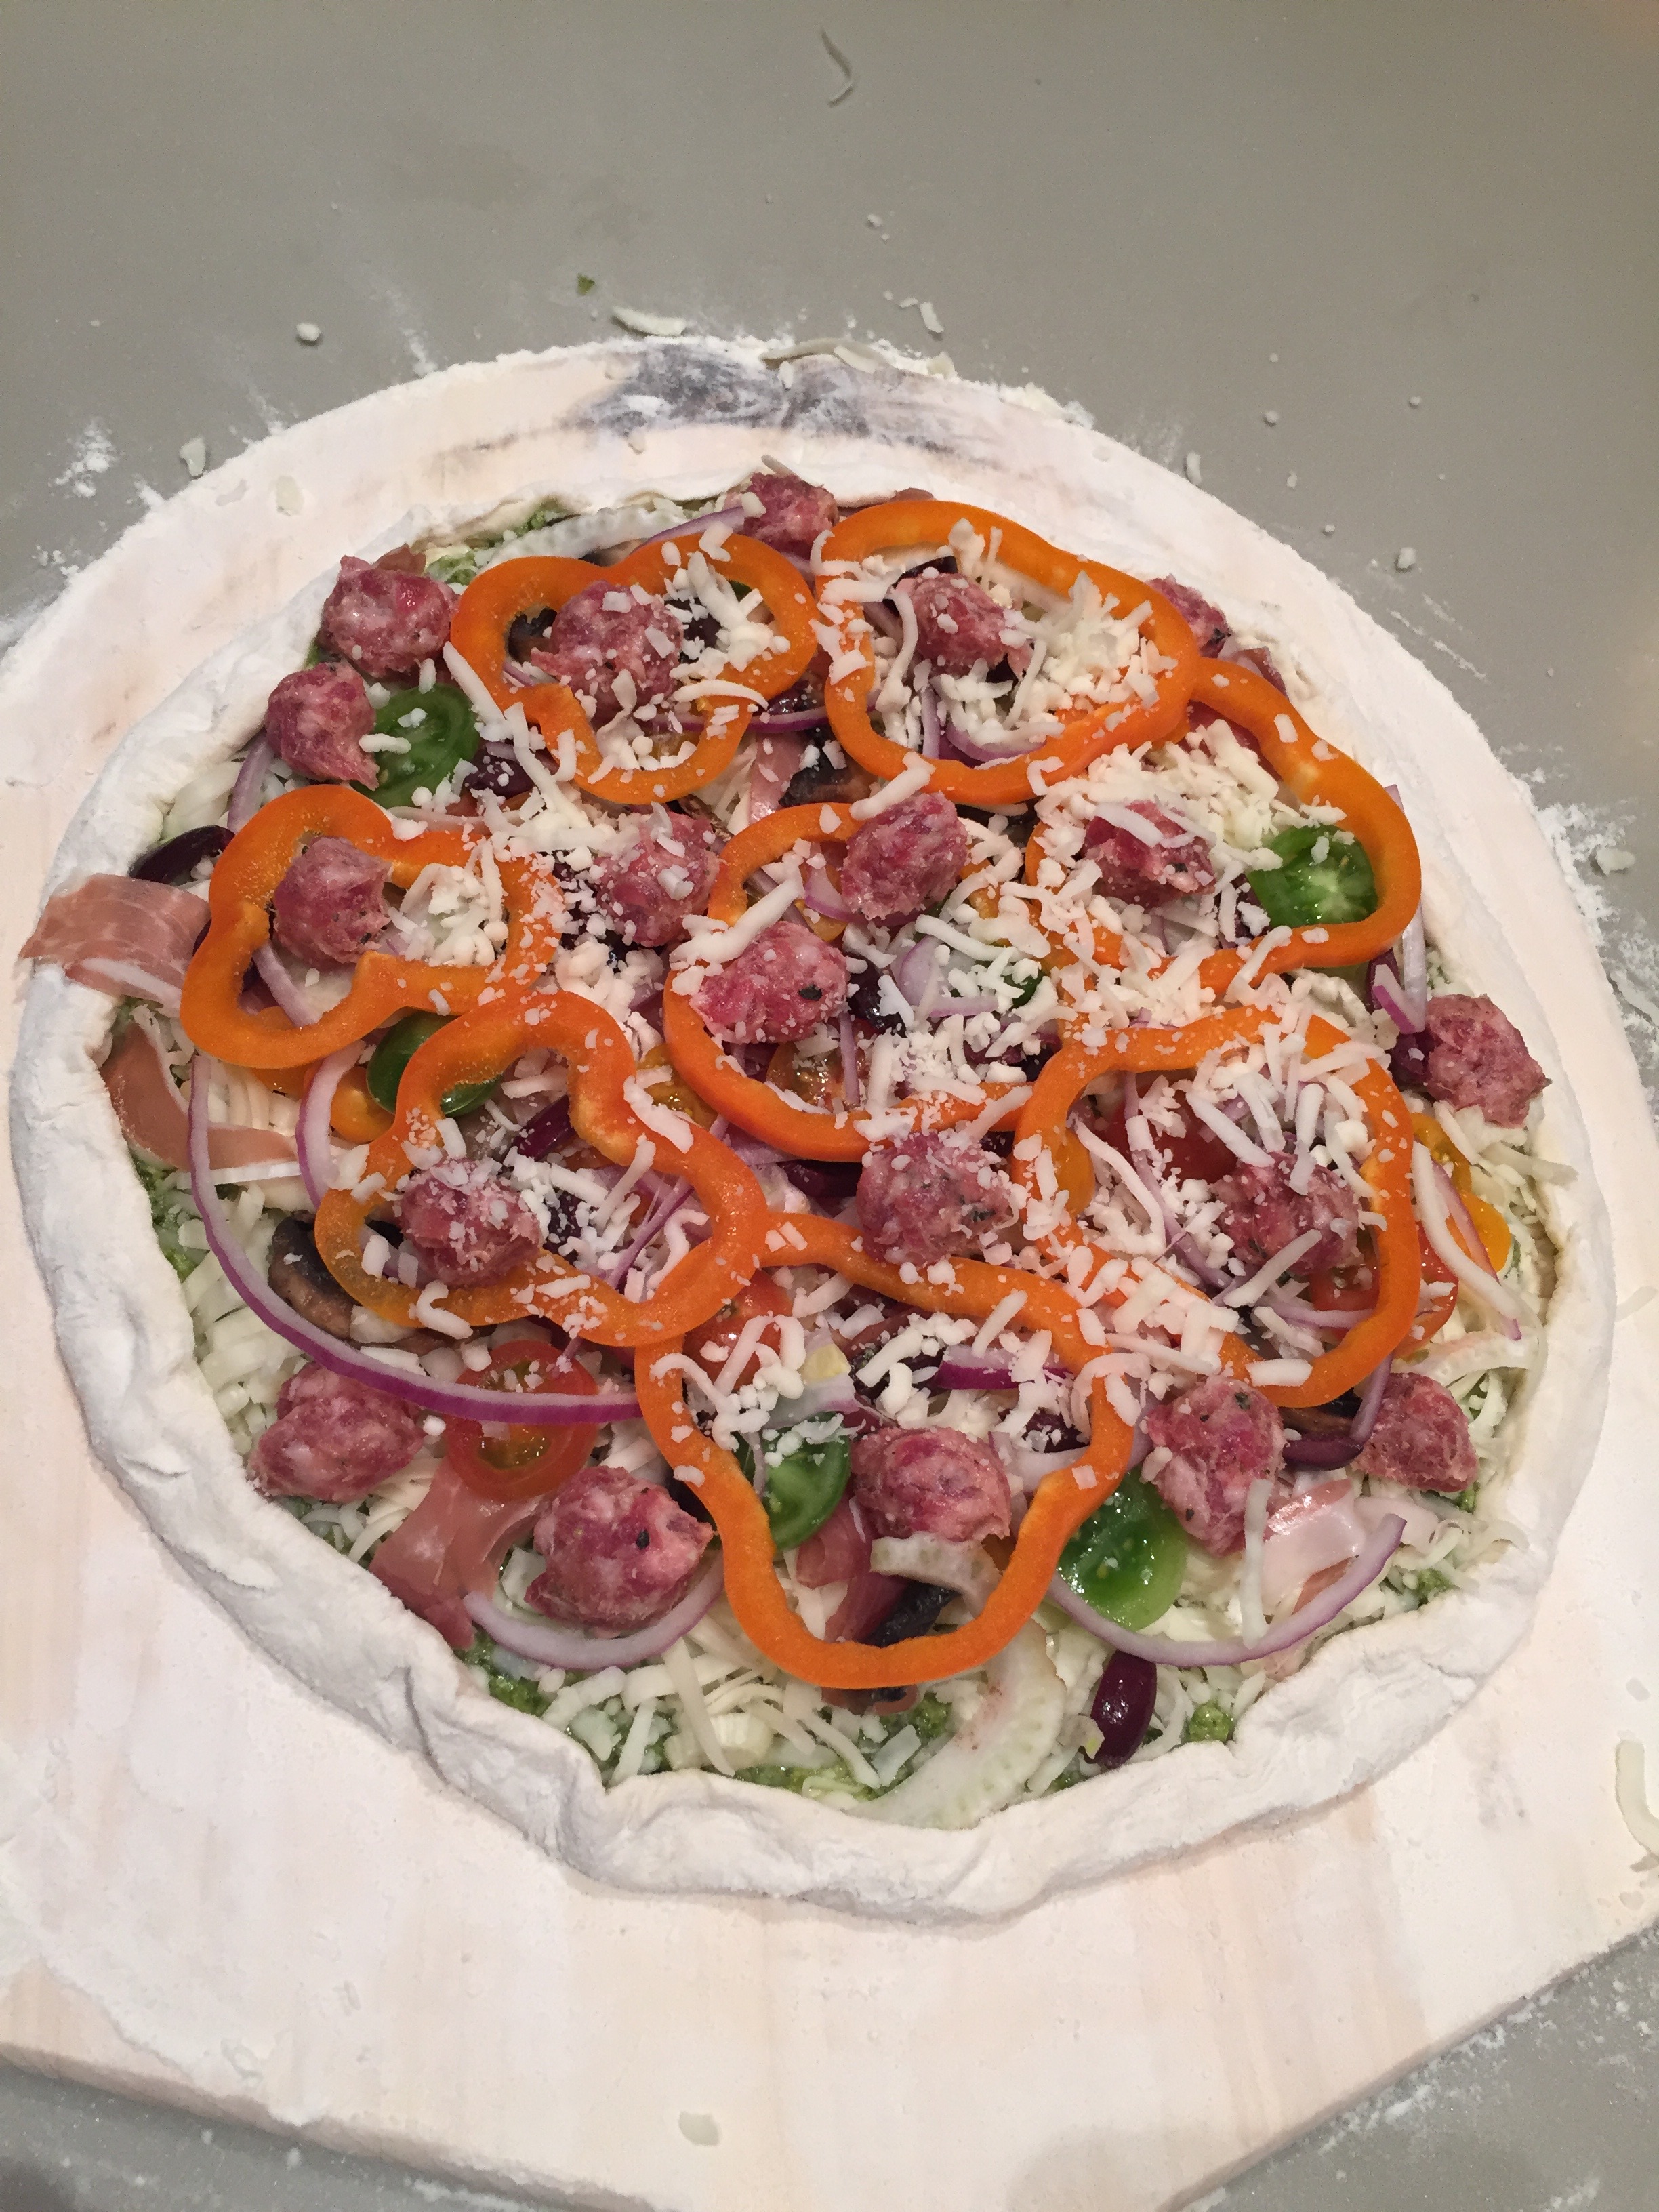
To build my favorite pizza I use the following:
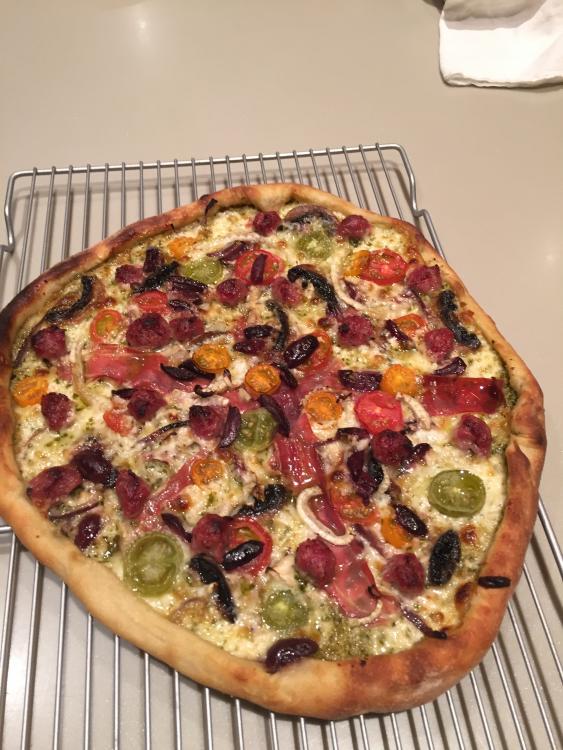
Pesto for the sauce lightly coating the area of crust to be topped. then I add Fontina and mozzerella cheeses, Sliced Mushrooms, sliced red onion, sliced fennel bulb, slice kalamata olives, thin strips of prosciutto, small balls of Mild Italian sausage, rings of Bell pepper and that is about it. once toppings are in place, I roll the edges to keep the sauce and cheese from running off the edges (about 13" in diameter now) and take the wooden peel with the pizza to the KK at 425 degrees.
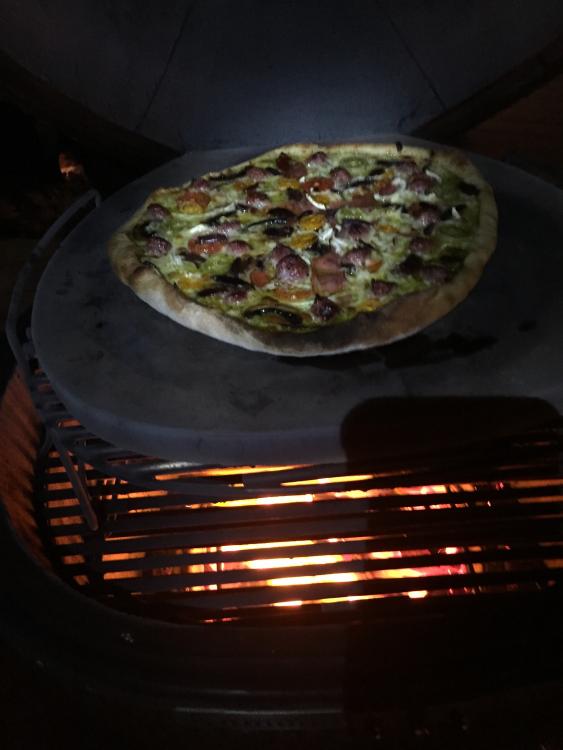
I use a steel peel to make sure that the crust is adequately loosened from he wooden peel then place the wooden peel on the stone and gentle shake the pizza off the wooden peel using the steel peel to help it along onto the stone. It generally takes about 7 minutes to really set and hold shape, then I use the steel peel to rotate the most cooked side of the pizza to the area where the pizza is least cooked, this keep the pizza cooking evenly. I am basically rotating the pizza on the stone to balance out the browning of the crust.
A raw pizza, cooking pizza and some results are attached below. I think they are the best Pizza's I've ever had, but I know there is always room for improvement. Let me know if you have any tips or tricks that I can try to improve the results. I assure you that the crust is better than most folks can imagine! Buon Appetito!

.thumb.jpg.ecfe4914522fceaeec29e4905d0c7564.jpg)
.thumb.jpg.fc64ba425837ff6f6aeea1d32927219f.jpg)
-
2
-
Hey there Colorado Rick,
Just happened to see your post so I thought I would share what I have learned.
First, your were probably way too open on your lower vent and top vent. To maintain 200-250 I've found that 1/16 to an 1/8 from full stop on top and a hairline crack in the bottom is about all you need once your reach 200F.
It is amazing how well these ovens burn. I can also state from Experience that it is very difficult to drop temp once you've overshot your target.
Second, I think you added a large piece of wood. That wood would burn and increase the heat in the oven as well. With smoking wood, a little goes a long way. Some folks like a very smoky result and that can be achieved in a number of ways, most of which have their own topics in the forum. I prefer a light smoke, so I'm not a great source for that type of information. I generally get enough smoke influence from a cup of soaked wood chips spread across the coals right before I start my cook (after I've stabilized my temp). This allows the fire to gradually encounter more smoke wood over the course if time as the coals burn across the top of the basket.
Other than controlling your Airflow, you need to make sure that "if you want to cook at a low temp, you don't get too much fuel involved too fast". I follow the recommendation of the more senior forum members in that when I light my low and slow, I only light an area about the size of a ping pong ball on the top of the charcoal. I then open my top vent a few turns and my bottom vent wheel about half open. From there it is a waiting game till It hits about 170. Then I start shutting things down so I don't overshoot my 225-250 target.
Everything else just kinda happens automatically. You gotta love these cookers! Use quality ingredients at the right temp for the right time and you really cannot loose!
Good luck with your next cook.
BTW, I dying to try the coffee wood charcoal. Did it add an interesting dimension in the flavor profile of your ribs?
-
seems like 'reasonable eccentricity' to me mguerra

I can't see where a little early smoke at low heat will make a huge difference over a 10 hour period. The smoking wood is finite and it is a shame to waste good smoke!
-
Wilbur,
to place my comments in better context, I would say that option 1, letting the KK come up to temp slowly, fully loaded takes more time and is more prone to eventually get away from me if I don't monitor it closely after it reaches 130-150 dome temp. I think that my damper control is probably the root cause of this issue because I tended to leave the top open about 1/2 a turn and the bottom about 1/4" at the top margins (I guess I have some trust and patience issues
 ). Once the Dome temp began to climb, I think that i allowed too much charcoal to become involved in the heat soaking before I hampered down, so I could not return the cooker to my target range of 220F. It tended to stay around 250ish. Total time averaged 1:30 minutes. I'd overshoot my temps consistently because I'd start doing something else and loose track of the temp i was working toward. Decreasing temp would require near full shutdown and if you go too far, then you don't finish your cook.
What i've come to prefer is using my new DigiQ + fan for Low N Slow cooks. This allows me to light a small central piece of charcoal (about 45 seconds with a Mapp Gas torch), set a target temperature at 200, Clip a probe to my cooking grate, open the Top damper about 1/8 turn and walk away. The lower dampers remain closed and the fan provides the air to bring everything to a stable 200F. Once that is established, I increase target to 220 and place my brisket into the KK to cook. This process takes about 60-70 minutes during 70F ambient temps. I also think that this method minimizes charcoal burn to attain and maintain target temp. It is very easy to increase or decrease temp by 20 to 30 degrees in a reasonable period of time (20ish mins) because it is easier to recruit more charcoal than it is to retire it.
I may just be enamored with the fact that I can monitor the cook from my phone anytime I want and have some help maintaining the temp using this gadget. It is not necessary, but I do like having a dedicated controller to keep my A.D.D. in check when I'm cooking Low N Slow, otherwise I find myself wishing I'd check in on the cook more frequently....
ckreef may have a point, and certainly has more experience that I do. I may try a slightly higher temp next time around, but on a smaller payload, like some pork ribs.
talk with you all soon.
-
Wow!
This group is full of enthusiasm and good information. Thank you all for the recommendations and insight. I can't wait to get my hands on another CHUNK of quality meat to slowly roast to perfection!
Seems that the consensus is to keep the minimum amount of charcoal burning to bring the KK to temp and then to make sure you have a good stabilization strategy. Living in Northern California it doesn't get terribly cold here at night in the summer so my heat soak time is probably a lot different than in Bali or in Northern Wisconsin during the fall or winter.
I will continue to practice and refine my skills, sharing what I learn along the way. Again, I really appreciate the inputs.
-
Dennis,
I was initially concerned about the water factor as you state above, however the reason I used the water was just to give the drippings something to float in without burning so that the pan was easy to clean after that many hours on top of the charcoal basket. The Bark had a nice mellow crunch to it (dry and slightly crisp yes, but not overly crusty). After measuring I seem to have overestimated the amount of water used. It was actually only about 18 ounces, not 32 (1 quart) as originally estimated and none of it existed at the end of the cook, but the drippings in the pan were not crusted down either. My intent was to try and make cleanup easier and that goal was achieved. I will do my next brisket without any water to see how the Drip Pan cleaning regimen is affected. Probably be a month or so before I get the opportunity to cook a brisket again....
-
Hi all,
Again, as a newbie I have a lot to learn, but I've been cooking' up a storm. I've really never had so much fun cooking in my life (and I've spent most of my life cooking...!)
I've done Bread, Pizza, Steaks (reverse sear is a dream on a 2" Ribeye), Brisket, chicken and the list goes on.... What a joy to cook on a KK!
So that brings me back to the point. Low n Slow, What's the best way to heat a KK and keep it where you want it?
I've tried a couple of different methods and I'm interested in the methods others use to maintain what I consider very low temps (<230F) in the KK using a heat deflector.
I've used the following techniques with varying degrees of success:
- Light a full basket of coco charcoal, install my deflector and wait for the KK to come up to temp. This seems to take a long time and also forces the KK to burn hotter longer to reach my target temp. I believe that so much heat is trapped by the deflector that by the time the dome temp gets where I want it, there is too much fire in the bottom of the cooker to properly maintain the cooking temp desired (200F?). I find myself fighting the temp for the balance of the cook.
- Light a full basket of coco charcoal and leave all the deflector/drip pans, grills out of the cooker. Allow the cooker to come up to dome temp and stabilize for some period of time. Then open the KK lid and build the environment for the Low N Slow cook. This tends to give me a smaller burn in the bottom of the cooker and allows me to better regulate the cook temps for a longer period of time without overshooting. It takes a little while after the environment is installed in the cooker to return to temp, but not nearly as long as building a small fire and waiting for the temp to come up in an ambient temp KK.
I would be interested in how others attain and maintain low n slow temps for their briskets and butts.
Thanks in advance for your help!
-
Perhaps I've figured it out.
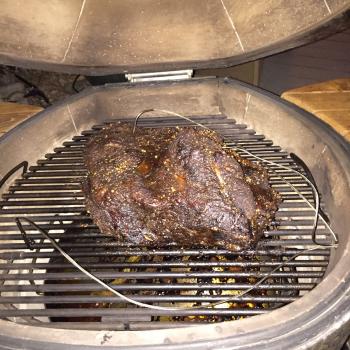
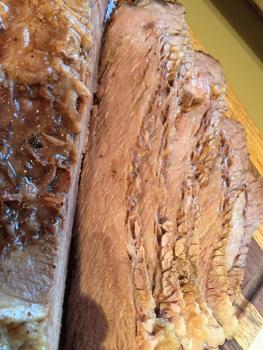
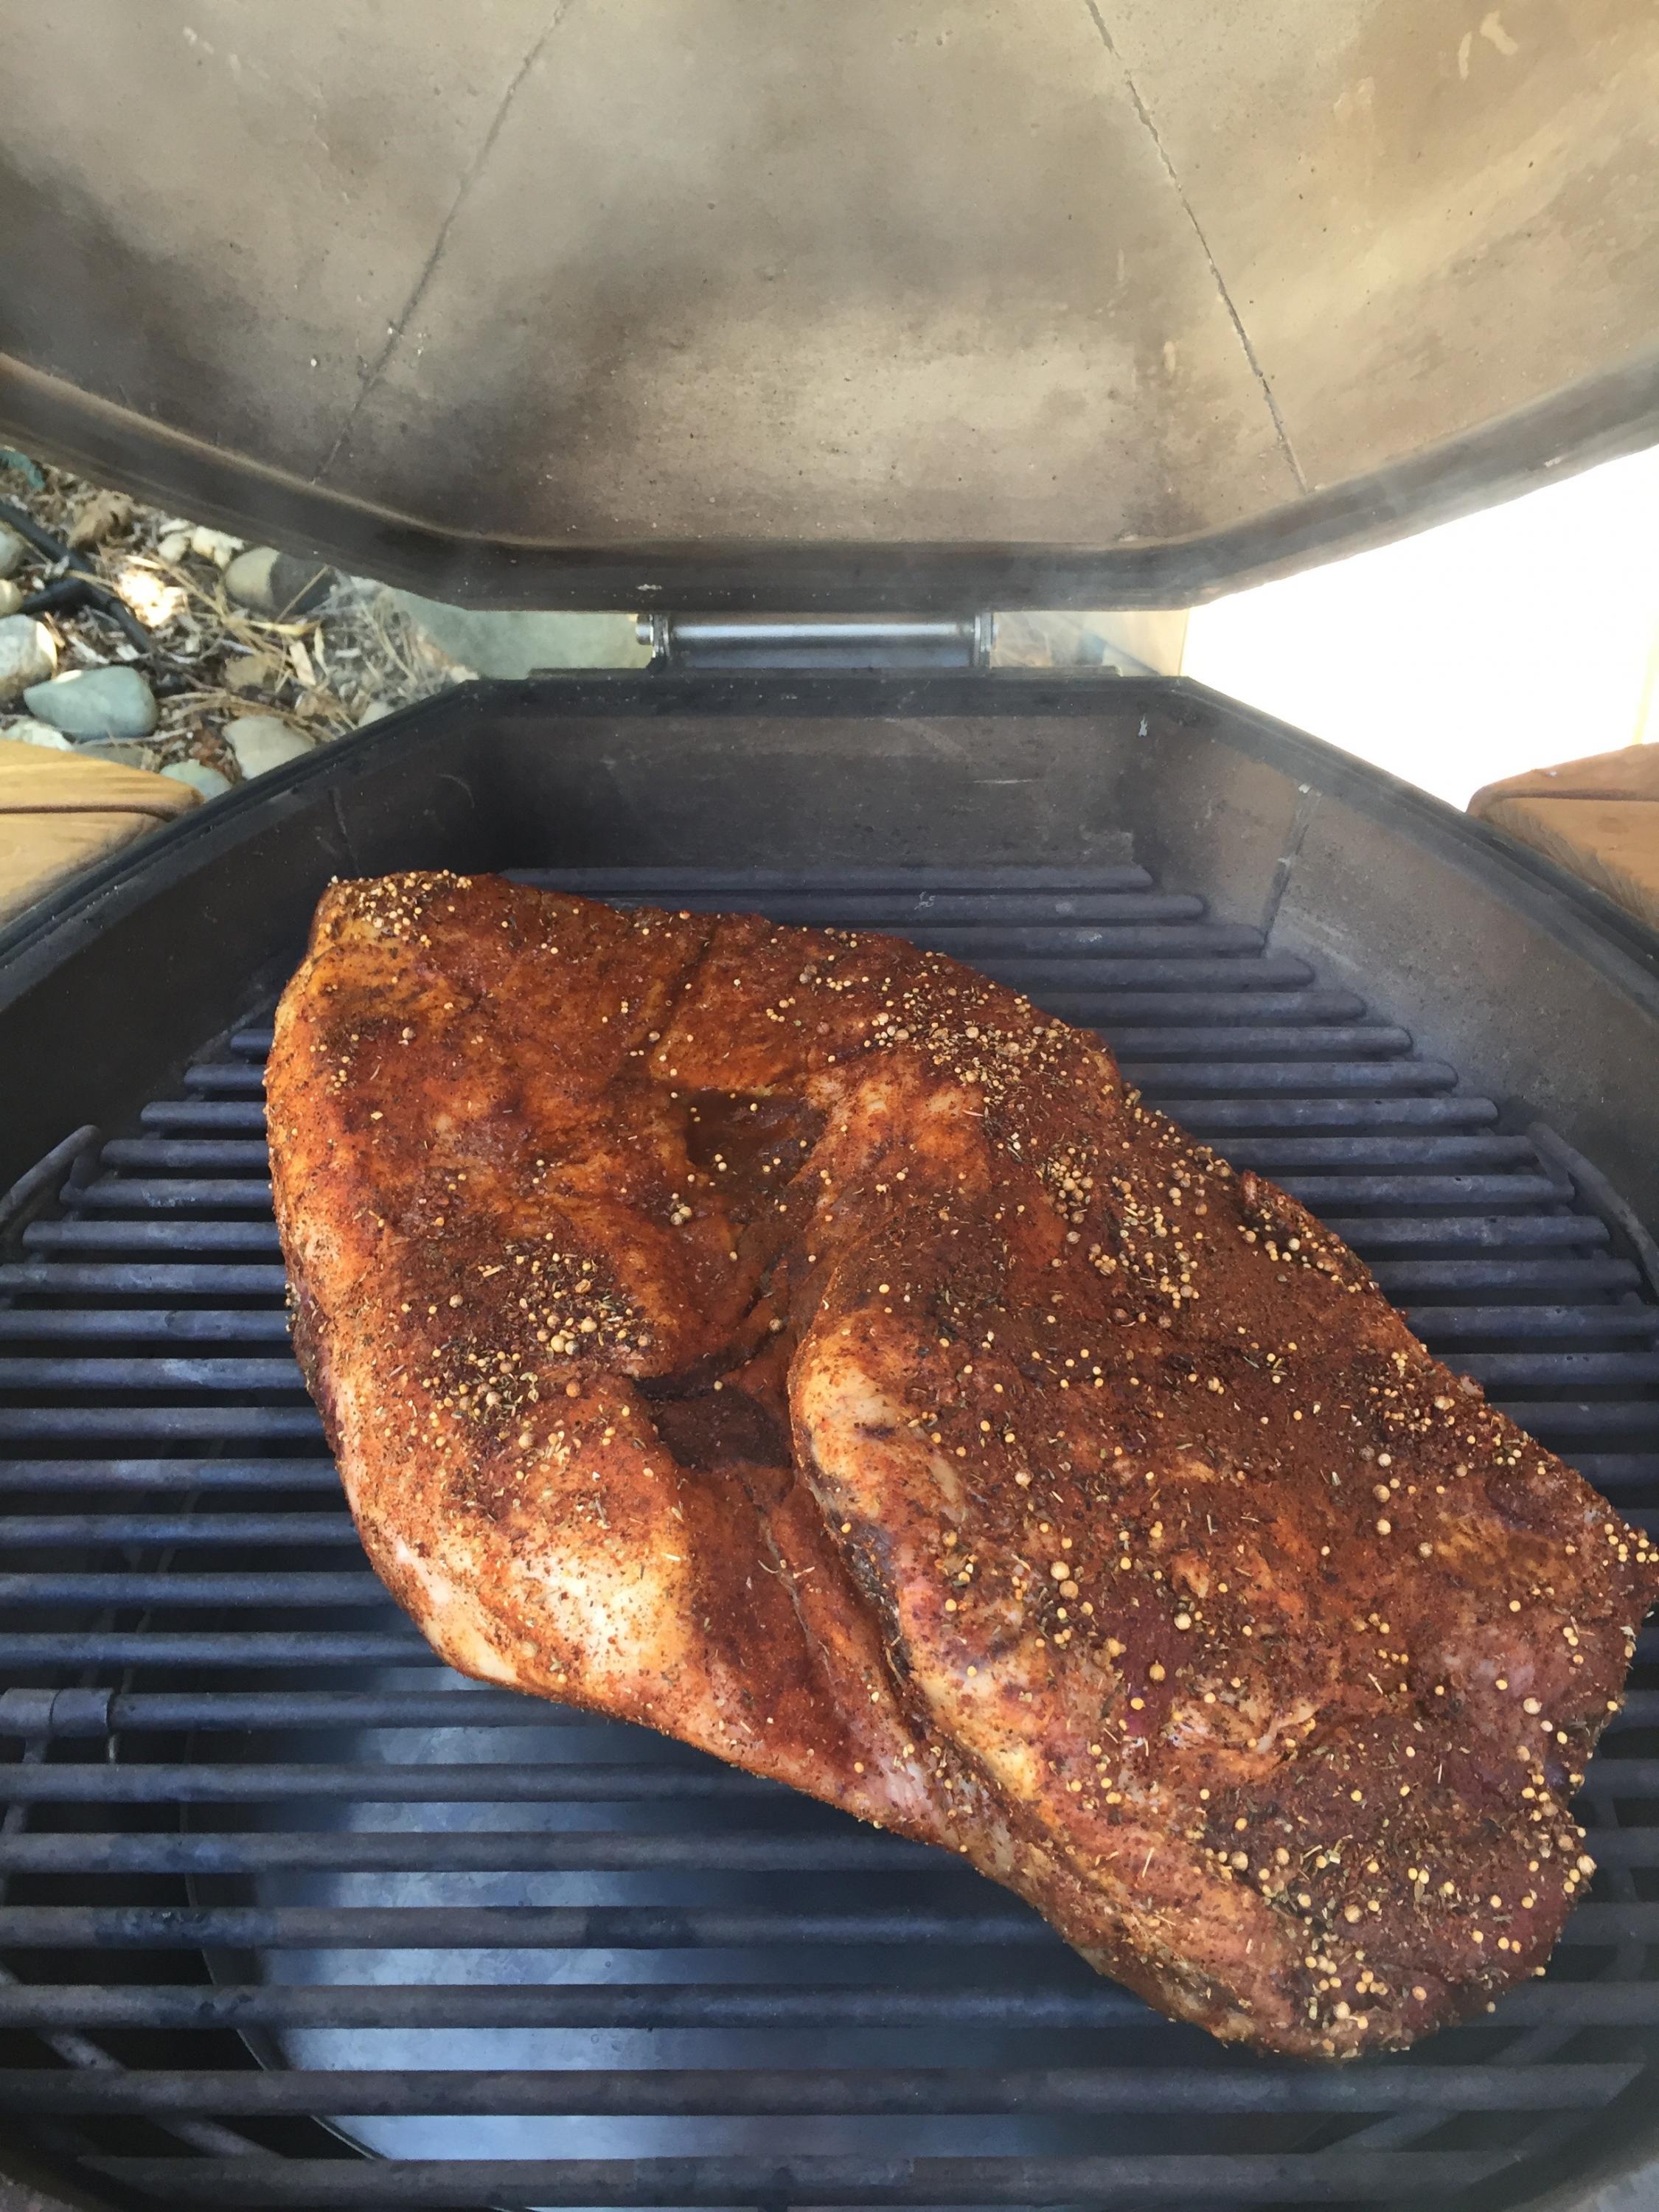
here is the Brisket with Rub:

then, when ready to remove from the KK:
and finally a close up of the slicing, this is the Flat only, point was removed hence the light top color:
-
KK is Olive Stone 23", received in May this year. Not sure how to post pictures. I tried but they did not seem to appear.
-
Hello all, I'm a newbie, but I have successfully rendered out a few briskets on my KK.
This being my first post, I'm not sure about etiquette, but I used the following setup and the results were awesome and easy to clean.
I lit my coals and let the temp stabilize at 180F dome temp (cooker was completely empty) and I heat soaked it for about an hour. I think this tends to prevent the bottom of the KK from overheating trying to overcome the limitations imposed by the deflector, I find that i can keep a lower intensity fire by heat soaking prior to installing the deflector, then creating my indirect cooking environment.
I set my Stainless Steel dual bottom Drip pan directly on the charcoal basket handles, I added about a quart of water to the pan and then set my top grate with my pit temp thermometer attached.
I waited for the Pit temp at the grate to attain 200F. At 200F I removed everything, added some Applewood chips for smoke, rebuilt the setup and then I placed my 15lb Brisket onto the top grate. Monitored the "flat temp" to 196F (the Point temp reached 174F). Pulled the meat and wrapped it, rested for 3 hours and then served. Total Cook time as about 11 hours. The bark was excellent, the meat was very moist and the clean up was a breeze because of the water in the drip pan (just used a flexible scraper to remove the fat and such). I'm guessing that had I used the Heat deflector Stone and rested the pan on the lower grate, I probably would have been able to pour the fat out and just wipe down my drip pan. I will try that method next time I do a brisket.


.jpg.d63f534aa69869668631a522bcb95e2d.jpg)
.jpg.7a639abc75e62d5c9e53df1eef6239d2.jpg)


Hurry up and wait
in Forum Members
Posted
welcome to the fold brother Steve.
Dennis' cookers are righteous indeed, and by far the closest thing a Kamado has to eternal life.
You will not believe how well built these baby's are...
Looking forward to the christening...!