


dstr8
-
Posts
838 -
Joined
-
Last visited
-
Days Won
7
Content Type
Profiles
Forums
Events
Posts posted by dstr8
-
-
I'm interested in trying this. How soft are they when done? I'd like to smoke enough to make it worthwhile, but I'm worried about storing them. How do you store them, and can they be stored one on top of the other or would they fall apart with the weight of another tomato on top? Any knowledge would be appreciated.<br />
<br />
Thanks!<br />
<br />
<br />
Sent from my iPad using Tapatalk HD
I like them dried until the juice is congealed but not completely dried out. I freeze them single layer on top of a parchment lined baking sheet. Then once they're frozen solid I vacuum seal them in bags, again, single layer for easy removal of how many I later need to use.
-
Used to catch striped bass on the Sacramento river in the spring time and they're almost like candy! Great looking bass on the KK!
-
Welcome BBQBabes...and nice looking olive stone 23"! Oh the tasty fun you are in for!
Dan
-
Welcome smokedinthyme! If you want to share a coco order I will be in Sacto the weekend of October 11th
 And I have a like new left side teak shelf just in case you need/want one for a decent price (decided on a cabinet from Dennis after I bought the side shelves)
Dan
-
As promised.

-
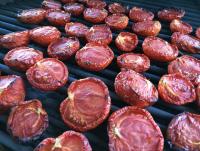
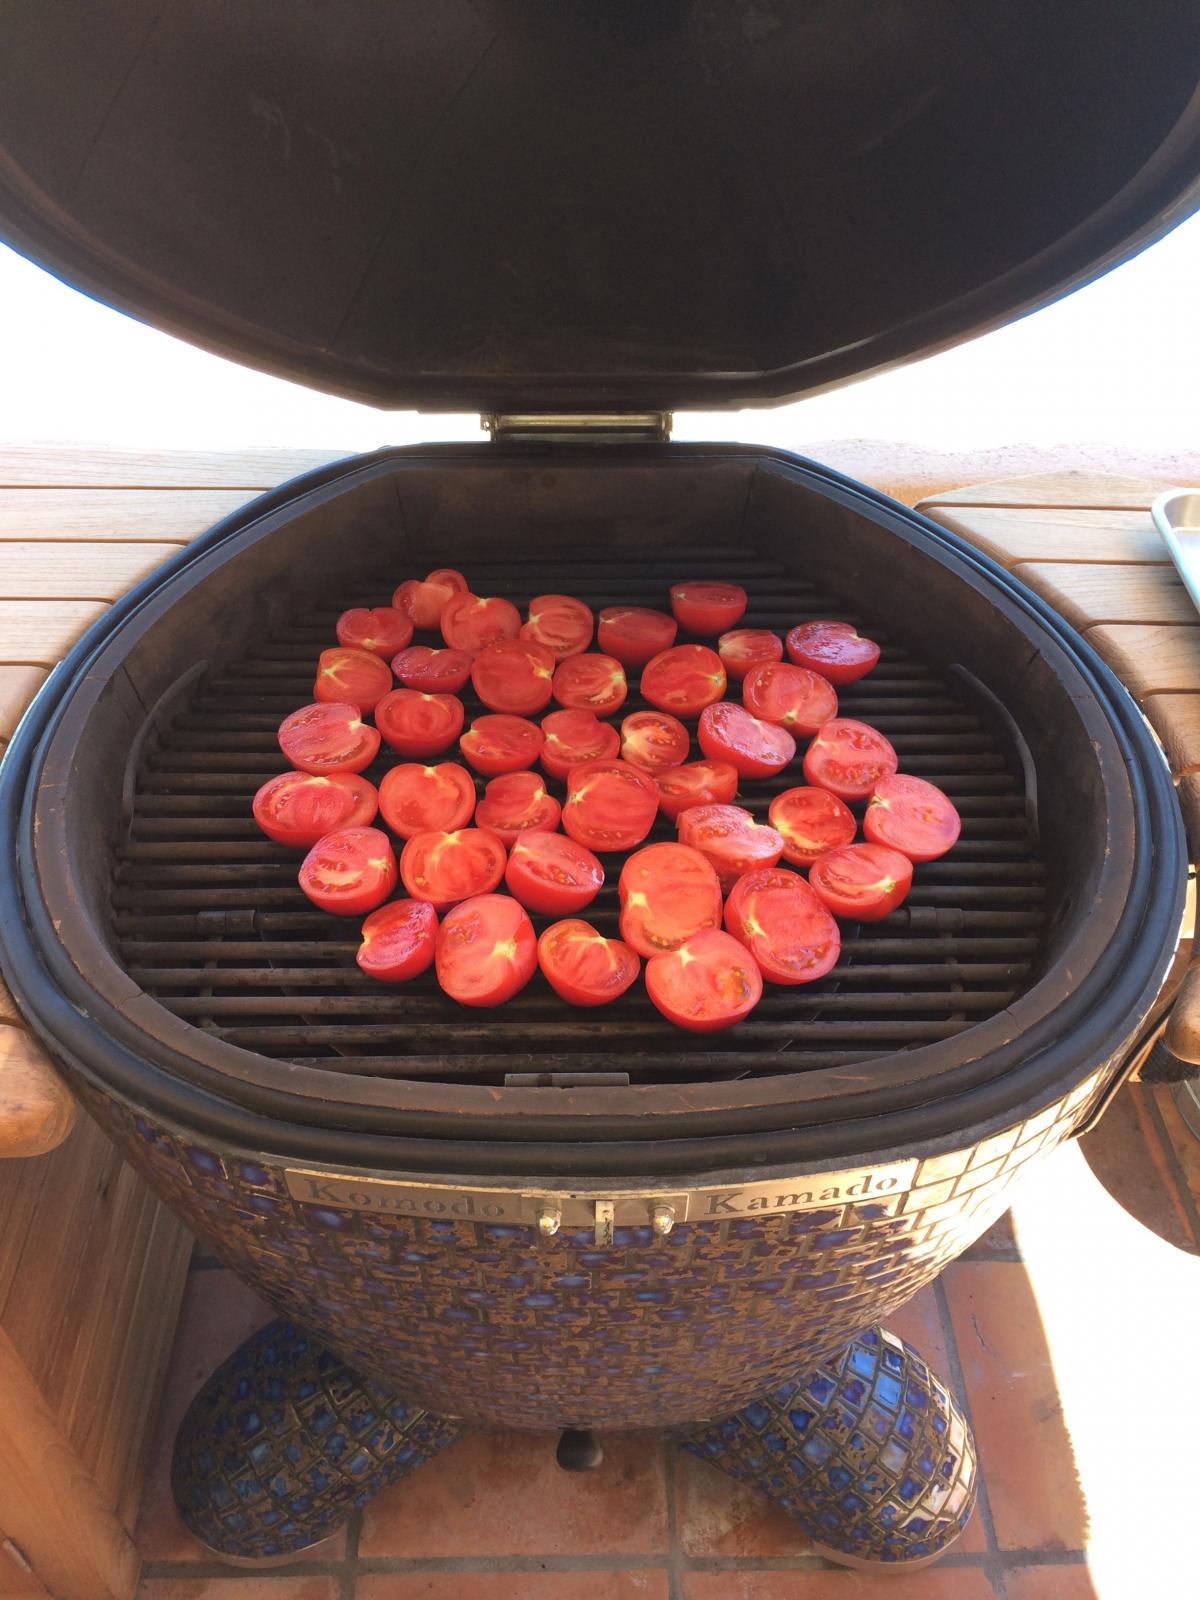
Ok...going to our local farmer's market tomorrow for round 2 which will include added photos. For now you'll just have to use your imagination

* Small to medium size Early Girl tomatoes cut in half longitudinally (from the stem down); I'm sure Roma's would work too...just need to be ripe and sweet
* KK heat soaked and idling at 200*F
* Metal heat deflector set on the middle rack
* Place the cut tomatoes cut side up on the upper large grate (mine's a 23"; adapt accordingly
)* Slow roast/dry for 6-hours +/- and until the tomato halves have reduced in size by about 50% or so but still have some thick juice left; the juice will be syrupy thick.
I didn't want these smoked, which surely would be super great too, so I used a mix of hardwood lump (oak and hickory) and KK coco-char; clean tasting!
I did my first batch last weekend and they were so fantastic...they're gone
. Sweet and unctuous! In fact I think I'm going to try using them in homemade ice cream for something different. I used them in a calzone this week and lettuce salads. But this sky is only limited by your imagination.Pics coming on Saturday.
-
 1
1
-
-
Ditto EGGARY: My (trimmed) spare ribs typically are done perfectly at 3-1/2 hours (225-250*F). But I am going to try the 275*F temp next time...to see what all the fuss is about
-
^ I too can relate to the ADD effecting my cooking
. Its so darn hard to make, especially BBQ, things the same way more than once or twice. -
Susan,
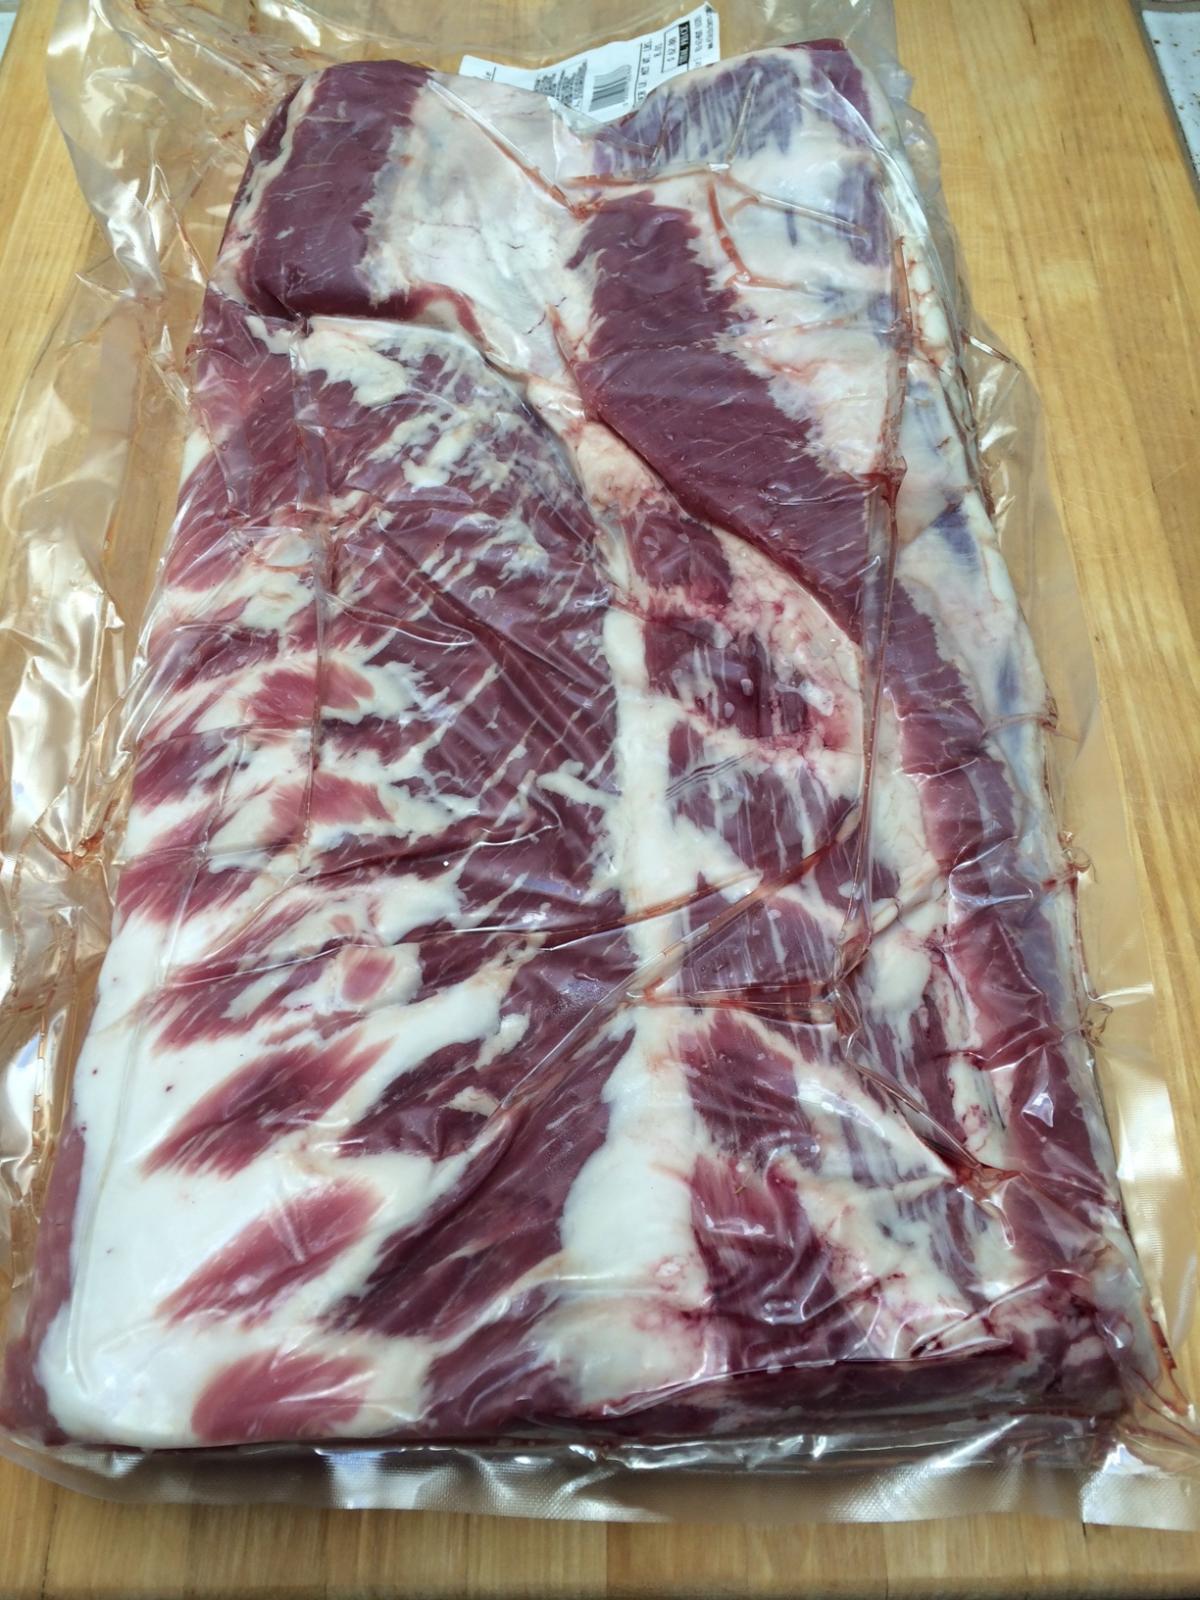
I portioned the belly mainly due to logistics: Not enough refrigerator space for brining, etc. And yes, at least in theory, smaller portions would provide more surface area for smoke penetration...
Can't wait to try it with more salt in the brine and then longer smoking session with higher internal temp. But its going to be a while now
-
Experimenting is 1/2 the fun
I started with Alton Brown's non-nitrate salt brine for 8 pounds of Devil's Gulch Ranch pastured naturally raised belly. For those of you not familiar with Devil's Gulch Ranch in Marin County California: http://www.devilsgulchranch.com/
Alton Brown's Bacon Brine recipe:
1C sugar
1C salt
8oz molasses
1/2 gallon water
1/2 gallon apple cider
2T course ground black pepper
Press the black pepper into the pork belly (if skin on then just rub into the flesh portions of the belly). Combine remaining ingredients in a suitably sized pan and heat until the salt and sugar is dissolved then chill to 40 degrees F.
Using large ziploc bags (I used the 2.5 gallon size, double bagged) combine the pork belly and prepared brine and refrigerate for 3-days.
After 3-days remove the pork belly, pat dry and place the pork belly on top of a cooling rack atop a sheet pan. Alton states to set-up a fan on the counter and 'blow dry' the pork belly at room temp for an hour. I, however, with the pork belly resting on the cooling rack atop the 1/2 sheet pan let it sit in the refrigerator for several hours to form the pellicle.
His recipe doesn't state what temp to smoke the pork belly...just "...smoke for 4-6 hours". Using info found here I decided to pull the belly pieces once the internal temp of the larger cuts got to 150 degrees F. This took about 2-1/2 hours over apple wood with a temp within the KK of between 160 and 200 degrees F.
Although this "un-bacon" won't be confused with nitrate cured bacon it is still very good. The only thing I'll do different the next time is add 25% more salt to the brine mixture. And I'll smoke the belly to 170-ish degrees F. I think taking it to 170 degrees will bring additional tenderness to the bacon.

-
UNCLE! Ok...have to admit if you're not 50+ years old you have no clue what "UNCLE" means
Your char siu pork looks outstanding Smokydave! With all the new recipes posted in the last couple weeks I'm starting to feel inundated
-
^ Thanks!
-
Tony,
How can it be "bacon" if it is nitrate/nitrite free? FWIW I'm actually going to do an abbreviated salt/sugar/spice cure on mine (24-hours)...sans any nitrate salts/celery juice powder...as I prefer the flavor of this "unbacon" method. Then smoke it as I would "bacon".
-
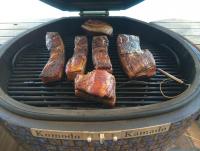
You're killing me with the quality looking beef ribs you can source! My beef consumption would take an up tick!
-
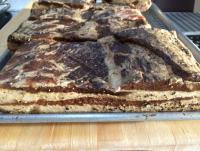
First step to homemade bacon: While in Santa Cruz today I picked up a Devil's Gulch Ranch pasture raised 8# whole pork belly today.
Second step: Decide on a cure rub.
More photos to follow as the process works its way to bacon

-
jclarkhpa,
Thanks for the 411 on The Ringer! Just ordered several for me and friends.
We need a "Thank You" button
-
^ another neat trick regarding vinegar, just in case you haven't tried it, is to heat the vinegar in a pan...simmer and reduce it; more for salads and less for marinating. Whether for marinades or salad dressing it offers a nice switch up. Tones the sharp acidity and condenses the flavor allowing the fruit to be more prominent (relative to the reduction).
-
All looks good...but the last photo, well, that's MONEY!
-
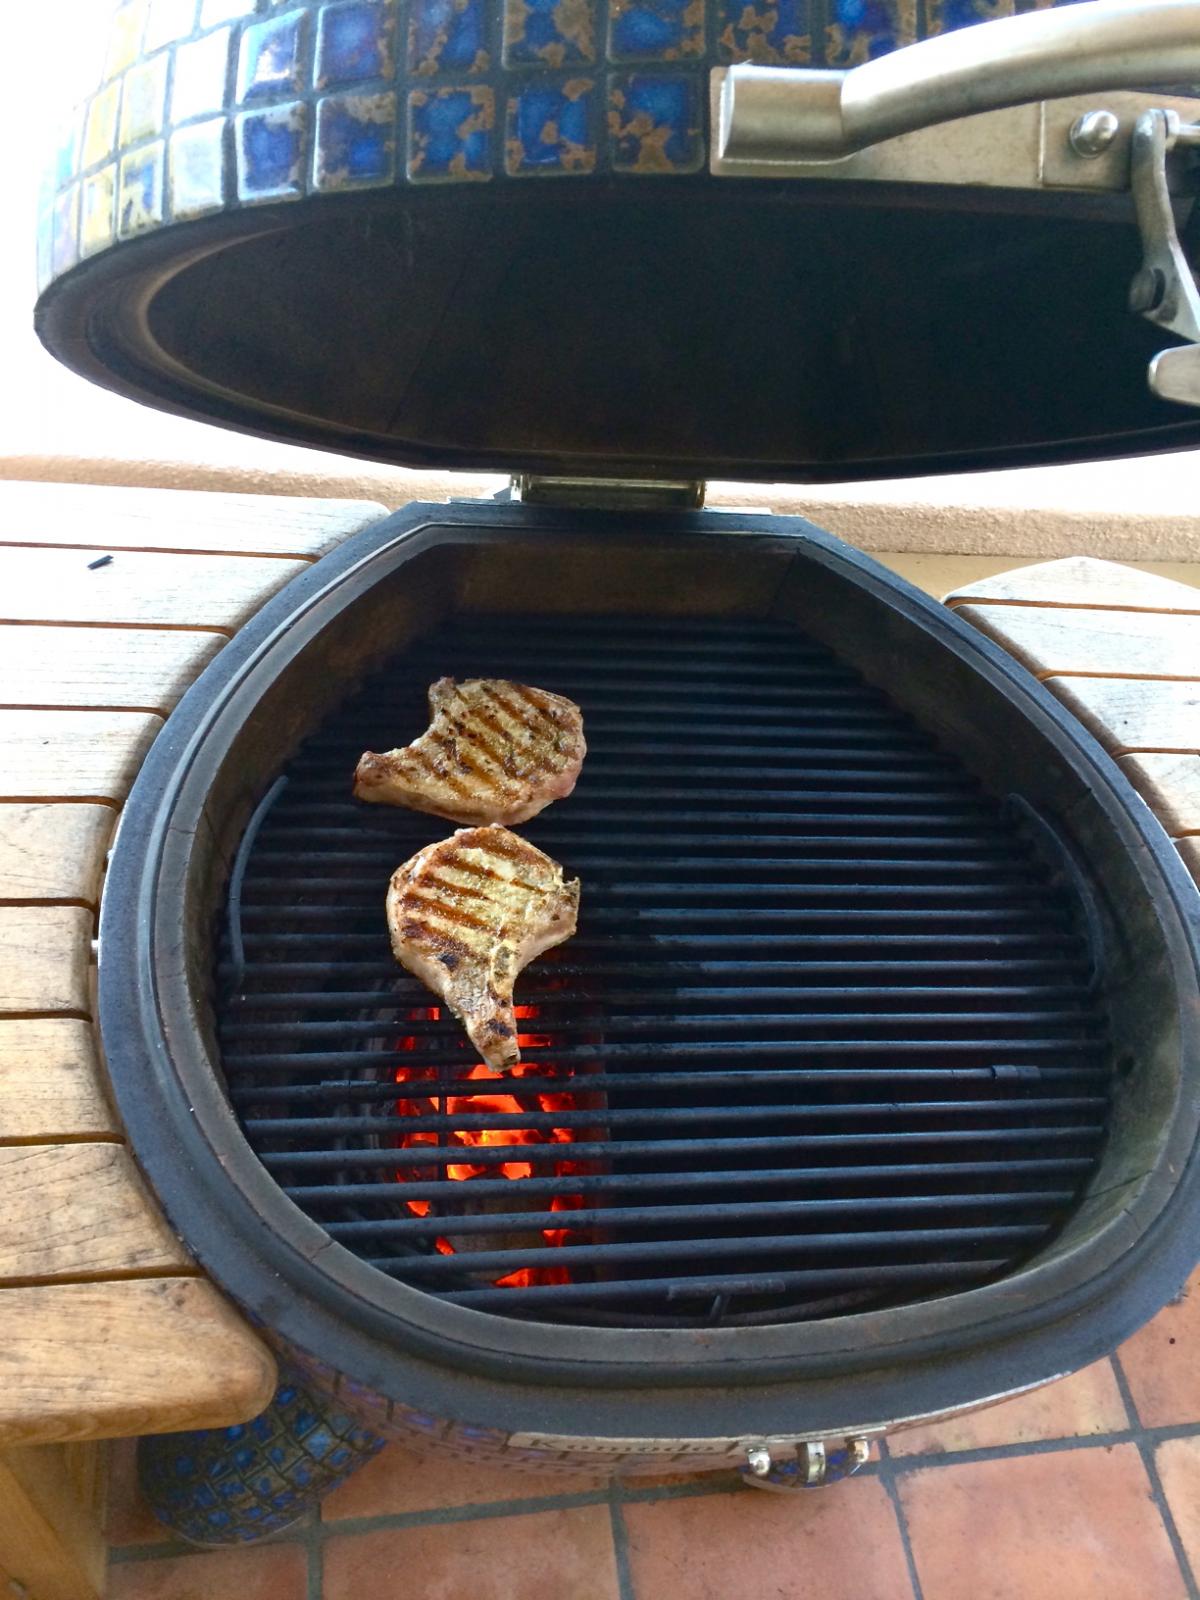
Just a couple nice simple pork chops coated with a little EVO and freshly ground fennel seed, crushed red pepper and kosher salt stuck to all surfaces...seared and then finished indirect over hardwood lump for me and the misses tonight
I told her again, for the umpteenth time, tonight the KK has easily proven to be one of the best buying decisions I've made for anything I own! This and my Londinium LI lever espresso machine keep me in smiles on a daily basis!
Thanks <again> Dennis!

-
Like you, I've never heard of Denver Steaks! Curious to hear and see all about them, post cook, Tony!
-
1. Although I don't have the propane burner I considered it when I ordered my KK and was under the impression it was mainly used in lieu of charcoal. I would think if it was used as a lighter eventually charcoal dust will foul/plug the gas ports/orifices in short time. I would think it would be a hot mess to deal with removing after each light up...Not a qualified answer and I'm sure someone with more knowledge will chime in.
2. Sounds appropriate.
3. Before each cook/fire up session you will want to shake the charcoal basket which will release small chips and burnt dust that only serves to disrupt the burning process of your next fire (hold your breath; wear a dusk mask; and/or lightly spritz the dust prior to removal with water to mitigate inhalation of coal dust). This will leave behind burnable coals; add new char as necessary.
I have a small garden trowel I use to remove the coal dust in the bottom of the KK with a final, but unnecessary, vacuum with a HEPA type vac (the fine dust won't get to/clog the vac motor). I use my KK several times a week and I probably only empty the coal dust about once per month...or less.
-
^ will try!
-
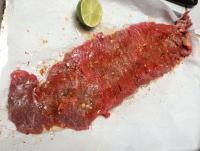
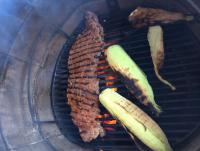
Flap steak...marinated with fresh lime juice, EVO, garlic, etc.
-
It won't scramble if you leave the yolk whole...gently slip it into the simmering water.
I've confit'd belly in duck fat, lard I rendered myself (because I can't find real lard to buy) and also olive oil. The olive oil confit turned out excellent and is overall less hassle and less spendy too.
Also know if you have Trader Joe's where you live they now, as of this spring, carry pork belly that has already been confit'd...12oz package...fresh...vac bagged...and ready to crisp...for <$7.


Best endorsement...buying a second KK
in KK Reviews / Happy Campers
Posted
Super and congratulations!