


wilburpan
-
Posts
781 -
Joined
-
Last visited
-
Days Won
28
Content Type
Profiles
Forums
Events
Posts posted by wilburpan
-
-
If you look around, you may be able to find a moving company that specializes in moving relatively fragile objects, and hire them just for moving your KK grill. (And your speakers.
 ) I do woodworking as a hobby, and friends of mine have had to move their shops. Your average moving company can’t deal with that sort of thing, but there are companies that specialize in moving machinery, including knowing how to pack and rig equipment to get the machinery out of the old shop to the truck, and out of the truck into the new shop.
One other alternative is to look into purchasing separate supplemental insurance that covers the replacement cost in case something happens with the KK grill during the move. Check with whoever provides your homeowner’s insurance policy.
-
 1
1
-
-
For cooking pizzas, other people with other kamados often set up a pizza stone on the upper rack to take advantage of heat bouncing off the inside of the lid, along with setting up a heat deflector low while cranking the temp up to 600ºF or more. Then they report cracks in the firebox, which is most likely due to the intense heat being trapped by the deflector.
Here's an example: this guy's set up: And the result:
And.... I cracked the box!!
Is this a concern for the KK?And how would you go about setting up the KK for a pizza? My thought was to use the KK baking stone by itself, placed on the upper cooking grid, since the KK baking stone is thick enough that an additional heat deflector may not be necessary. The KK baking stone looks like it’s close to twice as thick as the pizza stone in the picture above. -
My only challenge is patience - or lack thereof. I have a tendency to overshoot medium range cooks because when I open vents too far for my final temp (300F - 400F range) to "jump start" the cook, I let too much charcoal get going and even though I close the vents back down to final positions when the dome temps reaches 250F, it's too late and I end up higher than my target. As long as I catch it early, before the KK heat soaks, I can usually turn it around…
It's a time thing. Open it up and then shut it down if you are in a hurry. But you have to stay RIGHT on top of it if you do this.
So it sounds like as long as I don’t let the jump start go too long, it should be alright? As I said, I’ve only been letting the fire go with the lid open for five minutes before closing the lid and setting the vents. I could easily do that after three minutes as well.
-
In the month that I’ve had Smaug, I’ve found it
prettyamazingly easy to hit the temperatures that I want. For low and slow, I crack the lower vent barely open and open the top vent a minimal amount, and I’ll be in the 200-250ºF range. For high heat direct grilling, I just open up the lower and upper vents a good amount, and I’ll be at 600ºF pretty quickly.For temperatures in the 300-400ºF range, this is what I’ve been doing. I’ll get the charcoal started with the lower vents about halfway open, and wait about five minutes with the grill lid open. Then I’ll close the lid, dial the lower vent to barely open, open the top vent about 3/4 of a turn, wait, and fine tune the temperature with the top vent.
The rationale for doing that is that the first step gets the fire going in a relatively short time, and the second step is about where I wind up with the vents for 300-400ºF. I picked up the “leave the lid off to start†technique from the Kamado Joe YouTube channel, as that’s how they seem to get that particular grill up to temperature.
I understand and am convinced of the idea that you can set the vents on a KK grill the same way each time and you’ll hit your final temperature. But I find that if I start with the vents in the final position and close the grill immediately after lighting the fire, it takes a lot longer to get to my target temperature than if I give it a running start.
My question is, is this best practice? It certainly works for me, but I’d be interested in how others bring their KK grills up to a final temperature in the 300-400ºF range.
-
I used an attachment that goes on our KitchenAid mixer. If you have a KitchenAid mixer, and I bet you do, the meat grinder attachment is only $30 at Amazon. I don’t have the sausage stuffing attachments.
It works great, and it really doesn’t take much time. Cut up the meat into 1†chunks, and feed it through. It was 5 minutes altogether, including clean up. Plus, there’s something strangely satisfying about reducing a solid chunk of beef into ground meat burger material.
-
1
-
-
Wilbur's post of his Portobello Burgers reminded that I didn't post a recent burger feed that I did. While mine is nowhere as impressive as his…
Liar.
-
Last night I cooked something less complicated than a duck (which I don’t think is really that complicated): bacon cheeseburgers and portobello mushrooms.
First, I cooked two strips of bacon. I did this by direct grilling, at about 250º. No pictures of this step, unfortunately. I took them off after about 20 minutes.
The portobellos went next. I coated them on both sides with olive oil, kosher salt, and fresh ground black pepper. I bumped Smaug up to about 400ºF, and grilled these direct over about 20 minutes.

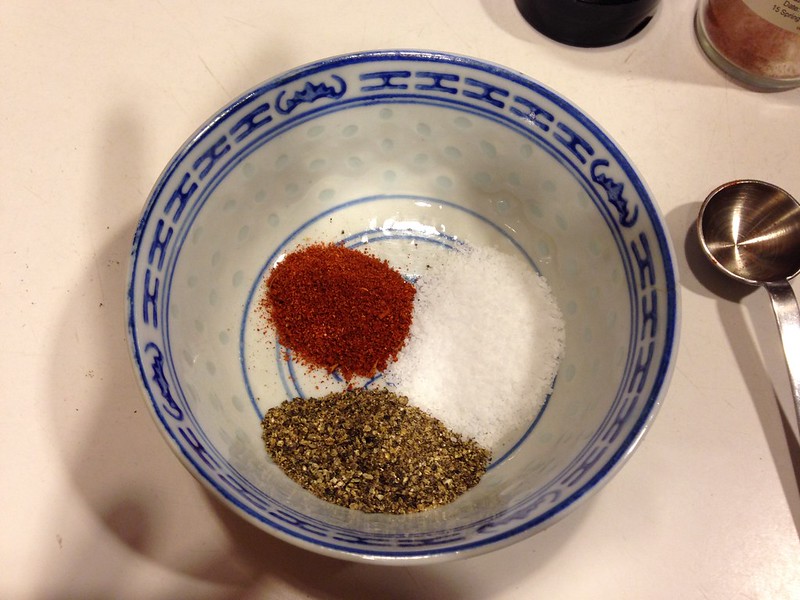
The burgers I seasoned with my go-to spice mix for direct grilling: equal parts kosher salt, fresh ground black pepper, and cayenne.
The burgers were made with chuck that I ground fresh at home, and were about 1/3 lb. each. I sprinkled a liberal amount of this spice mix on the burgers (as John would say), opened the vents, and got to 600ºF within 5 minutes. The efficiency of the KK grills continues to amaze me. I cooked the burgers about 4 minutes on each side.
This was the result, with cheese and bacon.
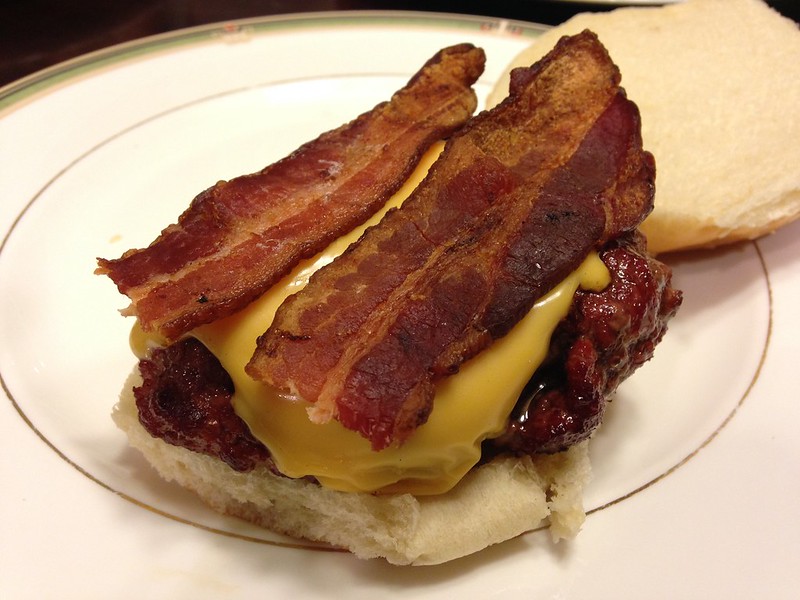
And with all the toppings. Some burger purists may balk, but I like toppings (mayo, lettuce, tomato, ketchup, mustard, pickles, raw onions, and relish).

-
I'm wanting to do duck as well and I have been thinking some sort of stainless frame that follows the contour of the closed lid, with hooks so you can hang your Char Siu Pork, Peking Ducks ect, true Asian style..
What I’d really like is a rack like the one in this video: http://youtu.be/xp-kzew2Ewg?t=1m24s
I’m sure it would work well for chicken as well. It might be too small for a turkey.
-
Great looking duck, Wilburpan!
Looking for tips on how to blow air under the skin. I tried several techniques and nothing I've tried seemed to work very well. Can't seem to generate enough pressure to separate the skin from the meat.
Thanks, Tony!
For this duck, I didn’t blow air under the skin, and the fat rendered out without any problem. The skin in the close up shot of the breast fell off as I was slicing the meat, so it was well separated. I also didn’t prick the skin, either.
The easiest way I’ve seen to blow air under the skin is to use an air compressor. The second easiest I’ve seen is to use your fingers to get underneath the skin to separate the skin from the meat.
-
Hey Wilbur! That's once good looking plucked duck! For a first time out, I'd say that you did pretty dadgummed good on this duck. I've never done duck on a kamado before and learned a lot from your post. I think I saw a lot of pin feathers on the before the roast pic. Did you pull those or does the roasting take care of them? I always spent way too much time plucking those little beasts with needle nose pliers. That's why I switched to only cooking duck breasts.
All in all, Wilbur, that is one very nice looking duck! Kudos!
Thanks, Ken! I have to admit, this is not my first time cooking a whole duck. I’ve done that many times in an oven. This was the first time in a grill, though.
I never worried much about the pin feathers. If the skin gets done well, the pin feathers pretty much become part of the crispy skin. It’s sort of like eating soft-shell crabs.
(It occurs to me that my soft-shell crab comparison is going to be either awesome or really gross, depending on how you feel about soft-shell crabs.
) -
One of the things I really wanted to try with Smaug was to cook duck. This summer my family and I were lucky enough to visit China, and we spent several days in Beijing eating Peking Duck every night. My kids love duck, and that was the main reason why I bought the rotisserie basket with my KK 23â€. But for the first time I was going to try it, I decided to take a very basic approach.
Here’s what I started with.
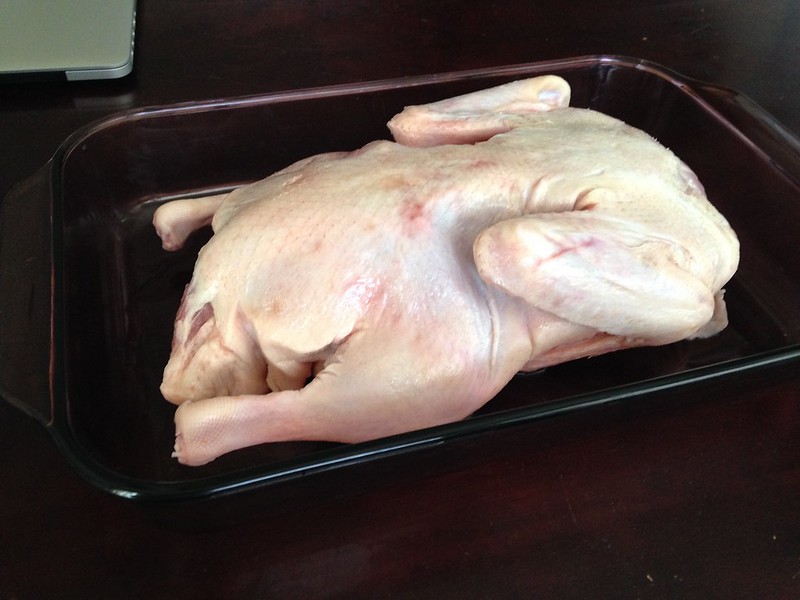
Prepping the duck was pretty straightforward. After taking out the liver, gizzards, heart, and neck from the inside of the duck, I took a big pot of water, sliced up an orange and put it in, and then added about 3 tbsp of honey. I brought the water to boiling, took the pot off the stove and into the sink, and dunked the duck in the hot water for 30 seconds. This step tightens up the skin.
Next I took 2 tbsp of five spice powder and 1 tbsp of kosher salt, mixed them up, and dumped it inside the cavity of the duck and rubbed it around.
I got Smaug stabilized at 375ºF. I had the heat deflector, drip pan, and main grate in place. During this time, I suspended the duck on a rack, patted it dry, and tried to get the skin as dry as possible. Once the grill was stabilized, the duck went on breast side up.
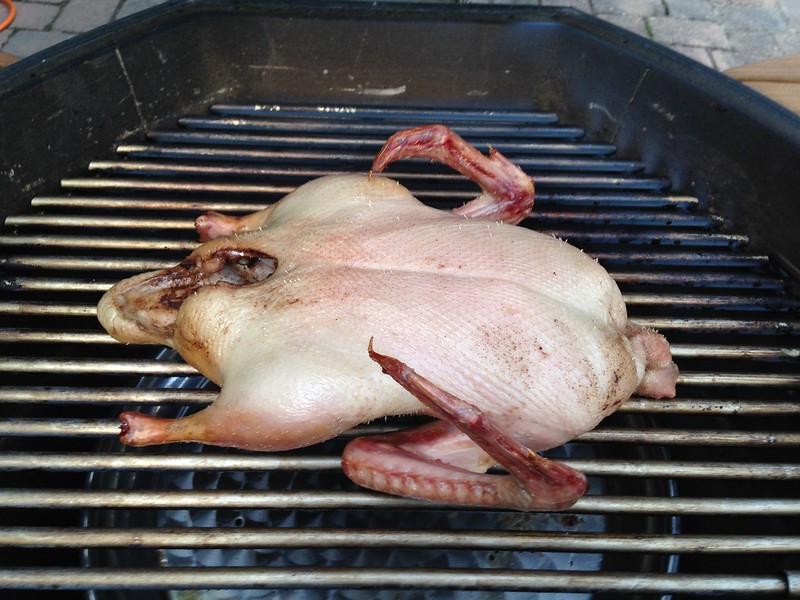
The duck sat for about 1 hour and 15 minutes. At that point I checked the temperature, and found that I was above my target of 170º in the thigh. Rats.
The skin wasn’t quite crispy enough, so I opened up the vents to bump the temperature up to 400ºF, and let the duck go for another 10 minutes. Here’s the result.
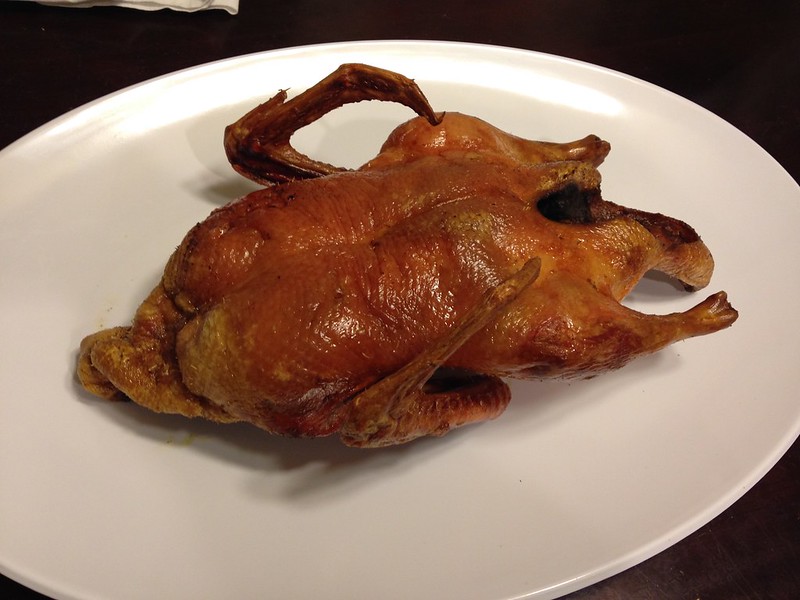
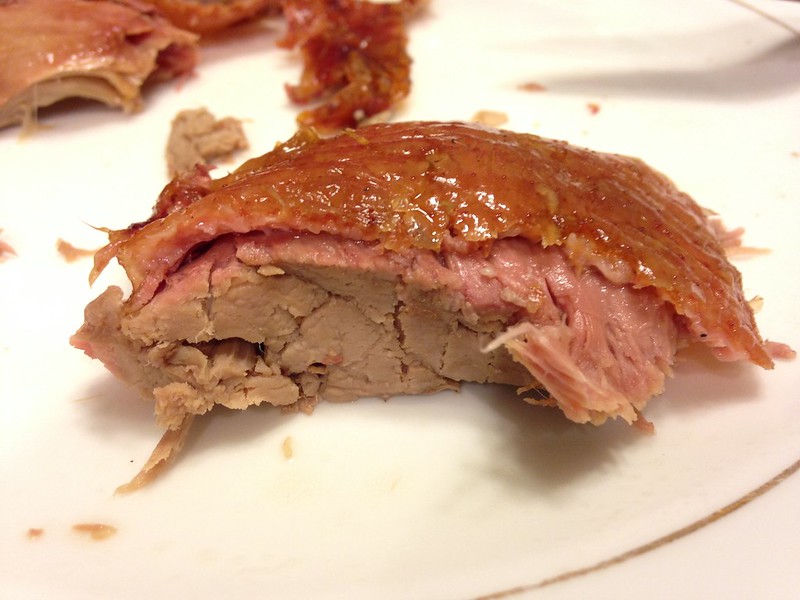
The skin on the breast side of the duck came out really nice. The meat was a bit overcooked, as you might expect from the temperatures I got. I was surprised as to how well the fat rendered out of the duck without pricking the skin. The skin on the back of the duck, which was placed down during cooking, was not crispy enough.
Next time, I’m going to keep a closer eye on the temperature of the duck. I plan for cooking at 350ºF, cranking up the temperature to 400ºF+ when I get to 160ºF until the thigh meat hits 170ºF. I think that the extreme efficiency of the KK 23†led to the duck cooking in less time than I anticipated.
Still, this turned out pretty well given that I didn’t pierce the skin, or do the long air drying step or blowing air under the skin that’s part of the traditional methods of cooking Peking Duck. I think the rotisserie will help with getting the skin on both sides of the duck nice and crispy.
-
1
-
-
Wow, that looks terrific!
What temperature did you cook at, and about how long did it take?
-
You got a crow bar...I did not !,,, LOL
If it makes you feel any better, I used my own crowbar.
-
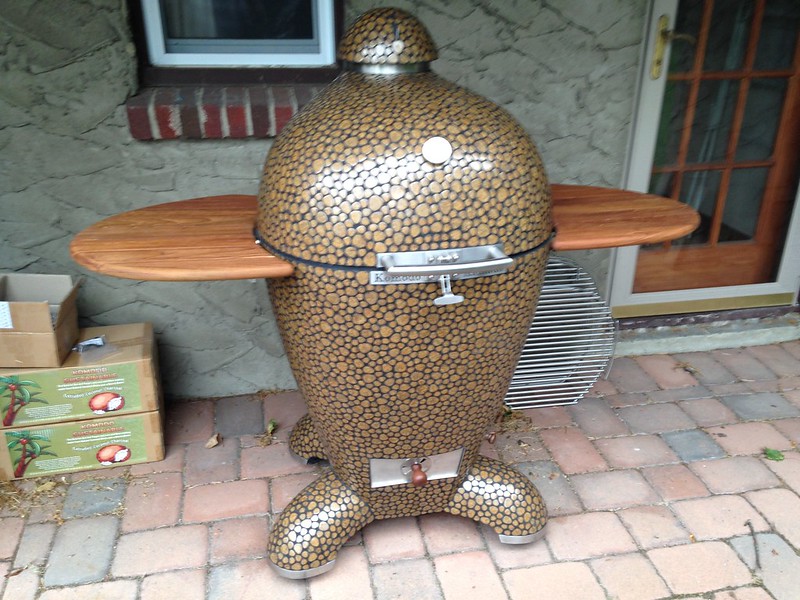
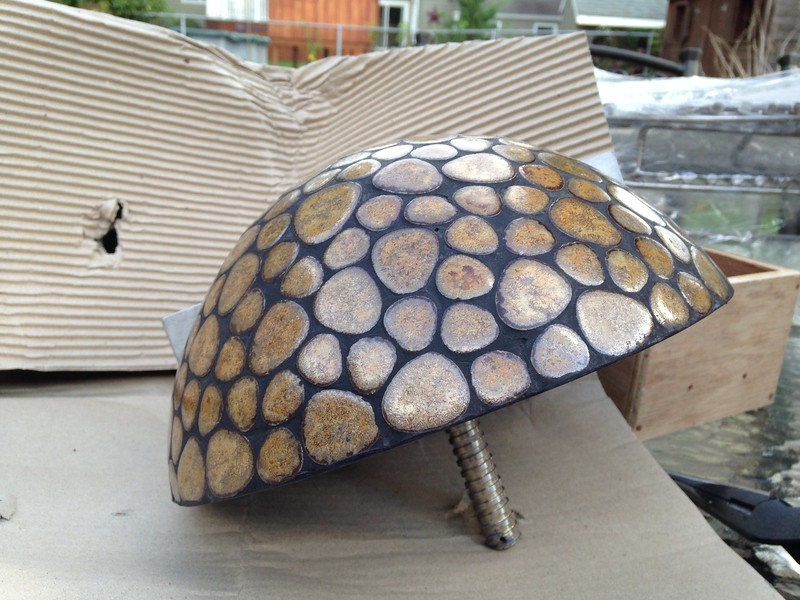
By the way, we did name our grill. As I mentioned above, my wife was partial to the matte black pebble finish shown on the KK main website.

If we had gotten this finish, we would have named our grill “Toothlessâ€, after the dragon in How to Train Your Dragon.

But this finish wasn’t available, so we went with the Olive Gold pebble.
And so we’re nicknaming our grill “Smaugâ€, from The Hobbit.

-
1
-
-
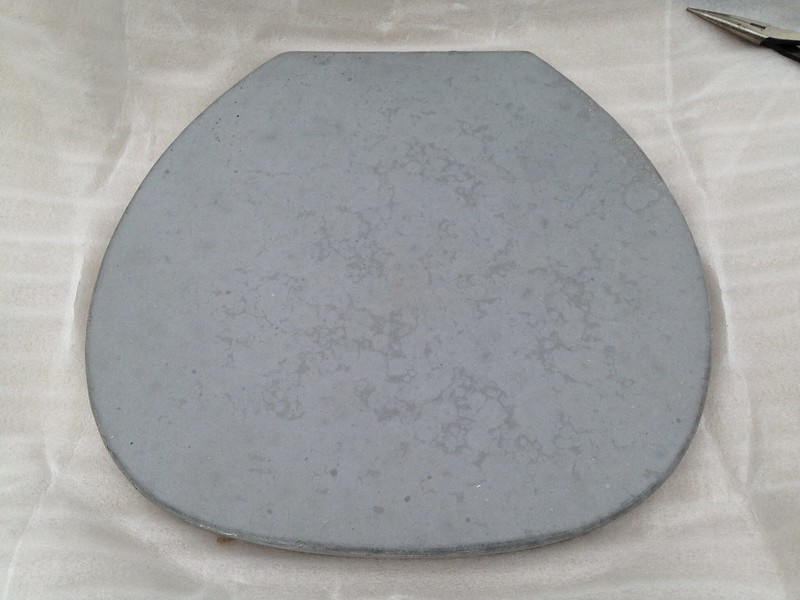
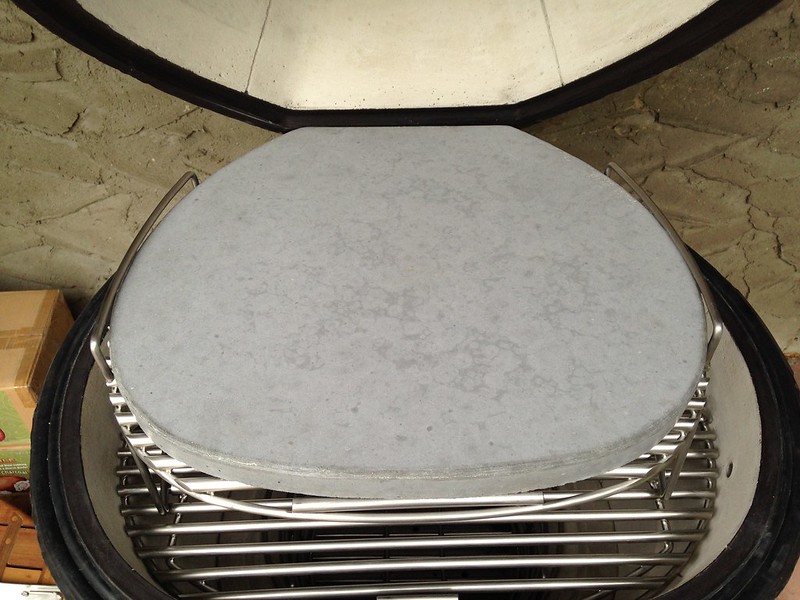
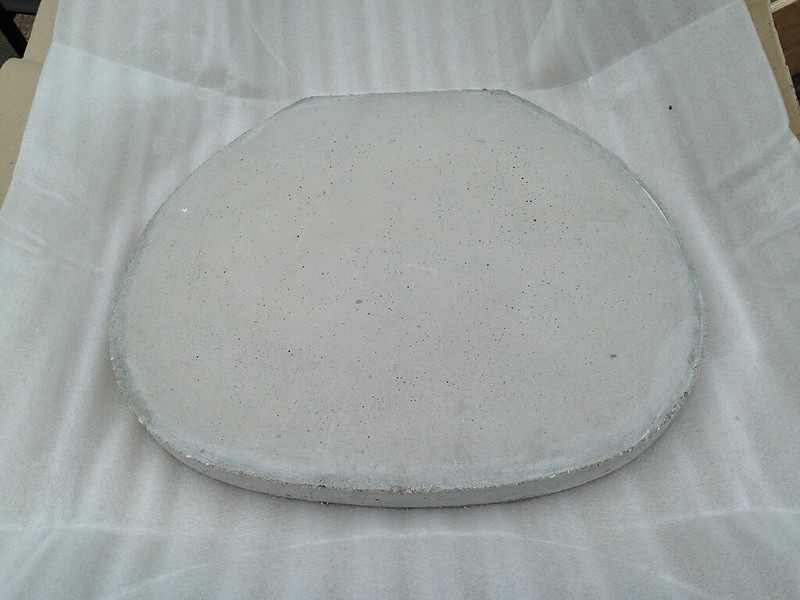
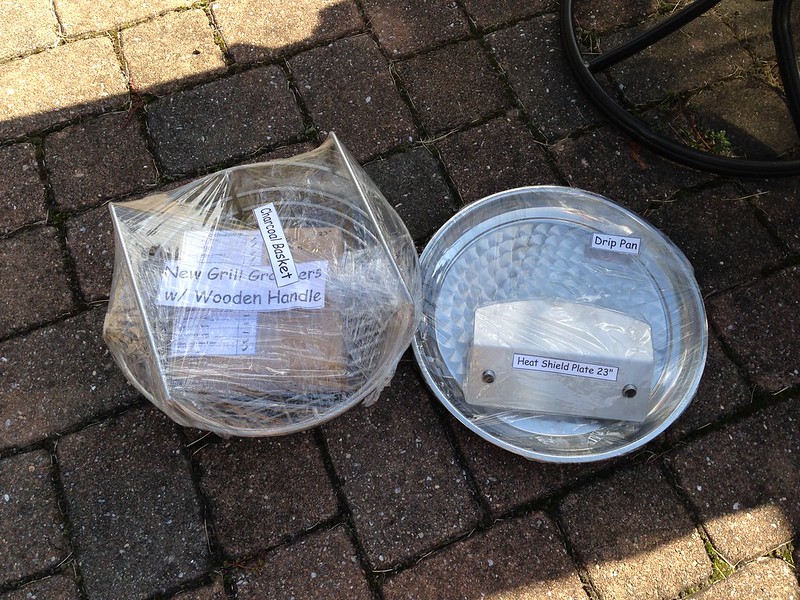
The last accessory I got with my grill was a baking stone. This baking stone is sized to fit the upper grill grate. It’s really thick, probably close to twice as thick as the typical pizza/baking stone that other kamado brands have.
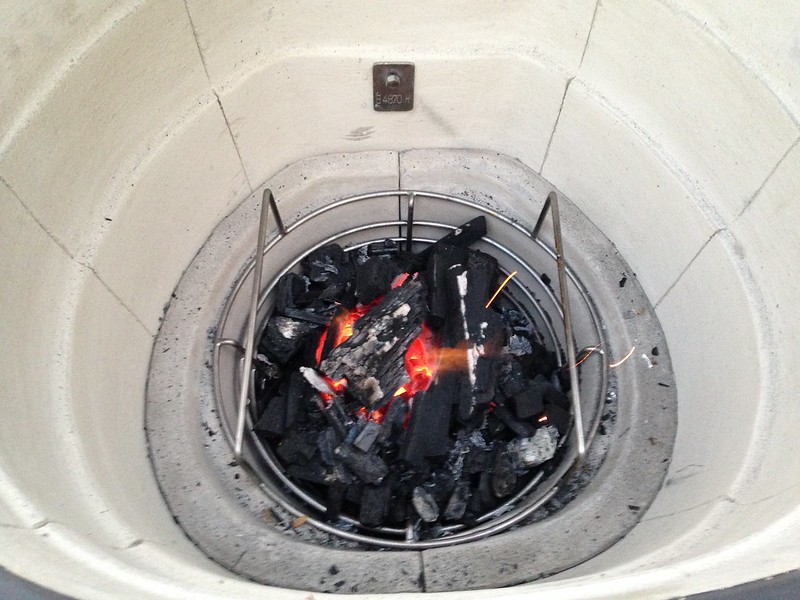
And finally, here’s the first fire I started in my KK 23†grill. I set the lower vent half open, and the upper vent so I could see the upper vent gasket. I hit 500ºF internal temperature in 10 minutes. Impressive.
Thanks for looking! As of today’s post, I’ve done a fair amount of low and slow and direct grilling in the three weeks since I first got the grill, and I’m just ecstatic about how well this grill performs.
-
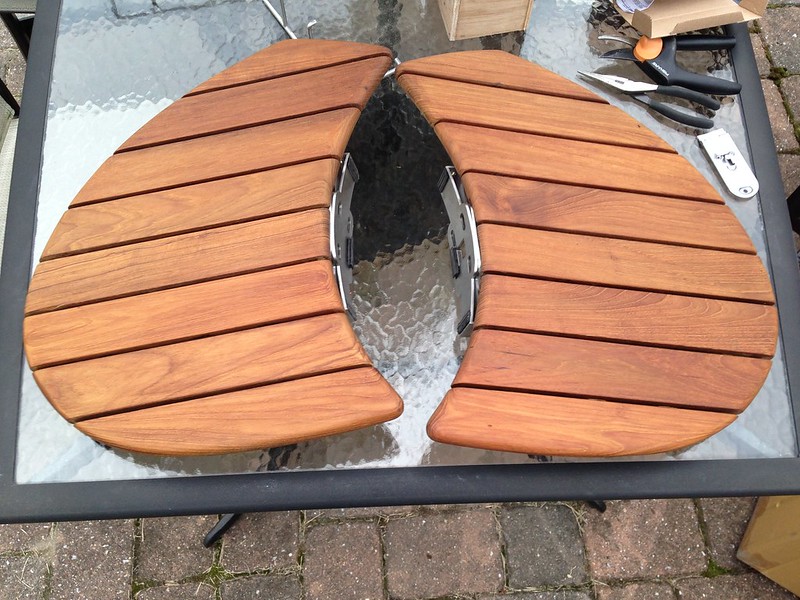
Here are the teak side tables. As a woodworker, I can say that these are nicely made. The wooden top is attached by screws on the underside, and Komodo Kamado took the time to plug the screw holes to prevent rust.
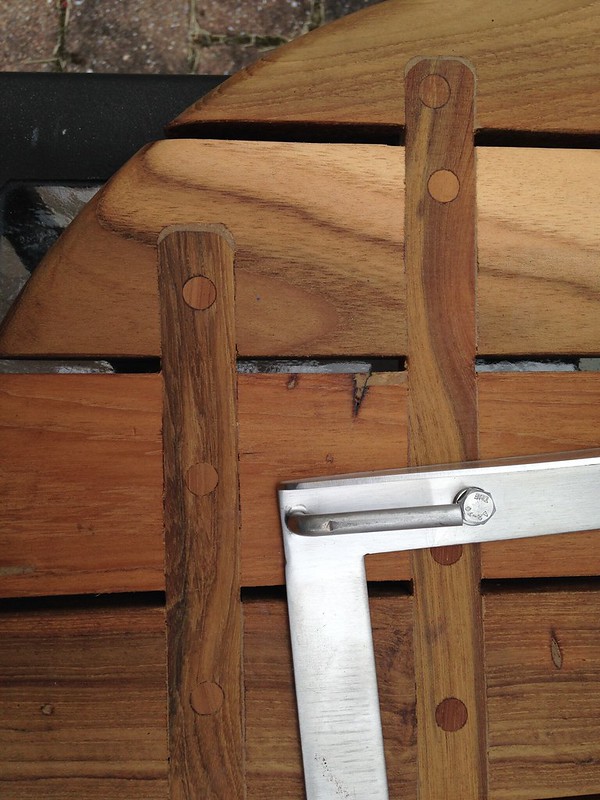
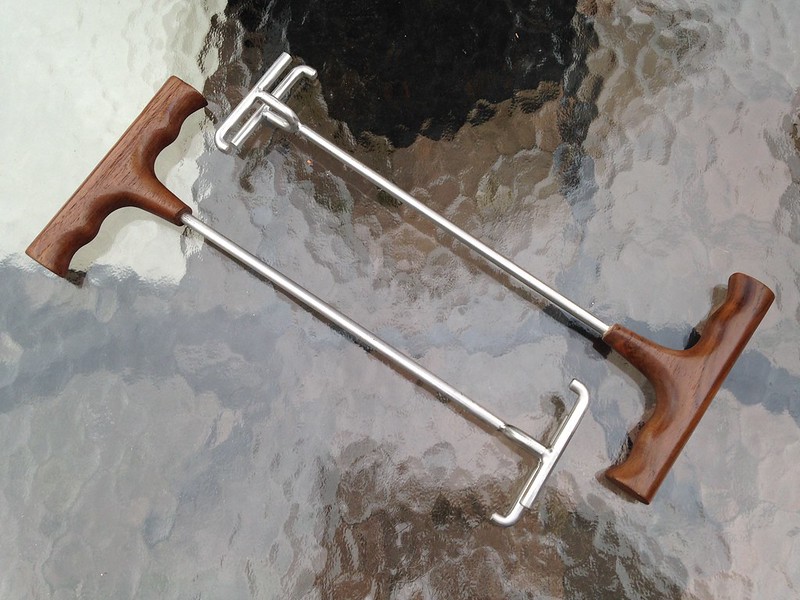
Grate grabbers, with teak handles. The teak handles are really nice to look at and to hold.
Spare parts kit.
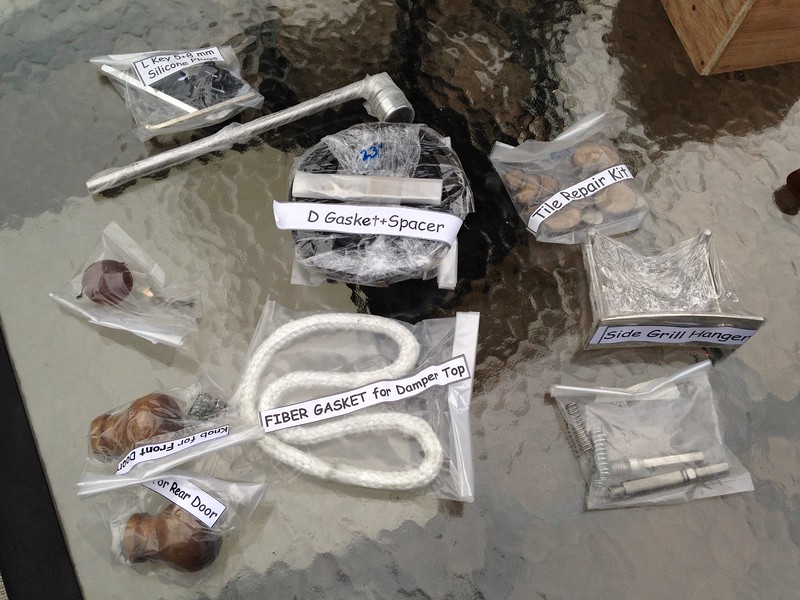
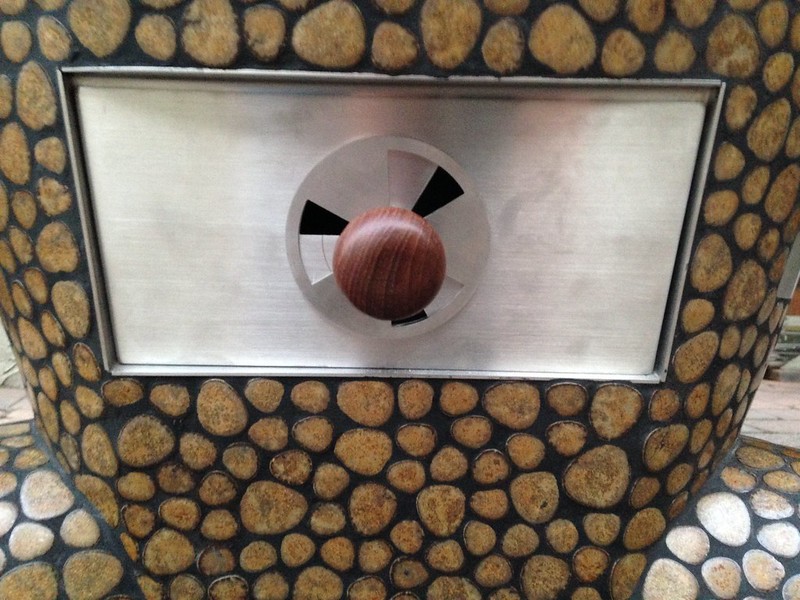
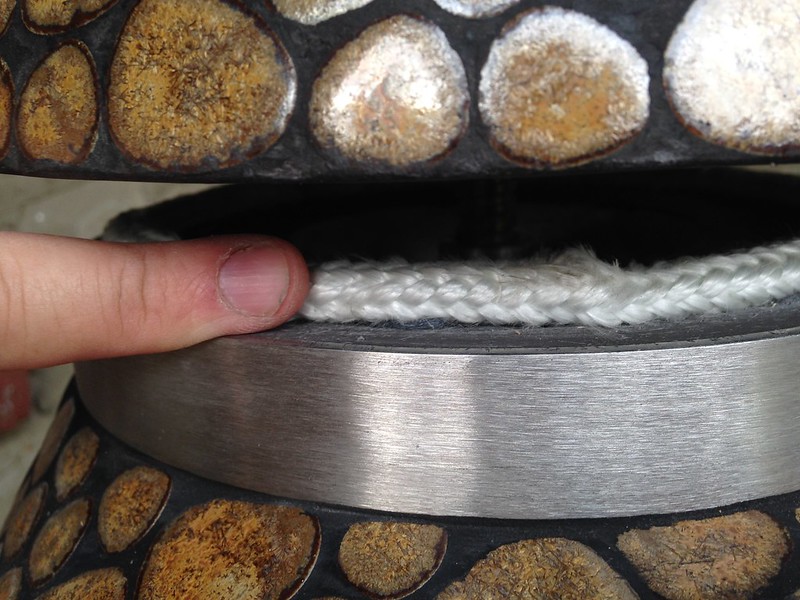
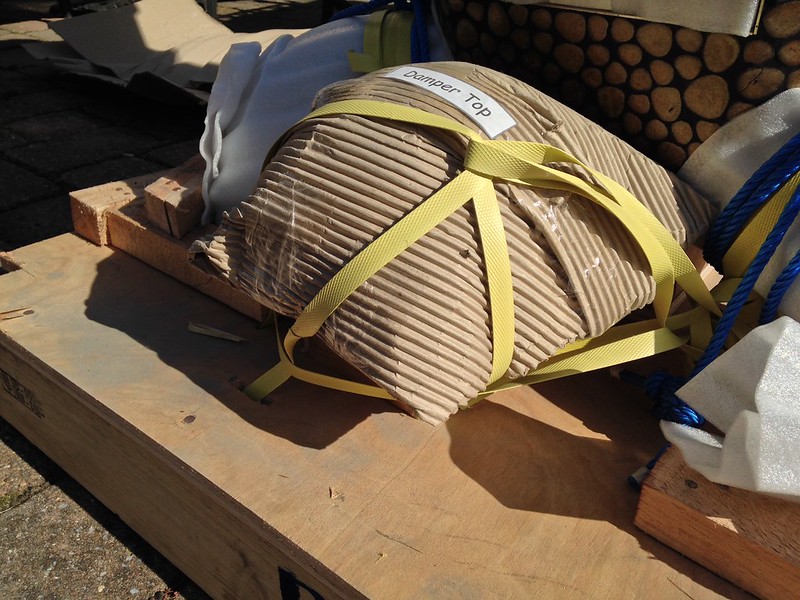
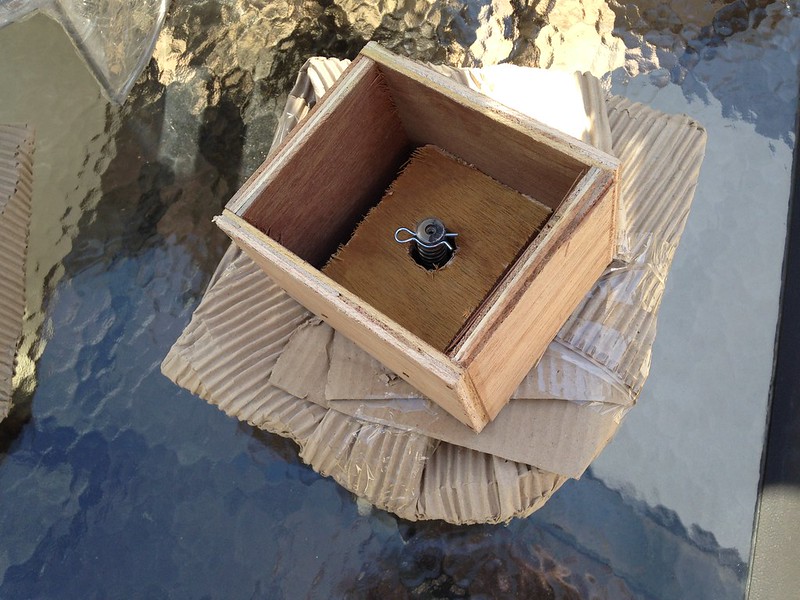
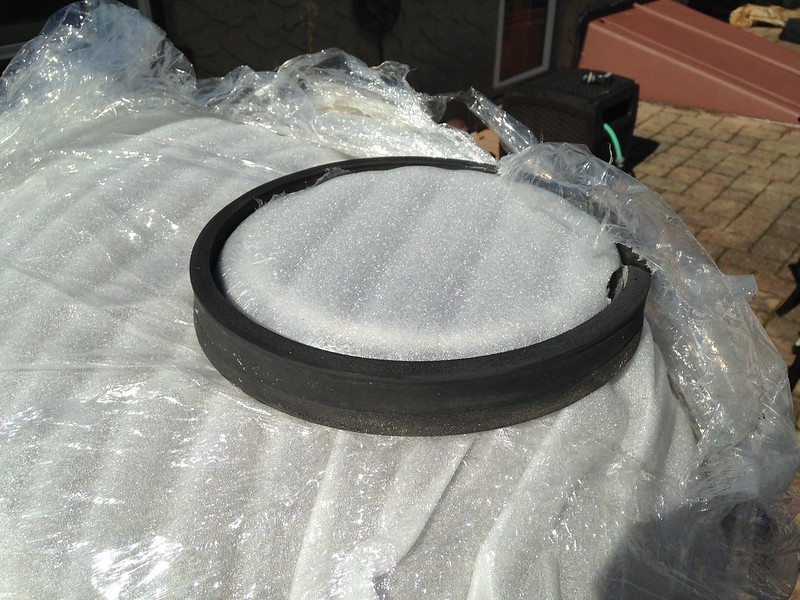
Notice the fiber gasket for the damper top. I’ve seen the felt gasket that’s used in most kamados, and was struck by how thin they are. There are a number of posts on this board about this issue. Here’s how thick the gasket is for the damper, with my finger for comparison. Impressive.
The main gasket that seals the top and bottom of the grill is no lightweight, either. It’s made of food grade silicone, and there are two raised areas that create an airtight seal. Because the gasket is made of silicone, if I spill sauce on it, it will still work. And it’s easy to clean.
I ordered a rotisserie basket. My family really likes duck, and I am going to try to cook duck on my KK grill, so I thought a rotisserie basket would be a good thing to have. Unlike every other kamado, KK grills come ready for a rotisserie. And if you’re using a rotisserie on a KK grill, it stays airtight.
-
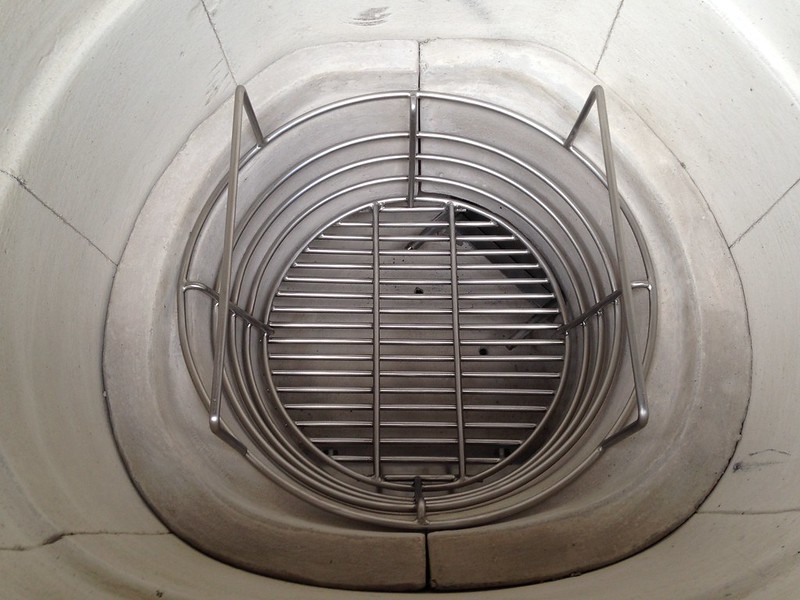
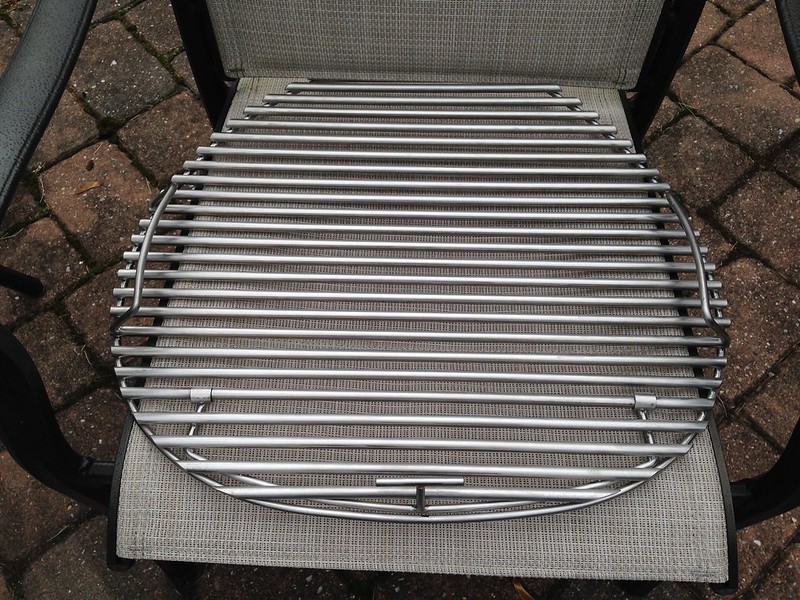
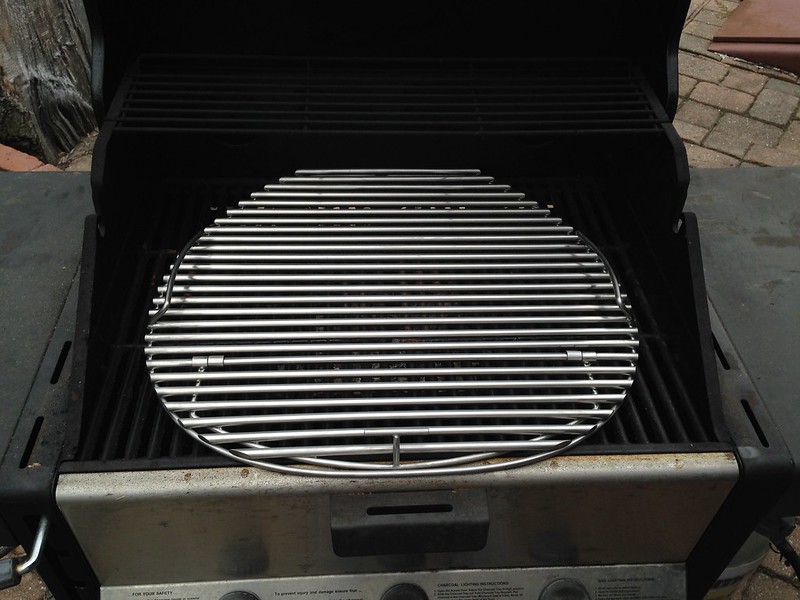
Finally, here’s the top grate, which rests on the main grate.
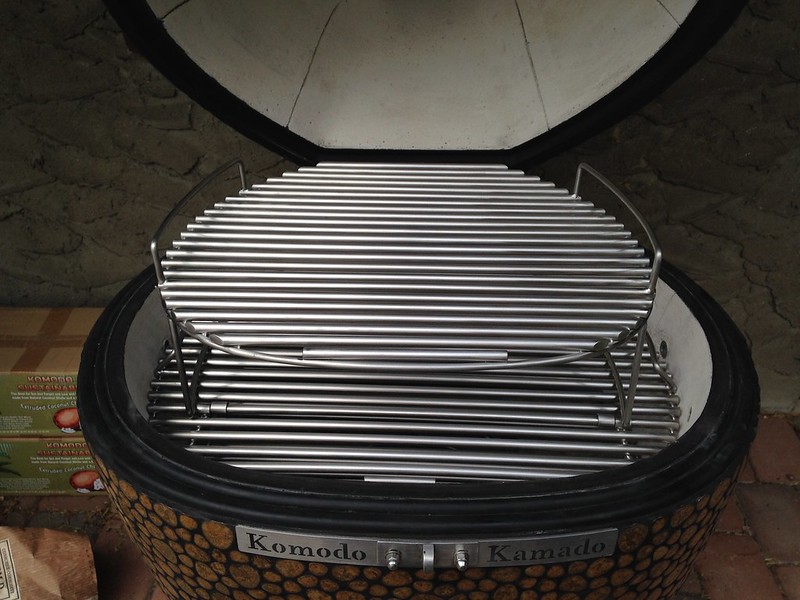
Finally, a run down of the accessories that came with my KK 23â€.
First, the heat deflector. This is made of the same refractory cement that the grill is made of. It’s a beast. Normally it would sit on the handles of the charcoal basket. I forgot to take a picture of that, however. Sorry.
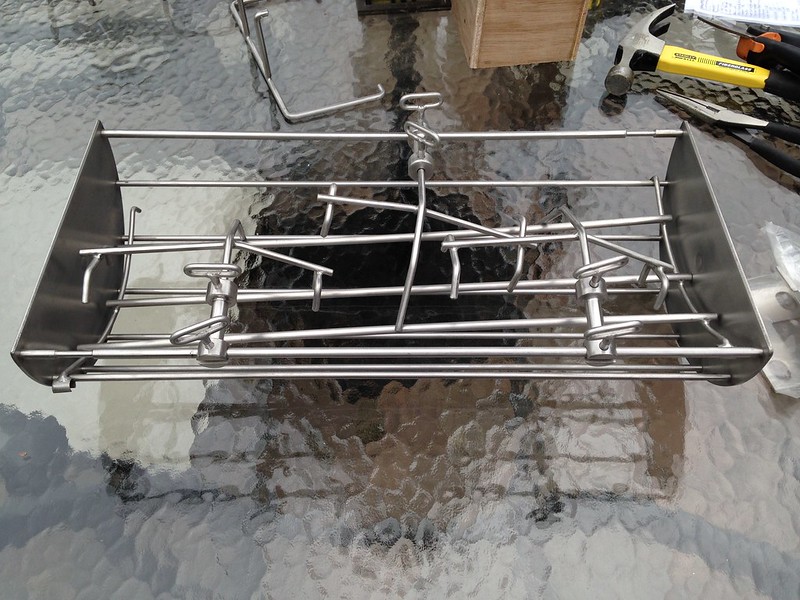
Speaking of the charcoal basket, here are the components of the basket splitter.
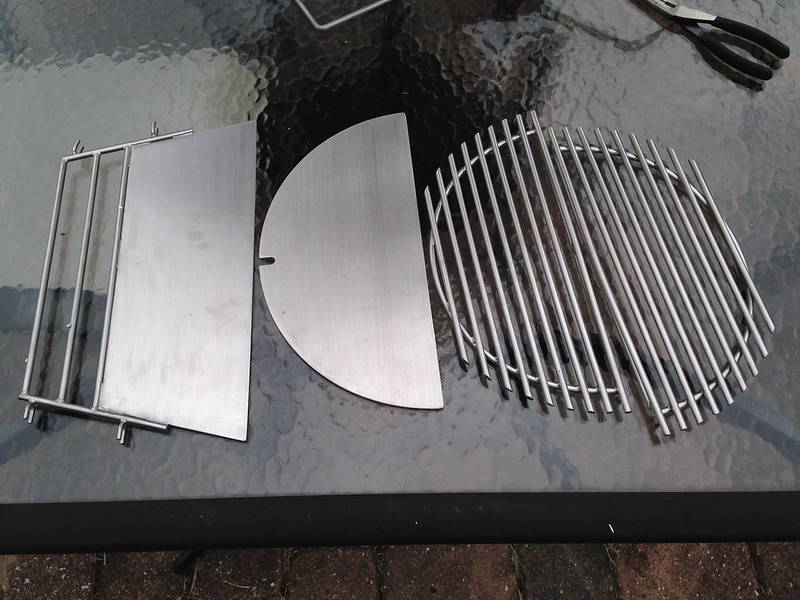
From left to right, you see the piece that splits the charcoal basket in half, a solid plate that fits into the basket, and two half grates that also fit into the basket. In use, it looks like this, using the solid plate and one of the half grates.
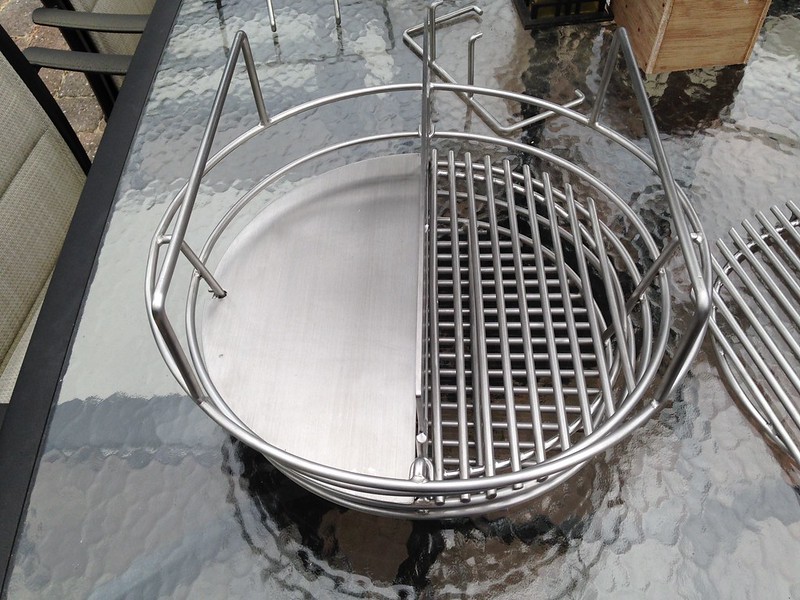
Kamado Joe has gotten a lot of attention for the divide and conquer system. I think this setup is even more flexible than that. You can use the center divider and the solid plate by themselves to split the basket in half. The solid plate and the solid portion of the center divider forces all the air to go through the charcoal.
You can also add the open grate which allows you to fill just the top half of one side to reduce the amount of charcoal you need for a short, high heat cook. Or put both open grates in and use the top half of the basket. It’s a surprisingly flexible arrangement.
-
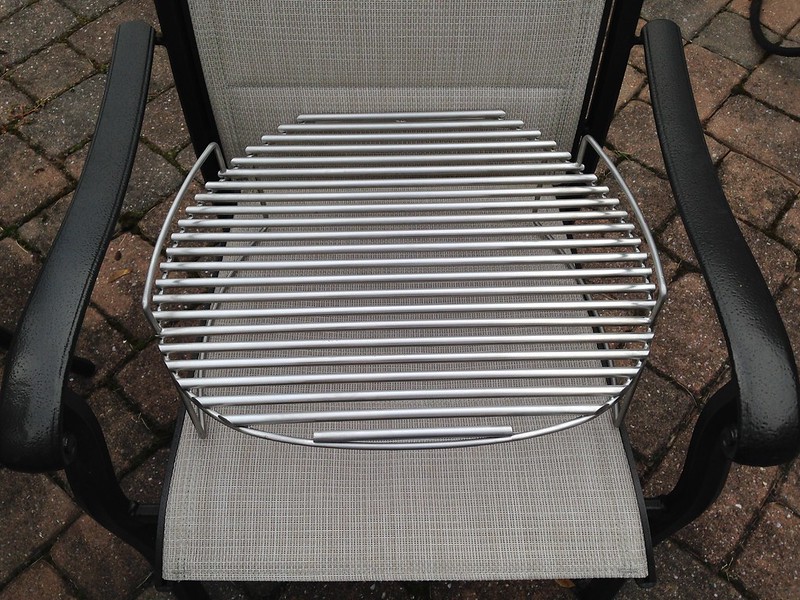
Here’s the charcoal basket. I put it on one of my patio chairs for scale. It fits into the grill very nicely.

The lower grate, again on my chair for scale. It has a door that can open up for access to the charcoal.
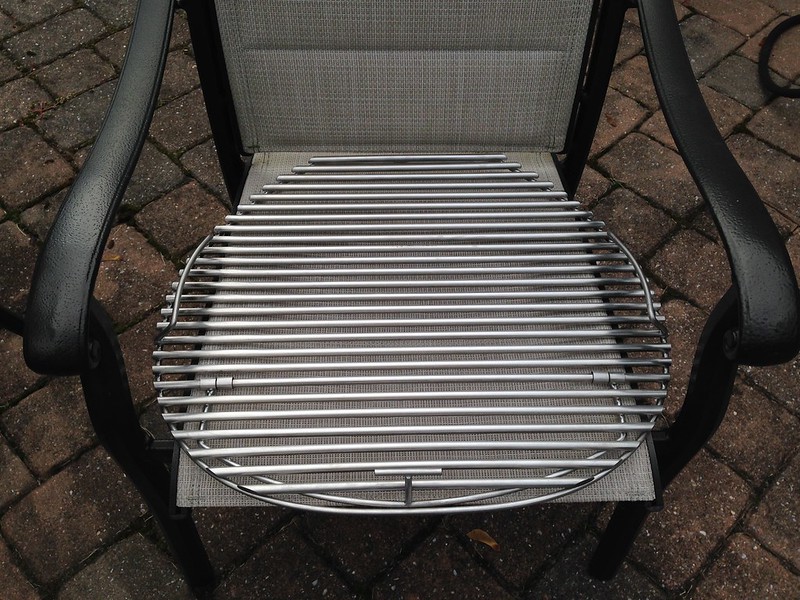
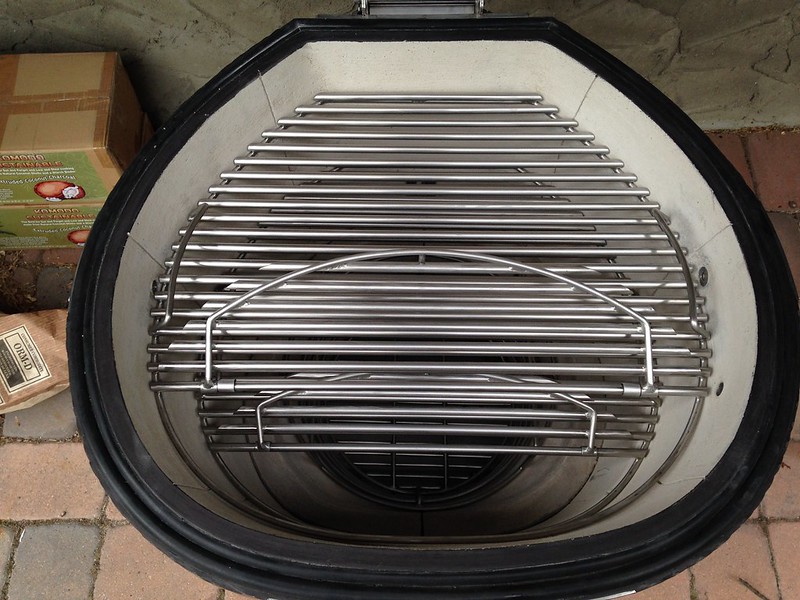
Here’s the upper grill. It also has a door for access to the charcoal.
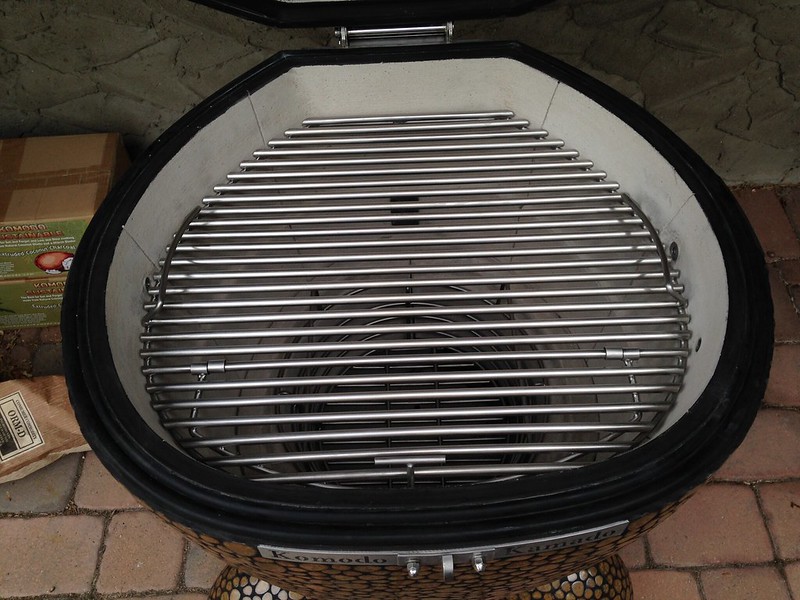
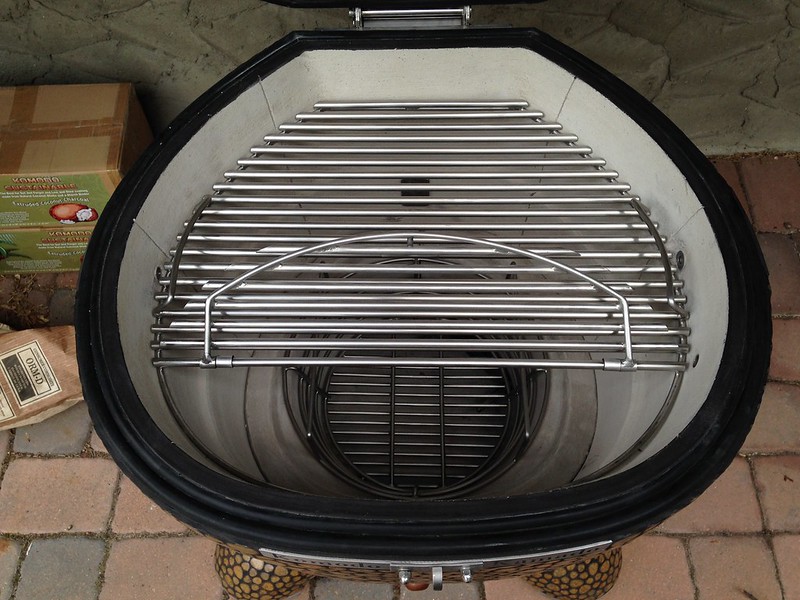
Both grates in place, with the access doors open.
And for a final size comparison, here’s the main grate on my old gas grill. It may look like the KK 23†main grate is smaller than a three burner gas grill, but because of heat loss, I never grilled out towards the edges of my old grill. I’m going to get more effective cooking area with the KK 23â€.
-
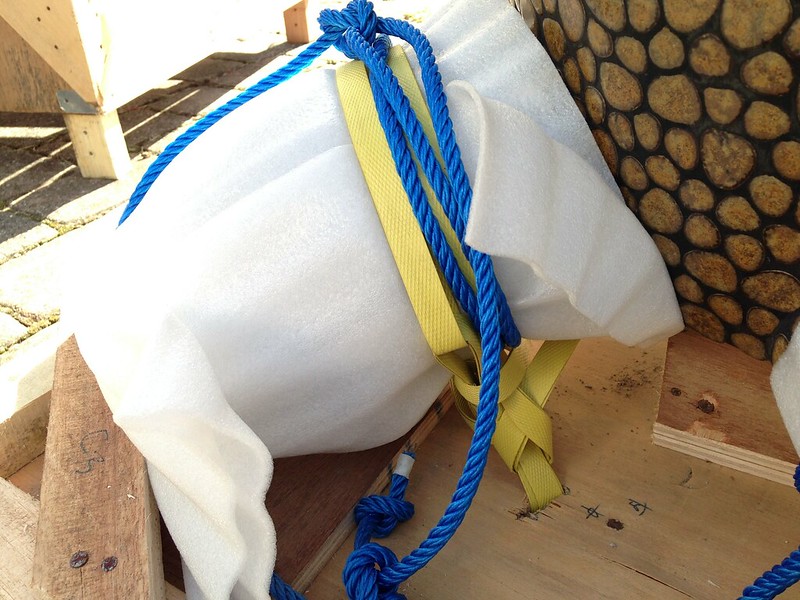
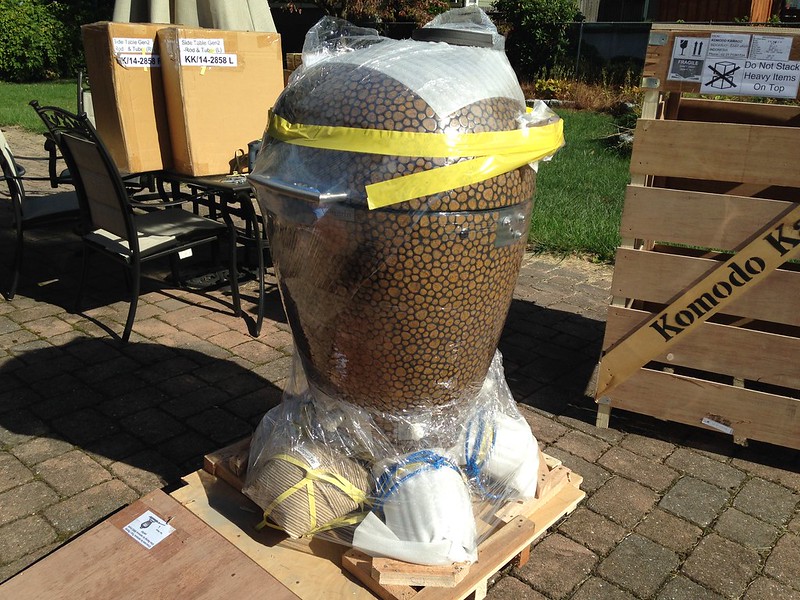
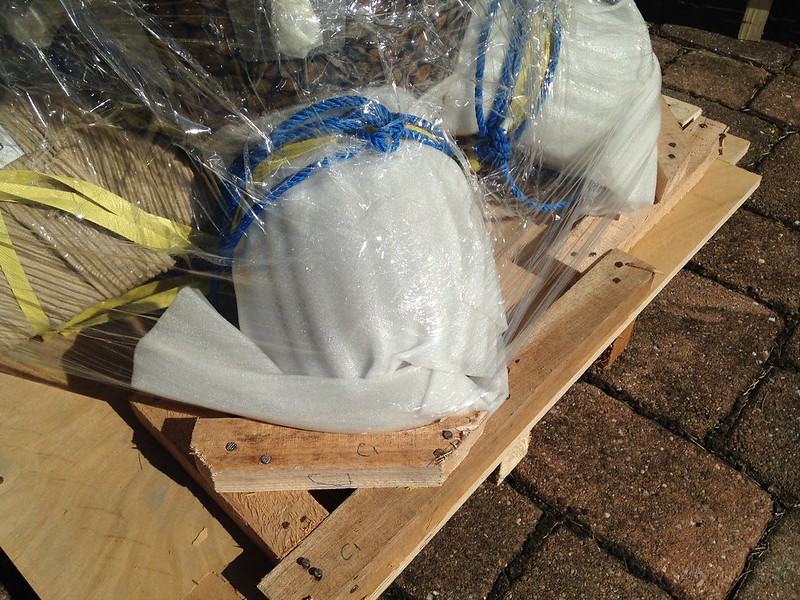
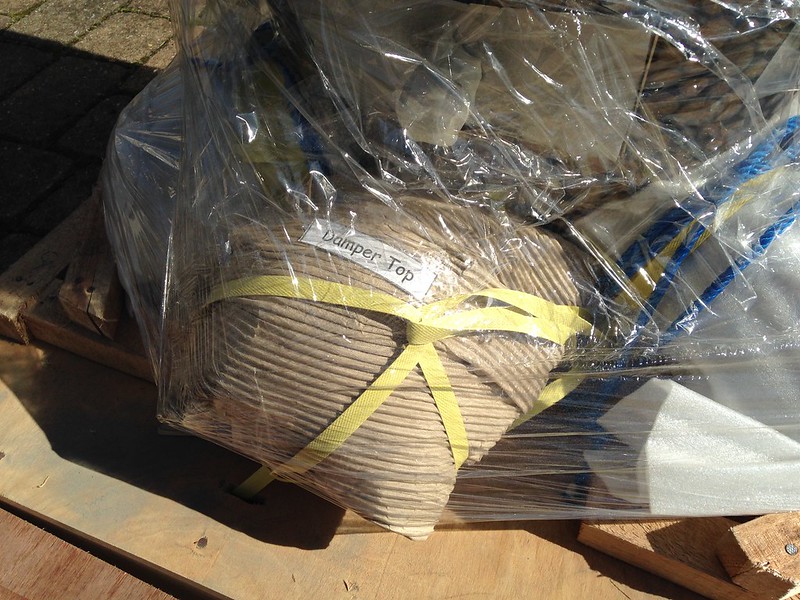
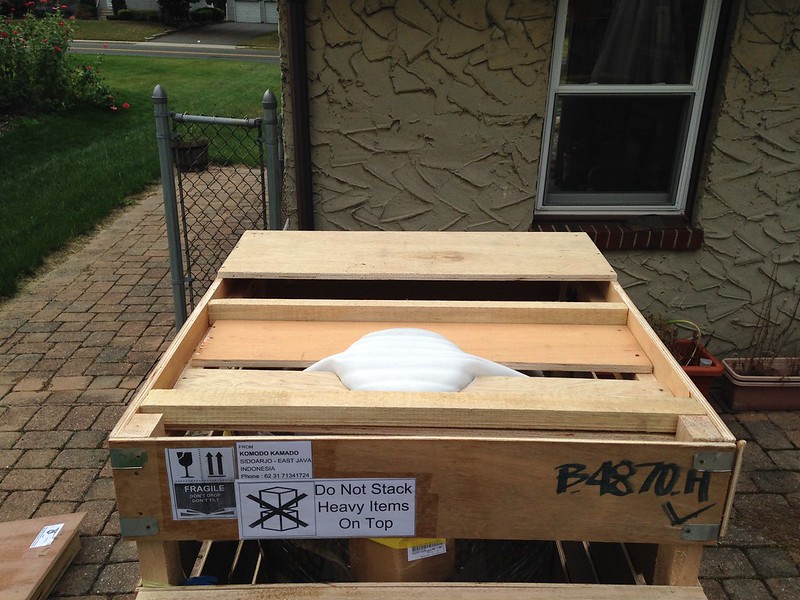
Here’s all the stuff that came inside the KK 23†grill. Like CeramicChef’s grill, a lot of stuff was packed inside the grill itself for shipping.
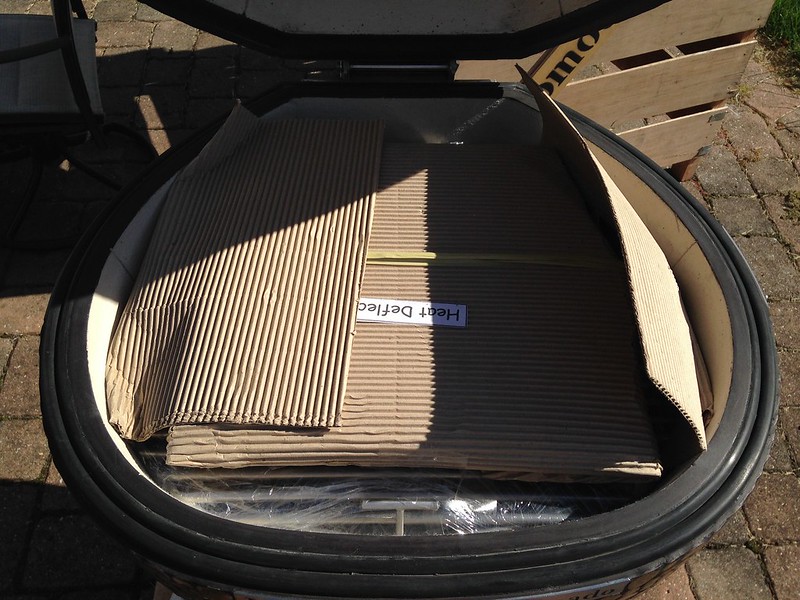
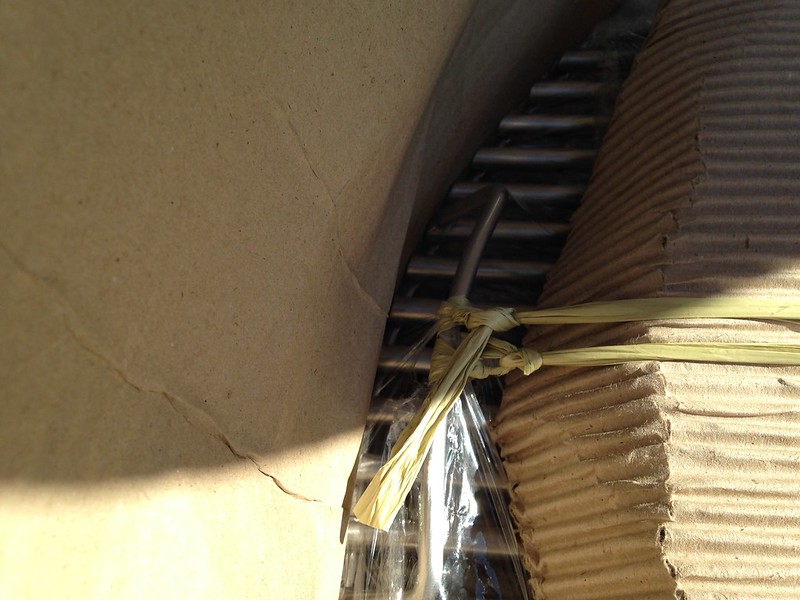
The top items were strapped and tied down really well.
This is what came out of the grill. Many packages. It was like a clown car. I kept pulling things out of it.
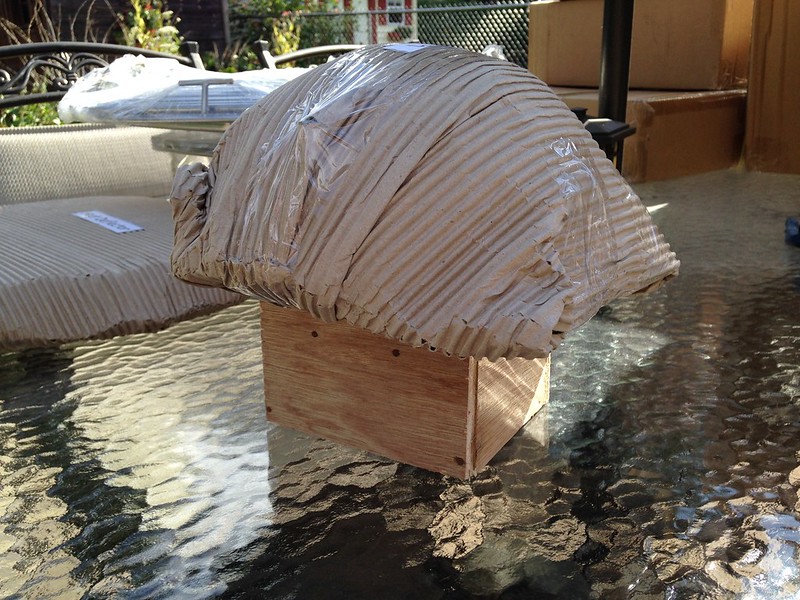
Here’s the damper top. It was strapped to the skid, and was packed in a way that protected it very well.
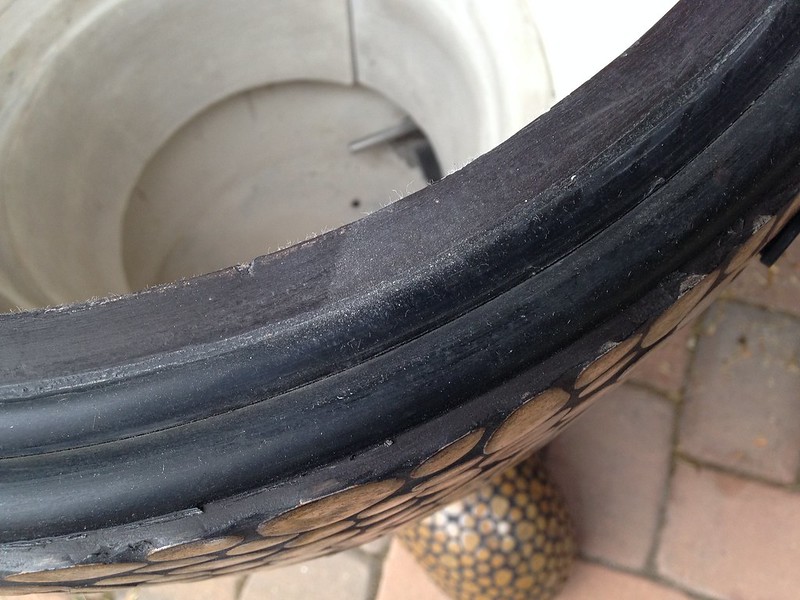
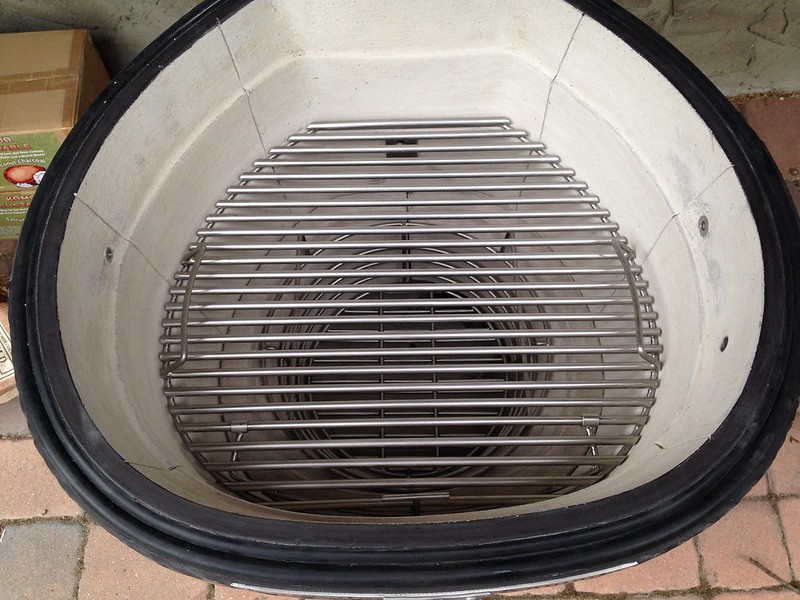
Here’s the view into the unloaded and empty grill. You can see the two piece firebox, which means that there shouldn’t be any worries about cracked fireboxes like I’ve read from BGE, KJ, and other owners.
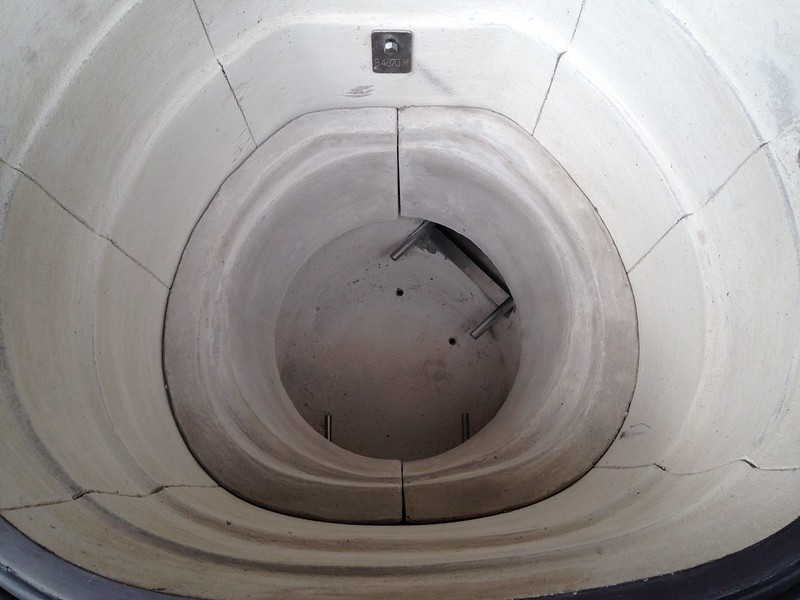
One thing to note is how tightly the firebox fits to the inside wall of the grill. This means that all the air that comes in through the bottom vent will come up through the charcoal, which is one reason why the KK is so efficient. Compare that to the Kamado Joe, where you can see gaps between the firebox and the inside wall. This allows air to come up around the firebox, bypassing the charcoal, and is less efficient.

-
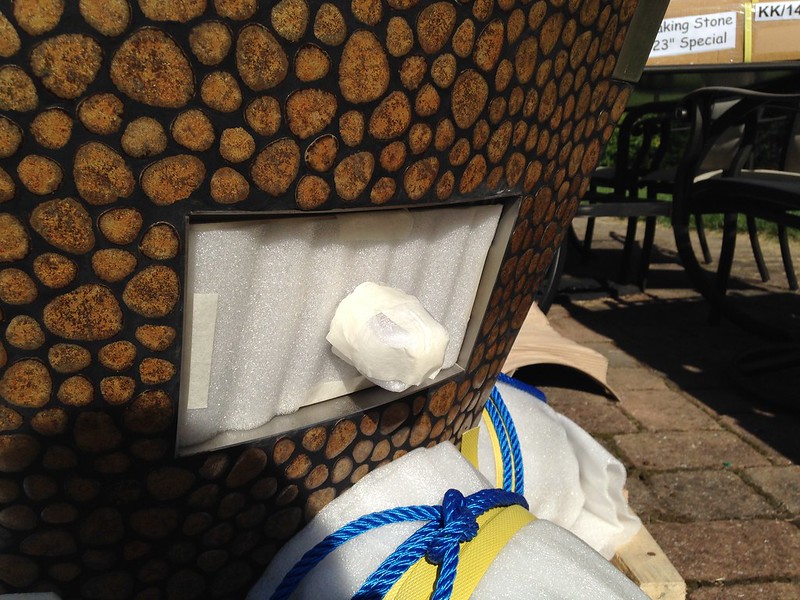
The feet of the grill, the knobs, and the various draft doors are also well protected.
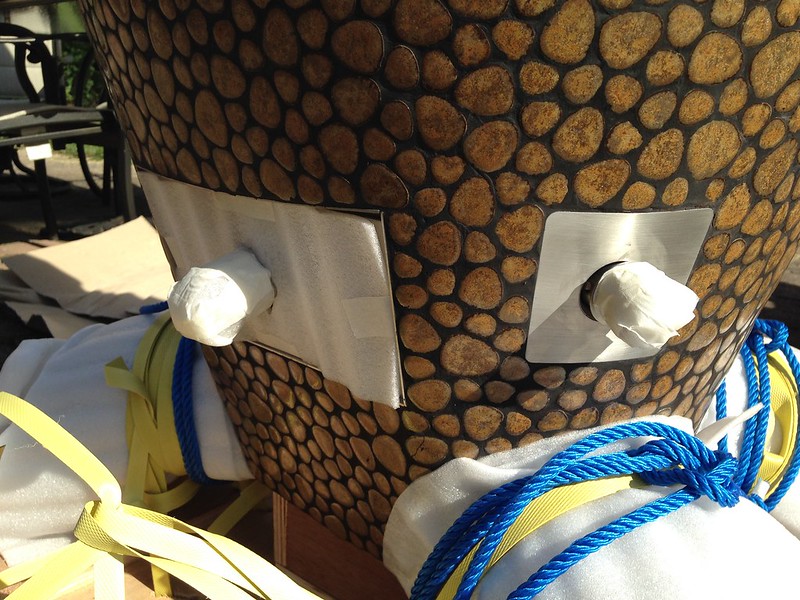
At this point I spent some time removing a heroic amount of wrapping material and cutting the straps that held the grill to the skid.
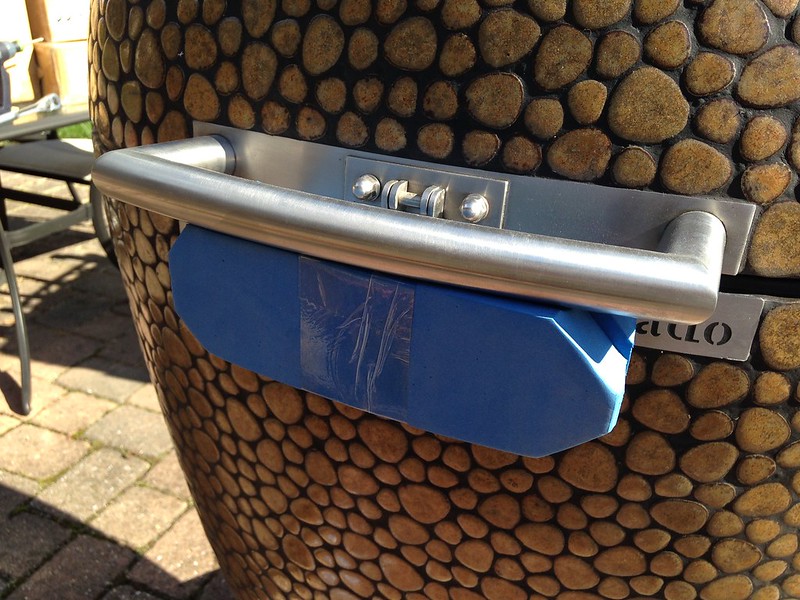
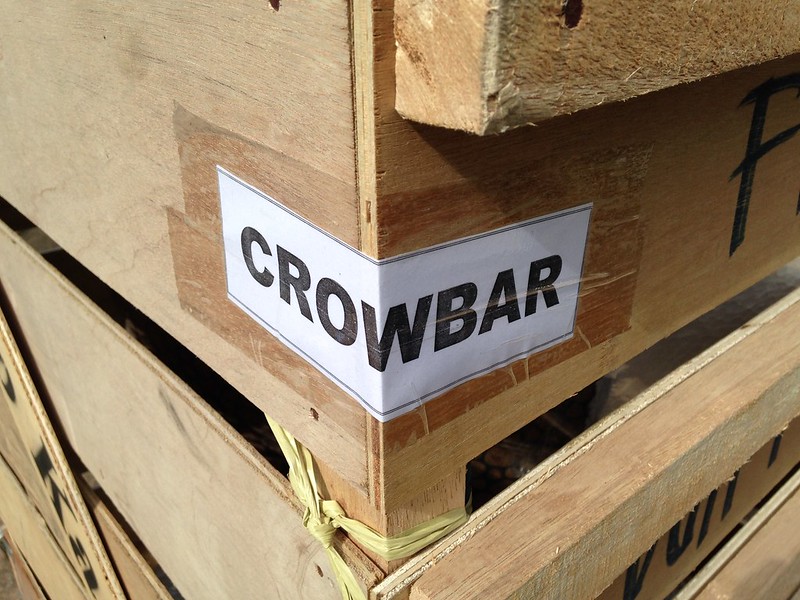
In the picture of the foot, you can see some pieces of wood that are nailed into the bottom of the skid. These wooden pieces help keep the feet of the grill in place. I used my crowbar and hammer to remove those pieces of wood from all four corners. It’s really nice that a crowbar comes inside the crate to help with this. Get a nicer crowbar. You won’t regret it.
I didn’t get a good picture of this, mainly because I was so excited to get the grill off the skid. Sorry.
Even then, the grill wouldn’t come off the skid, since it was resting on some pieces of plywood that made a box that sat underneath the center of the grill. I was able to get the grill off by standing at the front of the grill, grabbing the lid handle, lifting slightly, and nudging the grill off the box. I could then roll it down the ramp.
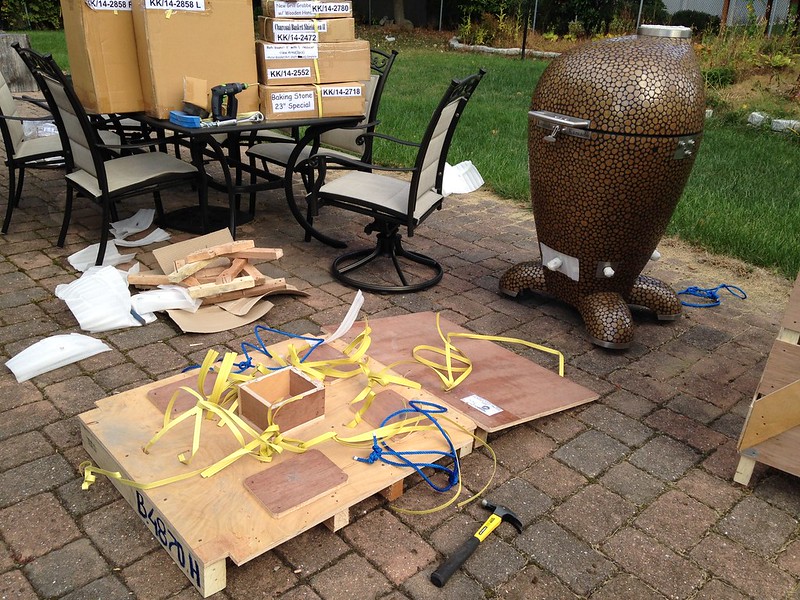
Now that the grill is off the skid, you can see how I set up the ramp and the box that was underneath the grill. The wheels were resting on the four darker pieces of plywood. The pieces of wood that framed the feet of the grill are all on a piece of cardboard at the top of the picture.
This was the other part of the unpacking where another person would have been very helpful. Clearly, I got it off by myself, and I’m not a huge guy by any stretch of the imagination. But if I had to do it over again, I would have gotten another person to help me get the grill off the skid.
Even so, this process didn’t take that long to do. It only took me an hour and a half to get from the time the crate got into the back patio to when I rolled the grill off the skid.
-
The top and sides of the crate are attached with lag screws, two at each corner. I used my ratchet wrench with the 10mm socket to remove these. After that, the crate can be lifted up and over the grill. This was the one part of the unpacking where you really need two people. The crate itself isn’t very heavy, but it is bulky, and you have to be able to lift it over the height of the grill.
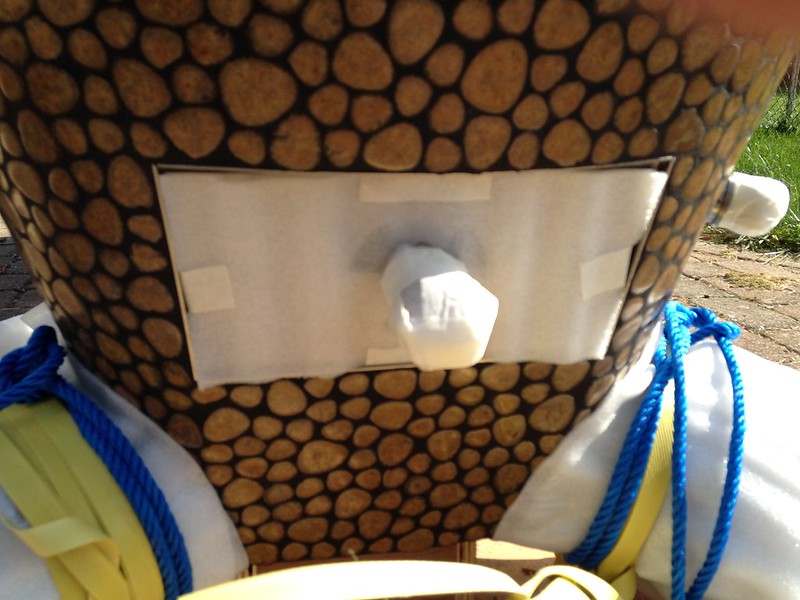
It’s impressive how much additional protective wrapping and padding there is on the grill.
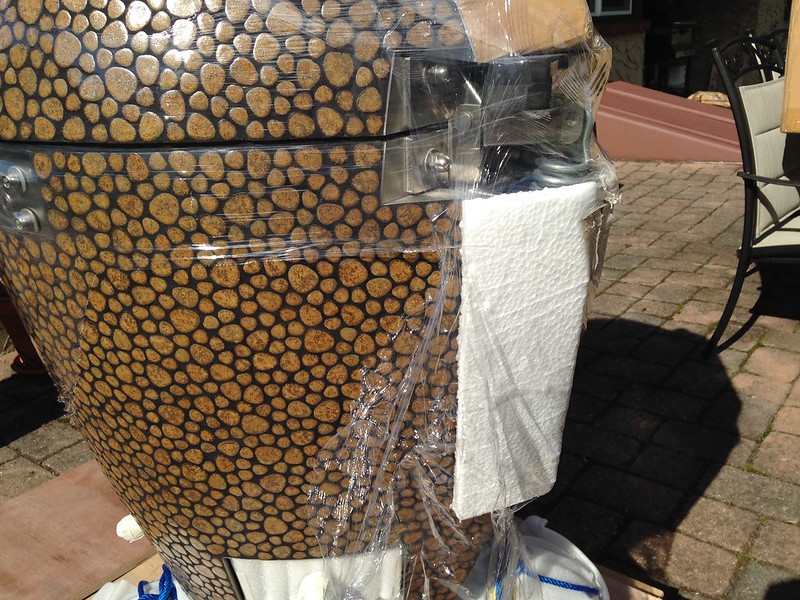
So I have to spend some time taking the wrapping and padding off. Now I can get a better look at it.
-
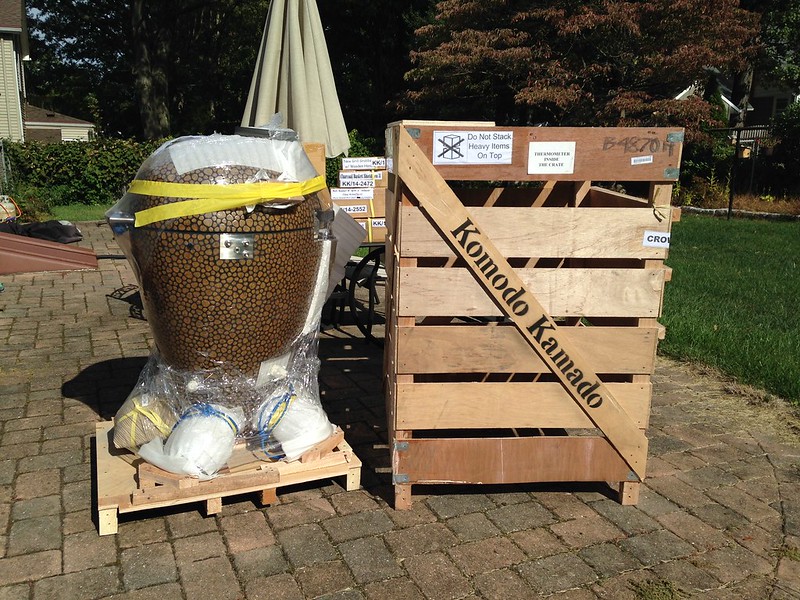
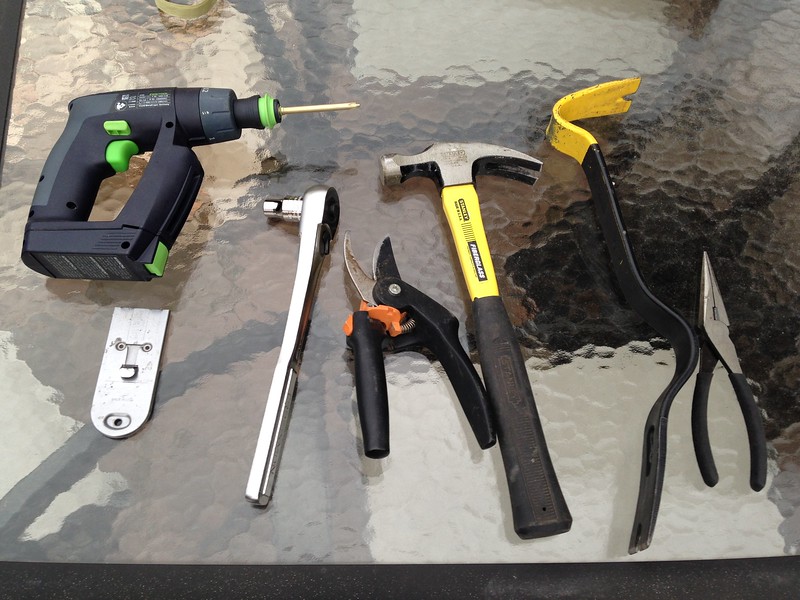
Next step: unpacking the crate. Here are all the tools I used for this. A drill with a #2 Philips bit, a utility knife, a ratchet wrench with a 10mm socket, garden clippers, a hammer, a crowbar, and a pair of pliers.
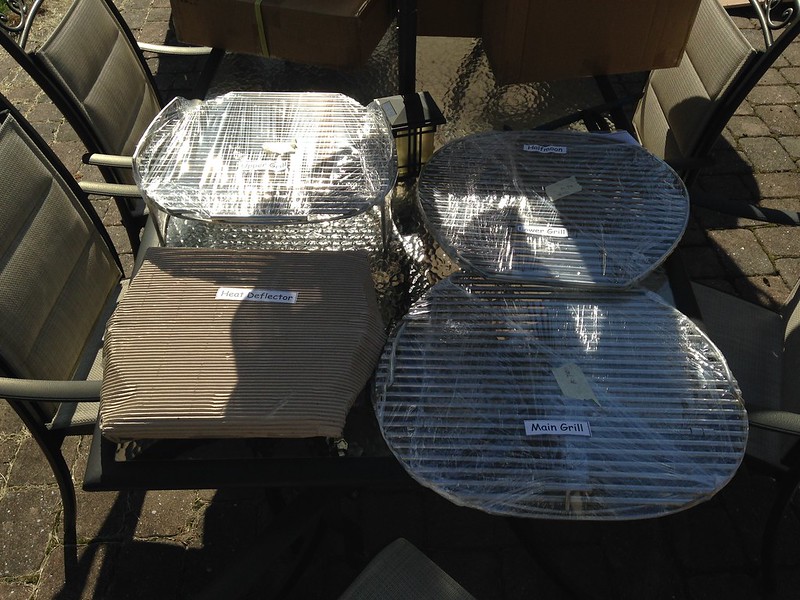
CeramicChef can attest to the terrific packing job that Komodo Kamado does with their crate. Suffice it to say that my crate arrived without any damage to the outside or inside components. The boxes on the top are some of the parts of the grill, and the accessories I ordered. Here they are.
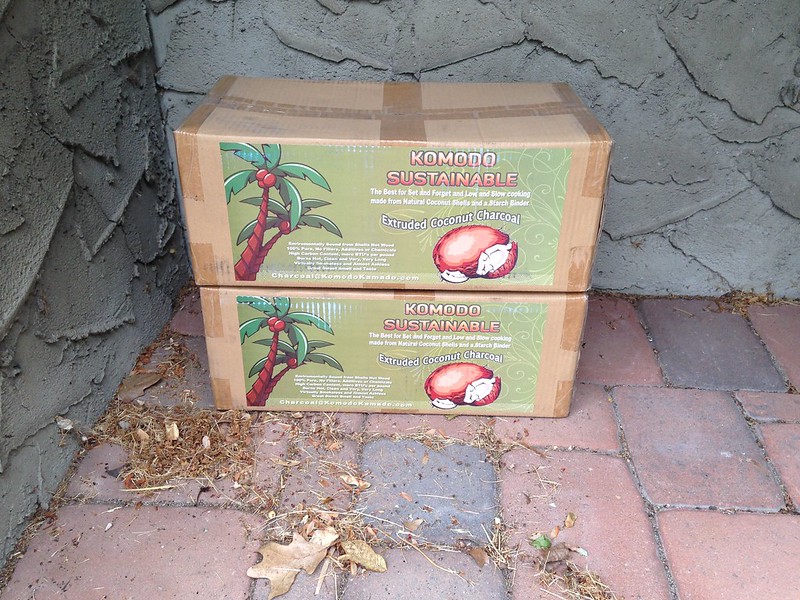
I asked for two boxes of coconut charcoal. I wanted to see what this stuff was like before placing a big order.
Here are the other boxes.
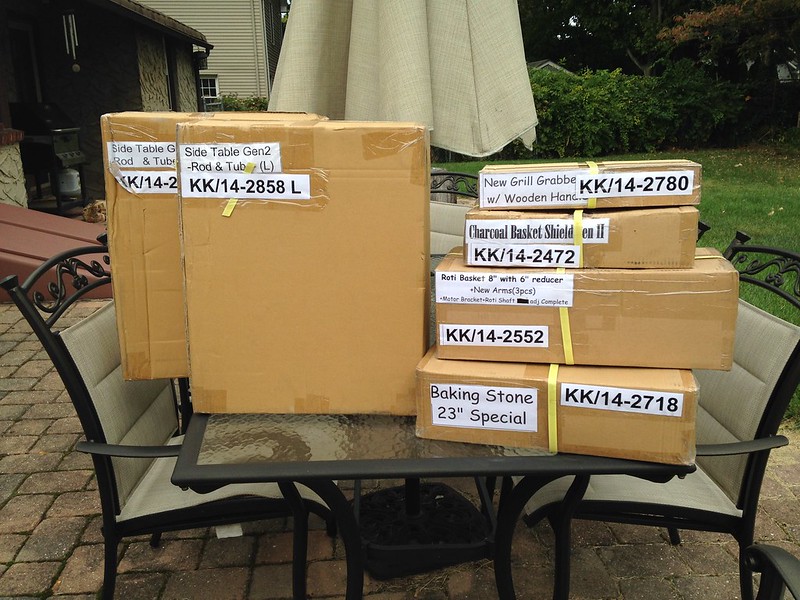
Two teak side tables, the new model grill grabbers with teak handles, a charcoal basket splitter, an 8†rotisserie with a 6†reducer, and the new baking stone sized to fit the upper rack.
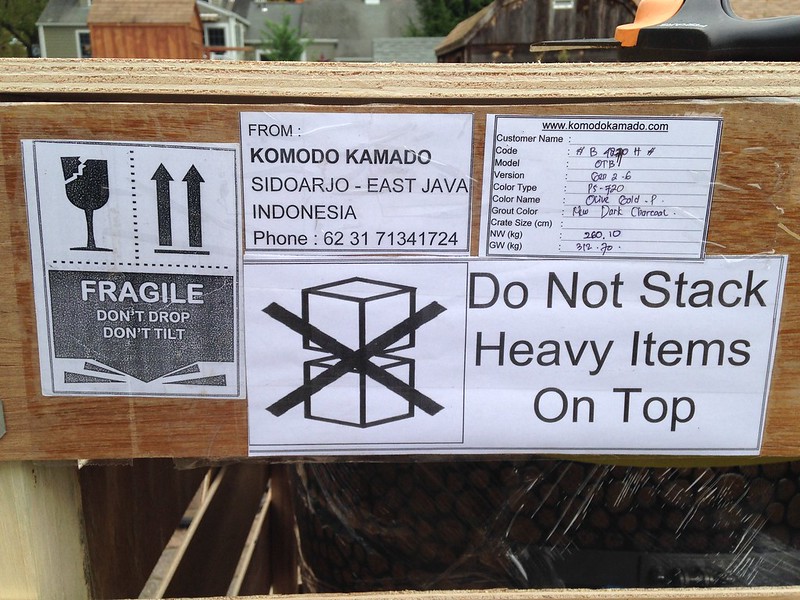
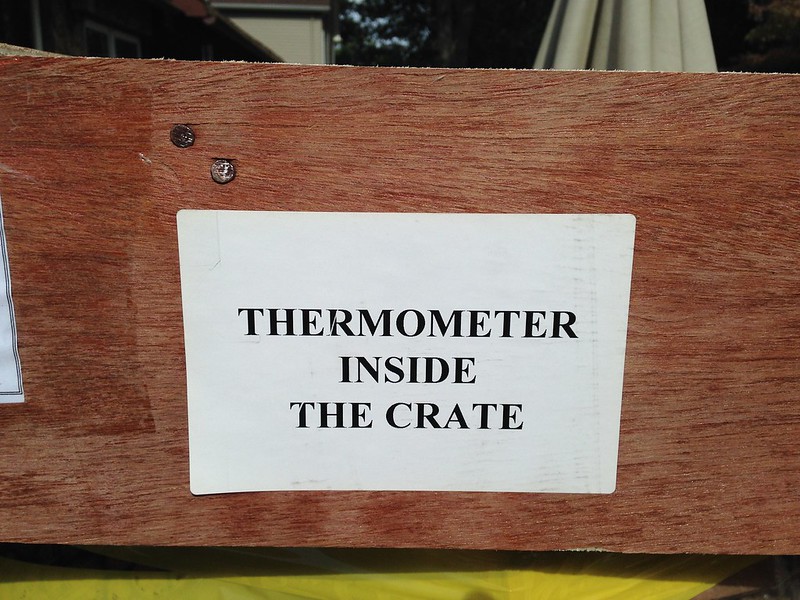
The crate is marked with all sorts of useful signs.
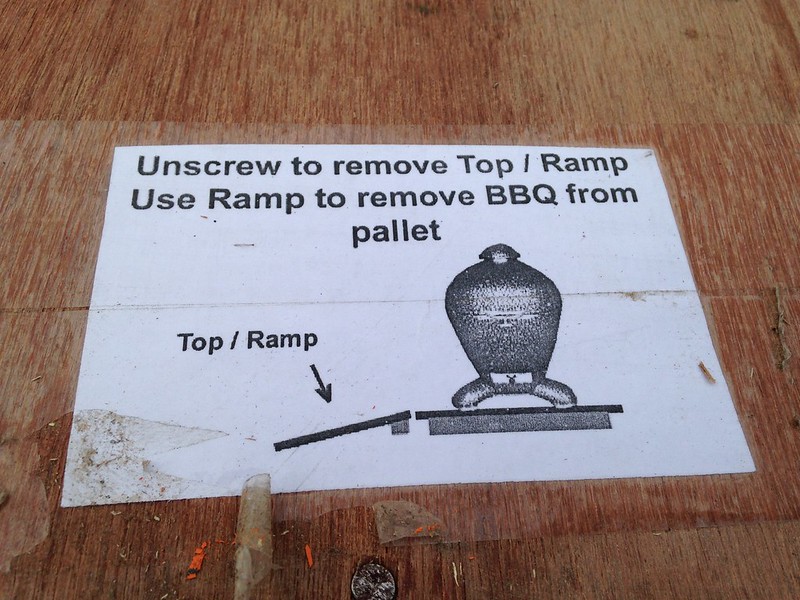
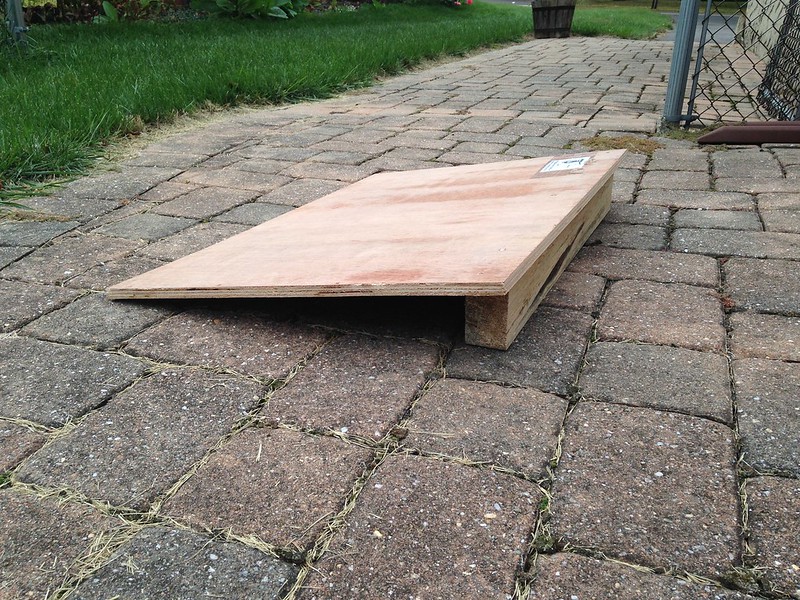
The first thing is to take off the top board, which doubles as a ramp that will help with getting the grill off the skid.
Underneath, you can see that the top of the grill is held firmly in place by the top of the crate.
-
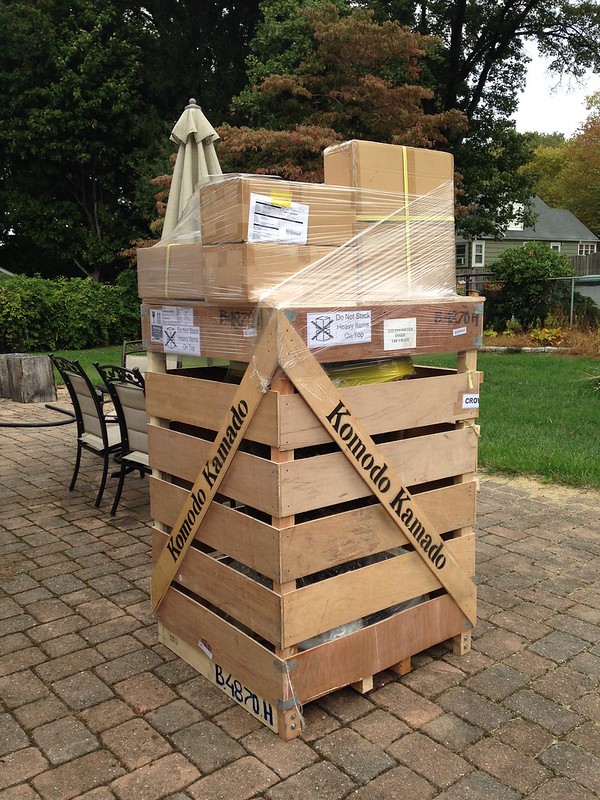
About a month ago, I had a great day. I was able to set this up in my backyard.
But first, let’s go back to the beginning. I hope you’ll bear with me on this first part, because I have relayed the story here and there, but I wanted to have the whole story in one place.
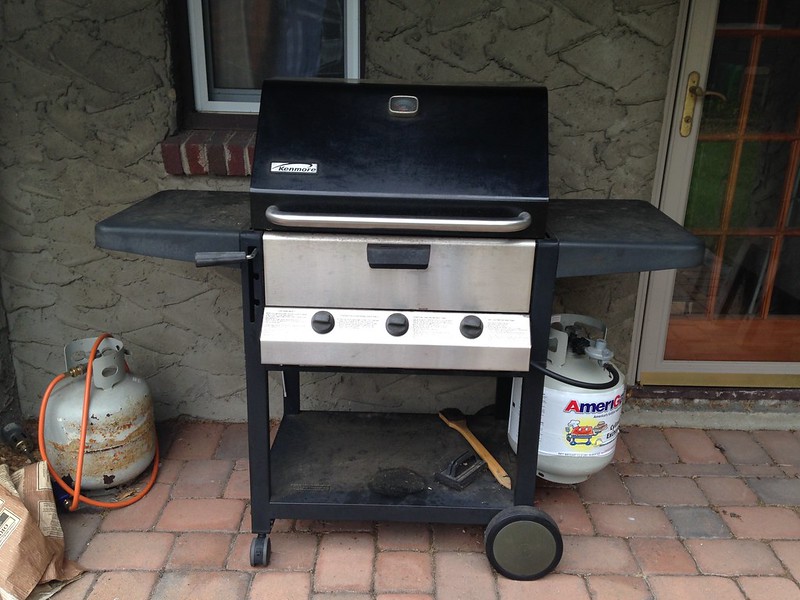
This is my old grill. It’s a Kenmore propane grill, with a standard three burner set up, but the really nice feature this one had was the ability to also use charcoal. There’s a small tray on the inside that can be loaded with charcoal, which you lit with the gas burners. I know that some folks think that stuff from Sears is not the greatest, but we were really happy with this grill. I had the flexibility of cooking something quickly with propane, and could use charcoal for when I had time to get the charcoal going.
But unfortunately, it died at the beginning of the summer, after a good 10 years of service. I thought about replacing the burners, but that would have been a very messy job that I just did not want to deal with. I started looking for another propane/charcoal combo, but there weren’t any quite like this model.
And then I discovered kamados. After watching a bunch of videos, I was convinced this was the way to go. At first, I was interested in a Kamado Joe Big Joe in red. I placed an order around Father’s Day, figuring that I might be able to be back to grilling by July 4.
Well, July 4 came and went. Then the rest of July went by. Despite contacting Kamado Joe, both directly and through my dealer on numerous occasions, I never could get an answer as to when I could expect my grill.
August came along. My family and I left for China for a three week vacation. I told my dealer that if my grill came while I was gone, to please hold it until I got back. No problem from their standpoint. I figured that would be great: we’d enjoy our vacation, and since we would be gone for three weeks, we were sure to come home and start using our brand new grill.
During that trip, I had a lot of time to think about the grill, and to get more into the details of the various kamado grills that were out there. And that’s when I began to appreciate the features that were built into Komodo Kamado grills. I also began to read about issues with Kamado Joe grills that began to make me nervous: grills arriving after a long backorder wait with broken parts, and no parts being available to fix the situation; fireboxes cracking in use; bands holding the lids coming loose; less than perfect performance from the felt seals; misaligned lids, and so on.
That’s when I started to really reconsider my choice. I had asked a couple of questions here before, but then I started to look into Komodo Kamados in earnest. While in China, I began to talk to Dennis Linkletter by email about the Komodo Kamado, and he was quite gracious in answering my questions, even though he was also on vacation at the same time for part of our dialogue, and even though I told him that I had a red Big Joe on order. The cost was one hurdle to get over. The other was the look of the Komodo Kamado. Granted, the look isn’t for everyone, including my wife at first. But after looking over the options on the KK website, we eventually settled on the same pebble black finish that CeramicChef had for his 32†Big Bad. There was only one catch: that finish wasn’t available at that time. Luckily, my wife seemed amenable to the Olive Gold pebble finish.
After our three week trip, we got back home, and I checked in on my Kamado Joe order. Still no luck. Still no firm delivery date. I took that as a sign. I cancelled the order, called up Dennis, had a terrific conversation with him and placed the order. I still had to wait, but at least I knew where my grill was: on a ship on its way to the U.S. That placed me way ahead of where I was with the Big Joe.
At the end of September, I got an email from Dennis. Good news: the ship with my grill made it to the Port of Los Angeles and cleared inspection. Bad news: this happened.

A fire broke out at the Port of Los Angeles. Luckily, it was contained without too much damage or any loss of life. At this point, I could only enjoy the entertainment value of all of this. It was as if the forces of nature were determined to keep me from grilling some burgers and steaks for my family.
The fire held up the processing of packages for a whole day. After that, there was a logjam of packages that needed processing. Eventually my grill made it to the Komodo Kamado warehouse, onto a truck, and on its way from L.A. to New Jersey.
This turned out to be the smoothest part of the whole ordering process. Dennis sent me a tracking number for the grill, and I was able to track its progress across the country. The expected delivery date was Oct. 10, but the grill got to NJ one day earlier than expected. I got a call from the trucking company yesterday to schedule a delivery time. I asked if they could bring it to my house that day. They did. And at about 1:30 in the afternoon, one day early, this came. The truck driver was nice enough to bring the crate up our driveway, around the house, and to our back patio.
-
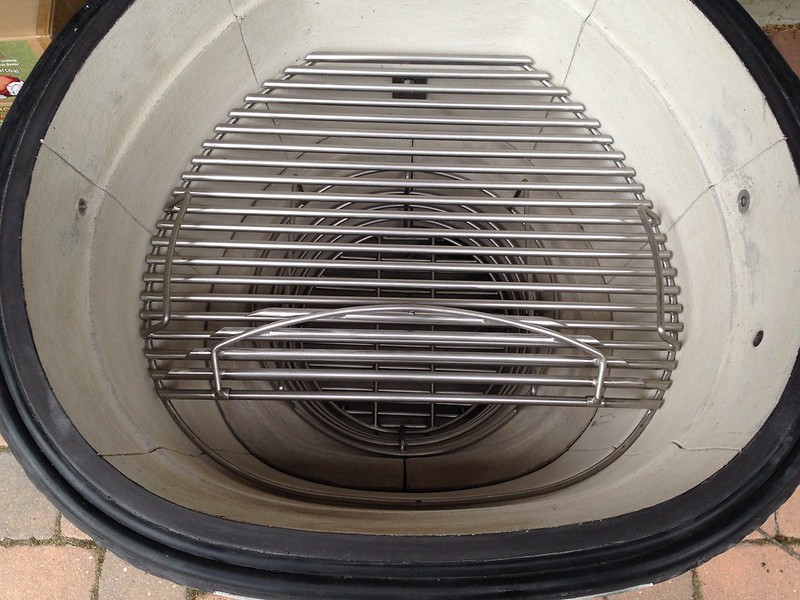
I finally got around to trying to cook steak on my KK 23â€. But first, I tried making a side dish of roasted garlic rosemary potatoes. I set the grill at 425ºF, put the heat deflector in place, and placed a glass 13x9 dish of Yukon Gold potatoes, cut into about 1†cubes, tossed with olive oil, rosemary, and garlic on the main rack. This went for about 45 minutes.
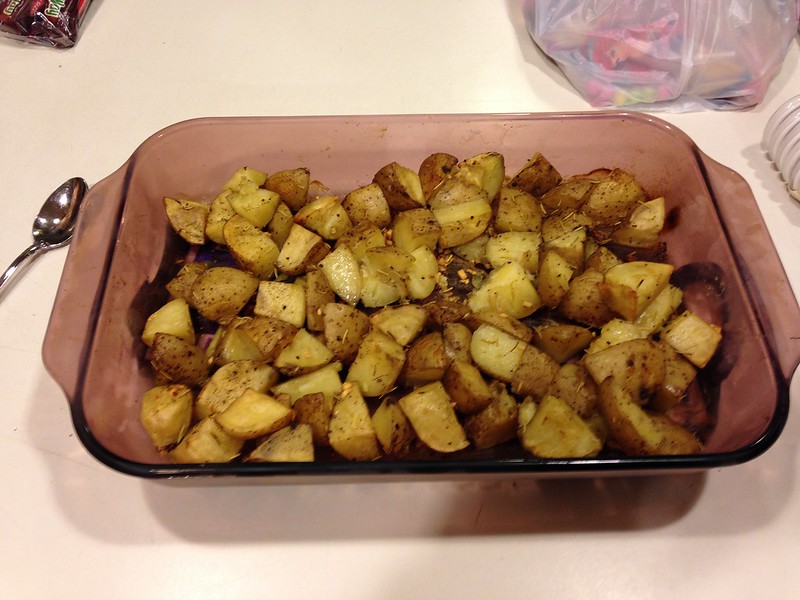
These were cooked through, but I probably should have kept them on a bit longer to get a little more browning. They probably could have used more olive oil as well. I pulled them because the boys were getting hungry, so I decided to get the steaks going.
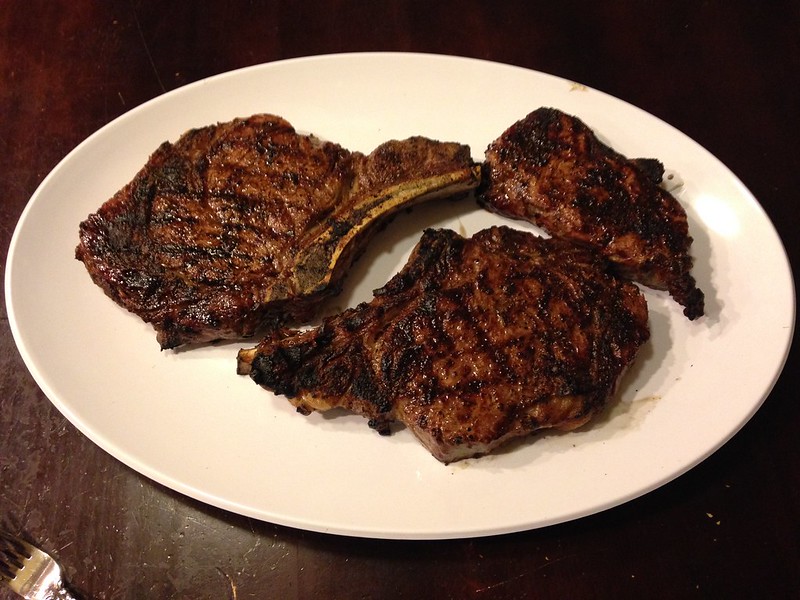
I took off the main rack and the heat deflector, put the lower grate in place, and opened up the vents. I was at 600ºF within minutes. I forgot to take before pictures of the steaks, but they looked great, with lots of marbling. We had two bone-in ribeyes and a strip steak. I got them at a local butcher who is so old school that they cut steaks for you to the thickness that you want with a bandsaw. I made my usual grilling spice mix of one part kosher salt, one part fresh ground black pepper, one part cayenne, and one part oregano.
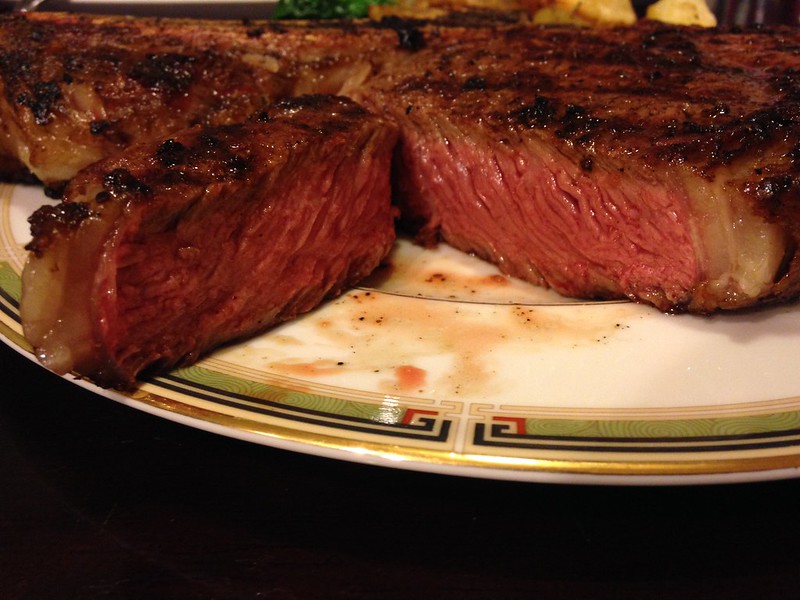
Since I don’t have much experience with kamado grills, I’m not used to cooking so close to a fire so hot. I realized that my usual routine of cooking on one side and then the other would result in a steak that would be charred on the outside. So I kept an eye on the thermometer, and whenever it got to 550ºF I opened the grill, flipped the steak, and closed the grill. The temperature would drop to about 450ºF or so, and when the temperature got back up to 550ºF, I would open the grill and flip the steaks again. Here’s the outcome.
Plated, with the potatoes and some sautéed spinach.
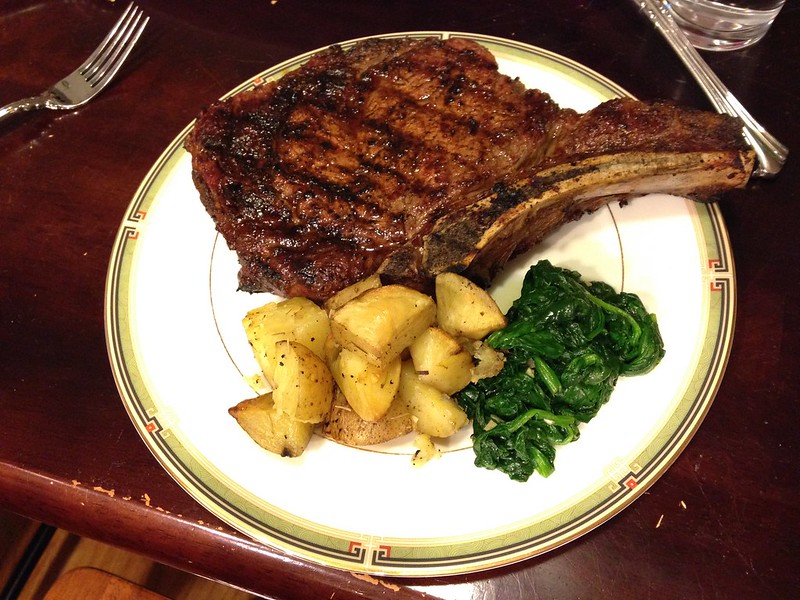
And the interior. Not bad, for my first try at steaks with this grill. They were delicious.
-
1
-
Another tall burger and beans
in KK Cooking
Posted
Whipped together a quick dinner last night. We had four hamburger buns, but no hamburgers. I made a quick run to the grocery store, found a 1.2 lb chuck steak, brought it home, ground it, and made three burger patties. They were sprinkled with my usual salt/black pepper/cayenne spice mix.