


wilburpan
-
Posts
781 -
Joined
-
Last visited
-
Days Won
28
Content Type
Profiles
Forums
Events
Posts posted by wilburpan
-
-
I did a pork butt cook over the weekend. I started with a rub that was mainly black pepper and salt, with a little bit of paprika, onion powder, garlic powder, ancho chile powder, and dry mustard. I pulled this idea from this video by Aaron Franklin. The thing that makes this rub a bit different from typical pork butt rubs is that it has no sugar, and relatively little paprika.

Here’s the pork butt before the rub.
And after.
Into Smaug, who had settled in at 240ºF. This was early Saturday morning. My last pork butt cooked in about 10 hours, so I thought this would be ready for dinner. As you’ll see, that didn’t exactly happen the way I had planned.
The finished product, after a little more than 12 hours of cooking. It was really good. We had friends over, and more than a few of them mentioned how it didn’t need any BBQ sauce.

Here are a couple of things that I learned about this cook.
First, I really understand the concept of probe tenderness now. The cook was taking longer than I had expected, and even though I had set a target IT of 200ºF, I stopped the cook at 192ºF. Our friends were waiting to eat, and with anticipated rest time, we were over 1-1/2 hours past when I wanted to serve the pork. But I felt good about stopping the cook at that point because the pork really was probe tender. No matter where I stuck the thermometer, it went through like a hot knife through butter.
The second thing I noticed was that over the last hour of cooking, the temp started to creep up from 240ºF to 280ºF. I didn’t really mind, since I wanted the cook to go faster anyway, and thought that this was Smaug looking out for me. When I took the pork out, I took the deflector off to add some more charcoal to grill some shrimp skewers over direct heat, and saw that the charcoal had burned in such a way that the center of the charcoal pile had a hole clear down to the bottom of the charcoal basket. My theory is that when that part of the bottom layer of charcoal burned through, airflow through the grill increased even without touching the vents, since there now was a clear path through the charcoal when there wasn’t one at the beginning of the cook. This led to the increase in temperature that I saw.
Anyway, it was great. My friends ate so much of it that we only had one meal’s worth of leftover pulled pork for Sunday. I can’t wait to make my next pulled pork. Only next time, I’m starting it overnight. -
No, this cook was done with just Royal Oak charcoal. I’m not sure how much flavor could be added with smoking wood, as it was only 6 minutes of cooking altogether.
-
Our Sunday dinner cook was pretty straight forward. Take 2 lbs of salmon fillet, slice into individual pieces, pat dry, and sprinkle with a liberal amount of Old Bay. Cook over high heat skin side up to start. Flip after three minutes, and cook for another three minutes. Here’s what it looked like coming off of Smaug.
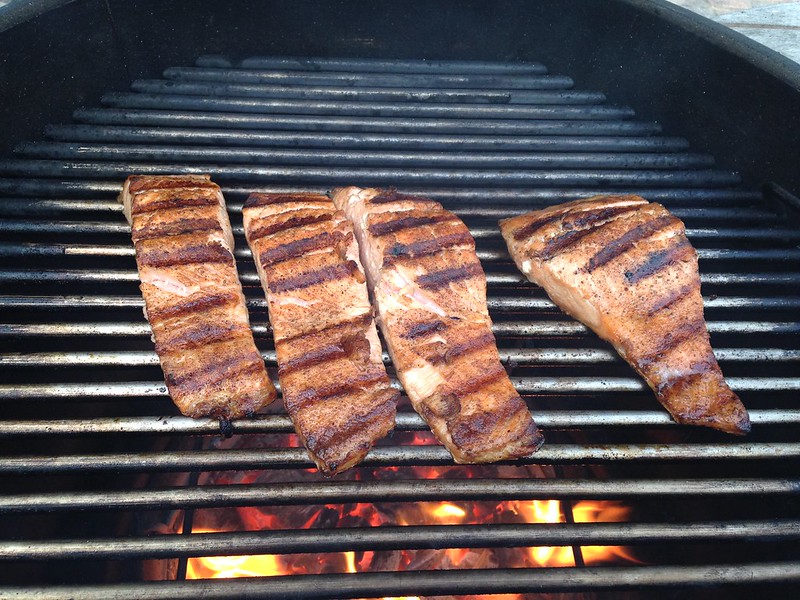
Plated.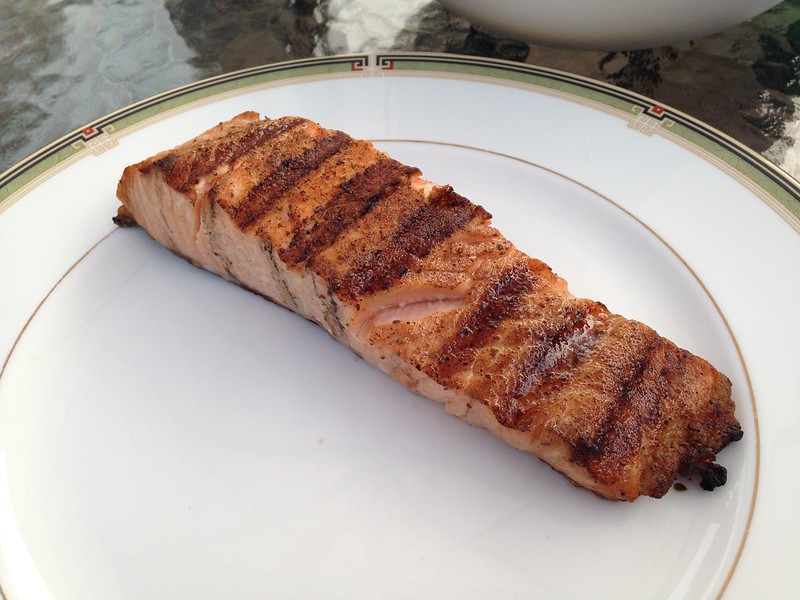
The skin side came out nice and crispy. Even my kids ate the skin, and they’ve been squeamish about fish skin before this.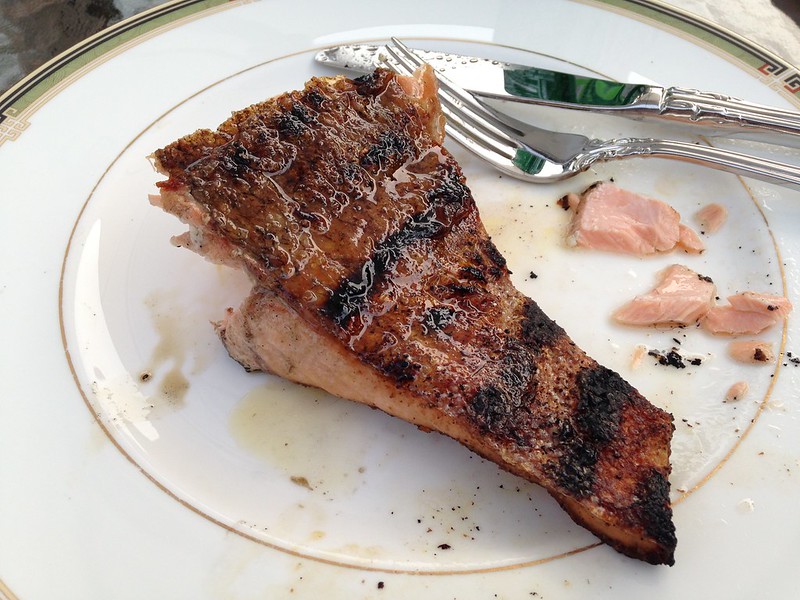
The inside was perfect.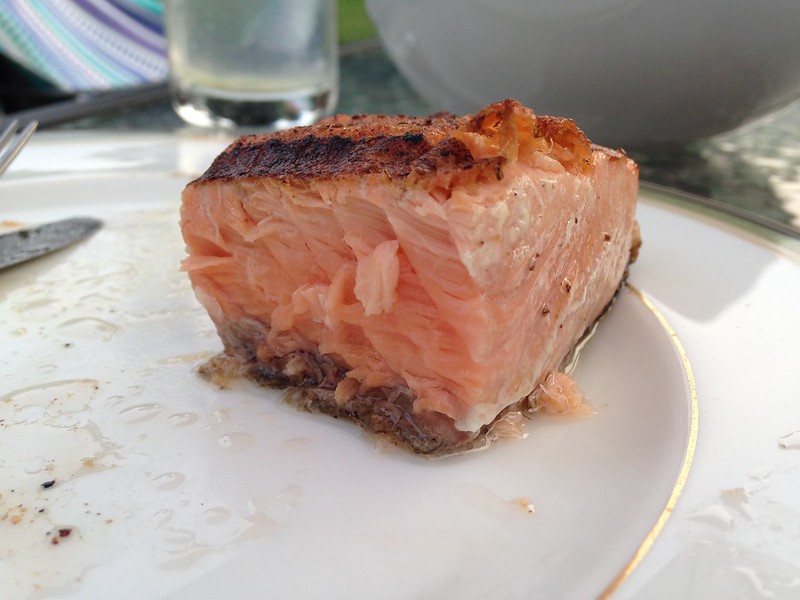
I’ve often said that having a kamado grill is like having a charcoal grill that’s as efficient as a gas grill. I timed how long it took Smaug to come up to temperature. I started with a full basket of charcoal, lit it over a fairly wide area, and had the lid open with the bottom vents fully open, with the grate off. After five minutes, I stirred the top layer of the charcoal a bit to spread out the lit coals, put the grate in, closed the lid and opened the top vent as high as it would go. I hit 600ºF after a total time of 12 minutes.
My old gas grill would have to heat for about 12 minutes or so before the grates were hot enough to cook salmon like this, and it never got this hot.
I’ve often read that people using kamado grills of various sorts have a problem getting the temperature high enough in a reasonable amount of time. As much as I would love to say that the solution is to get a KK grill , I think that my approach to starting a hot fire would work for anyone.
I think that the stirring after five minutes helps a lot, because it gets lit coals right at the top of the basket and distributes the fire more quickly than letting it burn on its own. (That’s also why I leave the grate off at first so I don’t have to maneuver a hot grate later to stir up the charcoal.) I’ve noticed in the past that if I’m going for a high temperature, and there’s large pieces of charcoal on the top that are burning only on the bottom side, the unlit portion of the charcoal is preventing heat from coming through. Flipping over those pieces did a lot to speed up the process. -
Robert
Are you saying that there are uncrating instruction that will be included when the grill is delivered?
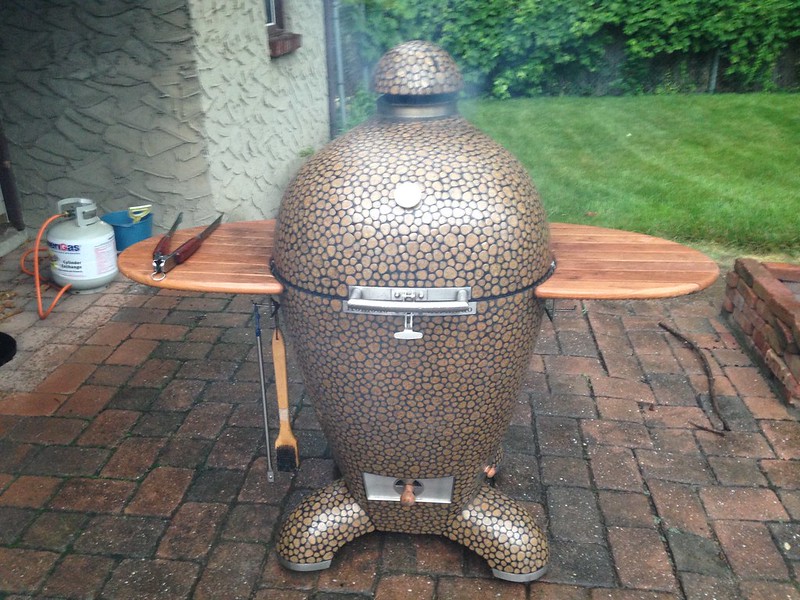
Here’s a post I wrote when I got and uncrated my KK 23â€. Hopefully this will give you an idea of what to expect.
-
What kind of wood/charcoal did you use?
Robert
I used Royal Oak, straight up, no other smoking woods.
-
Actually, this was a Third of July cook, since I had the day off.
Take equal parts salt and black pepper.

Mix it up well.

It’s going to go on this.

The rub is on. I used about 3/4 of the 1/2 cup salt/pepper mix that I made.
I got Smaug fired up. He settled in at 220ºF, and I wound up putting the brisket on at about midnight. Then I went to sleep. When I woke up, I was greeted by this.

Good boy, Smaug!
Here’s the brisket as it looked at that point, about 7 hours into the cook. My thermometer says the IT is 160ºF.
After about 13 hours total, I hit a final temp of 200ºF. Here’s the final product.
Sliced.
The smoke ring isn’t too bad.
Plated.
In case you all want to know the technical details, the thermometer was a solid 220ºF for the majority of the cook. When the outside temperature started to rise this morning, I could see the grill thermometer start to creep up a bit, and it finished at 250ºF. Total time of cooking was 13 hours, and the final IT was 200ºF. I was hoping to hit the magical IT of 203ºF, but we had guests to feed. Rest time was about 30 minutes, less than what I would have liked.
Overall, it was not a bad cook for my first try at a brisket. The bark was excellent. The meat could have been more moist (although it wasn’t dry), which was either a factor of the meat not resting for as long as I would like, or because this was a choice brisket from our grocery store. I think that if I had a prime brisket, it would have turned out moister.
Also, I think that the way this brisket was trimmed left it with a thinner than normal fat cap. I did start slicing from the flat end, but this brisket seems to have a thinner than normal fat cap layer. I think that if the fat cap layer was thicker, the brisket might have been more moist. I’ll be on the look out for this the next time I try a brisket. -
Glad I could help! I’m so happy that you got your grill back.
-
Congratulations! You’re going to love cooking on the Tank. So will your wife.
-
Welcome, and congrats on scoring your KK! Used ones seem to be like hen’s teeth. Looking forward to pics of your cooks.
-
Great job on that batch of wings! They look delicious.
-
Those wings look great! Nice job.
And I agree, more wings with less cholesterol and calories is always a good thing. Not to mention not having to deal with used frying oil.
-
I used Smaug a lot this weekend, but had many mishaps along the way. First was some ribeye steaks for dinner on Saturday. I’ve cooked steak a lot over my life, but on that day the fatal flaw in my plan was that I didn’t anticipate moderately heavy rain hitting our area right at the time that I would be grilling. And I had already seasoned the steak earlier in the day, so I felt that I was committed at that point.
Here are the steaks.

And here’s what I had to deal with, weather-wise. Luckily, Smaug seemed to have no issues with the rain.
Even though I don’t usually do a reverse sear for steaks, I decided to do that for this cook, since it would be less time actually sitting by the grill. (I usually go for direct cooking over very high heat for steaks, and flipping fairly often until they are done.) I did the indirect part at 250º, until the steaks hit 115º internal. Then I moved the steaks off, took out the grate and the heat deflector, put the grate back on, and started searing the steaks. Here they are, at the searing part.
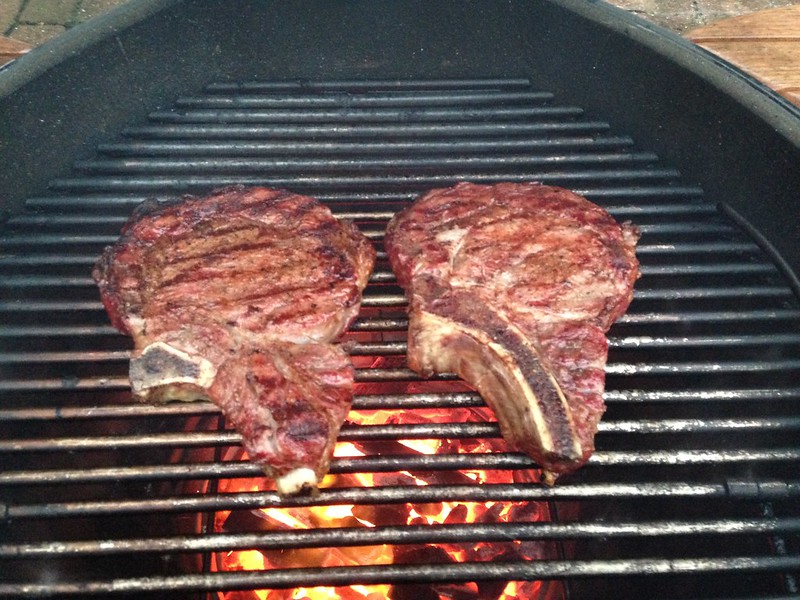
In my rush to get things arranged because of the rain, I forgot to drop in the searing grate instead of the main grate, and did the searing on the main grate instead, further away from the fire. Because of that, the sear developed more slowly than it would have, and so the steaks seared longer than I would have liked. Losing track of the time also didn’t help me at all.
Final result:
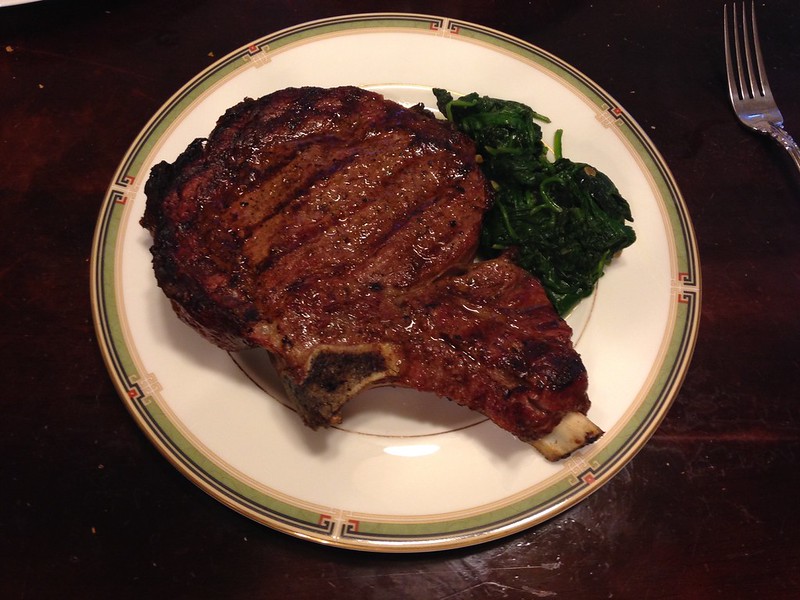
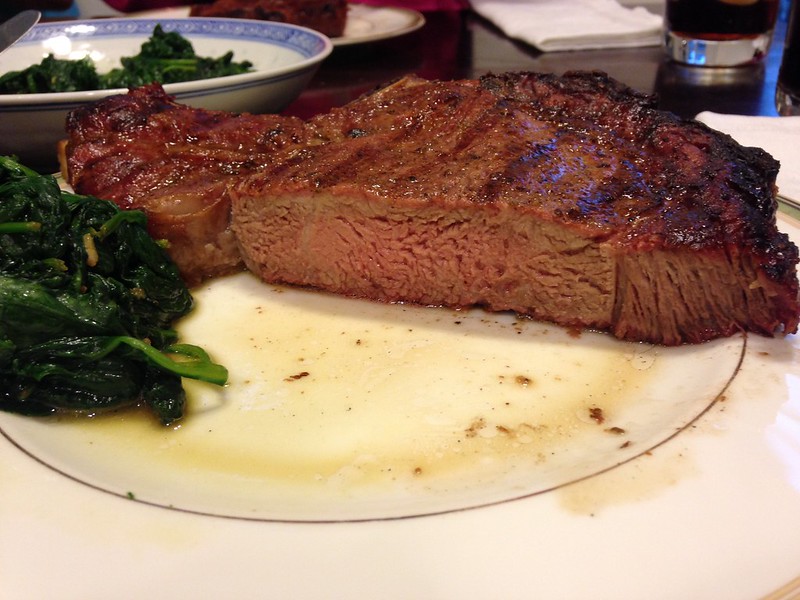
They came out more medium than medium rare. Still, they were really juicy.
Next mishap was cooking a rotisserie chicken for dinner on Sunday. I basically followed the exact method I used in this cook, down to the chicken coming with head and feet attached, except that in the rub I used a higher ratio of poultry seasoning and black pepper to the salt/baking powder mix that I have taken to using on chicken to make the skin super crispy. I also only used 1/4 tsp salt and 1/4 tsp baking powder, to see how low I could go on that component of the rub.
Here’s the final product.
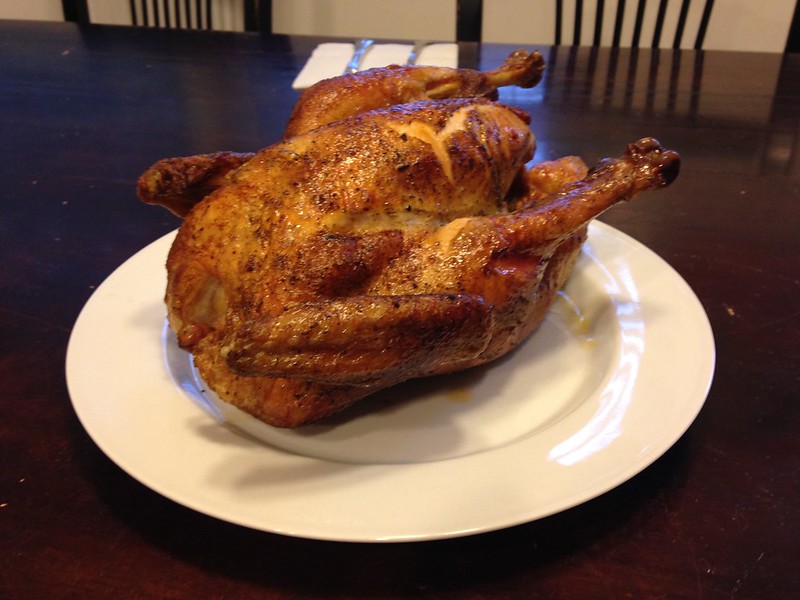
The chicken looks pretty good, but what you can’t see is that I lost track of time for this cook as well, and the chicken hit an internal temperature of 170ºF, higher than recommended. Still, it was still juicy, even the breast meat. Not as juicy as it could have been, but it wasn’t dry, either. The skin turned out great.
Last cook was some sausage that I got from the same butcher that I go to for steaks. It’s called Provolone sausage, and (you guessed it) has little bits of Provolone mixed in with the meat. It came in one long coil. I twisted it off to make links before cooking it.
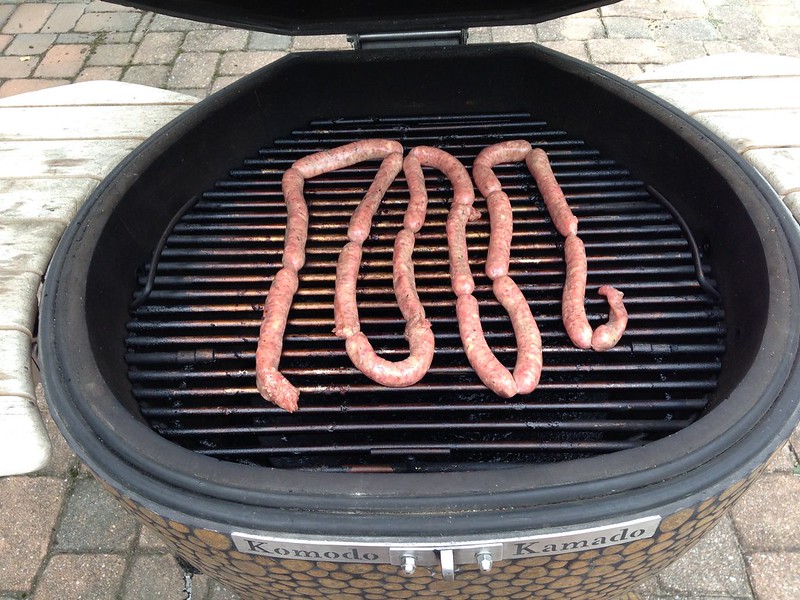
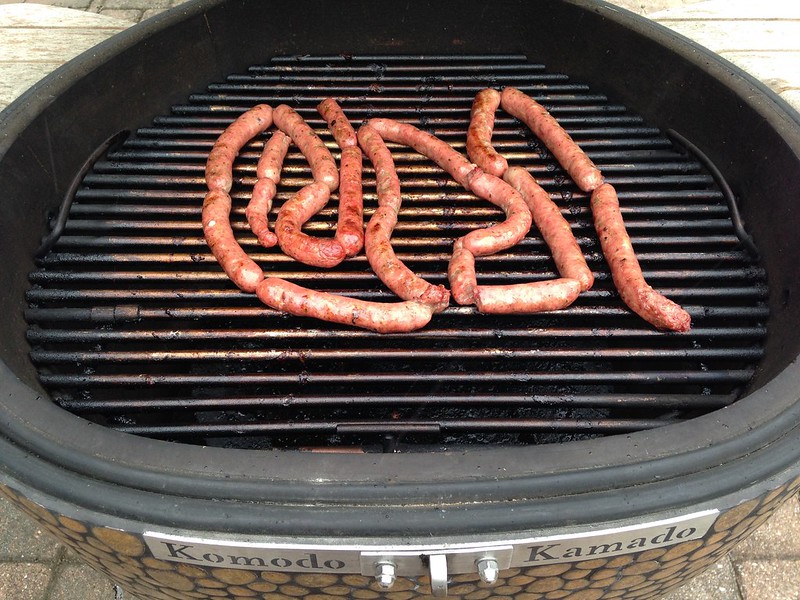
I did this at 225ºF, indirect. After about an hour, with me turning it about halfway through, it looked like this.
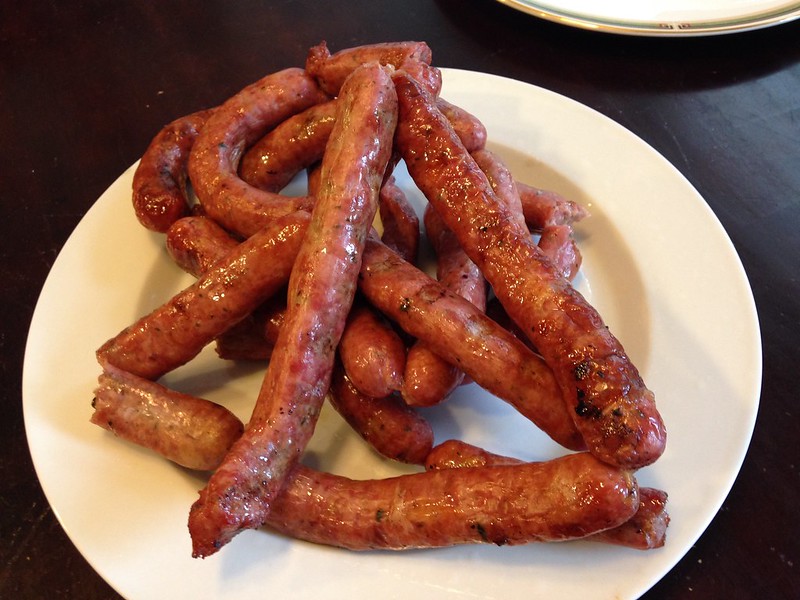
Served on a bun.

What was the problem with this cook? Nothing, really, except that the sausages were so skinny I could fit two of them on a single hot dog bun.
The lesson I learned this weekend: even a less than perfect cook is better than not cooking at all.
-
 1
1
-
-
Welcome! You’re going to be really happy with the KK 23â€.
-
Argh....I was not getting notifications from this forum....and I had given up hope and stopped checking....but thanks to all of you that were looking out (especially Wilbur for catching the ad)
Dennis is a rockstar and called me today. I have contacted the authorities and things are in motion. I will update everyone as to the outcome.....very hopeful that we can return "Tatay" back home.
Thanks to all...
Hope it works out! If so, I’m just glad to help.
-
I sent him a PM through this forum last night. Hopefully that triggers an email to him.
-
A terra blue KK 23" popped up on the Palm Springs Craigslist.
http://palmsprings.craigslist.org/app/5088908702.html
This could be it. The price is way below what one would normally price a used KK grill at.
However. Please call the cops and let them deal with it. It's not worth getting hurt over a grill.
-
A quick followup: last night we had the leftover ribs for dinner. This time I took the marinated ribs, heated them up in the oven, brushed them with the sauce, and broiled them for a bit to finish them off. The marinated ribs were much better finished this way than what I did the day before. In terms of flavor, it would have been much closer had I done this with the marinated ribs yesterday.
-
1
-
-
Sad, but true. Often "experts" get so caught up in their own hype; they lose perspective. That would be the death toll for any scientist or engineer. You gotta be able to keep an open mind and take criticism.
I'm too, a big fan of both Alton and Cook's, for precisely those reasons, they do complete work. I will check out Serious Eats.
Update: Liking the Serious Eats website. Thanks for the tip, Wilbur!
Here’s one thing you should know about Serious Eats: J. Kenji López-Alt, one of the main writers for Serious Eats, was an editor at Cook’s Illustrated and one of the main publicizers of the reverse sear method back when it wasn’t well known. Her may not have invented it (and he’ll be one of the first to say that), but he certainly was one of the main reasons people started talking about it.
So there’s your grilling props for Serious Eats.
-
Great write-up and pictures, Wilbur (see, I remembered!)
I will admit upfront that I am a fan of Amazing Ribs, in particular for debunking a lot of bad info out there on grilling/BBQing. In their article, they talk thinner vs thicker cuts and the difference marinading makes between the two. Ribs aren't that thick a piece of meat, so I wouldn't be surprised if there wasn't a lot of difference between your dry rub and marinaded ribs.
The Amazing Ribs site says that outside of salt, flavors from a marinade only penetrate 1/8†or so. These ribs were certainly more than 1/4†thick.
In addition, I’ve found that if you question their methodology, they are pretty quick to circle the wagons and call you an idiot. I had a discussion with Meathead one time about their method of “proving†that beer can chicken didn’t do anything to the taste. I wasn’t questioning their conclusions, just the fact that they didn’t do the test that would have been necessary from a scientific standpoint, which is to do a head-to-head comparison like I did with these ribs. Instead of discussing this, Meathead told me I didn’t understand the scientific method at all, and that he must know what he’s talking about because he had won awards. Eventually, he deleted my comments.
As far as my ability to understanding the scientific method, for my day job I’m a pediatric oncologist, and I know how to design and evaluate clinical trials. Meathead seemed to think this was not of any importance.
There is a lot of useful information on the Amazing Ribs website, but they seem to argue from authority fairly often. In terms of geeking out about food and cooking chemistry, I think that Serious Eats, Cook’s Illustrated, and Alton Brown are better. And Serious Eats covers grilling really well.
-
Nice experiment and nice write up! While I'm sure both tasted great, I can tell you right now (based on your pics) which one I'd choose...dry rub all the way. Was the skin from the marinated rack a bit chewy? Please don't take offense but at the surface level, that rack looks a little leathery in a few spots while the rubbed rack still looks moist. Inside they look pretty similar so I'm wondering if the rub doesn't also provided a little added protection...like an SPF 15.
Here’s where we run into the limitations of photography insofar as it relates how food tastes like. Despite the visual differences, both racks were moist, and both had a nice bark on them. I went back to look at my original photo, and what looks like increased moisture on the dry rub rack of ribs is really differences in lighting conditions and reflections.
The dry rub rack definitely looked more appetizing. But as I mentioned above, the marinated rack of ribs was handicapped in that I didn’t finish it off by brushing some sauce on and finishing on the grill at a higher temperature. If I had done that, the marinated rack would look a lot more delicious.
-
It’s not just this forum. Other forums using this software have similar issues with picture size.
I tend to upload my photos to Flickr, and then link to the photos using the picture button. Flickr automatically generates the BBC code needed for the resolution that you want.
-
That looks great. Without knowing how it tastes, but knowing how much I like lamb, I’ll have to give that a try sometime.
How much did your lamb shoulder weigh pre-cook?
-
Nice pile of ribs!
How did you decide on how long to cook them? Bend test?
-
I’ve wondered whether marinating ribs vs. putting a dry rub onto them had an advantage in how the ribs turned out in terms of moistness, bark, or texture. For Father’s Day I was planning on cooking some ribs, so I thought I’d answer my own question by testing this out for myself. I’m mainly interested to see how the bark and consistency of the ribs might be affected. I assume that the flavor profiles will be different.
On the marinade side, I followed this recipe from Saveur magazine. I’ve cooked this once before, using an oven. (Please forgive me. We lived in an apartment at the time and I had no grill.) It turned out quite well, despite the lack of real smoking action. I put together the marinade yesterday afternoon and they sat in the refrigerator overnight. Here are the ribs in the Ziplock bag, marinating.
On the dry rub side, I put together a rub based on Aaron Franklin’s approach, with some modifications. This rub is mainly 2 parts fresh ground black pepper, 1 part kosher salt, with a little bit of each of the following: garlic powder, onion powder, chile powder (see below), paprika, dry mustard, and brown sugar.
Here are the modifications. Instead of the chile powder, I used the spice mixture from the marinade recipe because it was on hand from yesterday, it has a good amount of ancho chile and cayenne in it, and I didn’t want to waste it. The brown sugar is an addition to his rib rub approach. Aaron Franklin says he doesn’t like to use sugar for low and slow cooks because of the chance of burning. He says to add the sugar for cooking chicken because those cooks are faster, and so there’s less chance of the sugar burning. He also cooks on an offset smoker. I think that with a kamado, burning the sugar in the rub isn’t as much of an issue because the temperature control in a kamado is so good.
In any case, everyone should watch his video on making rubs. It’s really terrific.
Here’s the dry rub ribs, ready to go.
And here are the two racks, side by side in Smaug.
When I bought the two racks, they were pretty much identical in size and weight. It looks like the overnight marinade caused that rack to swell and change shape a bit.
Smaug decided he wanted to be at 260ºF today, so that’s what I’m cooking at. Updates to come, but I plan on just letting them sit for the next five hours or so until they are done.
Here are the ribs at about the three hour mark.
Interestingly, both racks are starting to look the same as far as consistency and texture of the surface (beyond the presence of the spices in the dry rub rib, or course). I have about two hours left.
One other thing I’d like to mention. I know that I had said that I was cooking at 250ºF because that’s where Smaug settled himself. After I posted that, I dialed down the vents a bit, and Smaug dropped down to 225ºF, which is where I originally intended to be. Good boy, Smaug.
Here’s the final product. The ribs pretty much sat in Smaug for about five hours. I only disturbed them to take the in progress picture above, and tested their doneness by the bend test. The dry rub rack is on the top, and the marinated rack is on the bottom.

Here are some close up photos to give you all an idea of what the ribs looked like. Dry rub rack:
And the marinated rack:

The interesting thing to me is that aside from the fact that the dry rub rack has spices sitting on the surface, the surface of both racks of ribs are pretty much the same. They both developed a bark, and both developed that nice mahogany color. In other words, if I had sprinkled the marinated rack with some spices at some point during the cooking, I doubt I could tell which rack was which based on appearance alone.
I should also mention that there was no problem with the sugar in the dry rub burning, despite Aaron Frankin’s concerns about burning sugar in a long cook. I do think that’s because of the excellent temperature control that Smaug provided. Sugar can’t burn if it doesn’t get above its scorch point. Kamado cooking FTW!
Here’s a comparison of the cross sections of the two racks. The dry rub ribs are on top, the marinated one is on the bottom.

Both racks developed a nice smoke ring. It may look like that the dry rub rib has more of a smoke ring than the marinated rib, but that’s really just these two particular ribs. At other points in the rack, the dry rub ribs had less of a smoke ring, and the marinated ribs had more.
In terms of texture and bite, it was a wash. The only tip off (outside of flavor) that you were eating the dry rub rack was that you could feel the presence of the spices with your tongue, but the meat was otherwise identical in texture and moisture.
Here’s the glamour shot, with the ribs brushed with a little bit of BBQ sauce (here’s the recipe, and it’s the best recipe for BBQ sauce I have ever encountered). Marinated ribs on top, dry rub on the bottom.

In terms of flavor distribution in the meat, both methods were pretty equivalent. Despite what the Amazing Ribs website says, the flavor of the marinade seemed to have no problem penetrating the meat, and even though the rack was marinated overnight, there seemed to be no ill effects of the acid components of the marinade precooking the surface of the meat. Having said that, this wouldn’t be the first time that the Amazing Ribs folks have misapplied science.
In terms of overall flavor, we liked the dry rub better, but not by much. Both racks were delicious. It wasn’t really like one rack was “better†than the other. It was more like preferring one BBQ restaurant’s ribs to another. I have to mention that the marinated ribs were handicapped in the flavor comparison, as the original recipe calls for the marinated ribs to be brushed with BBQ sauce and then finished off at a high temperature. I didn’t do this step because I wanted to see if there was a texture difference between dry rub and marinating ribs, and the finishing step would have confused that. I’ve made the marinated ribs before, as I mentioned, and they did turn out better with the last step, and the taste of the marinated ribs with and without the sauce clearly showed that it was meant to be cooked and served with the sauce. Not all ribs are meant to be served without sauce.
My conclusion is that outside of the flavor profile, there isn’t much difference between cooking ribs with a dry rub and cooking ribs with a marinade. Overall, a dry rub is a simpler to assemble and apply, so there’s an advantage to using a dry rub from that standpoint. On the other hand, there may be some recipes where a marinade is the only reasonable option. I’m specifically thinking about Asian-style recipes where you’ll want soy sauce as a flavor base, and there isn’t a dry rub version of soy sauce that I know of.
So if you’re worried that a recipe for ribs calls for a marinade, and that might not be “real BBQ†because you’re not sprinkling on a rub, don’t be. Good food is good food, regardless of the method you took to get there.
I realize that this contradicts a lot of what Amazing Ribs has to say about dry rubs vs. marinades. Like I said, this wouldn’t be the first time that Amazing Ribs got their science wrong.
Finally, my wife made a batch of her cowboy beans as a side. All you need to know about this dish is that the first step in her recipe says, “Cook six pieces of bacon.â€
-
2
-
21" or 23"
in Komodo General
Posted
I think Robert’s comment about width is key. We have a family of four, and we have a KK 23â€. Although doing a relatively small cook on our KK grill may seem silly at times (tonight I’m grilling four hot dogs), I’ve never thought that the grill was too big. And there have been times where I cooked ribs when I was happy to have every inch of the space in the KK 23†because the rib slab was so long.
One other think to keep in mind with the size is that if you are cooking indirect, your actual cooking area is going to be about an inch less on all sides, because the deflector plate doesn’t stretch all the way from edge to edge. I learned that lesson when I was cooking wings, and covered the entire grate. The wings on the outside definitely cooked faster by a significant amount than the ones in the middle.
It’s true that the hi cap design on the 21†gives you more cooking capacity, but I think that only helps with low and slow cooks. If you need to cook a lot of burgers at once, that upper rack won’t be of much help because it’s so far away from the fire.