Search the Community
Showing results for tags 'chicken'.
-
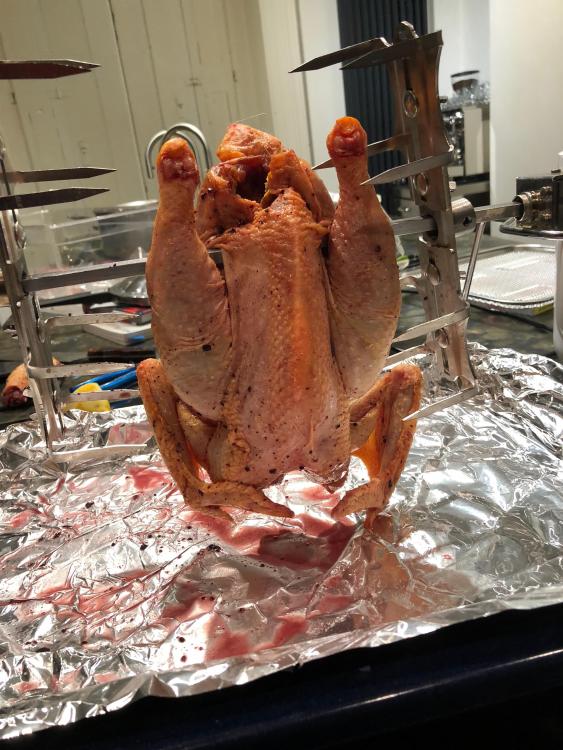
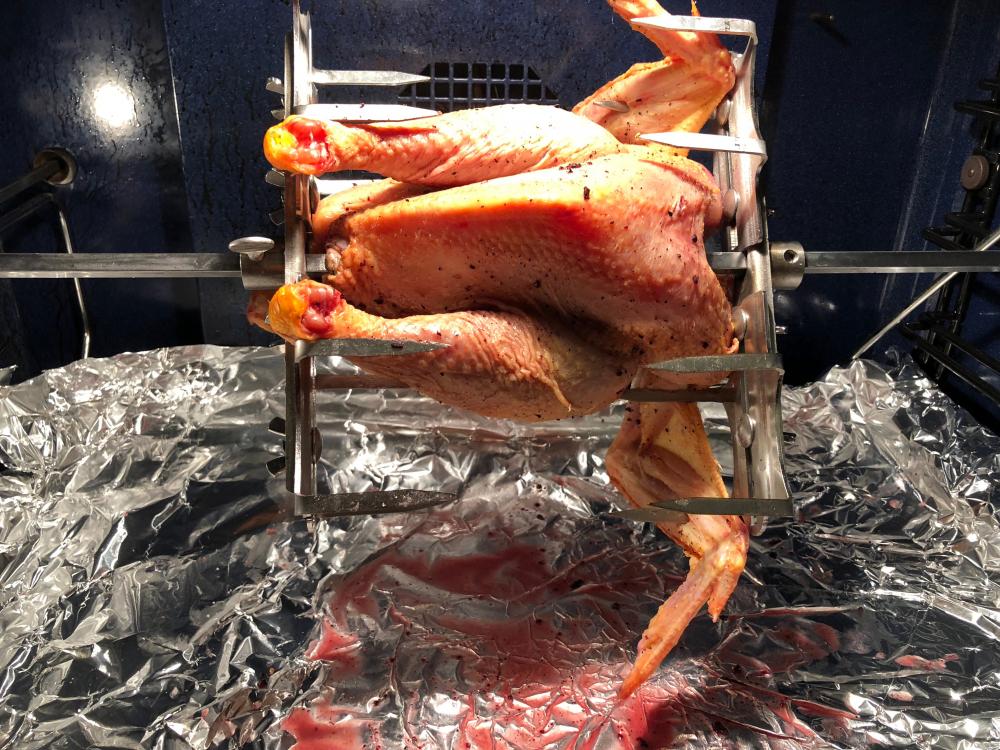
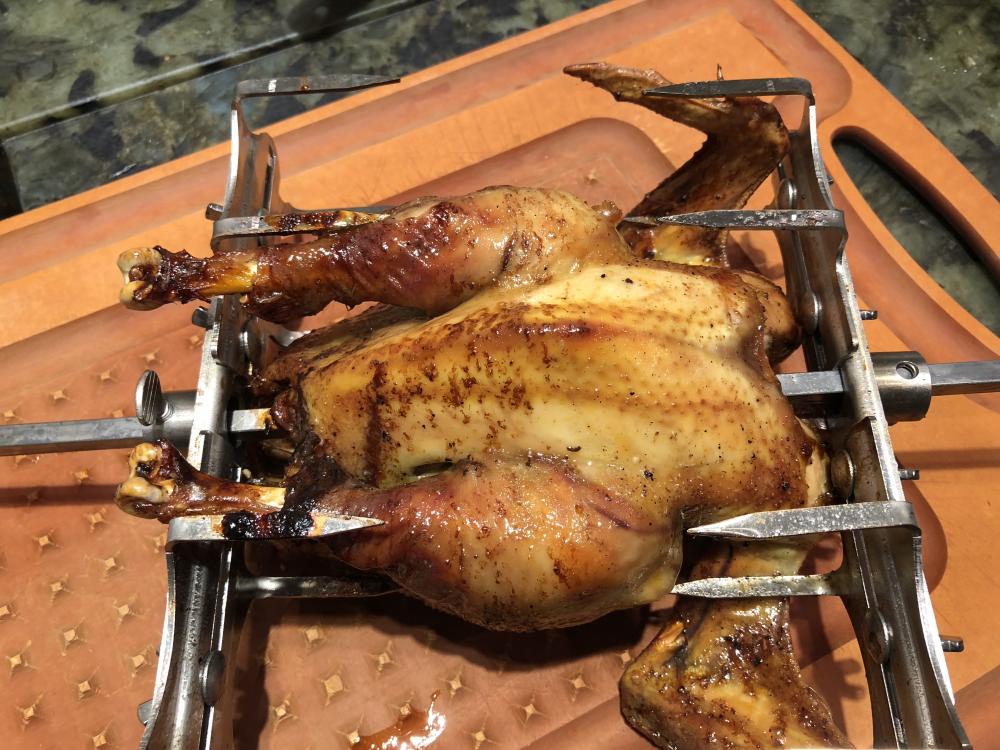
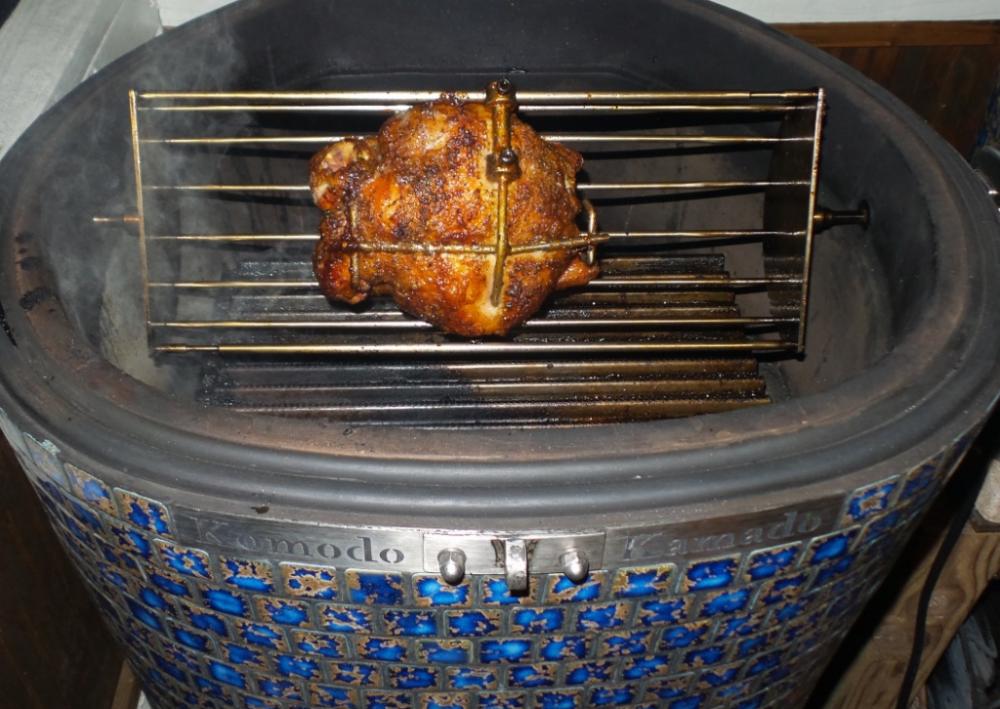
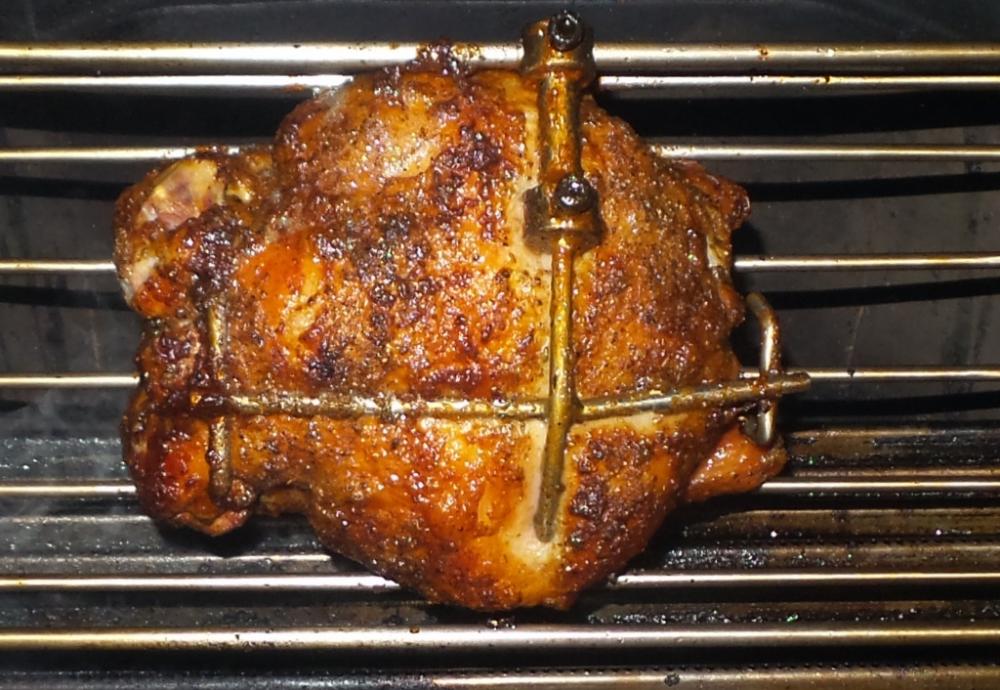
My KKs will be arriving soon and I am trying to experiment with the accessories that I have bought so far so I won't be overwhelmed by the newness of everything when the KKs arrive. I swing between being terrified by all that I will have to learn and comforted by the fact that you all say that KKs are so intuitive to use. I am gently settling into the latter mode and looking forward to the excitement when they arrive. Anyway, on to the business at hand: I have been trying out my home roti and found the forks to be so feeble that I had to pierce the skin with a knife to get them in! OctoForks to the rescue. I set them up yesterday and here is my first attempt at balancing a whole chicken on the spit: As you can see, I got the centre of gravity all wrong and it was never going to rotate smoothly. With the forks up close and personal to the sides of chicken, I wasn't sure that I liked the fact that the skin on the sides wouldn't see the heat but the skin on the back, which I don't eat, would be beautifully browned. So I switched to this configuration: Still not perfectly balanced but the OctoForks made a really stable cage for the bird. These are really robust birds that we bought in Italy, in the region that invented slow food. The first time I cooked one, I roasted it as normal for an hour and it came out really tough. The thigh meat is almost gamey. Since then I have found that a slow roti makes them nice and tender. This time the chook was in for two and a half hours at 150 degrees C and came out OK. There are a number of areas for improvement. First, try this out in a KK to see if what you say is true about how well it cooks chicken. Second, take the wing tips off and crank up the heat at the end to crisp up the skin. Third maybe brine the chicken and add more purple crack than I did this time. I do have a MEATER now but hadn't managed to charge and pair it in time and so left it out of this cook. Any advice about positioning the Octoforks? It would be good to see photos of your cooks with whole chickens to help make my first KK chicken cook as good as it can be. Or should I just do what Dennis says and go with a spatchcocked bird? Why am I even thinking of defying Dennis?
- 8 replies
-
- 2
-

-
- rotisserie
- octoforks
-
(and 1 more)
Tagged with:
-
Roadside marinade, spatchcock and rotisserie for the "Tri-Fecta Chicken" The pineapple part way through i brushed on evoo and sprinkled with cinnamon and sugar. Reversed the claws inward on this cook. Oh only took 1 pair of OctoForks and there's space to rotisserie lots more...kinda nice!
- 11 replies
-
- 2
-

-
- spatchcock
- chicken
-
(and 2 more)
Tagged with:
-
Just a little experimenting night. I knew the roasted potatoes would fall out of the basket without a slight modification. lol Used some foil tape to seal up the ends. Real good cook! The potatoes came off first and the chicken/ pork shoulder CSR's finished about the same time so I just pulled them last. Everything was sooo good especially the roasted taters. They tumbled away in the basket and were well oiled and seasoned prior to going in. Thanks for looking! Definitely lots more room for more food. I used 2 pairs of OctoForks for this cook.
- 2 replies
-
- 2
-

-
- octoforks
- rotisserie
-
(and 3 more)
Tagged with:
-
Talking Rotisserie Baskets. I've never been a fan of the spit rod going through the middle of the basket. Sometimes it's fine but others a p.i.t.a Cooked up some chicken chow mein tonight but spun the chicken in a basket vertical using the OctoForks. Plenty of room to spin multiple baskets! Rain rain go away but comfort food is good!
- 4 replies
-
- 2
-

-
- rotisserie
- octoforks
-
(and 1 more)
Tagged with:
-
Blowing up the rotisserie tonight! This was kabob night with sirloin steak, beef sausage and also some juicy chicken quarters. The kabob veggies were grilled in grill basket. A sneak peak at some of the accessories coming with the OctoForks...these are the stainless steel skewers in action. Hopefully more accessories coming Fall of 2017 Dang good meal and fun to watch spin!
- 9 replies
-
- 4
-

-
- octoforks
- rotisserie
- (and 4 more)
-
We had some chicken thighs in fridge and the rotisserie looked lonely so..... Here we go! Seasoned with Islandspice all purpose and mixed up some homemade sauce to cook on. (secret ingredient apricot preserves)
- 8 replies
-
- 1
-

-
- octoforks
- rotisserie
-
(and 1 more)
Tagged with:
-
Well, I finally got back from Vacation and was finally able to work through my first cook. I had lots of idea on what to cook but I thought I'd keep it simple and go with a beer can chicken but with a slight twist. I went with an 8 Lb. oven roaster. I thought that would be a nice size for five adults and two small children. I also wanted to end up with some leftovers that could be enjoy later in the week. At the end of the day, that worked out perfectly. Now on to my first cook. As I always do, I brined my bird overnight in a saltwater, spice and aromatics bath. This goes a long way in enhancing the flavors, while also producing a very moist bird as long as you don't overshoot your targeted internal temp. I always pull my poultry when I hit an internal premature of 160-deg. I also give it a good 20 to 30 minute rest before I go cutting into it. The results are always spot on for me. Okay, now on to the cook. This being the first time I would ever fire up my KK 32, or any Komodo style cookers for that matter, I started about three hours before my scheduled cook time. I should also add in that it was a brisk 34-dergs outside when I got started. I gave myself three hours because the one constant in everything I've read about Komodo cooking is to take it slow and at all cost, don't overshoot your cook temp or you will have a long wait getting back to where you want to be. I loaded the basket full of hardwood lump charcoal and hit it in three or four places with a propane torch. She fired right up. With the dampers wide open and the dome three full turns opened, things started heating up fairly quickly. By the time I was 30-mins in, I want to say I had the bottom damper opened about 1" and the fine adjustment on the smallest setting. The top was opened to maybe 1 1/2 turns at this point. The temperature was still climbing but very slow now. At this point I knew I had control over everything and would have everything dialed in shortly. I left the bottom dampers where they we set and started closing the top maybe an 1/8 turn at a time until I hit and held at 325. I was shocked at how easy it was to dial into my desired temperature. In less than an hour, I hit my 325-deg mark. Still being nervous and unsure, I intensely watched that dial thermometer for the next two hours. With a slight tweak or two, she held steady the entire time. Wow, was I impressed. Things went exactly as everyone on this form said they would go. I was very impressed. I should also mention that I also monitored the temps with two Maverick 73s. I attached a probe to the grate and one to the KK dome thermometer. I would eventually use a third probe to monitor the internal temperature of the meat. I was very impressed to learn that the KK’s dome thermometer was dead-nut-on. I've never had any grill thermometer I’ve ever owned be worth a crap. Again, I was very impressed. Next, I loaded my beer can chicken onto the top grate with a drip pan underneath and let the KK 32 do the rest of the work. I planned on cooking my bird for about 2 1/2 to 3 hours at a temperature of 325-degs. As mentioned above, I would be shooting for an internal meat temperature of 160-degs. Two hours and 45-mins. into the cook I hit my targeted internal temperature and pulled the bird off. Needless to say, I was very happy with the result. Oh, I almost forgot to mention the "Twist" I mentioned above. Instead of using a regular old can of beer, I decided to go with an Angry Orchard cider beer. I also poured 1 ½ cans of Angry Orchard into the drip pan. I complimented that with apple wood chunks for smoking. Man oh man did that turn out to be a good idea. You could smell the cider and wood smoke aroma coming out of the dome of the KK. It was awesome to say the least. Here are some pics for your viewing pleasure:
-
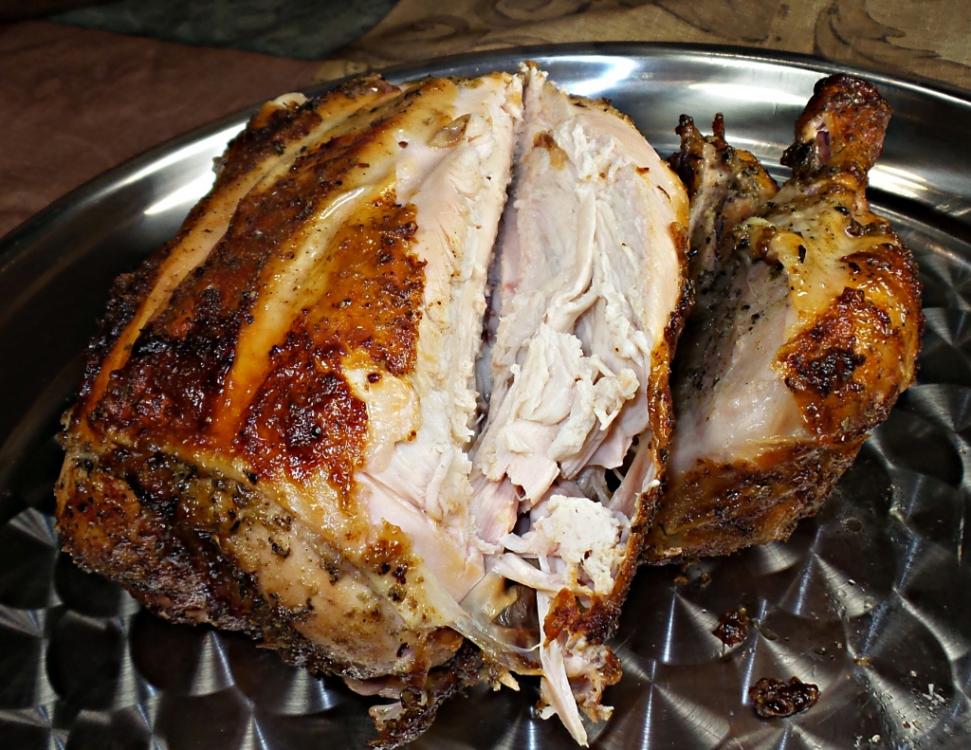
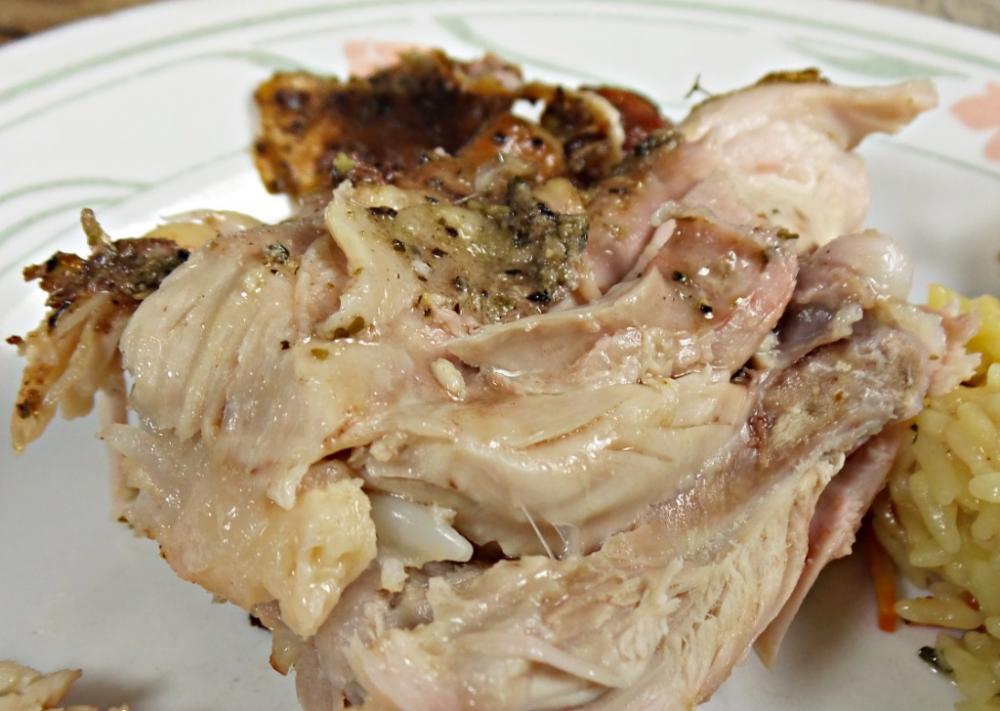
This didn't start out as an experiment but ended up being one. The Idea: because of the way a KK's firebox is setup it burns a cooler fire compared to other ceramic Kamados for a given temperature. I've noticed this looking at other people's cooks compared to mine and the size of the bed of coals for a given temperature. Because of a cooler fire it is a more moist cooking environment. The Experiment: at what point can I dry out a chicken done rotisserie style using my 19" Komodo Kamado. The Setup: 19" KK with built in rotisserie. 400* direct but with an infrared heat diffuser. I used the same brand chickens that are free range, no antibiotics (I'll post the name brand next time I run the experiment). Washed and dried the chickens. Cut the wings off for later use. Coated with a mixture of oil and seasonings. Note: since this didn't start out as an experiment I don't have pictures for my first 3 tests. (sorry) Test One: cooked for 1 hour 10 minutes (1:10). Although cooked through the skin was not crispy enough. Dark meat was so moist it was smushy. Test Two: cooked for 1:20. Skin was nice and crispy. Dark meat was just a little smushy. Test Three: cooked for 1:30. Skin nice and crispy. Proper texture on dark meat, tender and juicy. White meat still moist and tender. This is the cook Mrs skreef liked the best. Test Four: cooked for 1:40. Super crispy skin. Dark meat still tender and very juicy. White meat tender and moist but probably can't take much more time. This is the cook I liked the best. Cutting into the breast. Still moist and tender but not leaking juice. I mangled the leg quarter pulling it off the chicken. Dark meat has a good texture and extra juicy. Well haven't killed the chicken yet. Where do I go from here? 1:40 was getting close to the time limit to still have moist and tender white meat. Maybe next round I'll go for 500*. Stay tuned I cook a rotisserie chicken once every week or two.
-
Hi folks! I didn't have time to do a proper documentary this time, but thought I'd share some of pictures from my Independence Day Brew and Q celebration. It was a great party composed mostly of my eldest son's friends, but I had a few friends too - two of which provided live music. Sorry I didn't have time to take and post more pictures, but I was quite busy cooking, cleaning and hosting. I hope you enjoy the pics. If you have any questions, please let me know! Protein menu 2 pork butts, pulled, using Kaeding's Classic BBQ sauce and secret rub 1 UDSA Choice Brisket done Texas style (Bill Jamison recipe) 6 racks of St. Louis cut ribs done Kansas City style (Bill Jamison recipe) 4 brined, roasted chickens cooked beer can style (Myron Mixon recipe - modified) Cowboy baked beans (Emeril Lagasse recipe) using my home-brewed Belgian dark strong ale Equipment Nimoy (23" Kamado Komodo): Overnight brisket cook and ribs on the 4th Original Mushi Kamado #5 green: Overnight pork butt cook and 4 roasted chickens on the 4th Original Mushi Kamado #5 orange: Simmering the Cowboy Baked Beans in Dutch oven over mesquite lump and pecan wood chunks Camp Chef expedition stove: warm and serve On Tap (all home-brewed) Freedom Ale '16 (NW IPA dry hopped with Citra and El Dorado hops) Wit (Belgian White with tangerine zest, juice and green coriander seed) Deep Sixx (Robust Porter style) Pictures
- 21 replies
-
- 4
-

-
- brisket
- pulled pork
-
(and 1 more)
Tagged with:
-
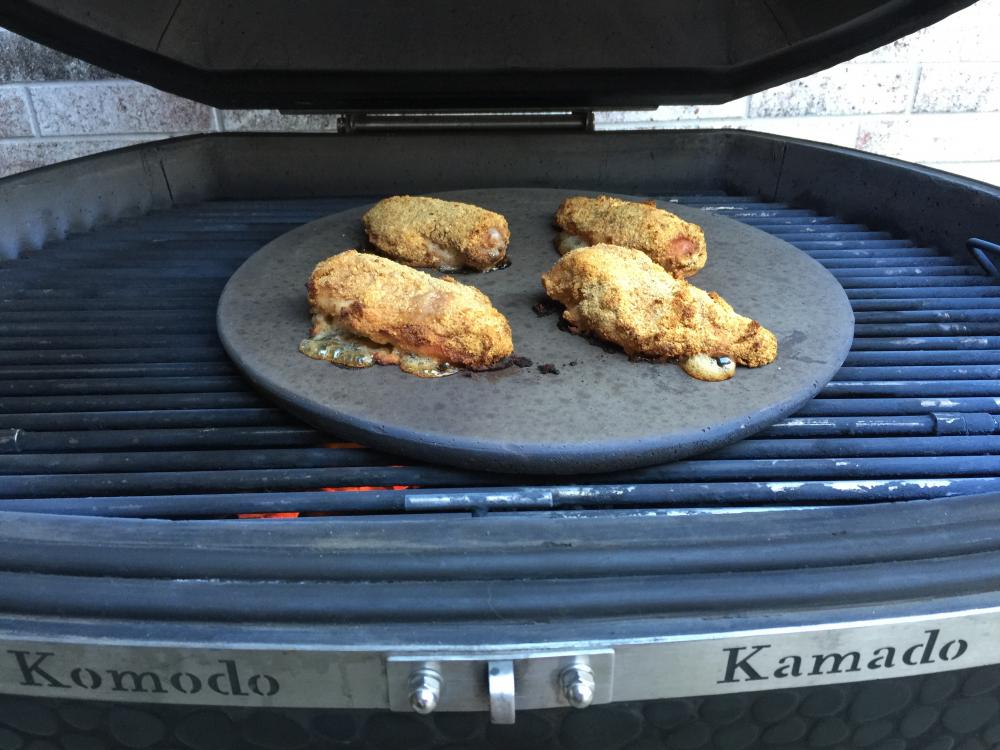
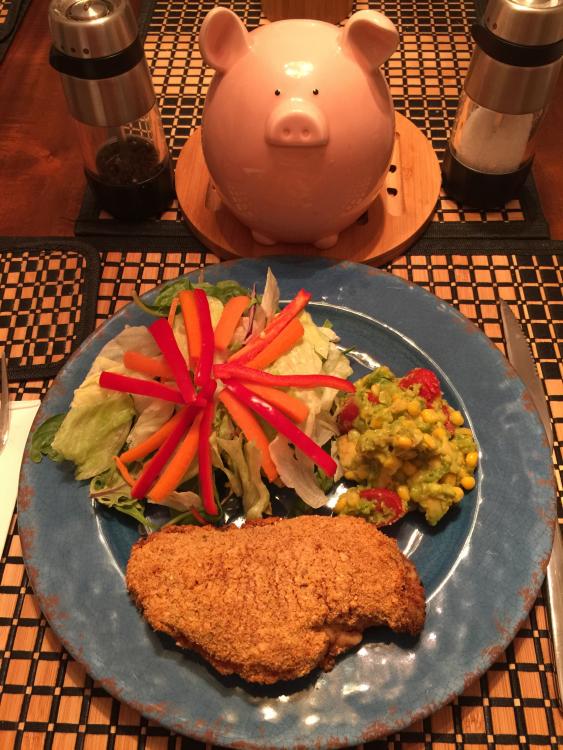
Howdy KKers! So I've been neglecting posting cooks as of late and I'm fixing that this evening. This is just a simple little cook of breaded chicken breasts, a nice green salad, and an avocado salad made by a friend. She thinks I need some care taking seeing as how I'm a bachelor. I don't tell her otherwise. She's been her many times for parties that I've thrown and she still brings me food. Here is the Marketing shot: Here is the money shot: The chicken breasts were most and juicy and the avocado salad was wonderful. Pete, my salt pig that was a gift from a dear friend, approves. He's not too happy with me when I do butts or pork ribs! The breading was really simple: I packet of powdered Spicy Ranch Dressing mixed into Panko breadcrumbs that had been salted and peppered. The breasts were soaked for 30 minutes in buttermilk and then dredged in the breadcrumbs. I personally think it needed more salt, but nobody complained.
-
Chicken on the bone, and chicken marinated overnight in buttermilk... these are a few of my favorite things! I apologize that I only have a "during" photo because the after photo was more of a platter where the wings were- If anyone is interested in a zippy new spin in wings try this: Put wings in a ziploc bag add equal parts buttermilk ranch dressing and red hot sauce (3/4 cup each) Marinade 6-24 hours KK soaked at 300-325 raised direct Here is where it can get fun- Take the marinated wings out and set on a cooling rack allowing the clumped on marinade to drip off. Toss the wings in 1/2-2/3 of a cup of potato flakes (from fake mashed potatoes) and then go to your raised direct surface. I cook for 50 min to an hour turning sparingly but mostly re-arranging to compensate for hot spots. The skin gets crispy and the potato flakes add an amazing crispy crunch. Now just sit back and watch then disappear.


