jeffshoaf
-
Posts
445 -
Joined
-
Last visited
-
Days Won
26


-
I upgrades from a Meater+ to the Meater Block several years ago and have been reasonably happy with it; my only complaints is that the ambient (pit) temperature measurement is generally low and the wooden case, while definitely attractive, isn't really very tough. I knocked the block off a table onto concrete while prepping for a grilling session and cracked the wooden battery cover in half and now have to tape it together and onto the body of the block. The software has some handy features but the predictive stuff is a bit gimmicky. I'll probably switch over to the new Thermoworks version at some point; I'm a bit fan of their products but them probably be a bit of time to get bugs and issues worked out. Their probes don't include an ambient sensor; they say their testing shows the food acts as a heat sink and prevents accurate ambient temperature measurements. Instead, their base units include a wired probe to monitor the ambient temperature; that doesn't really help with open fire rotisserie cooks but I found that the meater ambient and old style dual mechanical thermometers don't really work for that either - get both measure the ambient way too low (I assume due to the time when pointed away from the fire). I'd really like one of these that displays the temperature on the base station as well as in their apps (like Thermoworks Signals wired thermometer) even if i have to set up the alerts, etc. In the app.
-
It's one of the few cooks where a hammer is a required prep tool!
-
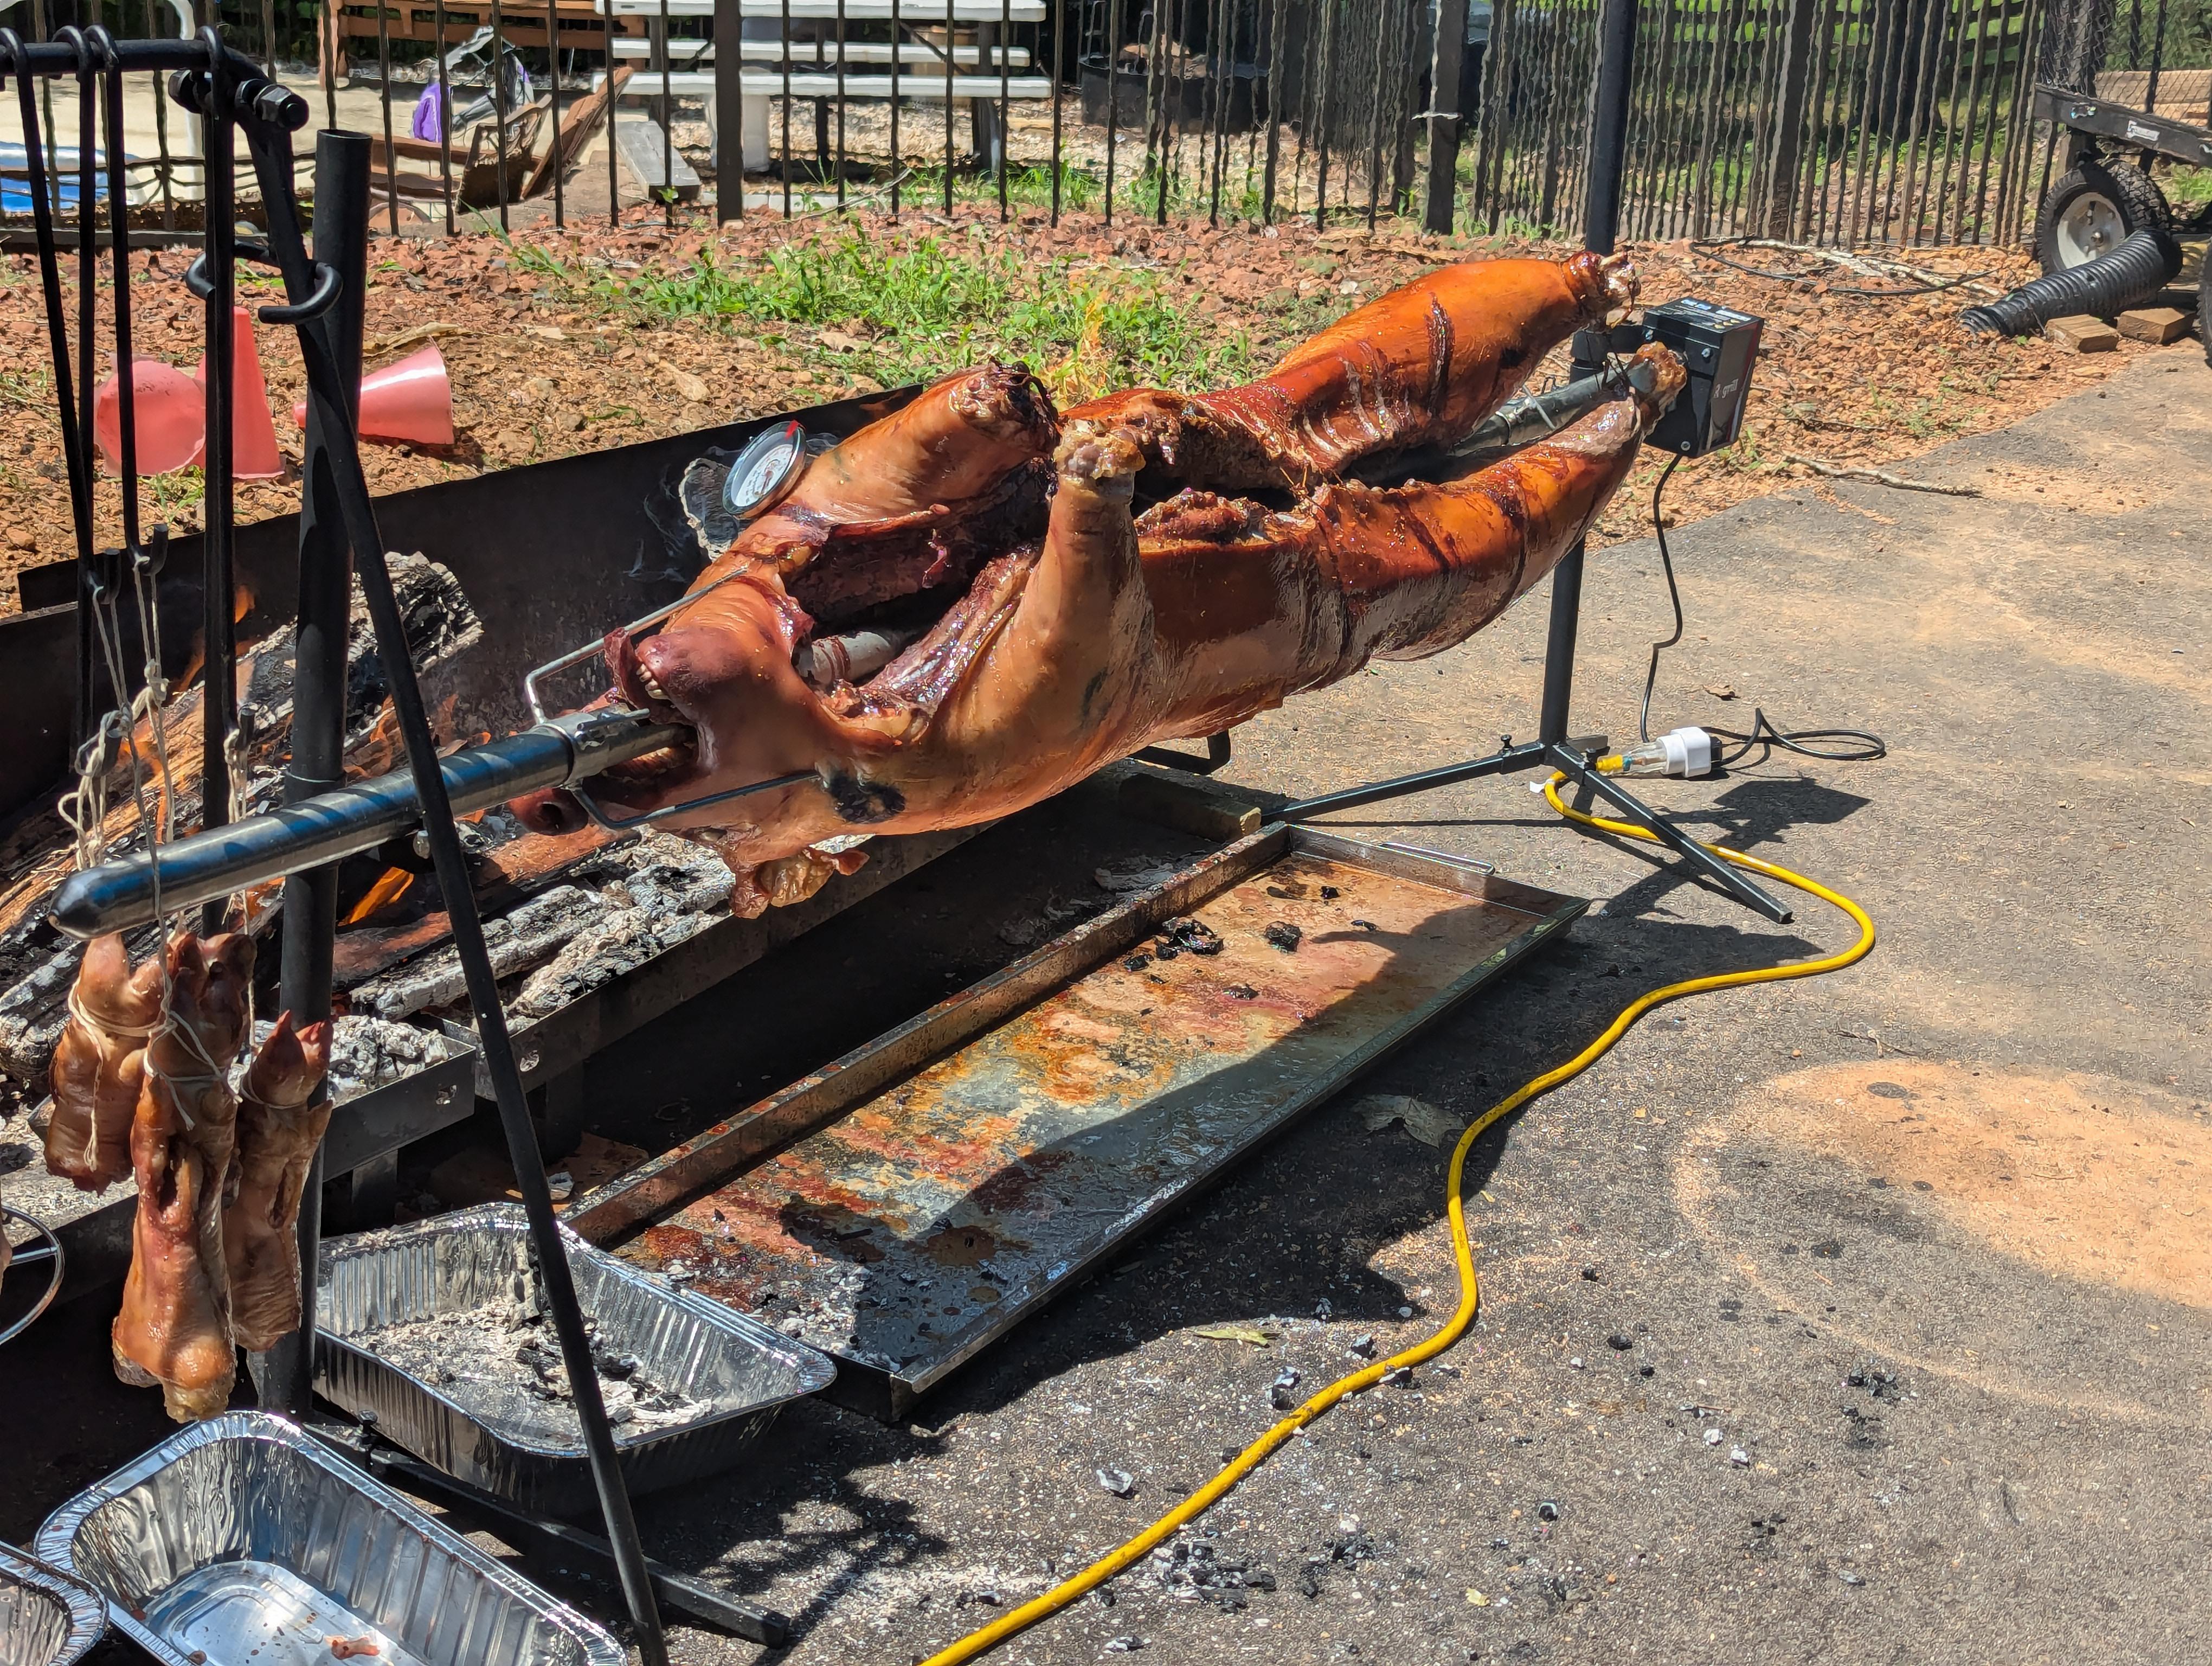
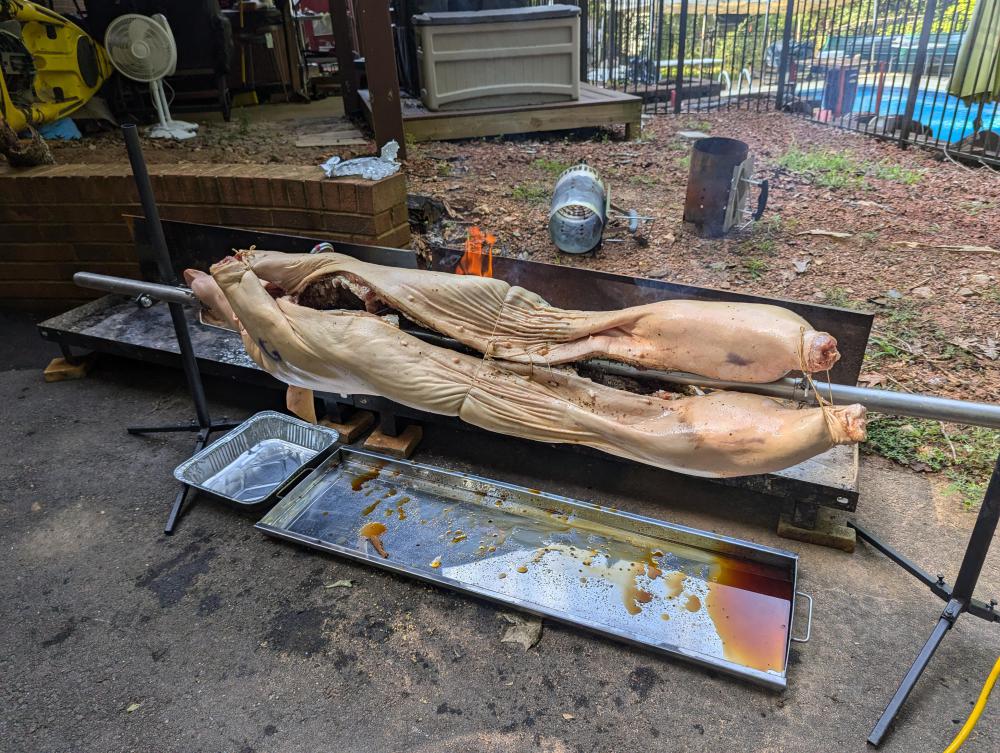
IMG_6449.MOV My brother took a few more pics and videos from our cookout, including some of the chickens. @C6Bill, the meat market offered to cut off the head and feet but we initially left then on for presentation (plus I have some kin who like the tongue and there's a surprising amount of meat on the head), but we ended up cutting the feet off - we had the pig's spine secured to the spit before realizing we hadn't accounted for the hind legs when centering it on the spit. PXL_20240810_170033718.TS.mp4 IMG_6449.MOV IMG_6453.MOV


-
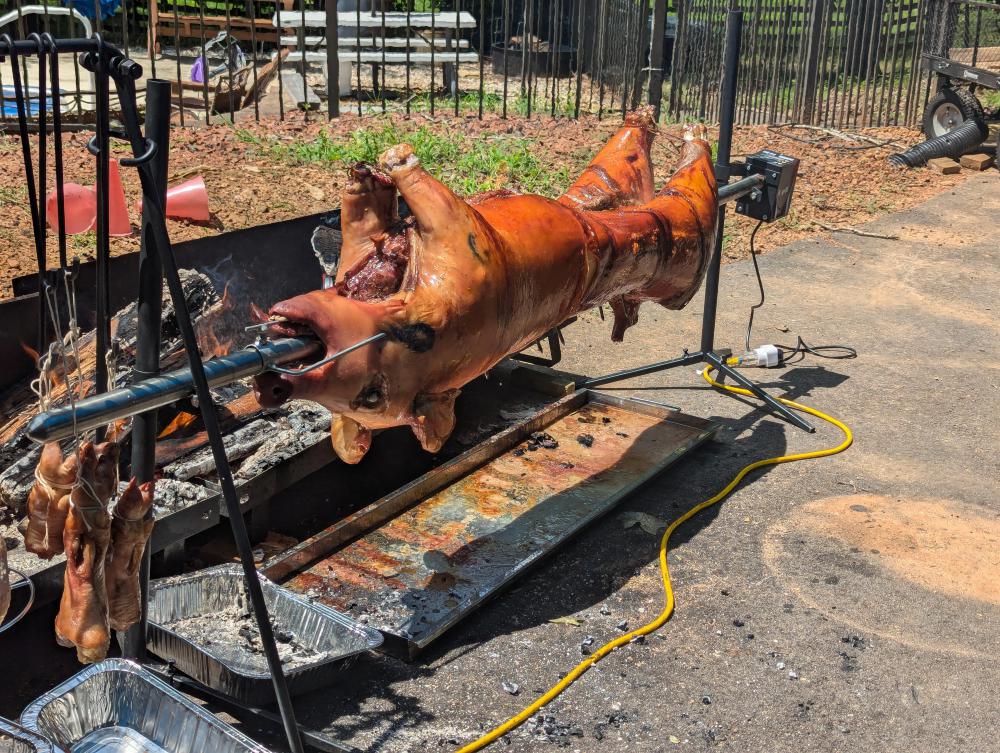
My brother got a pic of the finished pig just before we started serving it.

-
If y'all will recall, I did a practice run on an open fire rotisseried pig last April. After watching way too much Weather Channel and other weather-related TV to see what Debby was going to do, we had a beautiful but hot day here in North Carolina Saturday for the real run. We applied all the lessons learned from the practice pig and had a very smooth cook with an 89 pound pig, plus some chickens spinning on strings (shoulda done a practice chicken as well since the pig was done right on time but the chickens were a bit late). I got busy and neglected to get pics of the completed pig and chickens, but here are some in-process pics and videos. I couldn't really taste the meat due to some sinus congestion and smoke inhalation, but others said both were very tasty. PXL_20240810_135637245.TS.mp4 PXL_20240810_151439073.TS.mp4 PXL_20240810_170033718.TS.mp4


-
I've had mine for a while but it came with the appropriate adapter. No drilling required; the guru port is strong and deep enough to support the cold smoker. It can rotate but i haven't had it rotate without help from me. After updating to the newer two dial air intake plate, I took the dial off the old single dial intake plate, used high temp duct tape to seal up the extra hole, and mounted the Thermoworks billows fan to the other hole and used my Thermoworks Signals thermometer to monitor and control the cook temperature. I've posted pics of this somewhere on the forum.
-
I need to move a 23 ultimate up stairs - advice?
jeffshoaf replied to BalconySmoken's topic in KK 411
Hopefully, insurance for movers does exist so you'll get some help if they drop and damage your KK! -
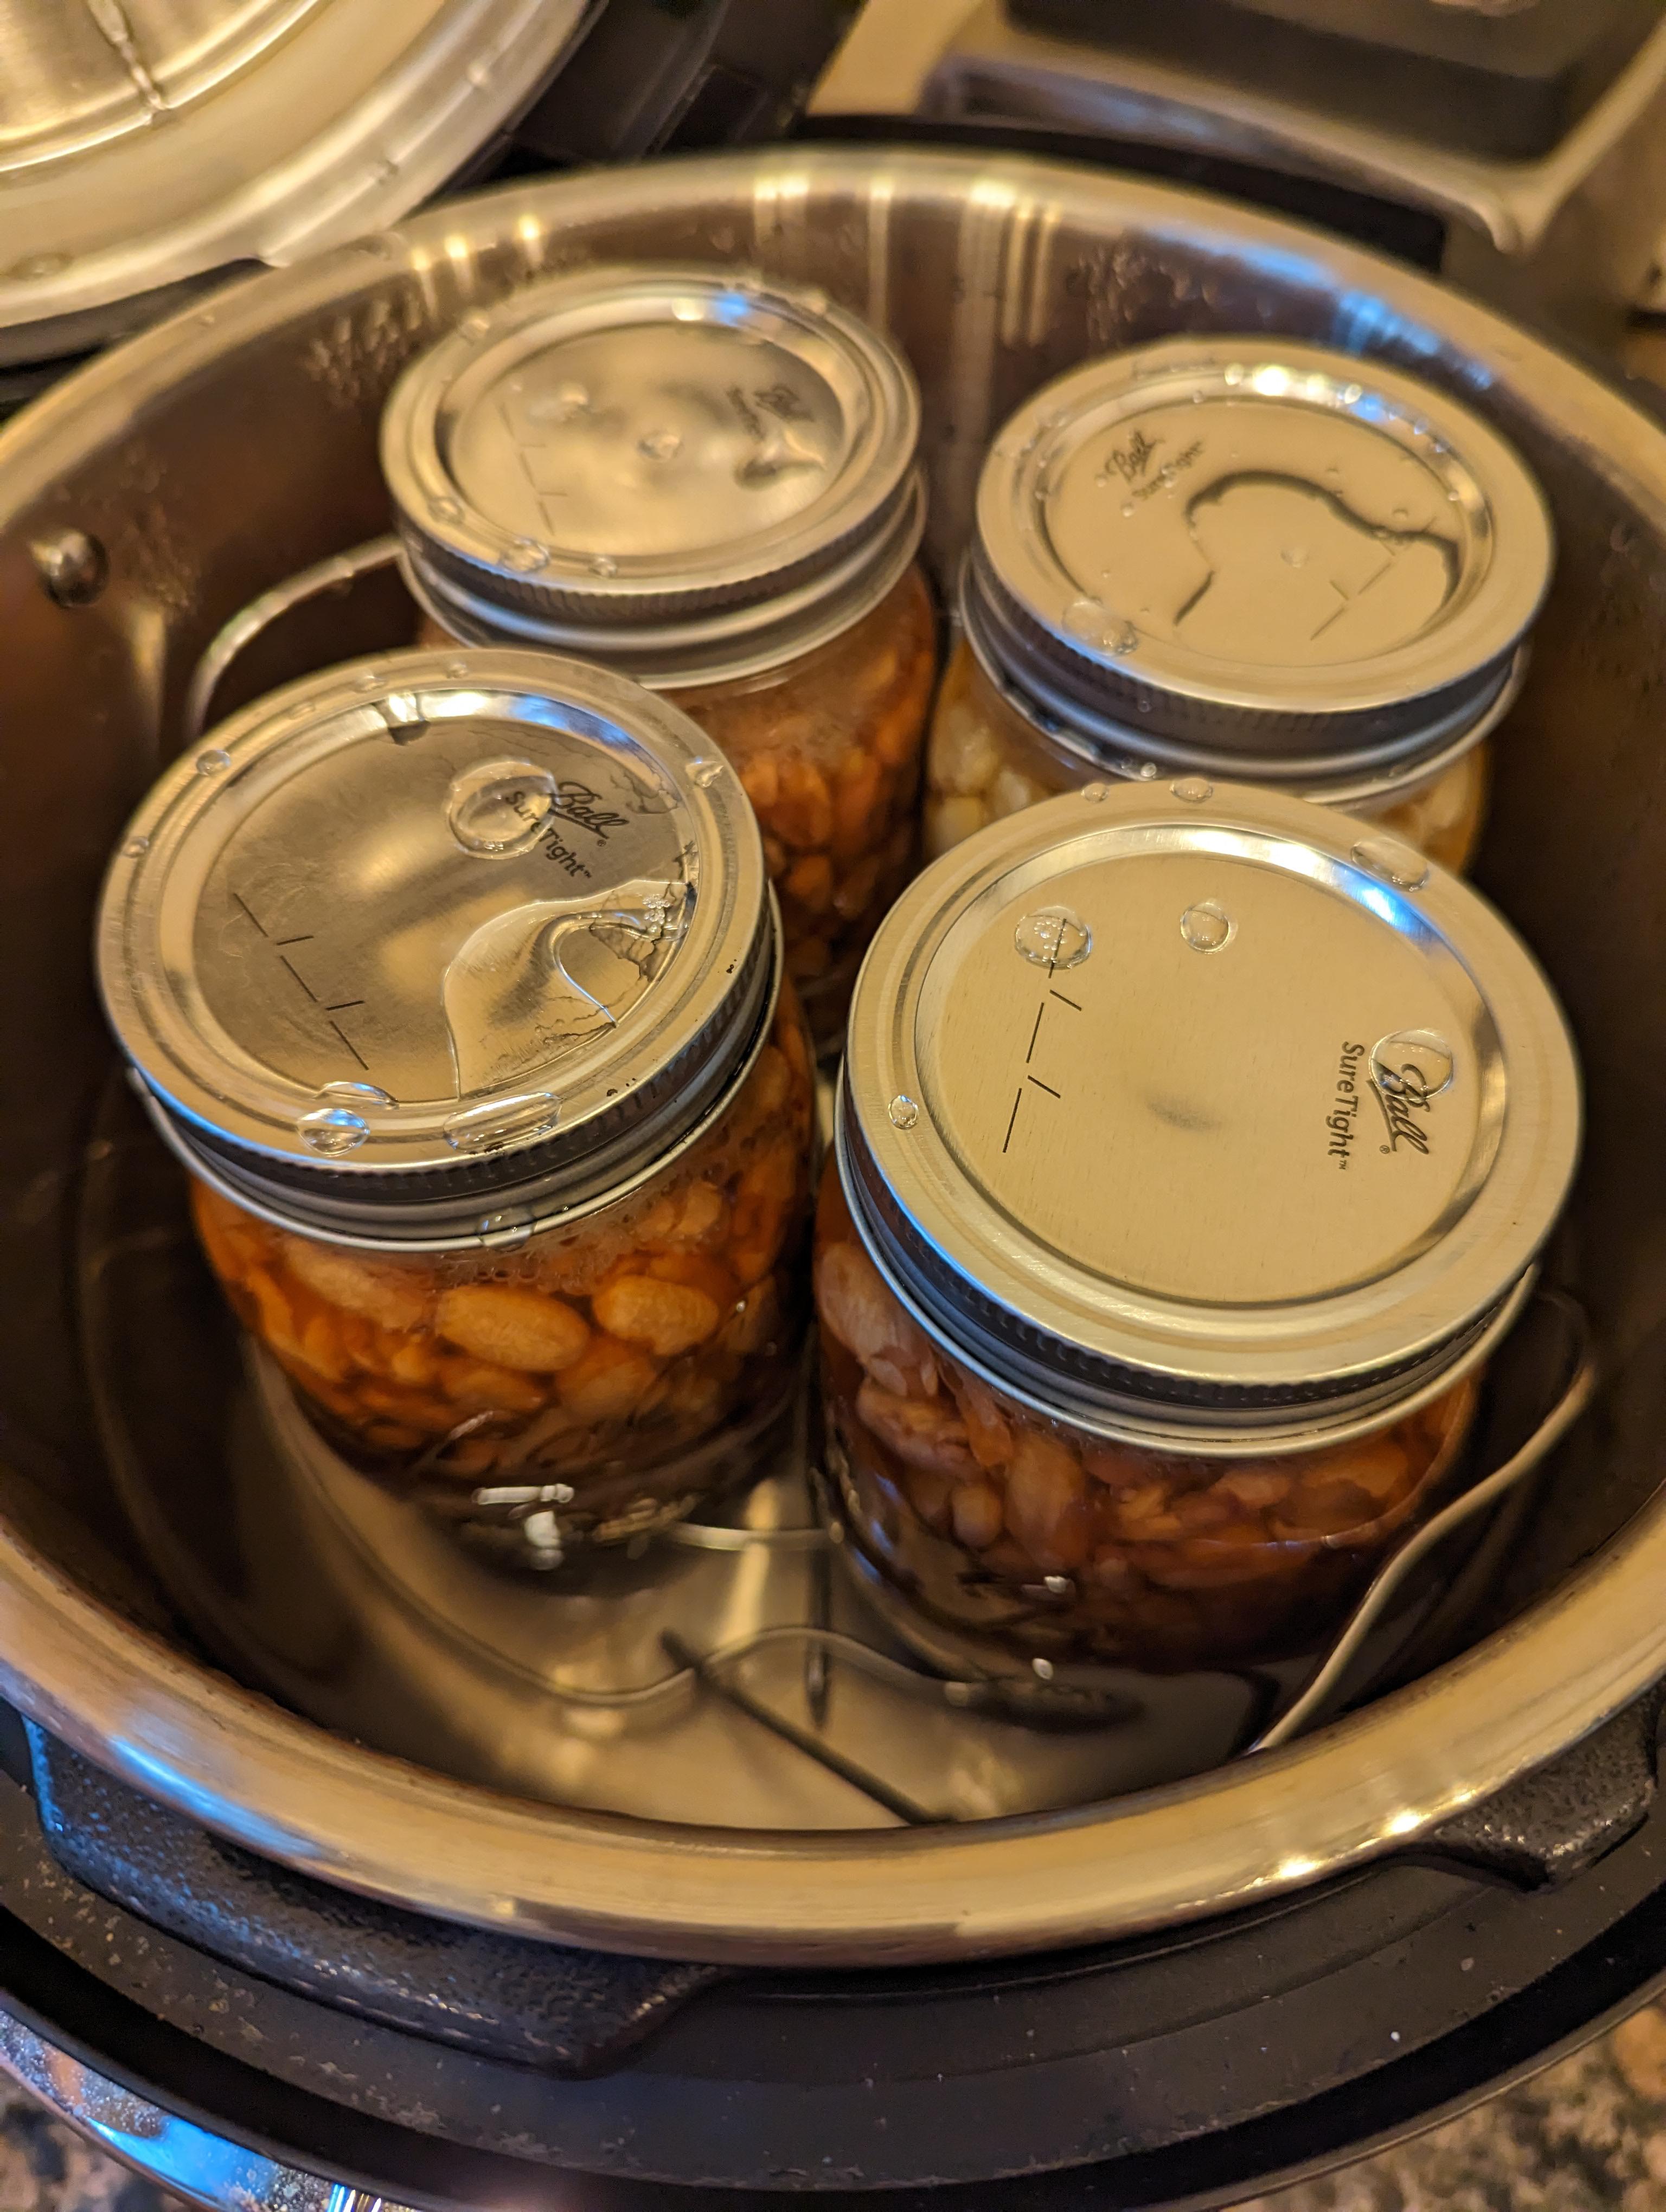
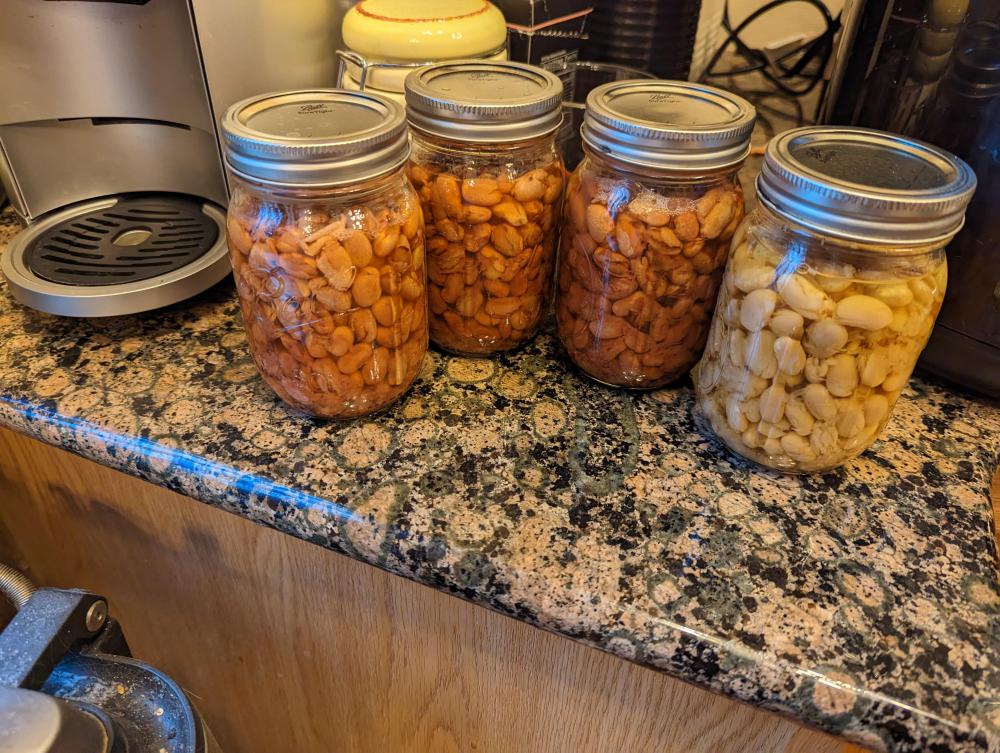
Yeah, i looked at the cooker on the Amazon UK site after replying and couldn't figure out how the lid locked for pressure cooking, plus the listed max temperature was lower than recommended for pressure canning. I searched for that brand on the Amazon USA site and couldn't find it. The beans I canned in the instant pot were just dried beans and water - i didn't add any seasoning or oil at all and waited until i unsealed and heated up to eat before seasoning. They were really clear right after canning but clouded up as they cooled. Seeing the pics, I remember that there were 3 jars of pinto beans and one jar of navy (white) beans.

-
I obviously forgot to follow up on this thread! I did get the instant pot that i mentioned above. It does work - I successfully canned homemade beef stock and pinto beans in pint jars and retort canned onions and peaches in retort bags. All sealed well and was stored in my kitchen cabinets; all of the stuff that i canned in jars was consumed while i had limited mobility after foot surgery. I've tried one of the bags of onions; they were vidalia (or something similar) sweet onions and were caramelized more than what i usually am for when cooking but I guess that's to be expected. They were successfully preserved. I honestly forgot about the peaches and the remaining onions until @tekobo revived this thread... I need to try some of the peaches for ice cream in the Creami! If y'all recall, one of my goals for canning was growing and canning tomatoes since I used a lot of store-bought canned tomatoes for sauces, soups, pizza, etc. I stumbled on a raised garden bed on clearance last fall and intended to get at least tomatoes and peppers started in the spring but that all fell thru - my sister totaled her car and borrowed my pickup truck until she got the insurance settlement and replaced her car, and then my mother moved into an independent living residence and that ate up a lot of time. So no readily available produce to try. And i haven't tried to buy enough to try canning due to getting her house ready to sell. Anyway, the instant pot model that reaches canning pressures does work and it's easy to use, but the size is a big limitation - it'll comfortably fit 4 pint jars at a time or six 8 oz retort bags (maybe more retort bags if you arrange them carefully). Those are pretty small batches even with the faster pressurization this model instant pot features, so fine for occasional use with small batches but really not suitable for much volume. It is a really nice pressure cooker though, and has relegated my OG instant pot to backup and pot luck duty. I'll be checking on availability in the USA for the canner @tekobo linked and wait on her review!
-
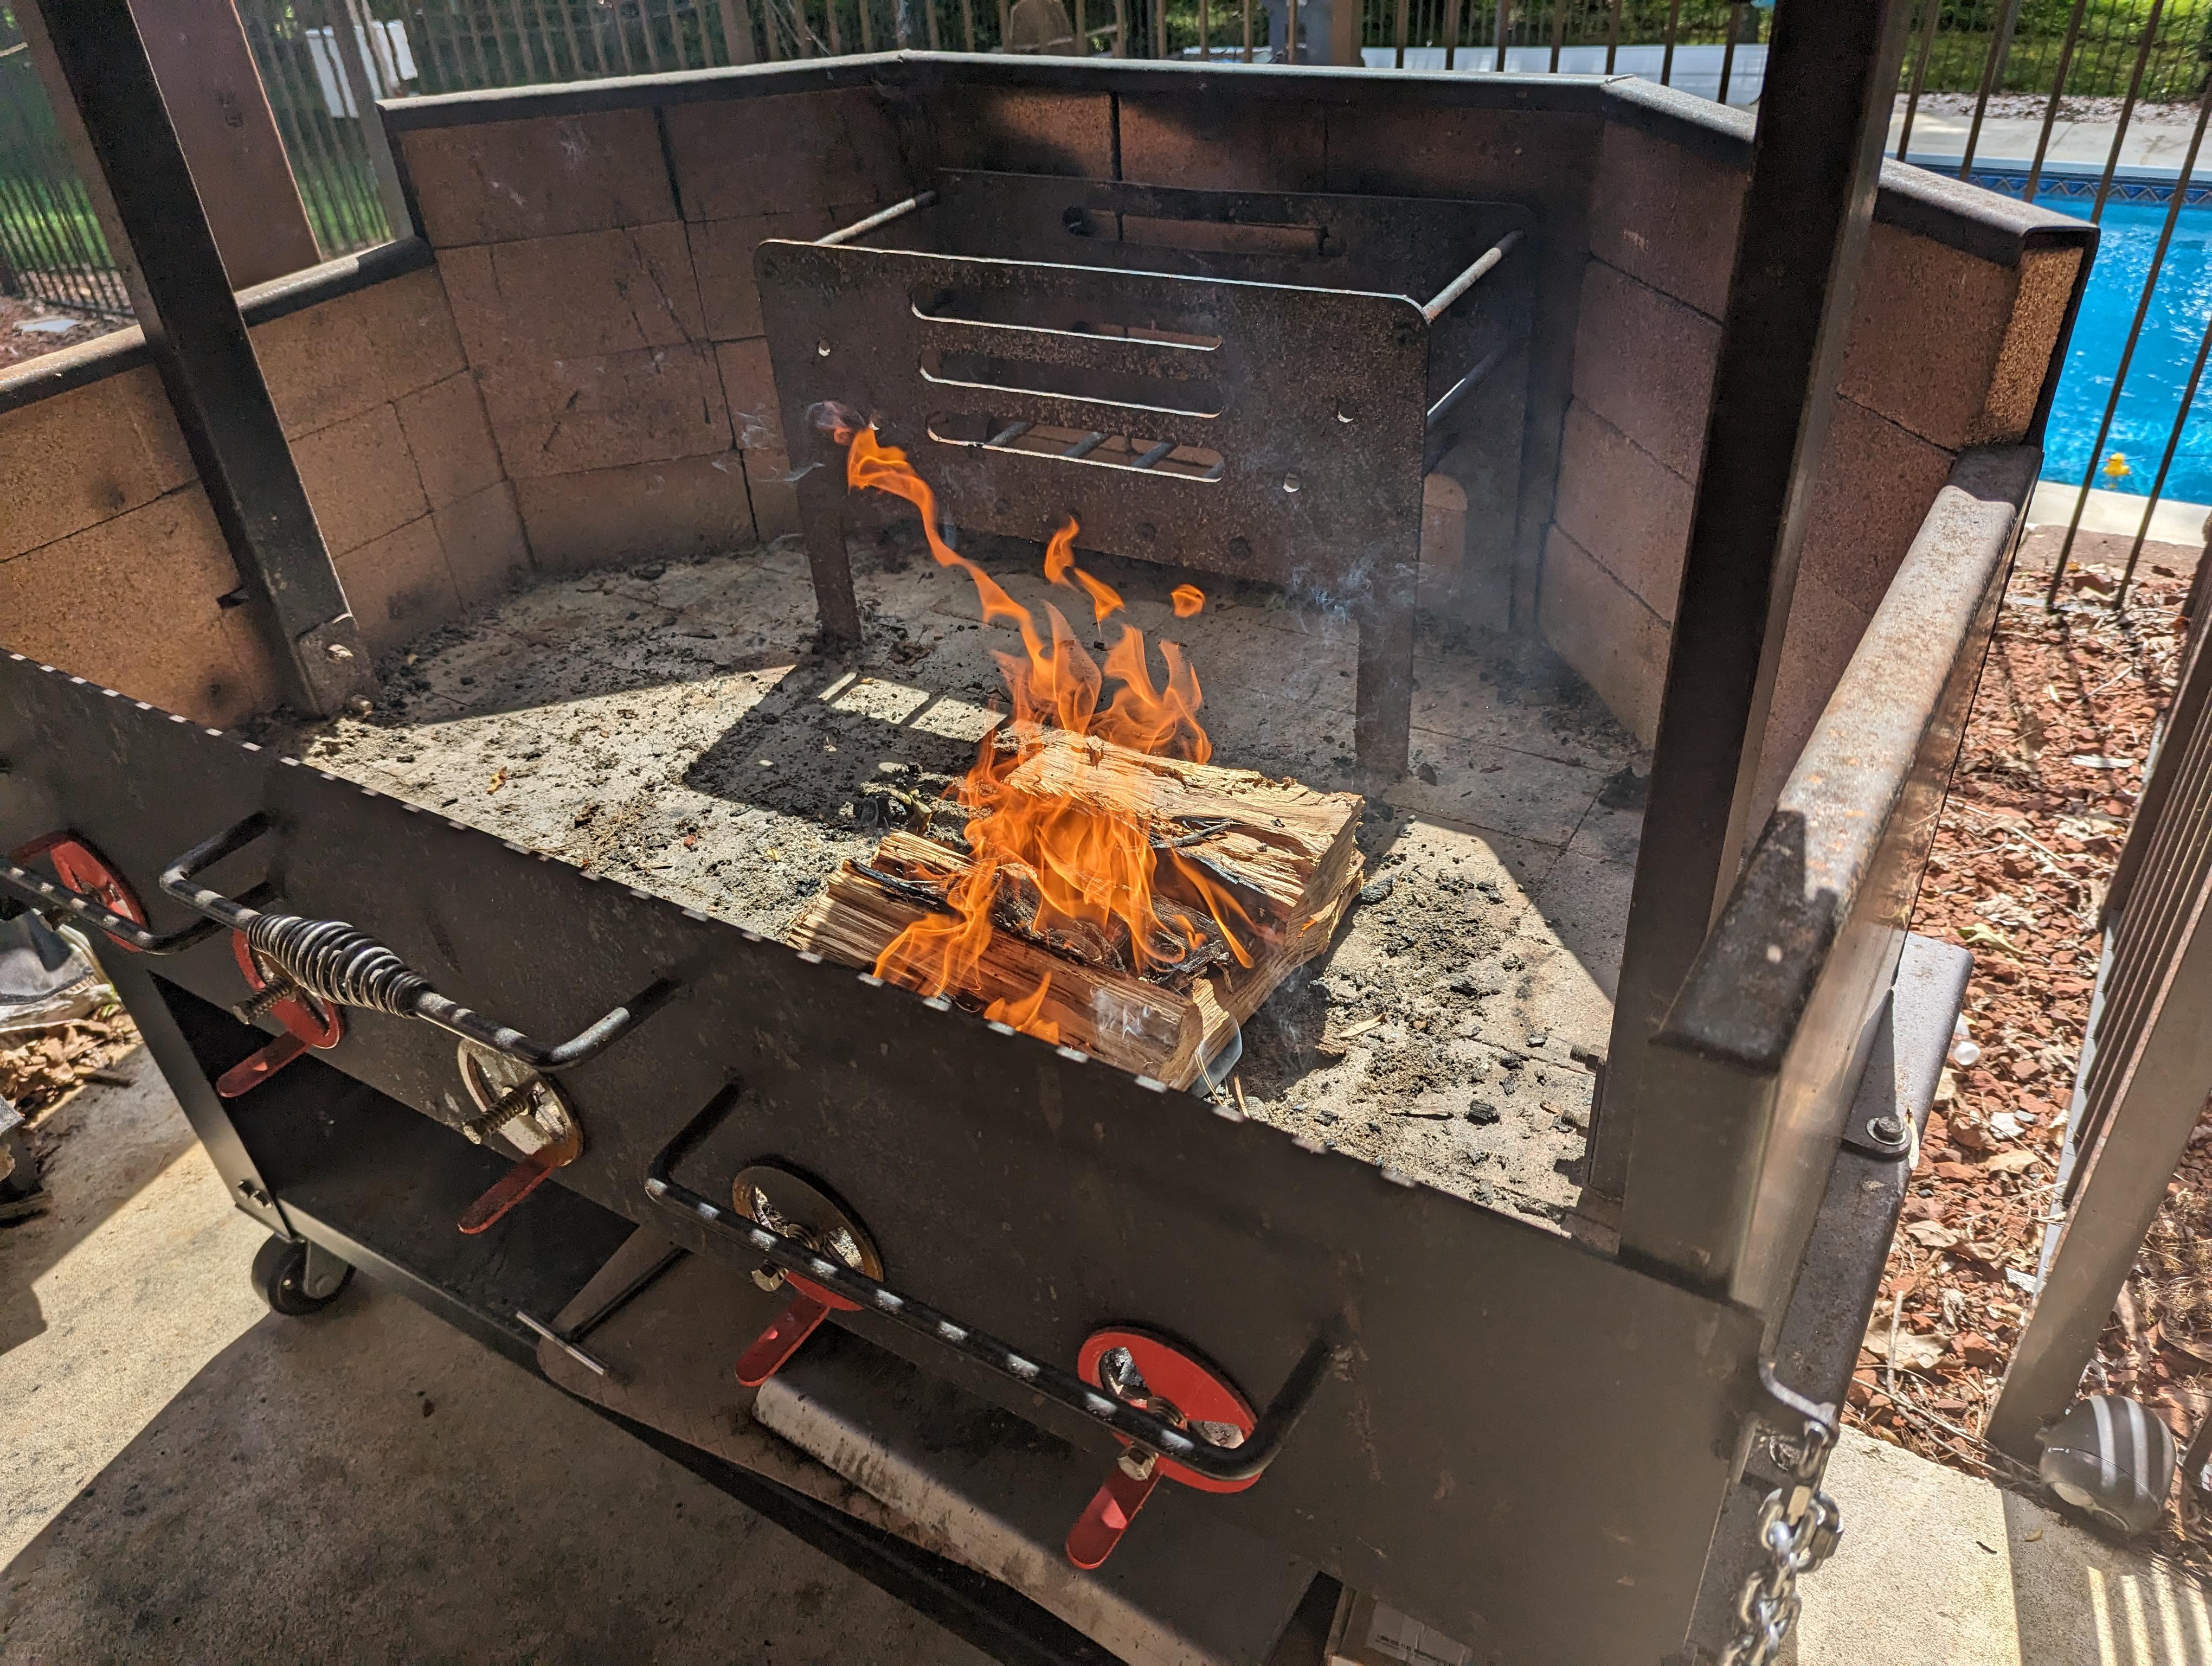
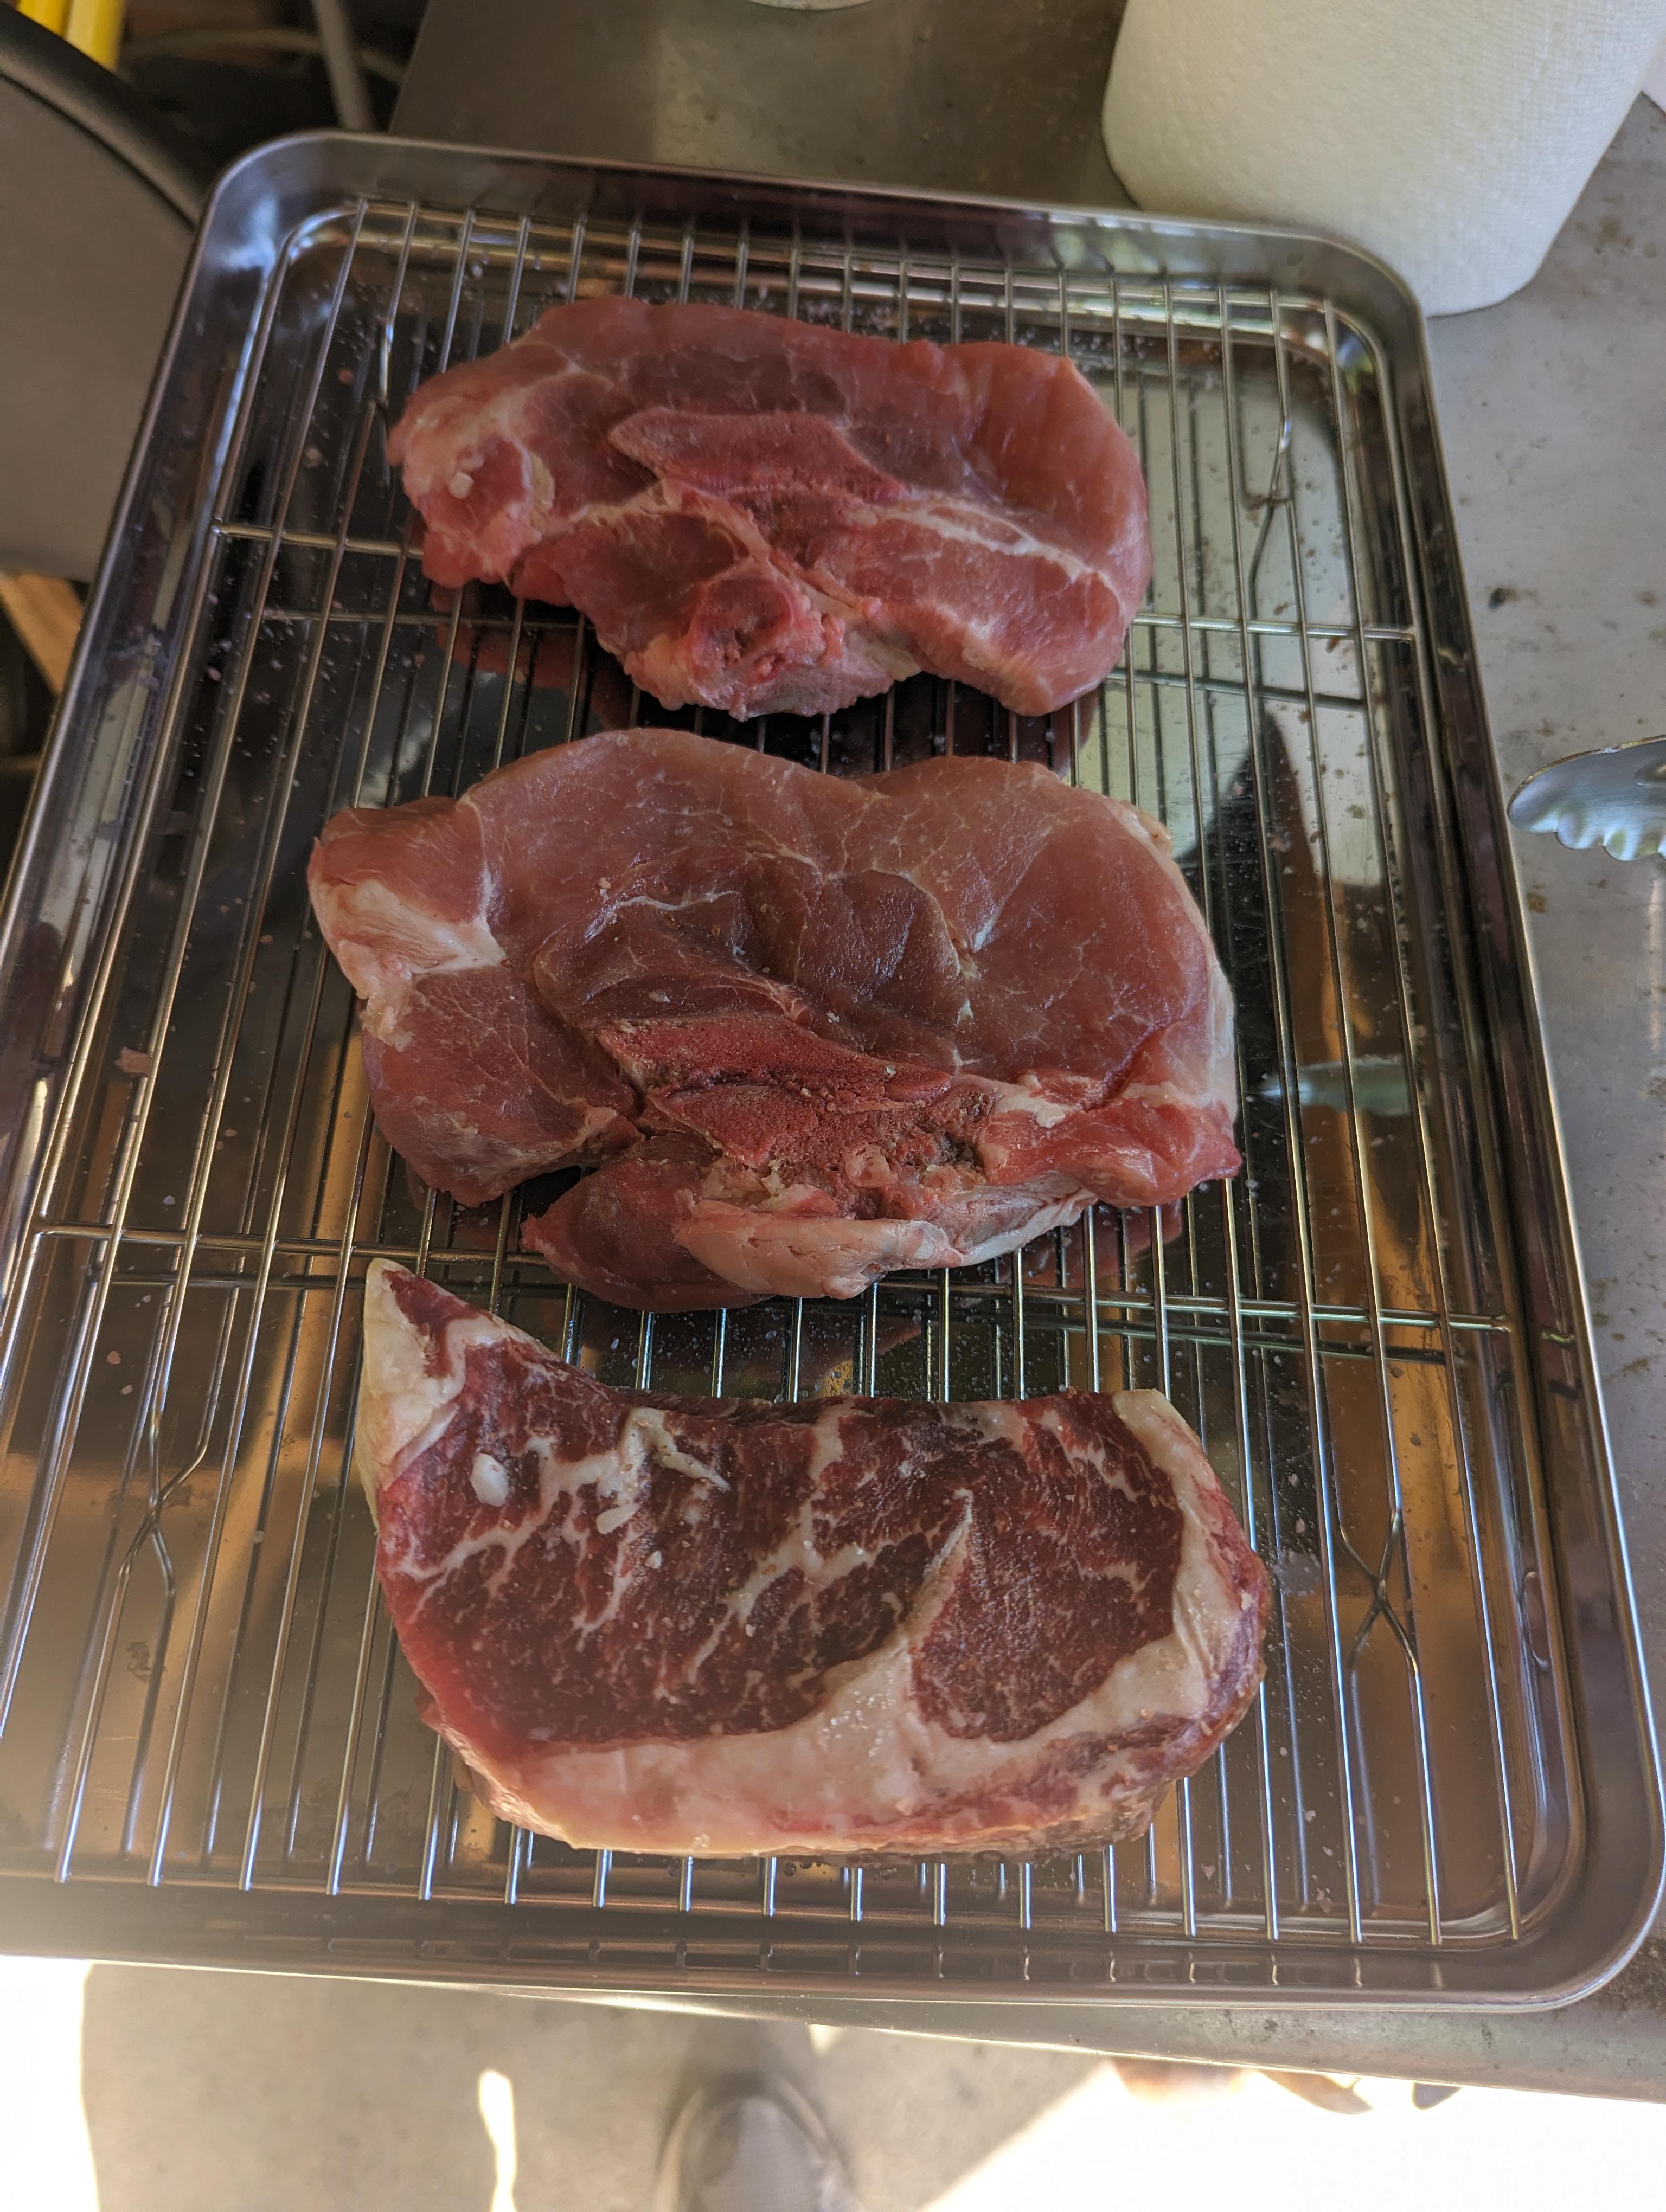
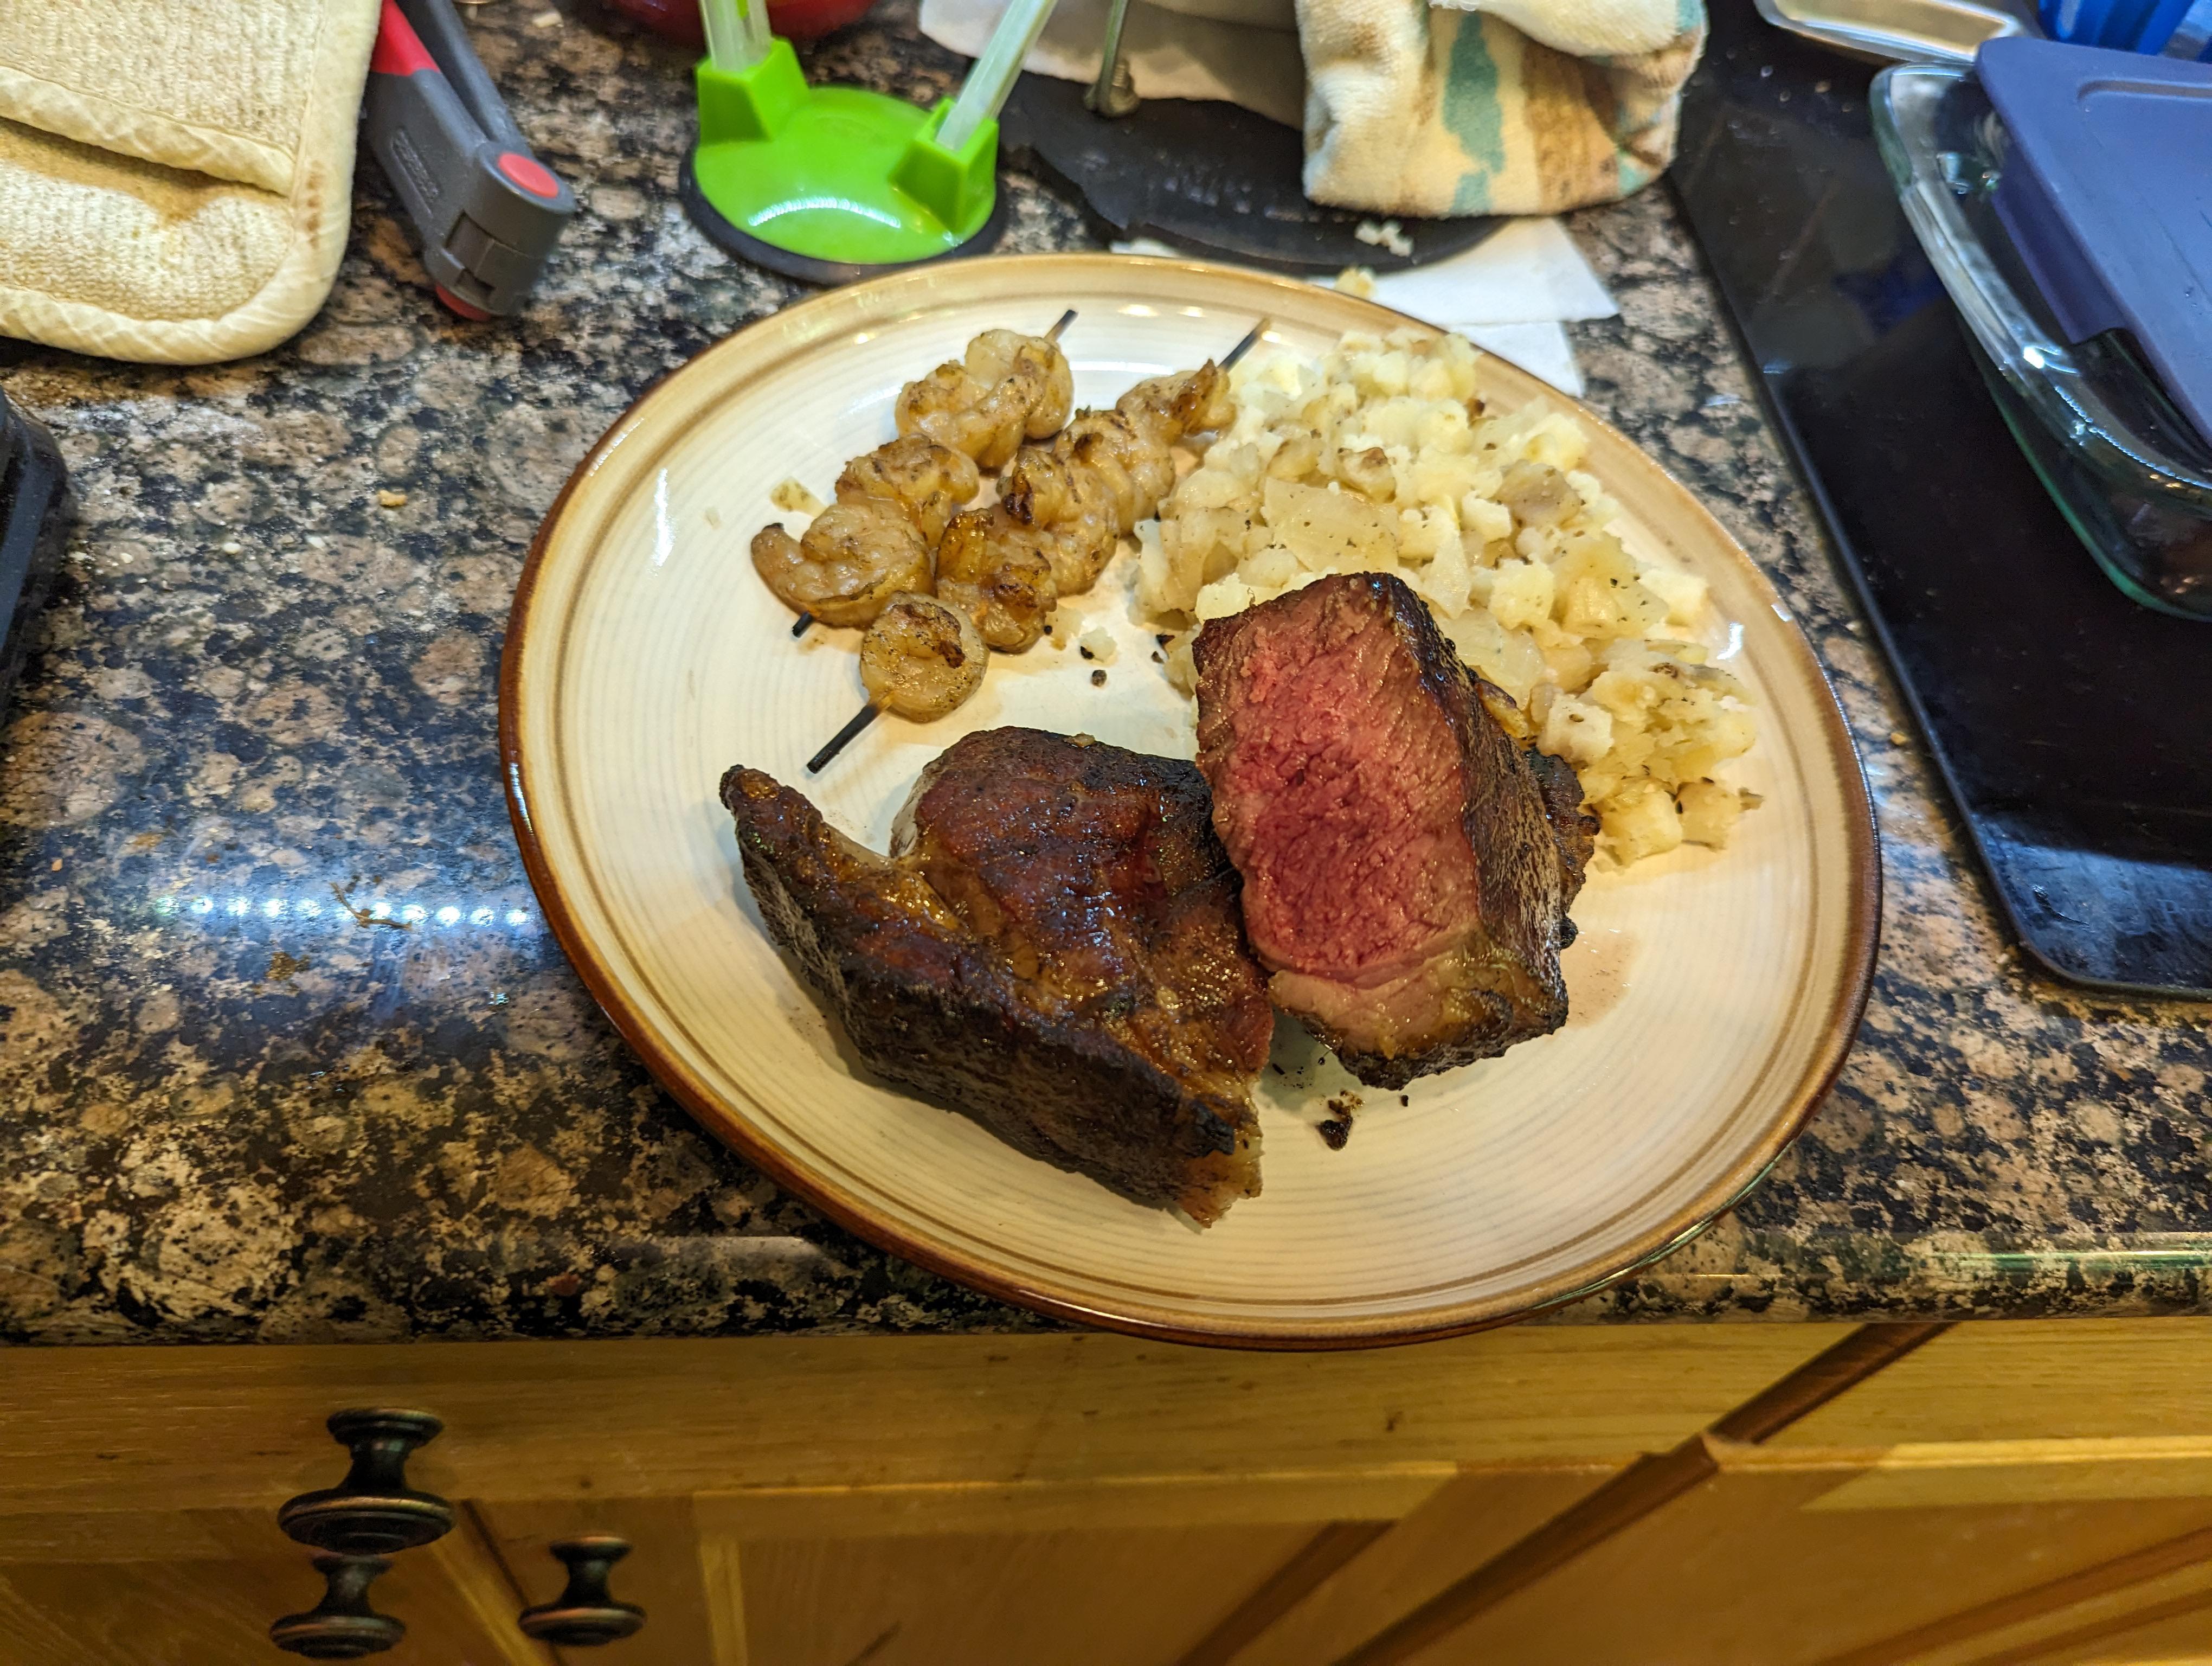
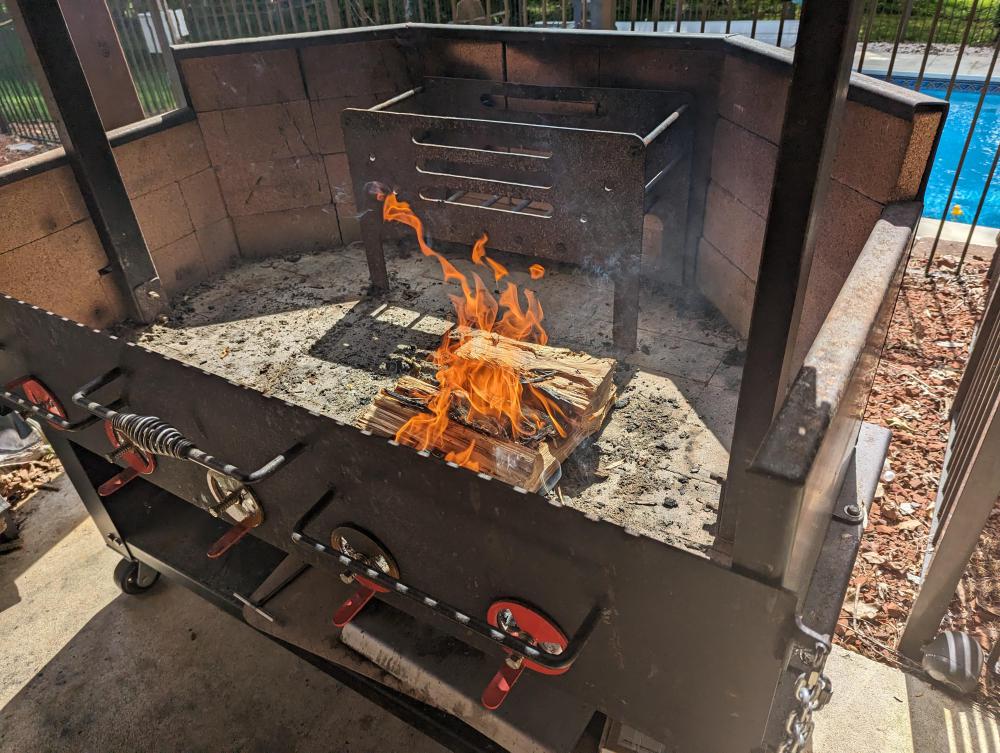
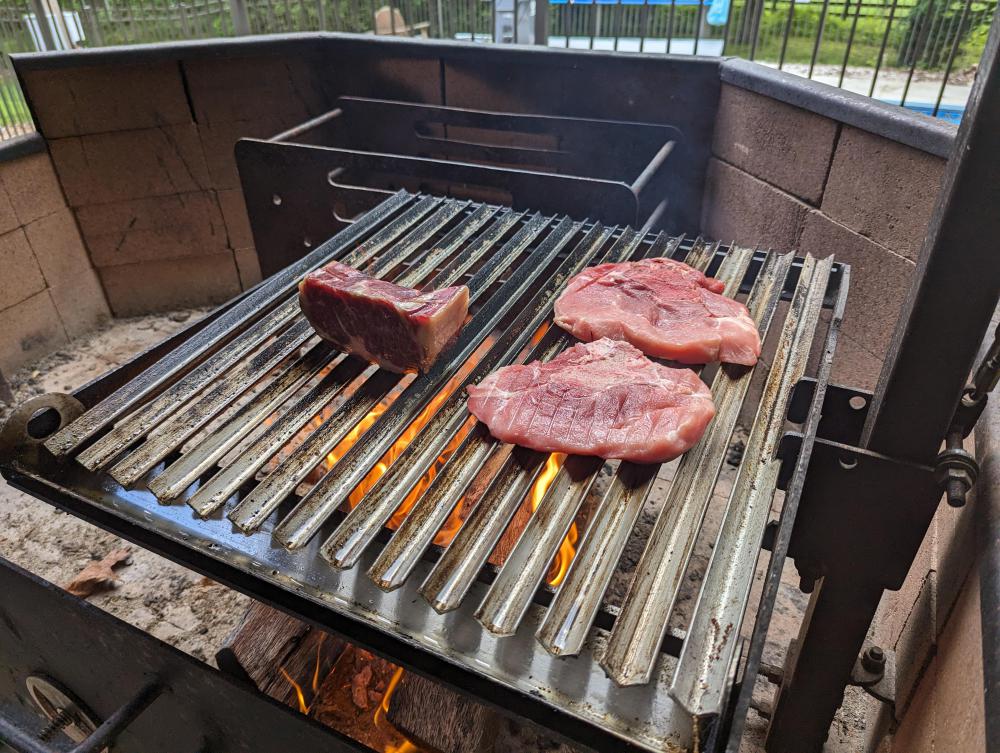
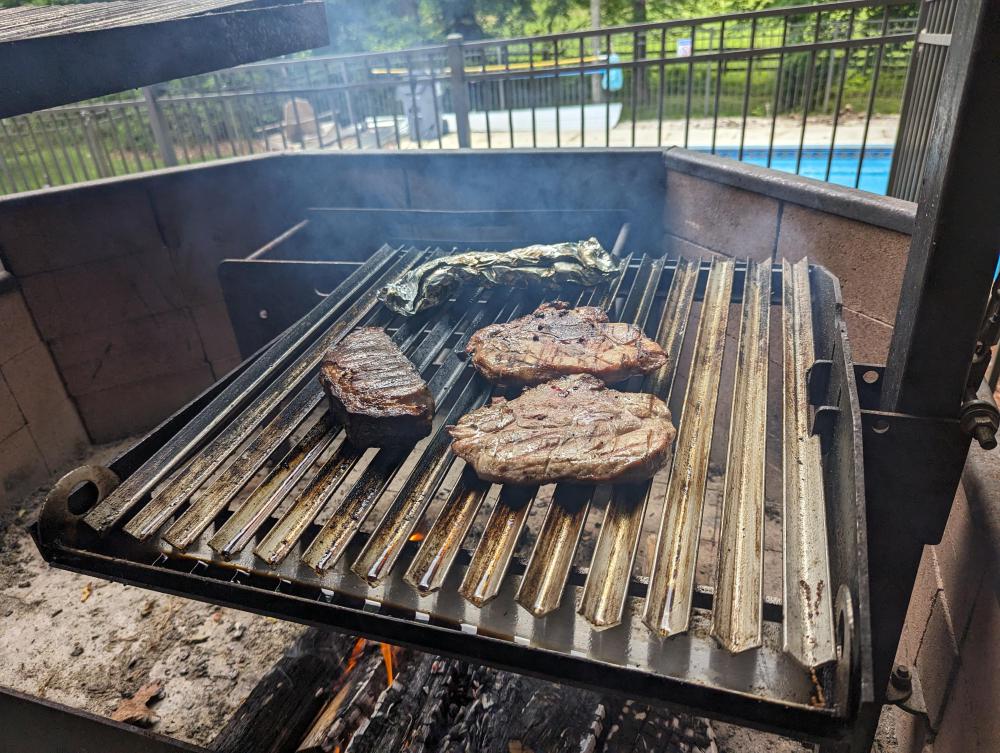
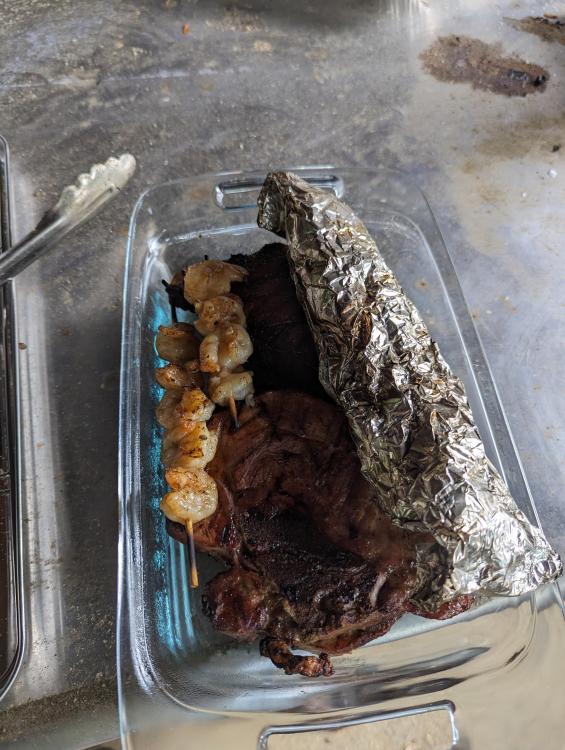
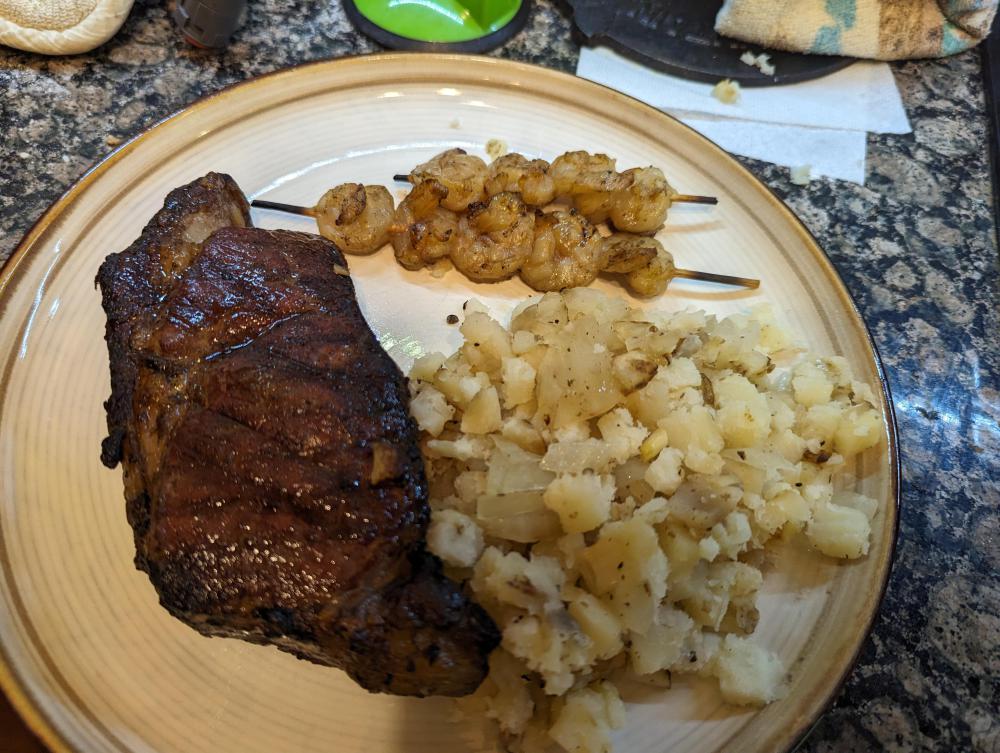
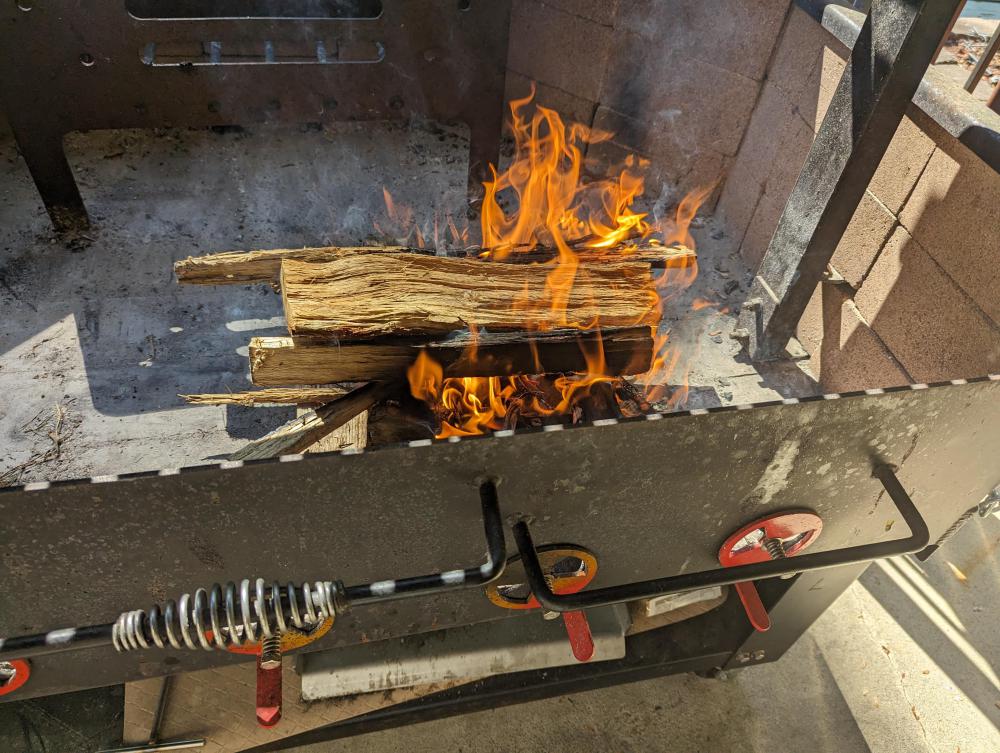
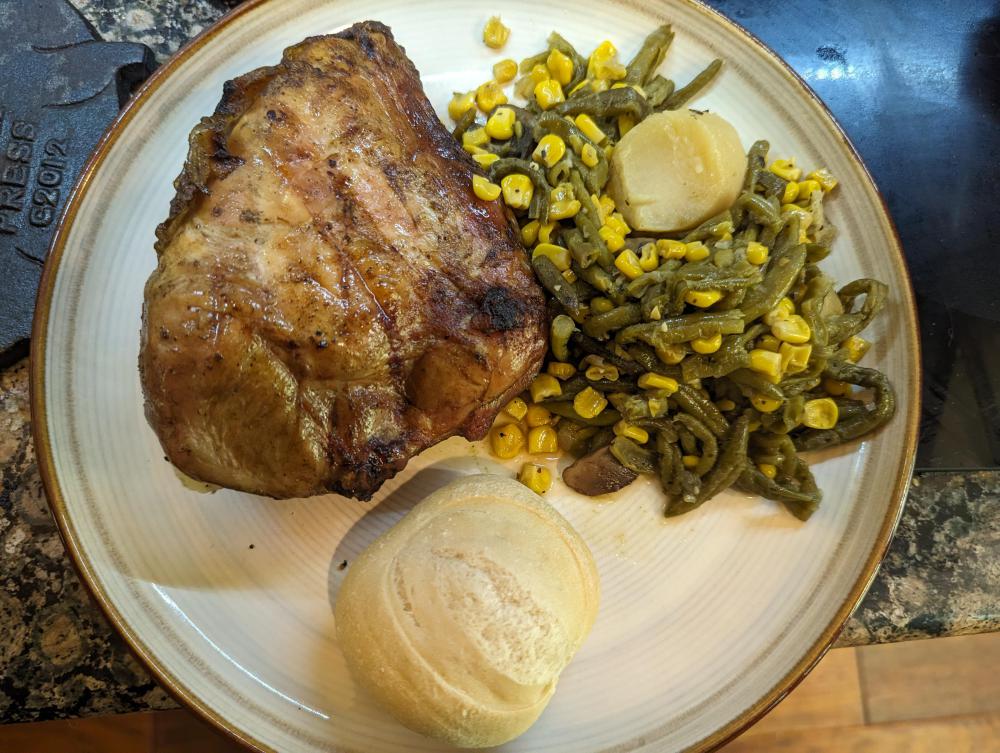
Fired up one side of the big grill for a big ribeye that was dry aged for 50 days, shrimp, and a foil packet of diced taters for today's supper, plus a couple of pork chops for later in the week, all grilled over hickory and a bit of oak. Steak was nice and tender and supper was very tasty!


-
If you want to use the drippings from you cook, the double-bottom pan is a good investment.
-
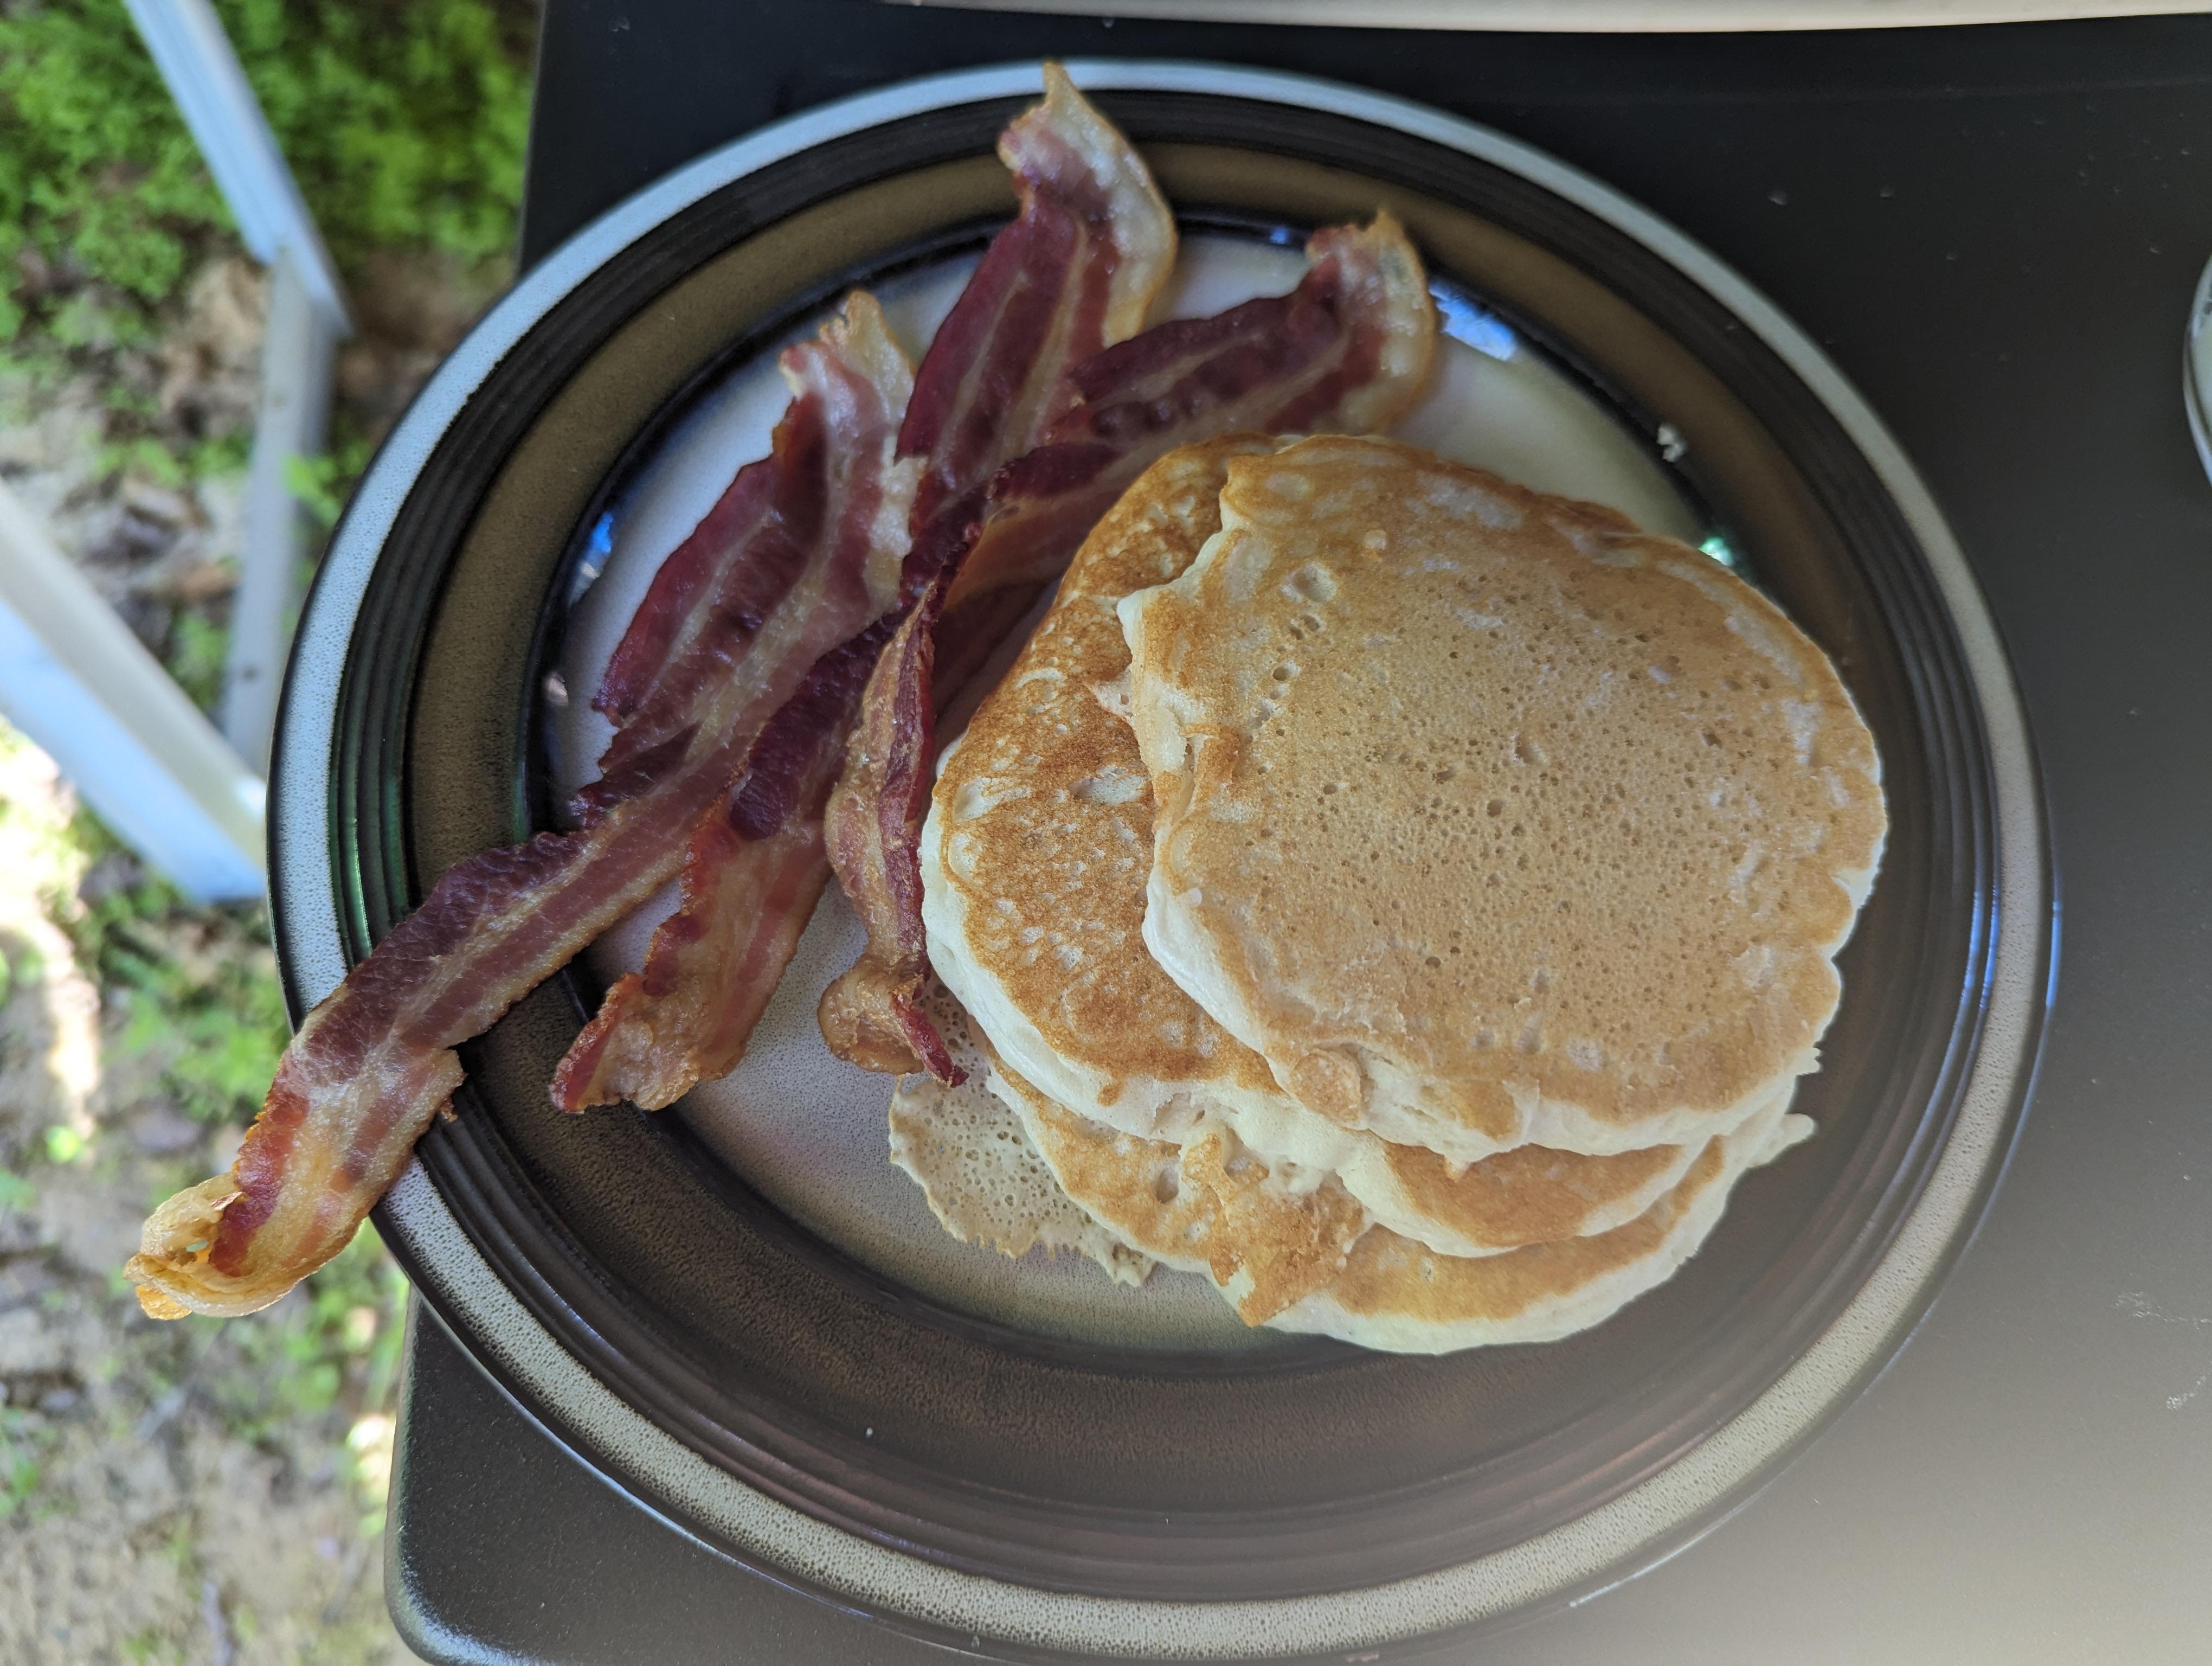
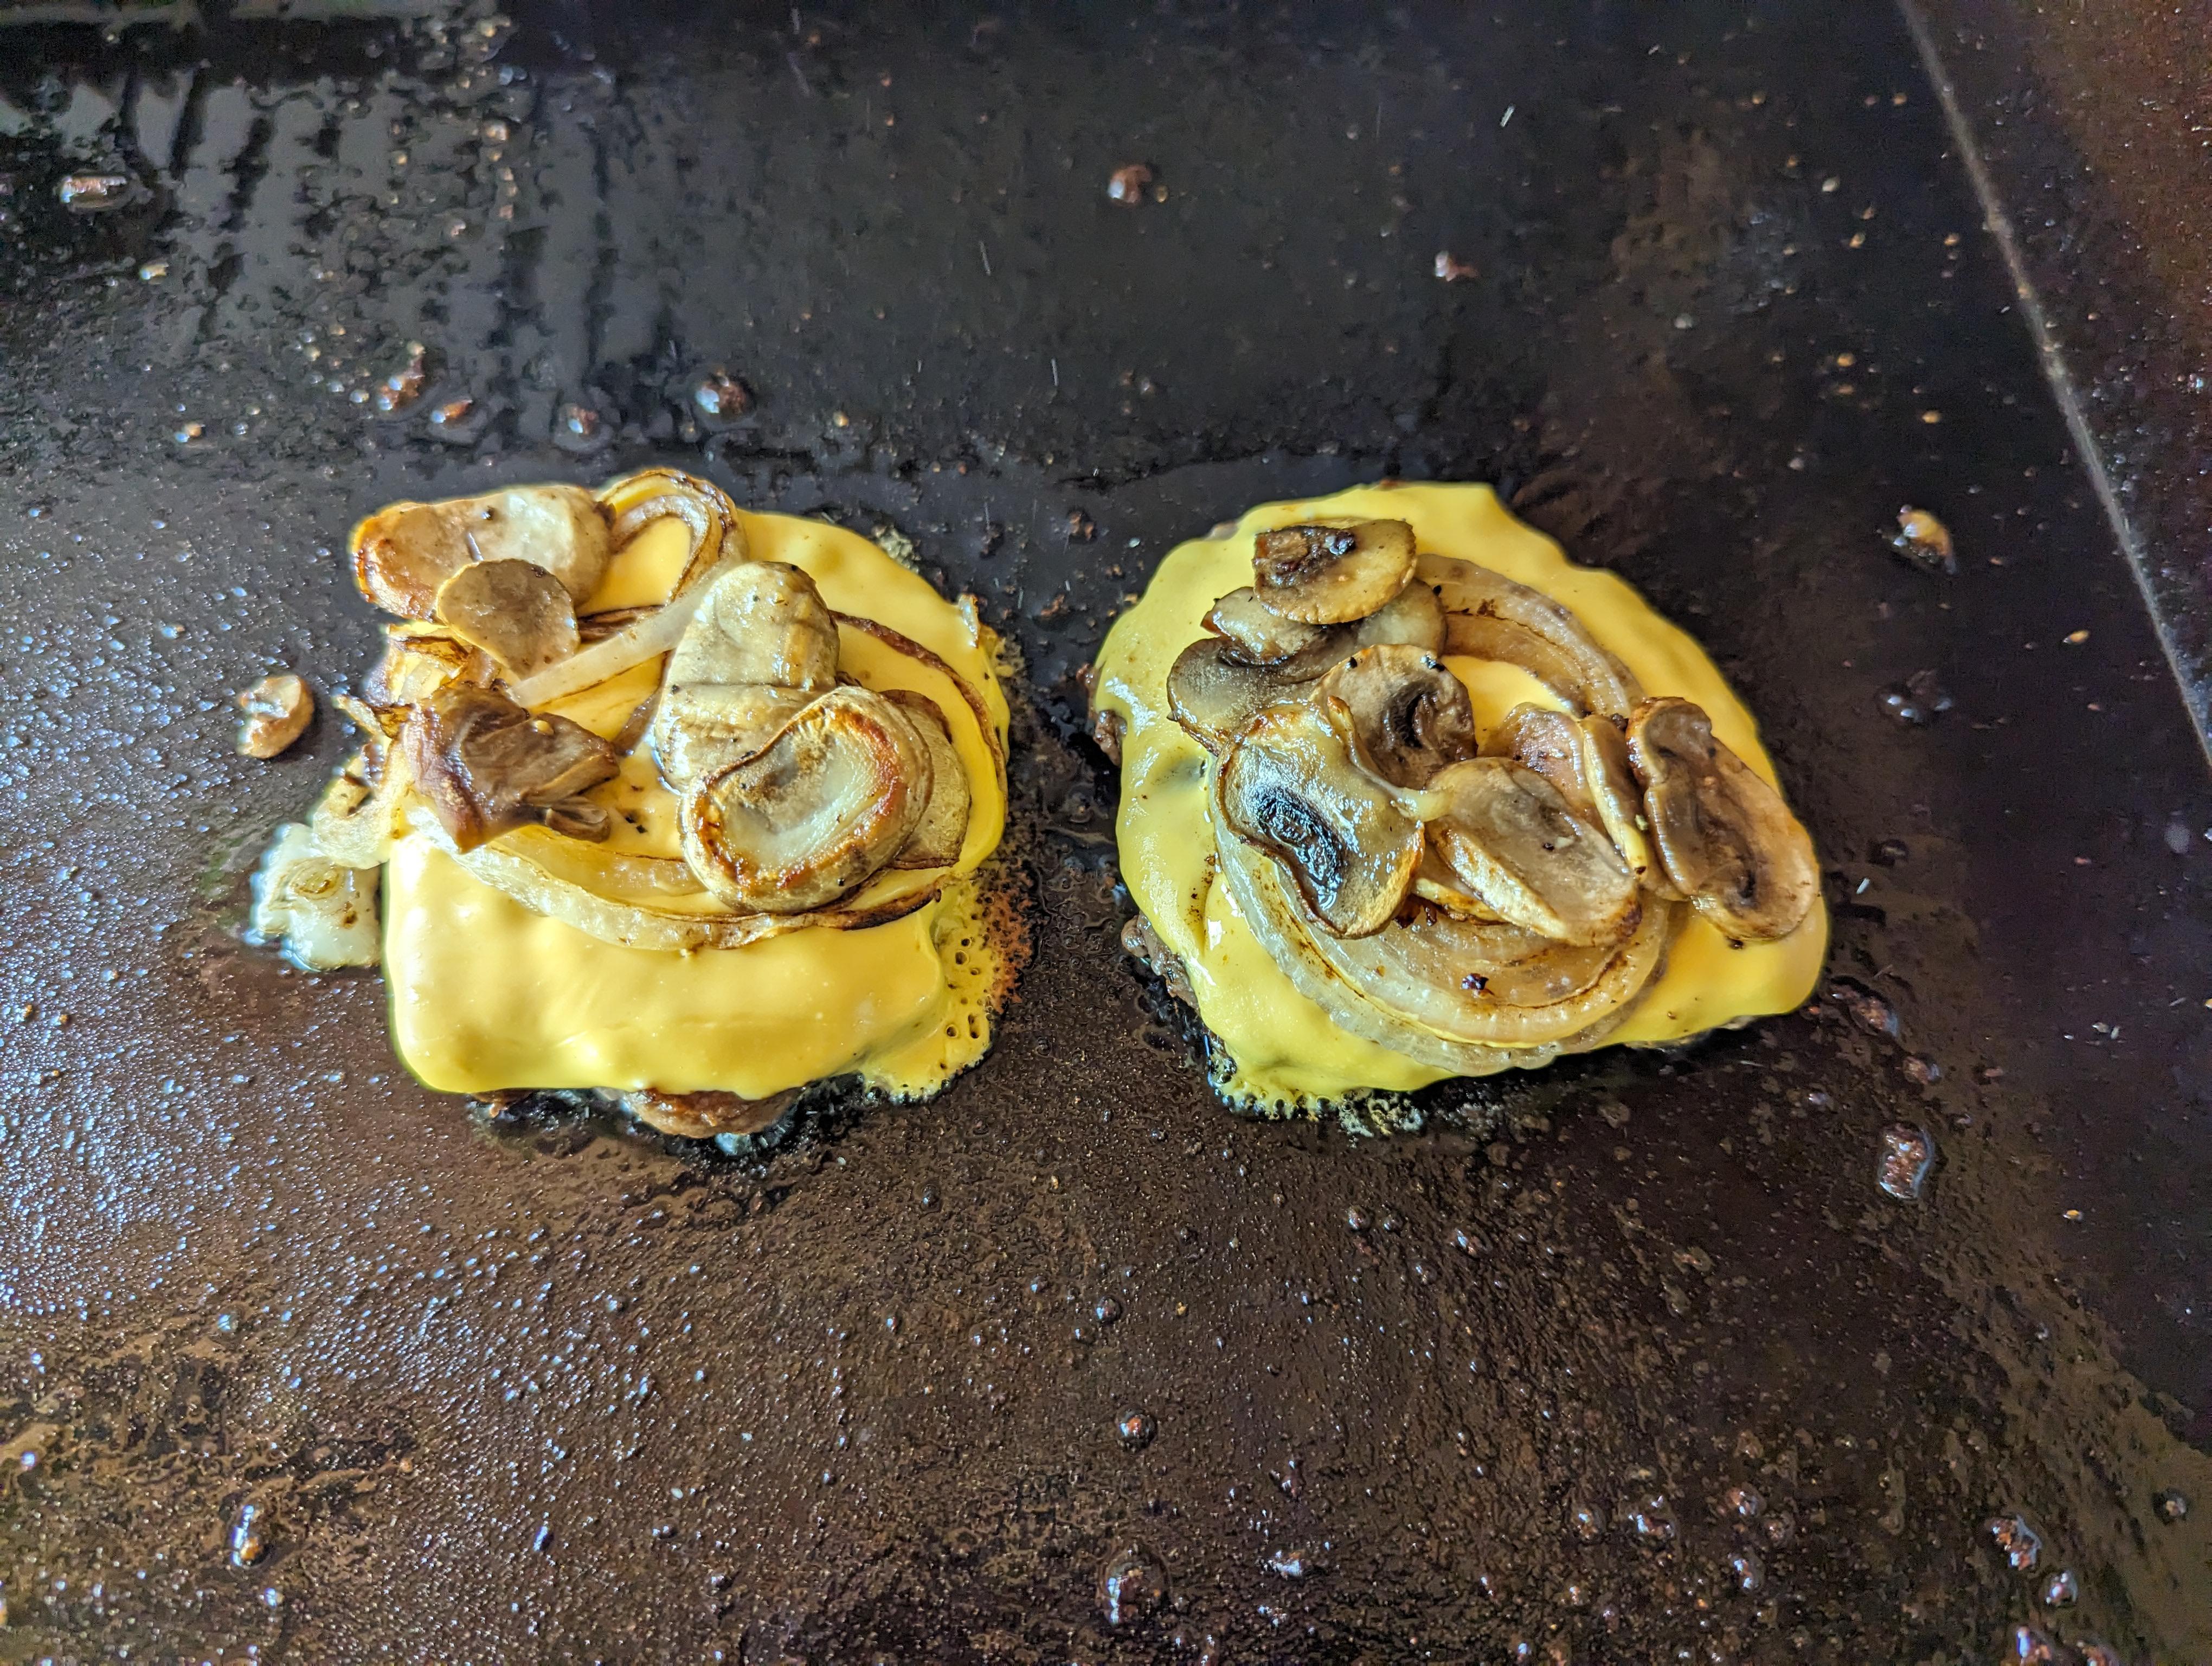
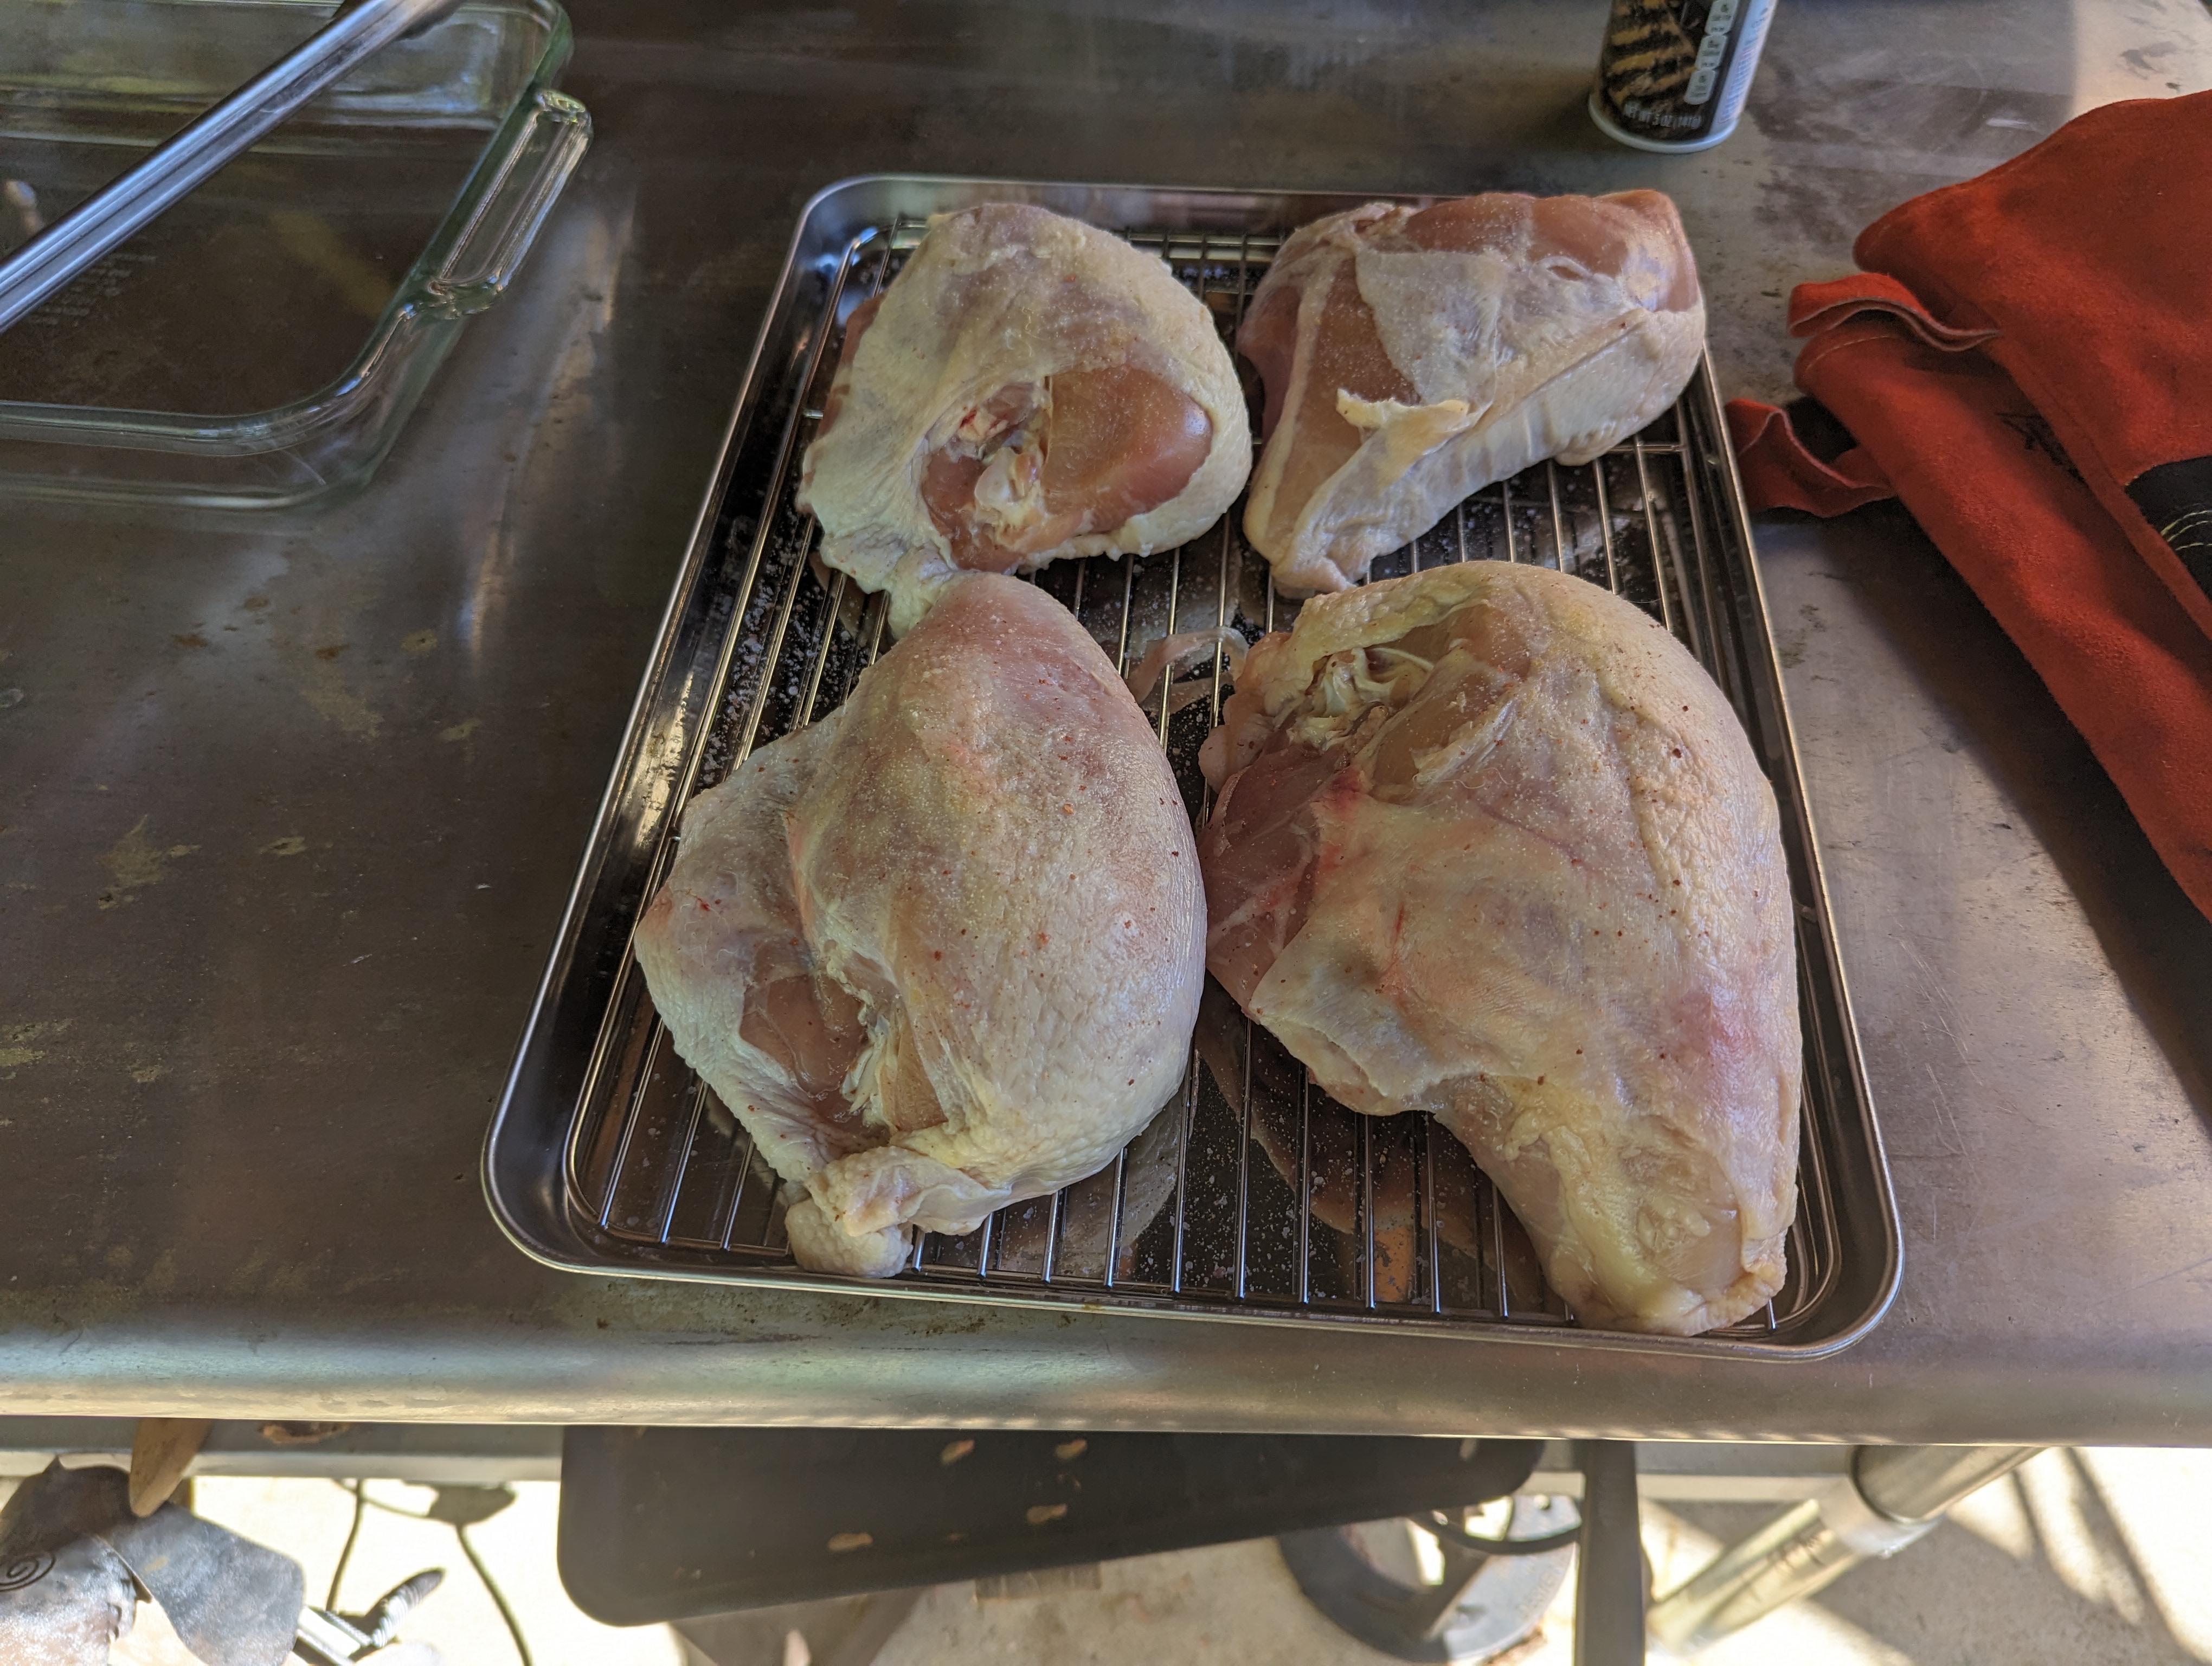
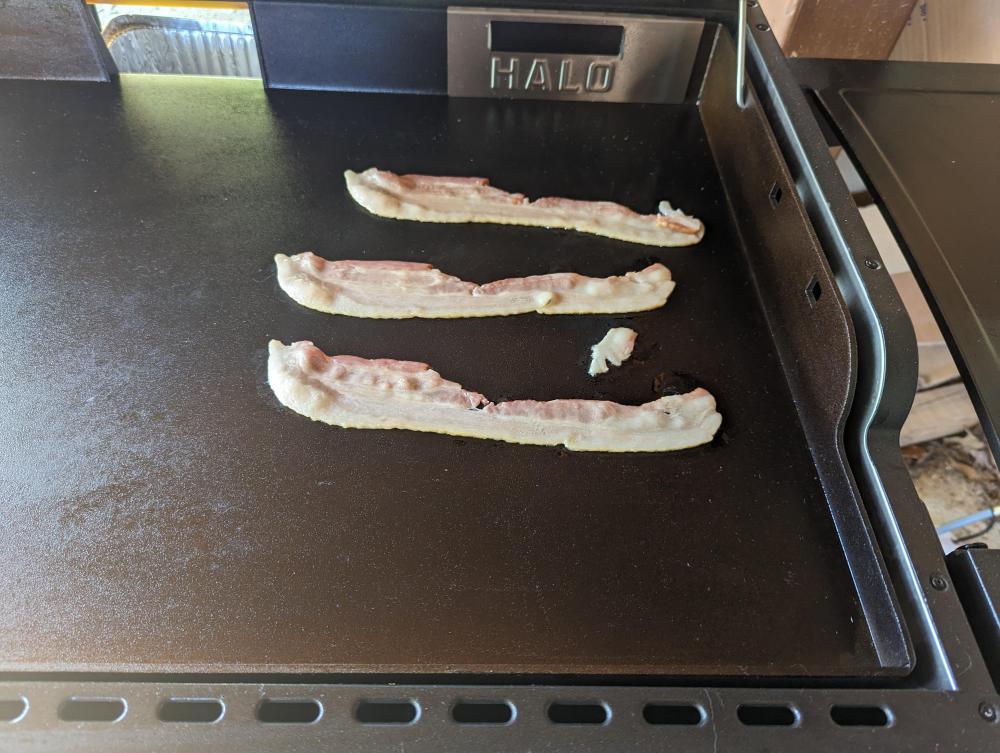
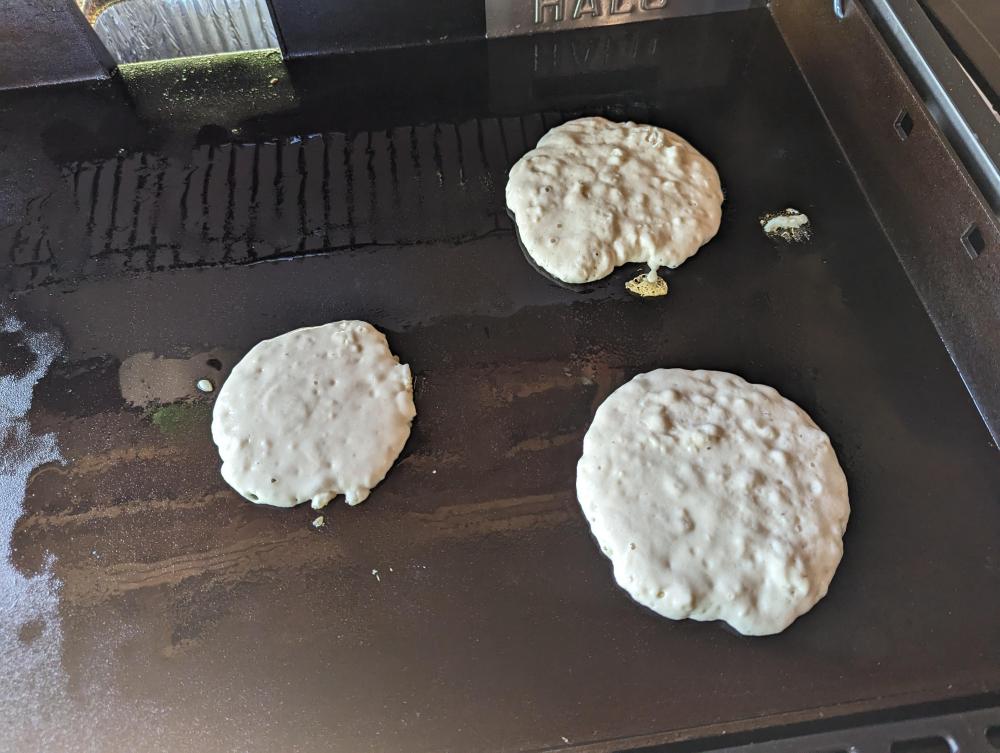
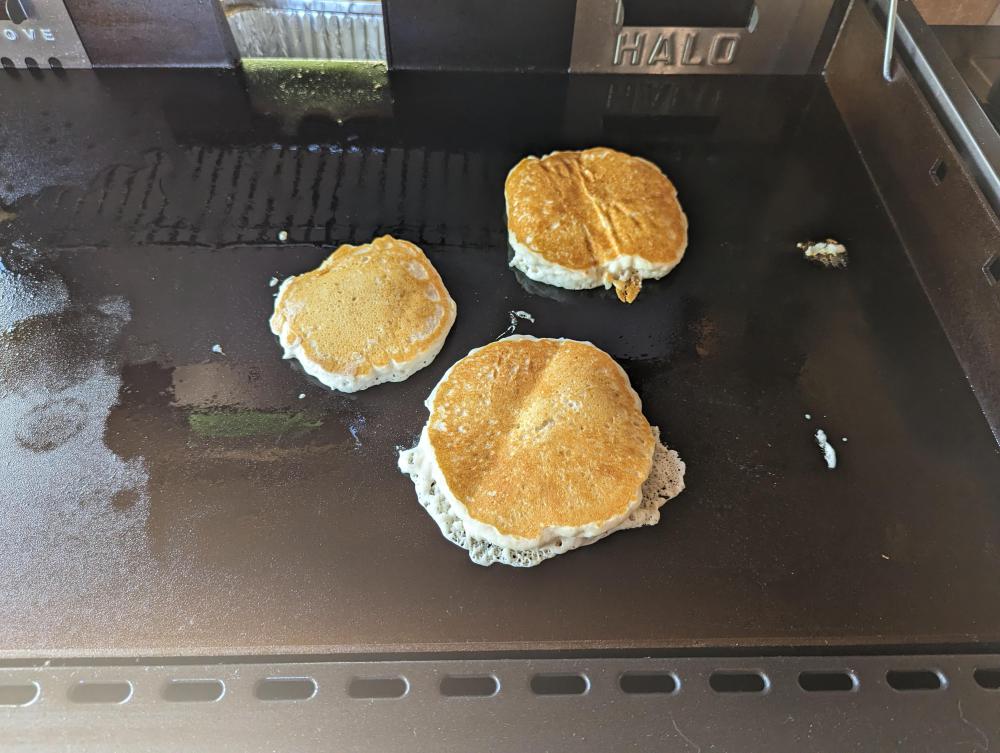
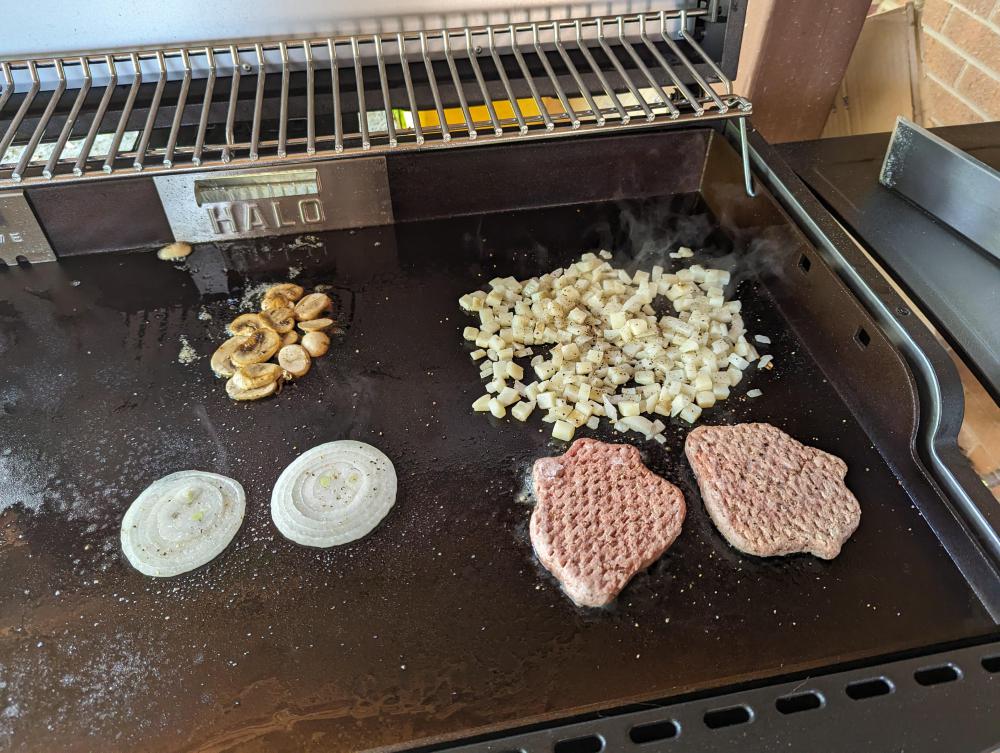
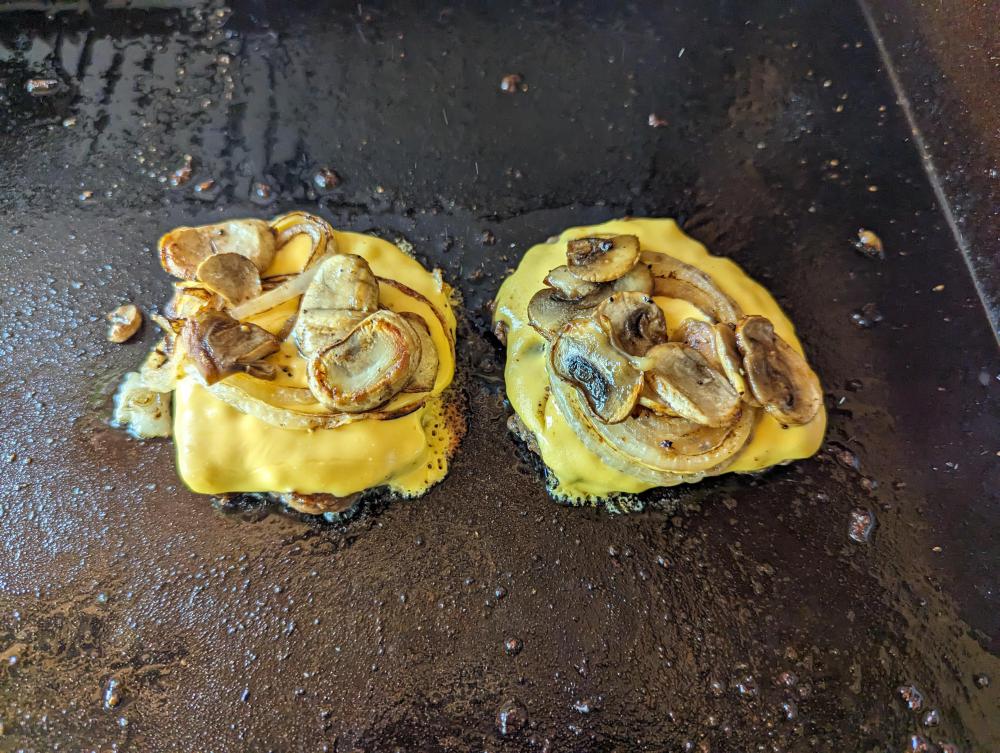
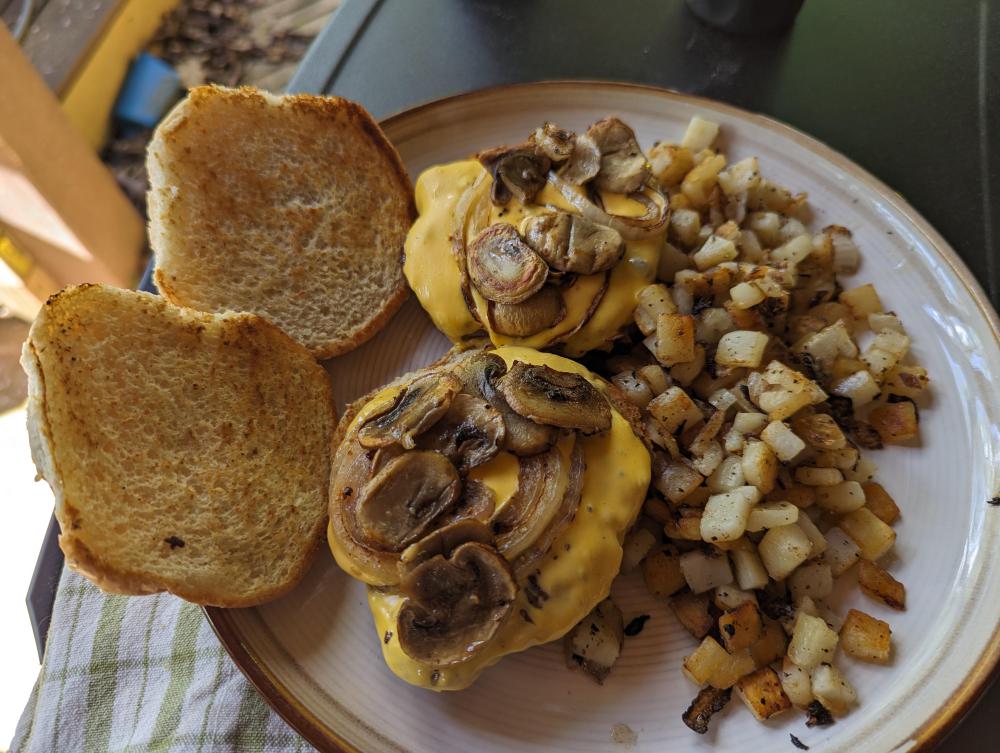
In addition to the multi-zone cooking Tony mentioned, all that room is very nice. The pancake cook in the pics is the first time I've made pancakes and they were all still warm when I ate them. Clean up is easier too! I do have to admit that I waffled about getting one for years due to that very valid point, but I really like pancakes and have always struggled with them - I always burned the first one and I struggled with keeping the first ones warm while the latter ones cooked. I tried several large frying pans as well as a griddle plate for my gas grill. The pans didn't really help with the "keep warm" issue and the grill griddle plate was a pain for grease management. I've always struggled with not playing with my food while it's cooking and having several things going on the griddle at the same let's me play with one thing that needs constant attention while leaving stuff that needs to be undisturbed while cooking alone. (I think that's also a reason I like cooking on the big Santa Maria grill - I can play with the fire instead of the food). I'm having a blast cooking on this thing!
-
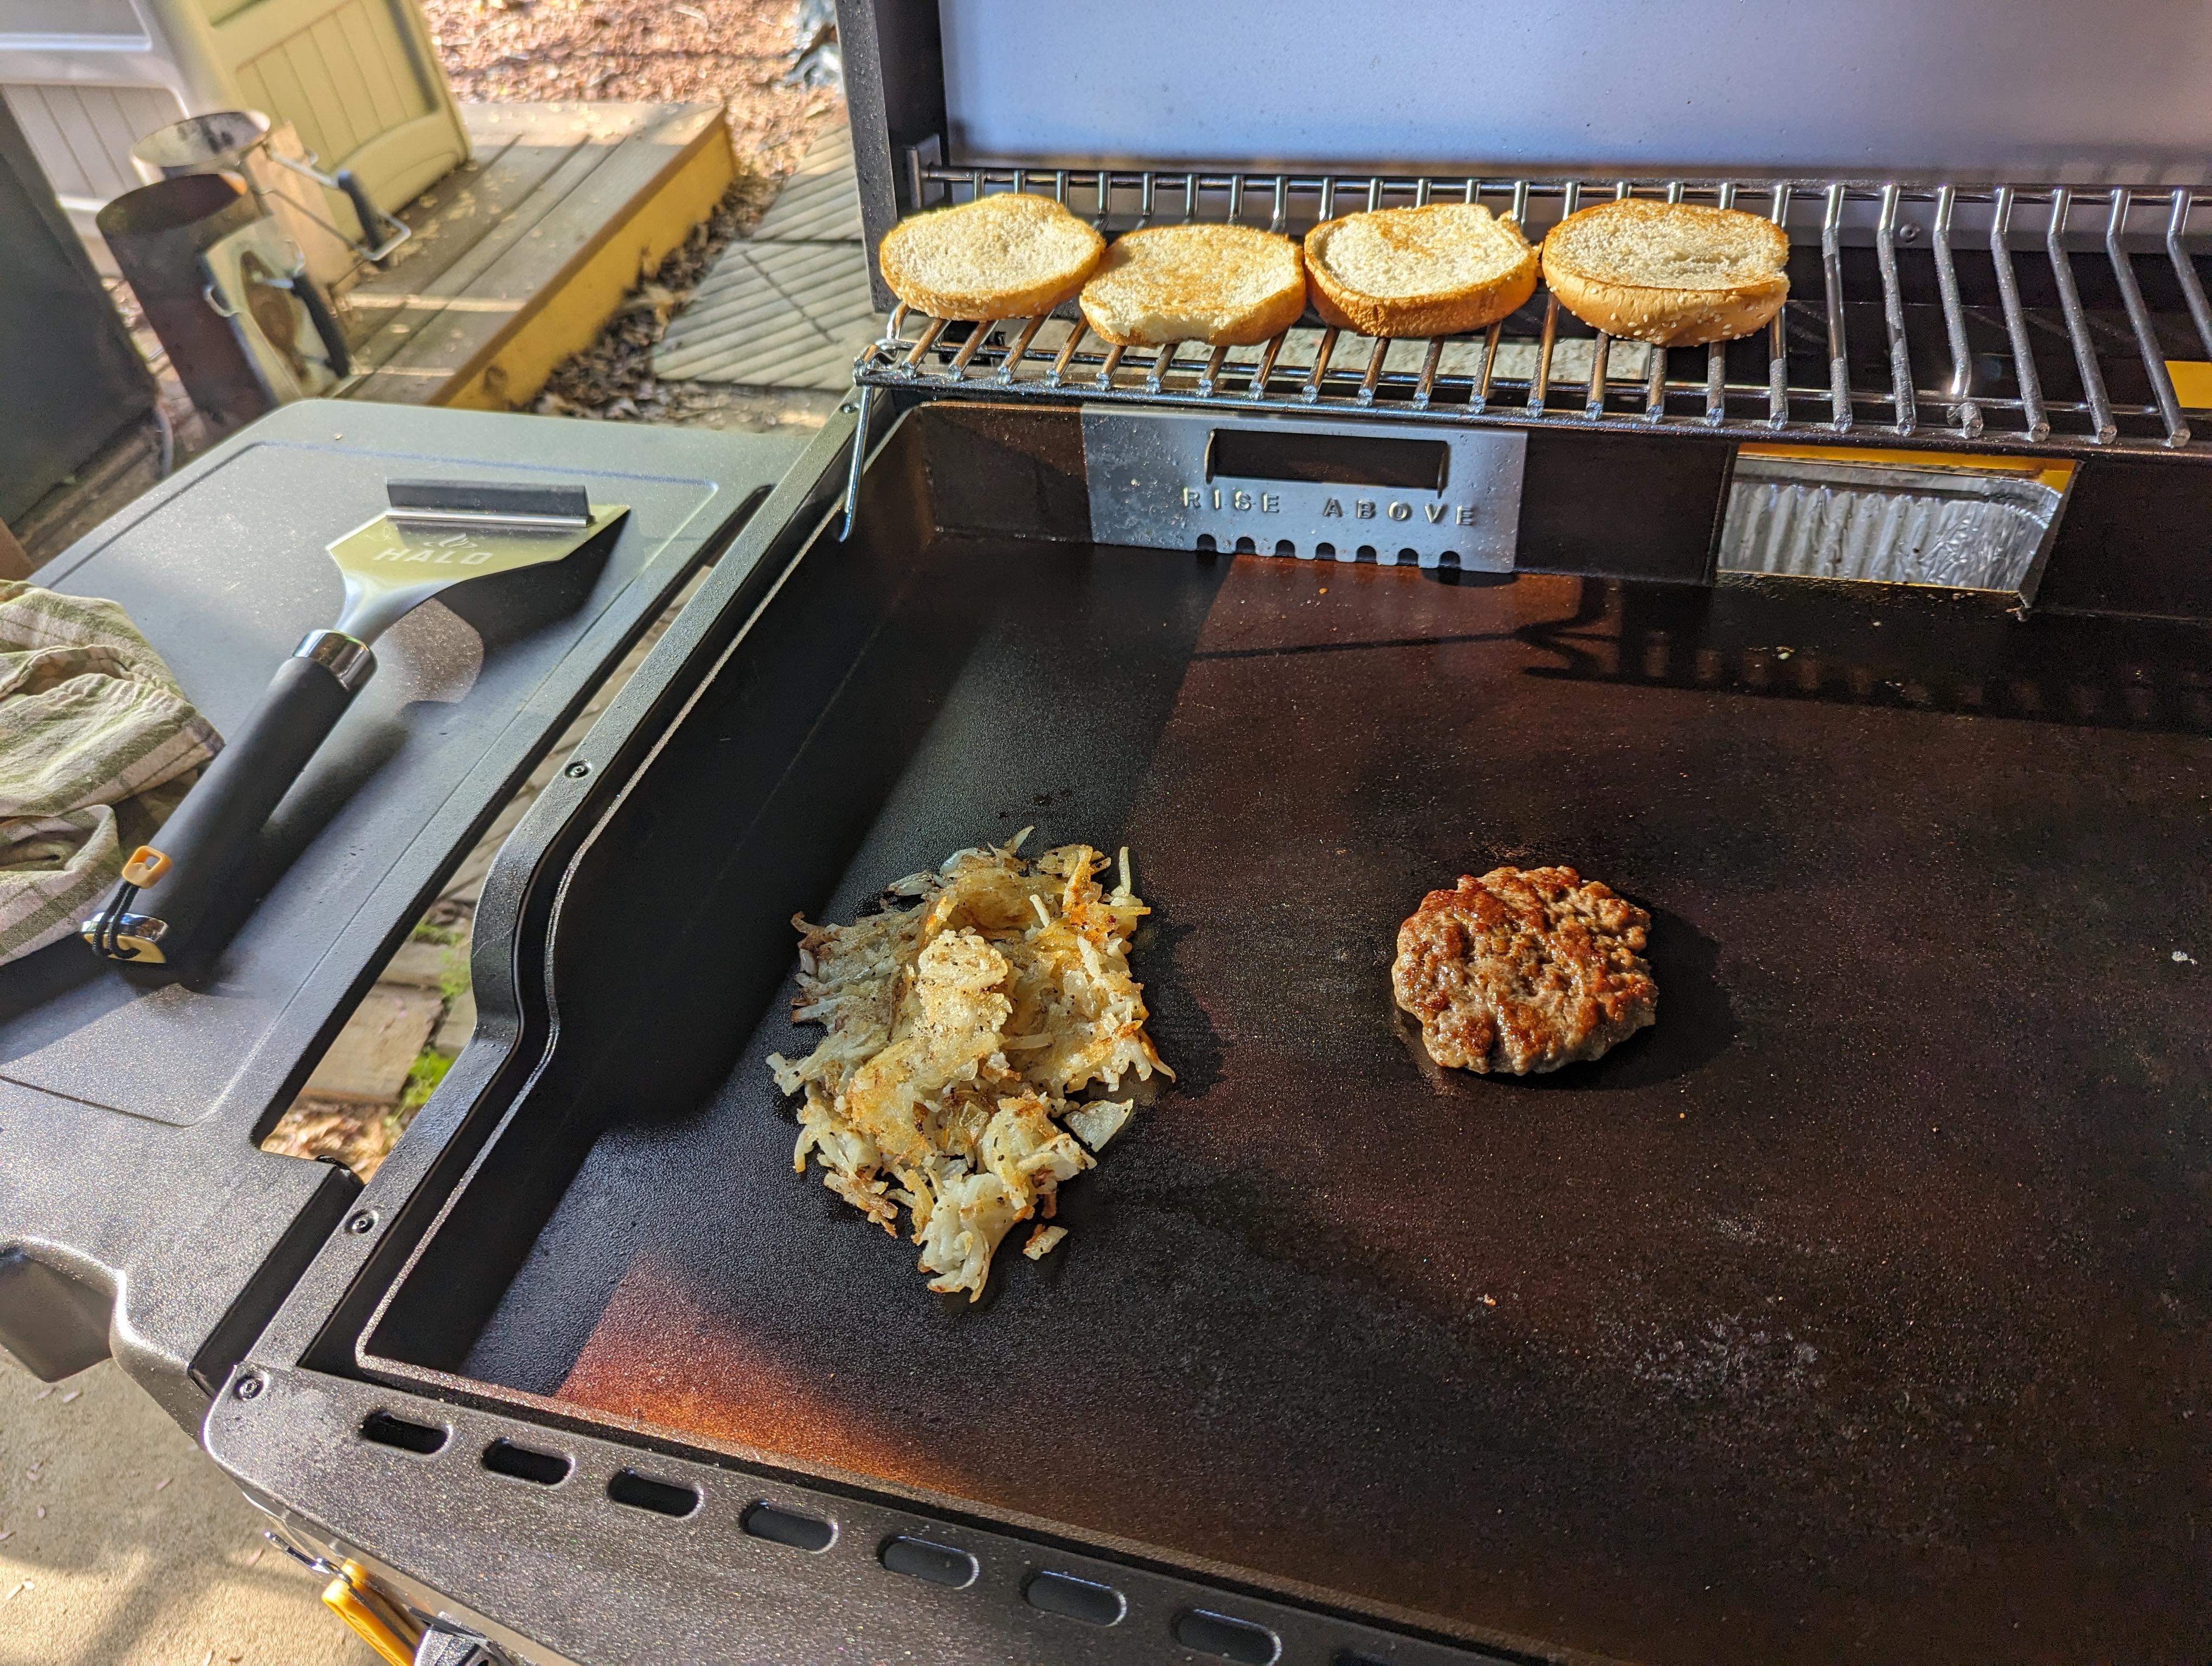
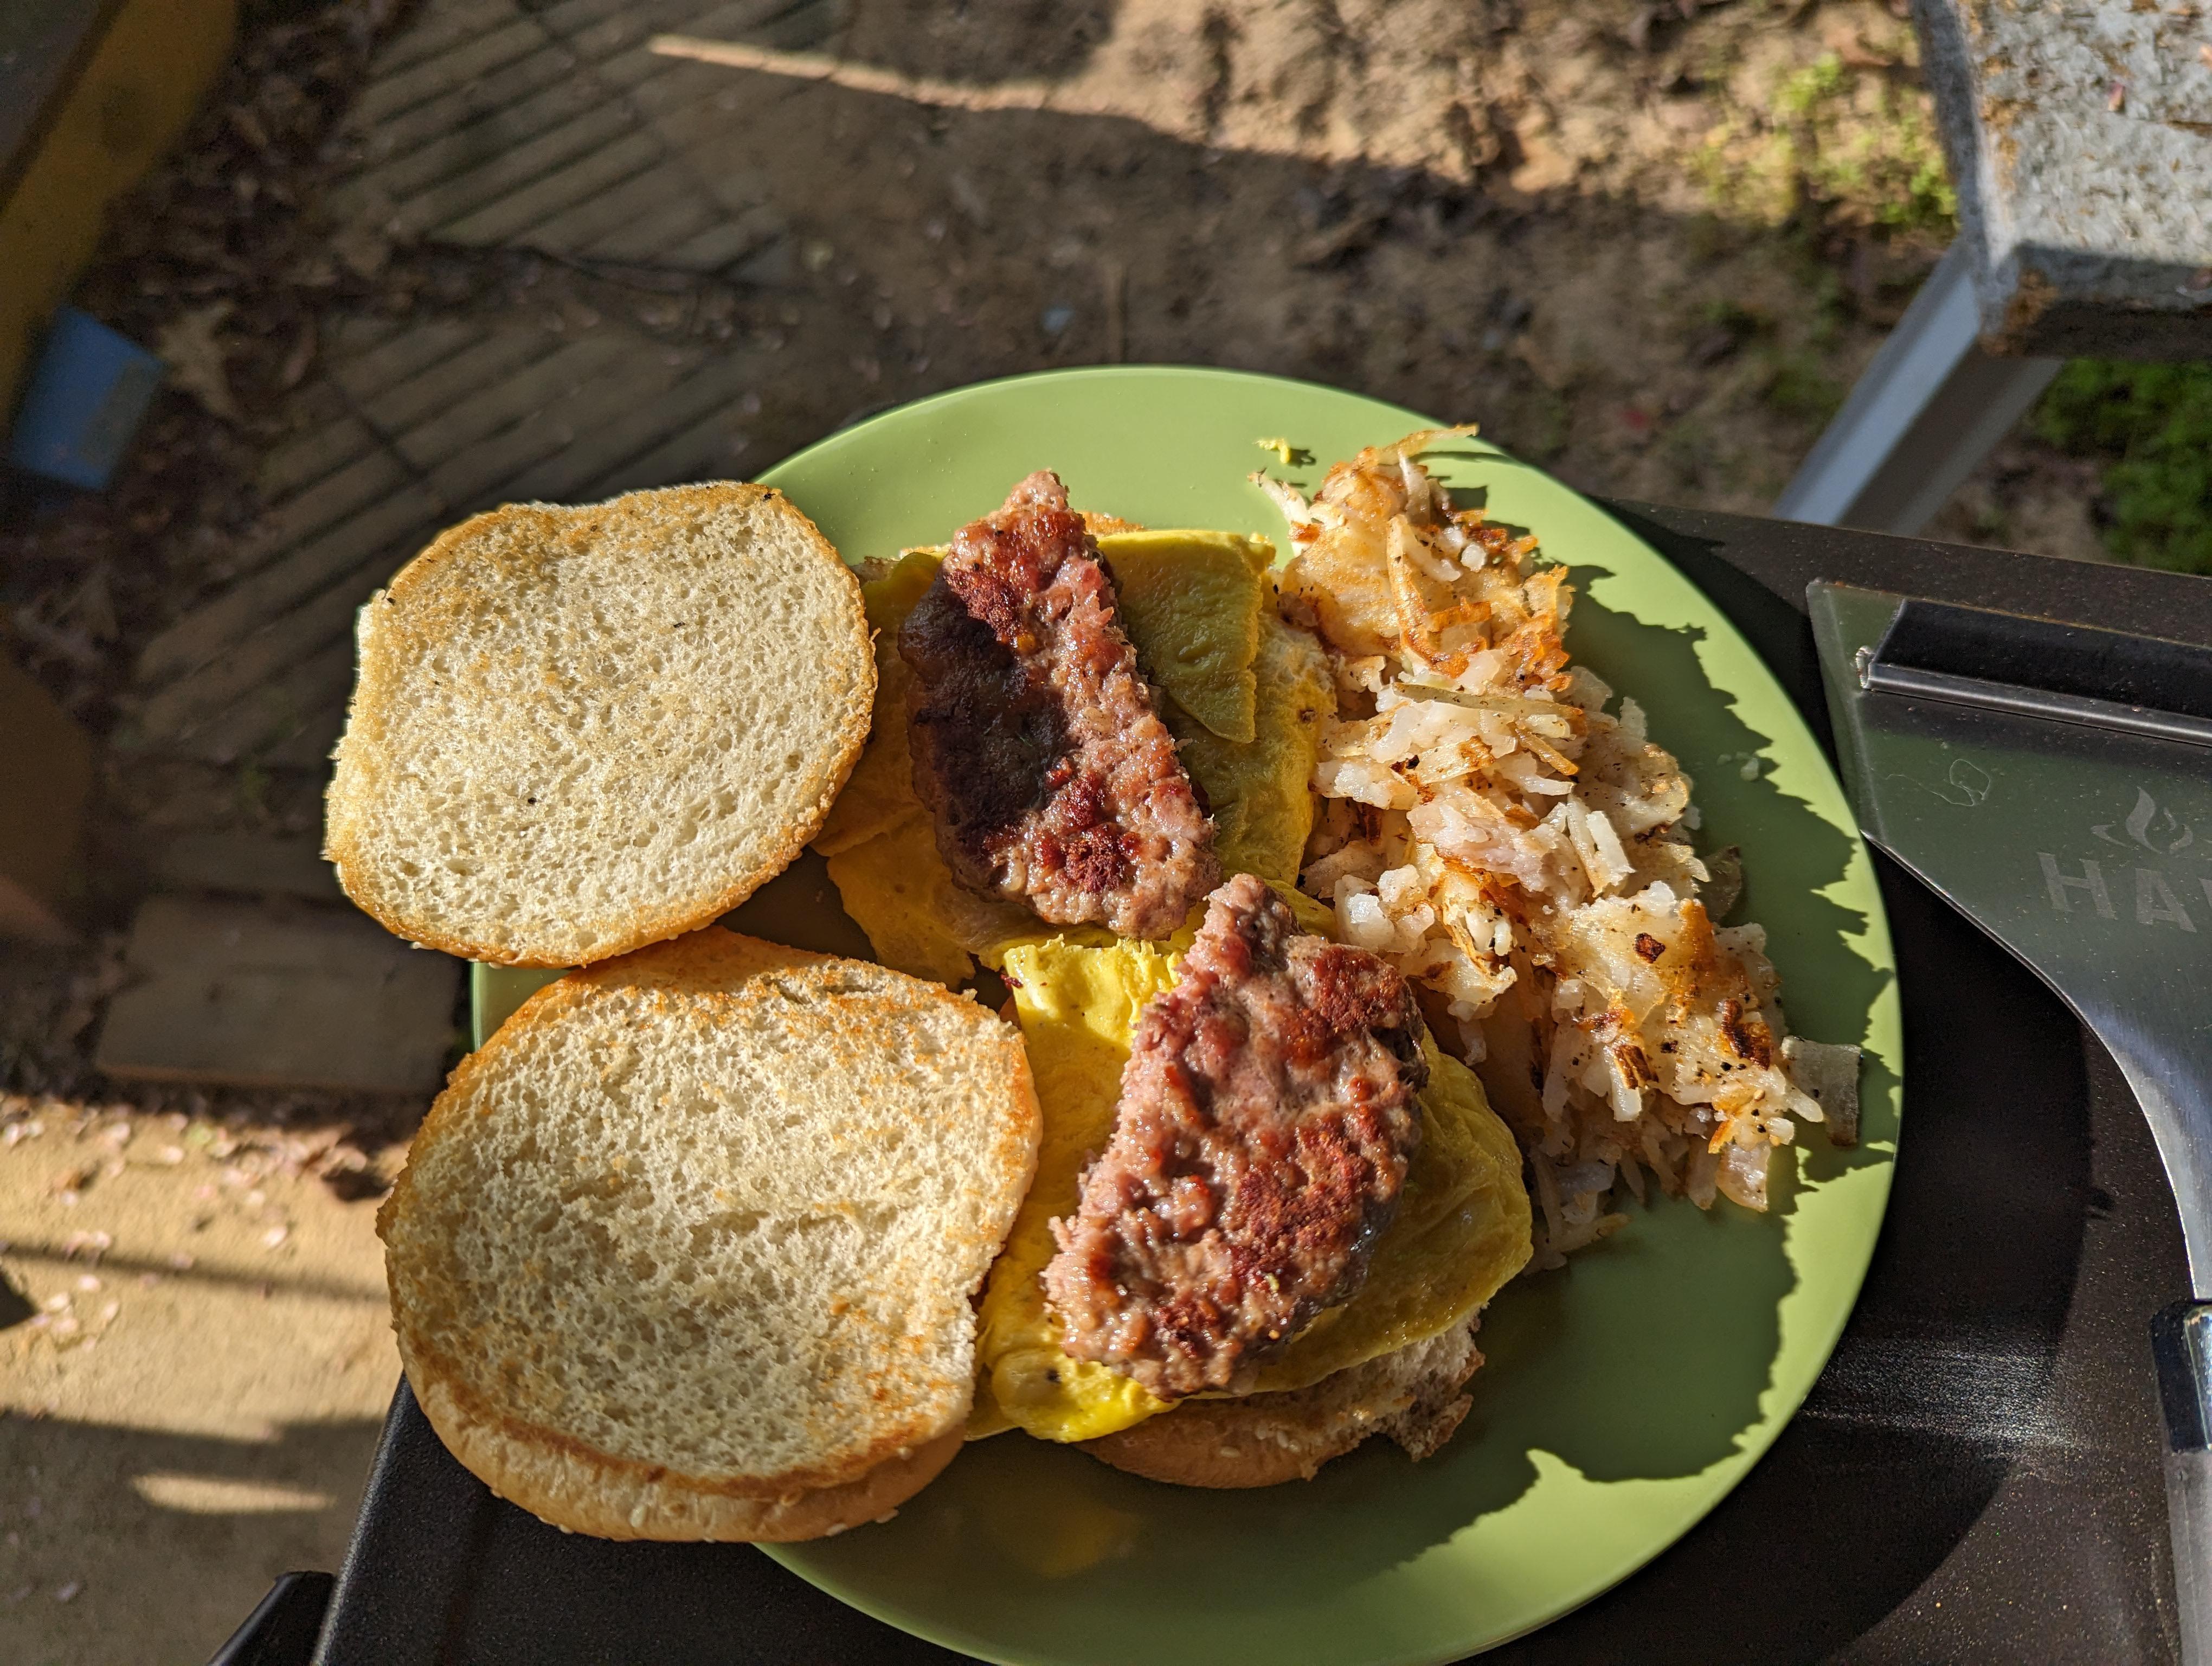
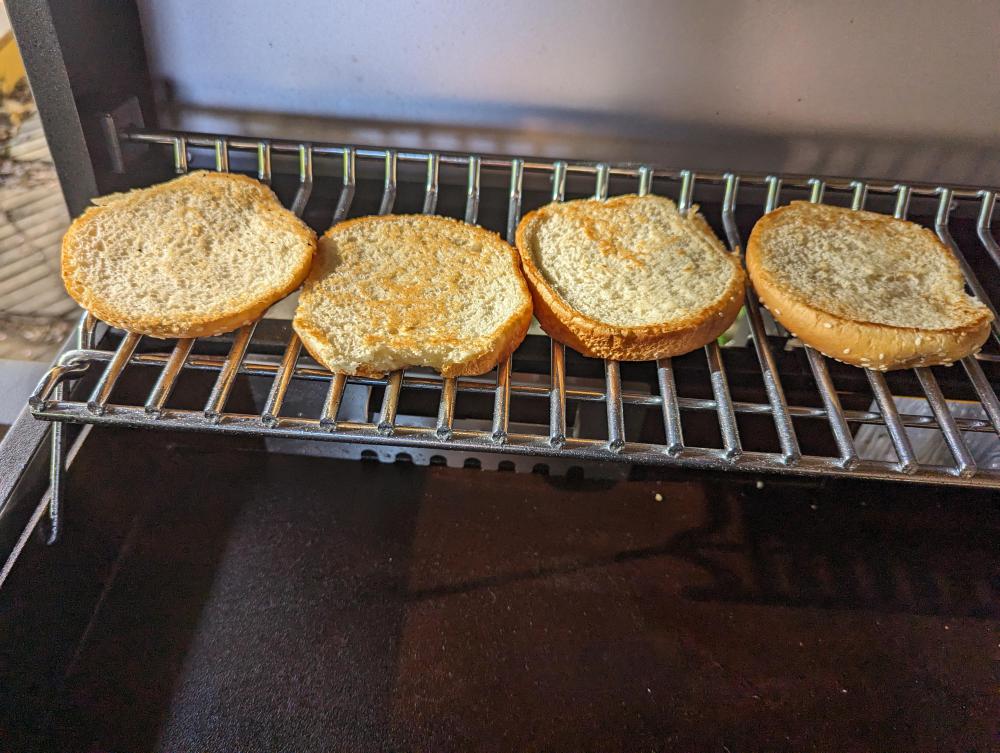
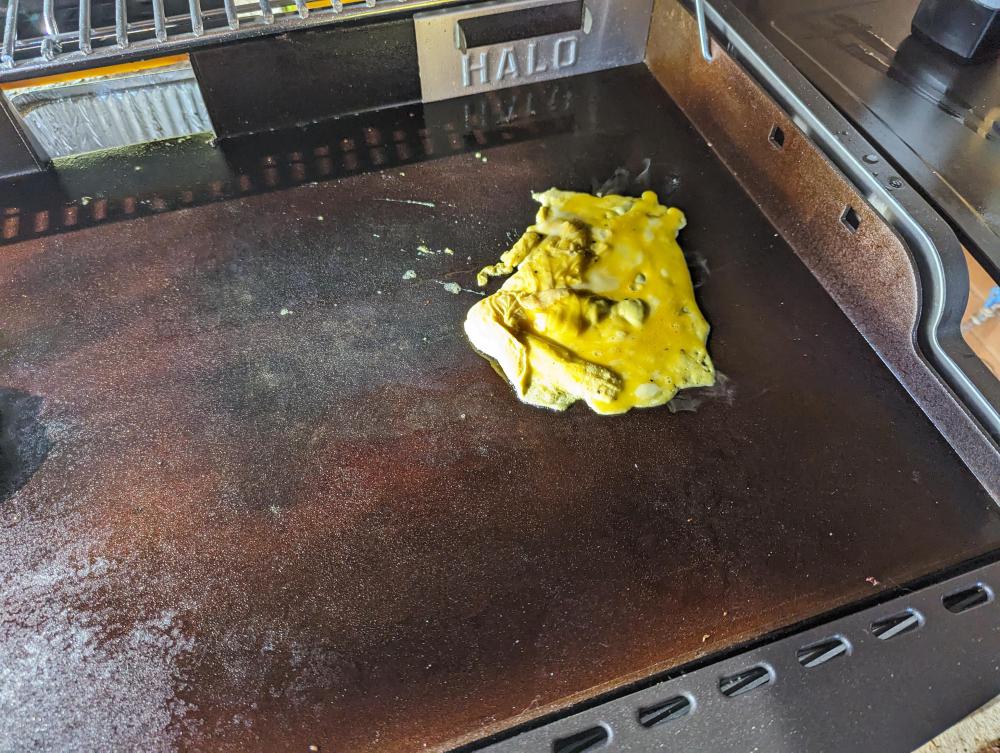
So I gotta griddle - a Halo 4b converted to natural gas using their conversion kit. This is a really different type of cooking for me and I'm enjoying it a lot. Still learning and doing small cooks - it's good training in case I need to get a job at the Waffle House.


-
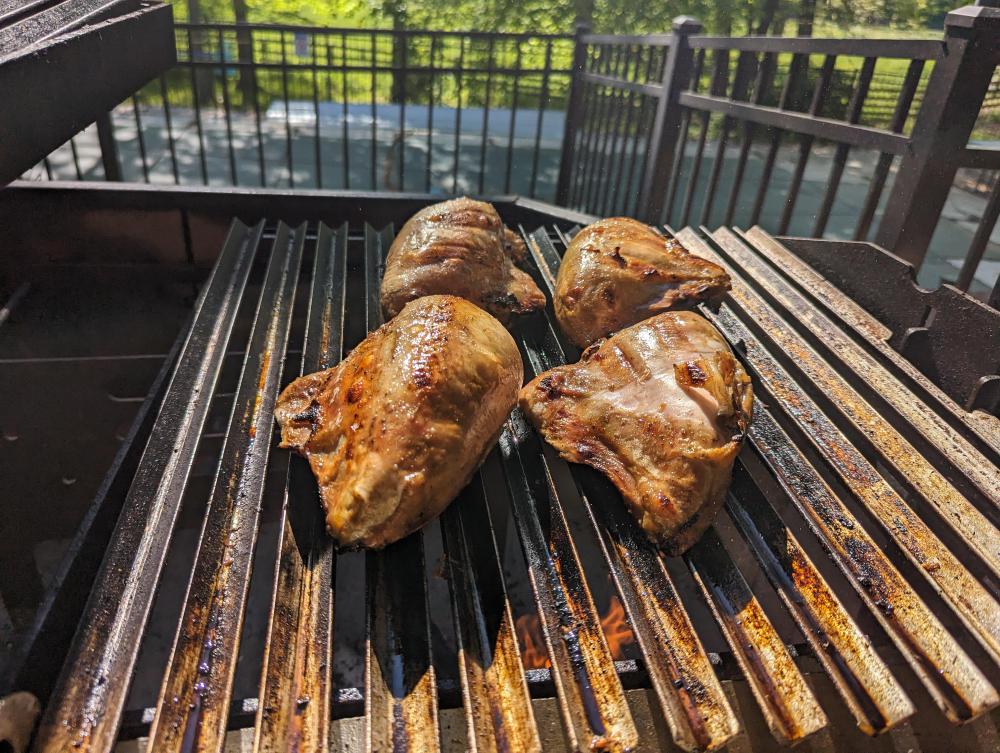
A relatively small cook on the big grill. PXL_20240429_203858075.TS.mp4

-
I just had my Ha!o 4b delivered last week and converted it to natural gas last Thursday - I've had my Fontana pizza oven for several years now. Looks like we're about synced up!