


wilburpan
-
Posts
781 -
Joined
-
Last visited
-
Days Won
28
Content Type
Profiles
Forums
Events
Posts posted by wilburpan
-
-
AWESOME !!!!!! I finally rubbed off on you!!! Look at you go
I need details same colour or we mix and matching???
This is great....
Wilbur you are on deck for your second!!!!
It’s the circle of life — Bosco is now trying to talk me into getting a KK!


I guess it’s true that what goes around comes around.
-
 1
1
-
-
Very cool. But this may be cooler.

-
1
-
-
Very nice!
-
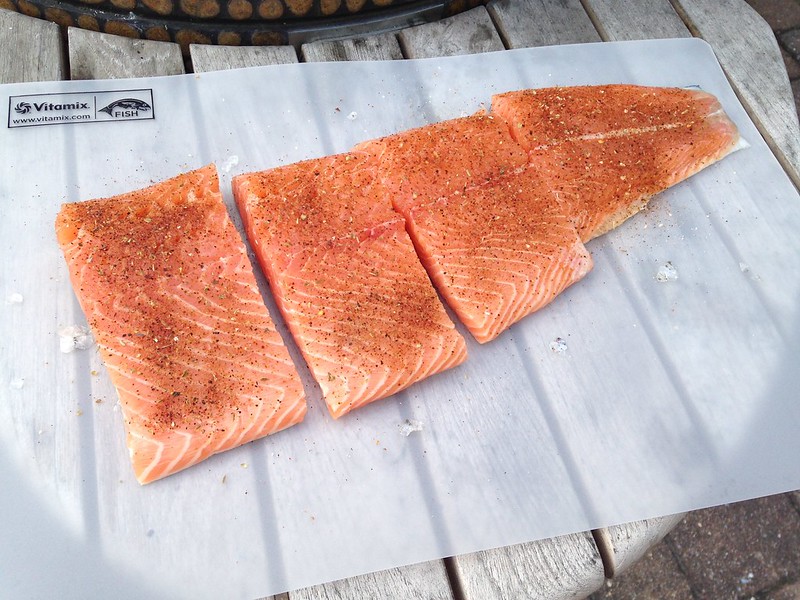
Here’s the salmon that we had for dinner last night.
Sprinkled with my go to all purpose rub: equal parts salt, pepper, cayenne, and oregano.
Onto Smaug they go, at 600ºF, direct.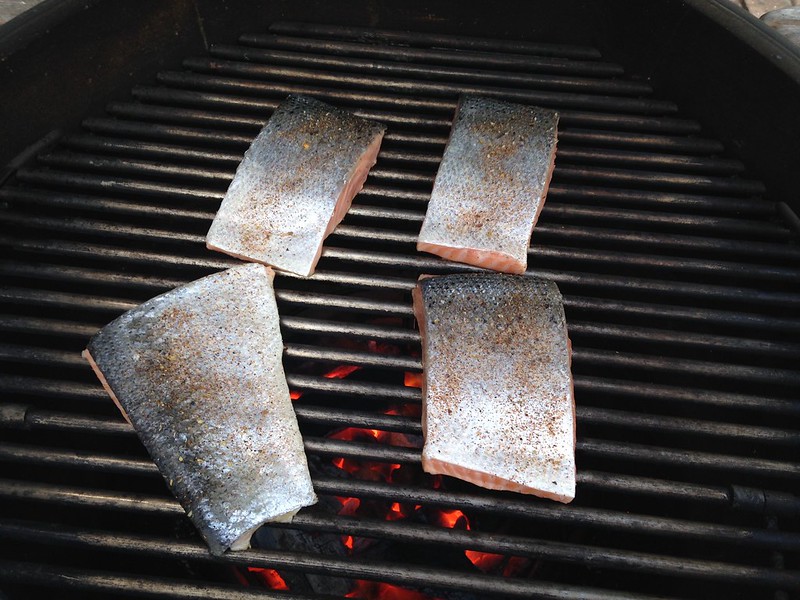
Finished product.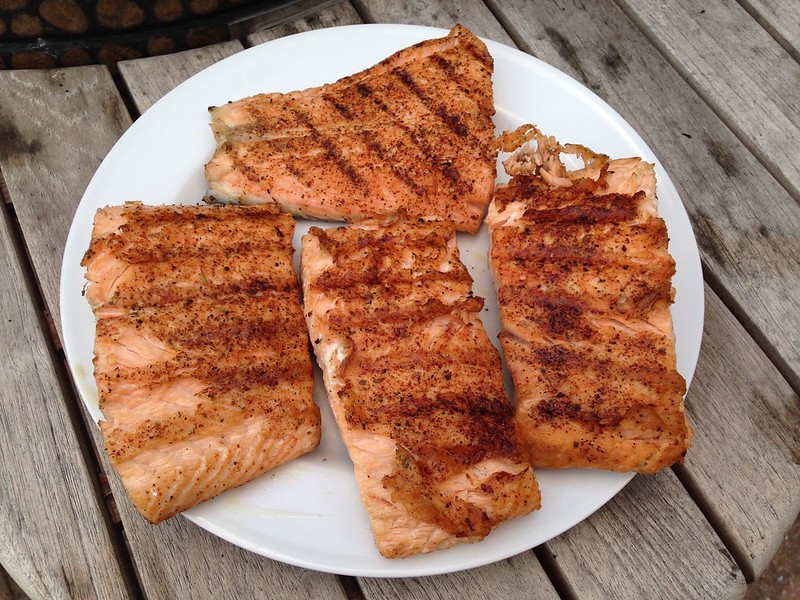
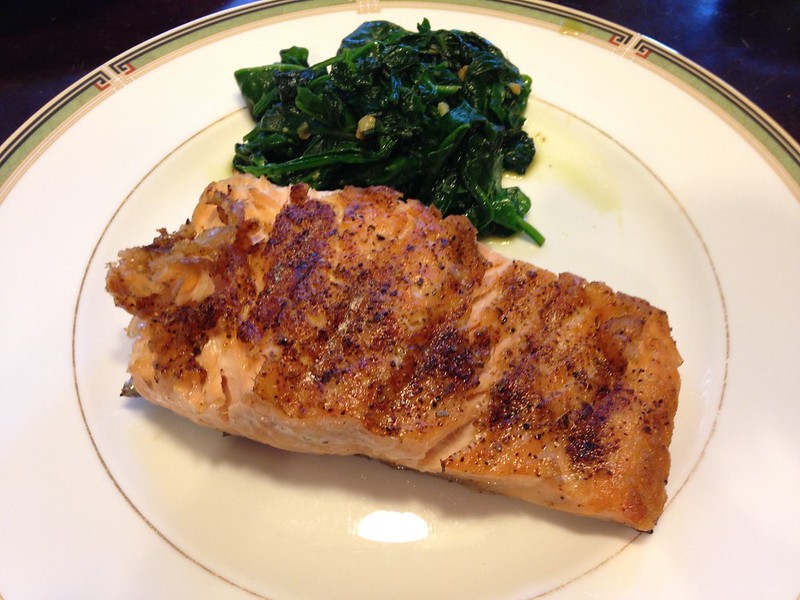
First lesson from this cook: I didn’t follow the cardinal rule of cooking fish: leave it there until it comes off the grill by itself. That’s why you can see areas on some of the pieces of salmon where the nice crispy area came off at the edges, revealing the meat underneath. Bad chef.
Second lesson: I’ve often said that having a kamado grill is like having a charcoal grill that’s as efficient as a gas grill. This is why. I started with a full basket of charcoal, lit it over a fairly wide area, and had the lid open with the bottom vents fully open, with the grate off. After five minutes, I flipped over the chunks in the top layer of the charcoal a bit in order to get the top surface to give off heat, put the grate in, closed the lid and opened the top vent as high as it would go. I hit 600ºF after a total time of 13 minutes.
My old gas grill would have to heat for about that long or so before the grates were hot enough to cook salmon like this, and it never got this hot.
I’ve often read on this forum that people have a problem getting the temperature high enough in a reasonable amount of time. As much as I would love to say that the solution is to get a KK grill, I think that my approach to starting a hot fire would work for anyone.
I think that the moving the charcoal around after five minutes helps a lot, because it gets lit coals right at the top of the basket and distributes the fire more quickly than letting it burn on its own. (That’s also why I leave the grate off at first so I don’t have to maneuver a hot grate later to stir up the charcoal.) I’ve noticed in the past that if I’m going for a high temperature, and there’s large pieces of charcoal on the top that are burning only on the bottom side, the unlit portion of the charcoal is preventing heat from coming through. Flipping over those pieces did a lot to speed up the process.
I’ve noticed that when my thermometer hits 500ºF, the top surface of the charcoal will mainly be on fire, but the larger chunks will have a dark spot in the middle that isn’t actually burning. Here’s a picture from the Serious Eats website that shows what I mean.

This looks like a good charcoal fire, but it’s really not at full blast yet. You see those large pieces of charcoal in the middle that still look black? That’s charcoal that’s not burning. I think this acts as an insulator, blocking the fire underneath it, and preventing the temperature from rising higher. Turning those pieces over helps the temperature come up faster.
One last thing: I know that BBQ is all about patience, and enjoying the process. But as long as folks keep talking about keeping a gas grill around for quick cooks, I’m going to keep making the point that starting a charcoal fire for high temp direct grilling can be pretty quick with a kamado grill. Using this method, I’ve consistently been able to hit these temps in 15 minutes, tops. And as I mentioned before, that’s about as long as I would let my old gas grill warm up to get the grates hot before grilling steaks or burgers. -
How do y'all think canned air would work on the duck?
I had spent last night looking into Whip-its and canned air, and then I was reminded that one way of doing this was to use a bicycle pump. I know what I’ll be doing the next time I make duck. Using a bike pump should also avoid the water/oil nastiness from using a compressor.
-
I'm excited to try Sijiminfu. Over the last 12 years in China I've tried most places; the big ones like Da Dong and Quan Ju De as well as many small independent ones. Previous favorites include a small family run place in Nanjing (yep, I know: my favorite Beijing duck is in Nanjing, but hey, They've got great ducks there!)
I live in Shanghai but have a Beijing trip next month and I'll put this on the top of my list as I LOVE Beijing duck!
I hope you like Sijiminfu half as much as I did. I know that they have 3-4 locations in Beijing. The one I went to was located near the north end of the Wangfujing mall.
They had a few different ways of preparing Peking duck, each more elaborate than the last. Go for the most expensive option. They also had a stir fried duck liver dish on the menu that was amazing. Based on my experience, I think it’s impossible to order a bad dish there.
-
If you can hold temps with a KJ, you’ll be able to do it with a KK grill. Put it this way: before I got Smaug, I had zero experience with kamado grills or low and slow cooking. For my very first low and slow cook I was able to hold at 225ºF without any problem. So if I can do it, so can you.
Some of this has been said above, but just to reiterate, for low temperatures, get used to the idea that the top and bottom vents can be open by what seems like a ridiculously small amount compared to what I see used for a KJ grill. I think that’s a reflection of how much more efficient a KK grill is compared to the ceramic grills. When I’m doing low and slows, I’ll have the top vent open by a quarter turn or less, and the bottom vent is open only 1/16†or so. When I’m starting the warmup process, the vents will be open more than that, but that’s the final position of the vents as I get close to my target temperature.
With your dual dial system, having the holes with their fixed sizes will help. But don’t be surprised if the hole you use looks like it’s too small to hold a given temperature compared to the vent opening on a KJ grill. It’s probably not.
-
So, you are in for an amazing ride once you get yours! Don't dally too long. The only regret any KK owner ever has is "Why did I wait so long to get one???"
So true. Welcome to the KK forum, Bowser!
-
Great cook and really nice writeup.
I've seen the air compressor video before. I think my only concern is most air compressors have a small amount of oil in the tank and can also collect moisture in there. That in turn gets blown back out (and under the duck skin). There are filters and water collectors that can be added so nothing but clean air comes back out. You would probably have to buy these extra as most smaller compressors don't come with them.
I use to work in a scuba diving shop. We had to clean out the compressor filters/water separators on a regular basis. You definitely would not want to eat what came out of those.
What if you cleared the line before inflating the duck?
-
Awesome duck cook.. I laugh overtime you post a photo of a duck hanging in your back yard. Are you buying these ducks frozen? If so you might be able to render out more fat with the boiling water at the beginning without cooking the meat by keeping the duck frozen for this process.
No, I try to stick with fresh duck whenever possible. There’s something about frozen duck that affects how the meat turns out in my hands, even after I let it thaw. Plus, it’s far easier to pick up a fresh duck and then start prepping it, as opposed to planning out the defrosting time, which is even more unpredictable than the time needed to cook a whole brisket.
The purpose of the boiling water is really to tighten up the skin, and that’s it. The rendering of the fat is primarily from the cooking process itself. With a frozen duck, the meat may not cook, but I would have to imagine that the skin would be affected by the increased contact time with the boiling water.
-
This month has been a great one for vacation, but not so good for using Smaug. The first week of August we were away on vacation. The second week I was slammed at work because my colleagues were away on vacation. Last week I was at the Hole in the Wall Gang Camp, a camp for kids with cancer and blood diseases. I’m a pediatric oncologist, and I was there doing the volunteer doctor thing for the kids at camp. It’s a ton of fun, I’m happy to spend a week up there each summer, and my family gets to go with me. Our sons got to participate in the camp activities while I was working, which means my wife got to hang out while I was working in the infirmary.
However, being away at camp means eating camp food (burgers, hotdogs, chicken nuggets) for meals, and when we got back yesterday, I was CRAVING something Chinese. So I decided to make a quick and dirty Peking duck for our first meal at home in a week, and my first real cook on Smaug since the first weekend of August.
I picked up a duck from the local Chinese grocery store. They sell ducks with the head and feet still on, which is how you can tell that the duck is fresh, not frozen. The first step was to force air under the skin. I used a marinade injector with the blunt tip to do this as best as I could.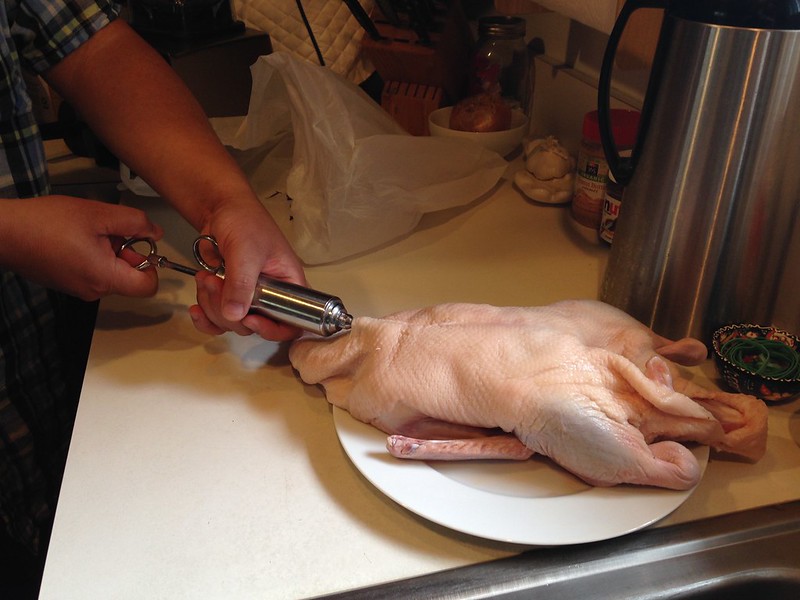
I’ve seen videos where they use an air compressor for this task. Every time I try this with a duck, I get one step closer to getting an air compressor.
Next, I boiled a pot of water, and submerged the duck for about 30 seconds. Having a duck with the head on is good, because it makes a nice handle.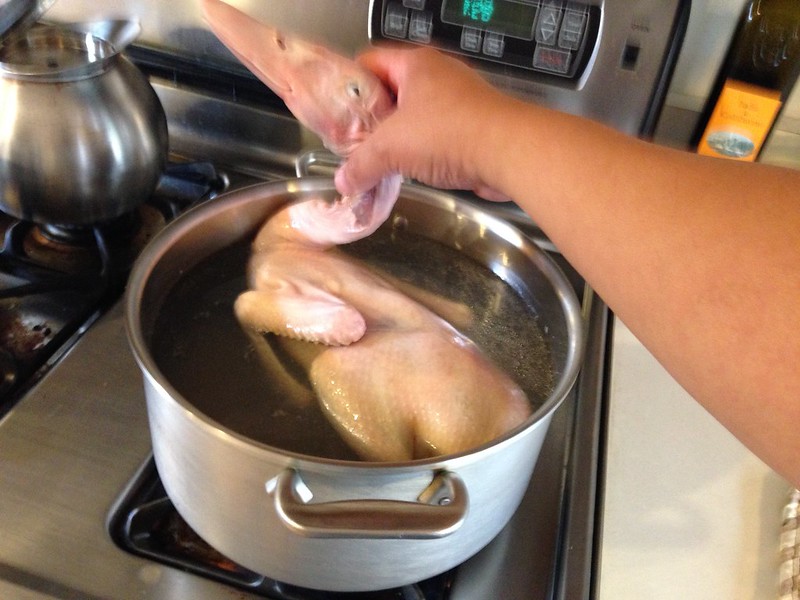
The boiling water shrinks the skin so that it tightens up. This helps get a crispy skin.
I put a mixture of 2 Tbsp. five spice powder and 1 Tbsp. salt into the cavity.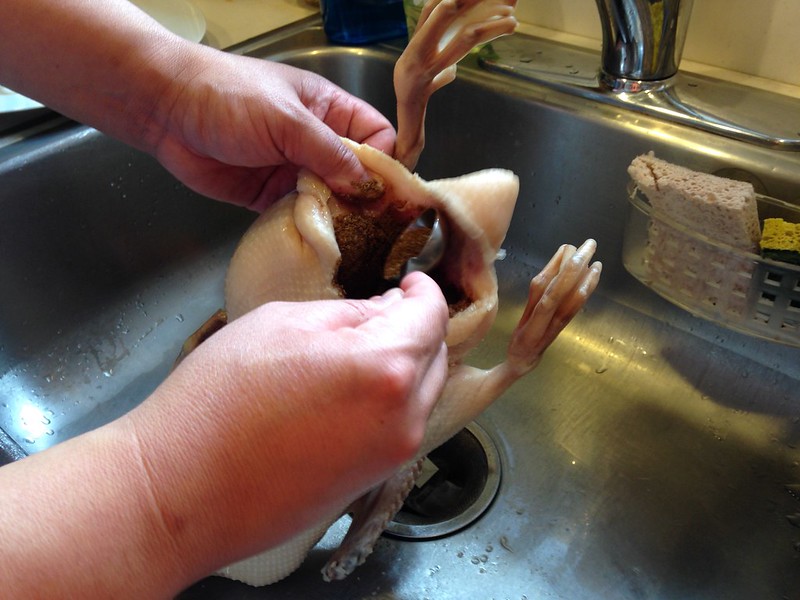
And on the outside I drizzled a mixture of 2 Tbsp. honey and 1 cup hot water to glaze the skin.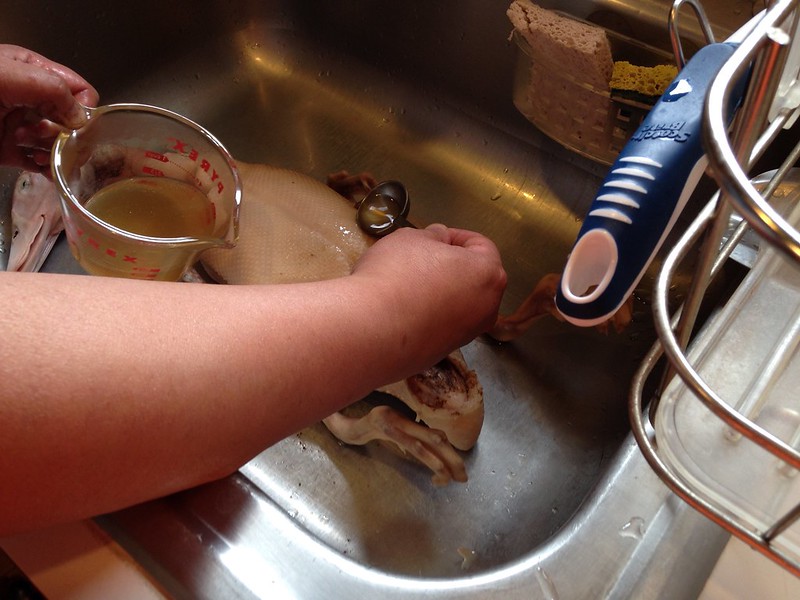
Then I hung the duck outside to air dry as much as I could. Again, having the head on comes in handy here.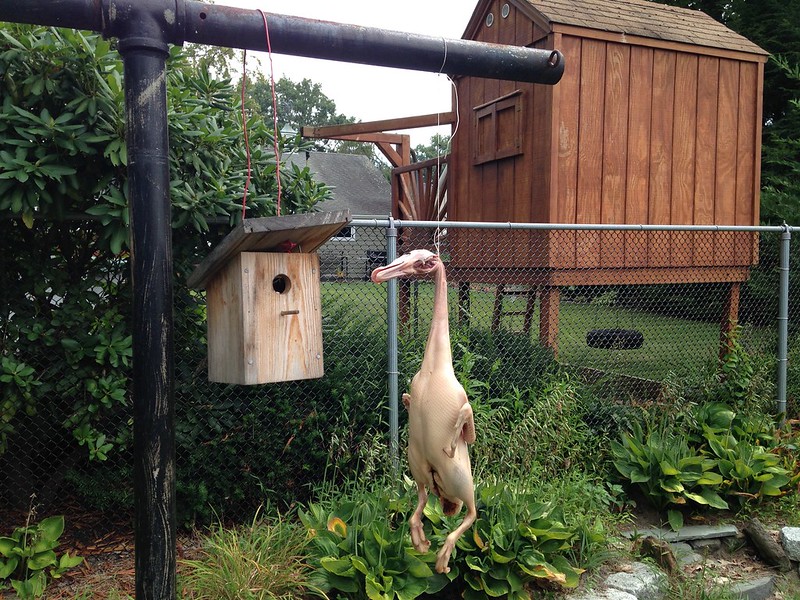
This was the first quick and dirty part of this cook. Ideally, you let the duck air dry for 24 hours, or 8 hours if it’s windy. The idea is to dry out the skin so that it’s slightly leathery in consistency, which also leads to a crispy skin. Today I let it hang for about three hours.
Once I was done letting the duck air dry as much as I could, I took off the head and feet, since they wouldn’t be needed for the roasting part.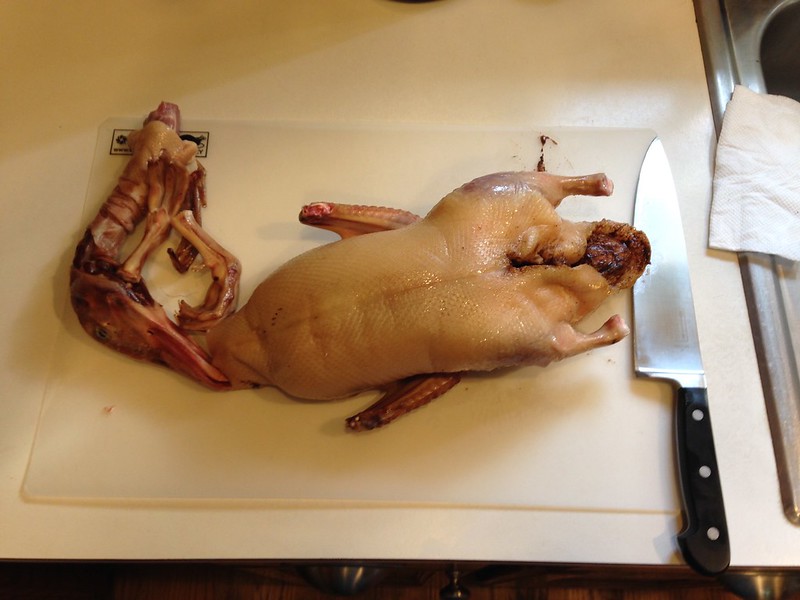
I placed the duck in the rotisserie basket with the 6†reducer.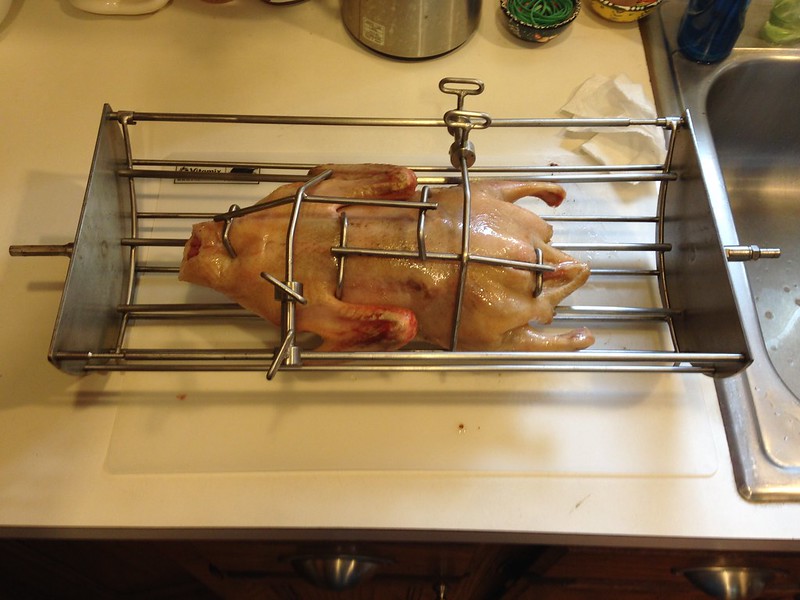
And put it into Smaug. You can’t see the charcoal basket, but I have the splitter in, oriented so that the splitter runs left to right, and the bottom half of the basket has charcoal in it. I didn’t use a deflector for this cook, so the duck gets direct exposure to heat half the time.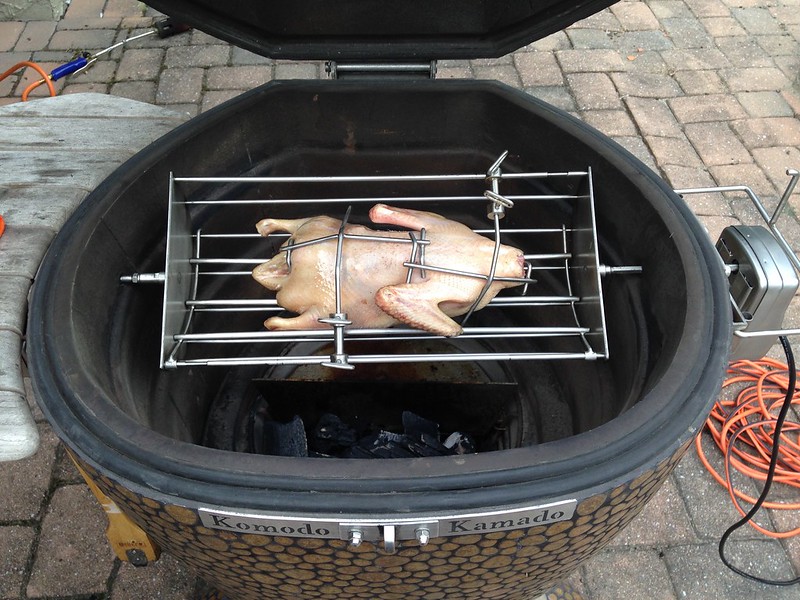
This is how it finished up. The dome thermometer read 300ºF for most of the cook, and and the end the temperature rose to 350ºF. I pulled the duck off when I hit an IT of 170ºF in the thigh meat. Total cooking time was about 50 minutes.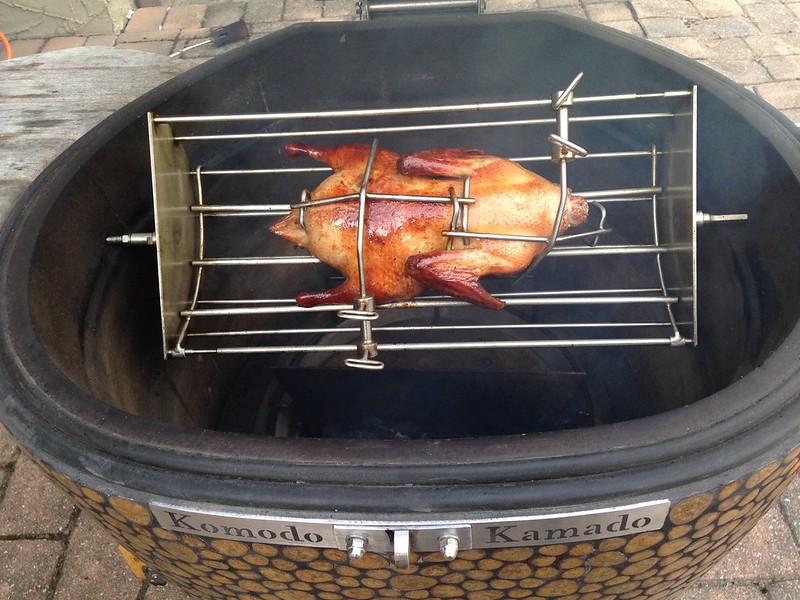
Here’s the glamour shot of the whole duck on a platter.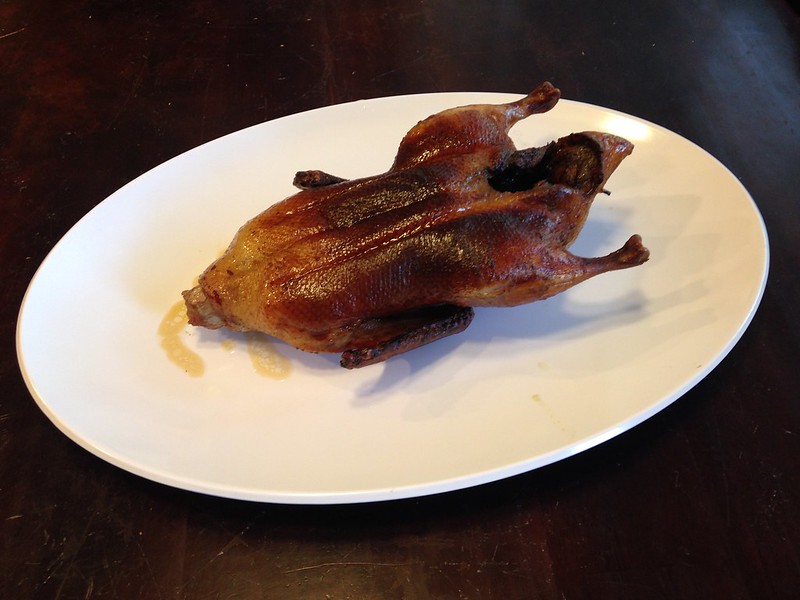
Sliced breast meat.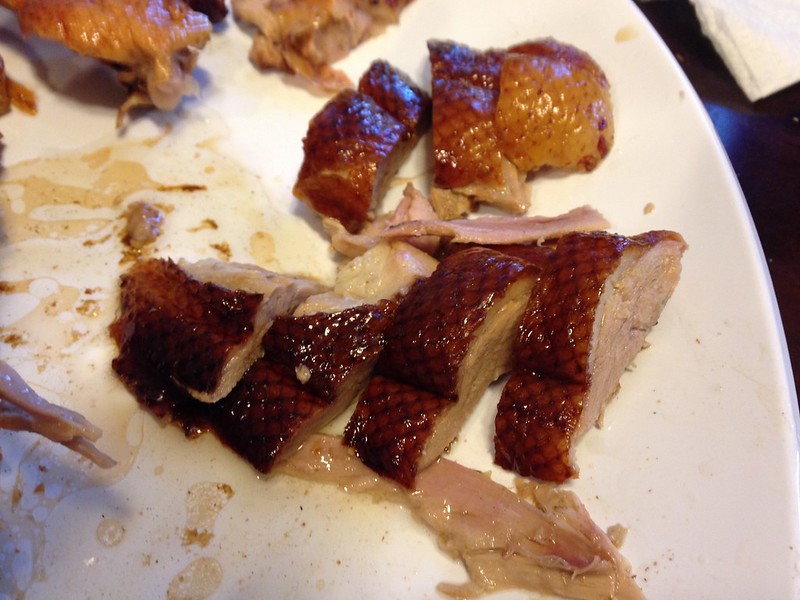
Here’s how I assembled the Peking duck for serving. Inside a thin pancake goes duck meat and skin, some green onions, and a sauce made from 1 Tbsp. hoisin sauce, slightly less than 1 Tbsp. sesame oil, and slightly less than 1 Tbsp. water. Tradition also calls for some julienned cucumber, but we didn’t have any.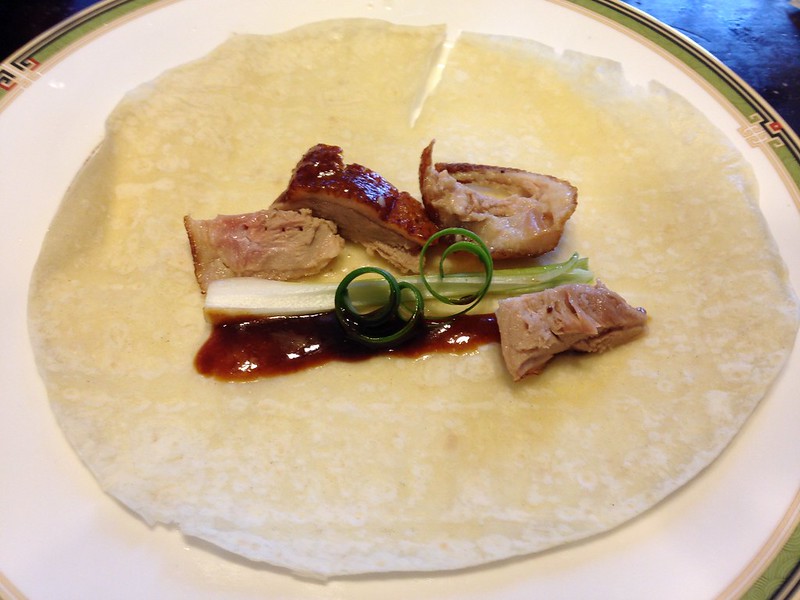
And the finished Peking duck wrap, with some stir-fried bok choy.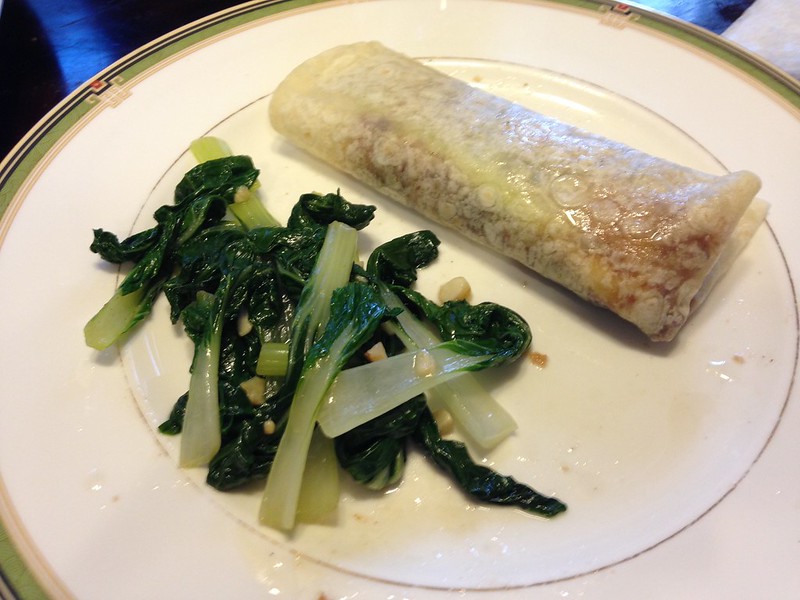
Here’s one last thing I tried. Last year and two years before that, we traveled through China. On both trips we spent some time in Beijing, where there’s a restaurant called Sijiminfu that’s well known for its Peking duck. But saying that Sijiminfu is well known for its Peking duck is an understatement on the order of saying that a KK grill is a decent grill. Not only is the Peking duck at Sijiminfu better than any other Peking duck that I’ve ever had, all the other dishes that I had there were amazing. Even a basic stir-fried vegetable dish with oyster sauce was better than the same dish I’ve had elsewhere. We ate there four out of the five nights that we spent in Beijing last year, and I wish we had eaten there the fifth night as well. This is the sort of restaurant that I want to eat my last meal at. It’s that good.
Anyway, besides the traditional Peking duck, Sijiminfu did some updates as to the stuff that goes into the wrap. There was this plum jam, a garlic paste, and minced pickled mushrooms that they provided for the wraps that were quite good, and that I couldn’t even begin to try to duplicate. But the one thing that I tried to duplicate was taking some duck skin (no meat here), and dipping it into some raw sugar. This is what it looks like right before I ate it.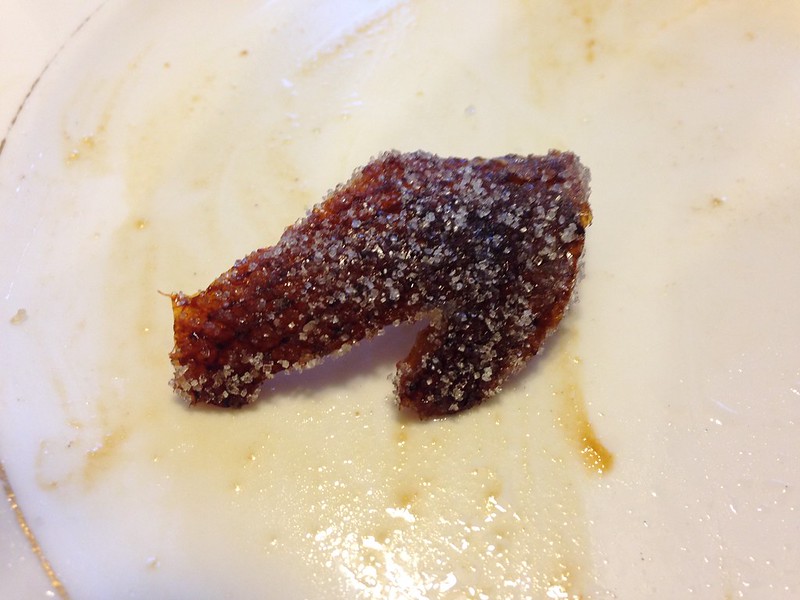
Success! This was quite close to what I remember eating last year at Sijiminfu. It was yummy. Try this some time.
I still have some room for improvement for this sort of cook. Here are some things I need to tweak.
First of all, the skin was mostly good, but there were some areas that were not as brown as I would have liked. There are several factors that could have led to this. The big one is the shortened air drying time. I don’t think there’s any good way of shortcutting this step.
Second, although the marinade injector visibly inflated the duck skin, I know this step could have been done better. Like I said, every time I cook duck I get one step closer to getting an air compressor.
Third, some of the lack of brown color could be from uneven application of the honey mixture. I need to pay more attention to this step next time.
Fourth, if/when I go the rotisserie route again, I’m going to try it without the splitter, and aim for a lower temperature to start to try to render more fat out of the duck. Compared to Sijiminfu, I got out about 80% of the fat. The remaining fat didn’t make the duck too greasy, but it’s not the same as in the big leagues.
As an aside, I was surprised that the temperature hovered at 300ºF for as long as it did. I was shooting for 350ºF on the dome thermometer. Some of that may be the fact that I’m using the splitter, but I did peek inside a couple of times to see what was happening. I think what was going on was that the duck fat hit the charcoal as it dripped away from the duck, which lowered the temperature of the fire. There was quite a lot of smoke coming out of the top vent. Once most of the duck fat had rendered, the fire got hotter, which lends support to my theory that the dripping fat was cooling off the fire.
Finally, I’ve cooked duck in Smaug before on the main grate with the heat deflector. I think that the rotisserie overall gives me a better result, but I’m going to try both methods for a while before deciding.-
1
-
-
Bosco, you’re such a tease. Just imagine how good your cook posts will be once your twin KK grills arrive.
-
That’s a great little grill you have. It reminds me of a cast iron hibachi grill I had when I was in college. It was probably the exact same size, and the grates were also cast iron. We had some great little picnics with that grill.
-
I’ll play devils advocate here. What’s the advantage of putting a rack of ribs on a rotisserie? It’s not like there’s a whole lot of fat that needs to be rendered off, and what fat there is is usually pretty evenly distributed. And a rack of ribs is pretty even in profile.
Compare that to a chicken or a duck, where there are areas with more fat than others, and it’s a fairly asymmetric shape from the front end to the back. In this case, a rotisserie is really useful.
I can see the advantage of having a Rib-o-Lator in a grill with hot spots, like inexpensive gas grills. But in a KK grill, that’s definitely not an issue.
-
Thank you MacKenzie! Yes, she is fun and its her fault I'm here! Everytime I am on the KK site, she runs up behind me and says "They are sooooo beautiful" LOL that girl is trouble!!
The girl is smart.
Welcome to the KK forum! Now it’s just a matter of time before you place your order.
-
1
-
-
I used to be in the "foil camp" for ribs. This Komodo keeps things moist enough where it isn't necessary. I also don't like the steam effect or the fact that you can easily overdo them that way. Never again.
So true!
Great job on those ribs!
-
Kudos on your cooking and planning skills! Planning the timing for cooking multiple dishes is something I still struggle with.
-
That looks delicious! This cook inspired tonight’s dinner.
-
When using the coconut charcoal, I’ll hit two whole pieces against each other so that they split into 2-3 smaller chunks, and then put them into the basket. I’m usually shooting to break them into thirds.
I have found that lighting them takes longer than Royal Oak, which is my usual other choice for charcoal. I use a weed burner to light the charcoal, whichever one I’m using. If I’m using coconut charcoal, I’ll just keep the weed burner on it longer. Whatever your current method is of lighting your charcoal, just give it extra time.
Theoretically, I suppose that if I have the basket full of coconut charcoal, I could put a small amount of Royal Oak at the top of the pile, light that, and let it light the rest of the coconut charcoal. I haven’t tried that yet.
-
Dang.
That's all I can say.
-
I have the old single dial bottom vent. For low and slows, I’ll put the vent to about 1/8†open to start, and the top vent open about 1/2 turn. Then as I approach the desired temp, I’ll put it to an even smaller setting, like 1/16â€, and then use the top vent to fine tune.
In our area, the wind can go from zero to somewhat windy and back again over the course of the day. I’ve found that throttling down the lower vent really helps in stabilizing temperature changes from wind. What happens is that if it’s windy, the air moving past the upper vent will draw more air through the kamado due to vacuum produced by the Bernoulli principle. (Or Venturi effect — I get the two mixed up.
) By keeping the bottom vent as closed as I possibly can, this limits the amount of extra air that can be pulled through the grill. And to reiterate what Robert said, it’s best to sneak up on the temperature rather than to overshoot and then try to bring the temperature down.
-
FWIW, I haven’t considered the possibility of using the lower grate for a low and slow cook, primarily because it would be closer to the heat source. I’ll defer to the experience of others who have tried that, and maybe I’ll try that myself some time.
I’ve only used the lower grate for searing. Having said that, I have a hard time considering the need for more space than what Smaug’s main and upper grates give me in terms of real estate for a low and slow cook.
To compare this to the Kamado Joe D&C system, for Smaug, the space on the lower grate is a little less than what you get on the main grate, because of the way the base tapers a little from the main grate to the charcoal basket. You don’t lose that space on a KJ grill, but then again, you just get the two half grates, so you can’t cook on the entire area of the top and bottom positions at one time.
Where the KK really shines is in the top grate. Again, because of how the top lid is shaped, you lose a little area compared to the main grate, but it’s not nearly as much of a drop in real estate when comparing the KJ grill expander to the main grate of the KJ grills.
One last thing: all three grates are standard with a KK grill. For a KJ grill, in order to duplicate all this you would have to buy an additional two half grates for the D&C system, and the KJ grill expander, and even then the top level is less functional than it will be in a KK grill.
And since people keep talking about my rib photo, here it is again. Six racks!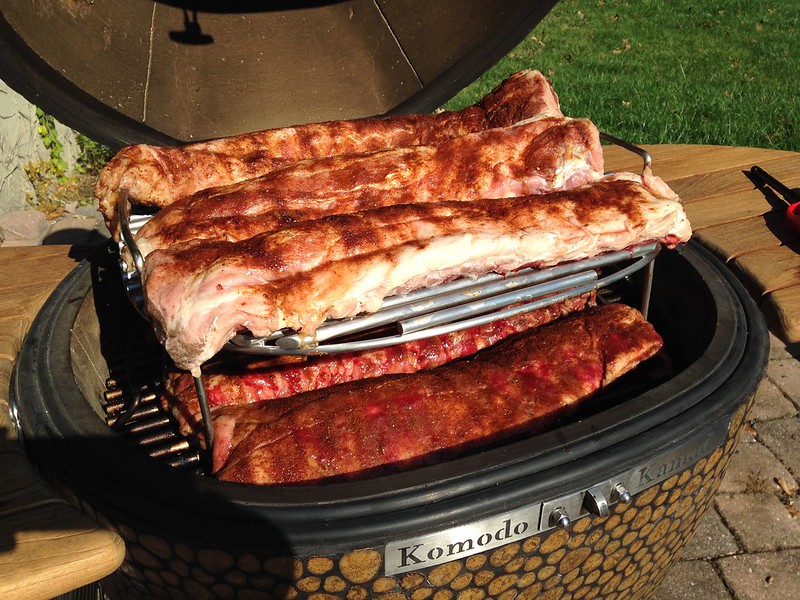
-
And as for twin names, I don’t suppose you’d consider Zan and Jayna, would you?

-
I’m really happy to read about the updates.
Did Dennis mention how long the building phase would be?
Slow Motion.......
in Komodo General
Posted
If it makes you feel any better, it took me 17 weeks to finally take delivery of my KK grill.
Of course, 11 of those weeks was due to Kamado Joe not being able to fill my order for a Big Joe due to their inventory issues.