-
Posts
156 -
Joined
-
Last visited
-
Days Won
13
Content Type
Profiles
Forums
Events
Everything posted by PVPAUL
-
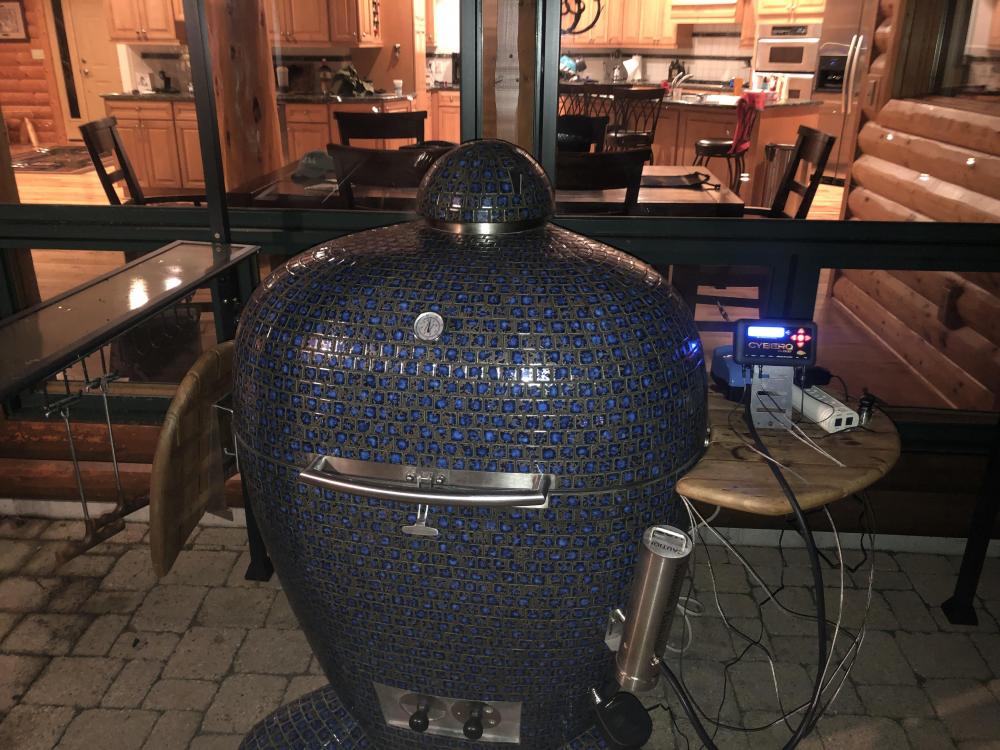
Well, it’s already been about 10 weeks since I’ve taken delivery of my 32”KK and doing my first Pork Shoulder! Based on some learning curves and advise from various forums and cook books I’ve arrived at the following set up and recipe. Ive got a shoulder that is about 7lbs. I dry brined it for about 12 hours with 3tsp of Kosher Salt. After this I rubbed it with yellow mustard and applied Dizzy Pig Dizzy dust. I put it on the KK at about 11PM tonight. Using about 3/4 basket of Fogo Super Premium. Set up CyberQ with a target temp of 240F. Bottom dampers closed and Pit Boss fan damper is 50% open. Top KK vent is just off the gasket. Set up KK cold smoker with a wood pellet mix of about 50/50 Hickory and apple. The photo below is the KK at the start of the cook and decided to include a picture of the moon over the lake....a beautiful evening here! Getting ready for bed now and going to trust that my set up is going to cook flawlessly.....I hope!!! I’ll include pictures tomorrow of the cook! Best, Paul
-
All, thanks for your feedback, next time I’ll do a better job of an even fire across the width of the grill and will plan on setting up more of an “indirect” cook with foil or pans etc. I was out pontooning with a bunch of friends and had my son light the grill and while he lit it in 3 spots across the width it ended up not an being an even fire...I could of cleaned it up a bit etc but after pontooning.................... was just in a bit of a hurry...using the craddle for the first time......... I think you get my drift!!! Best, Paul
-
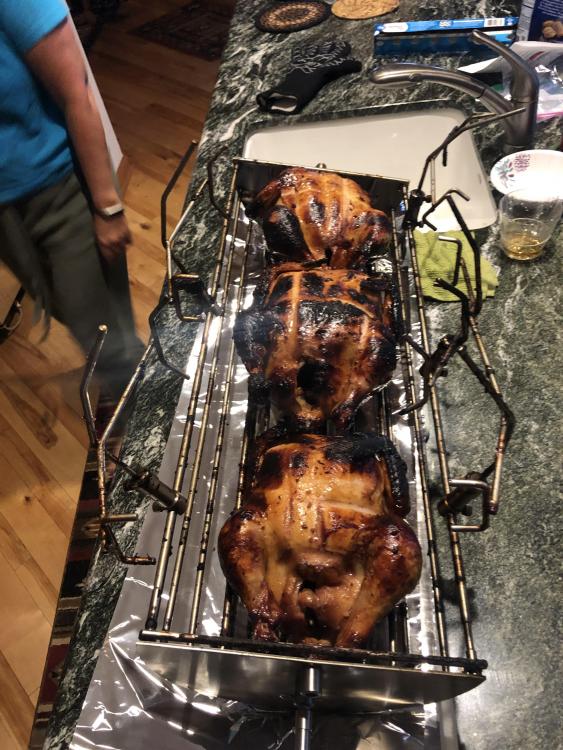
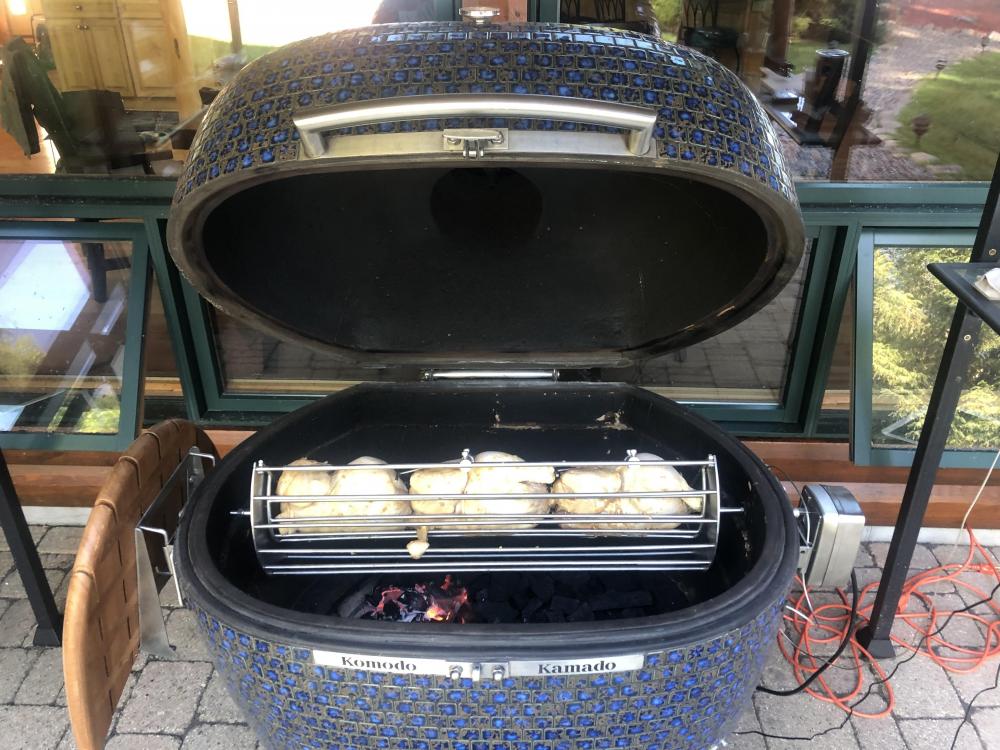
So I thought I would post a couple of picture of the 3 chickens in the 32” rotisserie craddle. As Dennis said these fit nicely in the cradle. These were about 5.0 to 5.5 lbs each. Cooked them with the Huli Huli recipe from the Meathead cookbook. A couple of other comments related to this thread. I ordered and received the CyberQ Cloud this last week. I did one experiment cook for bratwurst and really only used the Pit probe just to control the temperature and it went great. When making the rotisserie chickens I also tried to use it hear and had some problems getting to temperature.....I think this is likely operative error and my learning curve. I also received my cold KK smoker on Friday. Since we had company all weekend I just opened the box today and did a trial run of smoking only...no food. Based on some other threads related to the cold smoker I put some cherry wood pellets up to about the vent holes...I then soaked a small handful of apple pellets in Stroh Rum (very strong stuff) hit it with the lighter.....let it go about 3-5 minutes....set the pump air on high...let it go another few minutes and then added more pellets to the hopper.....it worked like a charm. Think I’m going to make a Pastrami next weekend and tryout the CyberQ and cold smoker at the same time!!!
-
Alphonse, I ordered mine in the 3rd week of February this year and received it the first week of June,,,,so about 3.5 months for mine and I’m in Wisconsin. There was a delay due to a holiday in Indonesia and I was one of the lucky ones who also got delayed going through customs. It seemed like the build went quick, just some bad luck in transit etc. Like Pequod said good to touch base with Dennis on inventory. I can speak from experience as I ordered mine custom as the color I liked most wasn’t in inventory.....When I was waiting ( which is like a young boy waiting for Christmas) I happened to go on the web site and low and behold the exact grill wanted was then in inventory!!! Because it was the 11th hour and most of my accessories were packed in the crate from Indonesia i just stayed with my order. Based on my experience I would say plan on 3 months +/- 2 weeks. Good Luck, Paul
-
Hello Tekobo, yes! You got the right stuff! Hope your tortillas turn out great....Keep me posted! Best, Paul
-
When using the 1/2 grate and the hinged lower grate your ability to open up the hinged lower grate is somewhat obstructed by the 1/2 grate. I do have the cold smoker on order so it’s not a big deal. I was just curious if anyone else out here in forum land also expressed an interest in a second half grate that would fit below the current half grate.
-
Tekobo, today I put a camp stove outside near my KK. I will give this a shot as I really would like to get this working. I also just ordered the hot/cold KK smoker but am sure that I would still find uses for the smoking pot. Best, Paul
-
So I received my 32” grill about 7 weeks and received the 4 grates that come with it. I’m wondering if anyone has ever approached the idea with Dennis for offering a 2nd half grate that would fit below the standard (included) half grate. I Would think this would come in handy as a area for a drip pan or second food item and still allow complete access to the charcoal bed so one could easily add smoking woods. With the current configuration the lower grate is a full grate and it’s not easy to add smoking woods to where the charcoals are glowing. I understand that you can lift up the front for adding smoking woods but once again I cannot reach where the glowing charcoals are. Thanks, Paul
-
Mcjudtsten, thanks for the information. If I had a 42” I’d be asking if I could spin 4 birds at once! Congrats on the beautiful grill! Tony, I’m a little confused by your response. If 250F is the lower limit of your low-N-Slow and you use the SYZ smoking pot at this temperature wouldn’t this mean that use use the SYZ smoking pot for everything (except maybe a cold smoke in which I would guess that for this you would use the KK cold smoker)? I was guessing that you are not having consistent smoking results (like I’m struggling with) in the lower ranges of smoke cooking. I also wanted to ask if you are successfully using the SYZ smoking POT at 250F range what charcoal are you mainly using. I’m wondering if my bad luck with the SYZ smoking pot is mostly a result of using RO lump? I look forward to hearing back from you! Thanks, Paul
-
Tony & Tyrus, thanks for the feedback. Tony, thanks for the tips on using the CyberQ...I hope to hit the ground running once this arrives. My biggest challenge with these types of gadgets is usually the connectivity with my internet...hopefully I can get through this part without too much difficulty. When you talk about using the Syz smoking pot with most of your “Hot Cooks” what temperature range are you speaking of? Tyrus, I will be out looking for some bricks to set up my splitter front to back! I will likely heat soak my KK prior to rotisserie as I’ll have 16 hungry guest and so I want to stack the odds in my favor for dinner being on time!!! Best, Paul
-
Hello Tony, I do have a basket splitter however with the 32” KK I believe it’s only designed for splitting left to right (or right to left) not front to back like the round KK models. I will look at it closer tomorrow in the daylight to see if I’m missing something here. There is so many ways to set up grates etc that I’m still learning. Also on a separate note I decided to pull the trigger on the CyberQ cloud today along with the KK cold smoking unit. While I’ve only had my KK about 7 weeks now I’ve had issues twice with maintaining consistent temperature control (hence the cyberQ) and I also cannot get the smoking Pot working. Both of these may likely be related to the Royal Oak lump I started with. Based on the Naked Wiz review and the fact that RO makes the green egg charcoal I figured this was a good product and stocked up pretty heavily on this..... which I now think was a mistake (or just a learning curve). In any event I also placed a pretty large order on FOGO charcoal which just arrived. I do like gadgets and the comfort of knowing where my cook / temperature is at and being able to adjust it remotely is a plus. I look forward to these new toys and continuing to learn to use my KK. Best, Paul
-
I’m planning on a dinner for 15-16 people the upcoming weekend. Thinking about doing 3 chickens in the rotisserie cradle. I looks like size wise 3 chickens at about 5lbs each will fit. Just wondering if anyone else here on the forum has done this? Thanks, Paul
-
Hey Tekobo, yes I’m happy to share this recipe. (Just don’t tell my sister!) 4 cups AP Flour, 2 tsp salt, 2 tsp Baking Powder, 2 TBS Olive oil. 2 cups of Water, 1 cup of yellow cornmeal. Directions: Mix flour & Salt together. Add baking powder and mix again. Add Oil and break up oil into flour into small pieces and set aside. Add yellow cornmeal and water together is small pot and heat until cornmeal and water fully blend together. Let it cool down until you can handle (about 100 degree F.) Add yellow cornmeal mixture to flour mixture and form / knead into a large ball. Once it’s the right texture then break off into individual balls (a little larger than golf ball size). Place back into original mixing bowl. From this recipe I typically yield about 18 tortillas. If possible and you have time cover bowl with damp cloth and then cover the whole bowl in foil. Hand roll with a rolling pin until 8-10” diameter. Heat up cast iron pan until very hot...Place tortillas on hot cast iron until it starts to bubble (about 10 seconds) then flip over and do the second side. That’s about it. Some comments based on years of experience. In the old days my family likely used Lard but most of us now use Olive oil. For the yellow cornmeal the finer the texture the better. I now use “Goya brand” “Pre-cooked” yellow cornmeal. This is super fine and I no longer have to cook the cornmeal...just add warm water. It will take practice / experience to achieve the right texture....if to dry the edges of the tortillas will be jagged.....too moist and the dough will stick to your rolling pin and be hard to work with. One other trick that seems to make the the final tortillas somewhat silky is to proof the dough for 30 minutes to a couple of hours. The dough doesn’t really rise but it seems to make them more pliable / soft. Try to use minimal flour for dusting etc as any dry flour on the surface can / will burn when cooking the tortillas and not too desirable. Some of the lucky family members have cast iron rounds that come from the old cast iron stoves in which you had a fire below. These are about 9-10” diameter and about 1/4” thick. These work grate as there is not as much mass so you don’t have to pre-heat these as long. When heating to eat you’ll learn that we Mexicans all have gas stoves and heat tortillas directly over the flame.....many of us like a little burn on the tortillas. These tortillas are nothing like you can buy in the store and 100% make any taco better. I have never seen store bought tortillas like these...they are typically either corn or flour. Great for enchiladas......everything. If you decide to make these please let me know how they turn out for you! Best, Paul
-
Hey Tekobo glad you liked! Last year we were on vacation in Europe and stopped in Nottingham to see ELO in concert! ELO was my 4th concert to see when I was a kid and it was a blast seeing them again about 40 years later! In June this year my wife and sister did a trip to Oxfordshire area on a “Midsummer murder” tour. This fall we are heading to Ireland (25 years since our last time there) to go see Jimmy Buffett perform in Dublin (yes we’re big Parrotheads!). In any event this is a very cool international forum we all belong to hear. This weekend we’re having company so no big meats going on the KK. Tommorow we’re doing Mexican......everything will be homemade including Carnitas sous vide, Frijoles, arroz and handmade family recipe tortillas and salsa y guacamole!!! Best, Paul
-
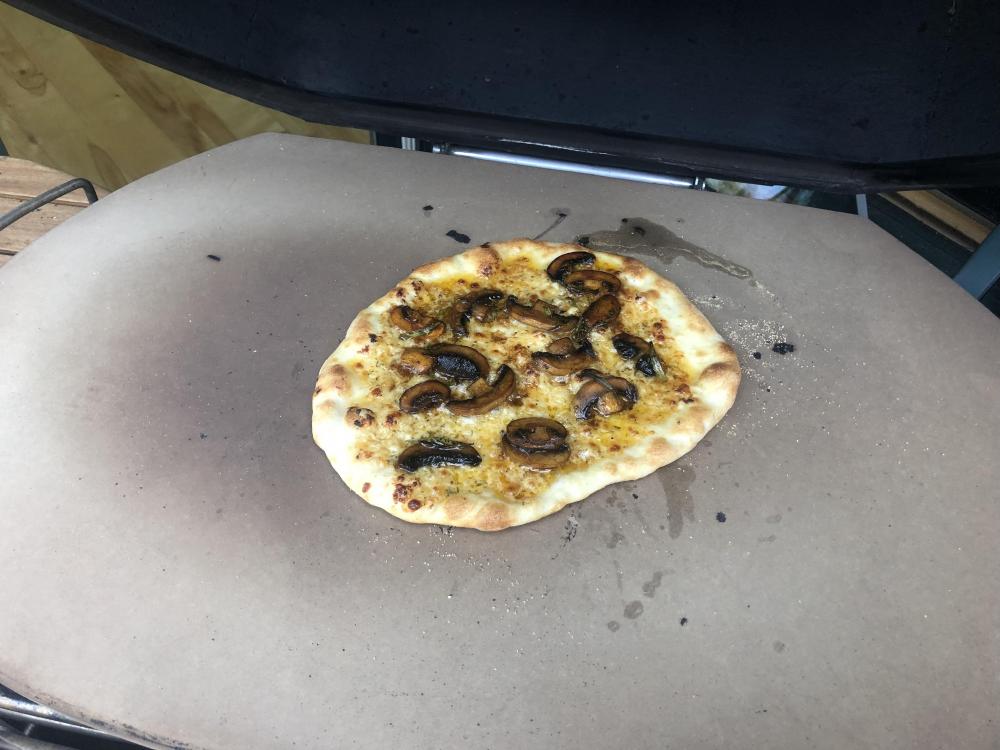
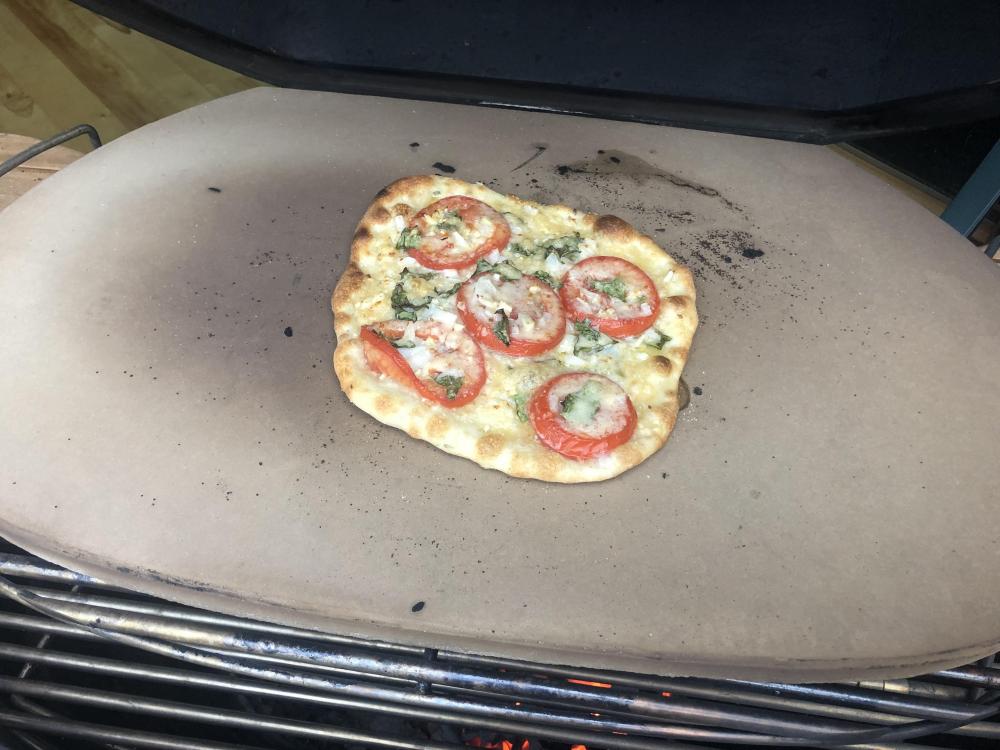
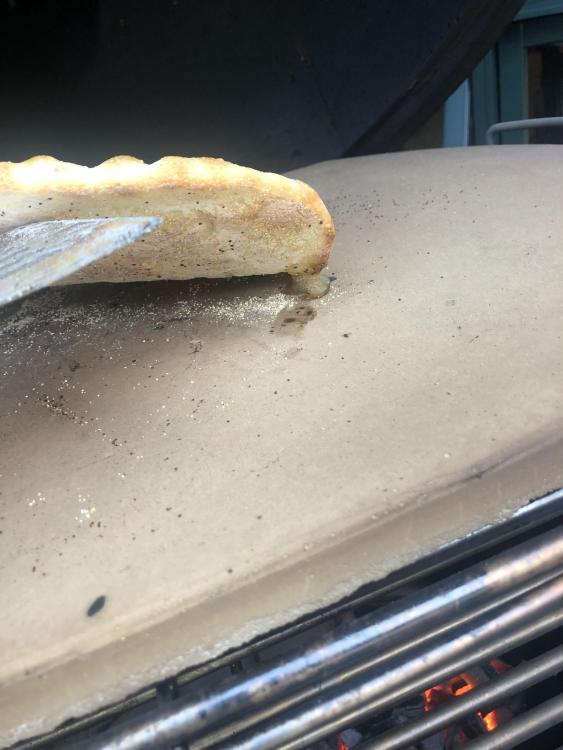
Thank you all for your comments. So today I made my 1st successful Pizza’a on the KK. Two days ago I tried the King Arthur dough recipe and wasn’t happy with the results of the dough. It seemed dry and really didn’t raise much. I used fresh yeast and followed the directions very closely. After looking at the dough I just decided to toss it and go out for pizza. Back to the drawing board today and followed a recipe out of an older cook book I have called “The best recipe Grilling & Barbeque” from the editors of “cooks Illustrated”. The good news is that I was 100% happy with the results. I was able to get my KK up to 525F and hold it there for some time. Made 2 small 8” pizzas. First one was made with the 4 cheese garlic spread my wife buys locally for stuffing mushrooms. I then sautéed some mushrooms in EVOO and added some balsamic Vinegar along with some fresh rosemary from my herb garden. The second one was my take on a magherita (SP?) fresh tomato, garlic, basil and parmesean cheese. Attached are some pics! Best, Paul
-
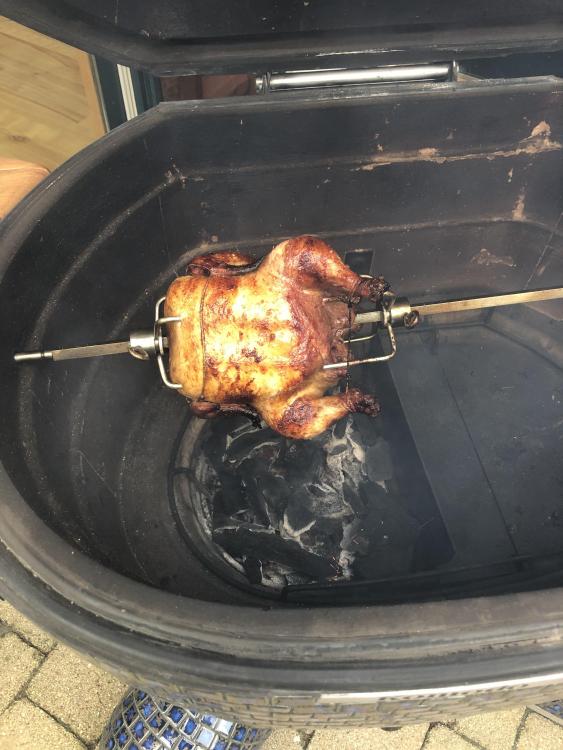
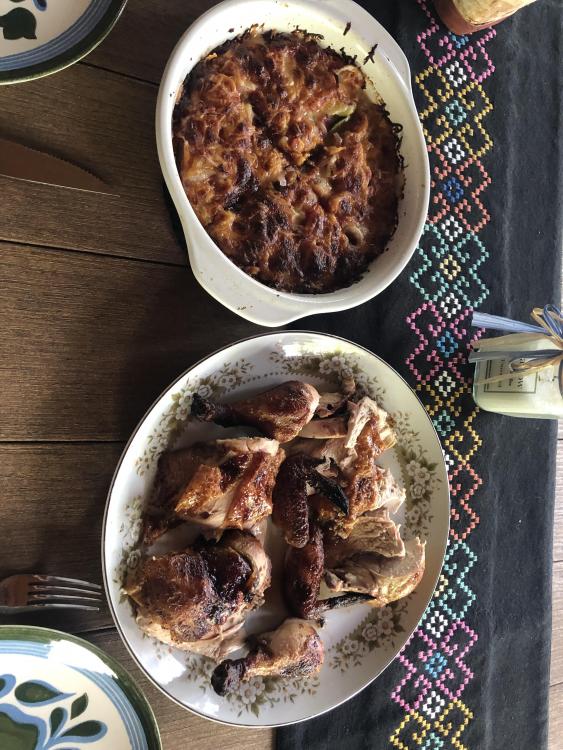
OK, So here are the pics as promised. The chicken turned out very good.....over shot the temp of the bird slightly but it was still very good. We liked the roadside Chicken recipe as well. The pic of the plated food also includes what we call Zucchini casserole. It’s basically sliced zucchini, tomatoes, onion with mozzarella and Parmesan cheese. It’s a staple side dish that typically OD on by the end of summer! Overall I liked the rotisserie cook and plan do do more of this! Paul
-
Thanks Pequot......I have the plan in motion. I’ll work on sending some pictures back. All the best, Paul
-
Looking for help on cooking my 1st roti chicken on the 32”KK. I have both the Octo forks and cradle so looking for opinions on this. I was thinking about going with the Octo forks for clean up simplicity etc. however if the bird turns out better in the cradle because your not puncturing and allowing the juices to run out I would do the cradle. Do you typically do this indirect? I have been using the charcoal basket splitter and have the coals to the left....so based on this put the bird on the right with a basket / tray underneath to catch juices etc? Also what temp would you recommend? Note my bird is about 5lbs. For the recipe I was thinking about doing the Roadside Chicken recipe I found here on the forum. Thanks!
-
Tyrus, thanks for the suggestion. Brisket is in SV now, I’ll report back later on my brisket results. best, Paul
-
So yesterday was my first Brisket cook on the KK. Set up a full basket of lump and placed the 2 qt smoking pot on the fire. All morning the KK was holding 225 - 250 degrees. Still not getting the smoking pot to work as hoped. Getting smoke early in the cook but it doesn’t seem to smoke very long. I ended up adding some wood directly to the lump to create more smoke. Before heading out on a pontoon ride I moved the smoking pot hoping to ensure that my coals would continue to burn. I ended up with the opposite and by the time I got back from pontoon ride the coals were pretty much out. Long story short I finished the brisket at about 9pm and did the FTC method for two hours and then vacuumed sealed the whole brisket and iced it down to cool it. Today I’m planning on serving the brisket and thinking about reheating via Sous Vide. Before cooking the brisket was about 8.5lbs. Looking for suggestions on sous vide temperature and time. Thanks, Paul
-
All, I just wanted to report back on my first baby back ribs cook on my new 32KK. I lightly salted ribs with Kosher salt and let sit in fridge fro a couple of hours per Meathead dry brine technique. I then rubbed ribs with Dizzy Pig Dizzy dust. Used basket splitter with half a load of RO lump. Lit the lump with a torch and then hit it with my lawn air blower. Set my new 2 qt lodge pot smoker on the charcoal and set it up for what I though would be about a 240F cook which was the second smallest bottom vent hole and a 1/4 turn on the top vent. Put the ribs on at about 240F and went fishing. Came back home about three hours later and the temp was about 340F? I discovered that I accidentally left the bottom left vent open very slightly (I thought I had closed it completely but this was not the case). I did the bend test after about 3.5 hours and they looked good. I took the ribs off and placed in the lower grate and open up the vents so I could sear / finish the ribs with some sauce (decided not go go naked this time). I was very happy with the tenderness off the ribs and more importantly so was the wife!!! Thanks for all of your advise here. Paul PS - I know a picture is worth a 1000 words but unfortunately I forgot to do it this time!
-
Planning to cook my first ever brisket on the new 32KK. I have an 8.5 lb brisket flat (all I could get at my Costo) and am looking for some suggestions here for the cook. I would like to start it in the morning as opposed to the night before. Based on the thread here thinking of targeting 275F and if it drifts to 325 - 350 I’m not going to worry about it (still working on the temp settings!). I’ve wrapped briskets before in foil at about the 160F temp. When I’ve done this I finished cooking the brisket in the foil until about 203-205F range and then did the FTC method. For this cook I’m thinking about wrapping in the Pink butcher paper at about the 170 mark. Do you then typically finish brisket in butcher paper and then put this as is (in butcher paper ) in cooler with towel? Or do you wrap in foil before the cooler & Towel? Just thinking that I’ll lose all of the juices if I don’t wrap in foil......but also not sure if I’ll lose the crunchy exterior etc. Best and Happy 4th to all, Paul
-
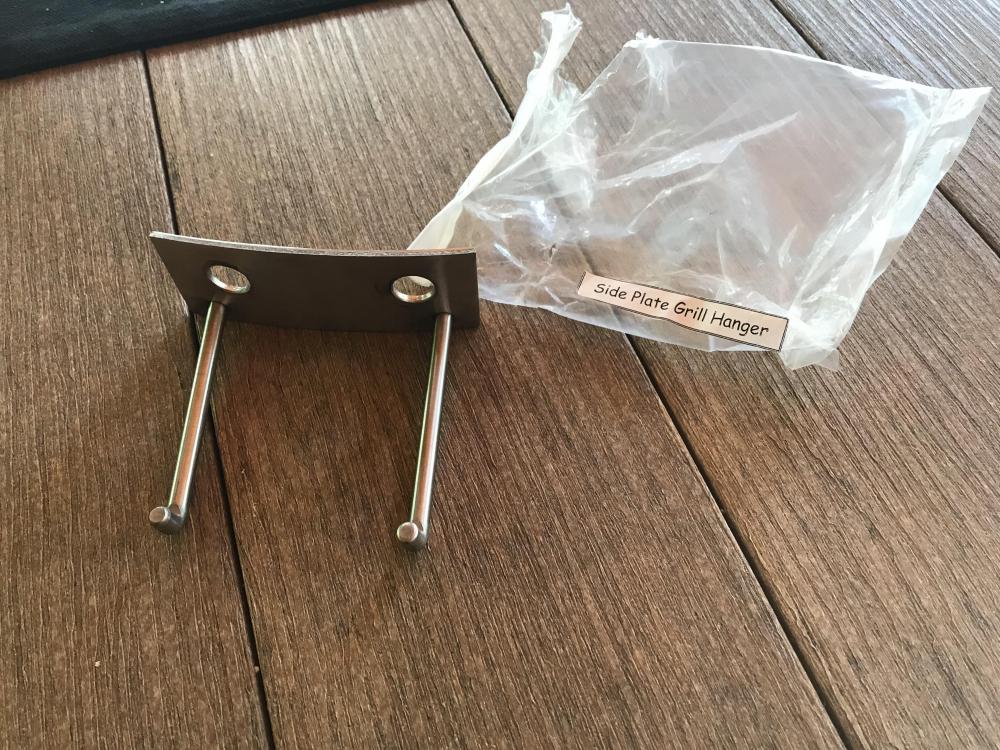
Great, thanks I now see how inverted upper grate gets me much closer to the coals. I guess I’ll store the “side plate grill hanger” until I hear from the “Big Boss”. All the best, Paul
-
Pequod, based on what I’ve read of the forum I’ll also end up using the head deflector stones for a walk way step stones. Thanks for your feedback. Attached is a picture of the hardware accessory labeled as “Side Plate Grill Hanger”. Another question, when in searing mode do folks just use the lower grate? Roughly measured from top of charcoal basket this looks to be about 7-8” which seems pretty far away from the coals.....especially if the coals are burnt down some. Best, Paul


