-
Posts
3,021 -
Joined
-
Last visited
-
Days Won
12
Content Type
Profiles
Forums
Events
Everything posted by Firemonkey
-

Calzones on a pizza stone prototype
Firemonkey replied to Firemonkey's topic in Bread, Pizza, Pastries or Desserts
The size is standard, its the exact same diameter as the pizza stones you can get at Bed, Bath & Beyond for about $10. What sets this one apart is the thickness, which at least helps it diffuse and distribute heat, and if pre-heated long enough hold the heat so you can reload faster. Of course, if its also got the heat transference and other fibrament properties, thats a bonus -
Well, yeah - only half of that load made it back into the house. The neighbors and I nibbled all afternoon. I will definitely be doing this again on a larger scale!
-

Calzones on a pizza stone prototype
Firemonkey replied to Firemonkey's topic in Bread, Pizza, Pastries or Desserts
How about a hint? Its made from HW refractory material Dennis will have to chime in here about the composition of the stone, since I really dont know what it is made of, but I do know that he had been working on his own version of a composition similar to fibrament. I'm not sure if thats what this is made of or just regular refractory. I dont know if these are ready for mainstream distribution yet, so I hope I am not leaking and secrets here. On the size, I just measured, and it is a 15" stone. -
The best part is something that unfortuantely cant be shared...THE SMELL! The marinade smell lingered in the house and the hickory wafting on the breeze all day added some serious "drinkability" to my Saturday afternoon brews while I lounged in the hammock
-

Calzones on a pizza stone prototype
Firemonkey replied to Firemonkey's topic in Bread, Pizza, Pastries or Desserts
I make the dough, using something pretty close to the Wolfgang Puck recipe: 1 package active dry or fresh yeast 1 teaspoon honey 1 cup warm water (105º F to 115º F) 3 cups all-purpose flour 1 teaspoon kosher salt 1 tablespoon extra-virgin olive oil, plus more for brushing Full recipe here I dont measure the honey, and I usually end up with 1.5 or 2 Tablespoons by the time I am done squeezing the bottle -
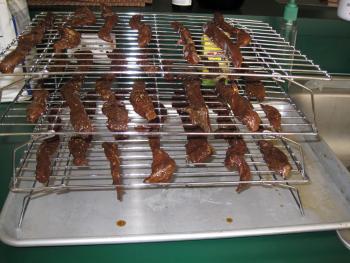
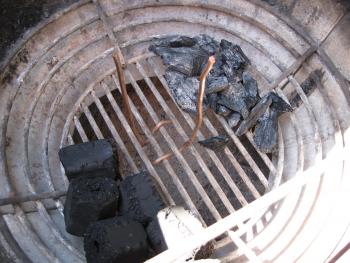
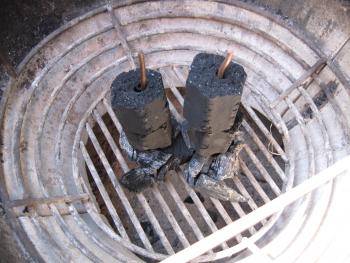
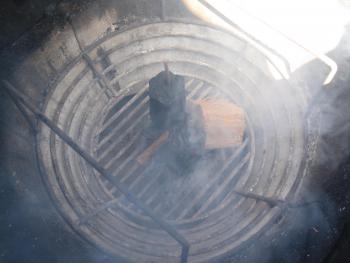
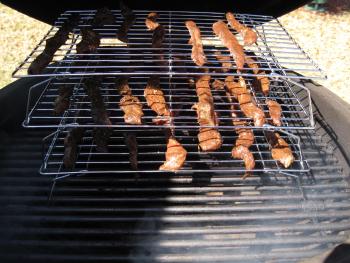
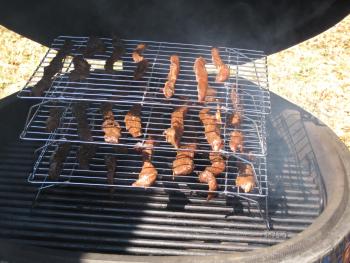
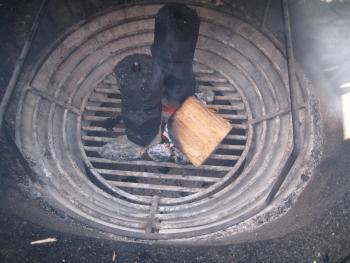
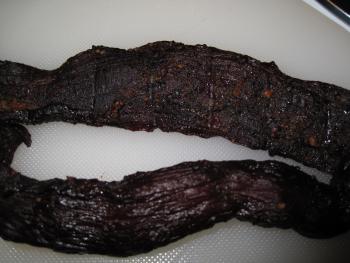
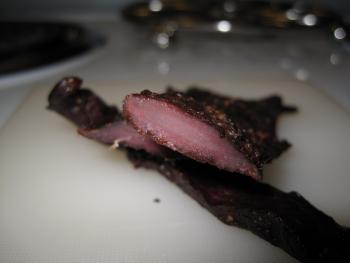
That is BEEF JERKY, what were you expecting I had picked up a whole sirloin tip roast at the warehouse club, because I was really in the mood to try making some Baltimore style pit beef. But since I wasnt sure if my family would eat the pit beef, I didnt want to go all in with the whole roast. So I did my best Primeats imitation and butchered it up into smaller chunks, and cleaned out all the nasty parts inside of it. What remained were a couple of roasts, one for pit beef which I will cook today, one for either pastrami or pot roast, depending on if I get to it before I leave on Monday, a few pounds of big cubes for chili or stew, and a couple pounds of strips I cut for jerky. In my quest for a good jerky marinade, I came across the recipe that Alton Brown used on his episode about jerky. It looked pretty close to what I was looking for, and had about 100 positive comments, so thats what I went with, with a couple of modifications. I'll post the recipe in the recipe section for those interested. Alton brown made his jerky with a box fan and some furnace filters, which seems absurd to me since i have a perfectly good smoker on the back patio. My goal here was to dry the jerky at about 175* for as long as it took, and I also wanted to put some smoke on it. Holding 175 on a KK is no prob, but drying anything is counter intuitive to a KK, so I had to be creative this time. I needed lots of draft to dry the meat, but in typical circumstances that would result in lots of heat to go with it. The KKEC charcoal is the perfect solution for this, since I could light only a couple of pieces and they would burn for a long time. In order to allow longer unattended heat, I needed a way to load more than a couple of pieces at once, and still have a controlled burn with full draft. Here is what i came up with: That is a couple of pieces of grounding wire that I bent a few curves in the end of. I can insert these from the top, and with a litle bit of angle and rotation, pop them into place. This will let me stack a few pieces of KKEC on each rod, and as one burns away, they slide down and can be reloaded from the top during the cook. I used a handful of lump to get everything going, and added a nice chunk of hickory for some smoke. I left the lower dial all the way open and the top hat 2 full turns open. I had only the main grate in place, and set my HD directly on the main grate, so I could easily reload the KKEC by lifting the hinged flap. The jerky was on some racks that are typically used for cooling cakes or cookies (multi-purposing these makes wives happy ) I let everything dry for about 6 hours and the results were nothing short of awesome. The rods worked great, and I was able to hold exactly the temperature I wanted despite the wide open drafts. The big variable in the process is going to be your ambient temperature, as I saw a 20* difference as the grill came out of the shadows into full sun. At 75* outside temp, I needed 3 pieces of KKEC to get to 170, and only 2 in the afternoon sun. So JDBower would likely need 8-10 rods to do this! I only burned 6 pieces of KKEC in 6 hours of drying The grounding rods worked well, but if I were going to do this large scale, I might try using some threaded rods with washers and nuts to hold them upright on the grate. I suppose a hotplate in the bottom of the KK would do just as well, but this seemed more fun Here are some pics of the process: I did use the HD under the meat, I put it directly on the main grate after this pic was taken.
-

Calzones on a pizza stone prototype
Firemonkey replied to Firemonkey's topic in Bread, Pizza, Pastries or Desserts
Nope no cornmeal or anything. You dont need cornmeal to keep the bread from sticking to the stone, you need it sometimes to help get a pizza to slide off the peal and onto the stone. I just picked these up and put them on the stone, so no cornmeal needed. -
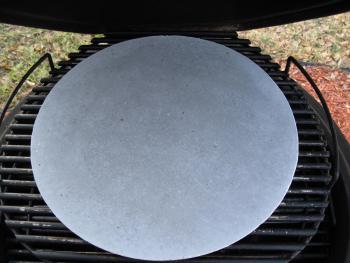
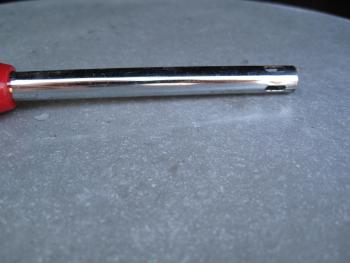
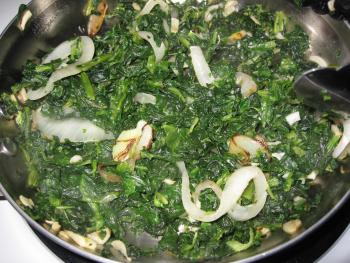
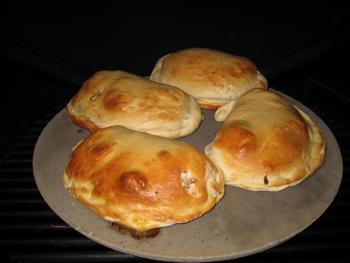
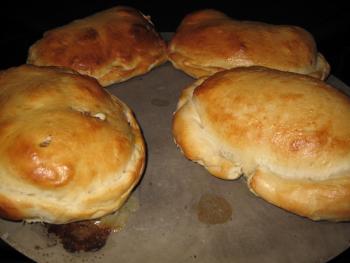
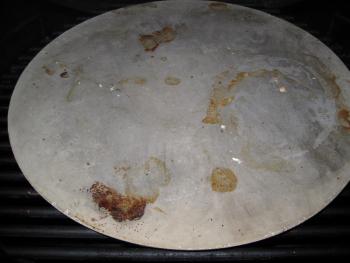
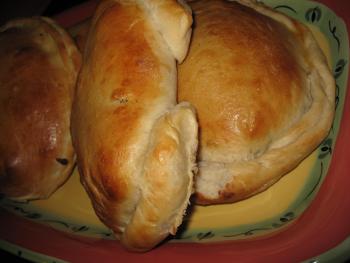
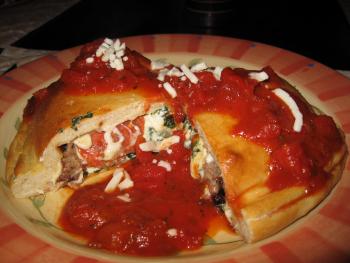
I received this pizza stone from an unnamed source and I finally got around to giving it a try. This stone came in a S/S liner, just like the KK drip pan, and some Gen2 HDs. The stone was in the liner, but not attached, and so I decided to use it without the liner as I would be heating it with the grill. The SS liner is intended as a layer of protection from placing it on a hot grill. Here is a peek at the stone: It is an inch or two larger than the KK deflector, but the same thickness. It happens to be the same size as the store bought pizza stones I have (15" FWIR) What sets the stone apart is its mirror smooth finish on top, instead of a white alumina coating on the standard deflector. You can almost see a reflection in this surface: I decided to christen this stone with a few calzones, so the first thing I had to do was grill a few sweet Italian sausages for the filling. I grilled the sausages on the main grill under the stone which was on the upper grill. In hindsight, this may not have been the smartest, since the greasy smoke from the sausages left a film on the top of the stone. No problem though, I just cleaned it off with a wet paper towel when the sausages were done. I set the grill to 475 degrees to preheat while I went in to build the calzones. The stuffing was some sauteed onions, garlic and spinach, which was mixed in with some ricotta cheese. Top it with some pepperoni, sweet Italian sausage, and mozzarella. Fold them over, and seal the edges, give them an egg wash to help with a nice golden brown shine and put them on the preheated stone. Check them every 10 minutes or so to make sure they are browning evenly, and rotate them around if necessary. When they are golden brown, bring them in and top them with sauce. I just mixed some pizza sauce from a jar with a can of my favorite canned tomatoes, and simmered with some oregano and basil while the calzones baked. The verdict on the stone? I like it. The dough was perfect on top and bottom, cooked evenly, and not too crunchy on the bottom. You may recall my previous pizza rig consisted of a HD under the pizza stone with some spacers. This stone was naked on the upper rack, right above the fire and it still diffused enough of the heat to keep the bottom from burning even after 30 mins of baking. Ill try to do some pizza soon to further test it.
-

Everyday Misc Cooking Photos w/ details
Firemonkey replied to DennisLinkletter's topic in KK Cooking
Just a run of the mill roasted chicken... Marinated in cider vinegar, oil, onion and garlic powder, with some salt and sugar. I usually marinate it in the cider vinegar and oil (3:1) and then mix up the spices depending on my mood. After mixing the marinade, I pour it in between the skin and meat at a few places, then let it sit breast down in a bowl for an hour or two until ready to cook. Roast on the upper rack for about 1 hour at 375-400. Indirect, deflector on basket handles, small drip pan under bird on main grill if you want. Sometimes I forget and its fine -
-
Yeah, where did you get the tubing? Might be easier to use a tube as conduit inside the grill than the fiberglass sheathing DJ posted?
-
Probably blow the top off the grill if that were the case
-
Thats an analog draft controller. You blow in the tube when the temp drops
-
It should be mentioned that when dealing with ground meat, a little bit of smoke goes a long way. Be careful if you add any smoke wood at all. I generally just go with the smoke from the lump when doing meat loaf.
-

Everyday Misc Cooking Photos w/ details
Firemonkey replied to DennisLinkletter's topic in KK Cooking
Simple burgers and fries The title says it all...Its fair season here in FL, so I had to make some fries to drizzle with apple cider vinegar and Old Bay seasoning. Just like the stands on the boardwalk -
yeah, that piece just kind of fell off when I flipped them I figured it was just destiny rewarding me with a nice sample. But you will notice its on the tray when I brought everything in. Oh, I tried it alright, I picked it up and bit it in half; it was till sizzling as I chewed it I decided the other half would be better if i let it rest a minute or two
-
-
For my valentine's day feast, I went with a traditional surf and turf. It had been so long since I grilled some lobster, that I forgot how good it is! Here is the surf portion sitting under a coating of melted butter, which has a little bit of minced garlic, old bay and lemon juice mixed in. Not pictured was a dusting of Old Bay and paprika that they got before they hit the grill: Their turf counterparts had already been coming up to room temperature after being seasoned with ground pepper and sea salt. The steaks hitting the grill: After the flip: The tails went on the grill meat side down after I rotated the steaks on the second side. They cooked meat side down for a minute or two, then I flipped them over, and kept them on the perimeter of the fire (like medium heat, while the steaks were over the hot portion of the fire. The butter coating kept them from getting any kind of dark grill marks, and after flipping them onto the shell side, I brushed them with the remaining butter. I closed the grill down and let everything roast for about 3-4 minutes, before the feast was to commence: Lets Eat! It was so good I had to take a picture of it before it was all gone
-

Everyday Misc Cooking Photos w/ details
Firemonkey replied to DennisLinkletter's topic in KK Cooking
I was also taking the leftover KKEC out of the grill for when I wanted to use regular lump. But now I have a new plan... It does just fine and if you set them closer together you will be surprised how much room there is. As dense as it is, it takes direct fire to get it burning, so I have not had any issues even when the basket full of lump is raging hot. Taking leftover lump out is not a problem. I will use most of it on the previous cooks if I know I am going to be using KKEC, and the few handfuls that are left in the bottom are perfect to get the KKEC going. -
That seems like a big difference in temps. Where are you placing the pit probe? I dont have a stoker, but I recall checking the difference in the temps when my KK was still new. I think the difference was only like 10-20 degrees from the main grate to the dome (dome hotter). I also sometimes place a wireless thermometer near the meat to monitor grill temps until things get close to finished, then I put it in the food. I have not seen that much difference between the grate and the dome.
-

New High Temp Hot face Finish
Firemonkey replied to DennisLinkletter's topic in KK Features & Accessories
Yep. The ends of the rod poke down into some sleeves it the bottom of the grill. Its removable if you dont have gas. -

First actual solid black OTB..
Firemonkey replied to DennisLinkletter's topic in KK Features & Accessories
You know a thread has gone south when DJ becomes the grammatical editor -
Absolutely I agree. I always let any large cut of meat come to room temp before putting it on the grill.
-
It looks great, Jeff. I think your extended dwell is what dried it out. Skip that 4 hour dwell in the grill and you would have had juice runnign off the counter. It wasnt the time in the fridge, many people dry age these roasts for a week or more before cooking them. I think you would have been better off pulling it off the KK, wrapping it in foil and then searing it when it was time to eat. But since the meat was on sale, you can afford to try again next week.


