Leaderboard


Popular Content
Showing content with the highest reputation on 10/31/2022 in all areas
-
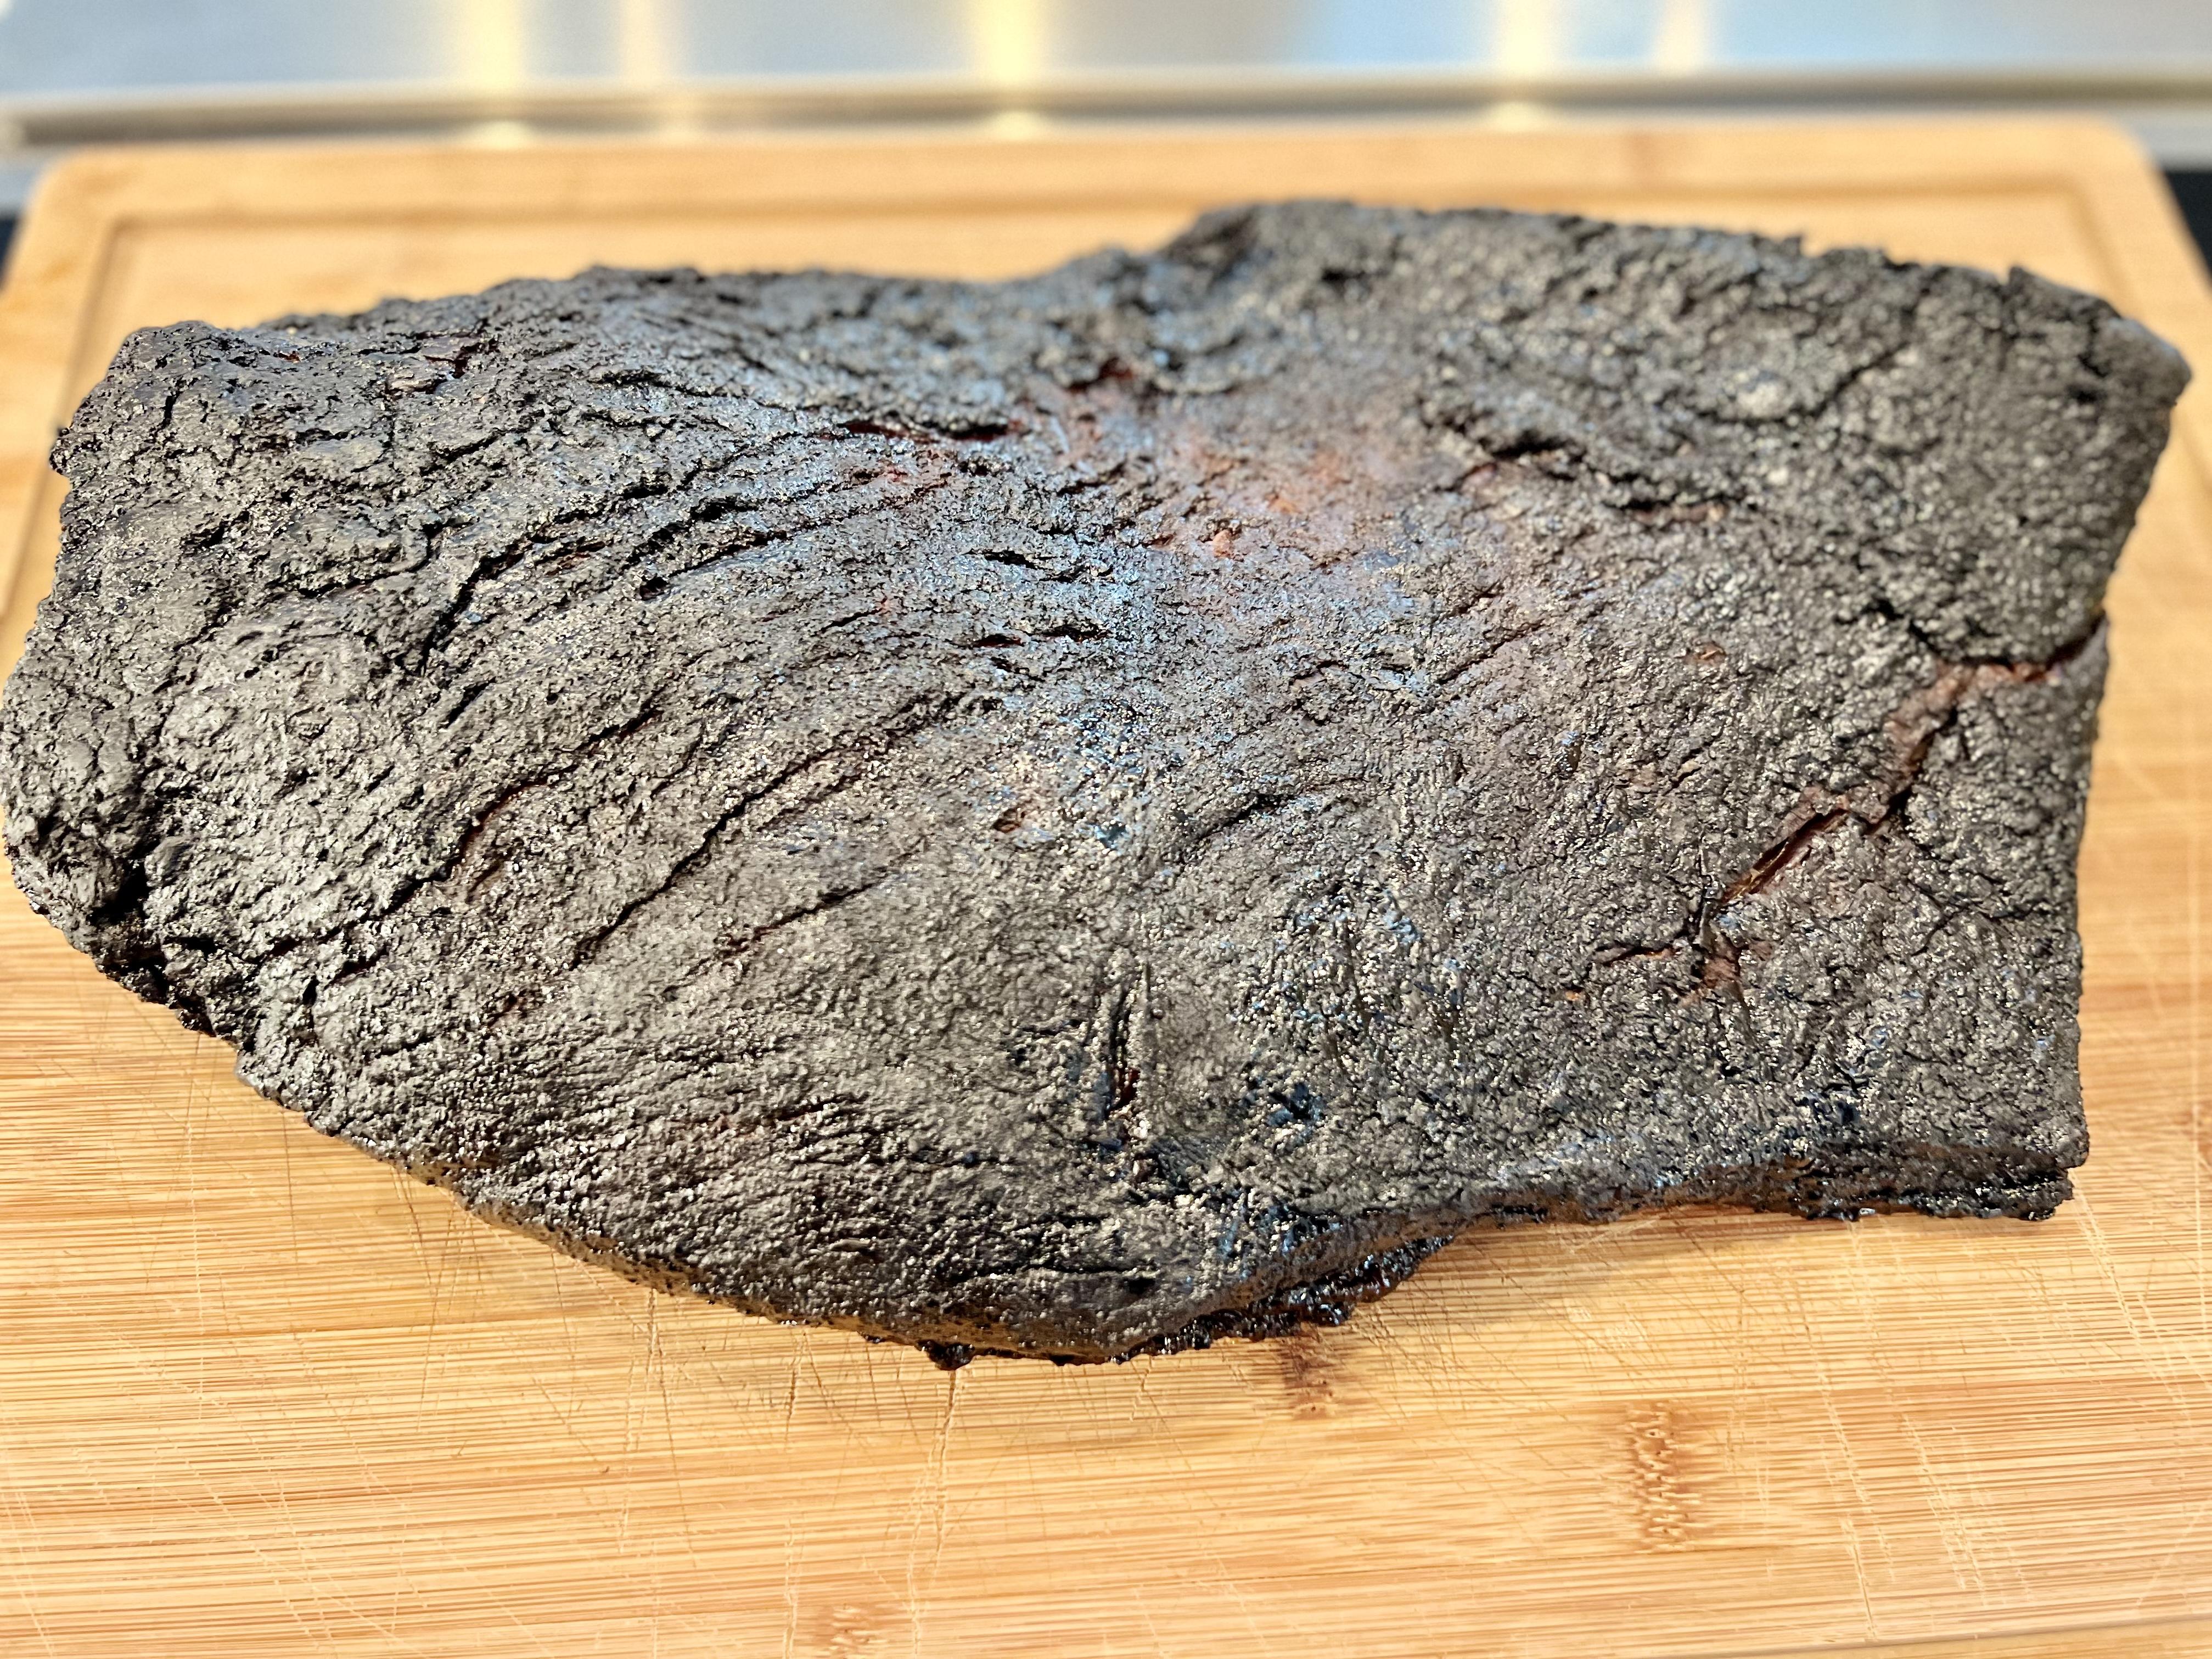
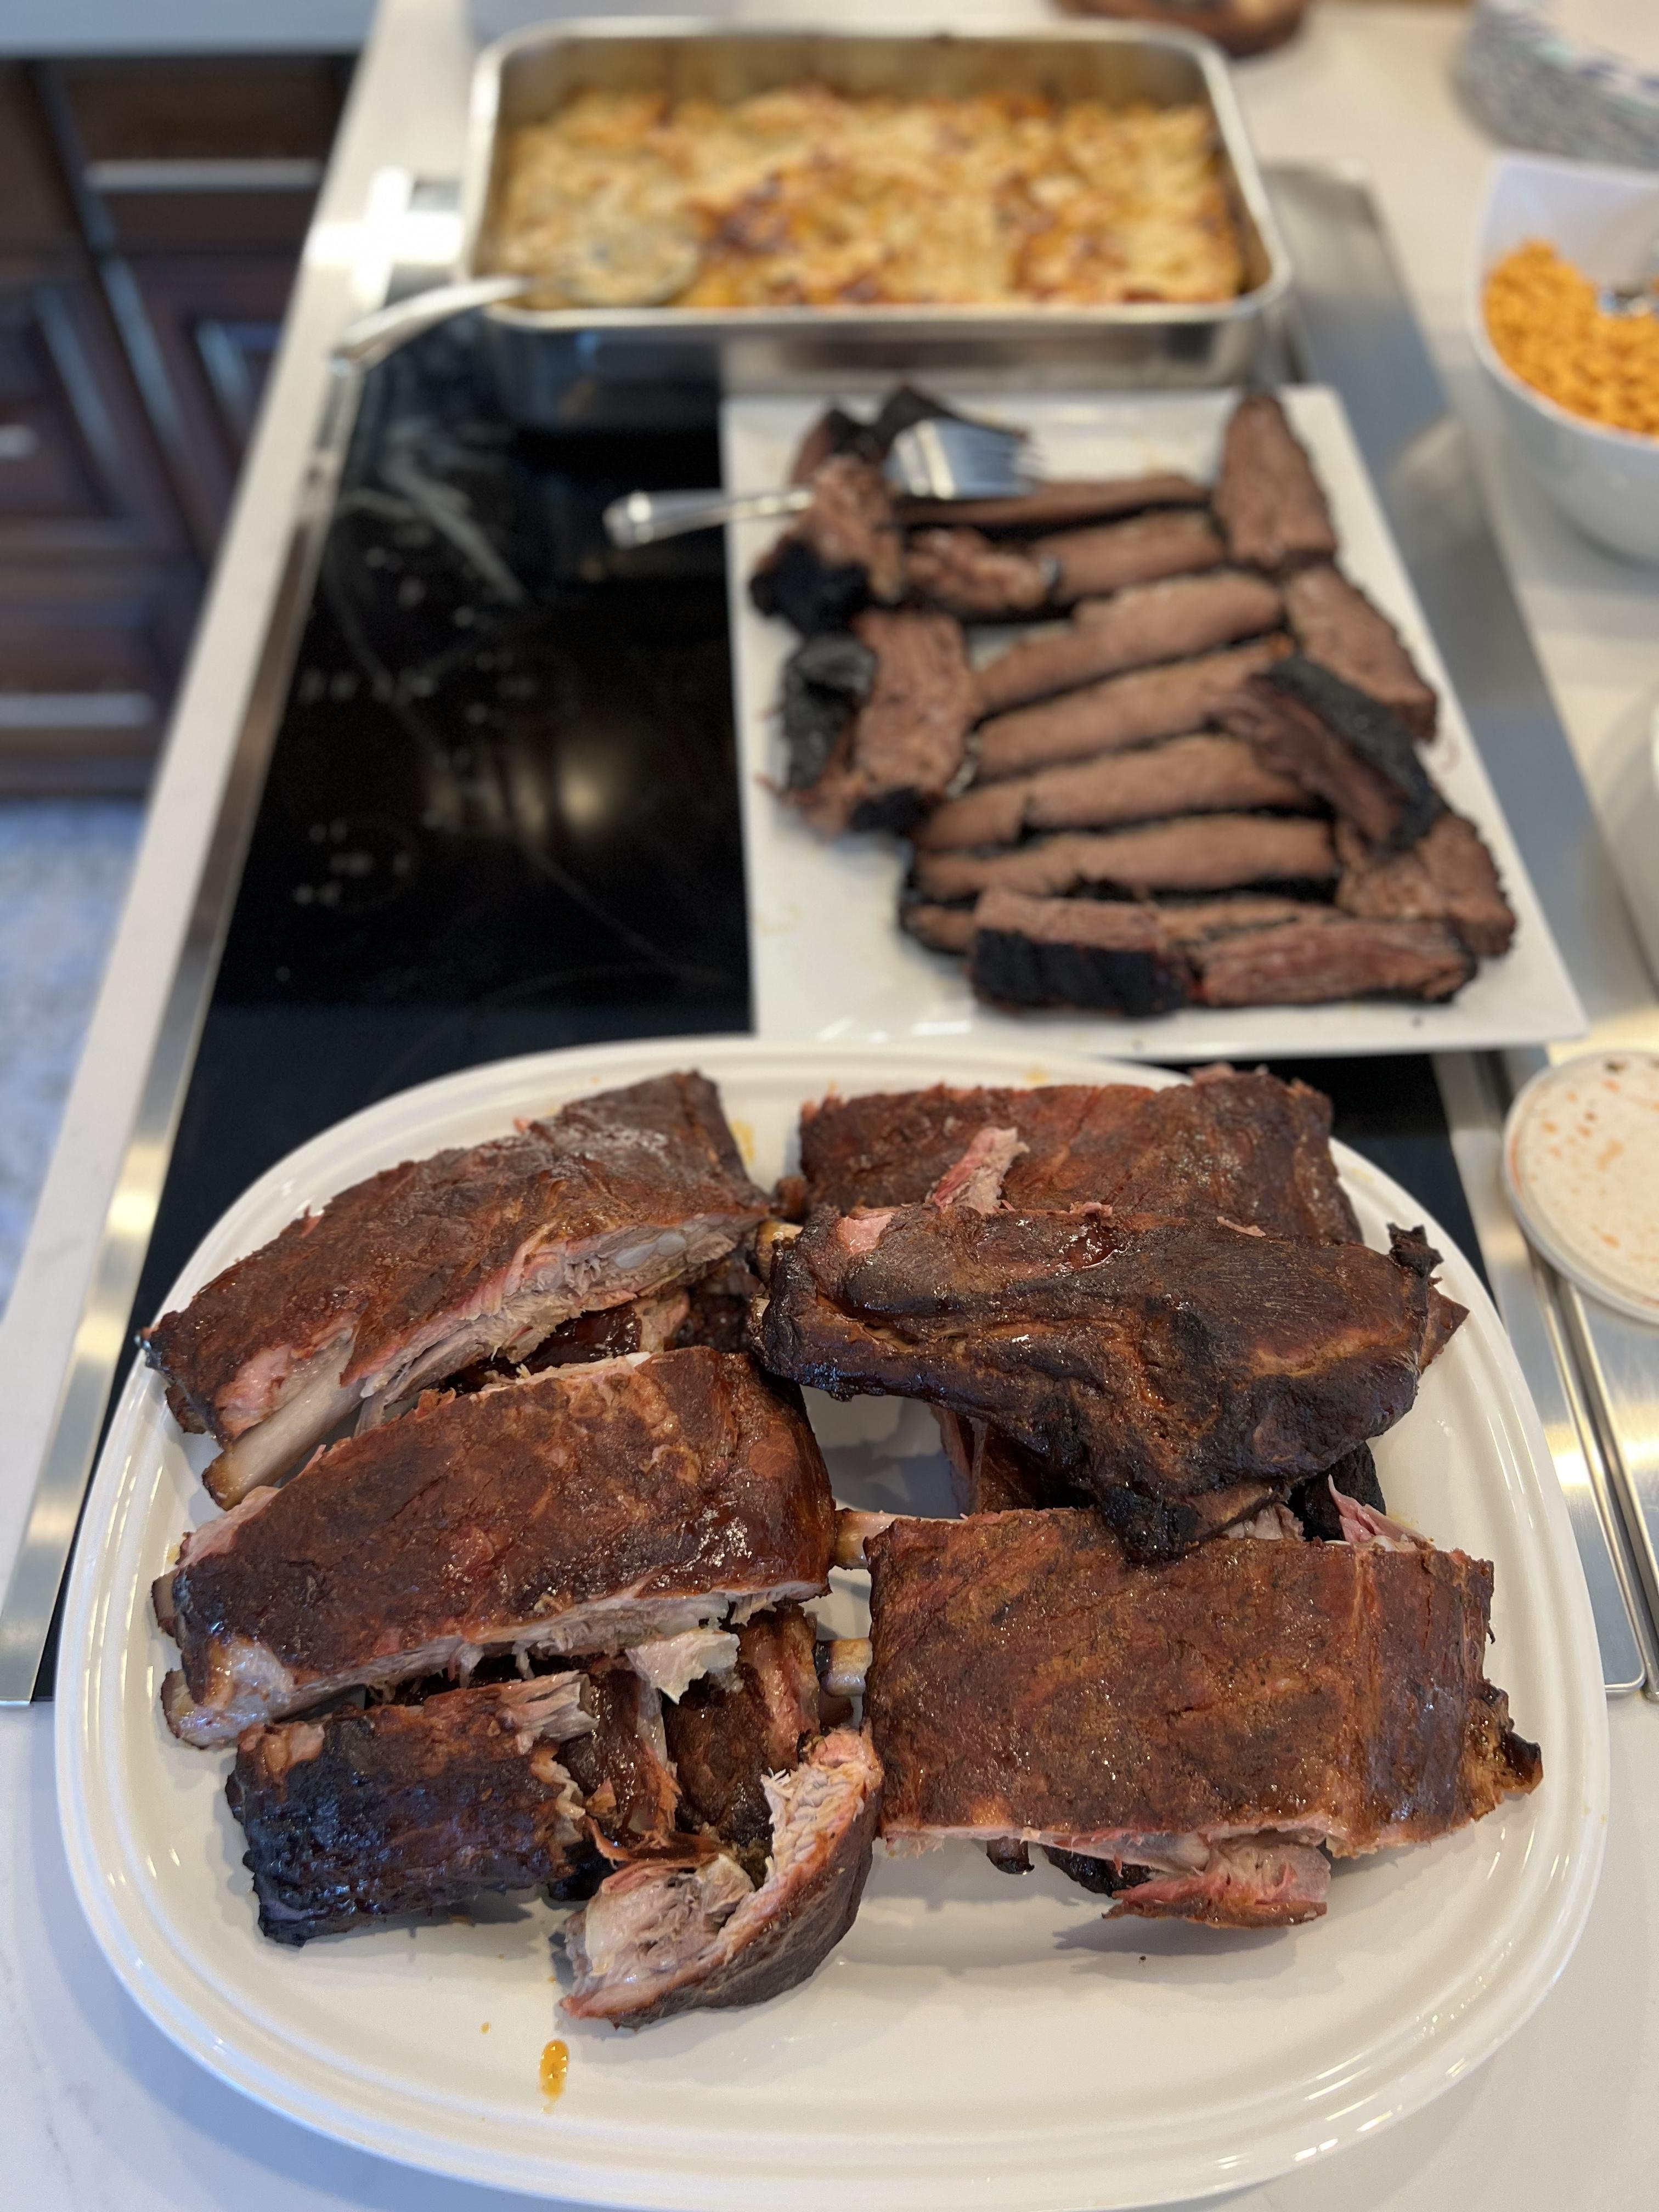
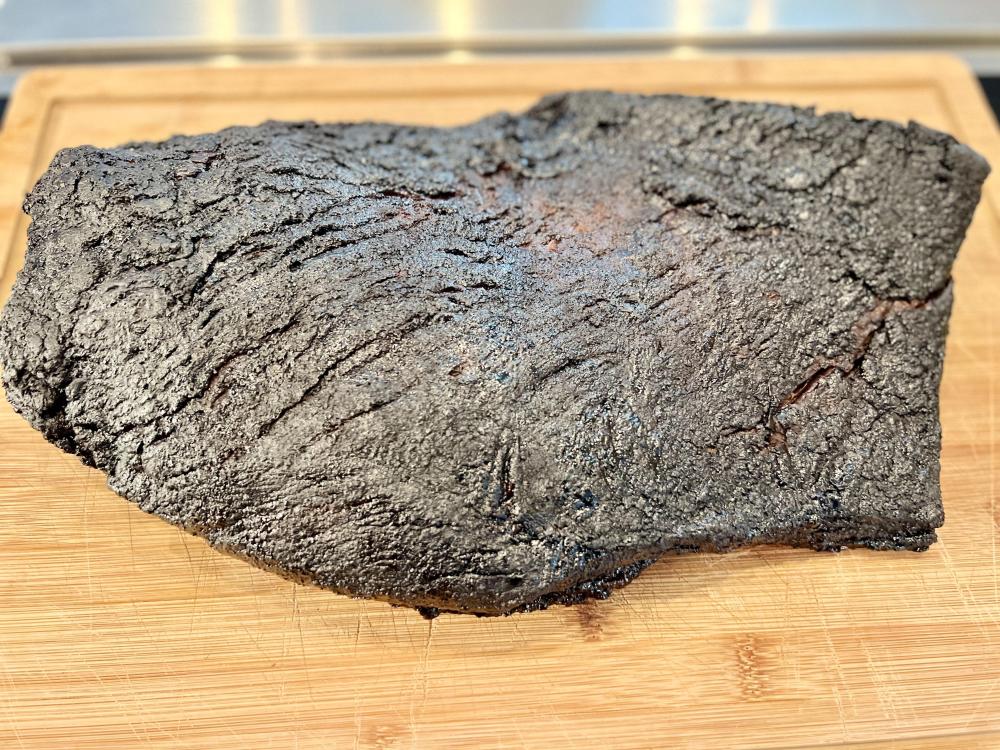
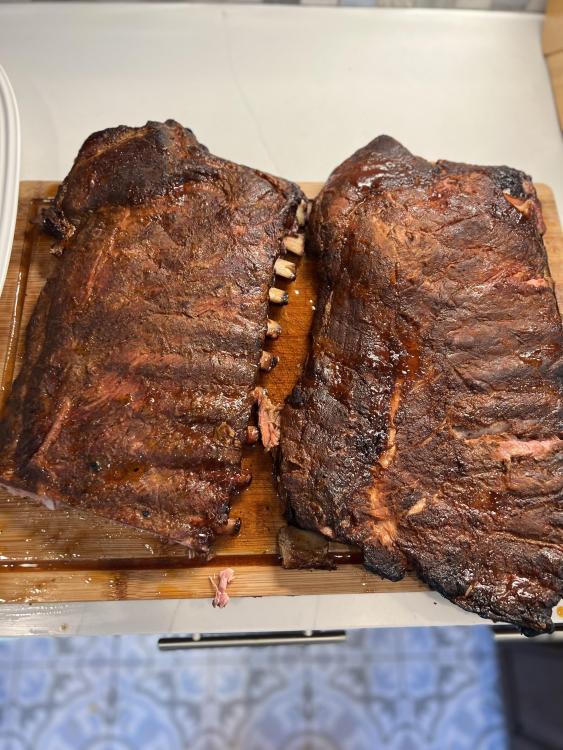
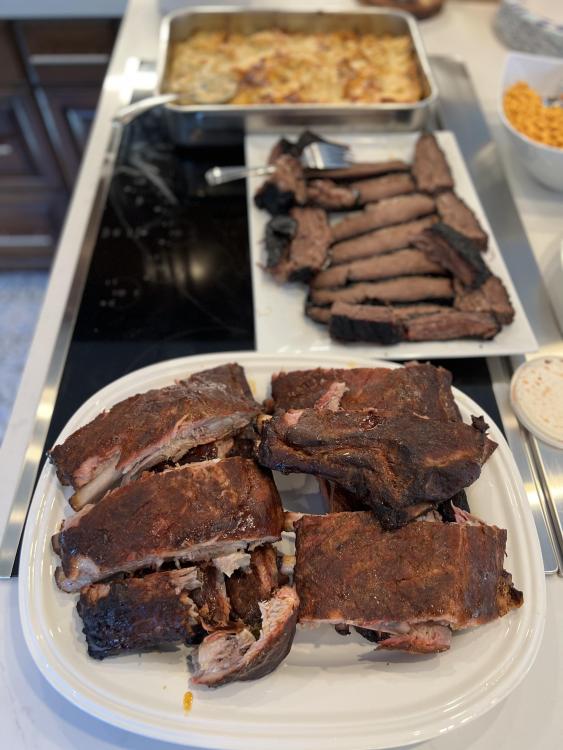
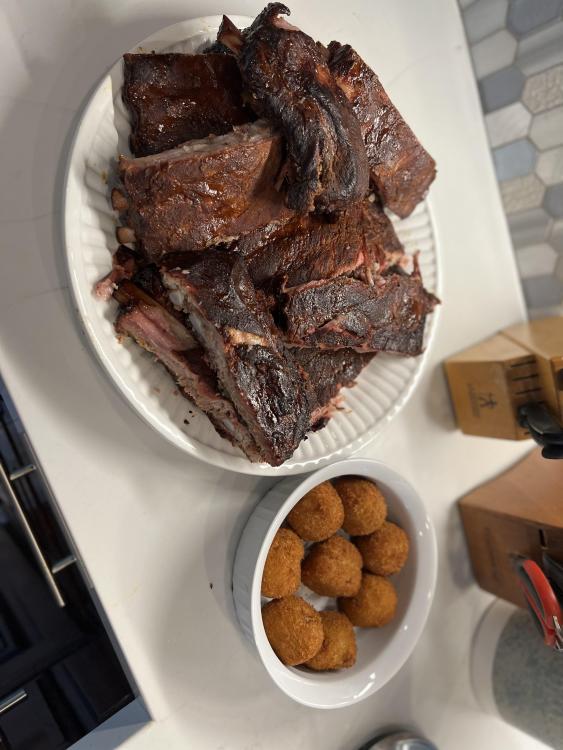
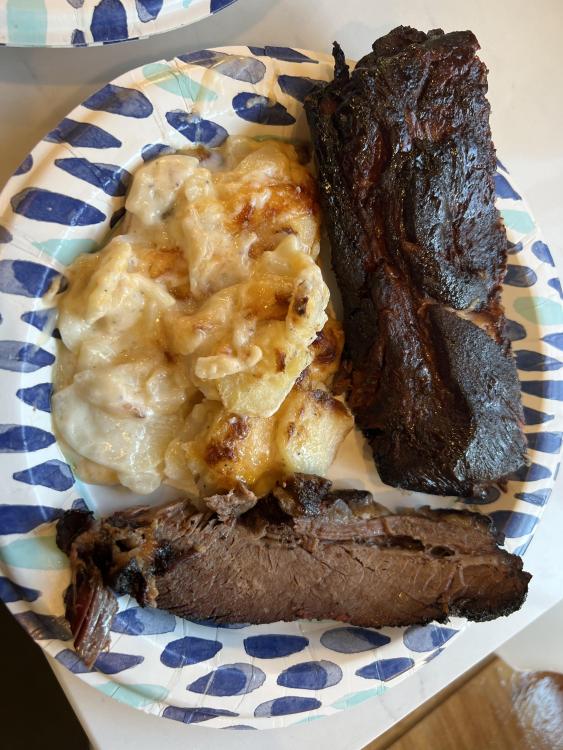
Picked up a 15lb Prime Brisket, 4 racks of spare ribs and used 4 different rib ribs that my good buddy @jonj turned me on to, plus used a brisket rub from @jonj. Ribs were rubbed with honey mustard then dry rub sat in fridge 36 hours. Brisket was rubbed with Worcester sauce then dry rub in fridge for 48 hours was aiming to serve at noon today so started the bbq during my kids birthday party yesterday and the brisket went on at 4pm much time the delight of all the dads who were at the party. Smoked at 250 with some coconut charcoal and mesquite wood. I expected to get up in the morning and wrap it but I ended up waking up at 1am, spritzing the brisket with apple juice, getting back up at 3am spritzing again then I got up at 4:45am thinking it would be time to wrap it but when I checked the temp it was 206, so I pulled it and wrapped it in butcher paper and a towel and put it in a cooler at 5am started the ribs at 5am, threw some post oak wood in there and cooked it at 225 for 5 hours then foiled it for an hour wife convinced me to get pre-made potatoes from Costco so I opted for scalloped potatoes which everyone liked and I got premade Caesar salad from trader joes. Everything turned out great. It’s been a minute since I did a big BBQ but between the last two weekends I made 2 pork butts, 4 racks of ribs & a 15 lb brisket. Thanks @jonj for all the rubs. Everyone liked them

 4 points
 -
And the pics…


 2 points
 -
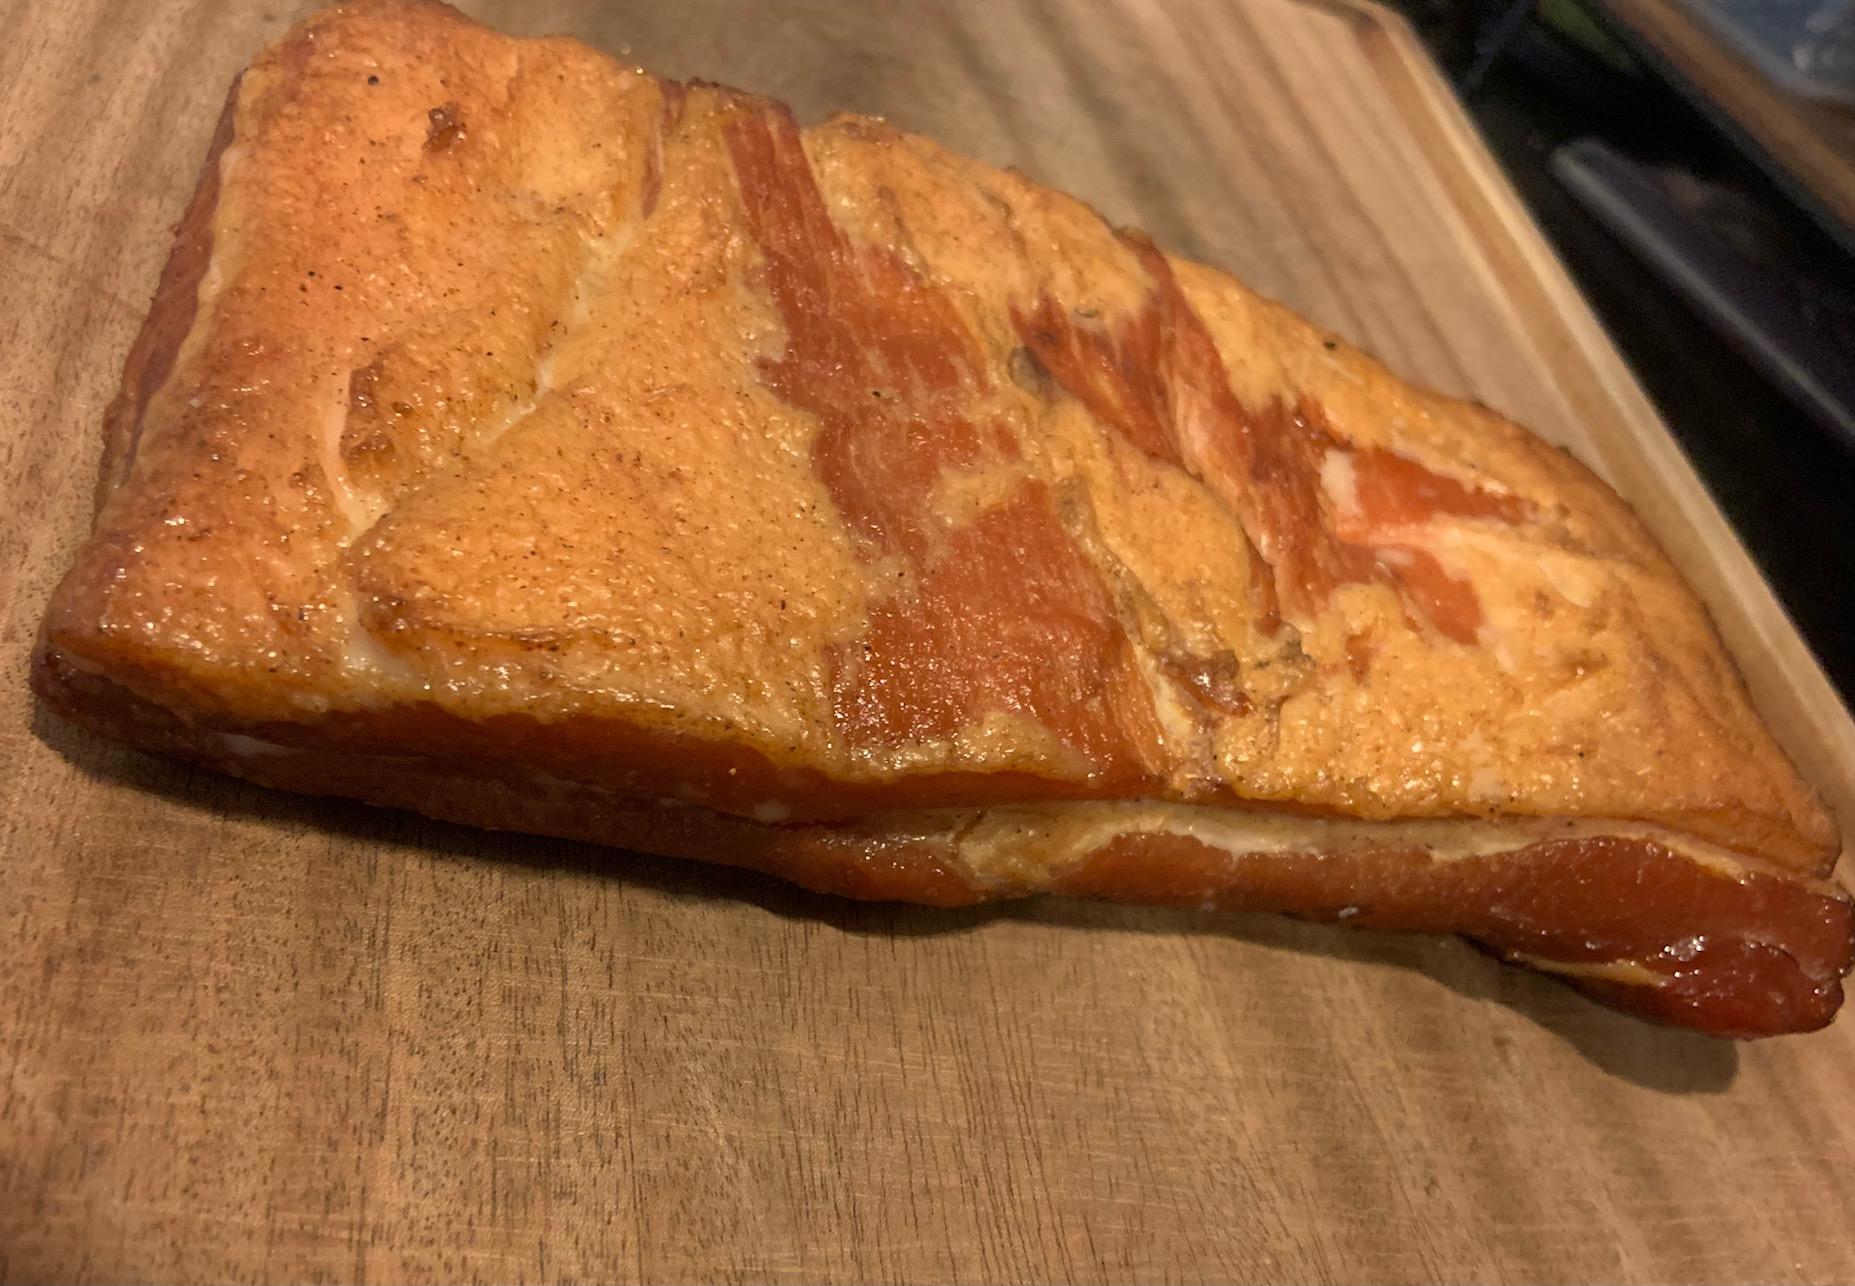
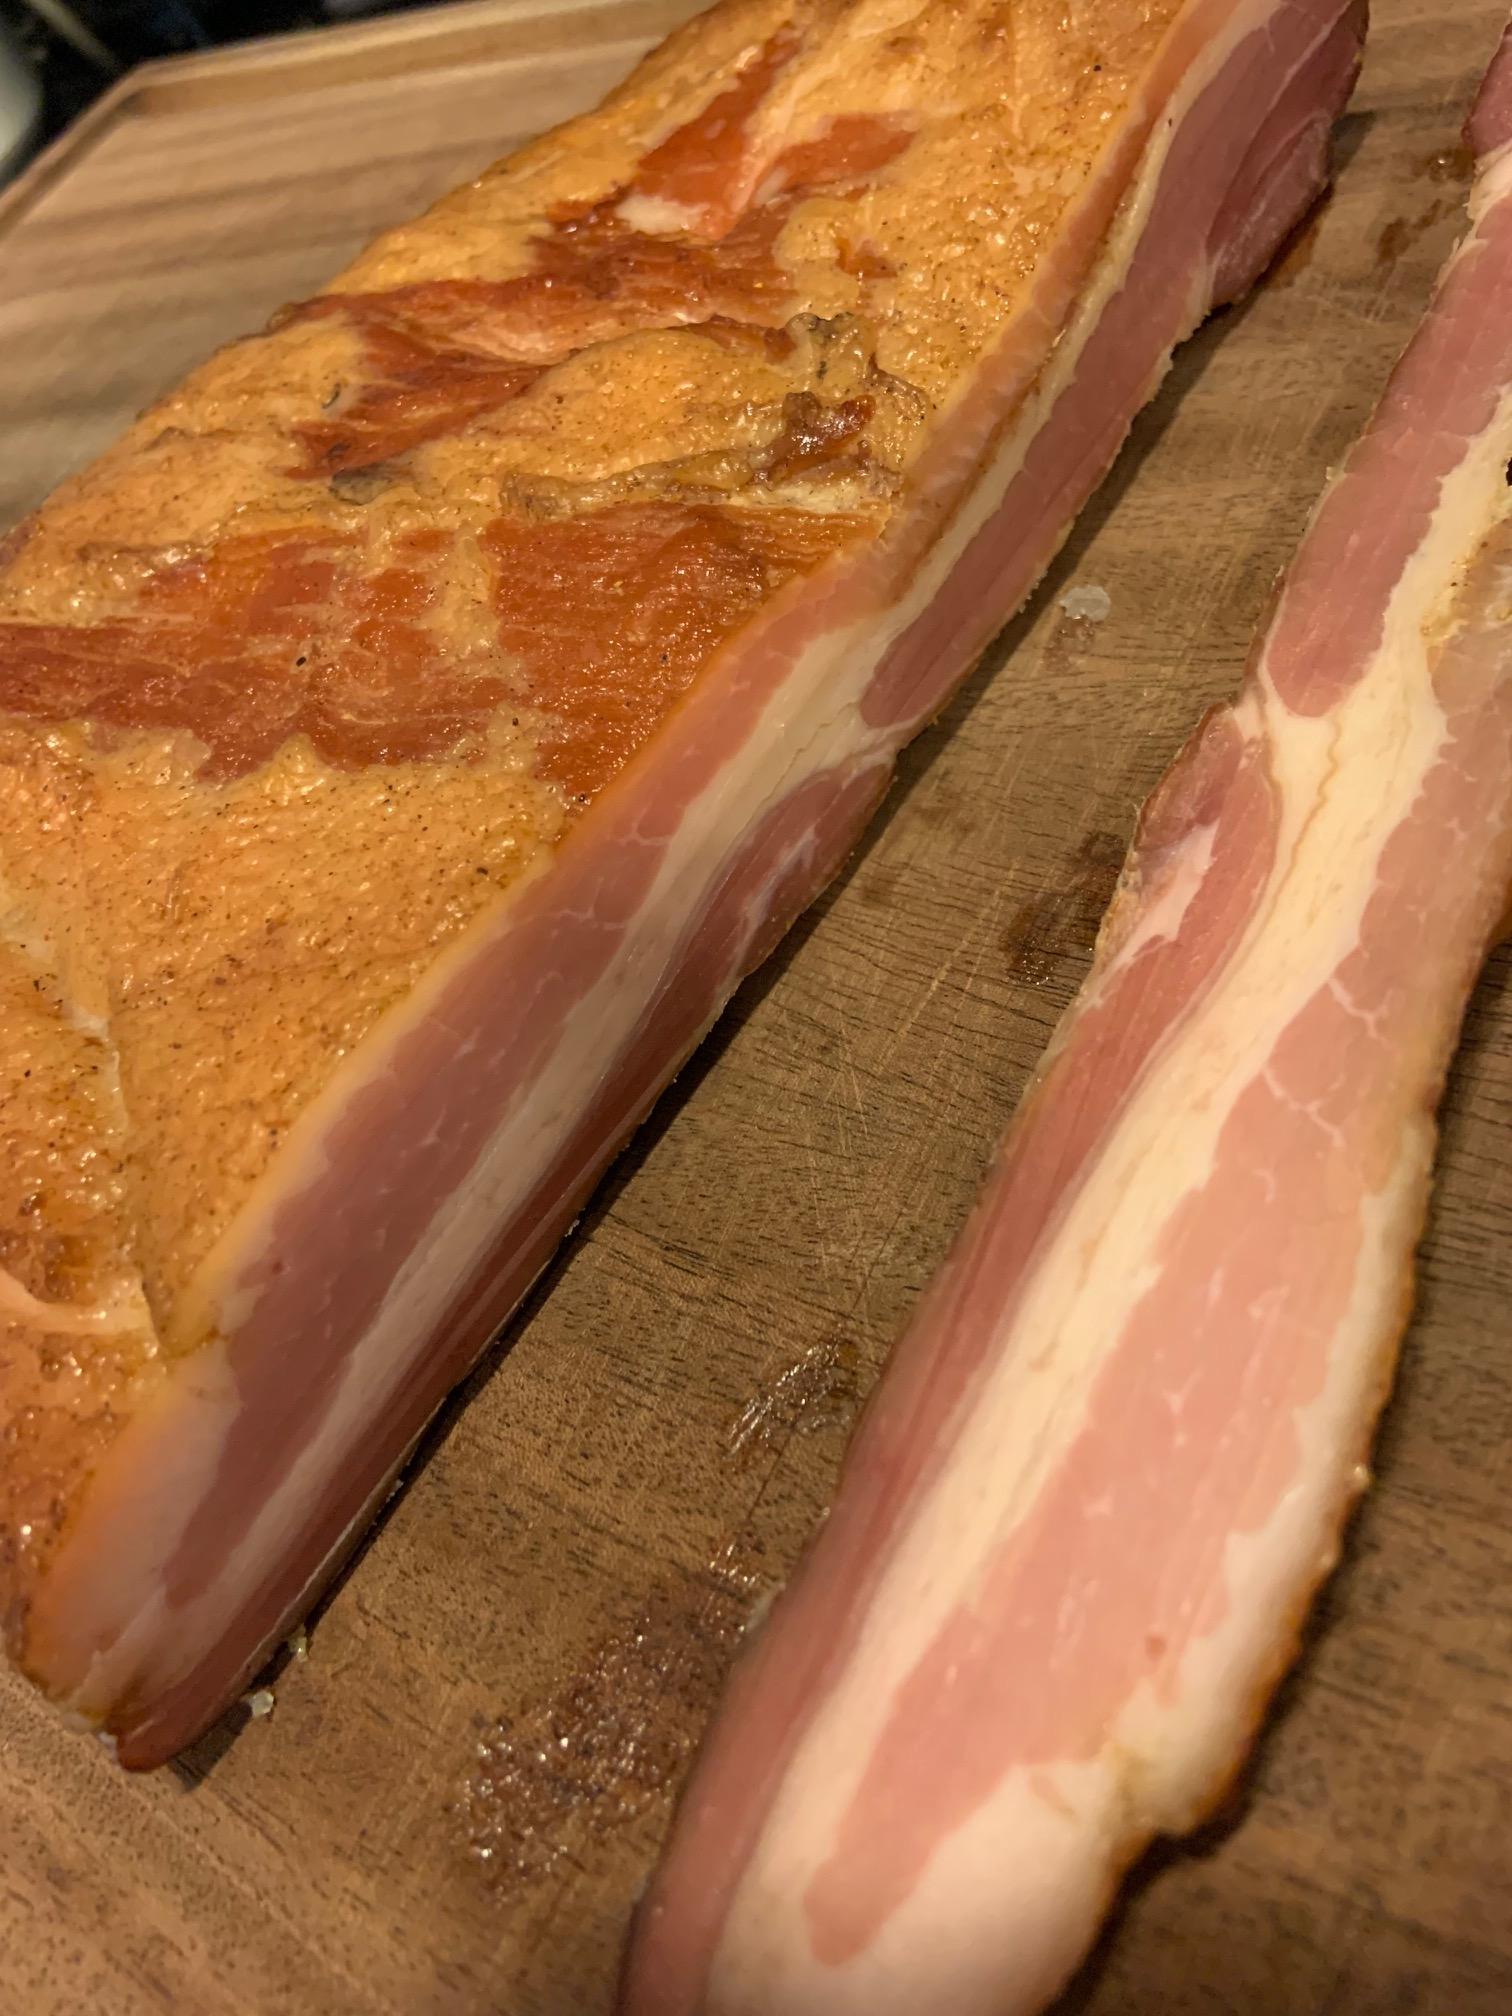
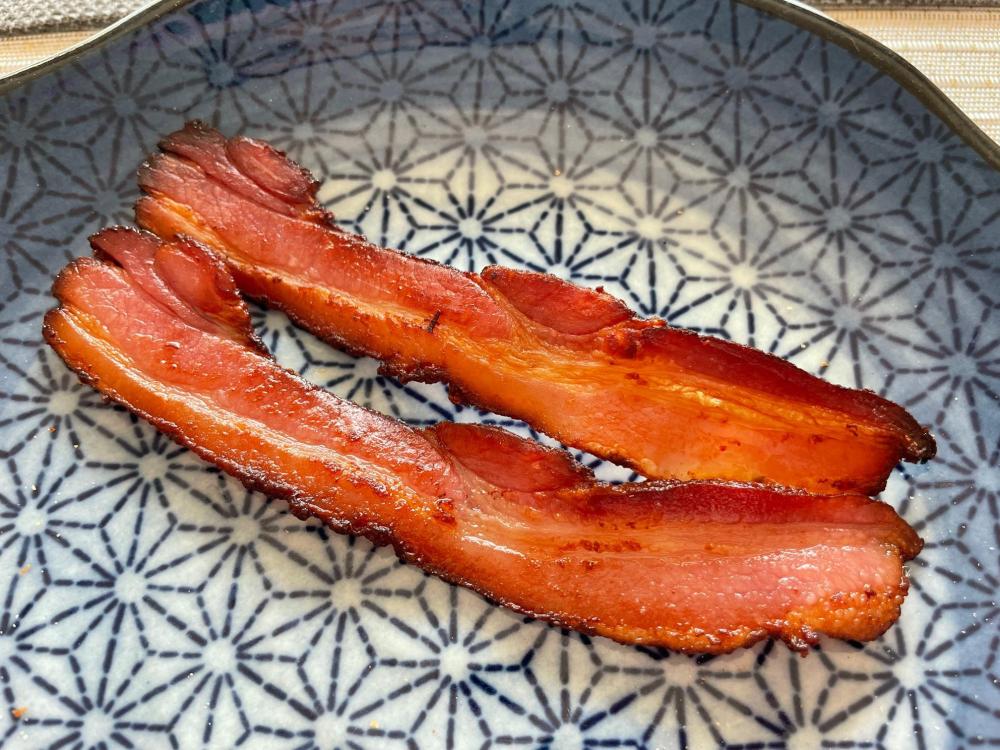
I experimented with curing bacon the other day and it turned out amazing. I can never go back to store bought. Recipe and photos below for those who want to try. Dry Curing Rub Pork Belly (2.5kg) 40g salt 40g brown sugar 5g curing salt 5g ground white pepper 5g coriander seed 5g ground mace (nutmeg as a substitute) 5g onion powder 5g garlic powder 5g ground ginger 5g ground fennel seed DAY 1: Remove skin from pork belly. Mix the curing powder and rub pork belly thoroughly. Place in a Ziplock or vacuum sealed bag. Place in refrigerator. DAYS 2-6: Turn the bag over every morning. Day 7: Remove from bag and rinse pork belly thoroughly with cold water. Pat dry and place on drying rack in refrigerator for two days to rest/dry. Day 9: Smoke on KK at 200-225f to an internal temp of 150f. Hickory is great, but other woods are too. Let the pork belly cool for an hour and them place it back on the cooling rack in the refrigerator overnight. Day 10: Slice/portion/eat


 1 point
 -
That looks like quite a spread @Troble! Making me hungry.1 point
-
Everything looks terrific, @Troble! Wish I was there to try some!1 point
-
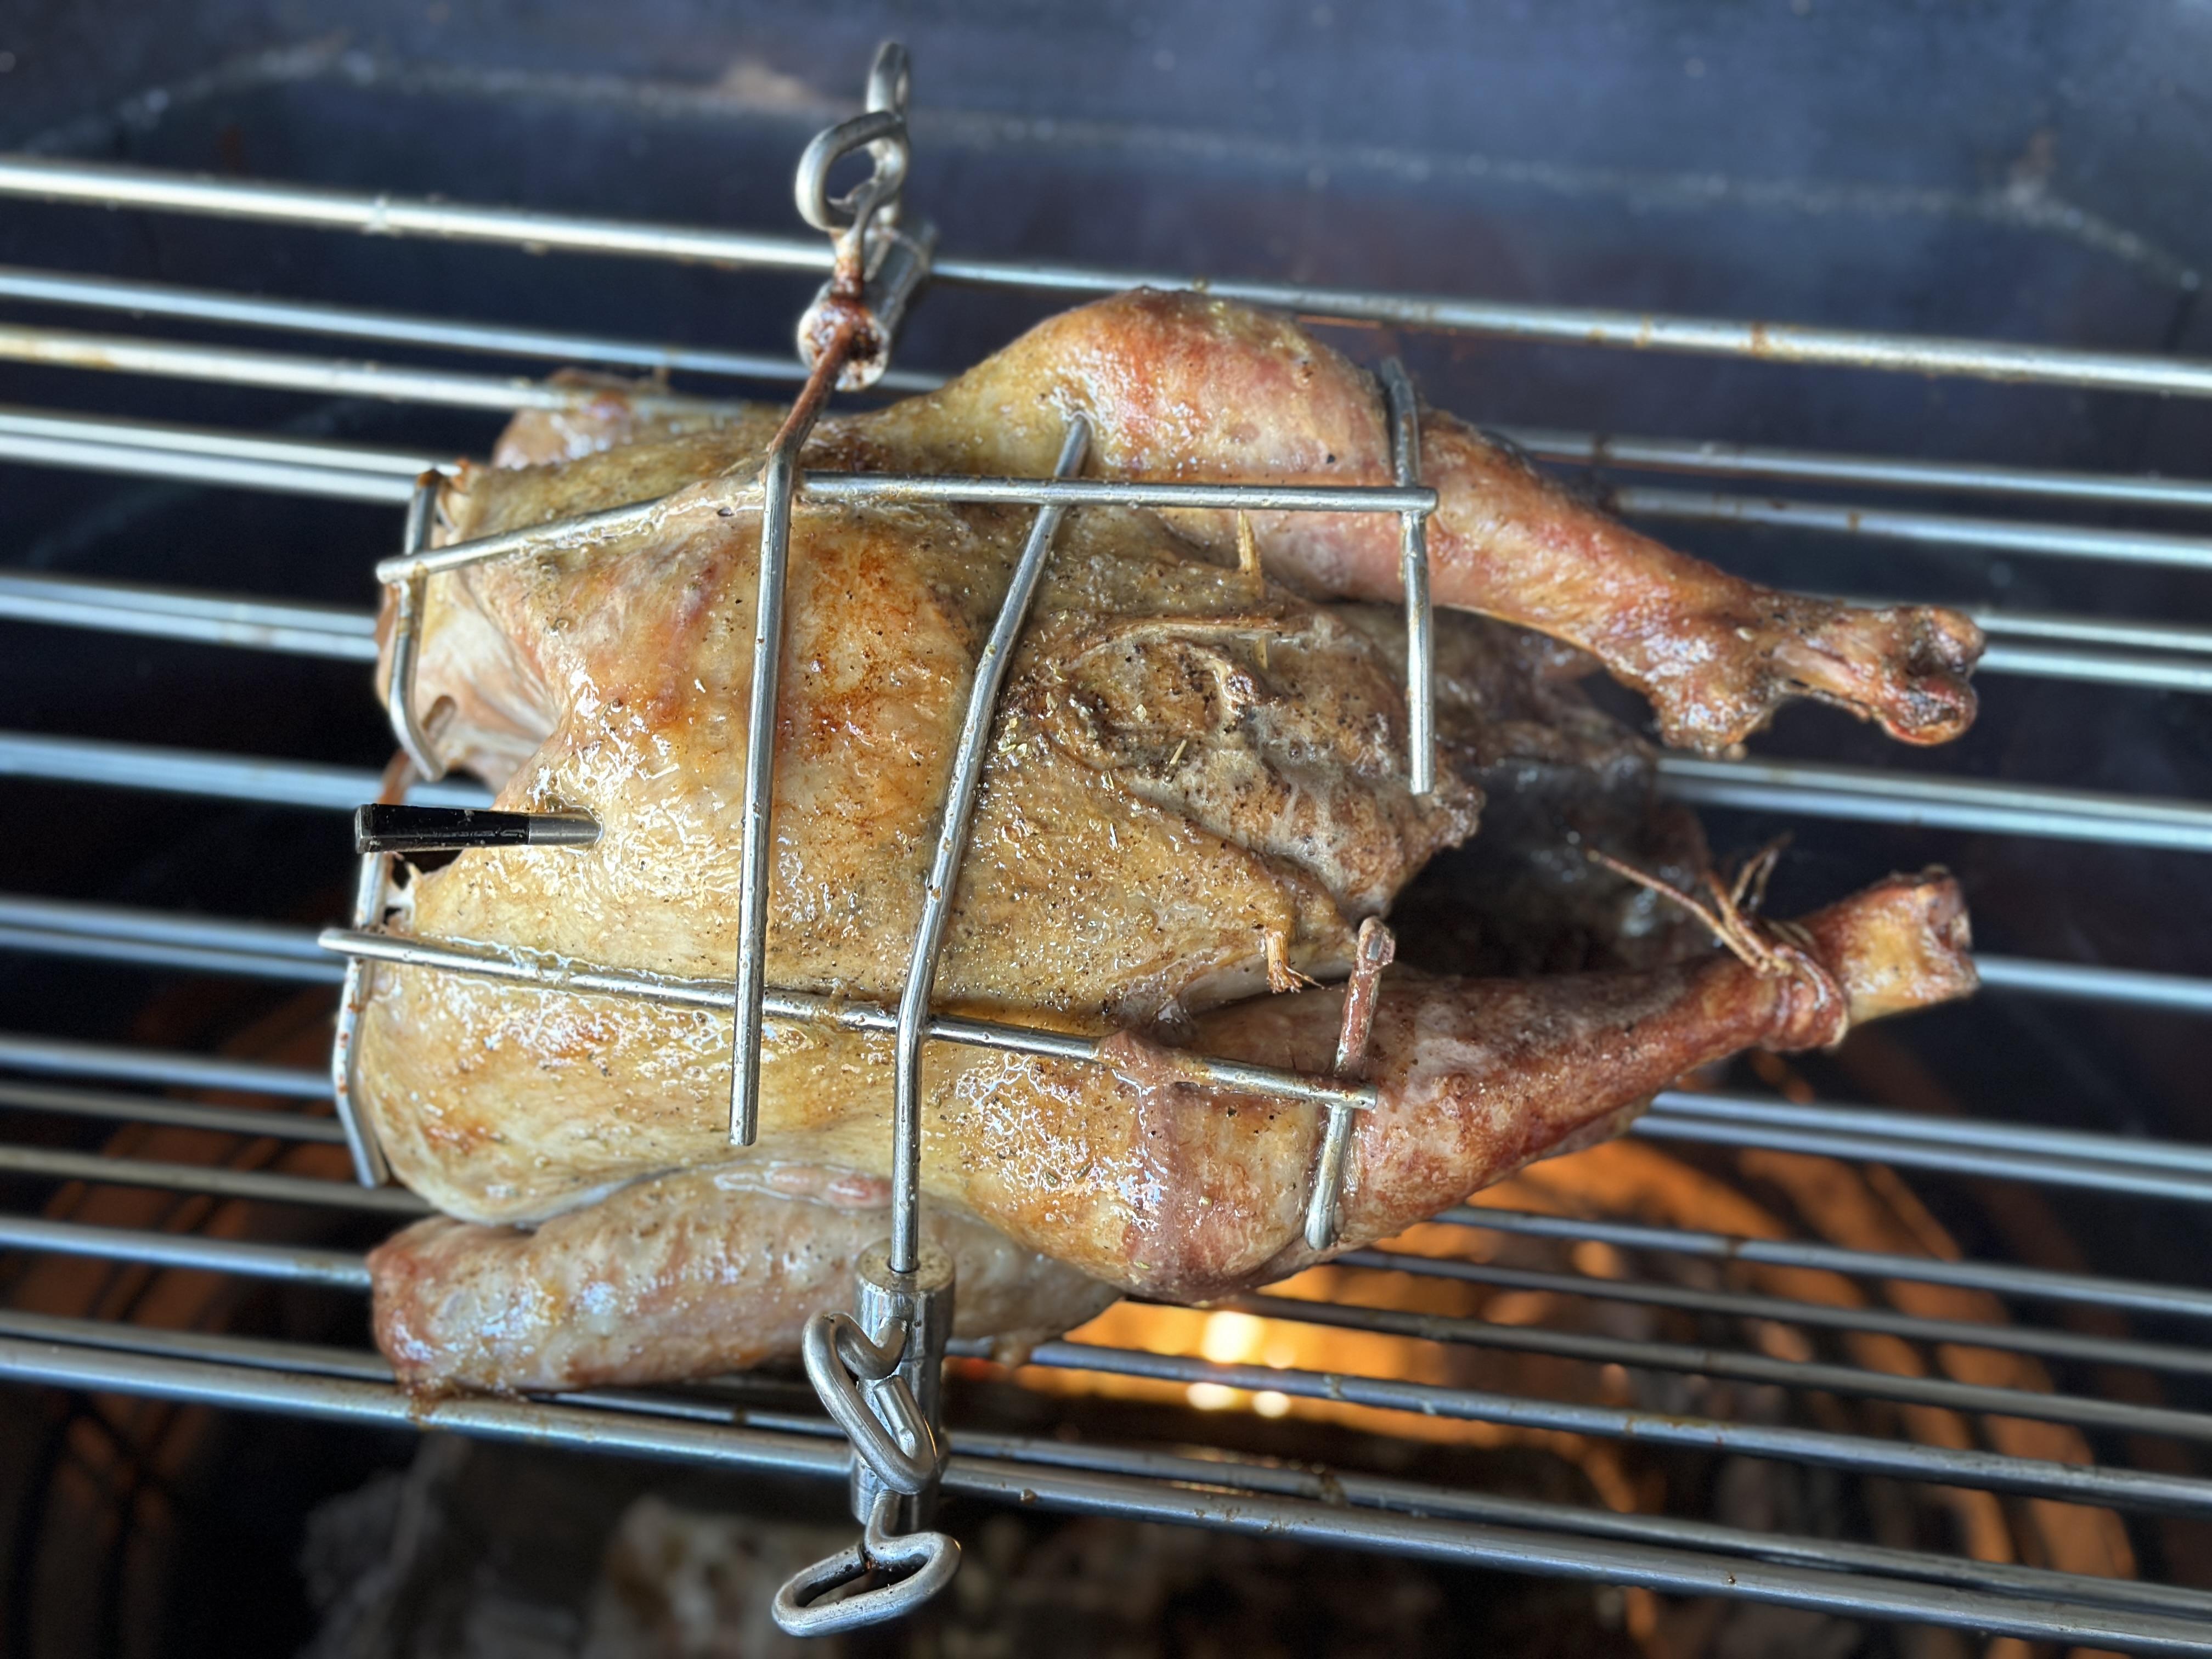
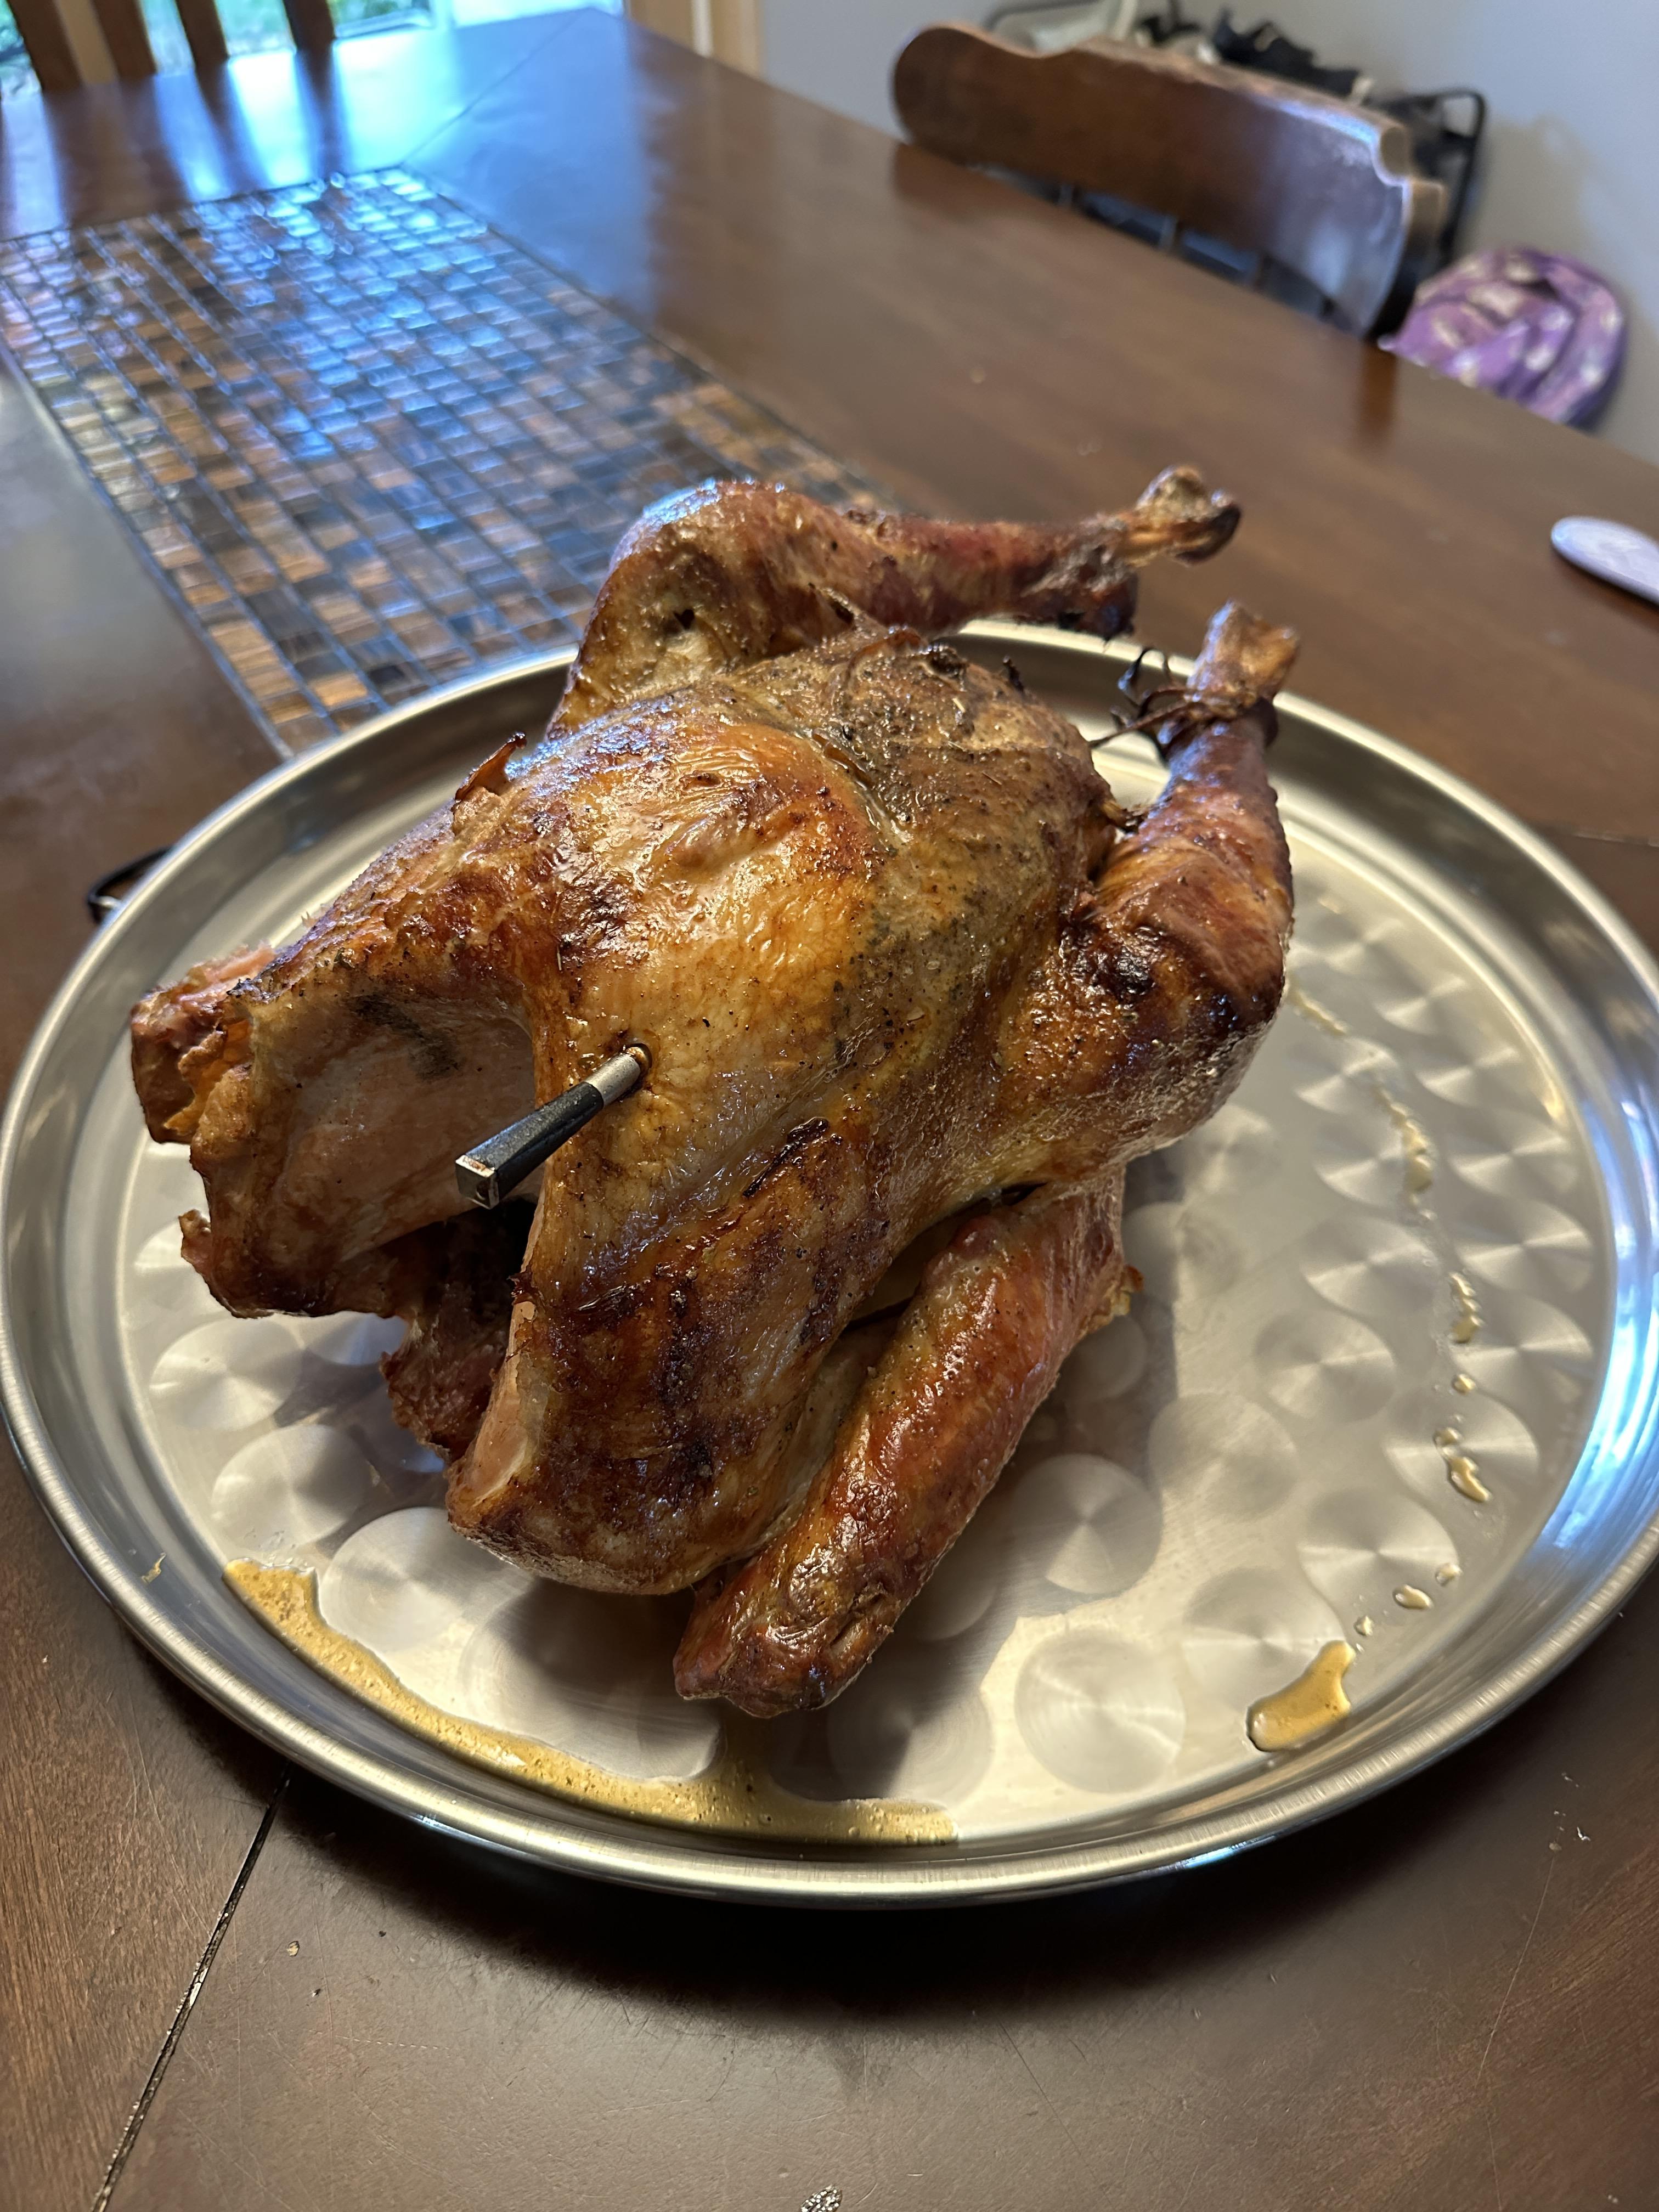
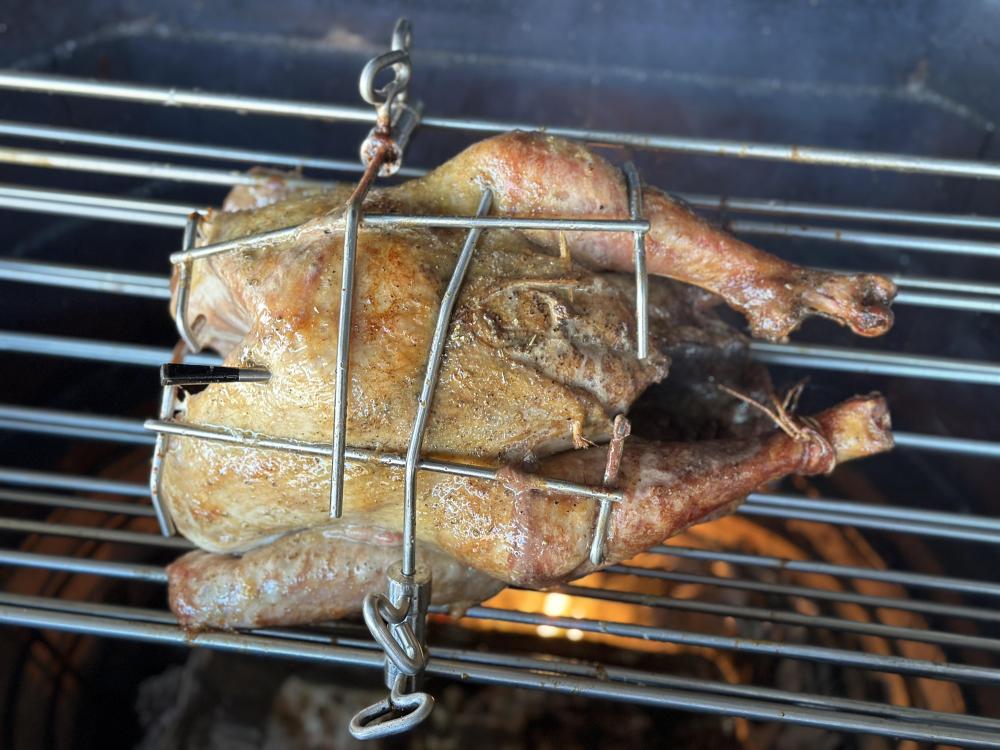
So, the first attempt was a success. It started off rough but the end product was above average. The party-goers ate the whole bird. To begin, I placed a foil pan in the basket and put the lump around it. (As advised by others.) I seasoned the bird the night before and lightly salted the outside. The next day I installed the rotisserie and placed the bird in. KK was stabilized at 275F. I let it go for about 10-15 minutes and then walked away. My neighbor was over checking things out and he noticed a sound from the motor. We went to inspect and the bird had fallen out of the cradle. It was laying on the bottom of the KK in the foil pan with coals on it. We quickly cleaned things up and situated the bird in the cradle again. One of the tines came loose and let go. Not sure if it had to do with the heat or what. It spun for a total of 4.5 hours. However, at the 3 hour mark I noticed the coals were getting low. I was hoping it would finish in time but it didn’t. I had to re-fuel the best and let it get back up to temp. I didn’t have time to get the bird hot enough to crisp the skin. It was a bit gummy. This was the only downside of the bird. The meat was super juicy and tasty. Even the breast. Overall, the rotisserie worked well and the end results were above average for my first time. Next time I will change the charcoal layout a bit. I will make a sideways L with the lump. Where the side of the L is I will place the breast towards that and the legs towards the other side. This will cook the breast a bit more so than the legs. Secondly, I will get the KK much hotter for the end of the cook. I just ran out of steam after the lump ran out. The drop in heat set me back a bit in terms of time so I couldn’t crisp it enough to my liking.1 point
-
@C6Bill. You know what's really scary? The fact that you are a Patriots fan. Fly Eagles Fly!1 point
-
Probably to late for any suggestions for this cook, but i do have some thoughts here. Wouldn’t setting up a rack with a foil pan underneath the bird also create and indirect cook? Years ago I was looking for alternatives to the deep fried turkey, I’m sure this method is also fun to cook (maybe a little more dangerous) and I’ve heard it taste great as well, I just always thought the oil requirements would be a waste as I wouldn’t likely reuse etc. I came across a High Temperature Roast turkey recipe / technique in Cooks Illustrated. The basics are spatch cooking a 12-14lb bird, brining first in a simple water / salt brine, air drying in cold space for a day or so, making gravy separately from gizzards & Neck and making stuffing separately. The spatchcocked bird is than placed on a broiler pan that sits on top of a large disposable foil pan that is filled with your stuffing. Cooking in oven at 450 degrees F and is done in about 75 minutes. This has been my go to for years, even though I own KK’s! In writing this I’m thinking if you use a foil pan to deflect the direct heat at some point you could also put a foil pan with your stuffing underneath the bird to collect all of those great drippings…..Maybe sort of a marriage of cooks illustrated and KK. In any event I wish success to Cheesehead griller and and Happy Turkey day to everybody on the forum. I know Thanksgiving is always my favorite holiday of the year!!1 point