


GoFrogs91
-
Posts
906 -
Joined
-
Last visited
-
Days Won
6
Content Type
Profiles
Forums
Events
Everything posted by GoFrogs91
-
Stable around 500. Cooked on lower grate, not searing grate.
-
Been a busy week so I didn't get too creative. Sticking with the basics as I seek to figure this beast out. Porterhouse in the ......err....house. Dizzy Pig Raising the Steaks seasoning. Straight up cook. No reverse sear or jacuzzi for these guys. The fire awaits. I think I can hear the Mormon Tabernacle Choir singing Hallelujah! Then again, that was quite a tasty martini, so maybe it's just me. Ahhhhhh. Fire. With a flash. Not as charred as I would like, but delicious just the same (med rare). I look forward to learning more from the KK veterans. Trying pizza tonight!
-
Thanks Tony. Pics in the phone from last night. Will make sure to post. I almost killed myself getting it from the driveway to the deck. This thing is H-E-A-V-Y!!!
-
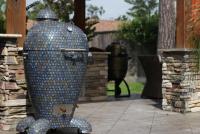
Thanks. The low res picture doesn't do it justice.
-
The angels are singing and the harps are playing. Finally, it has arrived. The Broil King Keg in the background is decidedly unhappy.
-
Do you guys use the Tapatalk app or go to the KK website to post?
-
If you are coming from a traditional, wood burning offset, this is a totally different animal. Fill the basket with charcoal. Only light in one place. Take your time bringing up to temp or you will overshoot.
-
I hit the "..." Icon in the far top corner of the screen. Choose reply. There are icons that denote choosing from picture, camera, etc. I am in the Tpatalk app.
-
Test
-
MM - was that your only smoke choice or were you augmenting chunks? Love playing with new toys
-
( )
-
Robert, I'm curious. What is up with the multiple designations in every one of your posts. If this is a secret handshake thing, let's hear it.
-
Agree with tony b. I would add pecan to his list as pork friendly. Mesquite is generally best for beef unless your palate leans toward a harsher smoke preference.
-
Thanks guys. Time is in slow motion waiting. Tick...........tock.........tick.........tock
-
Congrats MM. What color?
-
Thanks Robert. Position/type of deflector, drip pan, etc?
-
Beautiful lamb. Oh, and I will have a glass please.
-
Getting my KK next week and would love to get input on how everyone is setting up their cookers for the extended smoke.
-
TOTALLY BUMMED!!!!!!!! Wrong grill!!!! Originally selected a brown unit and changed to Terra Blue. Received the brown. Based on all of the positive reviews, I'm not worried about Dennis fixing it, but man this stinks. Sigh.
-
Congrats Wilbur! Mine is actually delivering to Houston this afternoon and I can't wait. If you have never used a Kamado style cooker, I put together some basic information on a recent post. Kamado Cooker Basic Primer http://www.komodokamado.com/forum/index.php?/topic/4948-Kamado-Cooker-Basic-Primer Good luck with patiently waiting. What color did you get?
-
I had a couple of friends recently acquire Kamado style cookers and prepared some basic information to get them started. I am attaching it below for those new to Kamado cooking. I expect to take delivery of my new Terra Blue 23" next week and can't wait to play with the new toy. Congratulations! What you have acquired, is a Kamado Cooker (Big Green Egg, Akorn, etc.). Most are similar in shape and have two vent openings. One on the top and one on the bottom. As opposed to other traditional charcoal grills, these are incredibly efficient in retaining heat and moisture. I myself have a Broil King Keg that my wife won a year or so ago at work. Same concept as what you guys have. After spending my entire life using gas grills, this was my first foray into charcoal. The kamado cookers are basically a charcoal fed convection oven. The lit charcoal heats the air and the air moves up inside the cooker toward the top vent. Replacement airflow is drawn in through the bottom vent bringing fresh oxygen (fuel) to the fire. The new air is heated and moves upward and some is released through the top vent. Much of the moisture and some of the heated air is forced back into the unit and round we go. The more the vents are opened, the more this reaction speeds up and the higher the temp goes. The bottom vent drives the temp more than the top. I have messed around with it quite a bit, so here is what I have learned. Rule #1 – Use lump charcoal, not briquettes, especially not “ready to light†that are impregnated with chemicals. They can penetrate the ceramic and taint many future cooks. Rule #2 – The heat(fire) in your grill is a function of access to fuel (charcoal + oxygen). The more of either, the temperature goes up. Rule #3 – Due to their efficiency, the temperature does not come down very quickly. If you significantly overshoot your target temperature, you are hosed for an extended time period. Rule #4 – The thermometer that is planted in the lid of your grill generally stinks. Mine varies up to 100 degrees from actual at times. DO NOT TRUST IT! You need to get a digital thermometer. This is what I have and it has worked great. It is a Maverick wireless, two probe unit. One probe for the grill and one for the food. Rule #5 – If you want to actually learn to smoke a number of different types of meat (ribs, pork butt, brisket, etc.), it is best to determine what level of babysitting you enjoy. There are those that enjoy waking up at 2am and checking on the 18-hour brisket or hanging out next to the cooker for 12-hours, and those that don’t. I fall into the latter category and choose to leverage technology. I had the unpleasant experience once of going to a soccer game and coming back to a fire that had gone out while smoking a pork butt. There are a number of devices that will monitor the temperature of the food and the grill and actually turn on a fan to stoke the fire in your absence. What I currently use is the CyberQ WiFi. I can access the unit via my phone over the internet and change temperature settings remotely. Setup was a pain, but it rocks. Two of the most popular units on the market are those made by BBQ Guru or Rock’s Bar-B-Que. Plenty of reviews online if you want to investigate. Rule #6 – If left lit with both vents open and unattended, these things can get out of control in a hurry. (I don’t know about the Akorn, but the BGE should have a felt gasket that sits between the top and the bottom and forms a seal between the two. I have read a ton of stories of owners frying that gasket up and needing to replace it.) Rule #7 – If you value the hair on your arms or your eyelashes, “burp†your grill if the temp is over 400 degrees. Slowly open the grill about an inch or two to allow some air in for a few seconds before opening all the way. If you don’t, you can have a flashback fireball in your face. Basics of fire in a Kamodo Start with a full fire bowl of charcoal. The best widely available that I have found is Royal Oak lump charcoal. You can usually find 20 lb. bags at Home Depot (good charcoal = lots of large pieces and fewer small little pieces). Open the bottom vent all the way. You can either light the charcoal in the cooker or use a chimney starter. A chimney starter is basically a big can with a handle. You put charcoal in the can and light newspaper below it. When it is lit, you dump it in the grill on top of your unlit charcoal. I don’t use this method. The second method is to light the charcoal in the cooker. There are a lot of paraffin cubes or other fire starters sold at the grocery or hardware stores. I currently use a (Bernzomatic MAP Torch): It takes about 30 seconds with this torch to catch the charcoal and get going. When I say “catch†I just mean that the coal is orange on the edges and will stay lit when you remove the ignition source. When you have lit the charcoal, close the lid and open the top vent all the way If you are us a fire starting cube or stick, make a little pyramid with a few pieces of charcoal and put it under the apex. Light the cube(s) and let it burn under the charcoal, when the flame goes out, close the lid and open the top vent. The heat from the coals that you have lit will create the convection effect and stoke the fire. As the coals are stoked by the wide open vents, the lit coals will spread fire to other unlit ones. VERY IMPORTANT: If you light too many coals, it will be impossible to hold lower temperatures (225-250) for smoking. With the lid shut, there won’t be enough oxygen for flames to form, but the coals will still get hotter and expand the fire to others. Very large pieces of charcoal leave a lot of space in between, which results in high airflow and the potential for high heat. If you have a basket full of a bunch of little pieces of charcoal, it will restrict the airflow and reduce your maximum temperature potential. After the fire is lit, there are a few things going on simultaneously. The coals are expanding the fire between them, grills or other objects (heat deflector, drip pan, etc.) in the cooker are absorbing heat from the fire, and the cooker itself is absorbing heat. The reason that this is important, is that as you’re raising the temperature of the cooker and everything in it, you can exceed the size of the fire required to maintain your target temperature. This is most important in maintaining low temperatures, but applies at higher temps as well. Due to the kamado’s efficiency, it doesn’t take a lot of incremental BTUs to maintain heat. Think of this thing a little like a locomotive. Once it gets inertia going, it takes a while to slow down, even though the engineer applied the brakes a while ago. So if the temperature is climbing quickly, even after we apply the brakes (closing down the vents), the temperature will continue to rise. Okay, so how do we retain control? We apply the brakes early so we don’t blow past our target temp. When you are 50-75 degrees below your target temperature, start closing the vents. This will take some trial and error to get the hang of your particular unit. For example, when I want to smoke at ~225, I have to close the vents down to about the width of a dime or nickel, top and bottom. At that kind of setting, there is barely enough airflow to keep the fire going, but it is enough to maintain the temperature. If I want to get up to ~400 degrees, I have the bottom vent open about an inch and the top open three nickels. Important: When trying to slow down the temperature rise, err on the side of closing too much versus too little. Watch the temp on your new digital thermometer. We want it to slow down and stabilize. If it does this below your target, start with adjusting your top vent more open. Think of the top vent as more of a fine tuner and the bottom vent as the gas pedal. Smoking: You are going to target low heat so you want a very small fire. Do not light the coals in more than one spot or you won’t be able to keep the temp down. I like to start a couple of coals on one side of the cooker. I feel that if you start the fire in the middle, you can ignite more coals resulting in a hotter fire than you may need. Very Important: All smoking will go on for several hours, so you don’t want your meat to get direct exposure to the fire or it may burn or cook unevenly. You need to cook indirectly. That means that you have something between your meat and the fire. This could be anything from a foil pan, to aluminum foil, to cast iron, to a heat deflector made by the manufacturer. Your meat needs to be elevated above this object so that there is air between the meat and the device. Keep in mind that the meat that you are smoking will drip onto whatever is underneath it. Many prefer to wrap their deflecting device in foil to keep it clean from grease if it is not disposable. The next part is personal preference. Some people put the grill that they will smoke the meat on and the heat deflector in the cooker as they get up to temp so everything heats up together. The downside of this approach is that you have to take it all back out when you reach your target temp to add your smoking wood and then put it all back in before you add your meat. If I am feeling lazy, I leave the grill and the heat deflector out while I am heating the cooker. When my cooker is stabilized at my target temp, I put a chunk or two of smoking wood directly in the hot coals, put the grill and deflector in, and add the meat. With this approach, you have just put a cold (relatively) grill, a cold heat deflector, and a refrigerated hunk of meat in at the same time. With all of this messing around, your grill temperature will plummet while the lid is open. Next, you will observe the temperature of your grill rise after shutting the lid, but stabilize below, maybe significantly, your target temp. Don’t panic and don’t touch anything. The fire has to bring what you added inside the cooker up to a higher temperature before it can stabilize at your target. Give it fifteen or twenty minutes before opening vents anymore. If after that time, you still aren’t where you want to be, judiciously increase your vents. Much of this is avoided with an automatic temperature controller. However, you may have to manage these a bit too at the beginning. After starting your fire, I would recommend setting the temperature on your controller about 50 degrees below your target. Let it stabilize and bump it up 25 degrees. Let it stabilize and bump up to target. You may find that it overshoots the temperature that you have set. All of the different brands of units have algorithms that function a bit differently so getting to know how yours behaves is important. It is fun to try different types of woods with different meats. I currently have cherry, apple, peach, sugar maple, red oak, mesquite, pecan, and bourbon barrel oak staves. I recommend http://www.fruitawoodchunks.com/. This is a great source of woods and they have recommendations of what woods go best with what meats. Important: Perfect temperatures like 225 degrees being optimal for smoking are not concrete rules. If you go up to 250 or 260, don’t worry about it. Throttle down if you can or don’t. It won’t matter to the finished product, but it will cook faster if you run hotter. Grilling: Much more forgiving. If I am going for higher heat, I will light the fire in 3-4 places. The fire will spread faster and heat up quicker. I will go around 500 degrees for burgers or steaks for a nice crust. DON’T FORGET TO “BURP†THE GRILL. Keep in mind, when you open the grill the coals will catch fire and the heat radiated can rise quickly. Getting some silicone gloves is advisable to protect your hands, especially if you are flipping a lot of burgers. Same overall rules apply for controlling heat, even at higher temps. For roasting chickens, pork tenderloins, Tri-Tips or other meats, it is nice to add some smoking wood for additional flavor. When you are done cooking, just close the top and bottom vents completely. The fire will be oxygen starved and the embers will die. You will be surprised how much charcoal is left, especially during low temp cooks. Just make sure that you clean the ashes out of the bottom prior to your next cook. Some good websites with tips and recipes: http://amazingribs.com/ http://www.greeneggers.com/index.php?option=com_simpleboard&Itemid=112&func=showcat&view=classic&catid=1&showdays=2&rightstyle=r-wide&leftstyle=l-wide http://www.deejayssmokepit.net/ http://www.nibblemethis.com/ Have fun!!
-
Our Olive Gold has arrived…party in the driveway!
GoFrogs91 replied to BBQBabes's topic in Forum Members
I'm with you BigLazy. Mine is on the water and I can't wait. -
Thanks Dennis. I'll try it
-
Great pics! I'm inspired to try again.
-
Thanks for the help. I'm not an official KK member yet, but believe that I have one on the water. I can't wait!!

