


wilburpan
-
Posts
781 -
Joined
-
Last visited
-
Days Won
28
Content Type
Profiles
Forums
Events
Posts posted by wilburpan
-
-
That is impressive! Great job!
-

You know where this container is going to end up when the ship hits the dock.

Could be worse. Bosco’s container could be the bottom one in the middle.

That way it will be the very last container to get off the boat. That should add at least an extra day of transit time.

-
I have to say, the first thing I thought of when I saw the title of this thread was, “I thought they had two grills? Why are they just using one? I hope something didn’t happen.â€
-
Great cook, Wilbur. You know that I'm a big fan of your duck cooks!

How did using the injector work for puffing up the skin? I tried the turkey baster with the injector needle before and it didn't work so hot.
I read a post online about using a foot pump for inflatable toys to blow up the duck. Might be worth the coin to give it a try.
The injector works okay. I usually insert the needle near the base of the neck and slide it towards the tail end, and then inflate. I can consistently separate the skin on both sides of the breast and both sides of the back. It’s not as good as using a compressor (see here: https://youtu.be/xp-kzew2Ewg?t=47s), but that’s the part of the duck where you get the most skin.
I just read an article this morning about just inserting a large spoon under the skin to manually separate if from the meat. I may give that a try as well.
-
That’s a great looking chicken. I’ve said this before, but you’re going to have a great time using the rotisserie.
Just to clarify, is your motor running clockwise or counterclockwise if you look at the side of the motor that the shaft inserts into?
-
I plan about 45 minutes to an hour cooking time for my duck cooks. The ducks I get are about 3 pounds.
Coincidentally, we usually cook duck for Thanksgiving. It’s usually just the four of us, and the smallest turkey is still way too much food for our family. Besides, we like duck better, so we give more thanks for a duck than we would for a turkey.
-
I did another Peking duck. I pretty much used the same technique I’ve posted before for this cook.
On the rotisserie. I cooked the duck at 325ºF for this cook, and I ramped the temp up to 400ºF when the IT got to 160ºF at the thigh.

Final product. Cooked to an final IT of 170ºF in the thigh.

Plated. I took advantage of chef’s prerogative, and snagged a drumstick.


It was great. The dark meat was cooked well, and the breast meat was still nice and moist. I think the skin turned out the best out of the ducks I’ve made so far. The one thing I did differently this time was that I used a full basket of charcoal for this cook, as opposed to using the basket splitter to create an indirect zone. I’m not sure if using the full basket made the difference, or that I’m just getting more experience with this cook.
One thing I had wanted to try with this cook was to use my bike pump to inflate the skin. I couldn’t figure out how to attach the needle that I use for this to my bike pump. So I used my marinade injector instead.
-
Well said!
I’m probably a bit of an outlier because I decided on getting a KK grill as my first kamado grill, as opposed to starting with a cheaper brand and upgrading. Some folks might say I was a bit nuts for doing so. Still, I haven’t regretted that decision at all, and I’m very happy that I jumped in the deep end.
And in the long run, I saved money because I didn’t purchase 1 or 2 other grills on the way to getting Smaug.
-
Nice writeup! Thanks!
-
 1
1
-
-
Great post, CC! I especially like this part:
I've always said that the KK experience is very tacit in nature. Everything about the KK is uncompromised. And you get used to that in a big hurry. You get used to uncompromised excellence at every turn. And as the saying goes, "You don't know what you have 'til it's gone!" I certainly didn't realize how deep your design thinking went until I had to use something else to cook.
-
Congrats on getting her home! Thanks for sharing the pictures.
And you're going to love having the rotisserie.
-
Congratulations, Jon! You're going to be really happy with your new KK grill.
-
Right on!
-
Looks great! How much fuel do you end up burning on a short burst cook like this?
For these sorts of cooks, I start by filling the basket with Royal Oak, and light it over as much of the surface as I can with my weed burner. I let the fire get established with the lid open and the bottom vents fully open for about five minutes. Then I stir up the top layer of coals to distribute the lit parts evenly, put the grates in, and shut the lid. It takes 5-10 minutes after that for the dome thermometer to hit 500-600ºF. Then I’ll cook the food.
After the end of the cook, I’ll take the food off, and let the fire go for about 10 minutes to help clean the grate, and then I’ll scrub the grate off and shut down the vents. The next time I go to cook, I’ll have a basket that’s about 2/3 full.
This may be different with other brands of charcoal, especially if it’s denser than Royal Oak.
-
Looks great! You’re making me rethink my plan to make some pulled pork this weekend.
-
Nice!
-
Very nice job!
I noticed you cut your rack of ribs in two. Can you lay a full rack flat on your KK 21�
-
It sounds great! Jerk chicken is on my list of things to try.
Please note that I said it sounds great, not that it looks great.
-
Thanks! I’m going to try that peeling the bottom of the asparagus trick. I’ve always just snapped off the bottom inch or so. I just hope that my pee doesn’t smell more.
-
1
-
-
CC did post a reply to me on the Kamado Guru website yesterday. It seems like he’s traveling a lot, but he seemed like his usual self.
-
Only a money shot, since we’re at the time of year where it’s too dark to take a cooking shot at dinner time. Asparagus had olive oil, salt and pepper prior to grilling. The steelhead trout had my mix of cayenne, black pepper, salt and oregano sprinkled on it, with a little olive oil on the skin side to help the rub stick better.

The two things I want to comment on are:
1. This was a direct high heat cook, sticking with using the main grate based on the feedback I got earlier this month. I got Smaug up to a dome temperature of 600ºF in 13 minutes. That may not be as fast as a gas grill, but my old gas grill would need a good 10 minutes of preheating the grates before I would do a cook like this on it.
2. I picked up this piece of steelhead trout thinking that I wanted trout, and didn’t really wonder why it looked like salmon until I was eating it and found it tasted just like salmon. A little googling, and I learned that steelhead trout really is a type of Pacific salmon. You learn something new everyday.
Still it was a really nice piece of fish. It’s not as oily as Atlantic salmon, which is what we usually get when we want salmon. -
Syzygies, how has your Baking Steel held up over time? Any issues with warping?
-
Welcome! I’m partial to olive gold pebble KK 23†grills.
You’re going to love having one.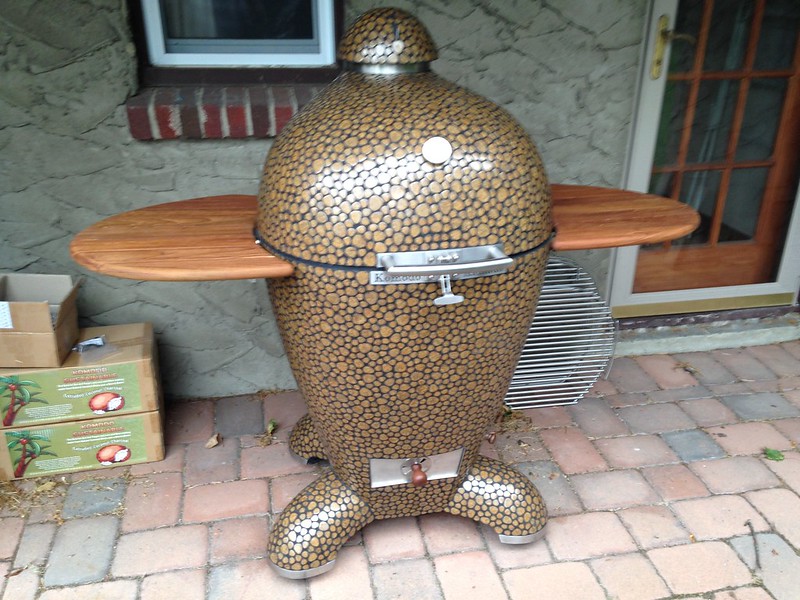
-
I’m 5’6â€. When cleaning out Smaug, I’ll take out the lower vent and the inside ash deflector. I have a little plastic shovel much like tinyfish’s that I put through the lower vent opening, and reach in through the top with an old wide paint brush. I’ll brush the ash into the shovel, pull out the shovel, and dump the ashes into a bucket. Repeat until done. This takes a couple of minutes, tops.
If I get dirty at all, it’s from leaning over the edge of the grill. But I make sure I wear old clothes for this, and I really don’t get hardly any ash on me. I think I get more stuff on me from smoke generated during cooking when the wind blows in my direction.

Low & Slow Temp Maintenance Tips Requested [32BBKK]
in Komodo General
Posted
As I mentioned before, for low and slow cooks I tend to throttle down the bottom vent as much as possible. Here’s a picture of the lower vent during a low and slow. I was really taking this picture to show the liquid running out the bottom because that’s how well a KK grill traps moisture during a cook, so it’s not the best angle to show how I have the vent set. But you should be able to appreciate that the vent is barely cracked open.

If I had the dual dial vent controls, this is how I would figure out what to do for low and slows. Start the charcoal fire, and make sure it’s established. Then I’d set the dual dials so that the left side was shut completely, and the right side was on the smallest hole, and crack the top vent barely open. By adjusting the top vent, I would figure out where I needed to put it for 200ºF, 225ºF, 250ºF, and so on. File that information away for future reference.
I’ve had little problem controlling temps with the single vent, but the dual dial vent controls offer the benefit of repeatability when it comes to restricted air flow at the bottom. The way I have my vent set for low and slow cooks, I try to set it cracked slightly open in a consistent manner, but small variations could easily allow twice the amount of air through. The holes on the right side of the dual dial vent controls allow setting the lower vent for low air flow in a very repeatable manner.