Syzygies
-
Posts
1,751 -
Joined
-
Last visited
-
Days Won
55
Content Type
Profiles
Forums
Events
Everything posted by Syzygies
-
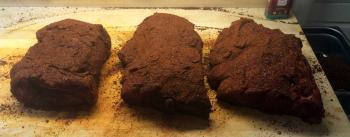
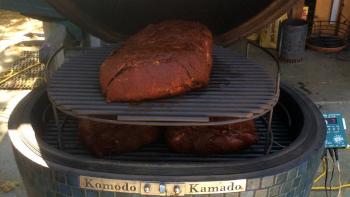
By chance I'm cooking triple butts two weekends in a row. Not sure what's up with "7" on the guru. My camera is acting up. It won't take my picture in a mirror either, it's like I'm not even in the room!
-
I understand that there are plenty of opportunities for 48h sous vide. Usually cuts that we'd cook overnight in a KK, or braise all day in a clay pot. For steak, I choose somewhere between minimum time till temperature stabilizes (usually an hour) and some additional time to tenderize more challenging but flavorful cuts (usually several hours). While I don't sweat it if dinner turns out an hour late, I've never applied 48h sous vide to steak. Except for brisket and pork butts, which welcome several days of advance planning, I rarely have any idea what I want to eat two days from now! My advice for anyone starting out, with a steak they would have simply grilled in an earlier era, is to sous vide 1 to 2 hours. The interesting question is the target temperature, a matter of family personal preference. My family prefers 134 F or 136 F, which I've learned to enjoy, migrating from my very rare "just pull the shards of windshield out!" inclinations.
-
I helped a friend release his stuck #5 POSK damper. Think "strap wrench" and design a tool two people can operate, involving a stick and straps. Working without an improvised tool is a shoulder injury waiting to happen. The damper assembly can simply fail rather than twist free. We also used some scary solvent like WD40, which we were careful to burn off. When I had my #7 POSK (before my 23KK), I found a stainless steel nut and bolt matching the damper threads. I'd regularly disassemble the damper, then have a swingers partner-swapping party with these four parts and some food-grade grease. Cleans out the built-up gunk and corrosion. Notice that there are threads that can't be cleaned by use alone, because they're past where the damper is completely shut. A lot of crud builds up past this point; a separate nut can clean past this point. With this maintenance procedure, there should be no further problems. Although, one gets these problems by not using the POSK. If one isn't using it, one isn't carrying out maintenance either. Give it to someone who'll use it (like I did) and buy a KK.
-
I used a batch of fig wood about a decade ago, for spareribs and such. Apparently the "farmer" who delivered it to Monterey Market in Berkeley pulled up in a car somewhat north of $100K. I found it delicious but a bit "distinctive". This is a spice, and one wants the primary impression to be the stellar hunk of protein itself, not the spicing. So this calls for moderation. It's easy to get enamored with new toys, but in cooking, if your guests even notice the odd ingredient, you've lost. Instead, they should simply be wondering why the food tastes so good. Were I using it again, I'd blend it with the vanilla ice cream of the smoking woods world: Apple. In a smoke pot.
-
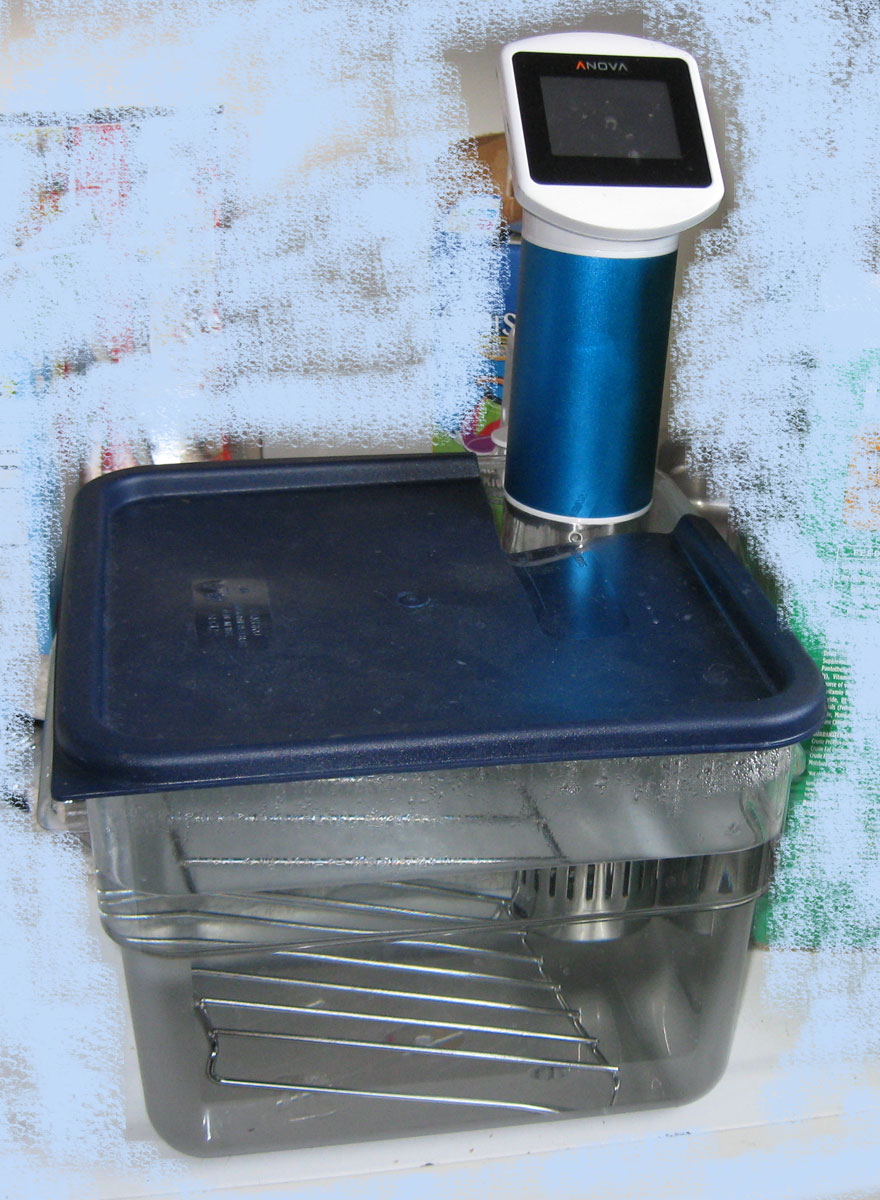
http://www.amazon.com/gp/product/B0001MRUKA/ http://www.amazon.com/Cambro-SFC12453-Polyethylene-Covers-Blue/dp/B001E0HRVK/ A 12 quart polycarbonate Cambro makes a nice water bath. Polycarbonate can take the heat, and insulates much better than a metal pot. Cut a corner out of the lid, to reduce evaporation. We've moved ours to on top of the dryer. Keeps heat and noise out of the kitchen. This rig is also awesome for defrosting vacuum-packed food. Just set the target temperature to 0 C. The heater will never turn on, but the circulating pump will speed the defrost along. (The metal grid is left over from a Sous Vide Supreme that we donated to Good Will. We were clearly never going to use it again, but I saved some hardware.)

-
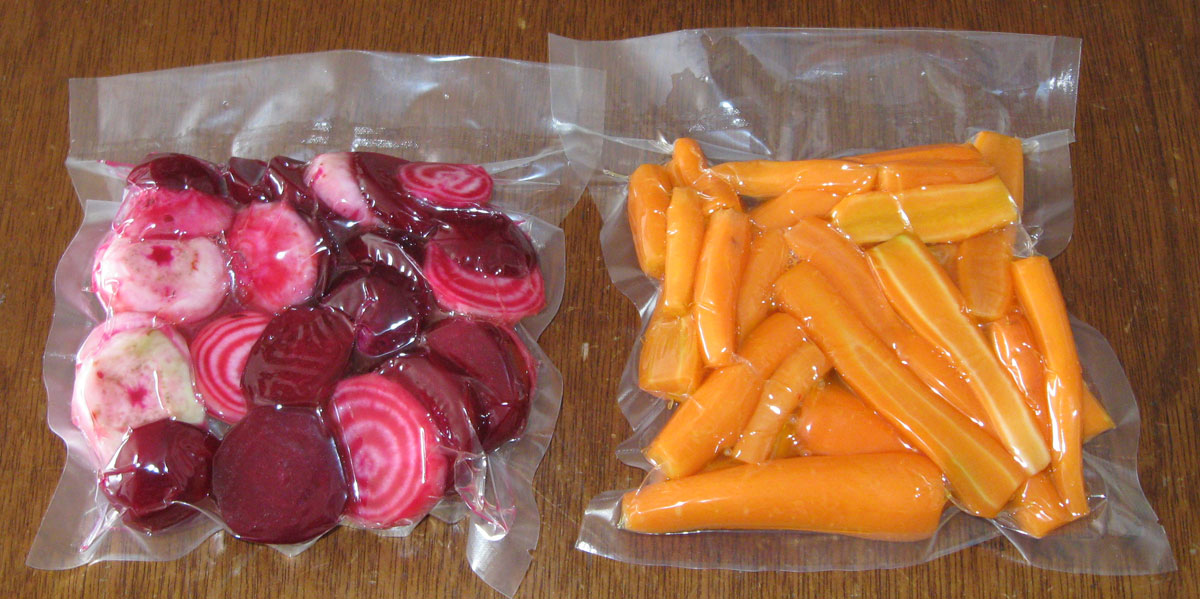
(Maillard reaction) I have several Anova Ones; they're better than any system I've used before. No one gets excited about basic cooking steps like incrementally better vegetables, but sous vide excels here. I'm having a Moroccan beet salad as I read this, for breakfast. Peel and cube beets, sous vide 75 minutes at 85 C, chill in the bag, then prepare as you like. Same with potatoes, later pan-fry in ghee over searing heat. 85 C is the threshold at which vegetables cook, and this method locks in flavor without introducing additional moisture (alas, also without removing any moisture). Thomas Keller prefers to flash-cook green vegetables in a giant pot of boiling salt water, then flash-chill in ice water, to preserve the color. I like the drab color of Italian well-cooked vegetables, and I'm not running a restaurant, so I'll even sous vide green vegetables at 85 C. I do also love Keller's big pot approach. For a related step at a lower temperature, http://sweets.seriouseats.com/2011/10/the-food-labs-apple-pie-part-2-how-to-make-perfect-apple-pie-filling.html Sous vide apple pie filling is an interesting idea. The basic idea of an apple pie is fraught with peril, but people get it to work pretty well, accepting the limitations of the method the way we accept so many quirks of life. And a basic homemade apple pie is pretty far up the food chain from simply buying one at the supermarket; I commend anyone who goes this far. Nevertheless, the simplest fix here is to confront the reality that having raw apples tag along for the ride is the source of all troubles with apple pie. A sous vide filling is one solution; we found ourselves just wanting to eat the filling, skip making the pie. We're also partial to French galette, where one cooks the filling first in a skillet. That has the advantage of abusing and reducing the apples a bit. Maillard reaction, yada yada, the "epoxy B" to building flavor when sous vide is a step. In a nutshell, this is the crux issue with sous-vide. It is simply a step, that cooks an ingredient with minimal fuss. If the ingredient is fantastic, the result will be fantastic. If the ingredient is drab, the result will be drab. Nowhere to hide here.

-
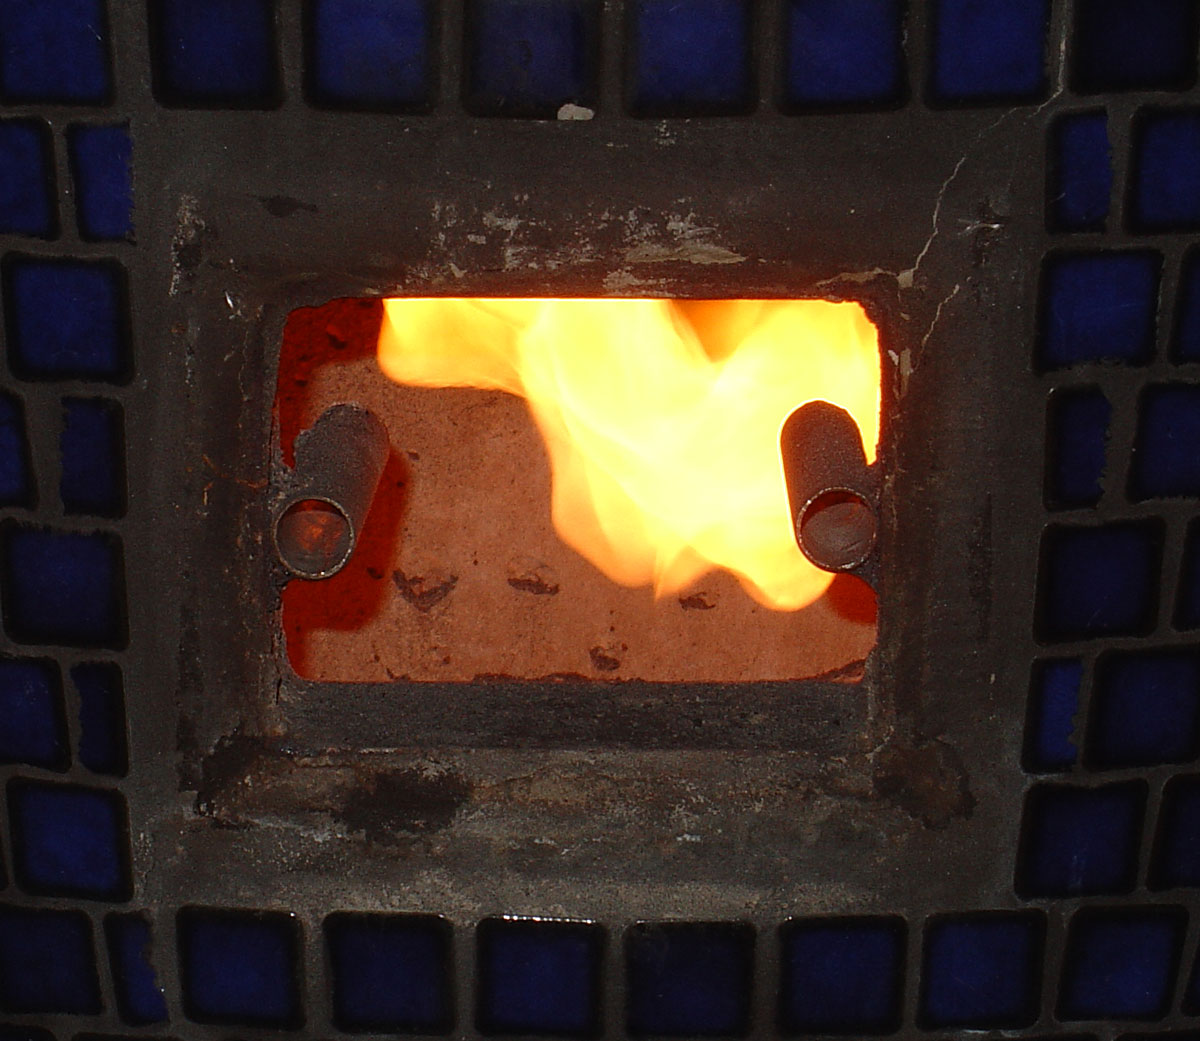
Wow. What fun to find this thread. I dug up this photo from 2005 (before my KK) to illustrate the idea Dennis had of directing smoke pot gases underneath the charcoal. If the fire gets a bit hot, these gases will take off on their own. In fact, I stumbled onto the smoke pot idea rather by accident. I was experimenting in 2005 with making charcoal: A basic technique is to heat a sealed wood chamber over a fire, with only a few holes at the bottom facing the fire. There's a threshold where the gases from the chamber take over, and one no longer needs the fire. Because oxygen doesn't enter the chamber, there's some material left when the process finishes, which one harvests as charcoal. After making a few batches of charcoal inside my ceramic cooker, it dawned on me that I could scale this down as a smoke source for cooking. The idea was like fractional distillation; I didn't want any of the nasties from actual combustion of the wood. (This is rather like "vaping".) After reading about Danny Meyer sinking a small fortune into custom barbecue equipment in a New York City restaurant, I wondered why one couldn't build a chamber to produce wood "gas" to pipe into a separate gas oven. Why not cook with all the usual controls of a fancy gas oven, and with the flavor of wood? I can see some engineering challenges here, but this could work. I do seal my lid each time, with a flour water paste squeezed out of a plastic bag with the corner nicked. Some lids will seal on their own better than others, but a paste seal will always have some effect, preventing any convection through the pot. I like how this tames the smoke, it becomes one more seasoning in balance. I've long realized that the flour paste step interferes with adoption, and it may not be critical, but it's far from the hardest thing I do in the kitchen. One gets used to anything, and it helps in the kitchen to fear nothing. Yes, I use a new drill bit and a bit of oil to drill three 1/8" holes in the cast iron. A cheap bit will do; it is sacrificial. In case anyone is motivated to make further experiments, here are some successes and failures from the past (various people): One can buy stainless steel camping cook pots where the lid clamps on tight. These pots haven't worked as well for me. One can also special order (for a small fortune) stainless steel pipes with threaded caps (think pipe bomb) for a better seal without flour paste. I haven't; the flour paste really doesn't bother me. Why stainless steel in each case? Various metals off-gas toxins when heated; one should be truly paranoid about using compound metals one doesn't understand around food. Have you ever seen galvanized metal for a cooking vessel? There's a reason you don't want to be the pioneer here, either learn the reason or be cautious. Not every smoking wood comes from a tree that produces food, but that's a safe start if one doesn't know. One doesn't need to stick to cast iron or stainless steel, but that's also a safe start if one doesn't know.

-
Lucky me, my first ceramic cooker was my idea, but the KK was Laurie's idea. I swear she bought it for the chance to talk on the phone with Dennis. He really is that charming. Guys: Arrange an incoming call, and have her pick up...
-
Yes. Our oven broke just after our first ceramic cooker. I still remember that strawberry rhubarb pie. Our most frequent KK use, again tonight, was bread. Never waste a fire, we put in our usual Spanish cazuela filled with potatoes, onions and spices. I was a little heavy-handed tonight with the pimenton, and boy do the potatoes smell good.
-
You do have neighbors? It's amazing how accepting people are of the sort of obsession you describe. There are many a tale on the web of extended power outages after natural calamities (as simple as an ice storm, or for example a hurricane) where a ceramic cooker runs 24/7 preserving the food from everyone's thawing chest freezers. Lesson: Keep plenty of charcoal on hand for the zombie apocalypse!
-
Best vacuum packer? (FoodSaver alternatives?)
Syzygies replied to Syzygies's topic in Relevant Product Reviews
I never liked the form factor of the VP112 but jumped on the VP115. It is smaller than a VP215. If one can manage the space and weight, the VP215 oil pump is an advantage: Greater vacuums, and if water gets into the pump just change the oil. I have two of the original Anova One circulators ($170 on Amazon) that go in 12 quart Cambros. I get the cooler idea, but Cambros (unlike metal pots) provide enough insulation (remarkably) that one can move on to life's other pressing questions. Cambros are easy. Cut the lid to make room for the circulator. One circulator is for vegetables at 85C, the other is for anything else I want to cook at the same time. -
Mine is manual, won't do this. I love McCann steel cut Irish oats. My Irish ancestors described a very slow process for cooking these oats. I have one of the better Zojirushi rice cookers on each coast. While we most often use it for organic brown rice from http://massaorganics.com/, there's a porridge setting and a timer. In my opinion, this is the way to go, to wake up to Irish oats. (Hey, at least I'm consistent.)
-
I've also had two baskets for a while now. One holds KK extruded coconut lump, the other holds whatever I'm using for high temp cooks such as bread. I store the spare on a terra cotta plant saucer to catch ashes.
-
I can't make out whether there's a loop handle at the top? I hang my cover on a big fat hook when it's not in use, I'd miss that.
-
After much research I bought a Fissler Vitaquick 8.5 Quart Pressure Cooker last year. Heston Blumenthal's Heston Blumenthal At Home and Nathan Myhrvold's Modernist Cuisine at Home both make strong cases for pressure cookers. Perhaps I should have been suspicious, as MCaH reads like a very expensive issue of Popular Mechanics, and also extols the virtues of microwave ovens. Huh. But Heston Blumenthal I respect. His best uses of a pressure cooker are for stocks and such, the idea being that if one can get the temperature past 100 C without boiling, one can extract flavors one would have missed. Alas, I wanted to love this cooker, but most of the food that I made with it tasted sadly institutional. I found myself repeatedly cooking beets, however. Theory holds they're best baked, but this way I found the time to eat them frequently. There are some rocking recipes for Moroccan beet salads, for example. More recently I bought a VacMaster VP115 Chamber Vacuum Sealer and a pair of Anova Sous Vide Immersion Circulators (to use in 12 quart Cambros). While I've been fooling around with (and defending) all manner of ghetto sous vide over the past decade, this setup brings me much closer to what you'd find entry level in a small restaurant, and the different is dramatic. (I never want to see my bulky, clumsy SousVide Supreme again, for example.) One easily uses this equipment, all the time for everything. One can dither over what temperature to cook meat, but it turns out that vegetable cell walls reliably break down at 85 C (185 F), so one can do all manner of cooking at once in a single water bath at this temperature. The best farmers market vegetables taste spectacular after 45 minutes to an hour this way, in a little salt and olive oil, perhaps a splash of sherry vinegar to tweak the acidity. And there's no incentive to make leftovers, just prep exactly what one wants to eat. Alas, this has changed my beet habit. Unless I really start taking to Heston Blumenthal's stocks, I'm never pulling out my pressure cooker again. Yes, the boiling point of water is arbitrary and does not deserve to rule a kitchen. However, I have yet to figure out anything that benefits from going over 100 C that doesn't benefit even more by going under 100 C. First and foremost, proteins such as all manner of barbecue, separately or in concert with a Komodo Kamado. (I'm also in the "cook your brisket slowly" camp, as intrigued as I am by other approaches. There's a pattern here I can't articulate.)

-
Best vacuum packer? (FoodSaver alternatives?)
Syzygies replied to Syzygies's topic in Relevant Product Reviews
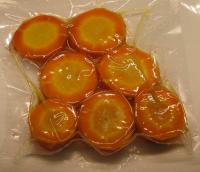
Here's an idea of the size of the VP115. It's next to a commercial rice cooker and a Sous Vide Magic controller, the economy approach to sous vide some years back. Today, I'd buy the $199 Anova circulator. (This is the other coast from where a spouse could raise concerns about the wood finish. I do take stickers off things I buy, but only after the return period expires.) The winner in experiments so far was a farmers market carrot cooked an hour at 185 F (85 C) in olive oil and a bit of salt. (This was a big carrot; you're looking at a lot of contorno.)
-
Best vacuum packer? (FoodSaver alternatives?)
Syzygies replied to Syzygies's topic in Relevant Product Reviews
One of my MiniPack Cyclone 30 clamp vacuum machines gave up the ghost (they may be able to repair it, but it's not clear they even have access to parts in the U.S.). So I took another look at the market. The VP112 always looked hoakey to me. One review nailed it: To make it fit on a counter under cabinets, it has too big a footprint. And it looks like plastic. On the other hand, the VP215 and relatives are quite large and heavy. To spend "enough" is a slippery slope. Should one get an oil pump? Should one spend another grand to get the really good German-made oil pump? VacMaster recently came out with the VacMaster VP115, and I bought one from Amazon for $689. Apparently (right or wrong) others were having my reaction to the VP112, and this is VacMaster's answer, a scaled down version of their bigger machines. It is really hard to imagine going back, and I would say I was too cautious in waiting this long. Entry level for a chamber machine but it drops air pressure by 95% to 98% (my MiniPack could manage 7% which is well beyond FoodSaver; it doesn't take much to mostly collapse a bag around food, but it does take a 50 pound beast to do more than that). It is a game-changer for sous vide. If you have more space, and help lifting it onto a counter, go for a bigger machine; they're only a few hundred dollars more. This decision was about space as much as money, and the extra space this machine has taken from me is what I could afford. -
I tried and rejected yellow mustard years ago; we never use it now. We like the effect of salting first (carefully by weight) then rubbing with black pepper and freshly pan-roasted and ground chiles, nothing else. As in all of cooking, more complex treatments are for meat that needs help; one wants to stand back when the meat shines. This is of course controversial. For comparison, Alsatian wine makers like to stand out of a higher deity's way, while in Bordeaux the wine maker believes they're bringing the added value in selection and blending. Does one need a bark to adhere? Take Buffalo wings. They're usually ghastly in sports bars. The best way to make the original is to both fry longer than a sports bar would, and to use a hot sauce so intense that one gets the needed flavor without unduly wetting the wings. Same with rubs; choose hotter chiles rather than caking on milder chiles?
-
We will sometimes take a frozen steak in a heat-safe vacuum bag, sous-vide it to (nearly the) desired internal temperature for an hour, then sear for a few minutes to finish. There have been frequent debates about sous-vide online (for instance eGullet) as to whether one can taste the difference searing first or last, and whether it matters. I'd say yes and no; it is what it is, so adjust. Searing first is simply ancient habit. There's no modern reason to stick to this order. One can still choose this order after rejecting the habit, but please make a free choice! Searing last is forced on users of chamber vacuum machines; one cannot vacuum process hot foods without damaging the machine. Coming up with an arcane rationalization for the virtues of searing last is every bit as silly as searing first out of ancient habit, if one is simply adapting to a technological limitation. Sous-vide then sear is convenient if one can easily rig the bath; an extra half hour hardly matters if life intervenes. For tougher cuts, an extended bath tenderizes in ways no other approach can match. I then save the liquid from the bag, dry the meat carefully, and sear. One can make a quick sauce based on reducing the liquid, or simply give it to the dog.
-
Funny you mention homebrewing. We're so near the distribution center for http://morebeer.com/ that I stop in for odds and ends. Last time, I bought some malt, and I've been using 3% in my sourdough breads, including today. Too much has a strange effect on the dough, but a bit adds a wonderful aroma. In cooking, it can be hard to sense a 6% difference, but compounding a dozen 6% differences is doubling, which one can sense. I'd say we live for the days we can get anything to come out twice as good as before; those days are rare. Roasting or drying one's own tomatoes is by itself a doubling, over opening any can I've ever tasted. Laurie and I frequently debate what we'd keep if we could save exactly one kitchen quirk we've picked up over the years. The answer is always the same: We'd keep our tomatoes, and buy flour. We have other quirks (easy, now!) but none in contention with these two. Nevertheless, home ground flour is dramatically different from what one can buy. One is buying e.g. organic hard red winter wheat berries at a health food store (just don't look at the aisle after aisle of homeotoxins and the crackpots buying them, on the way back to the bulk bins) and grinding the whole berry, then sieving out the bran. Any bought flour is a carefully constructed product involving aged components of grain, none of which can easily spoil. There is a parallel here between freshly squeezed orange juice, and a supermarket carton of orange juice. Our flour smells alive in ways that bought flour does not; the most likely suspect here is the germ, whose oils are both great for health and flavor, and go rancid in days. To understand commercial flour, consider a subject in which one is an expert, and think of the gulf between a lay understanding of the processes involved, and the understanding one obtains after putting the proverbial 10,000 hours. Commercial flour is easily this involved; there are 600 page PDF treatises online that I've glanced at, trying to solve individual problems. One individual problem is that bought flour is aged, while home ground flour cannot be similarly aged without going rancid. This affects bread doughs; "green" flours lead to flattened "flying saucer" loaves because the glutens fail to develop properly. The easiest workaround is to add on the order of 40 parts per million ascorbic acid, which has a marked effect on the dough. (This isn't far off from a person taking a typical pill, which is why I'm never doing that again!) One accomplishes this by mixing a 20:1 reduction with white flour, taking that mixture and making another 20:1 reduction to obtain a 440:1 dilution. (Check: (20+1)^2 = 441.) I used 15 grams of such a mixture in today's bread dough.
-
We have found no advantage to temperatures lower than max'ing out the dial on the dehydrator. Variables include slice sizes, spacing for airflow, and salt (be uniform in every possible way, or tend more frequently, pulling some pieces early). Think eight hours, perhaps fewer or more. We manage to go to a morning farmer's market, and have completed tomatoes in the bowl in the fridge before bedtime. The fruit roll liners simplify cleanup (and prying off overly dry fruit) but aren't strictly necessary. We soak the trays outdoors in one of those blue barrels you'd see filled with beer and ice at a large party, then hose them off onto the lawn, at which point they look basically clean but generally get a ride in the dishwasher. I've also managed to clean them indoors in a NYC apartment, fussier work but not out of reach.
-
Some pieces of tomato will dry more than others, despite best efforts. Pressing into a bowl and storing in the fridge overnight puts off the work of packaging till more convenient, and allows the wetter pieces to moisten the drier pieces. If one presses hard into the bowl, enough juice will form to nearly cover contents. This is a good rule of thumb if one hasn't weighed before and after, to judge a roughly 4:1 reduction. I own a Vitamix which is ideal for grinding rub ingredients, and I've owned other primitive grain mills. We settled on the Wolfgang Mock grain mill which uses millstones, and produces fresh flours of a similar consistency (after sieving out bran) to what one buys. There are two analogies here with coffee mills. First, many people use blade grinders (think: VitaMix) for coffee but others strongly prefer a good burr grinder (think: Mock), and for some applications such as espresso one is forced to use the better technology. Second, many people think nothing of grinding coffee beans fresh each morning because it is a drug. Grinding flour is no more work with the right equipment, one just doesn't have the drug-induced motivation.
-
I started out literally following Tom Colichio's recipe from "Think Like a Chef" (more or less same as http://www.foodandwine.com/recipes/roasted-tomatoes-and-garlic ) then went through a phase where we roasted in a giant cazuela in our KK-predecessor. Eventually we settled down to processing 80-120 lbs of tomatoes per year in a dehydrator (two stacks of eight trays each, http://www.amazon.com/dp/B000CEM3WM, lined with fruit roll trays http://www.amazon.com/Nesco-LSS-2-6-FD-28JX-FD-61WHC-FD-75PR/dp/B00004W4V9/ smeared with olive oil). We haven't opened a can of tomatoes in about a decade. I'll admit I'm fussy, but I have a gag reaction when I taste canned tomatoes in a $60 restaurant meal, which is one reason we don't eat out much. Canned tomatoes, even the $6 cans from Italy, are atrocious compared to home "roasted" tomatoes. I'm not even a fan of home canning, which made sense before chest freezers but not now. My advice here: Go as fancy as you like, as long as you have the patience to put up your entire tomato supply for the year. Doing something precious for 10% of your supply, and eating out of cans for the other 90% of your supply, doesn't make sense. We were driven back to simplifying our procedure so we could process 25 lbs at a time with minimal effort. Our procedure: Bring a giant pot of water to a boil. Wash tomatoes, blanch in batches 40-60 seconds and cool, to loosen skins. Cool. Skin and core, slice into uniform slices and place loosely (leaving airflow) on dehydrator trays. Salt lightly, e.g. 1/2 tsp per tray. Dry to taste, press into a bowl to stabilize juices. Weigh 225g or so into small vacuum chamber bags, seal with $30 impulse sealer by burping out air. Freeze in chest freezer for year. We aim for a 4:1 reduction, so two pounds of tomatoes yields one packet, ideal for many sauces over a pound of fresh noodles (we grind our own flour for this, our most common dinner including tonight). By feel these are "gooshy" but not dry, and will release juice to just cover, after pressing into a bowl before making packets. This process improves tomato flavor, just as drying other foods such as mushrooms intensifies flavors. Some years we just don't like how fresh tomato salads taste, but these partly dried tomatoes are still excellent. Concentrating fresh tomatoes by cooking down in a sauce is an entirely different effect, and not as good. I'm baffled that I don't know of restaurants that lay in a year's supply this way, selling off the excess e.g. at Eataly. This is such an easy way to gain a dramatic advantage in one's cooking.
-
Click on the green up arrow in the bottom right corner of his post. The counter says "1" now; that would be me. I did also order one.