.GIF.0c507fdd0aaa5c1cae84b6c43af405e7.GIF)
tony b
-
Posts
12,681 -
Joined
-
Last visited
-
Days Won
558
Content Type
Profiles
Forums
Events
Everything posted by tony b
-
I can definitely see your point on another "pricey gadget;" at $199 for an Anova, it's not a cavalier purchase. But, in my case, I use it not just in the kitchen, but also in my brewing room for getting my sparge water at the correct temperature. Keeps it from being, as Alton Brown puts it, a "uni-tasker." And, I cook a lot more other stuff with it than just steaks. Simplest way to make perfect soft-boiled eggs and seafood comes out amazing.
-
Wilburpan, first, great looking steak cook!, Second, next sous vide steak cook, try this tip I learned from Dennis - Sear it first, then put into the sous vide pouch and finish in the water bath. Interesting variation. Love the multiple ways to cook a steak on the KK. So far, I'm still leaning to the frozen steak cook, but just slightly over sous vide (conventional method - bath first, then sear). Great way to sear a steak first, without overcooking it, especially a thinner cut. I've also learned to give myself extra temperature range for doing a reverse sear (conventional or sous vide) - at least 15F from target final when I start the sear and to do shorter times between flips (15 secs each) - you don't get as much heat penetration that way. YMMV
-
She Who Must Be Obeyed Immediately
-
I use this book for my bread and pizza dough. http://www.amazon.com/Artisan-Bread-Five-Minutes-Revolutionizes/dp/0312362919/ref=sr_1_1?s=books&ie=UTF8&qid=1418062243&sr=1-1&keywords=15+minute+artisan+bread
-
-
You crack me up, dude! Nice looking steaks, too! And, I hope you're feeling better! The doctor said, "More Wild Hare!"
- 9 replies
-
- 1
-

-
- KK BB 32
- Reverse Sear
- (and 2 more)
-
You make it sound like NJ is the "taint" of the area!
-
Nice looking kebabs! Yeah, pork and dried fruits go naturally together. I use a combo of dried apricots, prunes, currants, apples, and cherries in braised pork chops with red wine. Toss the fruit and wine into the food processor after the pork chops are done, then back into the pot and reduce down to make the sauce, mount it with a healthy dose of butter and you got some kind of killer hearty winter dinner there paired with dumplings or noodles.
-
Yeah, what bgrant said. Palmer is one of the "gods" of homebrewing. To quote the godfather of homebrewing, Charlie Papazian, "Relax, have a home brew!" His books are excellent for beginners, too. He preaches the gospel of laid-back brewing. Don't sweat the minor stuff, just have fun with it. I have a signed copy of The New Complete Joy of Home Brewing. In fact, I hope to get the inaugural brew in today in the new brew room! On the menu, Baltic Porter.
-
Those silly scientists (physicists/chemists) think too damned much and dither around; us engineers just try stuff, even if it doesn't work perfectly. One of my favorite sayings is "Perfection is the enemy of 'good enough!'"
-
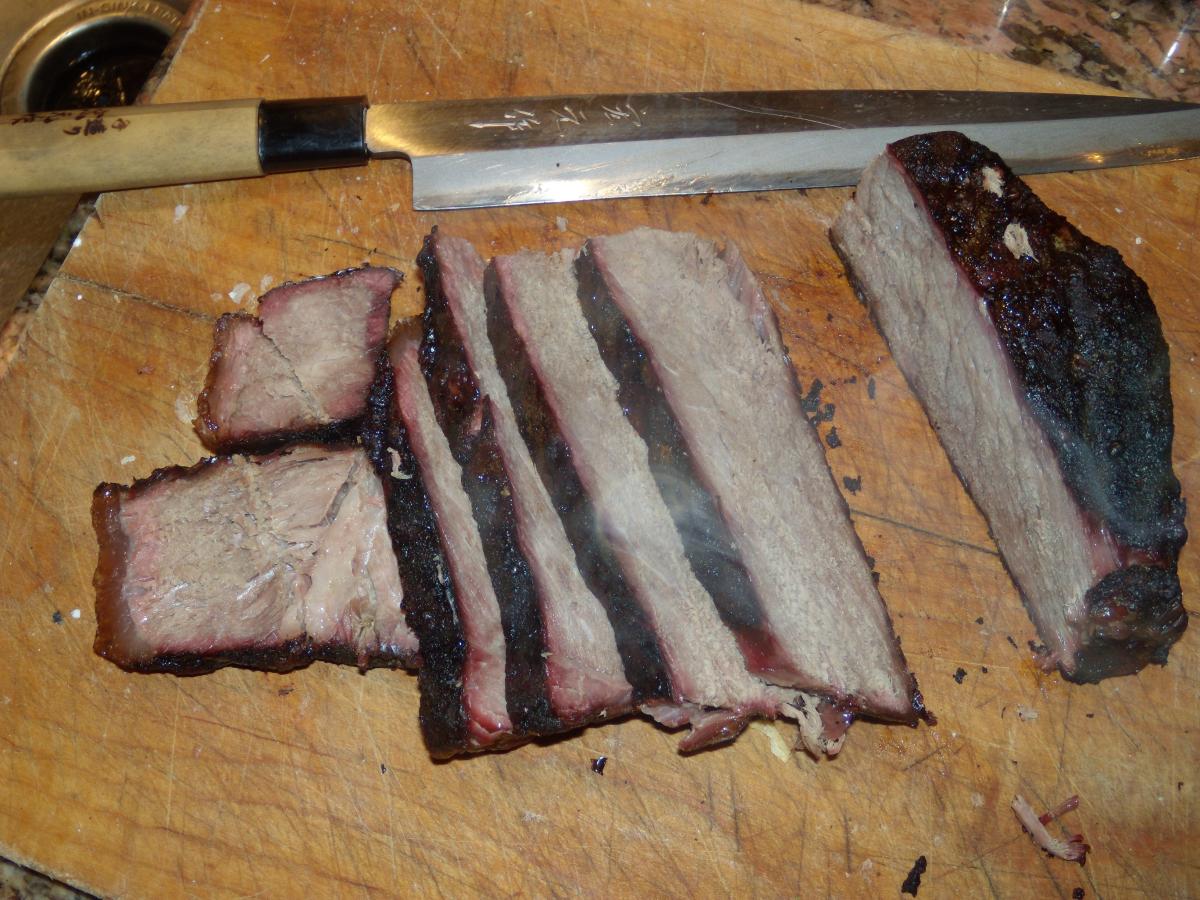
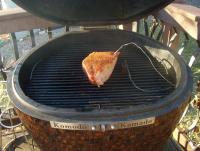
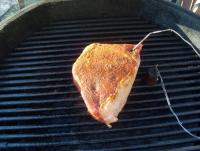
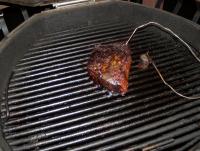
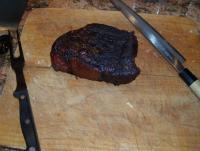
Did another roast on the KK yesterday - bottom round. Cooked indirect @ 250F, using Guru, with mesquite and red oak woods. Injected with Butchers BBQ brisket injection and dry rubbed with a combo of Oakridge Secret Weapon and Just North of Memphis. Rested in fridge overnight. Pulled off at 210F internal, rested for 20 minutes. Killer meat flavor. Here's the porn! Going on the grill - full shot w/logo for Dennis. Up close and personal. Done. Resting. Sliced and ready to be chowed.

-
You know that whiskey starts out as beer, just without the hops. So, you're more than half way there. And the best part is, you don't have to wait 3-5 years to find out if your batch is any good, assuming you're barrel aging it! Or, you just making white dog?
-
Karma, man. It's all about karma! If you need another hobby in retirement, I can hook you up and teach you to make your own beer. Been doing it for over 25 years. But, now in retirement, I'm hoping to scale up a bit. Construction is finishing up this morning as I type this, on my new brewing room in my basement. Finally, a place to brew, clean, keg, etc. without having to haul all my gear back and forth from the basement to the kitchen!

-
Second that. I would even suggest a bit higher: 375F - 400F to get crispy skin.
-
Like they say, "No good deed goes unpunished!" First, the brisket blowout for the KofC and now the whole family Christmas feed! Bet (wink) you didn't sign up for that when you bought your KK!
-
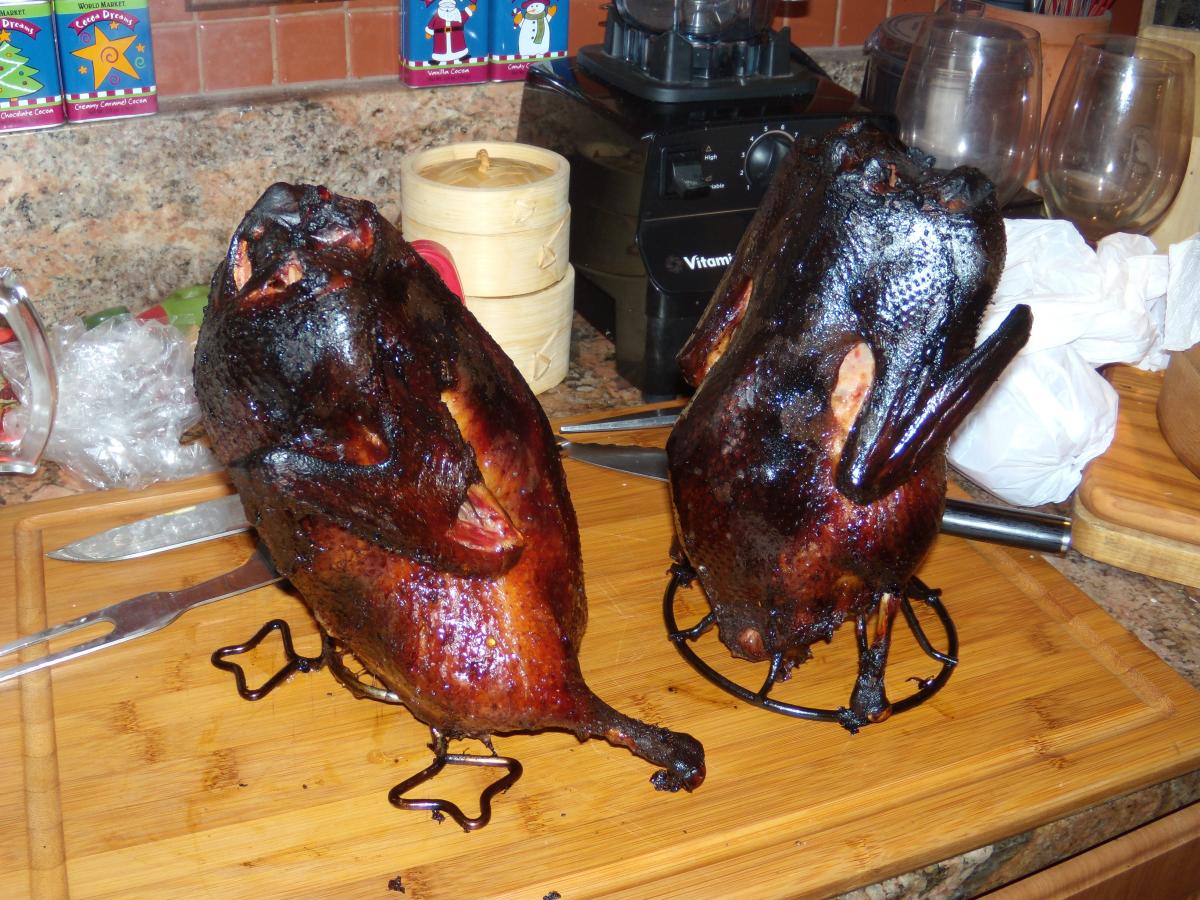
Sorry, but those ducks were cooked months ago for a Chinese themed dinner party, so they are long gone!
-
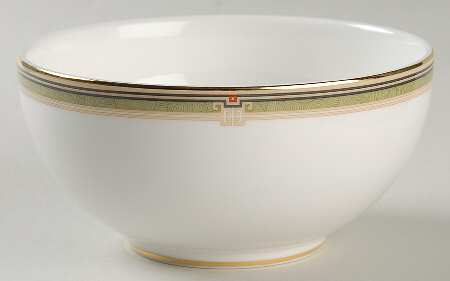
.thumb.GIF.006d23b9323146d2dd9055f4e195bc2a.GIF) Wilburpan, that's what Replacements does as a business - gets out of production pieces, so when you break a plate 10 years later, they are the ones you go to for a replacement (hence, their name). If you click on their "Find this for me" button, they'll notify you if they ever get in any, usually through estate sales or antique shops going out of business. I bet that bowl would work just fine. Looks "close enough for government work" to me.
Wilburpan, that's what Replacements does as a business - gets out of production pieces, so when you break a plate 10 years later, they are the ones you go to for a replacement (hence, their name). If you click on their "Find this for me" button, they'll notify you if they ever get in any, usually through estate sales or antique shops going out of business. I bet that bowl would work just fine. Looks "close enough for government work" to me.
-
If they did, and they are anything like my soup bowls for my china pattern, they are $60 each! Cost more than the dinner plates. The one major piece that I don't have in my pattern - I'd need 8 of them (that's $480 for those of you who are math challenged!) Update: You're in luck, Replacements has soup bowls in your pattern (and, as I suspected, $60 a piece!) There is a cereal bowl in your pattern that might be a better fit as a "rice bowl," but they don't have any in stock right now. http://www.replacements.com/webquote/WW_OBE.htm I'm in luck, they are running a special on mine and dropped the price to ONLY $50 each! But, they only have 4 of them in stock.
-
Have to admit that I'm a dish junkie. I have 6 different sets of dishes. My 8 place settings of china (Royal Dalton) only gets used about once a year, maybe. A mini set of Noritake (small dinner parties). I have a Pier One blue mosaic set for the patio (it matched the blue tiles on the POSK). Pier One, bamboo, is the "everyday." A four place-setting of an orange/red block pattern (forget the manufacturer) that was a gift from my sister-in-law. It came with matching flatware and place-mats and napkins (she made them to coordinate). It's the "BBQ plates." Last, but certainly not least, is the Pink Flamingo dinnerware/glasses, etc. We used to auction off the annual "Pink Flamingo" dinner at the church fundraiser every year. The deck was totally done in everything with Pink Flamingo stuff we could find. We even made the food pink too. That took a lot of creativity to be different every year.

-
Dude, were you like running 3 temperature probes in that bird?? Crazy!!
-
Kinda reminded me of my Peking Duck adventure - too dark skin!

-
Mine were posted over here - http://komodokamado.com/forum/topic/5032-best-thanksgiving-turkey-recommendation/#entry47025
-
$115 - WOW!!! You could get a Wagyu Prime Rib for that here. My 10# Butterball was only $16. Why do I have flashbacks to "A Christmas Story"? - Bumpases! But, they cut the video clip too short, the next line is "Get dressed. We're going out to eat!"
-
Lots of good advice on brisket is buried throughout the Forum. Use the search engine to find them all. After your first one, then we can kickstart the debates again over the "Texas Crutch," hot & fast vs lo & slo, etc.