All Activity
- Past hour
-
No, use the splitter such that you’re using a half ish basket. I suppose it doesn’t matter that much because you’re only going to use whatever it takes for a given cook, whether half basket full or full basket. Sent from my iPhone using Tapatalk
- Today
-
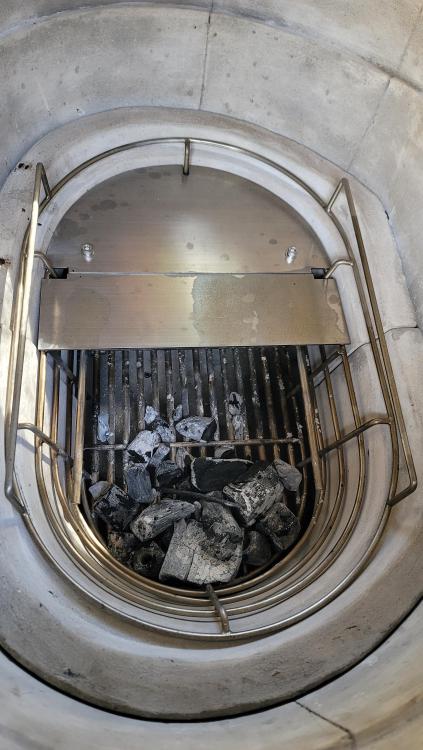
Nice! I haven't noticed a problem with the ash at temperature, the fan doesn't usually kick on at high speed while maintaining a low-and-slow. But I did get a face full of ash when testing it. FWIW, here's mine - I needed to cut slots for the Fireboard mounting rails.
.thumb.jpg.7e5a591e17fdb6d26fc1e9444bc29a13.jpg)
-
@5698k are you suggesting for longer cooks, I completely remove the divider entirely and fill the whole basket underneath the splitter tops? If so, that would make sense! Thanks.
-
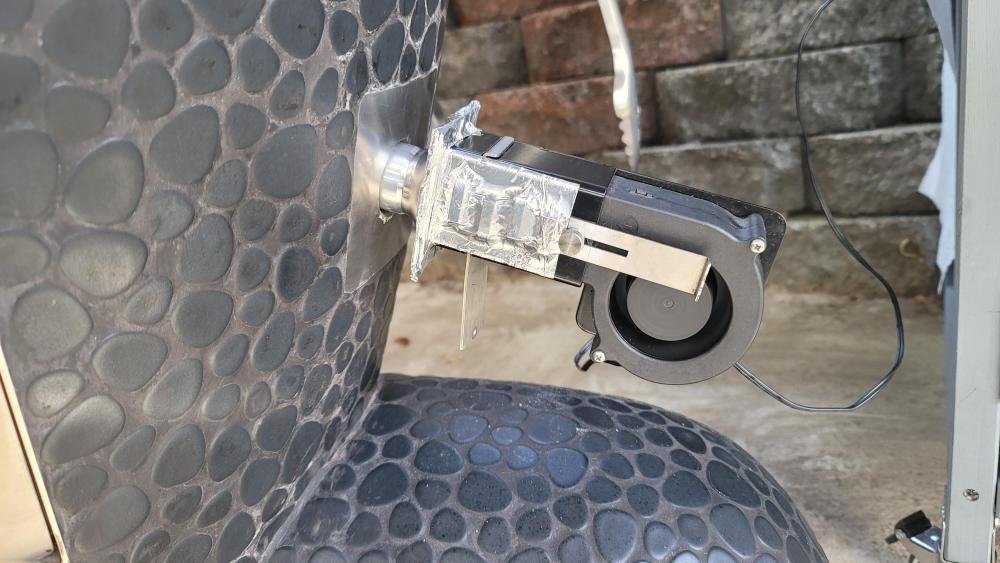
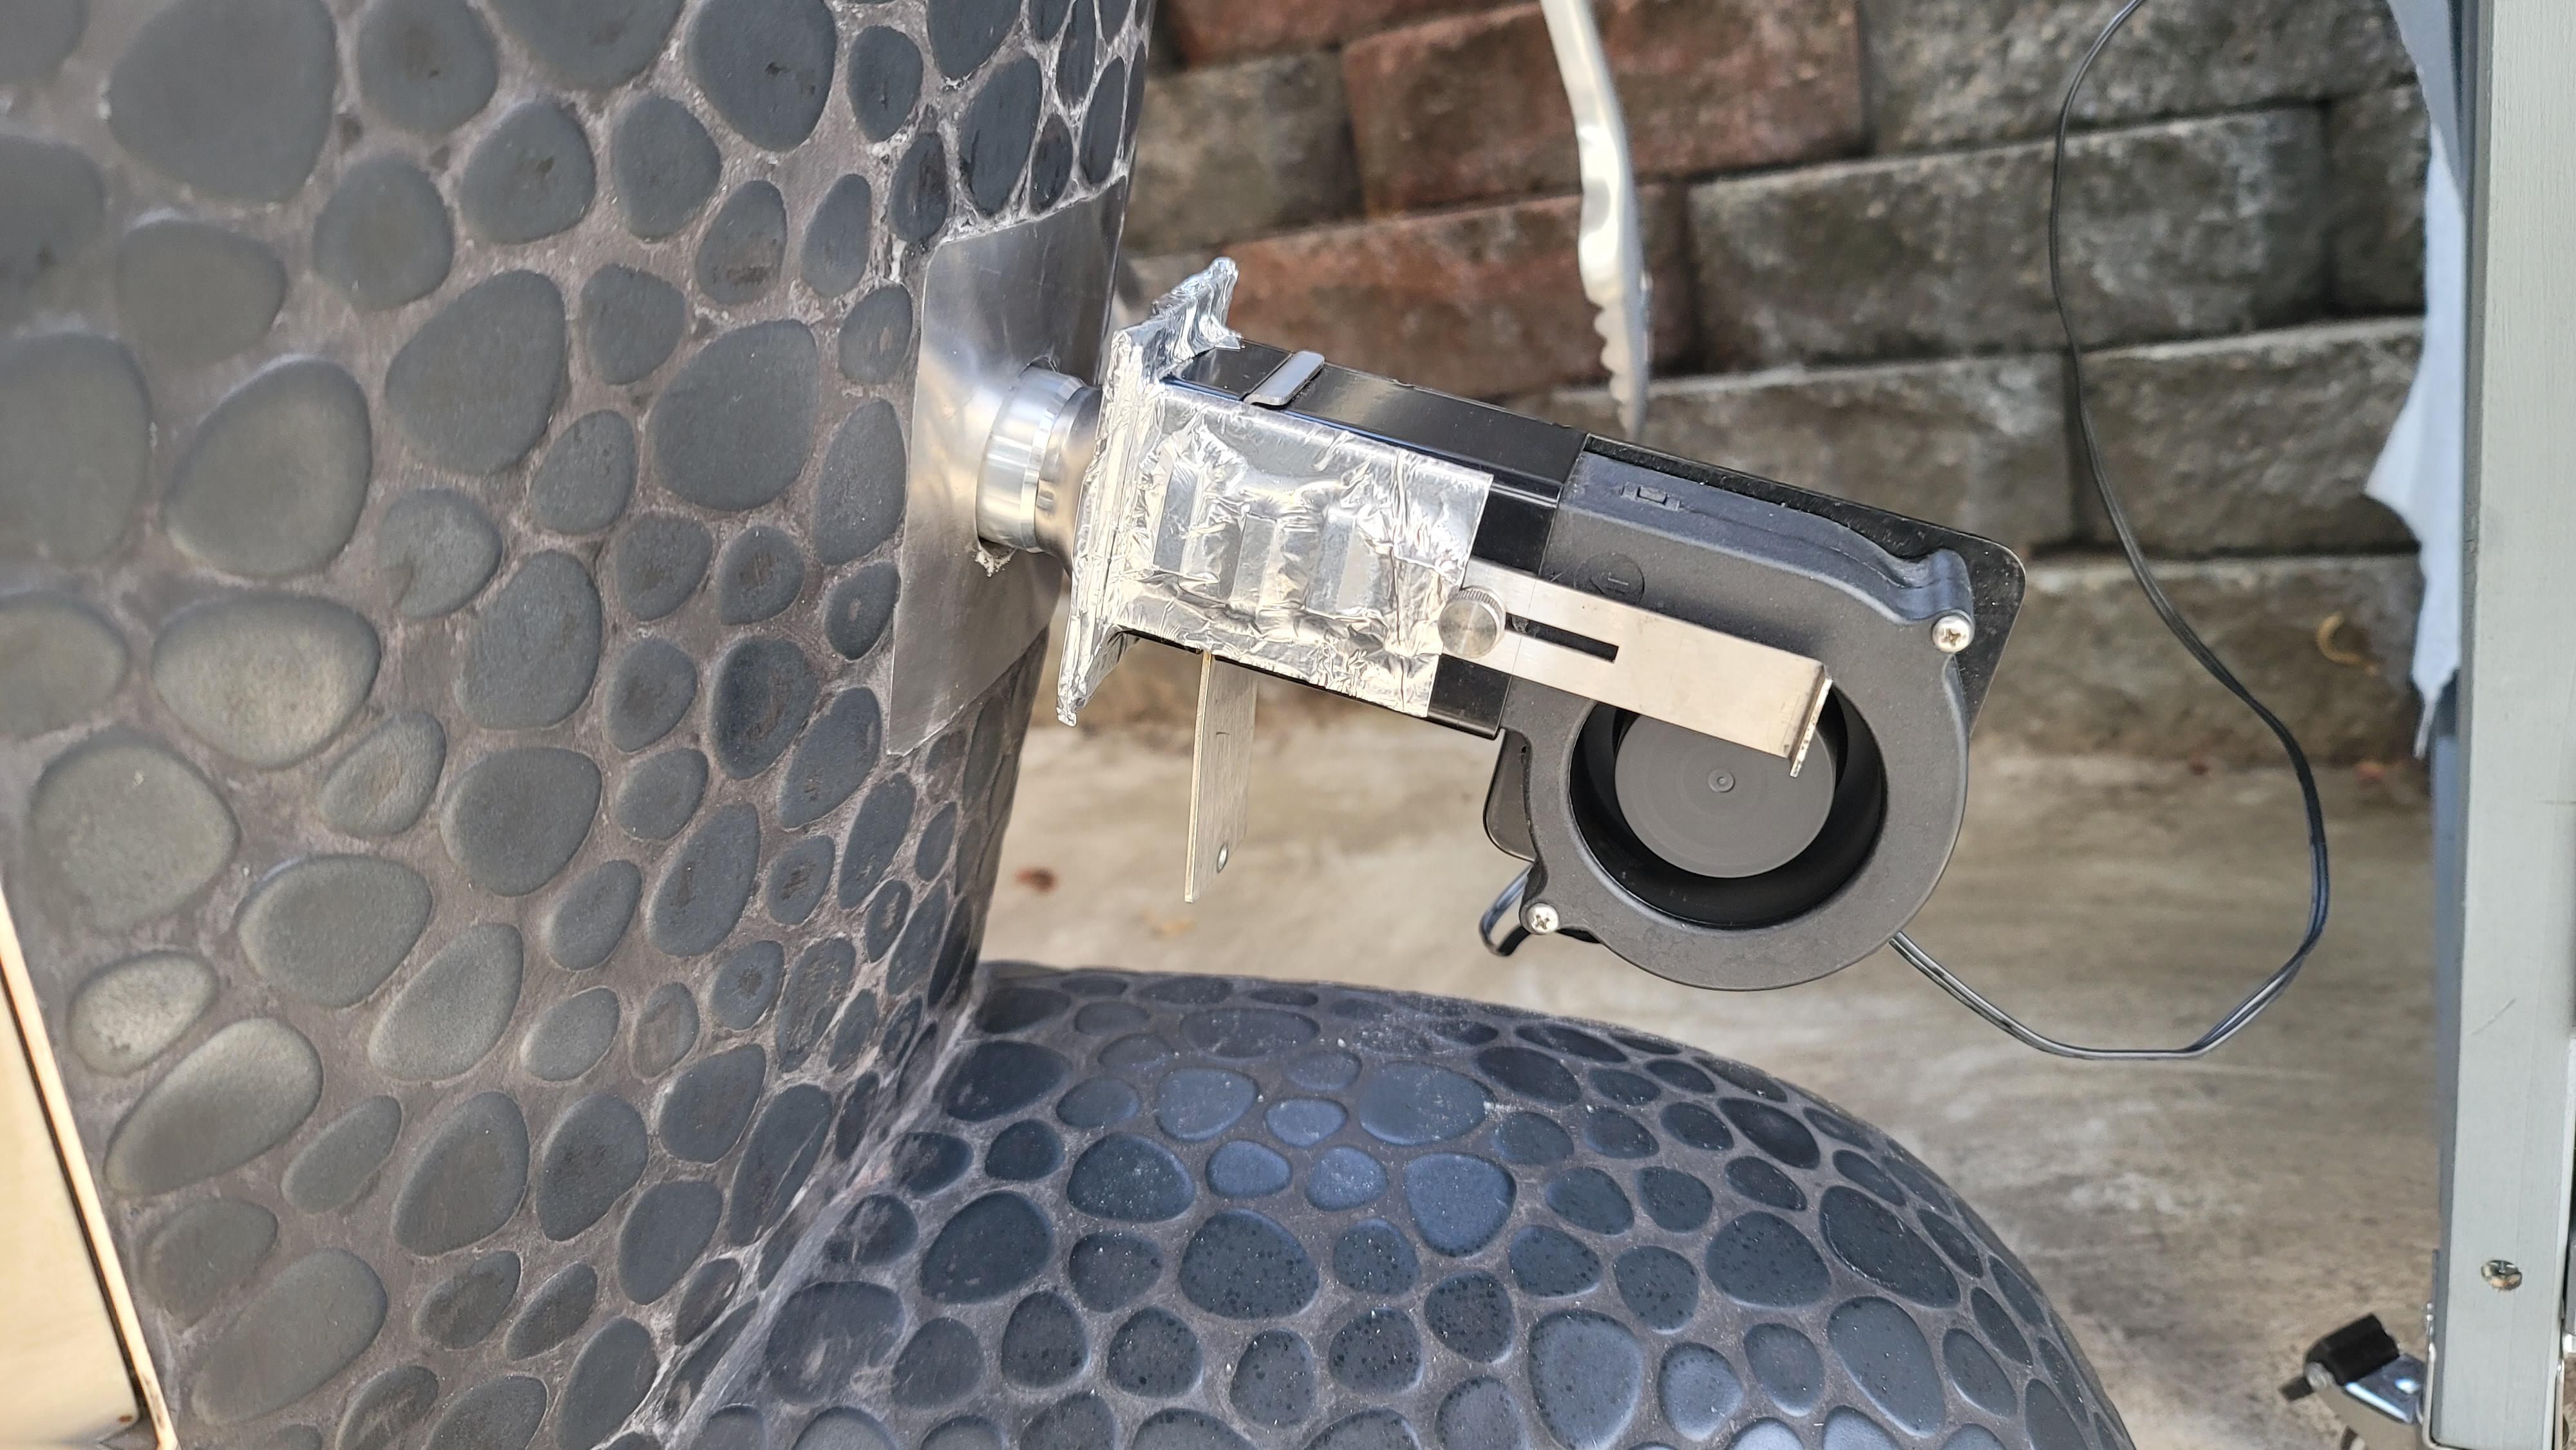
Thanks for the tip @jdbower on the Therm works universal mounting kit. I don't own a Dremel so I just used HVAC duct tape to keep my Fireboard fan together and block off the airflow leaks. Works like a charm! However, at 40%+ fan speed, I did notice that it blew a lot of residual ash around at first from the previous cooks (which could go on your food if you turn it on midcook so be mindful of that) so be sure to keep a clean area if you're going to use higher fan speeds midcook. Also, I noticed that because of the angle of attack from point of entry, for the fan to be more efficient, the lump charcoal should be on the right side of the grill, not the left (although they'll both work of course because it's a vacuum). Regardless, I suspect I'll only use this fan setup for higher temp cooks when I'm a bit rushed for time but still want to eat damn good food.
-
100° below target! Perfect. Thank you very much @tony b. I really appreciate it. Perfect starting point for me. I just ordered another temperature probe for my Fireboard so I'll be able to really gauge temps at main grate and lower grate areas as I've read they can really differ. I may have to get some ribeyes now for this weekend.
-
If I'm trying to get going a bit quicker than usual, I'll open up the top more until I'm about 100F below target. Then set the vent for the target. Like you experienced, if you get too close to your target before you close down, you will likely overshoot a bit. No worries. As we've said +/- 50F is nothing to fret about. Happy cooking!
-
Thanks @Tyrus I appreciate that. I thought of cool names to name it, but nothing stuck. I remember reading a forum article here years ago about how a guy named his KK "Puff" for the dragon, and that's always stuck with me. However, all of the dragon names seem like too much and unrelatable so instead, I've decided to refer to it as "The Forge." I think that's pretty badass/medieval sounding as well, and very fitting for me as I have 3 different flamethrowers and tend to cook with 900°+ high temperatures on my other grills. Now I just gotta get a sign that says "The Forge" to place above it. Thank you very much for the inspiration! Love it!! One question. If I want to speed up the process to get to 225°, and I leave all of the vents open, at what temperature should I start closing the vents off to be safe? 140°? Last time I overshot it, I was around 160°-180° or so (I wasn't paying too much attention) before I closed it off to 1/4 turn + 3rd hole open at the bottom and I landed at 250°. I'm pretty sure I'm not the only one who does this expedited airflow process to get to starting temps, and I know that these KKs heat soak like no other. Thanks in advance.
-
Very nice setup!
- Yesterday
-
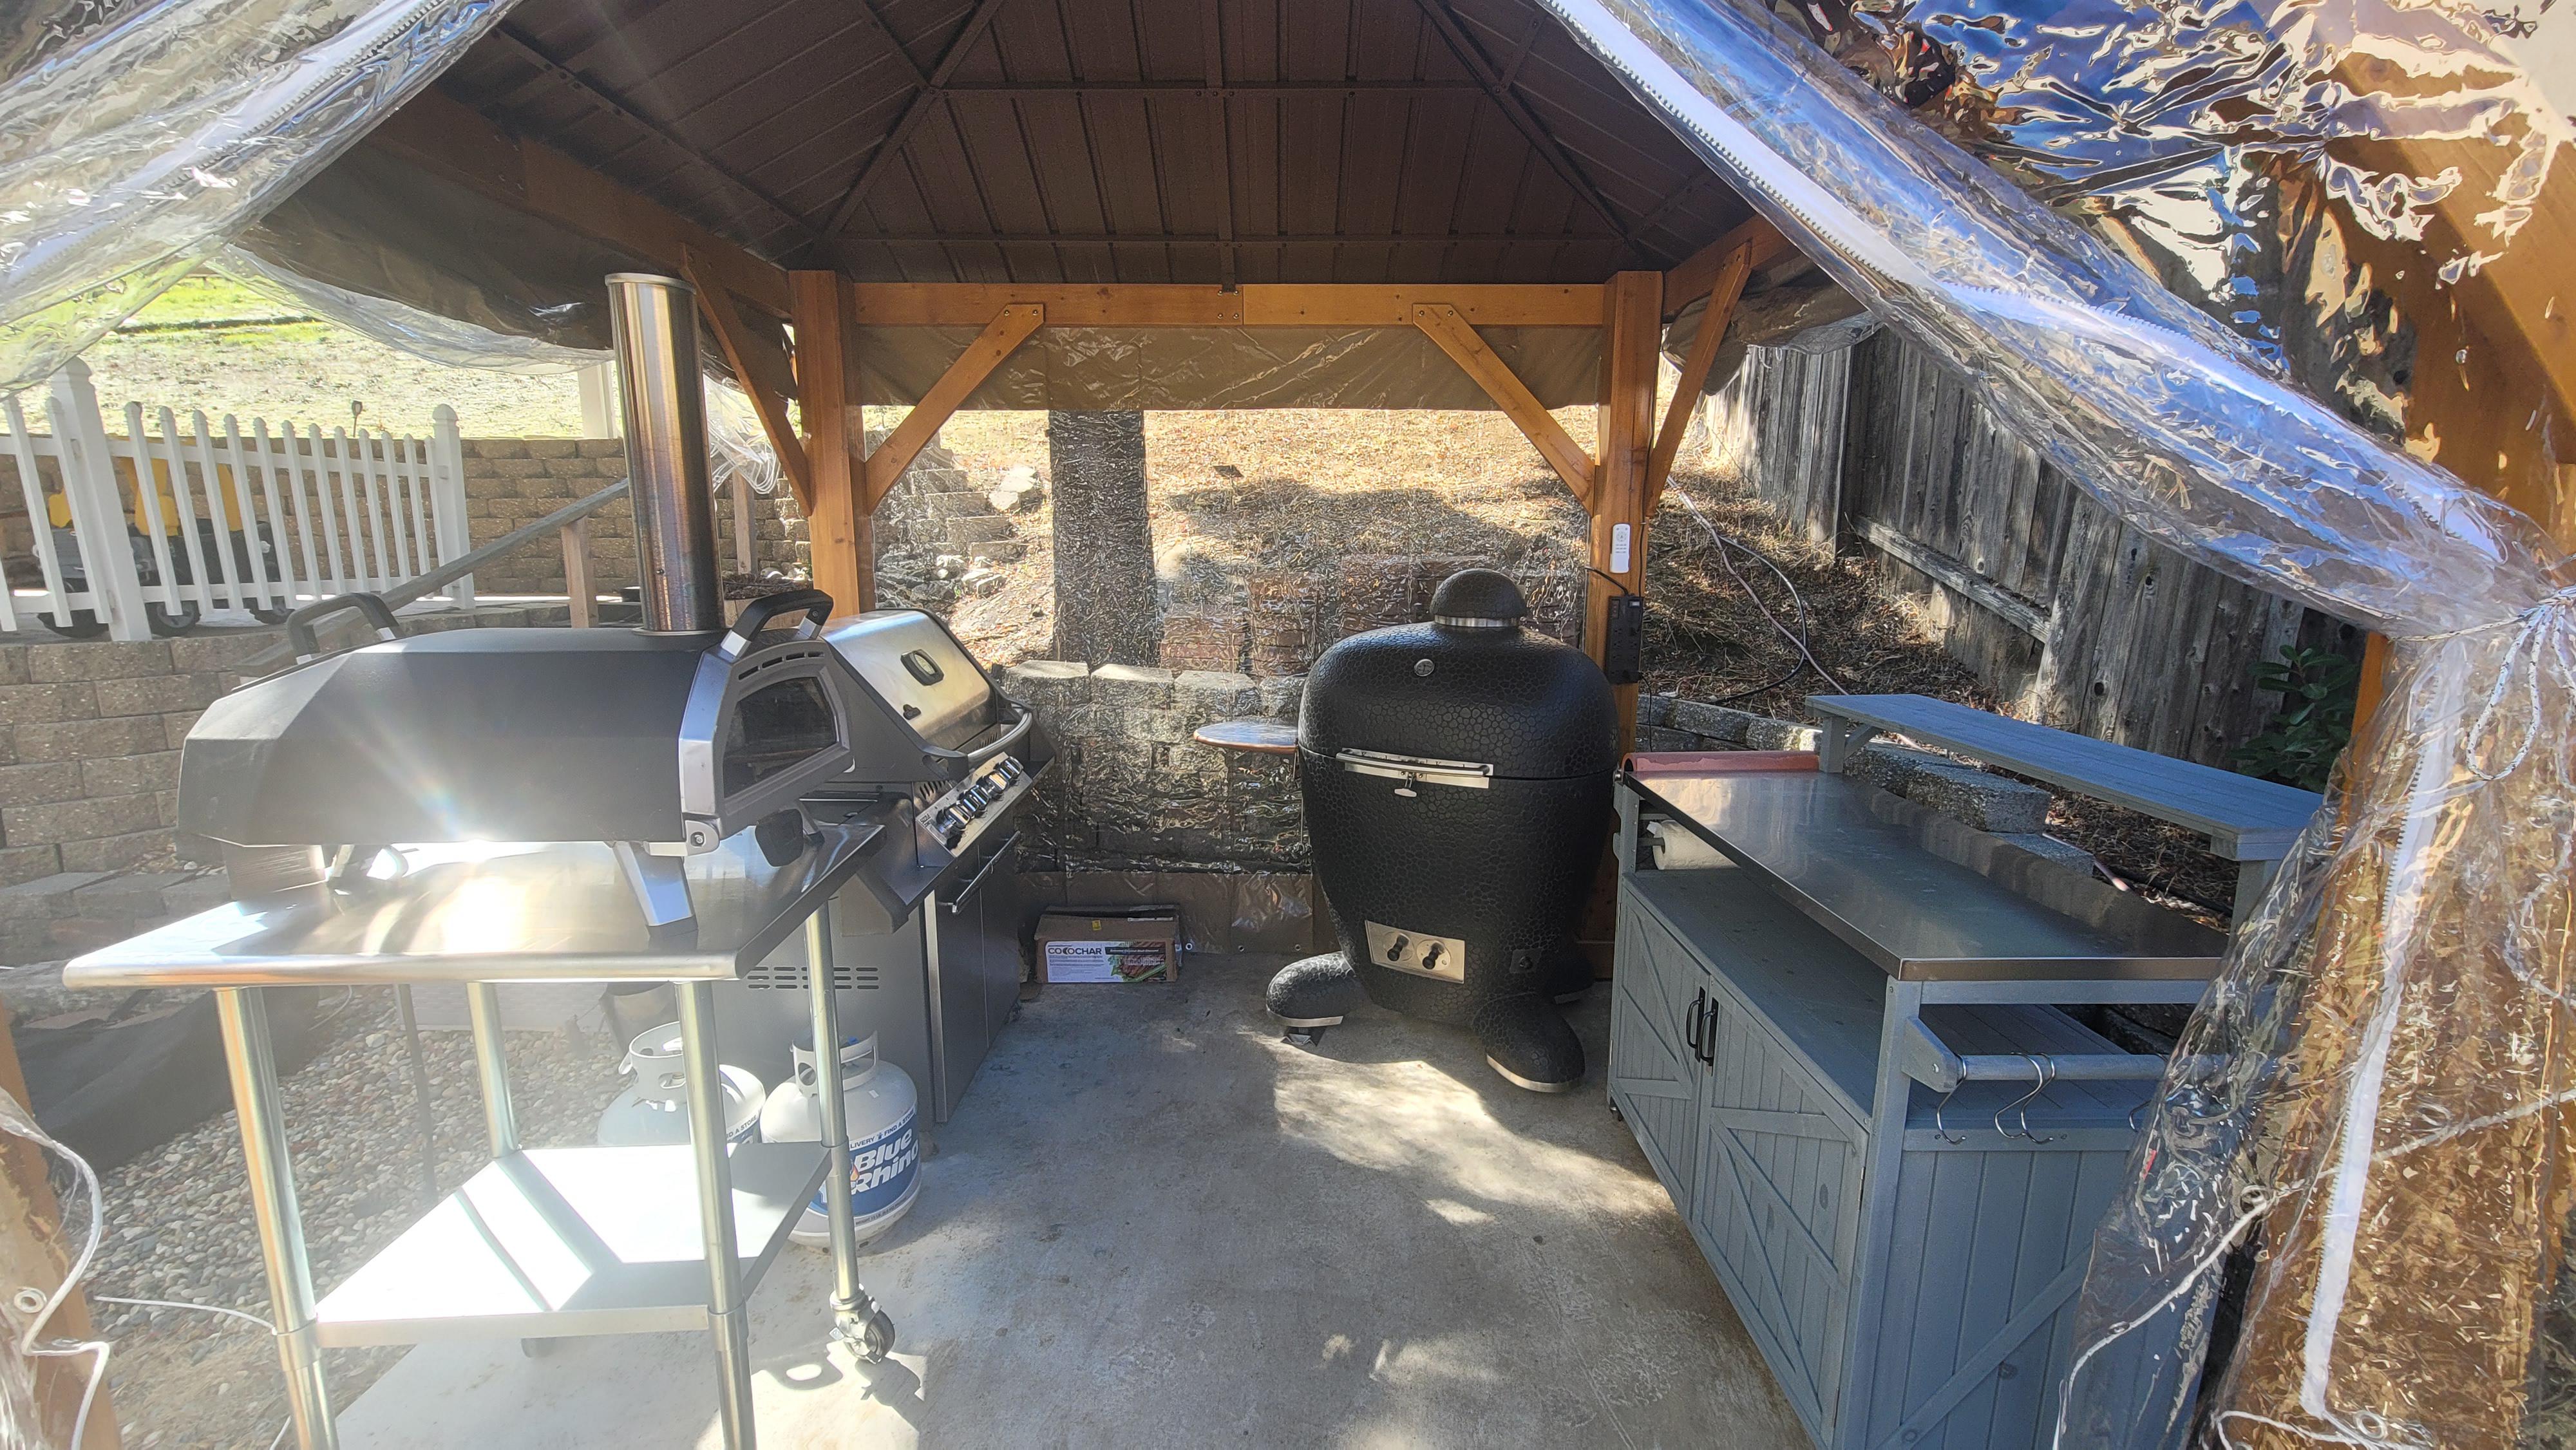
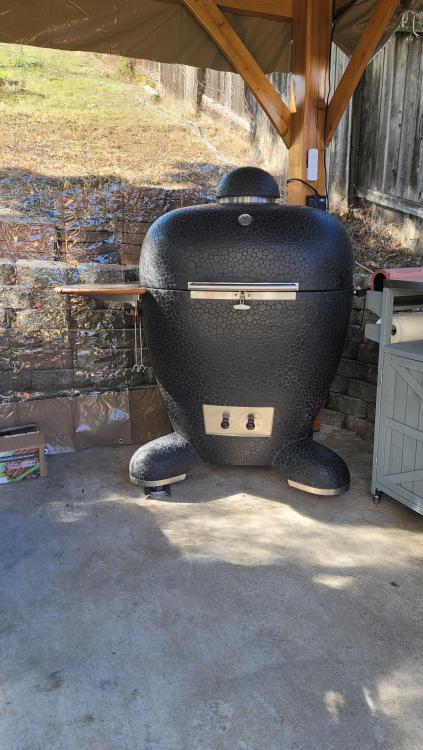
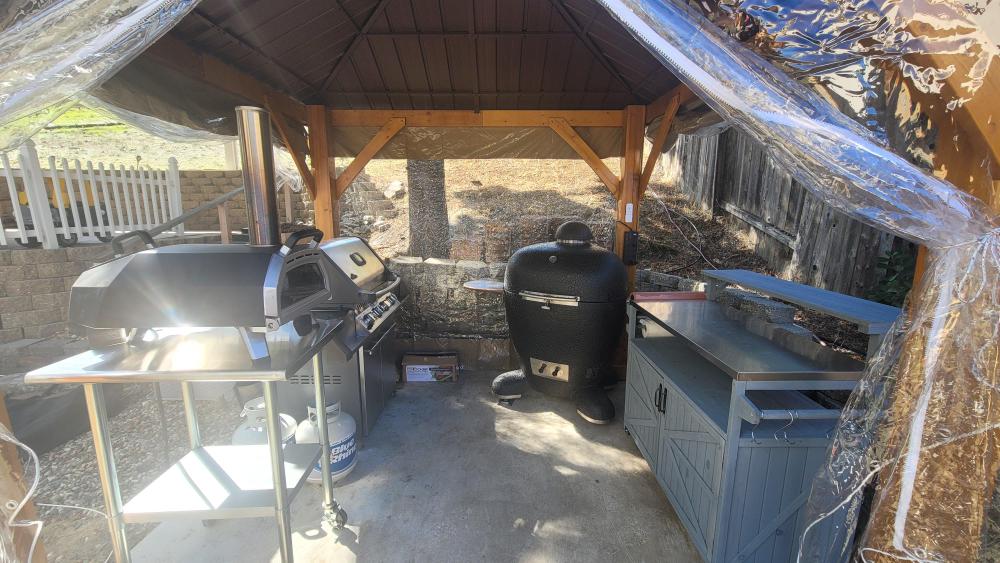
Some more pics of the setup. After years of neglecting the Yoder smoker and not treating it the way I probably should have, I built this gazebo just for the Komodo kamado. My space is tight here (8'x8'), so between these three workhorses, I should have all my needs covered. Additionally, I modified the Napoleon propane grill as well, so I removed one burner and replaced it with an infrared burner that gets over 1000⁰F in 30 seconds. Between that and the Ooni pizza oven, I will never have the need to cook with hot temperatures in this Komodo kamado, and that will preserve the longevity of this beautiful masterpiece.
-
Thanks for sharing. your experiences. My understanding is that once the grout has dried, you can treat your KK as normal. I just went through the process of repairing cracks and filling in the grout. It was a lot messier than I thought it would be (this is a function of my ineptitude). With that said, I used my fingers to push/smooth the grout into the cracks while the KK cooled down from 500F. There was one instance where the tiles were sticking/pushed out and in that situation I used the syringe to squirt into the pocket and pushed in the tiles from the impacted area. Other than that, it felt more manual and I used my fingers to smooth in the grout in cracked areas. My understanding is that the materials (once the tube has been opened) has a short lifespan. I plan to 1) make sure my KK is covered now at all times when not being used and 2) cook as much as I can in the next weeks to check for cracks and fills in with the grout.
-
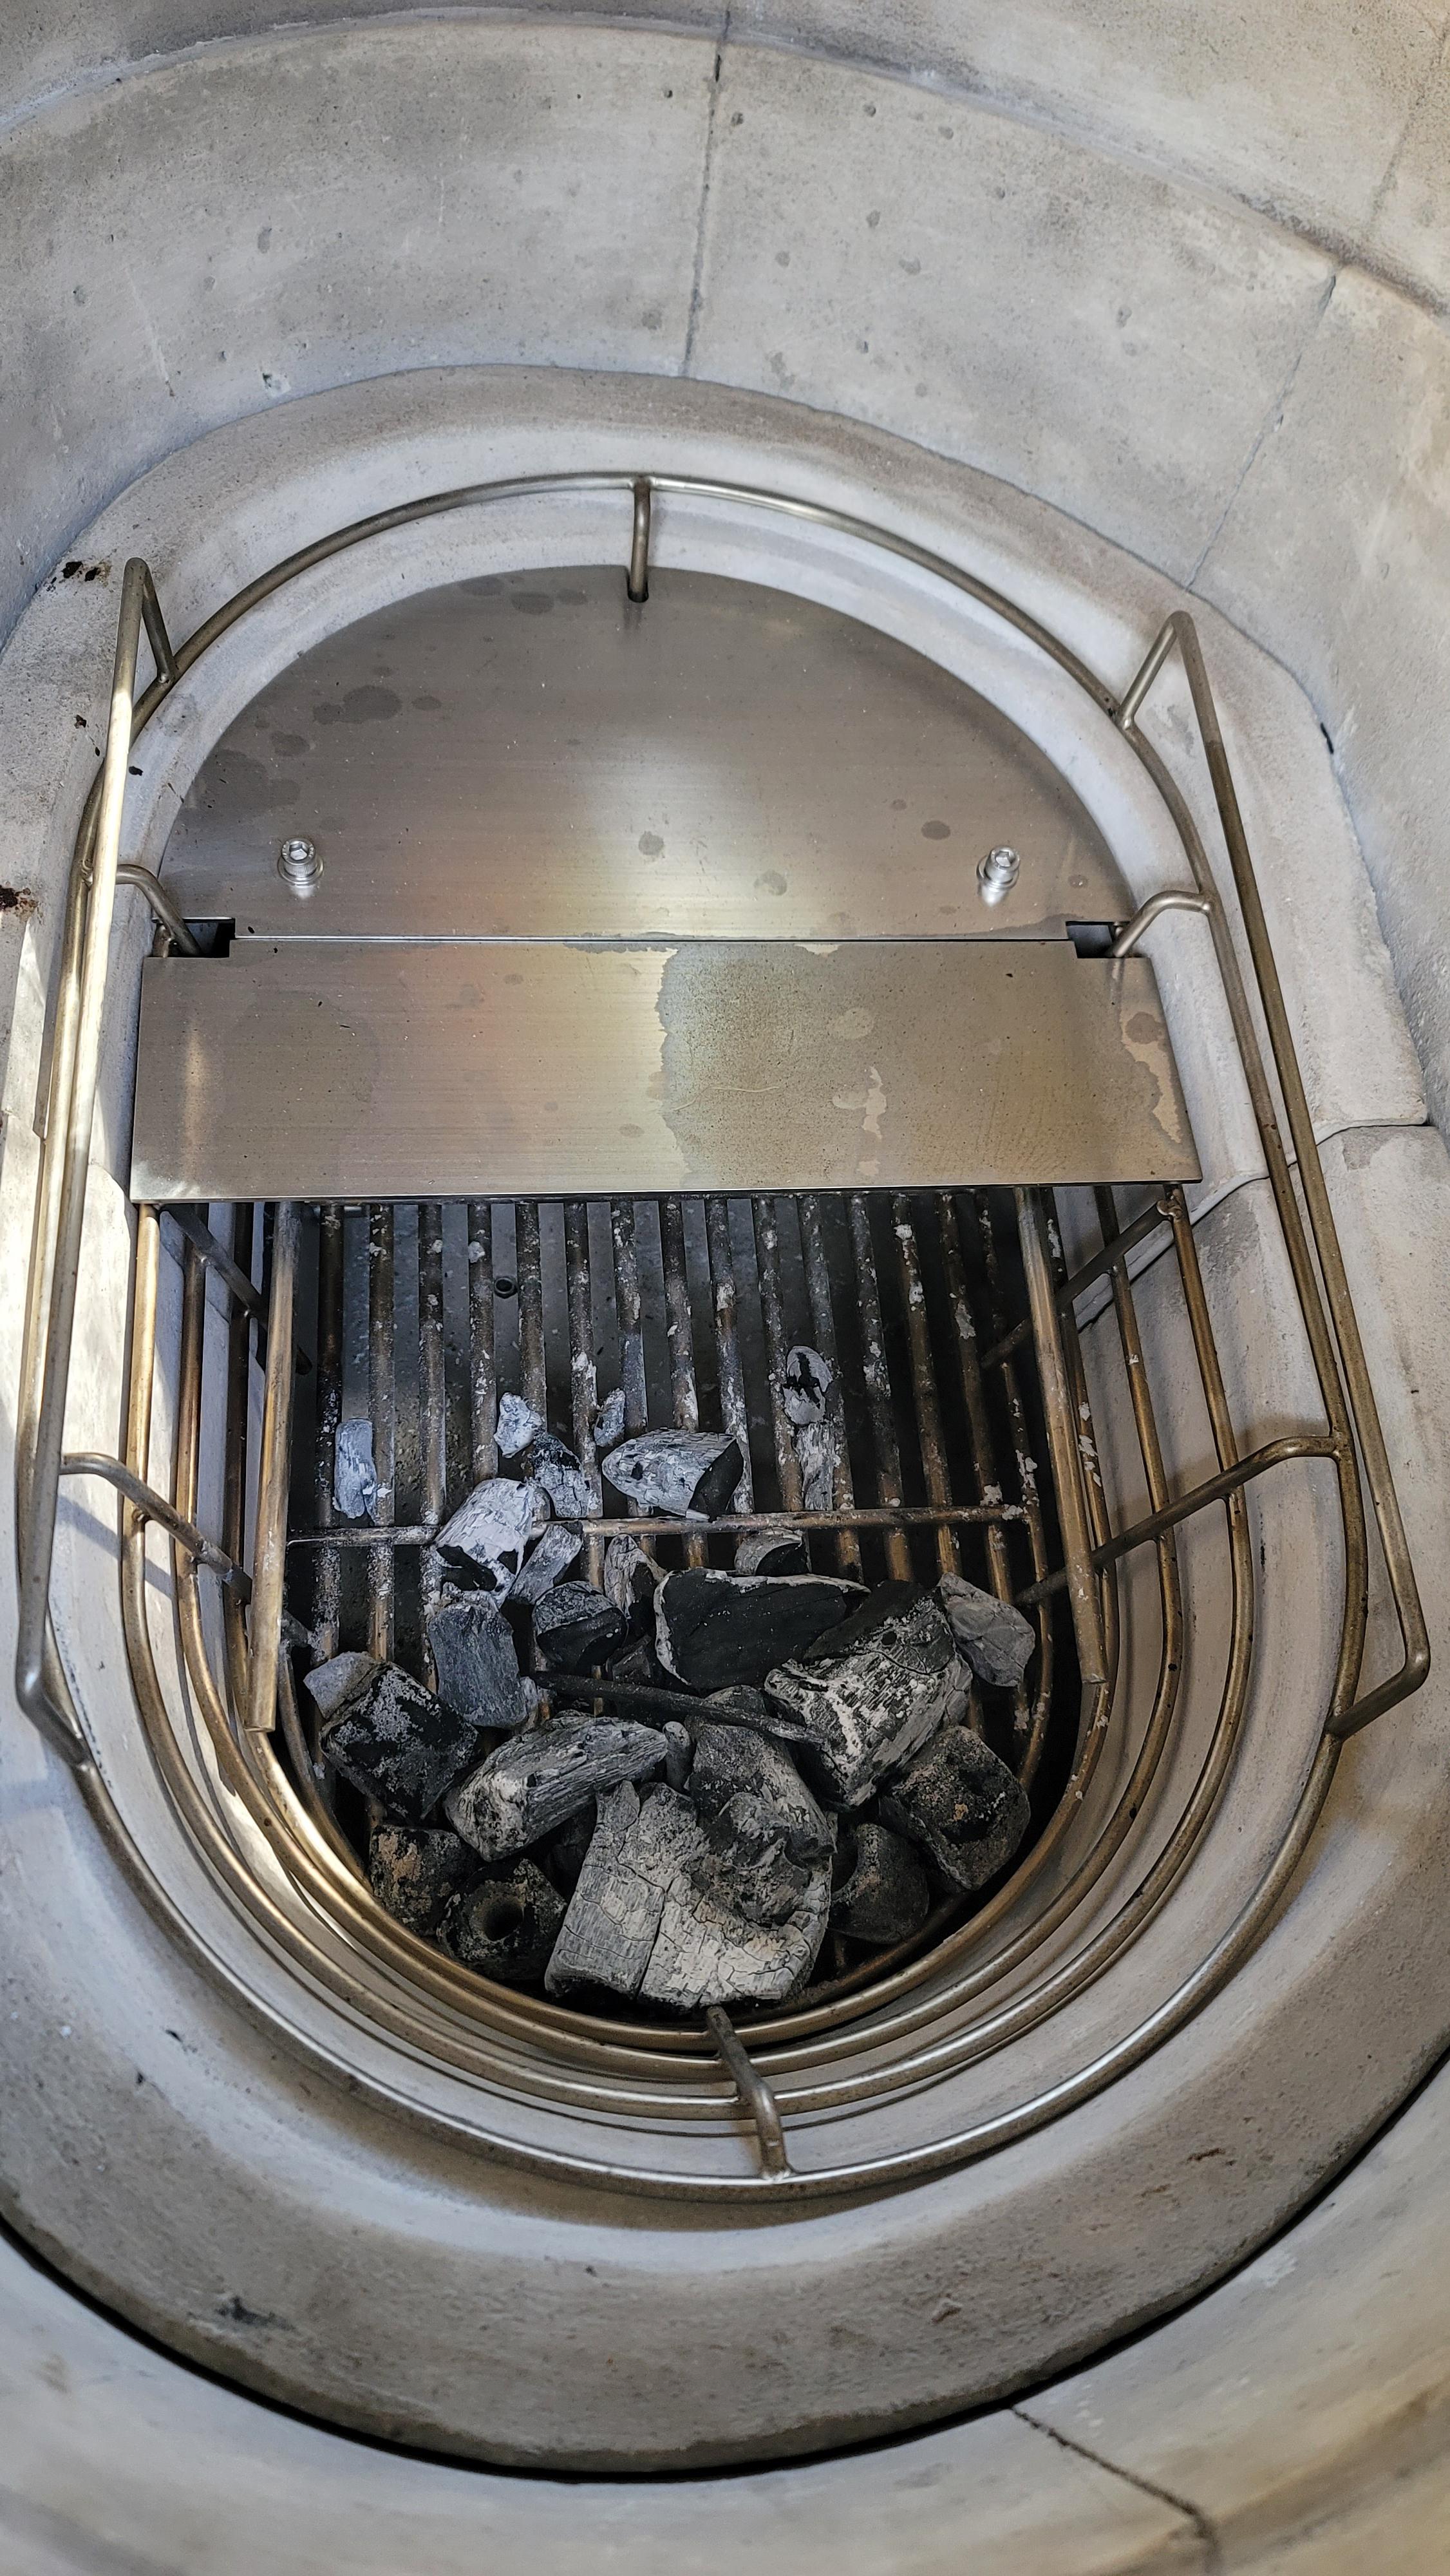
Thanks guys. Yeah, I've practically read every forum article and watched every KK YT video out there by this point (I've been following this forum for years even without a KK). I did exactly what you all suggested and cooked it at 1/4 turn + 3rd hole open at the bottom (lit half the basket splitter). I suspect maybe I should have been at 1/5th turn instead of 1/4 turn and that's the learning curve that I'm going to have to figure out. I think I also had the vents open until about 160-180° or so (I wasn't paying too much attention) before I closed it off to 1/4 turn as I was trying to promote more airflow after lighting the lump. Perhaps I should have just started off at 1/4 turn to begin with (but alas, patience is a virtue...)? The ribs in the end weren't bad, but I know with a little practice, I'll make them perfect.
-
You know there's somethin to be said about a black KK in pebble finish, not only does it have that mysterious look but it has a medieval touch like a black knight in armor, congrats and happy trails cooking. 250 is the temp I like for ribs, saves me on the cooking time a bit. If you overshot and then put the ribs on it's a little more workable seeing the temp drop 50 degrees from the addition of the meat, then you could make a trim adjustment without too much worry. The great thing is......once your locked in your there to stay and that's a comforting thought. All those ribs and living in wine country, it musta been a beautiful day.
- Last week
-
Couldn't agree more.
-
For slightly tougher cuts of meat, I recommend a soak in Shio Koji (paste is better than the liquid). But you should cut back on the amount of salt that you use to compensate for the extra umami of the Koji.
-
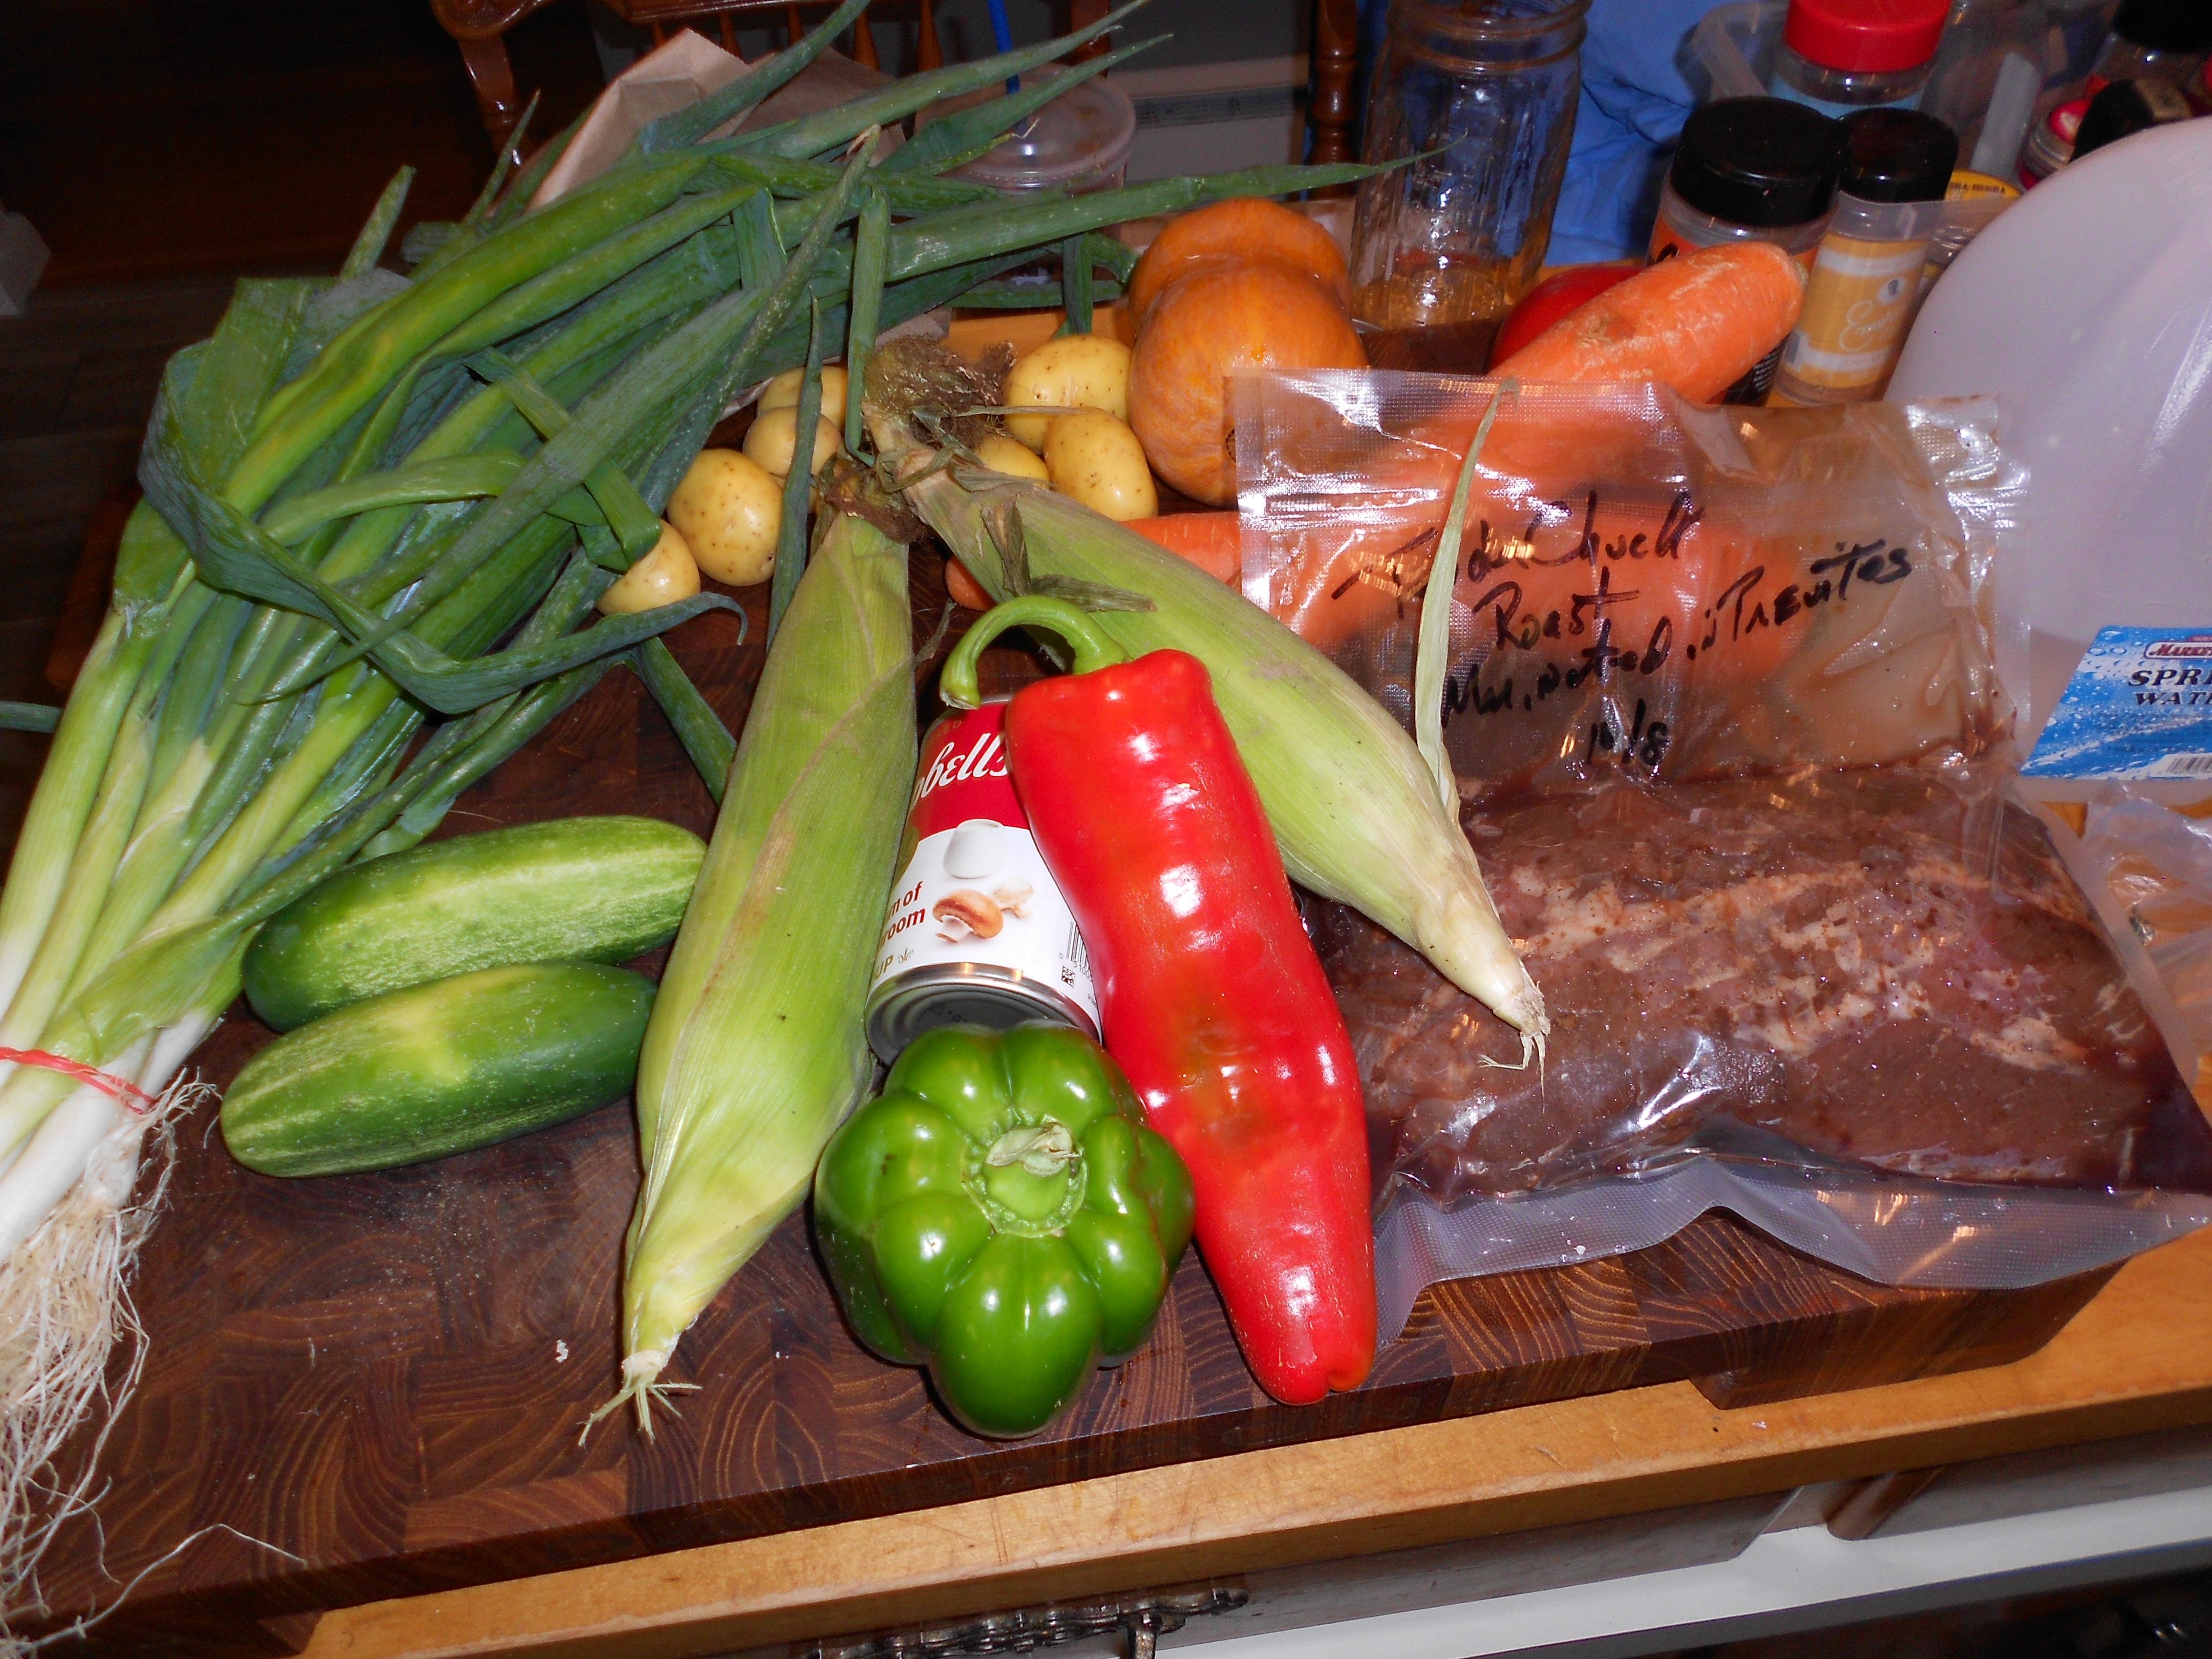
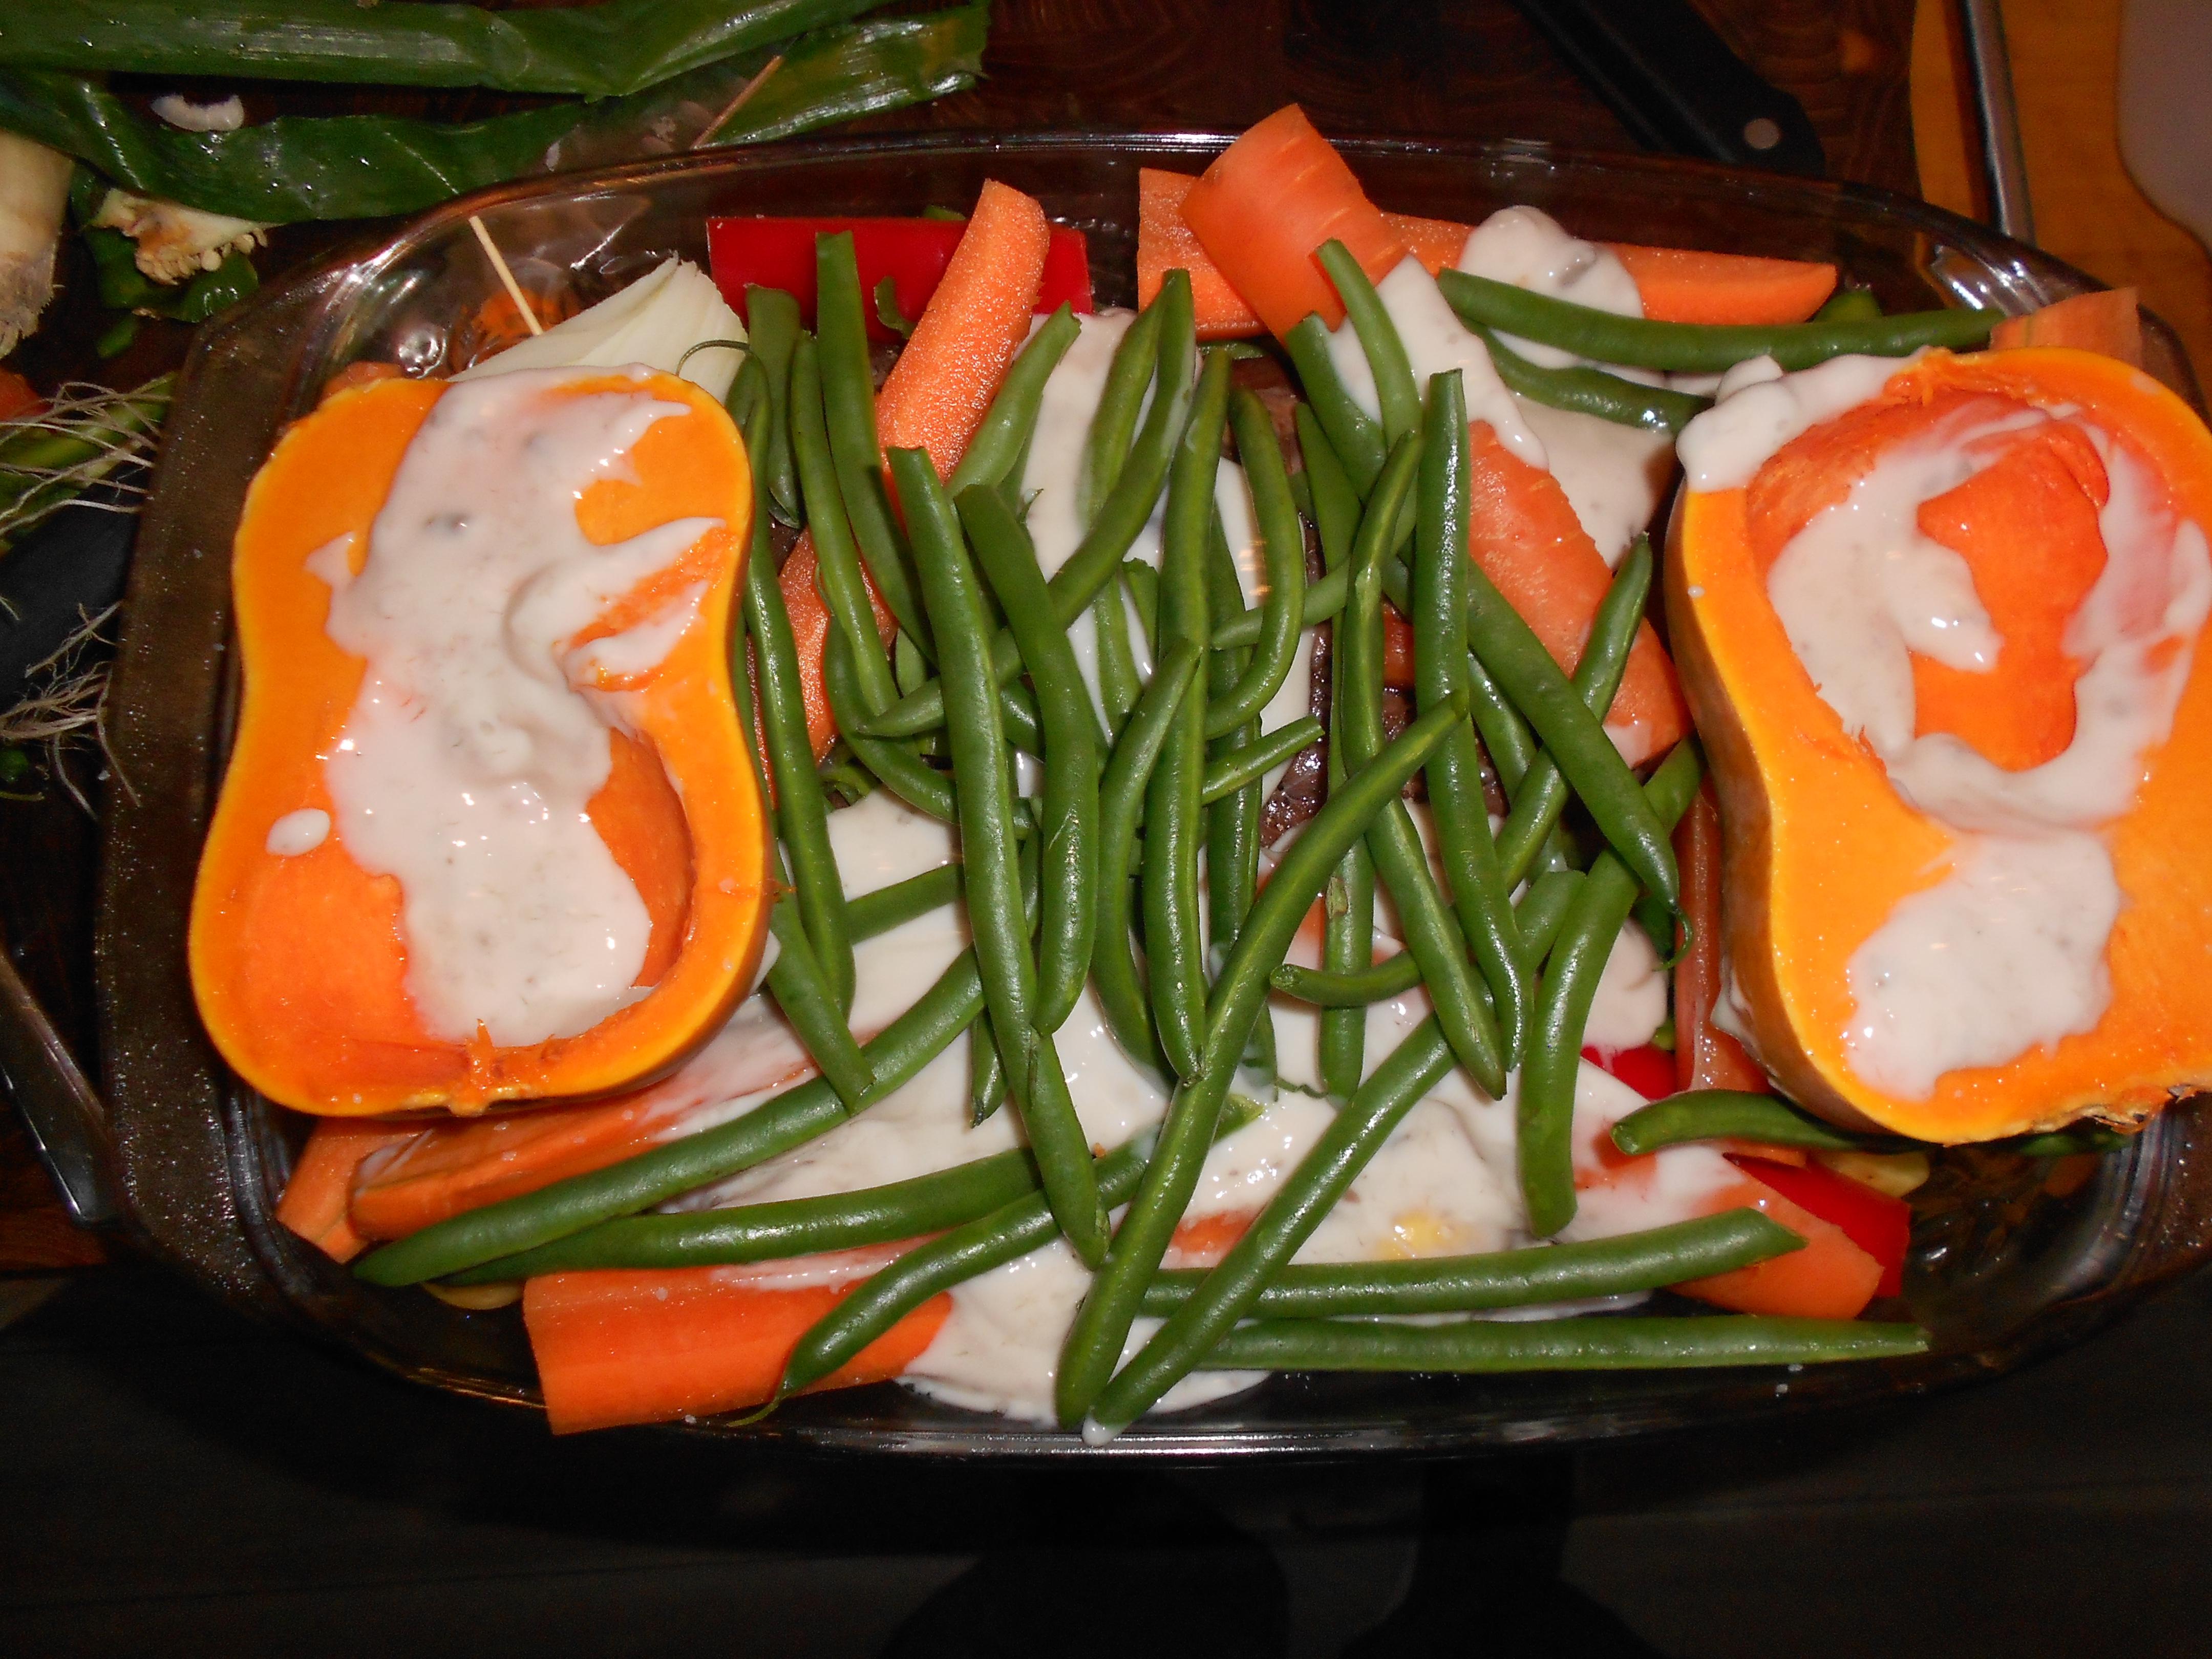
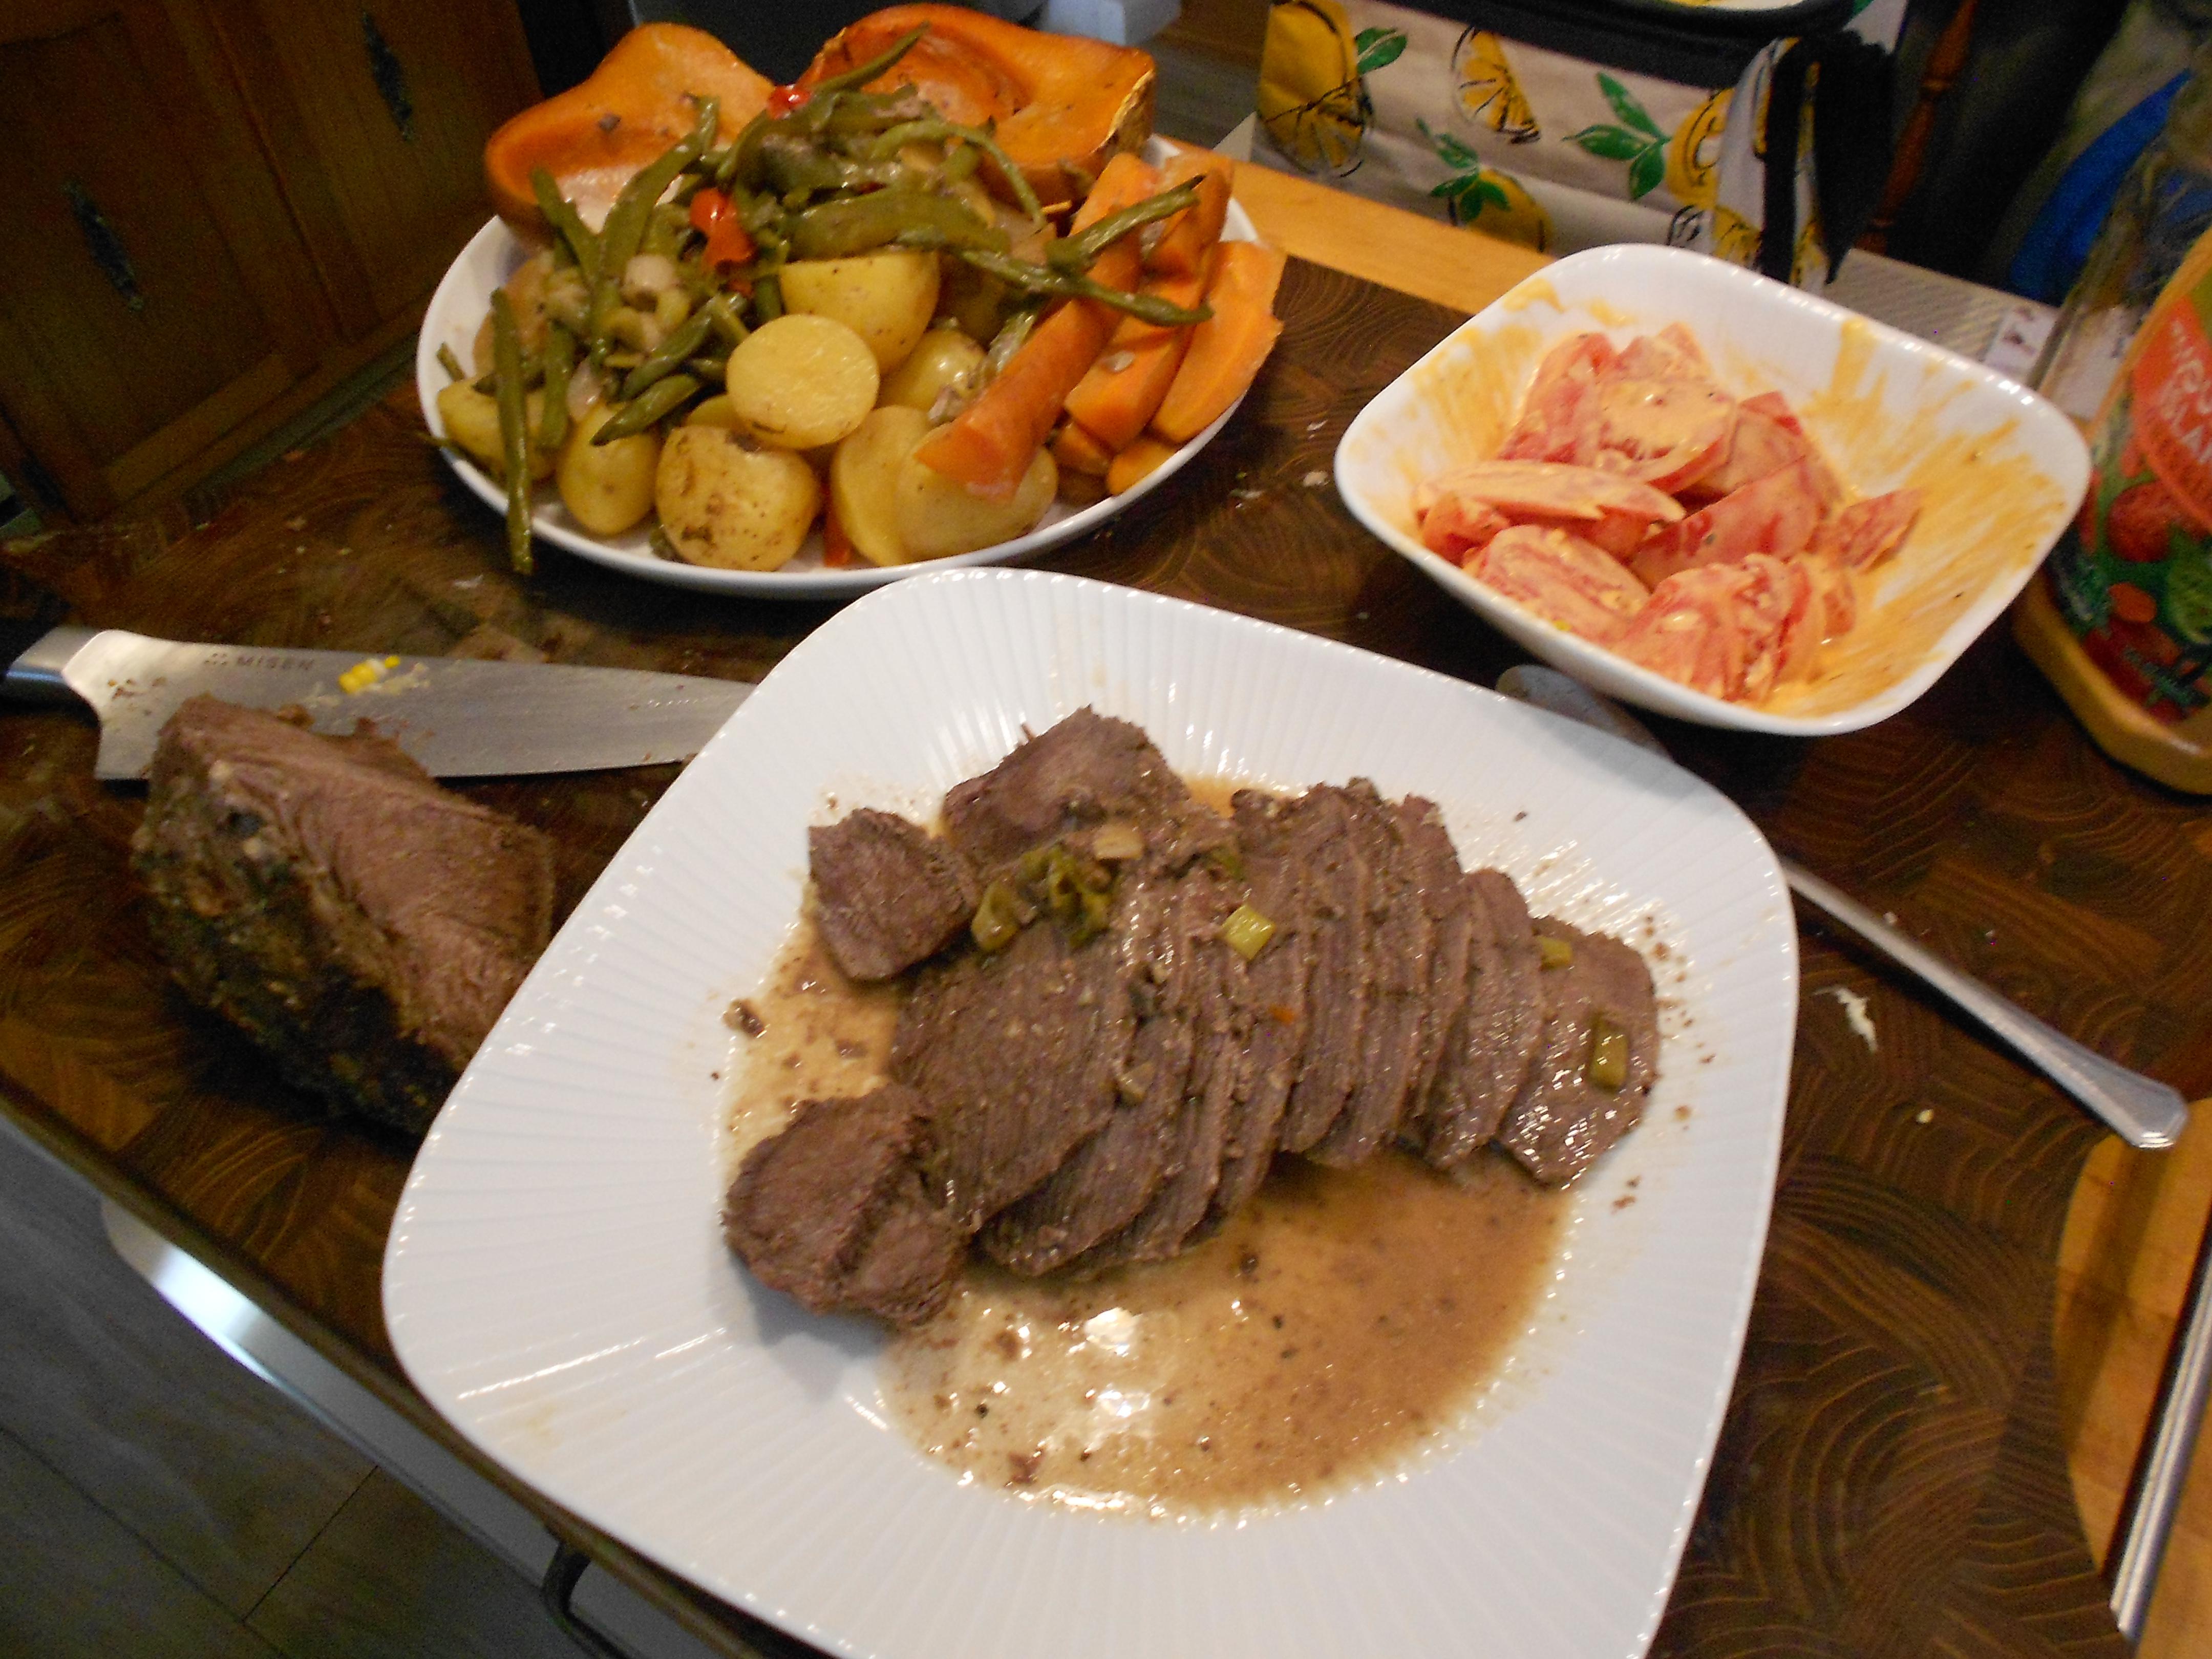
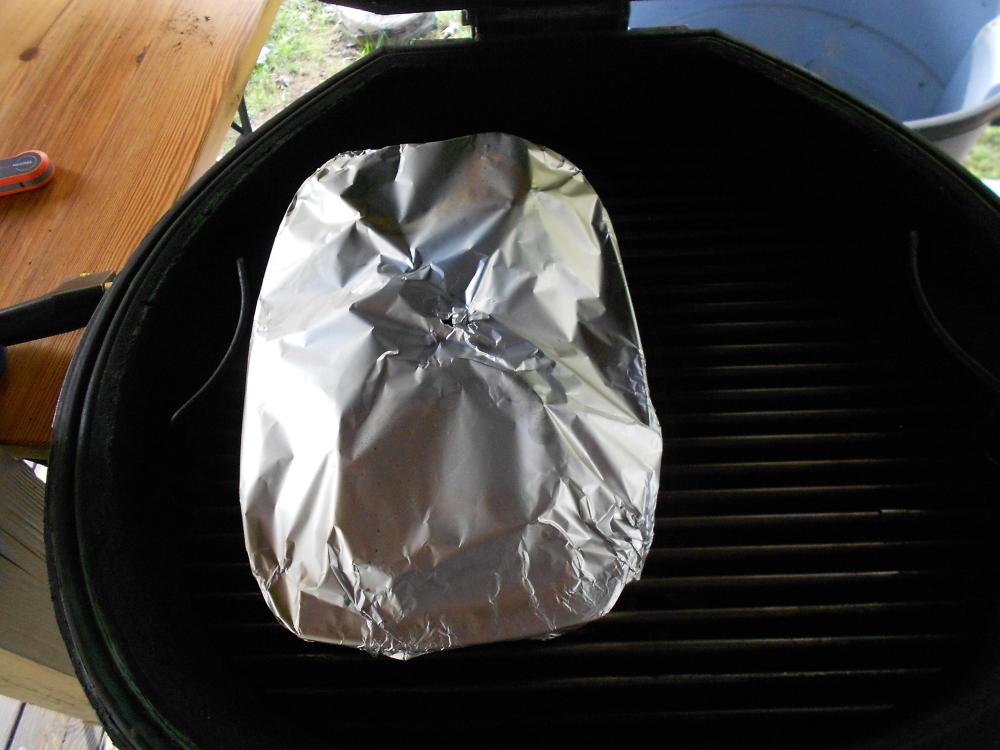
This weeks local crop share had an abundance of fresh fall related items that went well in my KK slow cooker. Adding all the ingredients into a deep tray along side a marinated tender chuck roast all wrapped in foil and time prepared a hearty tasty meal.


-
I've found what works for me is letting the meat soak in the marinade for 18-24 hrs as long as it's not one the accelerates the break down of the meat tissue as say pineapple juice, vinegar or wine...then your time in the soak is much less. Sweet and savory marinades do well longer, I soak my Tri-tip whole for 24hrs in a savory worcestershire sauce base having garlic and onion powder and other herbs, I find it at a local meat shop. It's kind of like brining a turkey, the process is long but the result is what your looking for. Chicken wings and thighs do well in a good soak of Buffalo or Peri Peri or Teriyaki for that matter. Some may not prefer it that way, experimenting with duration may be one's choice, you've got to find your comfortable niche. I do like those McCormick quick packages for chicken on the grill, best to follow the directions here or try a Product called It's Incredible by Heaven Made Products, an alternative to salt and pepper for some things. I really should be better at writing things down, I've probably forgotten more than I can remember but if the time and effort of preparing countless cooks have taught me anything I believe it would be just having a understanding of what goes with what. As far as methods are concerned...I stick to what works and evolve from there, like most folks.
-
Welcome to The Obsession! Best way to learn temp control. Fill up the basket with coals, Light a small spot, Open the top vent 1/4 turn and bottom vent just barely open (pinkie). Sit back with a cooler of your favorite adult beverage and watch the temp. Once stabalized, make a note of it, bump the top vent another 1/4 turn and have another beverage. Again, once stabalized, take notes, bump the top vent again and maybe open the bottom a bit more. Keep doing this until the dome reaches maybe 450F, as almost all your cooks will be below that temperature (except the burn-in and doing pizzas). The vent position/temperature correlation is very repeatable, assuming you have enough charcoal in the basket. Secondly, DON"T CHASE THE TEMPERATURE! If the KK is heat soaked, you're not going to be able to lower the temperature easily if you overshoot your target. Also, it's BBQ, not rocket science. Plus/Minus 50F off your target is nothing. Just roll with it. You won't notice any difference in the results, only the cooking time might be slightly affected. Good Luck, Post Pictures of that all-important virgin cook!
-
As my "partner in crime" battling the spammers, I'll give you a PASS on the No Pic, Didn't Happen rule.
-
This! The top vent open 1/4 on my Big Bad is also about 225-250 and 1/2 is about 300 with the bottom vent open enough to fit a finger in it.
-
Congrats !!!! 225 is only about a 1/4 turn of the top vent with the bottom vent only being open enough to get your little finger in there. Dennis has some good videos on that, i'll see if i can find the links This will get you a good temp for ribs And this one is everything you need to know about the 32
-
What size cooker do you have ? A 32 ? And for ribs I don't use the splitter in my 32. Just a drip pan with foil to catch any drippings, that acts as a deflector to get me indirect. At 225 a 2.5 pound rack of ribs should take at least 4 or 5 hours.
-
For a longer cook, i would have the splitter open roughly half, but always fill the available opening with coal. Any leftover coal can be re used for future cooks. You’ll also used a little less coal once you learn your settings. Sent from my iPad using Tapatalk
-
Congrats on your new grill! You’ve certainly made a great decision. Temp control is a little bit of a learning curve but easily mastered with a little practice. My first question is how much coal are you lighting? Sent from my iPad using Tapatalk
-

Best Meat Thermometer, Top Picks for Grilling and Cooking
zoee replied to zoee's topic in KK Cooking
Thanks for sharing that’s super helpful. Sounds like ThermoPro thermometers are reliable and backed by great customer service. I might try one for my next cook since it fits well in hand and works consistently. Appreciate the tip! -

Best Meat Thermometer, Top Picks for Grilling and Cooking
mavoo12 replied to zoee's topic in KK Cooking
@zoee I’ve seen the Alpha Grillers Digital Meat Thermometer and their reviews are good, but I think everyone has their own personal preferences.

.jpg.3f4900bd51619e3ff36263ff7c2496c6.jpg)

.thumb.GIF.006d23b9323146d2dd9055f4e195bc2a.GIF)