.GIF.0c507fdd0aaa5c1cae84b6c43af405e7.GIF)
tony b
-
Posts
12,653 -
Joined
-
Last visited
-
Days Won
544
Content Type
Profiles
Forums
Events
Everything posted by tony b
-
OK, so once I emailed the pizza pics off my phone to my PC email account, I got full sized images, as I suspected. So, here they are again, but LARGE images this time.

-
To quote a former POTUS, "I feel your pain!"
-
Not intentional. I had taken them with my phone and downloaded them via Google+ to post here. It made them very small - 20KB. So, this time is wasn't the Forum software's fault (for once!). I may see if they get larger if I directly email them to myself off the camera.
-
You can also usually find Dizzy Pig rubs anywhere that sells Big Green Eggs. The ACE hardware down the road from me usually stocks the basic ones.
-
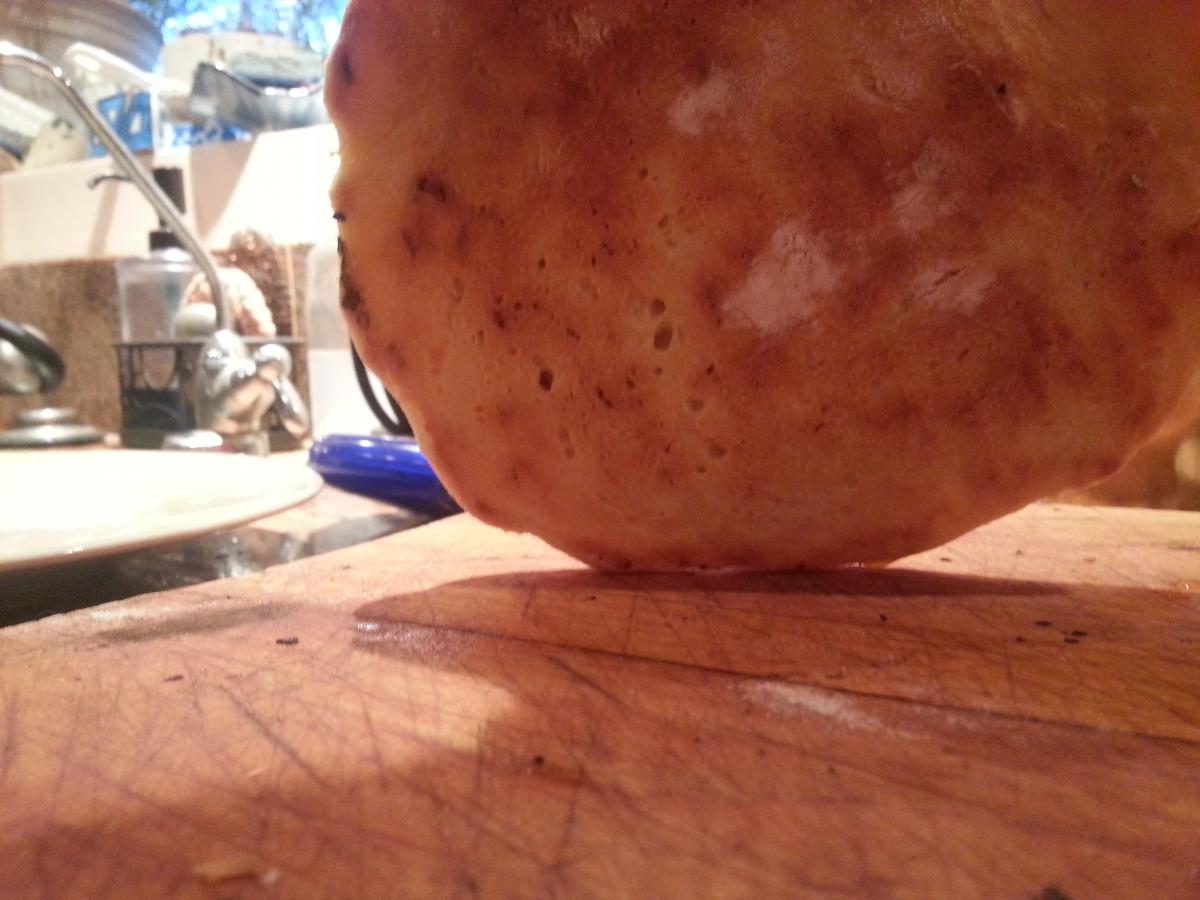
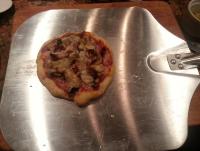
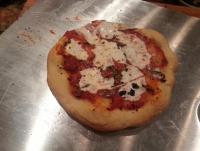
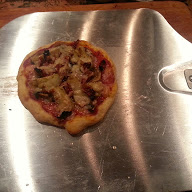
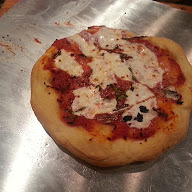
Pizza night again last night. 2 baby pies. Since I cracked my smaller pizza stone (not a KK one), I had to go back to the big KK stone that only fits on the main grill so the upper part of the crust didn't brown as nicely. (Note to self - order one of the new pizza stones for the upper grill.) Here's some pics anyway. This one was artichoke hearts, mushrooms, and sundried tomatoes with Grana cheese. Nice crust on the bottom, even if the top didn't brown as nice as I wanted. This one is a classic Margarita.
-
Doc, you've been away for a while. Most of us have solved the infamous photo upload problem. First, make sure that the picture size is under like 2MB. Second, don't try it with Internet Explorer, use Chrome or Foxfire, they are more compatible with the Forum software. At least these seem to have fixed the problems that Susan and I were having. YMMV.
-
Our Fresh Market had its Grand Opening yesterday (Foodie Heaven!!) and YES, they have Nueske's bacon. It's in the meat counter and isn't labelled as Nueske's, just "applewood smoked bacon," but the printed out label on your package says "Nueske's" on it. Unfortunately, their pepper bacon isn't Nueske's, so I think that I know what I'm ordering to get the above freebie! Or, maybe the cherrywood smoked?
-
http://www.amazon.com/Pressure-Perfection-Editors-Americas-Kitchen/dp/1936493411/ref=sr_1_3?s=books&ie=UTF8&qid=1412271340&sr=1-3&keywords=pressure+cooking+cookbook http://www.amazon.com/Emerils-Cooking-Power-Delicious-Starring/dp/0061742988/ref=sr_1_1?s=books&ie=UTF8&qid=1412271450&sr=1-1&keywords=pressure+cooking+cookbook+emeril
-
Hey Nueske's fans, got a catalog in the mail today and inside was a promo for a FREE pound of applewood smoked bacon with ANY purchase - no minimum! Offer ends on October 15th! The promo code is - PC1654F.
-
Actually, it's primarily to get the toppings done/cheese melted before the crust burns on the very hot pizza stone. Have you ever been to a pizza restaurant with a big brick oven, especially a wood-fired one? Watch them cook the pies; at the end of the cook, once the crust is done, they take the peal and lift the pie up near the ceiling to finish them off. Same principle as what we do in the KK by using the upper grate near the dome.
-
Tabasco peppers are very similar, so you could try a small batch and see if it works. Or blend them in with some "meatier" peppers like Anaheims. I am a certified "chilehead!" I have every issue of Chile Pepper magazine ever published. One whole shelf in the door of my fridge is bottles of hot sauces, as well as half a shelf in my pantry. (The other half is BBQ rubs!) One of my favorite places to visit is Peppers of Key West - they have a "tasting bar" where you can try just about any hot sauce, salsa, BBQ sauce, etc. in the store. I'm like the kid in the proverbial candy store!!
-
He's very into sausage making right now. He's supplying a couple of restaurants in town and maybe expanding to a third soon. He also sells to folks on the side. He just upgraded to a 20# stuffer to help keep up with the orders. I've gotten his cheddar brats, hot links, and was a "trial taster" for his breakfast links - he's still working out the recipe on those. He does both fresh and smoked sausages. He's been doing bacon, corned beef and pastrami for a while, too. He has a "day job," so he's strapped for time, but wants to eventually do more things like copa, prosciutto, mortadella, etc. As an "oh, by the way," he inherited my old POSK and has managed to keep it functional, despite the top hat falling off. He just stacks washers on the lid to the desired gap and sets the top hat back on it.
-
Other than the pizza stone, which is stored inside the house, everything else is outside by the KK. I have a tiled-top, wrought iron table that has hooks on the end for spatulas, tongs, grill floss, etc. I generally stash the extra grills, baskets, and my charcoal chimney at one end. Their is an underneath shelf for 3 large rubbermaid tubs, which hold the deflector, smoking woods (Large chunks) and my charcoal. Like Susan, I also have one of those large blue/white plastic deck boxes where I keep smoking woods (boxes of smaller pieces), rib racks, gloves, guru, etc. All are in very close proximity to the KK.
-
Got a buddy who's into charcuterie, so he's got plenty of pink salt. He's also the one who got me to do my own fermented hot sauce. Got a batch going as we speak - mostly Caribbean red habaneros, with a couple of ghost peppers thrown in for over-the-top heat!!
-
.thumb.GIF.006d23b9323146d2dd9055f4e195bc2a.GIF)
Careful.. Dome 900º ~ Lower Grate 1452º!!
tony b replied to DennisLinkletter's topic in KK Features & Accessories
WOW! I knew this thing could get crazy insane hot, but that's impressive!! -
I did get the skin on belly - a whopping 13#!! Killer busy weekend (homebrew club's annual beer festival), so had to toss it in the freezer. I promised Susan (Loquitur) that I'd take pictures during assembly and cooking.
-
Yeah, what she said!
-
Tasty looking little birds! I was already in the mood for chicken today, but this just sealed the deal. Have a pack of thighs in the freezer begging to be grilled! Just struggling to figure out how I want to do them? Maybe a "snack pak" approach - LOL!
-
Yes, they seem to be different cuts, as the first one was a bit more marbled. They cooked differently, too. The first one pulled easily, the "pot roast" didn't and I ended up slicing it, even though it was cooked to 200F and let rest for 30 minutes in foil. Both were seriously tasty though! Will try and remember to take "in process" pics. This is a whole belly; hence 13#. I'm hoping that the porchetta only uses a portion of it, so I can make some bacon with the remainder. Eager to tackle both, as I've never done either one before.
-
Funny, but the first picture still shows the bent probes, but all the others show the straight ones. I've owned 2 of these in the past and been generally happy with them. Minor complaints about the on/off switch being inside the battery cover (hope the newer ones changed that). Hard to get to sync up sometimes (multiple attempts needed). And, the "pre-programmed" meat temperatures are all on the high side of the USDA recommendations, so you need to manually lower them to get the doneness that you really want, as they don't account for any increase during rest periods. That said, a large percentage of reviews on Amazon of this new model are not good. Lots of complaints about probes dying after one or two cooks (or right out of the box). Others complained about it eating batteries and having low display brightness. Sounds like they didn't improve the interface either, as many complained about the same sync problems that the older model had. YMMV.
-
I do the same, Syz. If you look closely, I think I can make out the strap on the top. It's just lying flat.
-
Great to hear that others have discovered the Anova. I was an early convert. The newer model is even better. But no buyers' remorse. Syz, I also bought a nice Cambro and lid to do larger cooks in, but most of the time, I'm just cooking for me, so the stock pot works just fine. I mainly use my pressure cooker for canning, but have made some seriously good batches of bolognese in it.
-
See this second post, but without the picture. As a "newbie" you might not know this, but you can edit your posts afterwards. Look at the bottom right-hand corner and you'll see an Edit command - but only in your own posts. One of the things you can do in Edit mode is add a picture, if you forgot or took it later and want to add it to the old post instead of a new one.
-
Nice looking birds. I am fond of spatchcocking them as well. With the KK, I've never seen the need to brine, as they stay very moist on their own. Try it next time to compare.
-
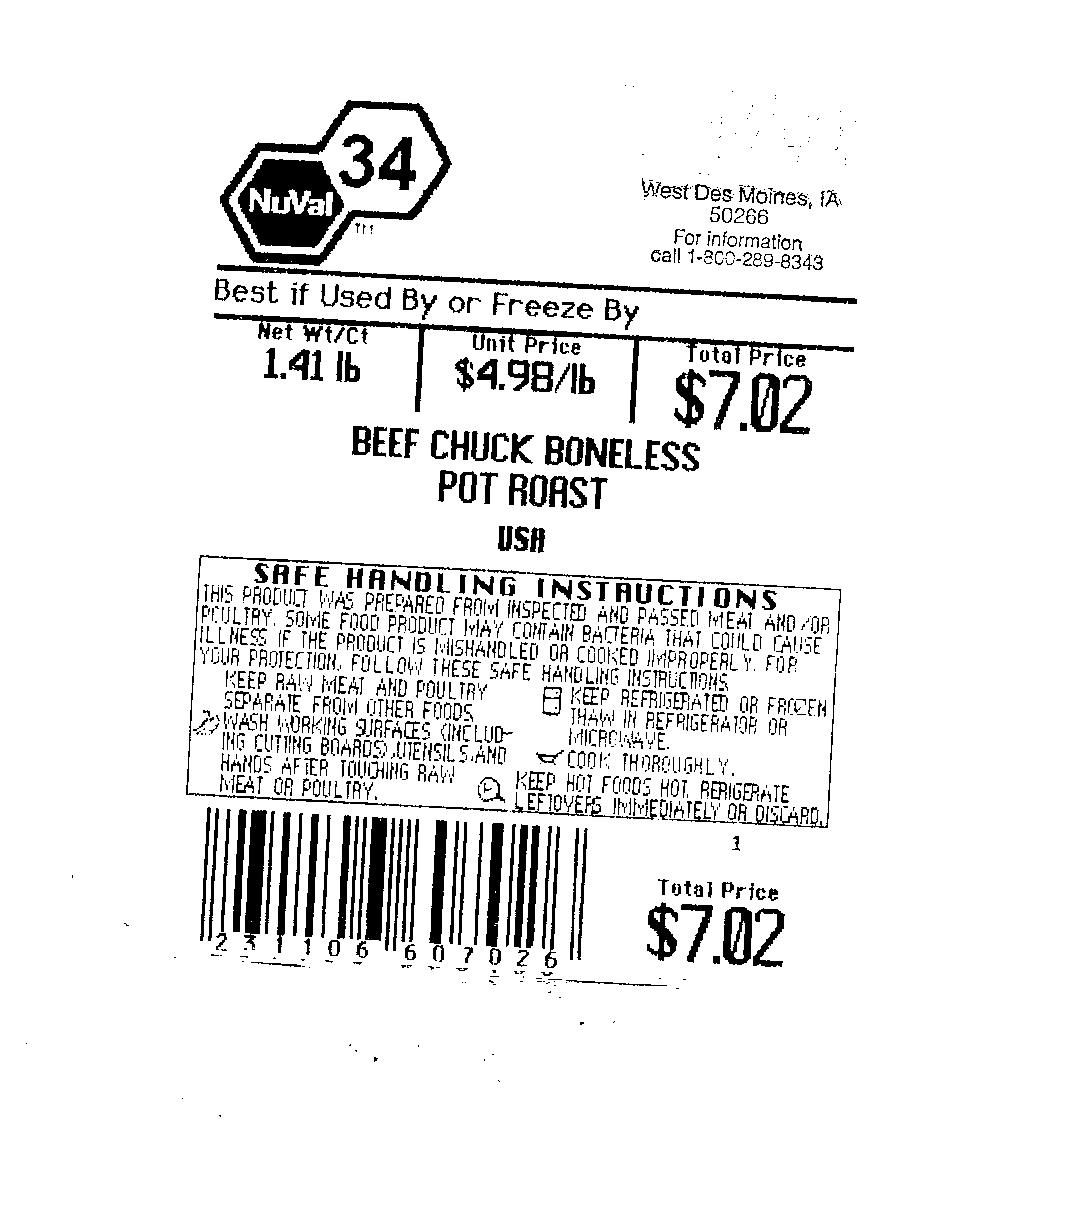
Fingers crossed that the belly will be at the market today. Went by yesterday and they didn't come in with their order. Update: We have BELLY!! Woo-Hoo!! 13# of porky goodness. Now I just need to go buy the roast to go inside and find the time to put this bad boy together! Susan, here's a shot of the lable off of the "pot roast." As you can see, that's how they labelled it. Lobel's Meat Bible says this - " Pot Roast is a dish, not a cut of meat. Any relatively large cut of beef does well when pot roasted, or to use an old-fashioned term, when it is "potted." We don't recommend using this method to cook the more tender roasts, such as rib roasts, sirloin roasts, or whole fillets. Instead, use tougher cuts that are improved by braising. In order of preference, we like the following cuts for pot roast: chuck, whole flat iron, brisket, bottom round, and eye of round."