Leaderboard
Popular Content
Showing content with the highest reputation on 06/30/2016 in all areas
-
I have two 4'x12' sheets of A36 Mild Steel being cut up and milled as I type.. 10mm slightly more than 3/8 inch 0.393" will have groove machined on the outside of one side.2 points
-
Interesting you tune into probably the most important piece of information in the entire post. It's the piece of information that allows the edge to experience the most oven spring as possible. . For thin and crispy it really kills me to see people take a rolling pin to their pizza dough. Rolling pins are for pie crusts not pizza dough (with a very few exceptions). Reef's Bistro2 points
-
These two grills were used at Steven Raichlen's BBQ University earlier this month. The University is two 3-day sessions.. so I'm guessing 6 cooks on each. The 23" Ultimate is Cobalt Blue and has the new SS and teak side tables The 32" Bad Boy is Vibrant blue and has the original teak side tables They are at the Broadmoor resort in Colorado Springs, Colorado. Give me a call let's make a deal1 point
-
@Syzygies, Thanks again for letting us know of the 25% off sale. I took advantage of the opportunity and purchased the VP215. It is definitely something that I do not want to pick up and move too many times. Therefore, I'm currently looking for a cart to set it on to move (roll) in and out of the kitchen as needed. Syzygies1 point
-
Just an FYI, in the event folks have not seen this. http://www.generalmills.com/flour1 point
-
Hey jimbob do you live in Cali.? I have charcoal, bought a pallet and a half. The garage was full until some of the guys took some of it.1 point
-
Ken those look great. I have never tried an enchilada cook before, never eating an enchilada either. I have to give them a try very soon. They look like a pan of tasty goodness.1 point
-
That is the key. I pushed a bit to get the POSK. Laurie bought me the KK. (Her favorite part was talking with Dennis.) Don't emphasize price. Try different techniques, and ask attentively what you should do the same, or different. She'll lead you. I'm pretty much under orders to only use coconut extruded lump and my smoke pot for low & slows. And we're eagerly phasing out ordinary charcoal for high temp chicken, now that we have coffee lump. We're not affluent, but we can afford what we want, and food matters. The problem with more charcoal is finding space to store it.1 point
-
Thanks, Charles! My biggest take-away was the "leave the edges alone" part. Never saw that bit of info before. Makes sense though.1 point
-
1 point
-
As a former POSK owner, go the planter option with this turd and just buy a real KK to cook in. My "RJ special" (I got one of the first ones built in the Indonesian factory that he later abandoned and Dennis took over) lasted 6 years and then began to disintegrate rapidly. After 2 years of patching it up to keep it going, I finally came to my senses and bought the "real deal" from Dennis. Never looked back. (btw - I gave away my POSK to a friend. 2 months later, half the neck area where the bolts hold the top hat spider gave way completely. But, believe it or not, I never had an issue with the mass tile shedding that became common later, especially with the POSKs made in Mexico.)1 point
-
Breaking News: Delivery is confirmed for Friday morning.1 point
-
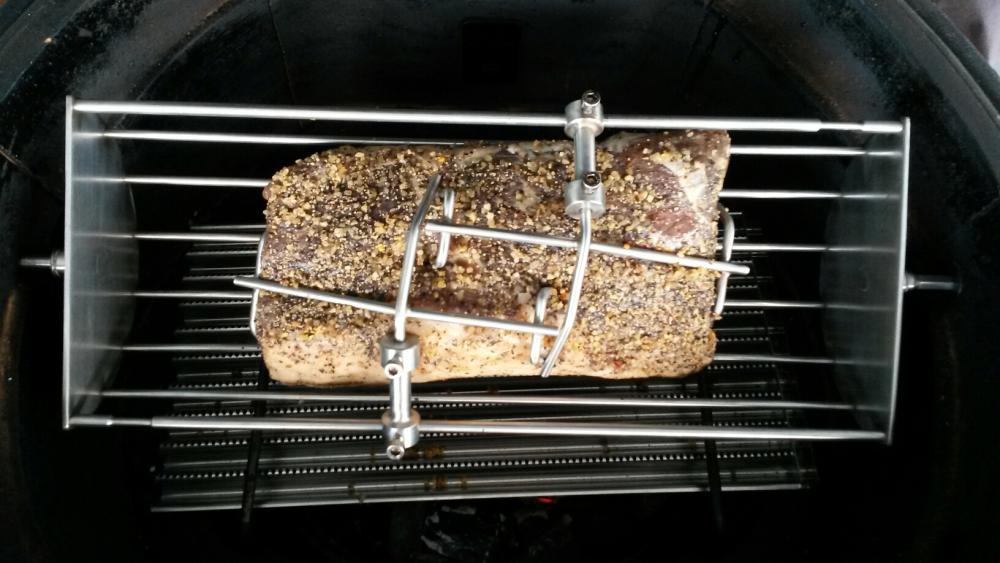
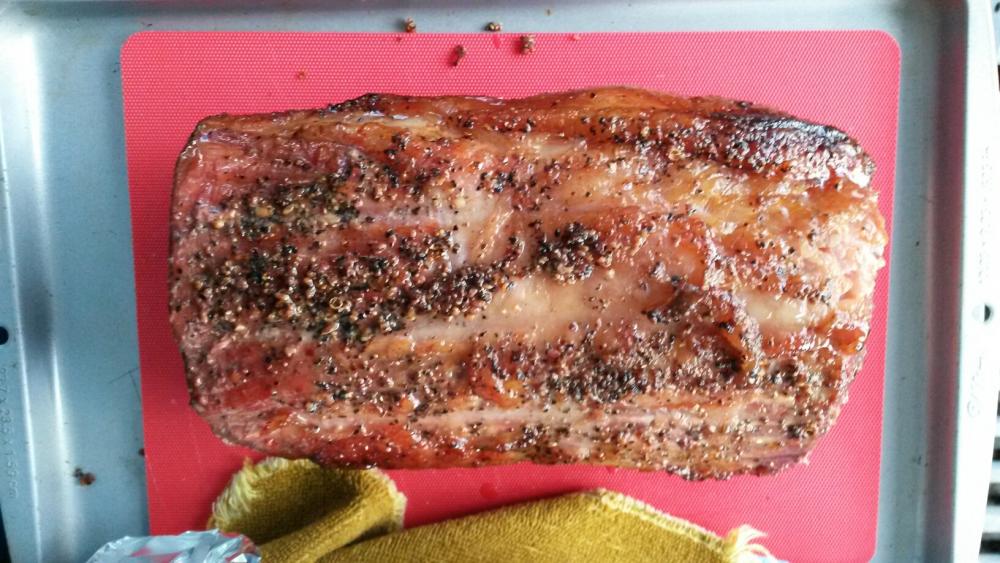
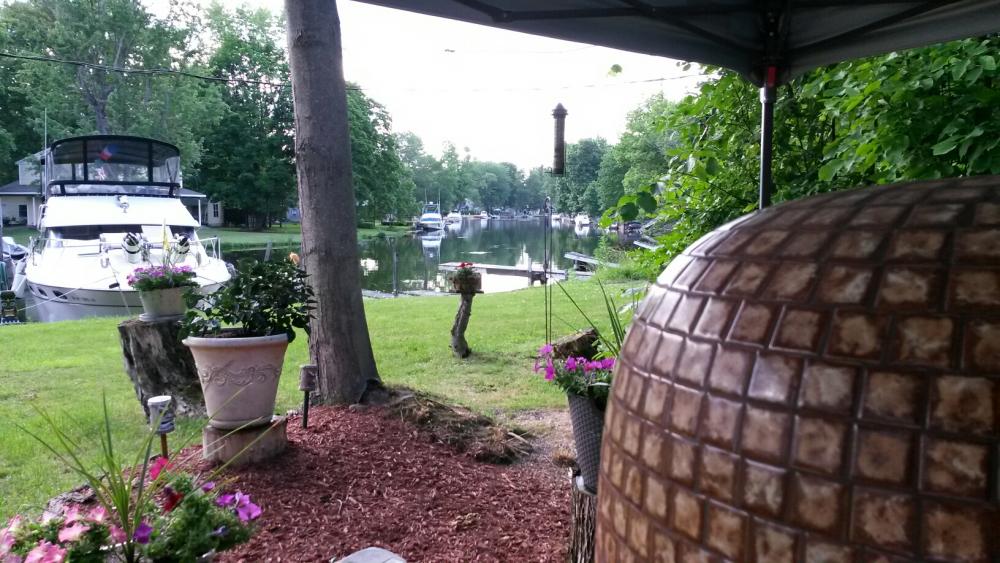
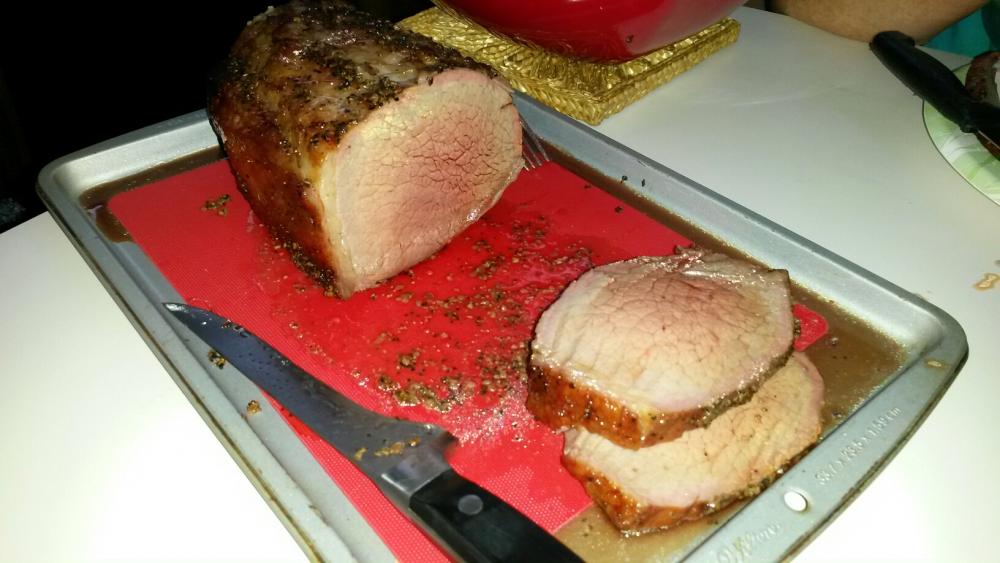
A fun / learning rotisserie cook.............................. Bought a cheap cut of beef roast at Sam's Club. Dry rubbed it with Montreal Steak Seasoning and let it rest for 24 hours in the refrigerator. Here it is on the spit ready to go with ckreef's drip plate below it: Brought the KK up to 350*F with a little left over cherry wood in the mix. Didn't really time the cook but started checking internal temp about 45 minutes after it reached cooking temp. Pulled it when it reached an IT of 130- 135*F. Here is the roast fresh off the grill (didn't get the color I hoped for...will try a direct cook with no drip tray next time). Decent internal color and very juicy. Wasn't too bad for a cheap cut of meat. Here was Mac's view while spinning away.................looking down the the creek, heading out to the lake, just around the bend.1 point
-
It's been 24 hours time to build some pies. . Get your proofing station ready. Regardless of dough used in the recipe I use plain all purpose flour for this. A wooden work surface sticks less. A dough scraper helps a lot. 2 floured plastic bowls. . The dough after the 24 hour counter rise. . Using a spatula coax the dough out of the bowl onto the floured counter top. . Sprinkle the top with flour then using the dough scraper divide in two. . Transfer half to the board. . Start with well floured hands. Stretch and fold from the right then stretch and fold from the left. . Give it a 1/4 turn then repeat the above stretch and fold procedure ending with this. . Flip it over into your hands so the bottom is now the top. . Form a proper dough ball by using your fingers to curl the edges over and under the ball. . Place in a floured bowl. Repeat with the other dough half then cover with cling wrap. . This needs to proof for a minimum 1 hour but 2 hours is OK. Now is a good time to fire up the kamado and get it and a pizza stone heat soaked at 600*. Also a good time to get your toppings together. . Setup your building station. Parchment paper tucked under a wooden peel for now. (scared to try launching straight from peel due to high moisture content - LOL) . Put a dough ball onto the work surface and begin to stretch starting from the middle and working out. Very important not to disturb the outer edge. . Flip it over. . Stretch a little more then repeat the flip and stretch. Stretch a little at a time. . Using the dough scraper lift an edge and get your well floured fists up under the middle. . Lift it up and transfer to the parchment paper allowing gravity to do a little stretching. Don't spread your fists or you'll stretch it too much. This lifting/transferring procedure only takes 10-15 seconds. . Now you can do a little more stretching and a final shaping. Once again don't disturb the edge. . A thin layer of sauce and hard cheese (parmesan, Asiago etc....). . Add mozzarella cheese and toppings then cut the parchment paper as close to the edge as possible. For thin, hot, fast pizza I limit it to 2 toppings (not counting cheese). Too many topping and the top doesn't cook correctly. . Two pies ready to go. . Cooked in the Blackstone at 600* for less than 3 minutes. The Blackstone is a much different beast compared to a kamado. In a kamado at 600* I imagine it will take 4-6 minutes. I left the parchment paper in the whole time. If you want to pull the parchment paper make sure the edge is done rising first (about 2 minutes). . One money shot (not sure how many pictures I'm allowed to post at once) . As an added bonus I'll pass on this final yummy step. Save some of that soft delicious crust for afterwards and serve with some honey for dipping. Awesome pizza desert. (got that from Ozark Mountain Pies in Idaho Springs, CO.) . Any questions please feel free to ask. Although this seems like a long complicated procedure it is not. Once you get familiar with it you'll stretch and build a pie in 1-2 minutes. . ............................................. . A few final pictures and thoughts. . . Of all the flour combinations I've tried the one I like the best is 2/3's KA Pizza Blend and 1/3 '00' flour. Better color and taste. . They say after the 24 hour rise you can refrigerate for up to 6 days. I've tried that but it seems to stretch better if used right after the 24 hour counter rise. If you are going to do a few days in the refrigerator allow it to come to room temperature for 4 hours before stretching and folding. . Even if you use a different dough recipe there are a few techniques that could apply to that recipe. . Stretching and folding. Proper ball formation. Board stretching. Air stretching. Final shaping. Leave edge undisturbed. . .......................... . I would say this post is "Pic Heavy" even by my standards but if you've made it this far I guess you know that already - LOL Reef's Bistro1 point
-
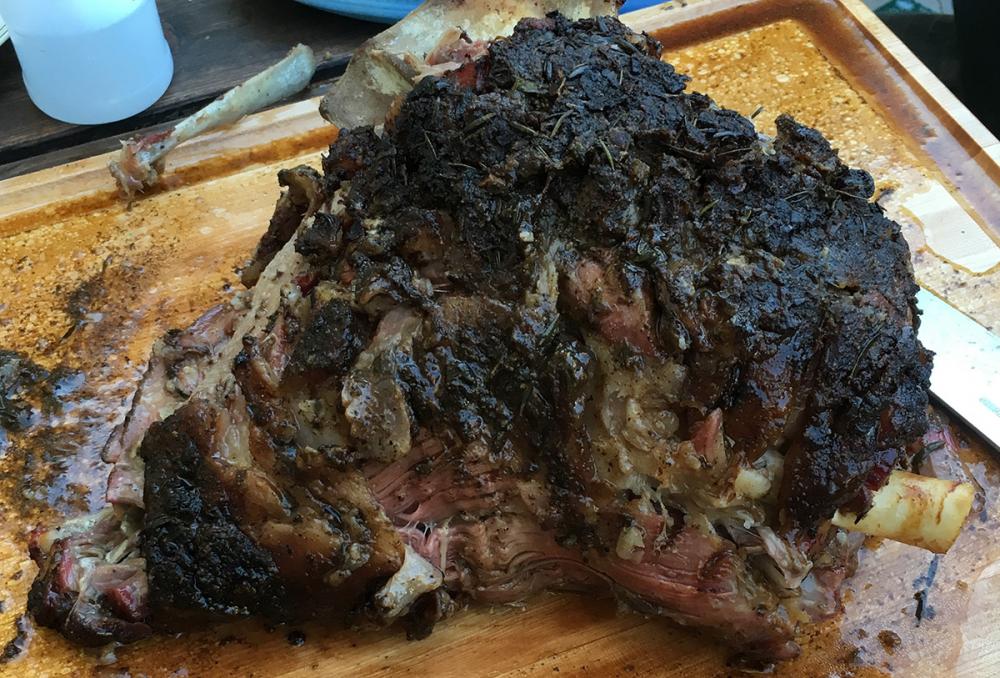
I'd never tried a whole lamb shoulder before, so when Berkeley Bowl offered me a 9 pound lamb shoulder for $50, it was hard to say no. Have the neighbors over. A bit rich for the oppressive heat, but tasty. This called for Mediterranean rather than classic barbecue flavors, so the rub was a marinade of 1% salt (by weight of the shoulder), black pepper, smashed garlic cloves, lemon peels, rosemary, olive oil. The oil tends to suspend the salt and impede absorption into the meat, so better technique might be to lead with the salt, and apply the marinade later. Multiple sources propose four hours at 325 F, for smaller shoulders. I used pink butcher paper in the style of Franklin Barbecue for the last hour, which turned into two with late arriving guests. Incredibly moist. Or is that sensation fat? A great change of pace, but this doesn't edge out pork butt, where the fat is easier to manage. Working over the leftovers for hash will be like dealing with a bone-riddled fish. I'll vacuum pack as-is, and pick over after warming sous vide.1 point


