-
Posts
1,751 -
Joined
-
Last visited
-
Days Won
55
Syzygies last won the day on January 29
Syzygies had the most liked content!
Reputation
1,645 ExcellentAbout Syzygies
-
Rank
Senior Member

- Birthday 11/29/1955
core_pfieldgroups_99
-
Location
New York, NY and Concord, CA
-
Occupation
Mathematician
Profile Information
-
Gender:
Male
Recent Profile Visitors
The recent visitors block is disabled and is not being shown to other users.
-

Brød & Taylor Sourdough Home
Syzygies replied to Syzygies's topic in Bread, Pizza, Pastries or Desserts
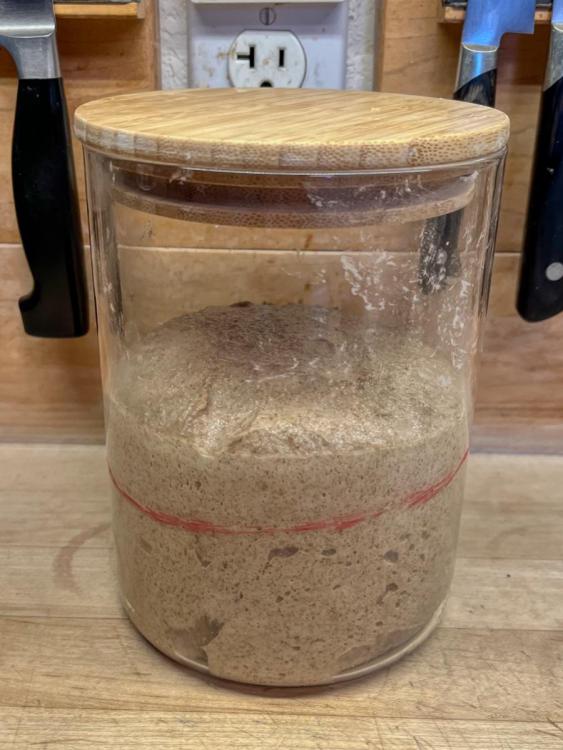
Wow. I was trying to remember where I bought my bulk fermentation jar, and used a photo in Google Image Search. I'm staring at a photo. Yes, same lid. Huh, same color grease pen. Well, I'm a boomer, others do what I do. But the same butcher block? Huh... I never would have guessed, as this is the usual hardware store "appropriation" puzzle. In what different domain does someone else have my problem? This jar was designed to store coffee beans. -
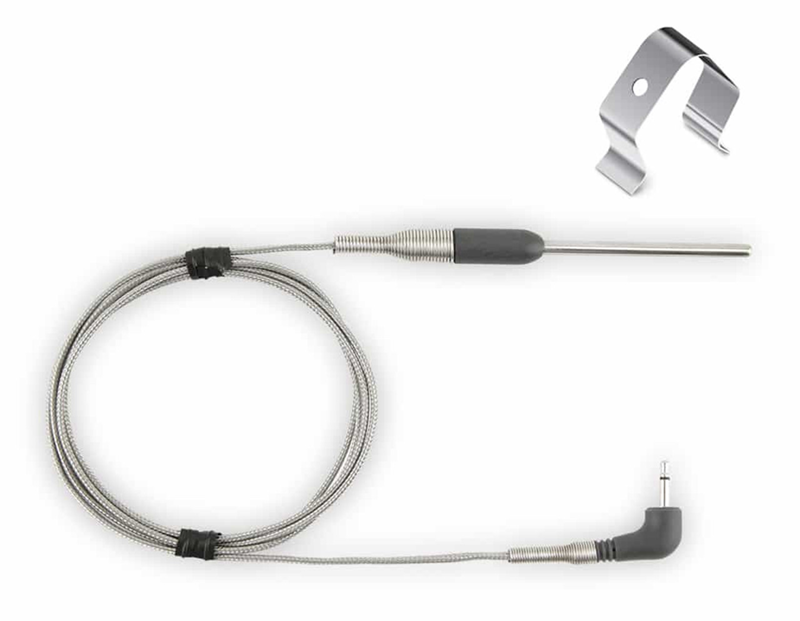
Yes, I figured this out. The fat part on the probe end does fit through the KK probe port, once one removed the split port plug. Then slip the plug over the cable, and reinsert. I had to ask them dimensions. And I forgot that the split port plug had a split (duh!) because I rarely use it.
-
It was overcooked for that cut of meat, and yet not tender like a great brisket. We're still figuring its best use.
-
My read of their web site is that one can control their fan using either the big dome probe, or the air end of their wireless meat probe. Pick your poison: They're coming out with a longer dome probe that will actually clear our 2" thick dome with a margin to get good readings. Yet there's plenty of well-intended advice that near the meat is the correct place to control a pit. Thermoworks counters that "near the meat" is living in its own bubble, less accurate than a separate grill-level probe. Presumably if one believes this, one can set a second meat probe on a grill clip, and use that instead to control the fan. In short, one could put together a working system from GGG now, not waiting for their longer dome probe to reach market. I'm a broken record here: It's simplistic to reduce the complex system of a BBQ pit to a single number. It's a reality that current fan controllers are designed to key a single number. I can back my car into the driveway using any of three mirrors. I can control a cook using any of three probe locations.
-
Yes, after further checking, the fat section around the probe is 3/8" and our hole is 1/2". This clearly works. (I've had other probes where the bend kept them from going through that direction.) I'm now getting to the less positive reviews online, giving me pause. GGG is also in the running.
-
I'm very tempted to go all in on Thermoworks, for monitoring and fan control. What are the gotchas? I'm used to reading pit temp through the dome, but that requires a longer than 2" probe. Their Pro-Series® Air Probe has a fat right angle plug that won't fit through the KK probe port, and there's no way I'm going ghetto and creating a gasket leak. I know the well-intended advice to measure by the grill, not by the dome, but these are all single numbers that sketch a complex system that converges. I can fly the cook either way. GGG has a wireless pit probe capability, giving them the apparent edge here. Thermoworks claims this reading is thrown off by the meat. Again, I'd counter one can fly the cook using any reading one understands. I don't give a hoot whether a physicist would get all upset if I said I liked to cook low & slow based on 250 F air near the meat, because the "true" pit temp is higher. There's no "true" here.
-
AI (our new family dog) says its a beef clod heart.
-
As is an annual tradition, I planned a brisket for a dear friend's birthday party. After I'd sourced the meat, she canceled. No party, everyone had the flu. Marin Sun Farms at Rockridge Market Hall confidently told me this would be a great brisket. The cautionary tale I had in mind: In Think Like a Chef, Tom Colicchio has a stellar recipe for braised beef cheek. I tried this with a California beef cheek, and it was like Charlie Chaplin’s stewed boot. We figured organic cattle smile too much. The cautionary tale I should have had in mind: Berkeley Bowl once tried to sell me a cyrovac pork shoulder. The symmetry was unsettling. I realized still in the store that it was a pair of pork butts. I was being a clod, thinking more of the first story than the second, and didn’t react to the unusual shape. I’ve never seen a brisket this tall and squat. I got one thing right: Rather than going to Las Montañas for generic chiles, I just used up my hoard of chiles from Boonville Barn Collective, and ordered more. Best rub I’ve ever made. I never would have made the party; after eleven hours at 275 F this meat was nowhere near done. An Akaushi Wagyu brisket this size would have needed 8 to 10 hours. Slicing a hunk off the end for dinner, the flavor was great, but no collagen or marbling to suggest further cooking would help. And it didn’t look at all like brisket. No deckle. So I parsed the rest into pieces to use as an ingredient various ways. Chinese noodles? Hash? I’m thinking Borscht. I’m guessing this was a legendary cut that I’ve never been able to find before, that was sold to me by accident. I’ll hold back my guess in hopes others will weigh in.
-
I'm disappointed with myself that I bought a BBQ Guru UltraQ. The web app was so broken I stopped trying to use it. The phone app displays stale information without labeling it as such, which is inexcusable. My meat probes stopped working, and I can't bring myself to waste money trying to figure out if it's the probe or the UltraQ. Effectively it's an attractive bright display, where one changes settings such as target temp using their phone app. Sometimes restarting the app and power cycling the UltraQ is necessary for changes to take. I once loved BBQ Guru. I now believe they're giving "stupid country hicks" a bad name. They have to already know this. They're never getting another penny from me. It's great news that longer GGG probes are coming. I'm confused. My emails with them describe their probes as 3", and I measure my 23 Ultimate KK as having a 2" wall. 1" sticking out in my experience is plenty. Are GGG measuring wrong? Do other KK owners have thicker walls?
-
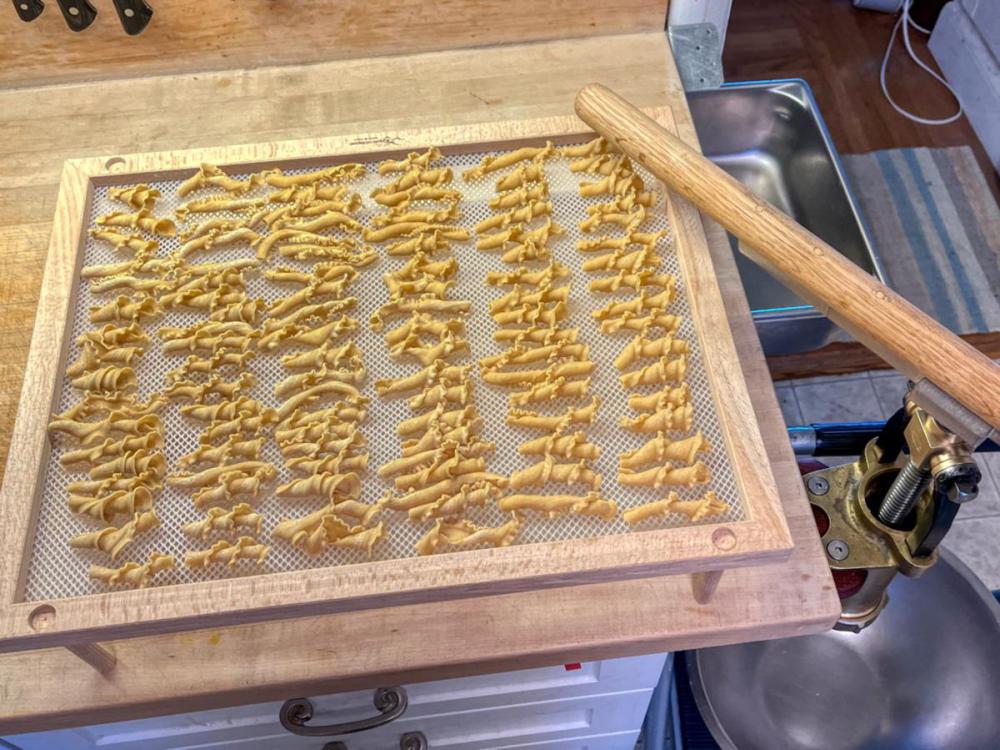
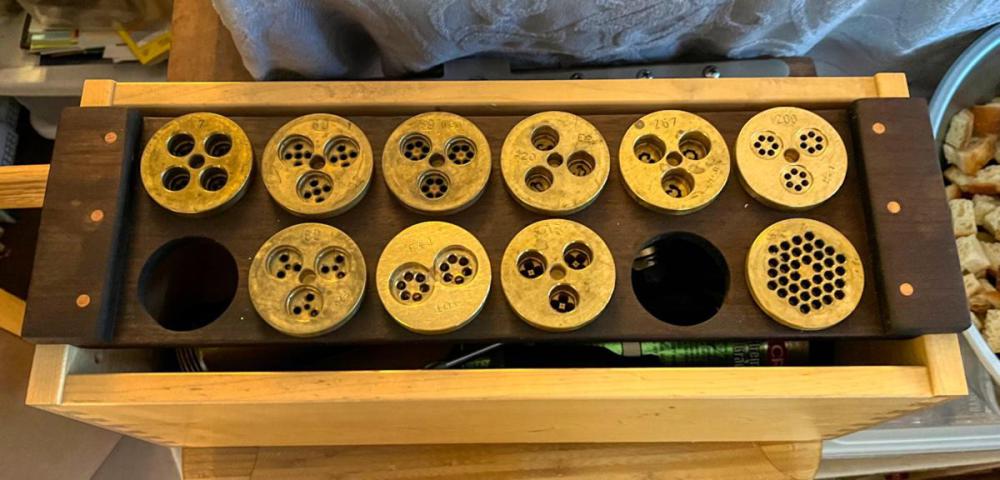
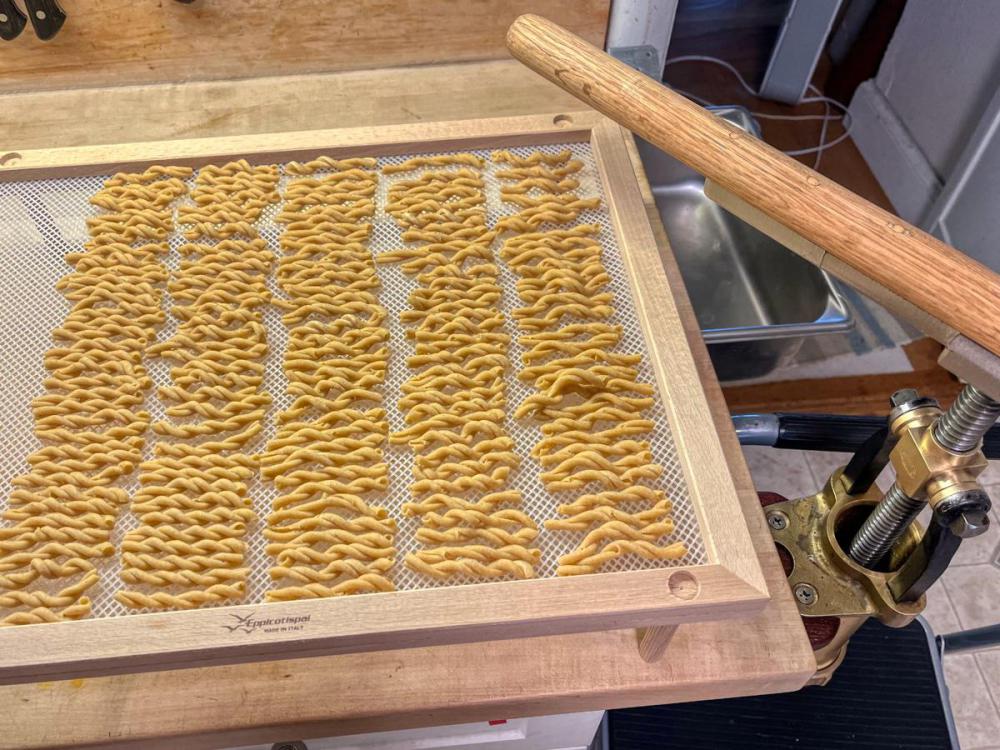
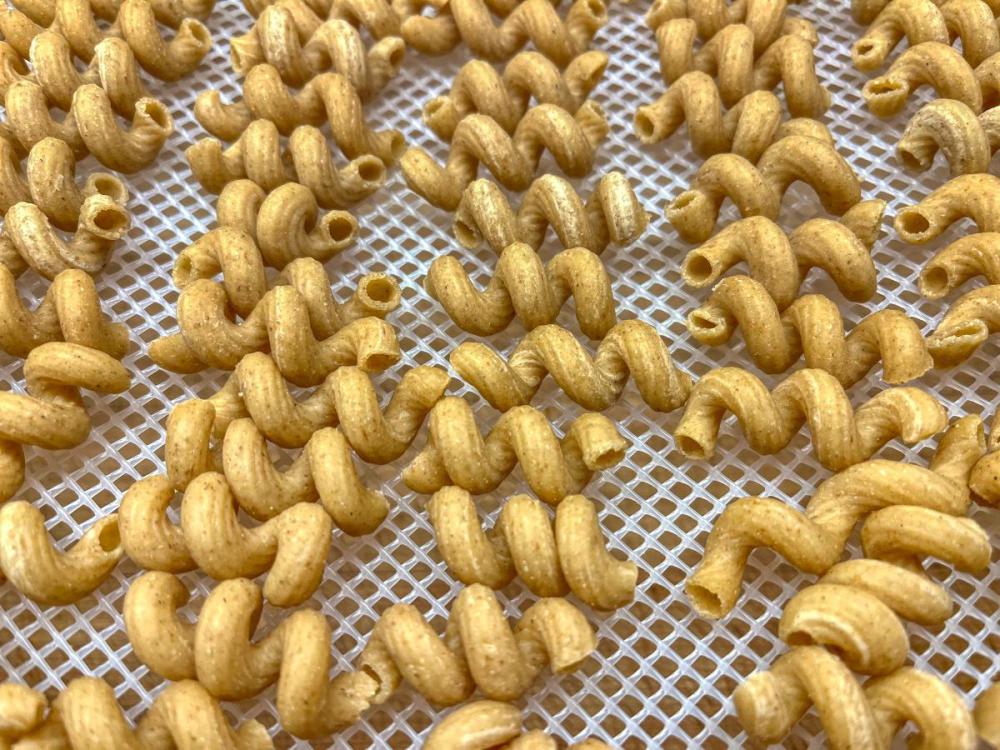
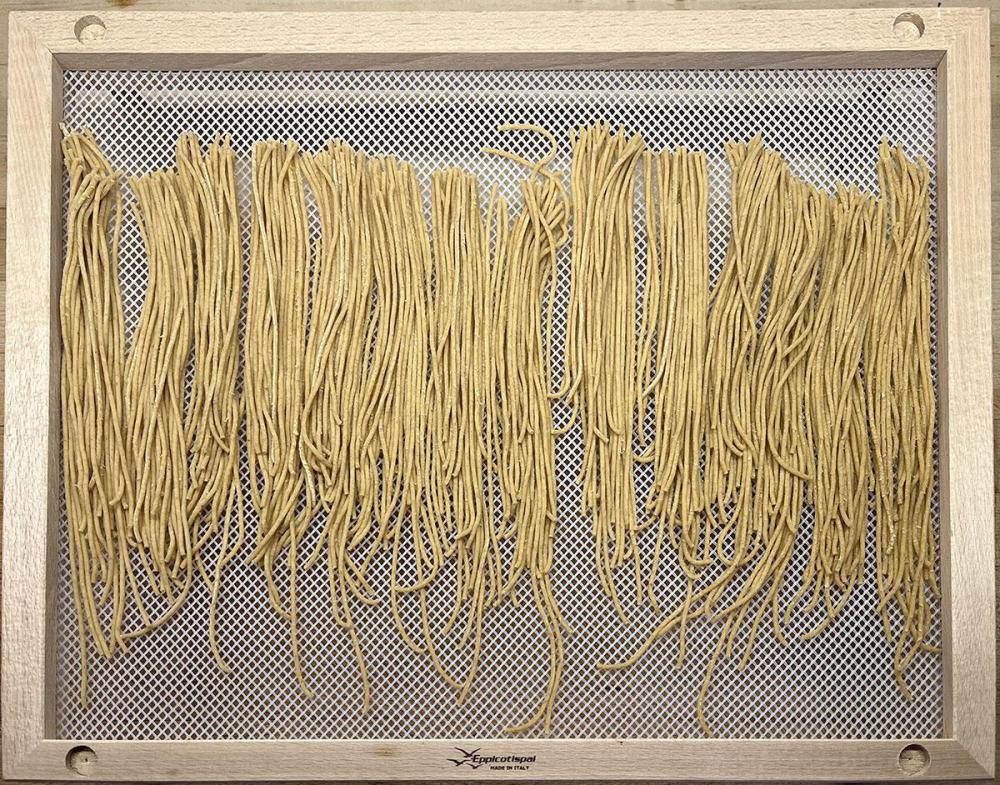
Hi Tekobo! Let me send you a custom handle! With some reworking, your torchio can take on any powered machine. I'm gearing up to make bespoke handles from Jatoba hardwood and laser cut stainless steel. Or if you like to do your own woodworking I can send you the DXF file for fabricating the boss plate. The handle shown above is a prototype using an oak dowel. Here is my response to being asked about my bigolaro on the Rancho Gordo Bean Club Facebook group: This is a "Torchio Model B" bigolaro by Bottene. They also make the powered Lillo Due for home and restaurant use. The Model B accepts the same bronze dies, opening up a vast catalog of shapes. https://bottene.net/en/products/bigolaro/ https://pastabiz.com/torchio-hand-press.html https://it.wikipedia.org/wiki/Torchio_da_pasta This design is one that has been in use for centuries in the Veneto region, primarly to make "bigoli" noodles. These are fat round noodles sauced with an anchovy, sardine, liver, or duck sauce. The noodle recipe is tuned for ease of extrusion through its namesake bigolaro, requiring less pressure than a powered extruder. Bigoli noodles are an obscure corner of the pasta universe. As we prefer homeground flour, we have long dismissed dried noodles, even from whole wheat, in favor of Atlas or similar (Otello is an upgrade) laminated egg noodles, or hand-formed shapes such as busiate. Shapes are nevertheless a major part of the Italian pasta experience. Pairing shapes with sauces for Italians is a profoundly deep enterprise. One cannot fully dry extruded pasta at home with the same care as an artisan factory: Varying climates is why there was an early trade in dried pasta. If someone tells you they're happy drying extruded pasta, they're telling you two things: They're happy, and they're drying extruded pasta. An Italian would not be happy; they'd find someone who can do this right. Pasta dried for part of a day is neverless a wonderful third category, that opens up the entire experience of pairing shapes with sauces. This is what most restaurants with extruders do. Pasta: The Story of a Universal Food https://www.amazon.com/Pasta-Story-Universal-Silvano-Serventi/dp/0231124422 I am thankful beyond words that Bottene chose to modify the design to accept Lillo Due dies, but we are left without guidance for how to best use dies designed for greater pressure. With a maniacal attention to detail, the "a serious bunburyist" blogger has managed to make good use of a variety of bronze dies, but even he has moved on to a powered machine. The basic problem is that a dough wet enough to extrude will come apart (gravity unwinds fusilli) and stick together. https://ibunbury.blogspot.com/2010/06/confirmed-and-secret-bunburyist.html Am I an insane mathematician, for figuring out what to do? (My hands played one, once.) https://www.newyorker.com/magazine/2002/03/11/a-beautiful-hand People go to more trouble than I went through when a drug is involved; pasta is also worth it. People roll their eyes that we grind our own flour, but they grind their own coffee? Same thing. What I'm about to describe is not hard. I don't want to clean, or store, or lug around a heavy powered machine. I love hand tools, such the better-than-vintage woodworking tools that Lie-Nielsen makes. https://www.lie-nielsen.com I've had my bigolaro for fourteen years, but only recently has it become our daily driver, the routine way we make pasta. That was a long road. A few years ago I destroyed the boss socket in the stock handle through misguided experiments with too-stiff dough. After some hilarious failed improvisations, I learned to respect the forces involved. I fabricated replacement boss plates from 1/2" thick stainless steel using the custom parts service SendCutSend, and mounted these plates to longer wood handles with better leverage. https://sendcutsend.com What broke next? Further misguided experiments lead to howling noises that I labored through; I wanted dinner. It turns out that all grease is not the same; who knew?! If a grease doesn't publish a Tinken Load and Four-Ball Wear Test, it will simply skip town under duress, leading to a howling metal-on-metal contact that grease is supposed to prevent. I replaced my worn threaded shaft assembly, and applied a grease a factory might choose, for a radical upgrade in performance. If one makes a single modification to a stock torchio, this is it: Disassemble the threaded shaft assembly, take it outdoors to strip any incompatible grease, and lubricate it with the best grease one can source. Apply a bit more for every use. If operation isn't dead silent under extreme loads, you're doing this wrong. https://www.grainger.com/product/CRC-Extreme-Duty-Food-Grade-Grease-12G591 I also upgraded how I mount the bigolaro to the same overhang I use for clamping other kitchen tools. I slightly enlarged the holes to accept 5/16" bolts and oversized nuts, washers. Now the bigolaro is effectively fixed to the foundation of my house. Believe it or not, there was some play using a 1/4" bolt, nut, washer combination. Now, one has a device that accepts Lillo Due dies, and with 20 pounds of force at the ends of a 26" handle can extrude with more power than a Lillo Due. One cannot now simply use a Lillo Due dough recipe, because the mechanics of extrusion are different. A powered extruder uses a twist screw, while a bigolaro is a piston that compresses the dough waiting in line. Nevertheless, one is now free to work out a more flexible range of dough recipes, less likely to fall apart or stick together after extrusion. In our case we use freshly ground flour (primarily durum and Kamut) and a sourdough process that improves flavor and glycemic index. I've settled on adding 4% psyllium (the same hack factories use to make gluten-free pasta) and extruding my dough cold after an overnight fridge rest. These steps both enable and require a higher hydration; for my specific dough I like 43%. My pasta doesn't fall apart or stick together. Now that I've figured this all out, I need to write up a web site with handle plans that even an apartment dweller can assemble (e.g. order 1 1/4" square staircase balusters online). I should also offer to make handles for people. Ideally, I can convince someone who already sells pasta woodworking to make handles. Probably this constellation of ideas is overkill; after one appreciates the issues in play, one only needs to address a subset. Start with the grease, then the handle, then tweak your own dough recipe. A torchio should be in as widespread use as an Atlas crank machine, rather than in a cupboard like a twice-used rowing machine. These challenges are easily surmounted, and the results are worth the trouble. What can we do to make this practical for other people?
-
My $95 Thermapen gives me instant readings from the very tip. A typical use, I'll be pan frying a piece of fish or grilling a burger, I slide the tip through the food and watch the movie as the temperature changes. Ask the GGG people how their thermometers work. What zones along the probe contribute equally to the reading? If they're as sensitive at the tip as Thermapen, you're fine. And as I've said before, it can be off if the error is consistent. We just need to learn to cook with it. Most of human history, people have relied on instruments with unusual response curves. No instrument has to be "right". We want instruments that can help us to react, that can predictably tell us what to do. You could establish a stable fire, and swap TelTrue and GGG thermometers every ten minutes. Is there a difference? Is it anywhere near the difference between measuring by the grill and measuring by the dome? One cooks relative to how one measures. Let's say that measuring just inside the dome doesn't correlate perfectly with measuring Tel-Tru depth inside the dome. We're talking a very complex system here. Would this mean that measuring just inside the dome is broken? Or has an utterly fascinating rabbit hole just opened up before us? We want the dome material itself to heat up, we want it to radiate heat... if the dome is lagging behind pit air temperature, that tells us something about where we are in our cook. Near a fire's end, the pit air temperature is entirely because the KK walls are hot. Most strikingly with pizza, cooks partly rely on radiant heat from the walls. There's no primacy to understanding the KK air temperature rather than the KK wall temperature. I can back my car into my driveway using any of three mirrors. We can cook following any of these temperature curves. Hey, I wish a Star Wars hologram could pop up over my smart phone, a 3D version of the weather charts at meteoblue.com, to help me visualize the interior of my KK. Not yet, we're still looking at one number. My point is there's no right number.
-

KK Basics Video gone Viral.. 700K views - HELP for FAQ Video
Syzygies replied to DennisLinkletter's topic in KK Announcements
Exactly. I've fed 60 to 100 people various times from my KK23; pork shoulder goes furthest but brisket goes a long ways. One can fit many ribs. When we want to grill for 80 we rent. While I can appreciate the thrill Dennis took in designing larger sizes, and the thrill others take in buying them (I've seen a few in person), I've never felt any desire for a bigger KK myself (or a bigger car; again when I need one I rent). I'm sure the smaller models are also useful, but again I can't imagine it (or driving a Fiat). Promoting all sizes makes sense preaching to the choir. With a new opportunity like this, I'd put the KK23 front and center, and promote its capacity for anything but grilling. Anyone in this market already has experience grilling, and equipment they can turn to: A kettle, or (!?) a rectangular gas grill. -
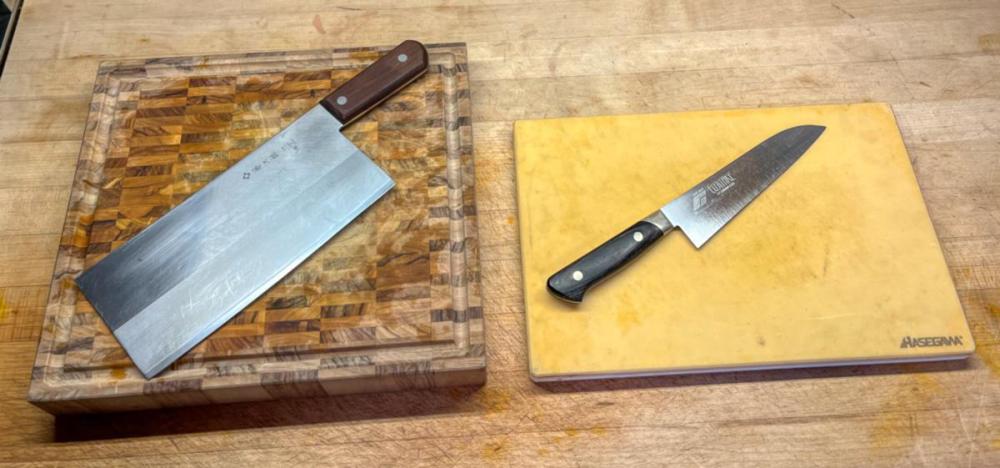
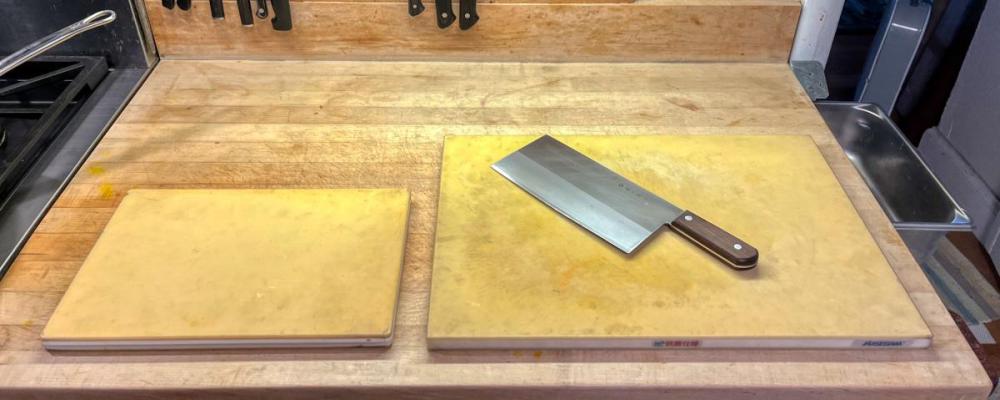
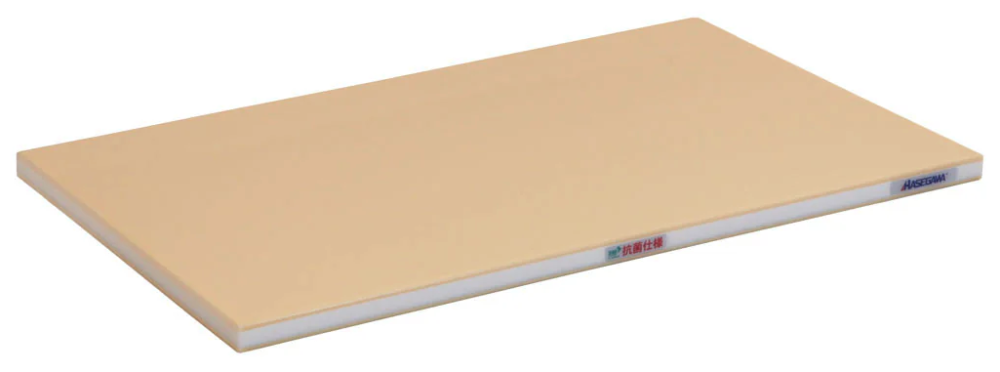
Olivewood End Grain Carving Board (Arte Legno, Italy) I do love a good end grain cutting board. Shown is my favorite; I used a UK source. The end grain testimonials here happened to coincide with my pulling out this board to bone some chicken thighs that I had cooked sous vide in a Chettinad pepper masala, best chicken curry of my life. My smaller "utility" Hasegawa board is shown for comparison. For any detailed knife work such as mincing, I always reach for one of my Hasegawa boards. I have a great capacity for creative delusion, balanced by high entropy, so I find what I do after I stop thinking to be informative. On the other hand, food is part romance. For anyone who hasn't admired the attentive composure of Japanese chefs working in front of you on a Hasegawa class board, the end grain wood is more romantic. And it rarely makes sense to have one type of tool, though my cast iron, carbon steel, enameled cast iron, and various clay pots are all talking behind my back as I go all in on Hestan NanoBond pans for utility use. Many reviews haven't made the effort to learn best use of this molecular titanium surface, yielding a metal pan that thinks it's ceramic nonstick. If with careful technique I can glide a fried egg across its surface like an air hockey table, and I don't want teflon nonstick pans for health reasons, then any other pan becomes a speciality player. I've had other kinds of laminated boards chip on me; my knives are sharper than they imagined. I don't see a health hazard with my Hasegawa boards. And I bought their sanding block, tried it once, and haven't thought about it since. I will simply buy these boards again when the time comes; they are that important to me.
-
The Hasegawa and Asahi cutting boards will have cutting surfaces superior to any other I have used. Both for protecting the knives and actually cutting food more effectively. Bamboo is hard on cutting edges; it's penalty work for my woodworking neighbor. Various synthetic boards chip on me; they aren't expecting my sharp knives. And a company that flogs pure titanium pans on Facebook also sells titanium cutting boards, which tipped me off that they have no idea what they're doing. Sure, titanium is softer than steel, but that's far from the whole picture. I'm loving my Hestan Titanium Chef's Pan which is actually a molecular titanium surface deposited on steel that is 4x stronger than steel, and slick, leaning in the "ceramic nonstick" direction but more durable. But pure titanium is a terrible idea for a pan. Luckily, my knowledge of cutting boards saved me from a mistake. The Japanese, of course, are expecting sharp knives. I have long had a raw butcher block work surface in each kitchen, with an overhang to mount tools. I wash the surface by scraping with a bench knife into an (empty) steam table insert that also collects compost as I work. Since getting Japanese cutting boards, I only use the bare wood some of the time, like for prepping winter squash. I am delinquent in bleaching my Japanese boards again, which does work. I lay down paper towels on the board surface in a utility sink, pour over a bleach mixture just strong enough to turn the paper towels back to pulp. But I'm not expecting Michelin inspectors any time soon (their loss!) and the stains don't bother me. Still, black? Clever. 600cm, wow. Cutting the Hasagawa boards (which you don't plan to do) would expose the wood core. Artists know this one: Cut both ends, make it look deliberate. 😀
-
HASEGAWA PRO-SOFT RUBBER WOOD CORE CUTTING BOARD FSR 19.7" X 13.8" X 0.8" HT Traveling solo in Japan, I'd often sit at bars where I could watch chefs work. I learn, and I have always taught my math students to learn, by absorbing the mindsets of others I admire. Cooking isn't following lists of ingredients. This is the class of board I always saw at the stations that relied on knife technique. I now have several sizes, duplicated when I had two kitchens. I consider these the canonical answer to your question, with the same certainty as "the JVR Vac-100 is far and away the best entry level chamber vacuum machine" (again I bought one for each kitchen, in each case replacing a far clunkier VacMaster). They do stain. One can ignore this, or soak with a mixture of bleach and water. My "Made in Japan" hall of fame also includes items one would expect to buy from China: the best cleaver and best wok I've ever owned, again duplicated while I had two kitchens. We saw the New York wok last night in constant use yesterday at California friends' Thanksgiving, for various veggie sides. They ship worldwide: Tojiro DP 3-Layer Chinese Cleaver 225mm (thin blade) Yamada Hammered Iron Round Bottom Wok (1.6mm Thickness) Yamada Hammered Iron Flat Bottom Wok (1.6mm Thickness)


