All Activity
- Yesterday
-
The stall won't impact your grill temp. And 20 degrees isn't all that much of a change. It sounds more like the way you have the lump stacked in the firebox, it can burn in a spot and sort of create a hole in the pile and the temp could drop, then the lump sort of collapses onto itself and the temp will spike. What brand of lump were you using and did you have large pieces at the bottom then some medium sized pieces on top ? Are you cooking in a Komodo Joe or a Komado Kamado ?
-
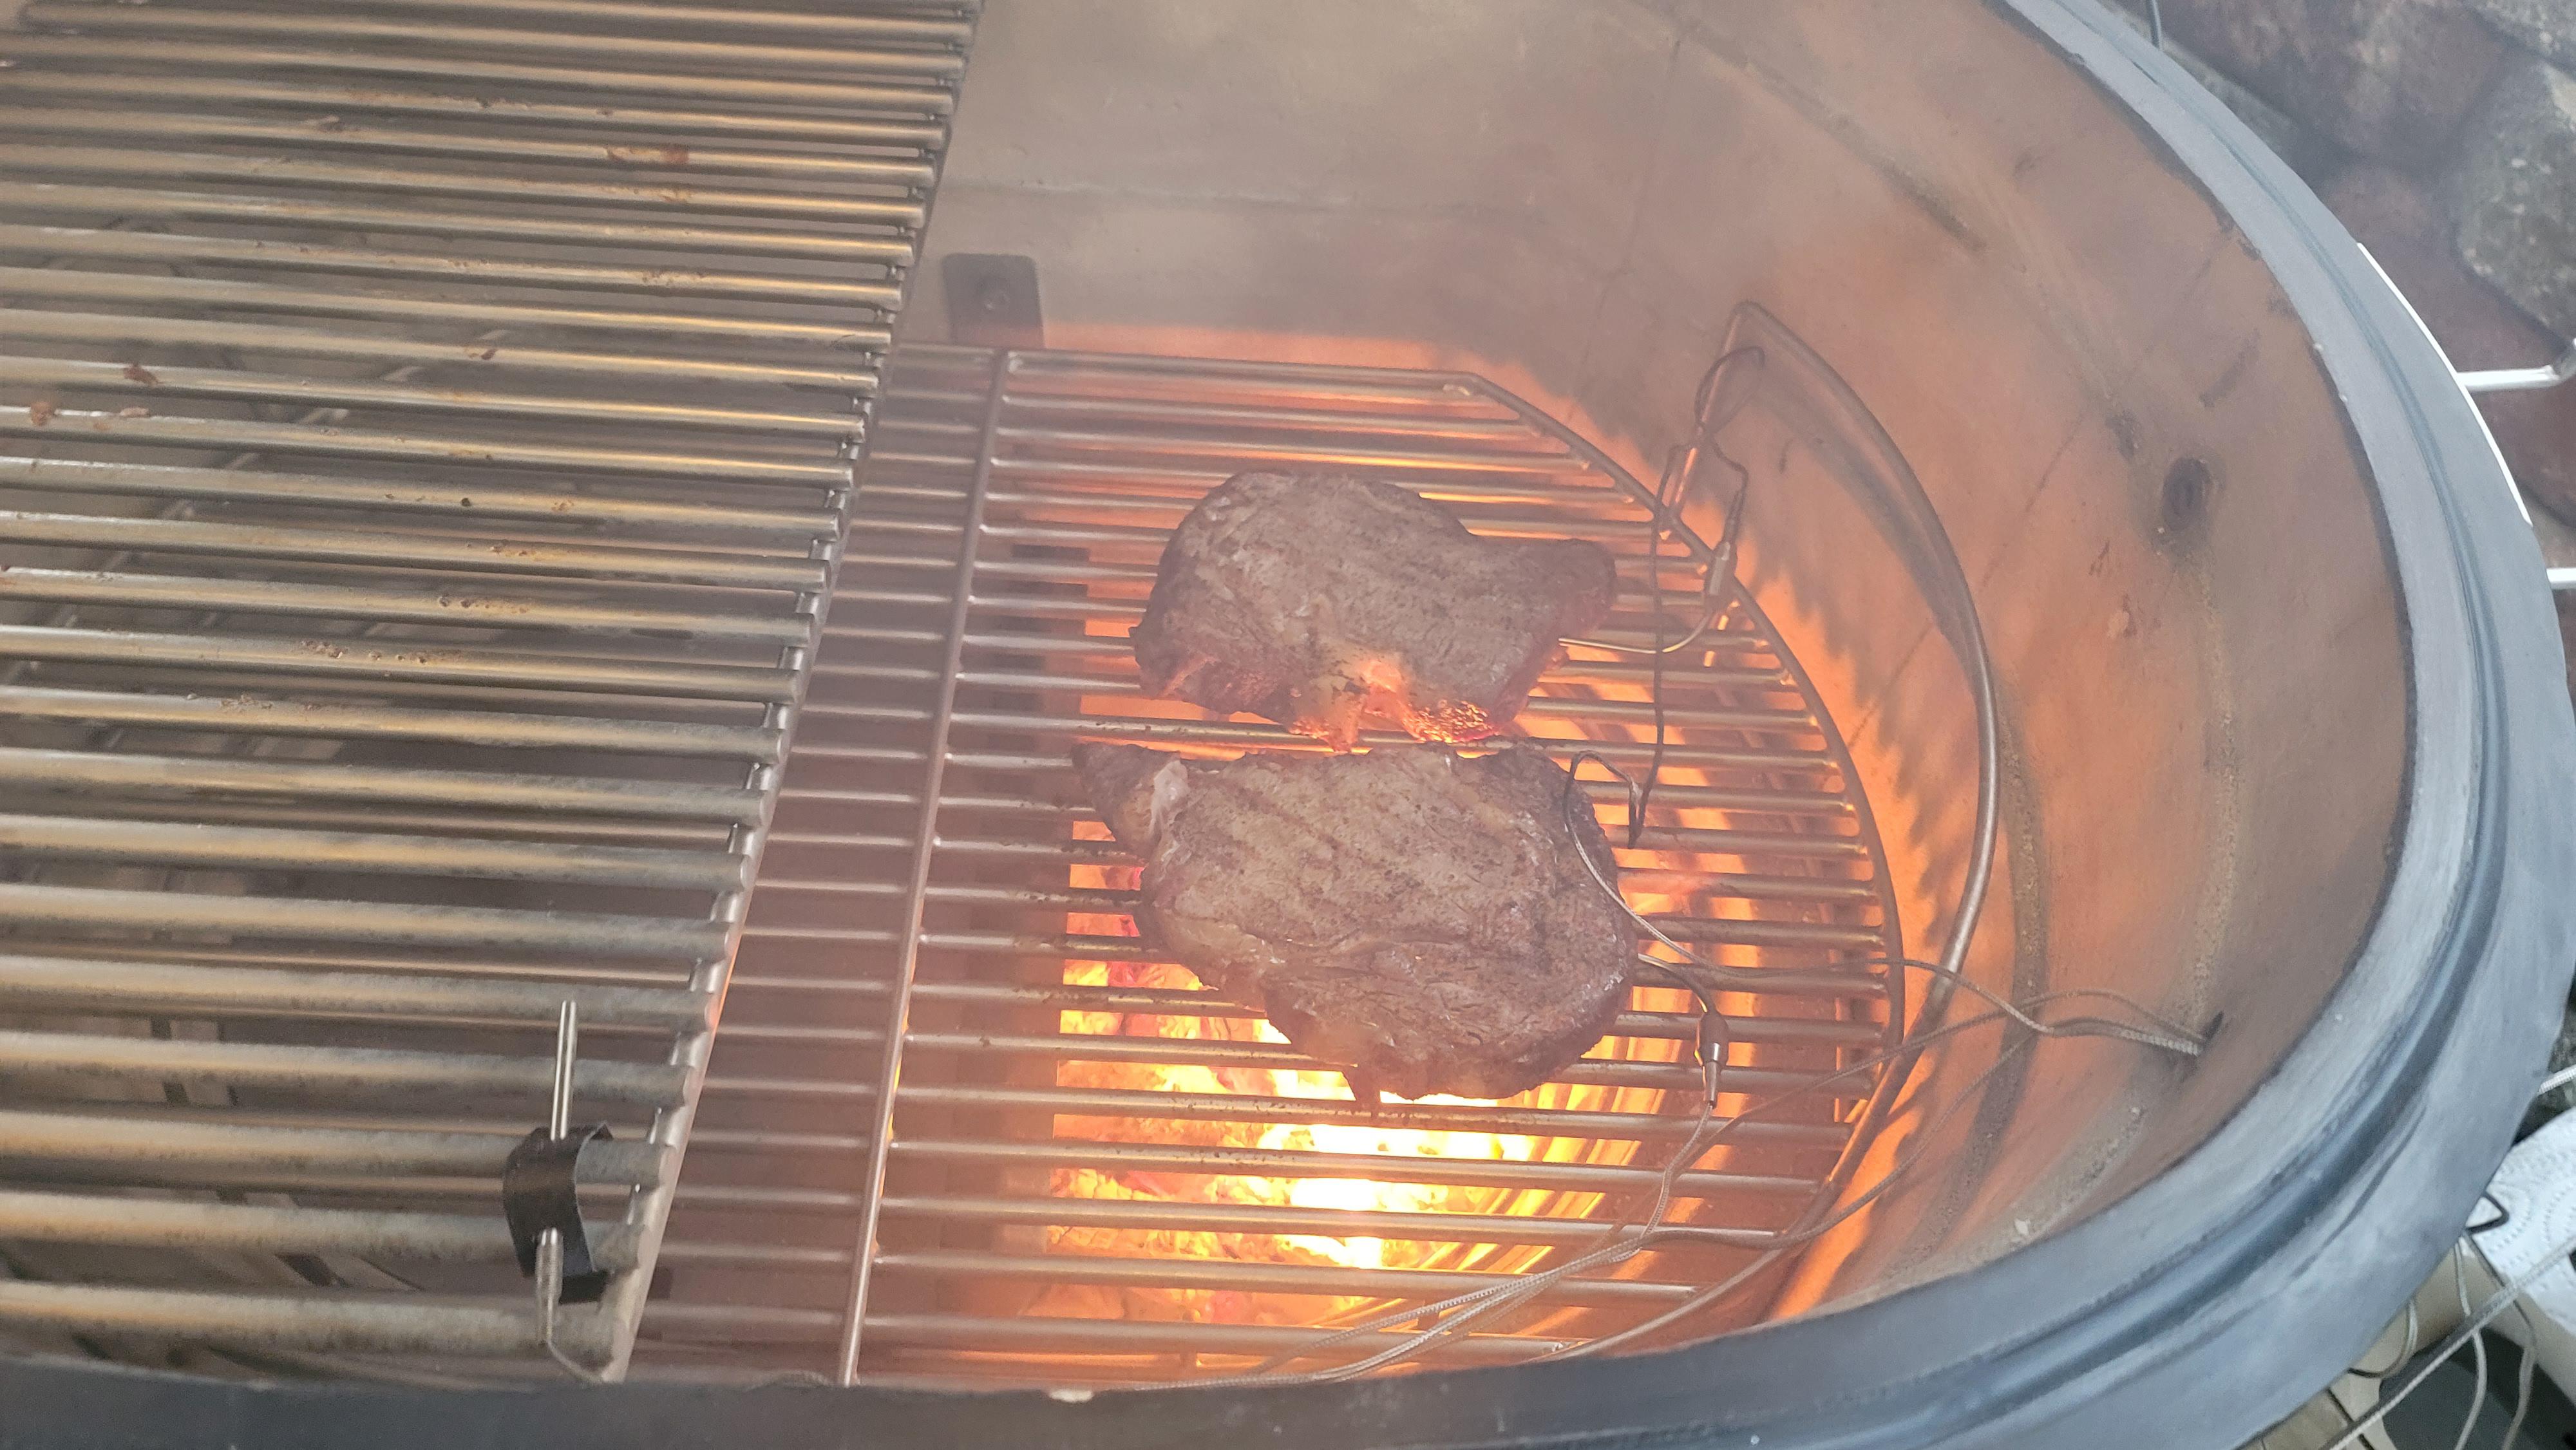
Put on a pork butt, no temp controller, dialed in at 250. Went to bed, all good. Temp started to drop by 20 degrees. Rather concerned, I know I had enough lump in there. Made a small top vent adjustment, short time later temp went up from 230 to 280. Thinking it was around the stall. Question is, would the stall on a 8 pound pork butt be enough to drop the temp? And should I of left it alone and it would of corrected itself. Another thing, I use the fireboard to monitor meat and dome. I had a previous cook where I used the kamado Joe's dome temp gage. Calibrated it, it goes up in temp well, does not go down to well. Infact hardly at all. Thought my meat stalled out forever, dome temp read fine. Checked the dome with my hand and it was cool, ran out of wood. Dome temp gage did not reflect that. Anyone else have that issue? Any replacement dome gage that you would recommend? Thanks in advance.
-
 dalek joined the community
 -
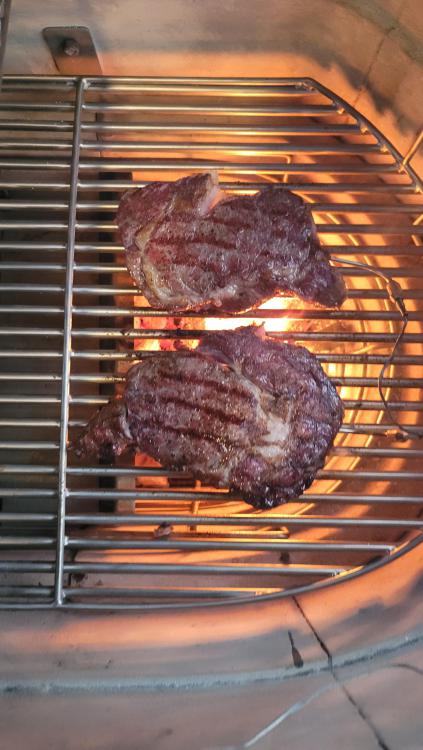
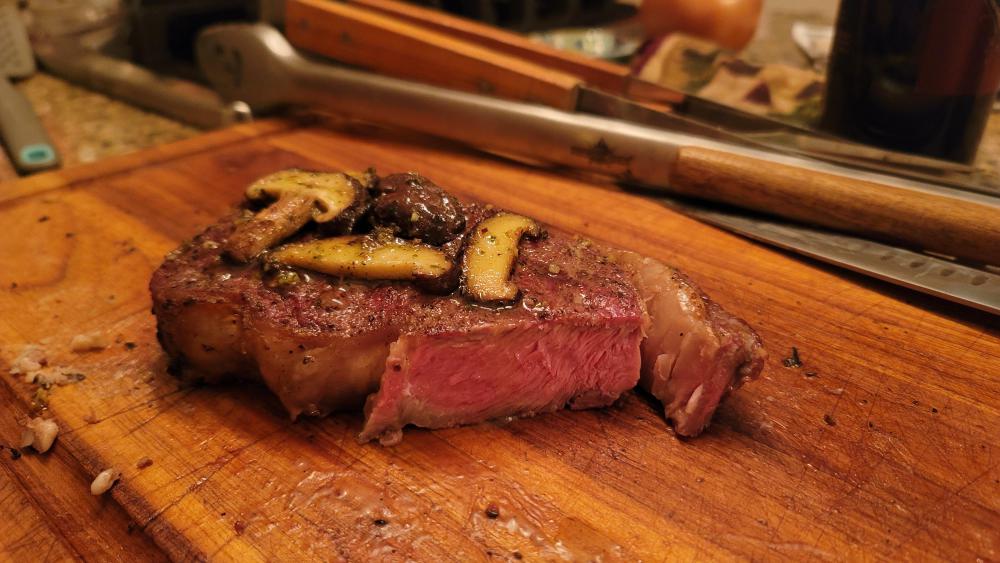
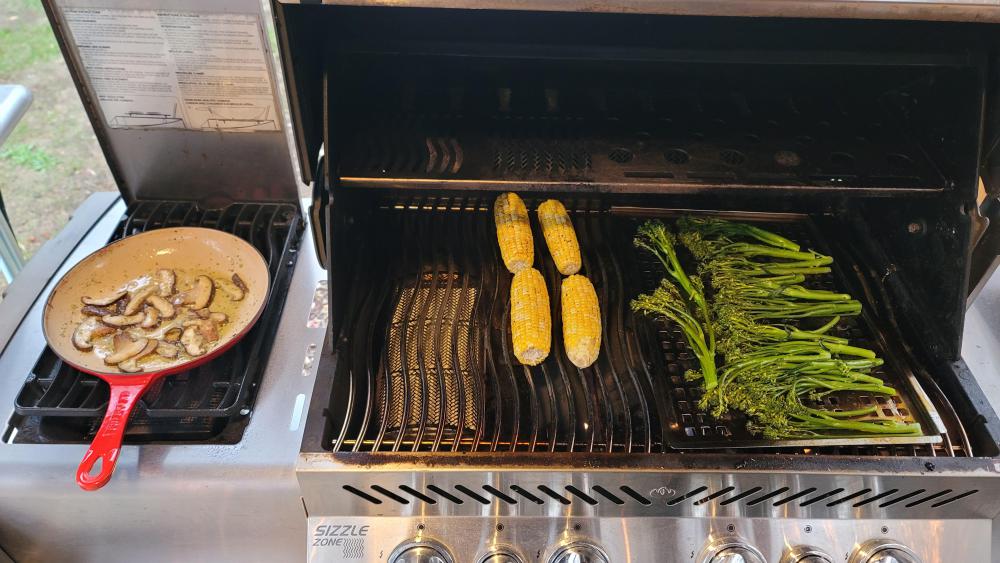
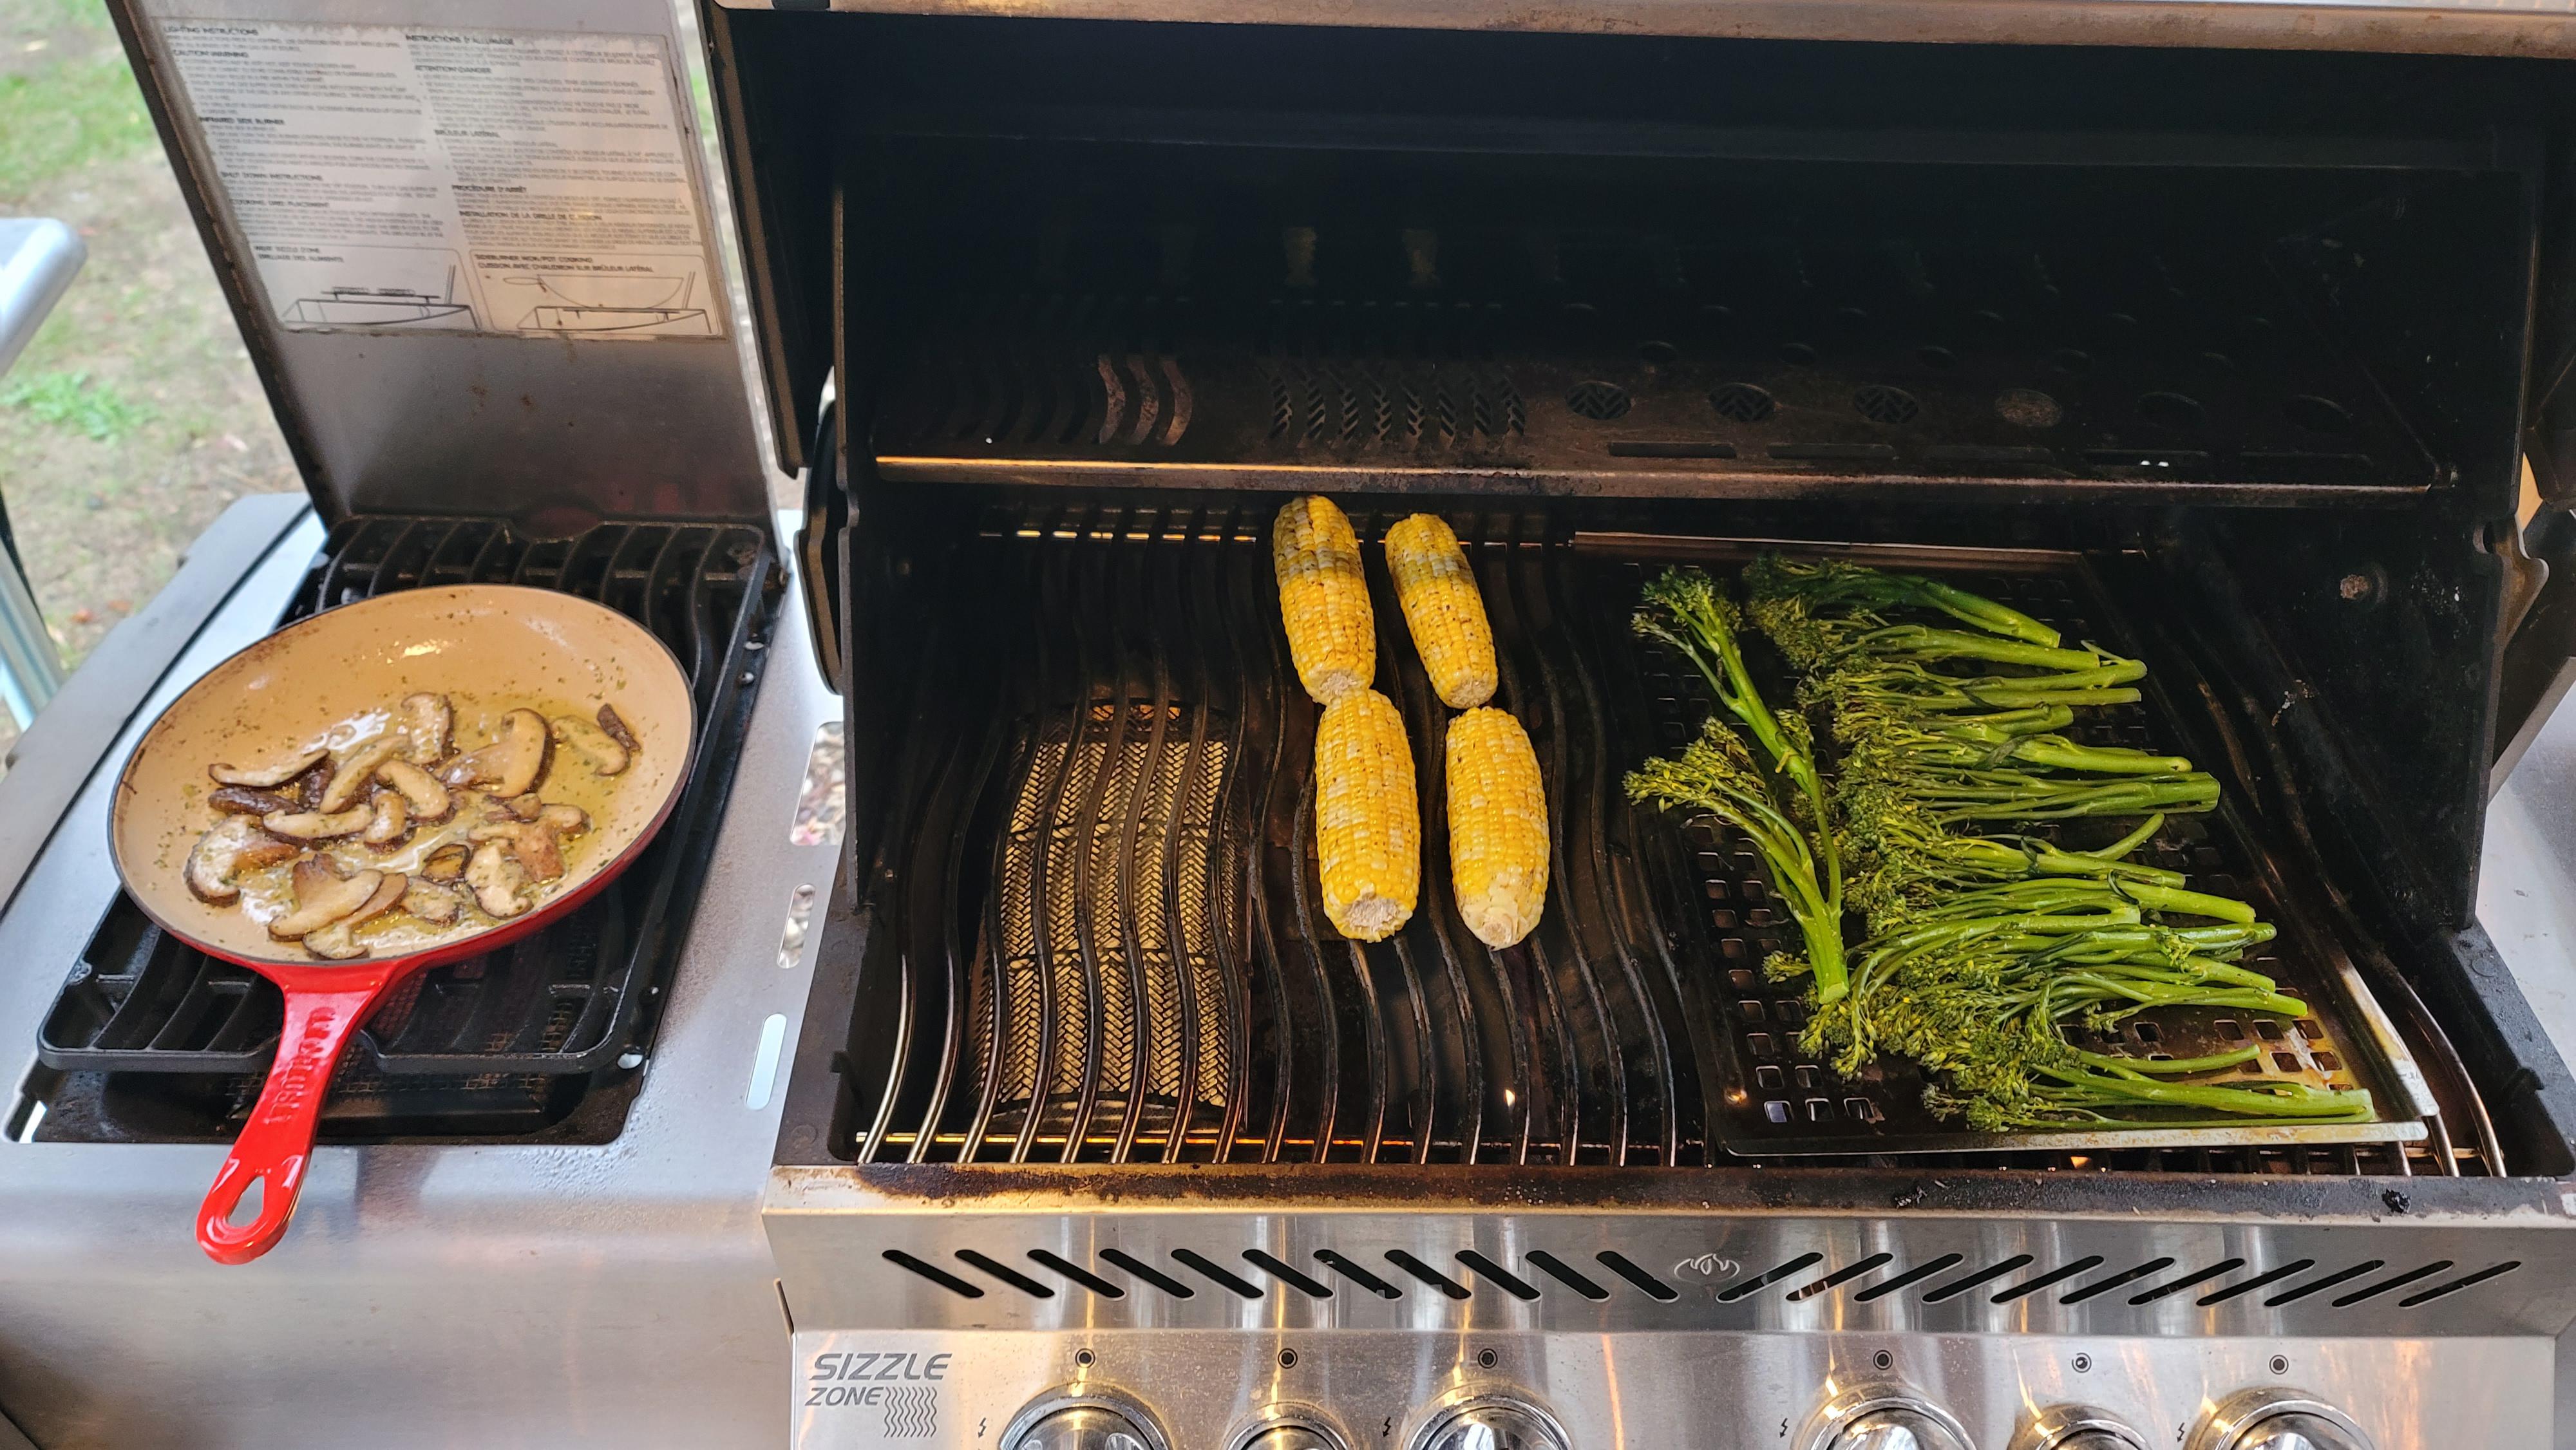
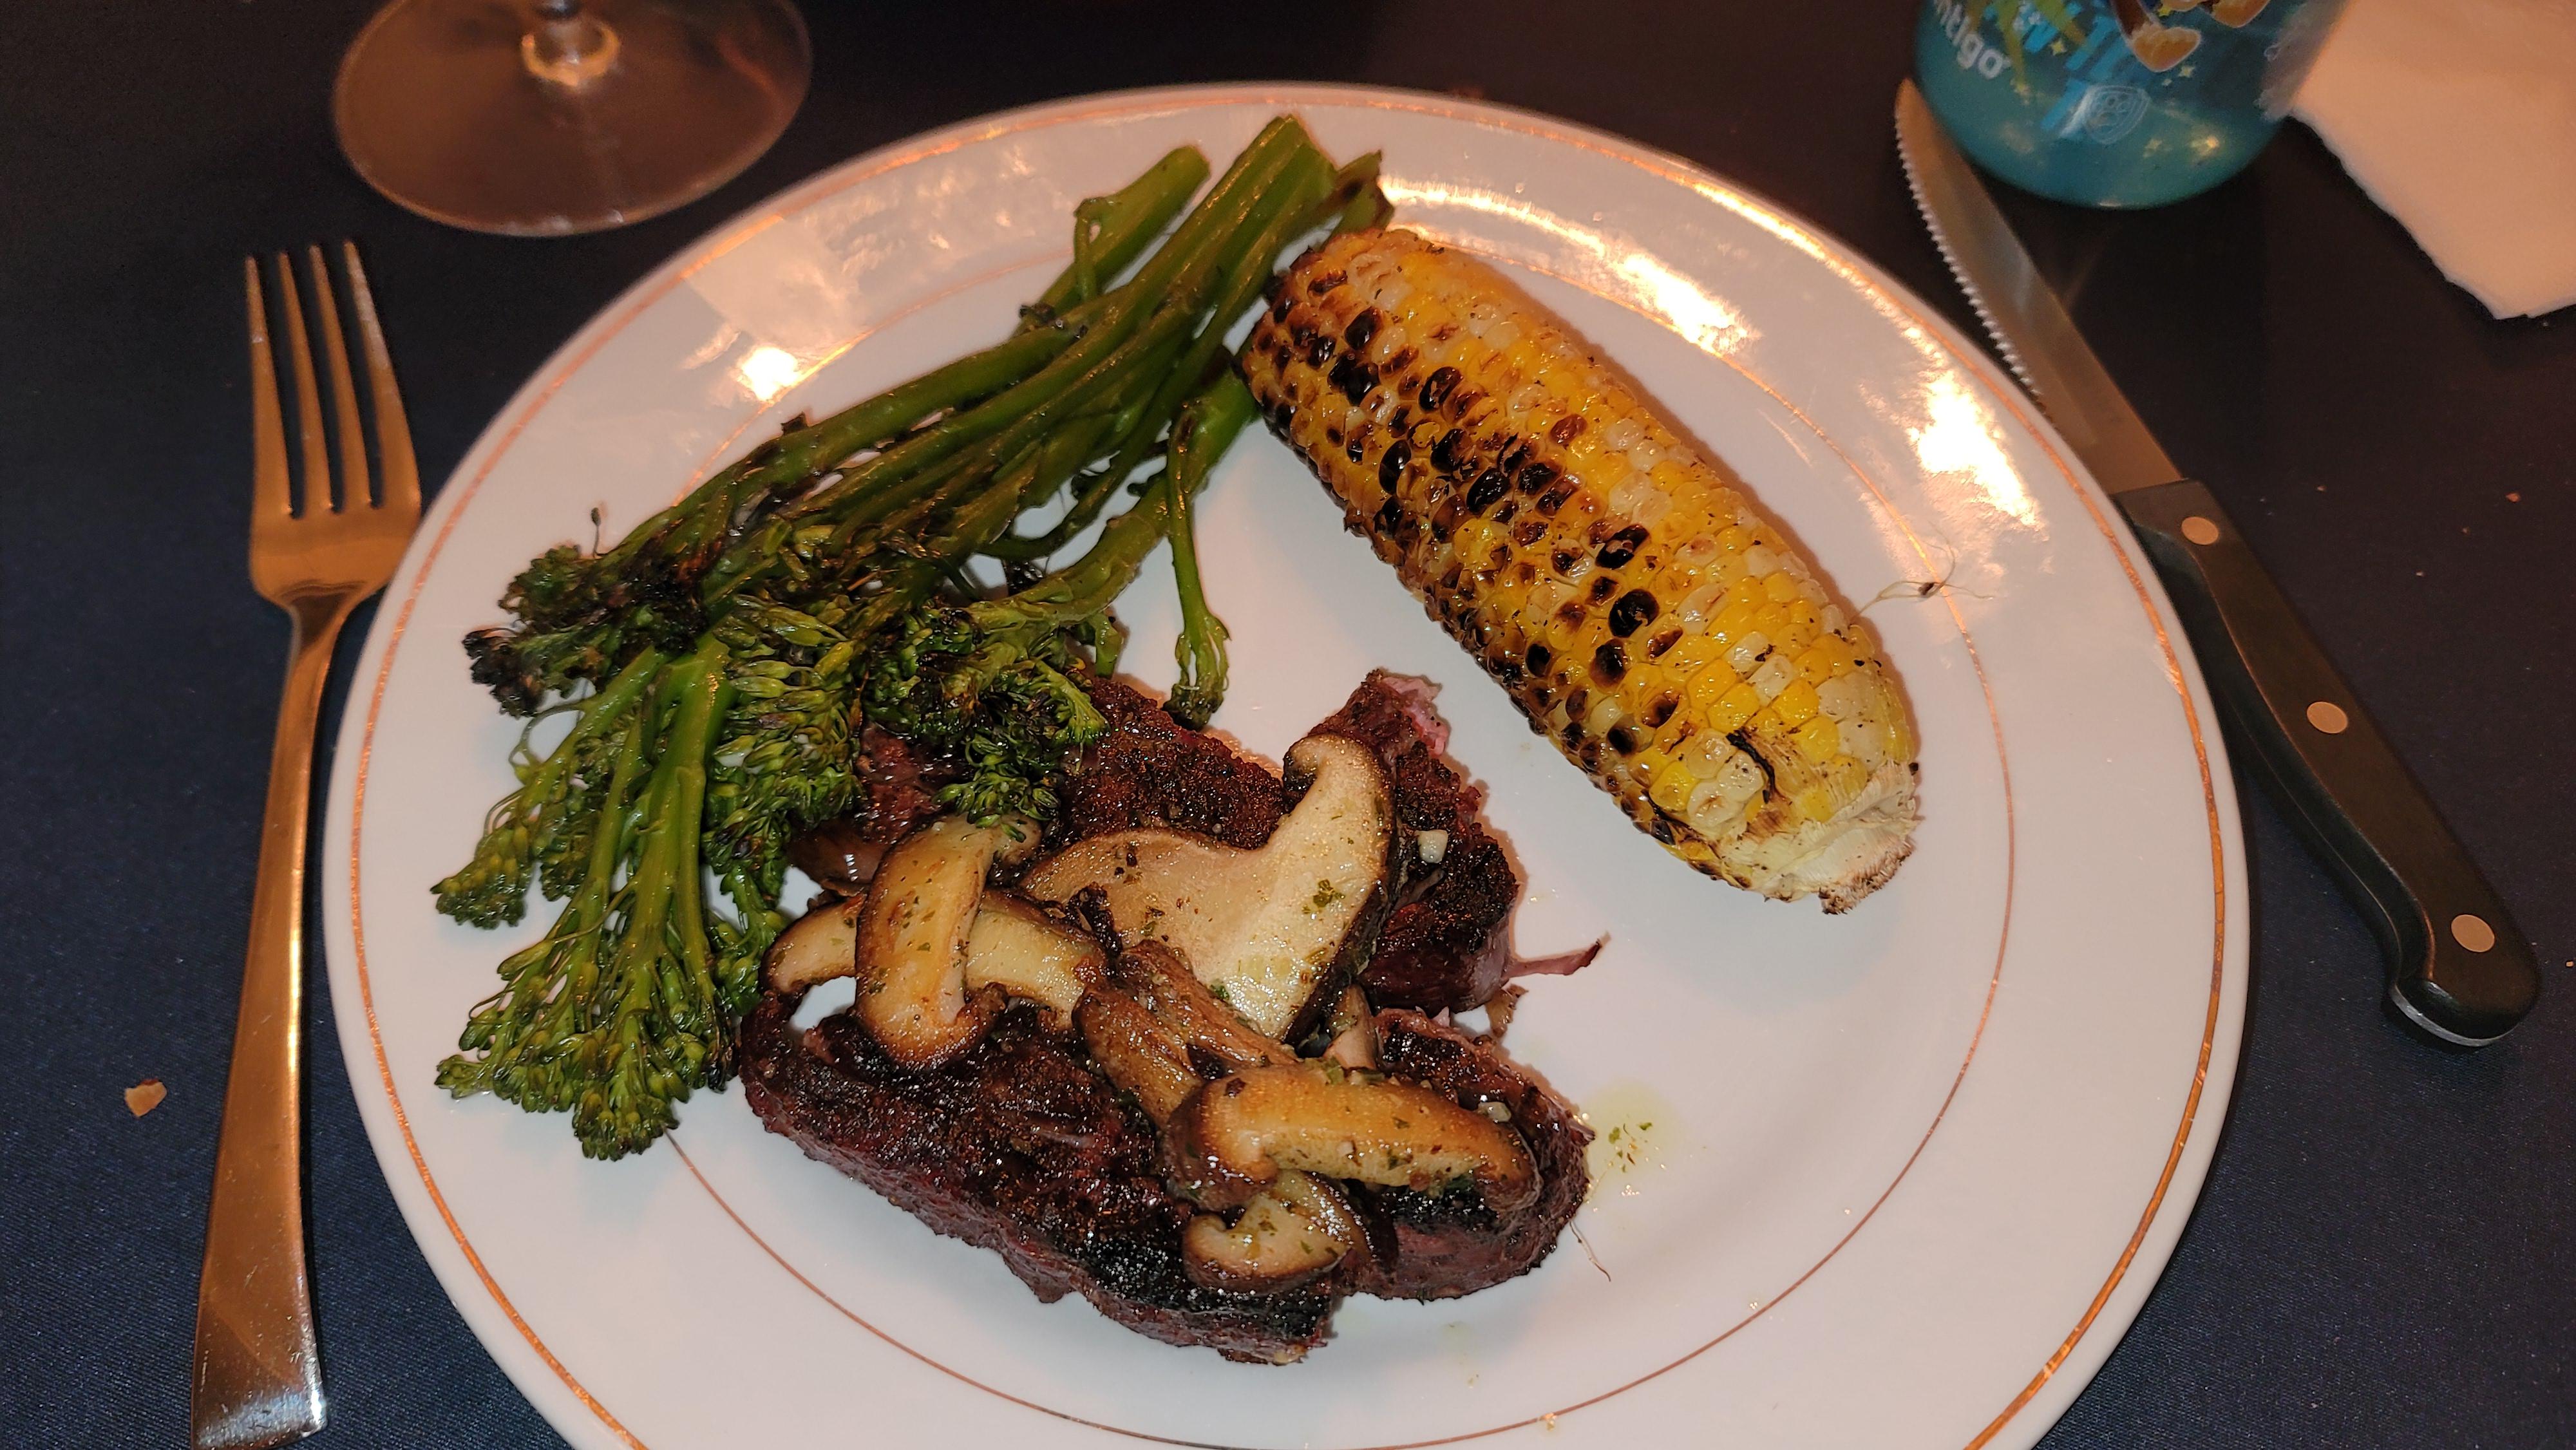
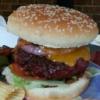
Reverse seared ribeyes at 450⁰ topped with chanterelles simmered in a garlic butter sauce. Steamed and grilled the corn and broccolini on the Napoleon grill at medium heat for about 15 minutes. Pulled the ribeye off the lower grate at 128⁰ internal temp and it's perfection. YUMMM!


-
- 6
-

-
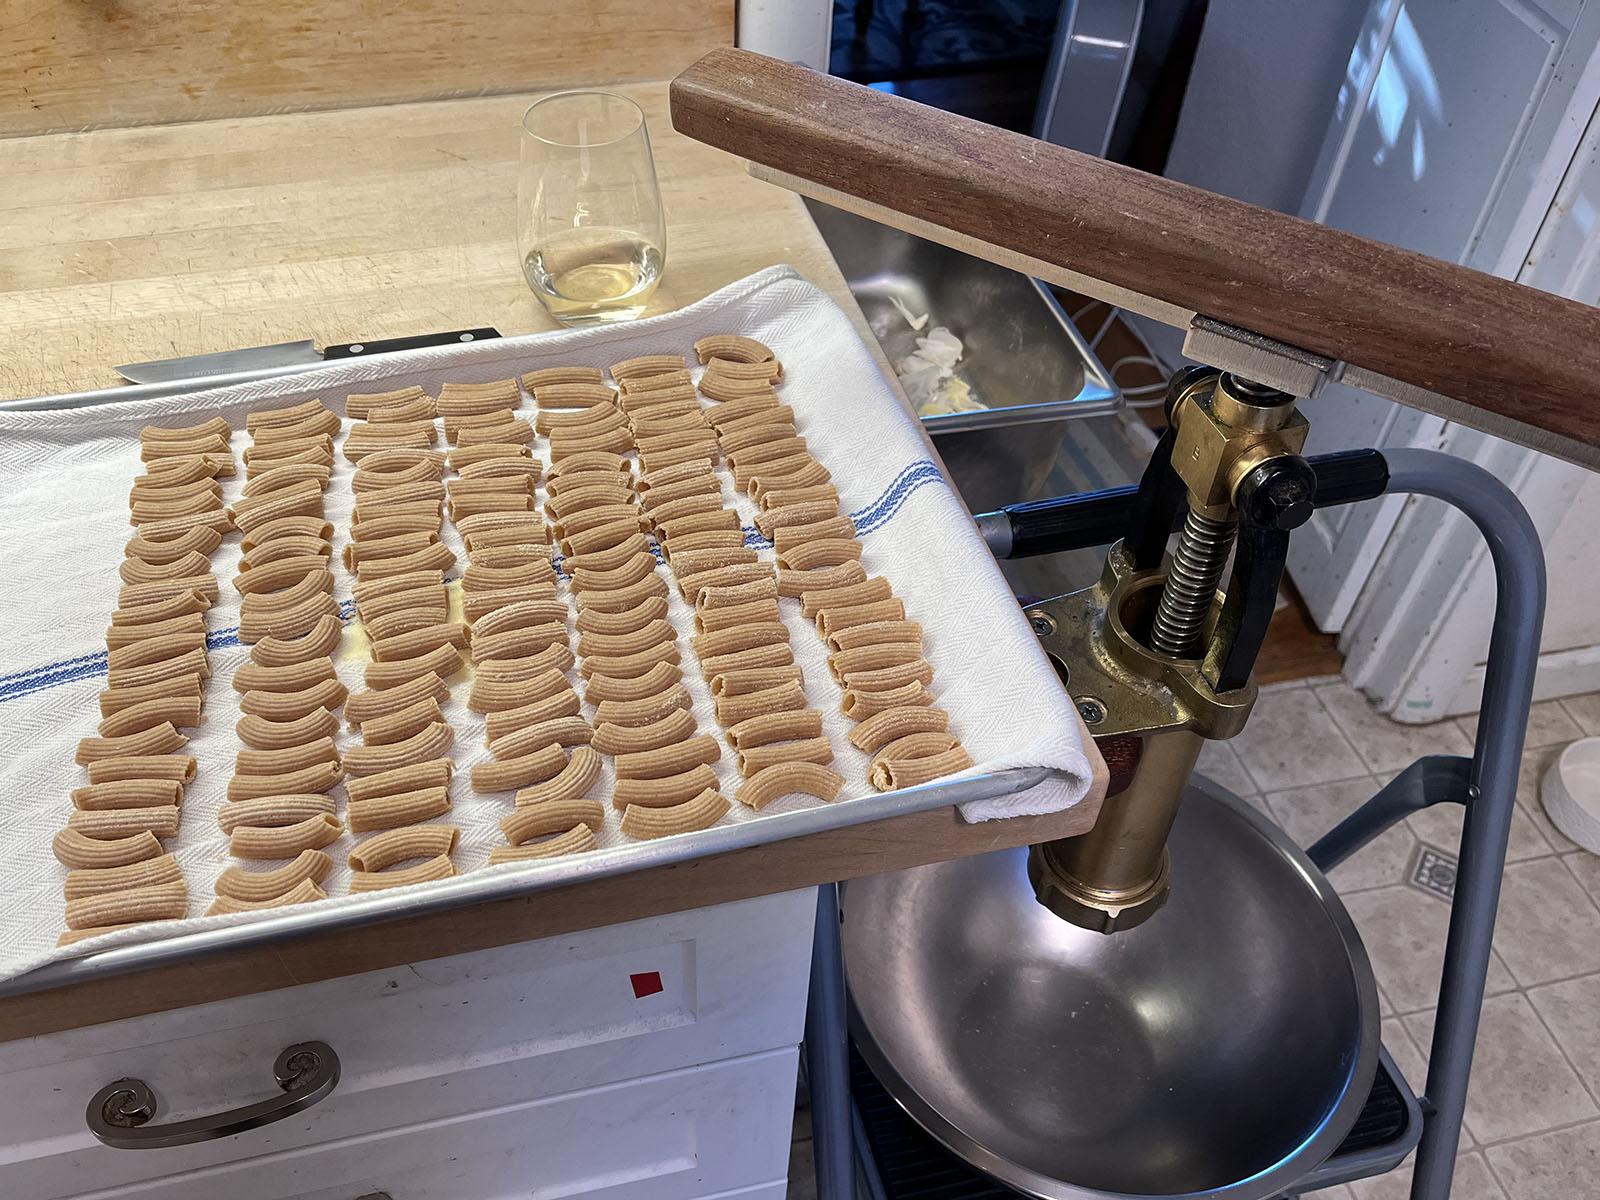
I'm episodic in my pasta. For a while I was only making Sicilian busiate by hand, or rolled pasta with my Marcato Otello (a definite upgrade on their Atlas, several of which I've broken over the years. Laurie and I are just back from a food tour of Sicily with Rosetta Costantino, author of My Calabria. She and her husband were debating importing a powered pasta maker, and PastaBiz is having their annual die sale. So I returned yet again to see what I could figure out, making a Bigolaro easier to use. When I worked (math professor), one administrative skill I demonstrated was looking at a list of requirements that couldn't possibly all be satisfied at once, and killing off a requirement. The puzzle with a hand pasta extruder is this: They don't generate as much pressure as a powered machine. The Model B torchio that various of us own also accepts dies meant for the Lillo powered machine, but these Lillo dies allow less "flow" than the dies designed for a hand extruder. So one wants a dough wet enough to extrude by hand, but dry enough to not stick together and make a mess. This window is small, perhaps negative width. Meanwhile, people love how extruded pasta dough is just flour and water. Um, there's our candidate requirement for deletion. The obvious conclusion is that one needs to reformulate pasta dough to pass through a hand Bigolaro and Lillo dies. It's better to knead dough, but then it's too stiff? Um, add water. It's better to rest dough in the fridge for hours or overnight, but then cold dough is too stiff? Um, add water. If one is at all worried about "A1C" numbers for pre-diabetes, adding sourdough starter and resting dough overnight changes its carb profile for the better. You will worry about A1C if you live long enough, if something else doesn't kill you first, so it would be kind of stupid not to consider this. But you're off the hook! Just as sourdough bread dough that ages in the fridge for day(s) tastes spectacular, so does pasta dough handled this way. So extend your life and your quality of life by being a hedonist! I'm doubling pressure using a custom handle, and I'm adding a small amount of psyllium hush to my dough, which stabilizes water that would otherwise make the dough sticky. I'm adding sourdough starter, and resting the dough overnight, good for both health and flavor. And I've never experienced such an easy time using a Bigolaro. I stare at the shapes I can now perfectly produce, "I did that?"

- Last week
-
 france_hall joined the community
 -
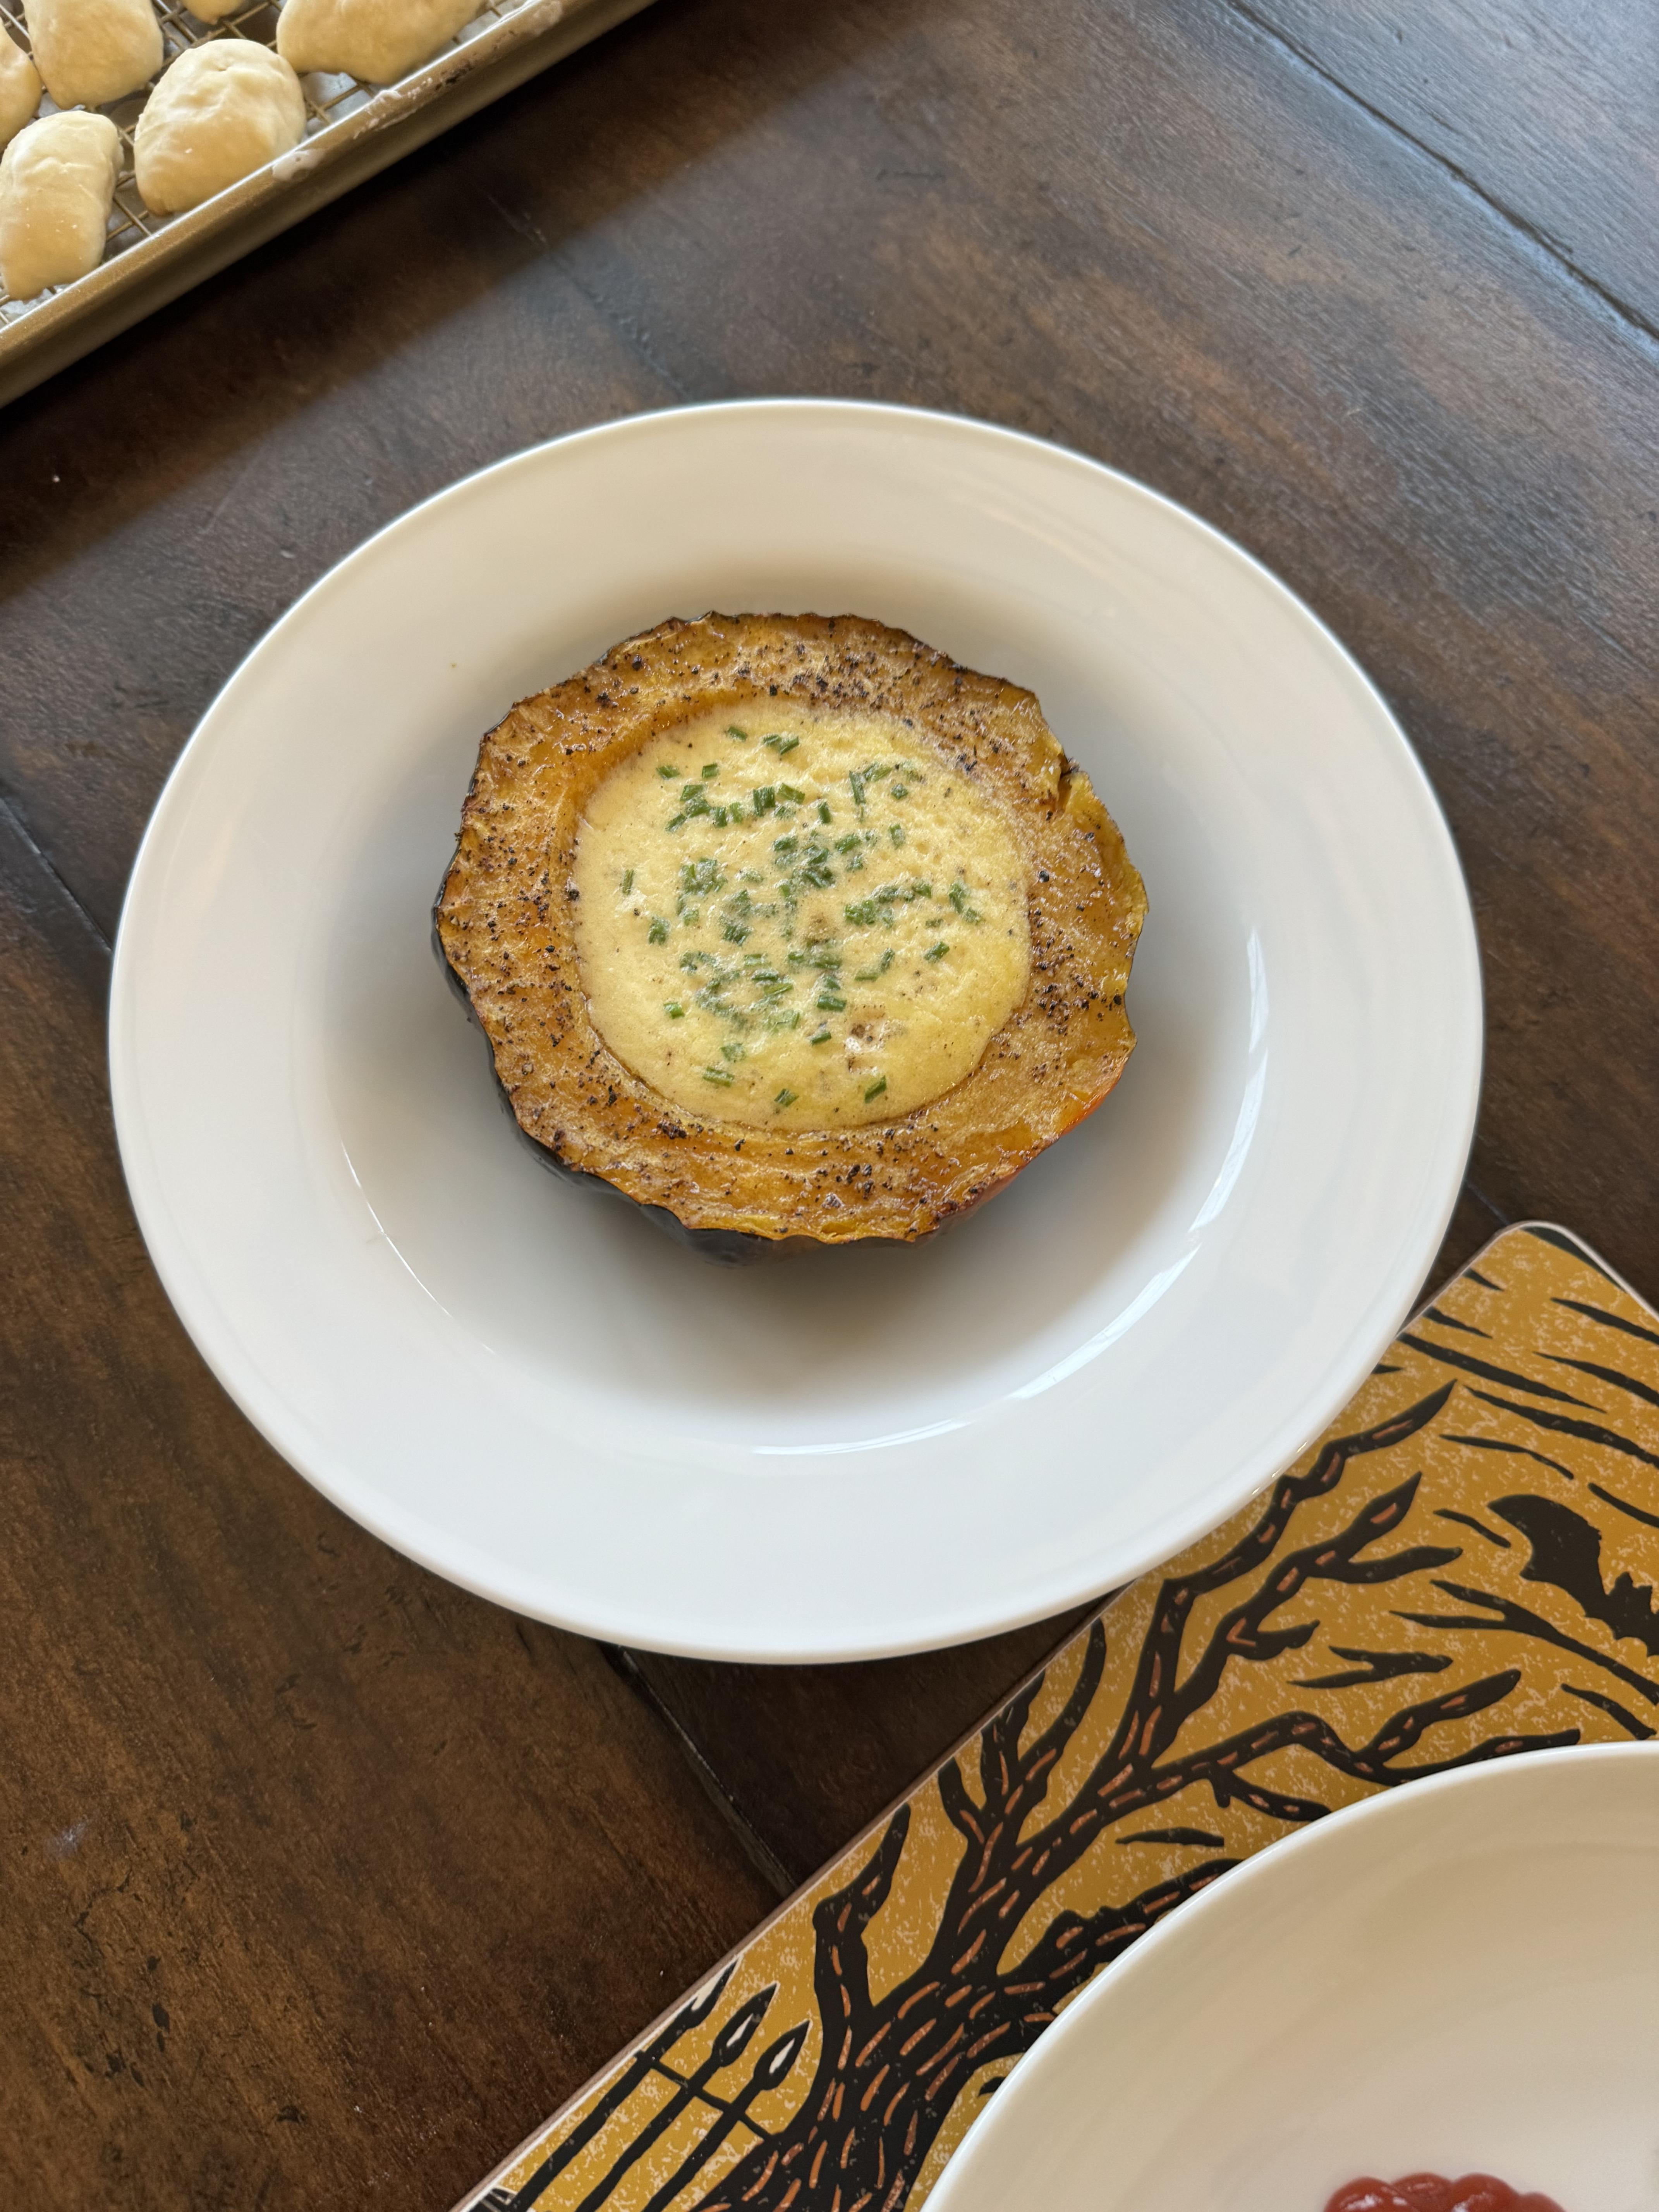
The flan was in the center of the squash and they blended great together. Sent from my iPad using Tapatalk
-
SteveL, Not sure I know what Parmesan Flan is, but that squash looks delicious.
-
I have a 23 Ralph like Toney has so it might be different considering the acreage difference. Sometime I'm in a hurry so I open the vents up quite a bit and get the coals rockin, then I shut the vents to my general running temp of 250 and let it heat soak and settle in. I'm thinking it's around 200, works for me if I don't get distracted. After a few times you'll just know where the runway is and you'll be cruising. Nice backyard outpost, enjoy your new toy.
-
I enjoy overthinking! (Plus I can't help doing it.)
-
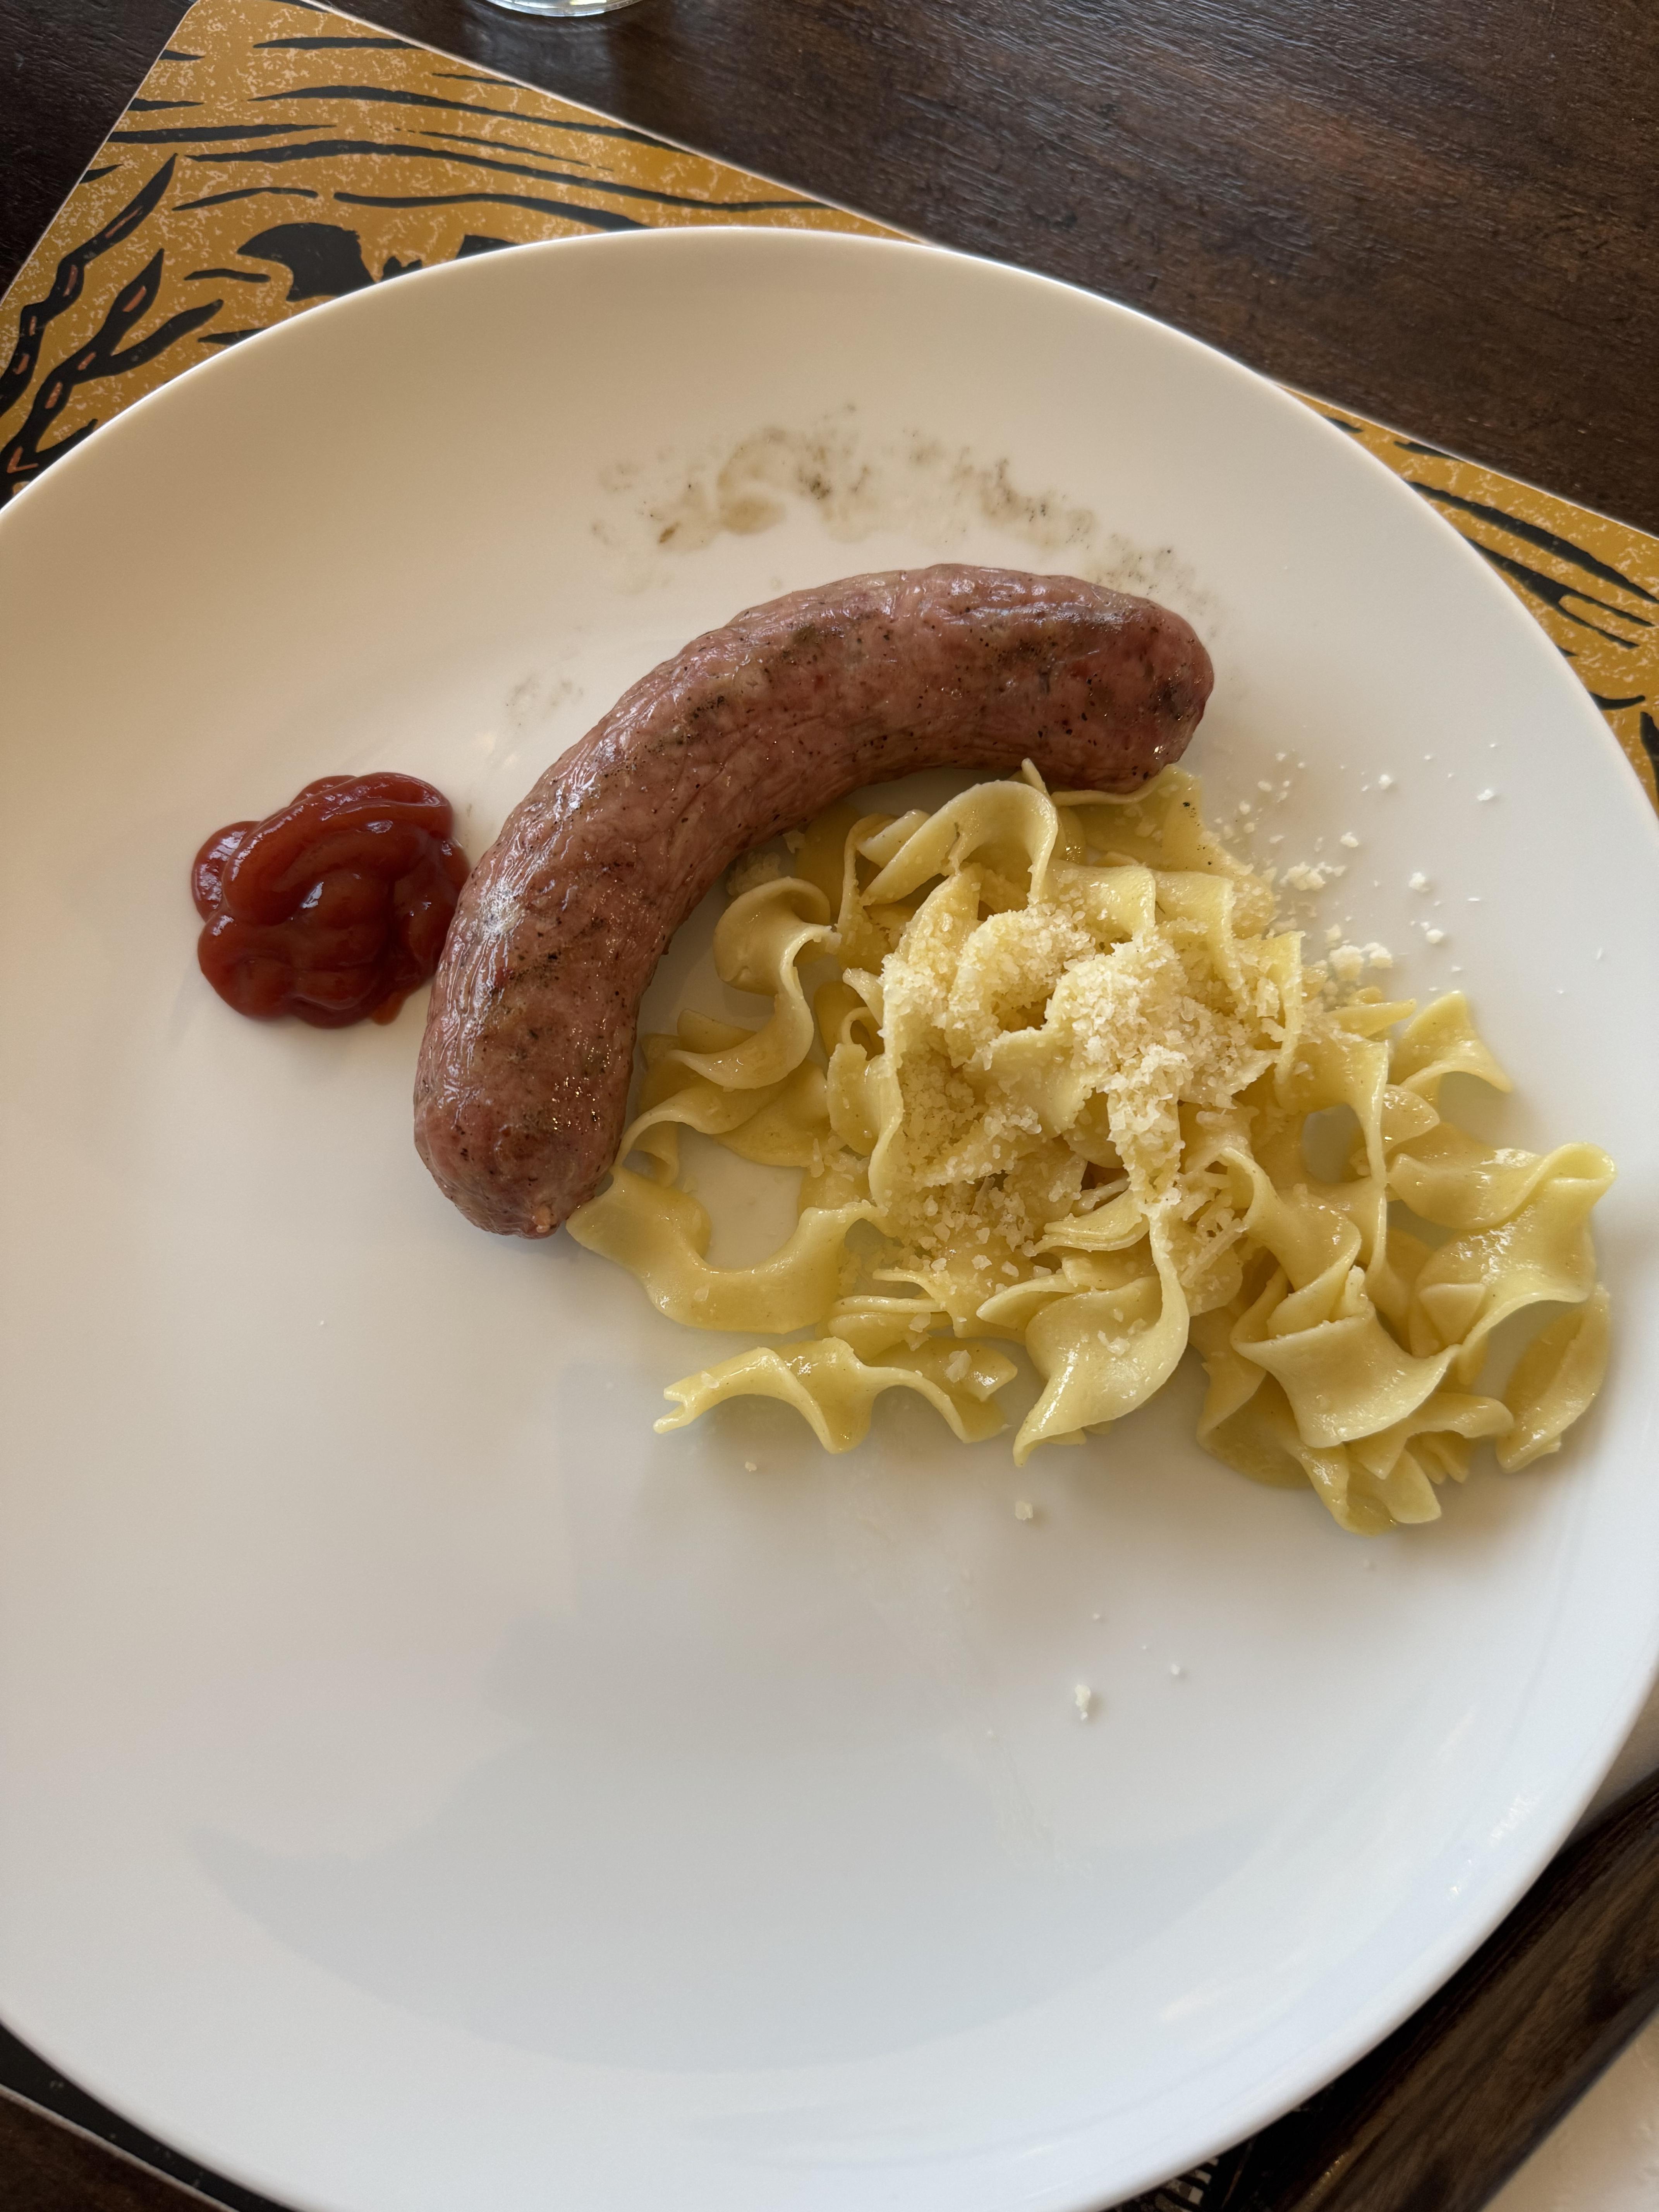
As Fall is encroaching upon us, I cooked some Italian Sausages I picked up from a local sausage maker yesterday and paired them with acorn squash with parmesan flan on the KK tonight. Perfecto!


-
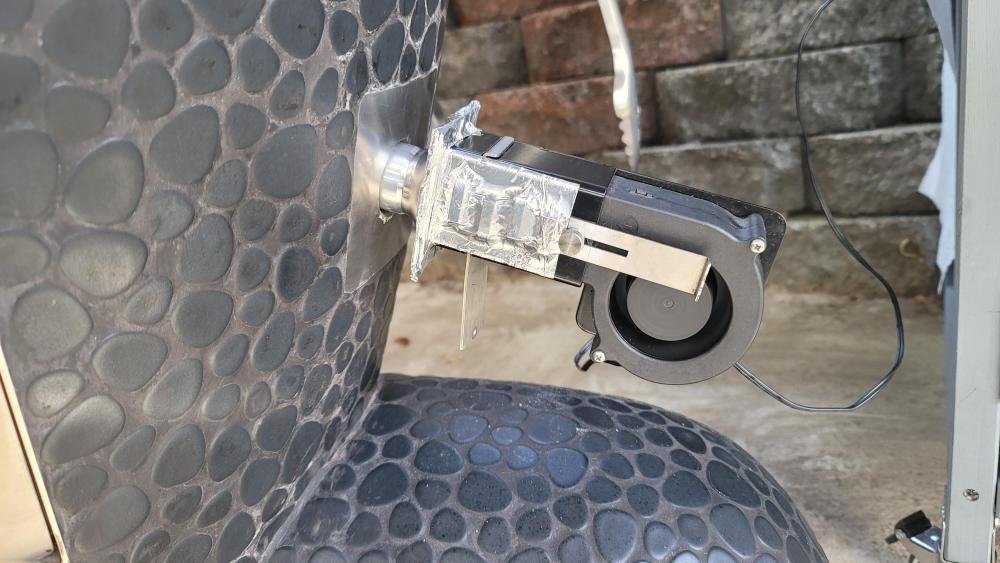
Ah, good to know. I got a face full of ash while testing it too which made me really think about it. Lol. I think for high speed, the fan is great to pre-heat soak the KK, but once it's at temps, turn it off and let the vents do the rest. If my HVAC tape fails, I'll look into buying a Dremel too. Thanks.
-
Please don't overthink it, you start putting probes in different places you will drive yourself crazy. And by doing so you will stop enjoying the cooking and the outcome. We have seen that happen before.
-
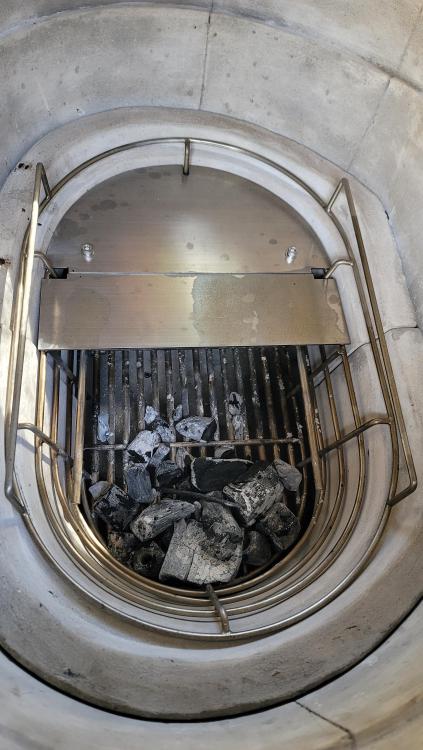
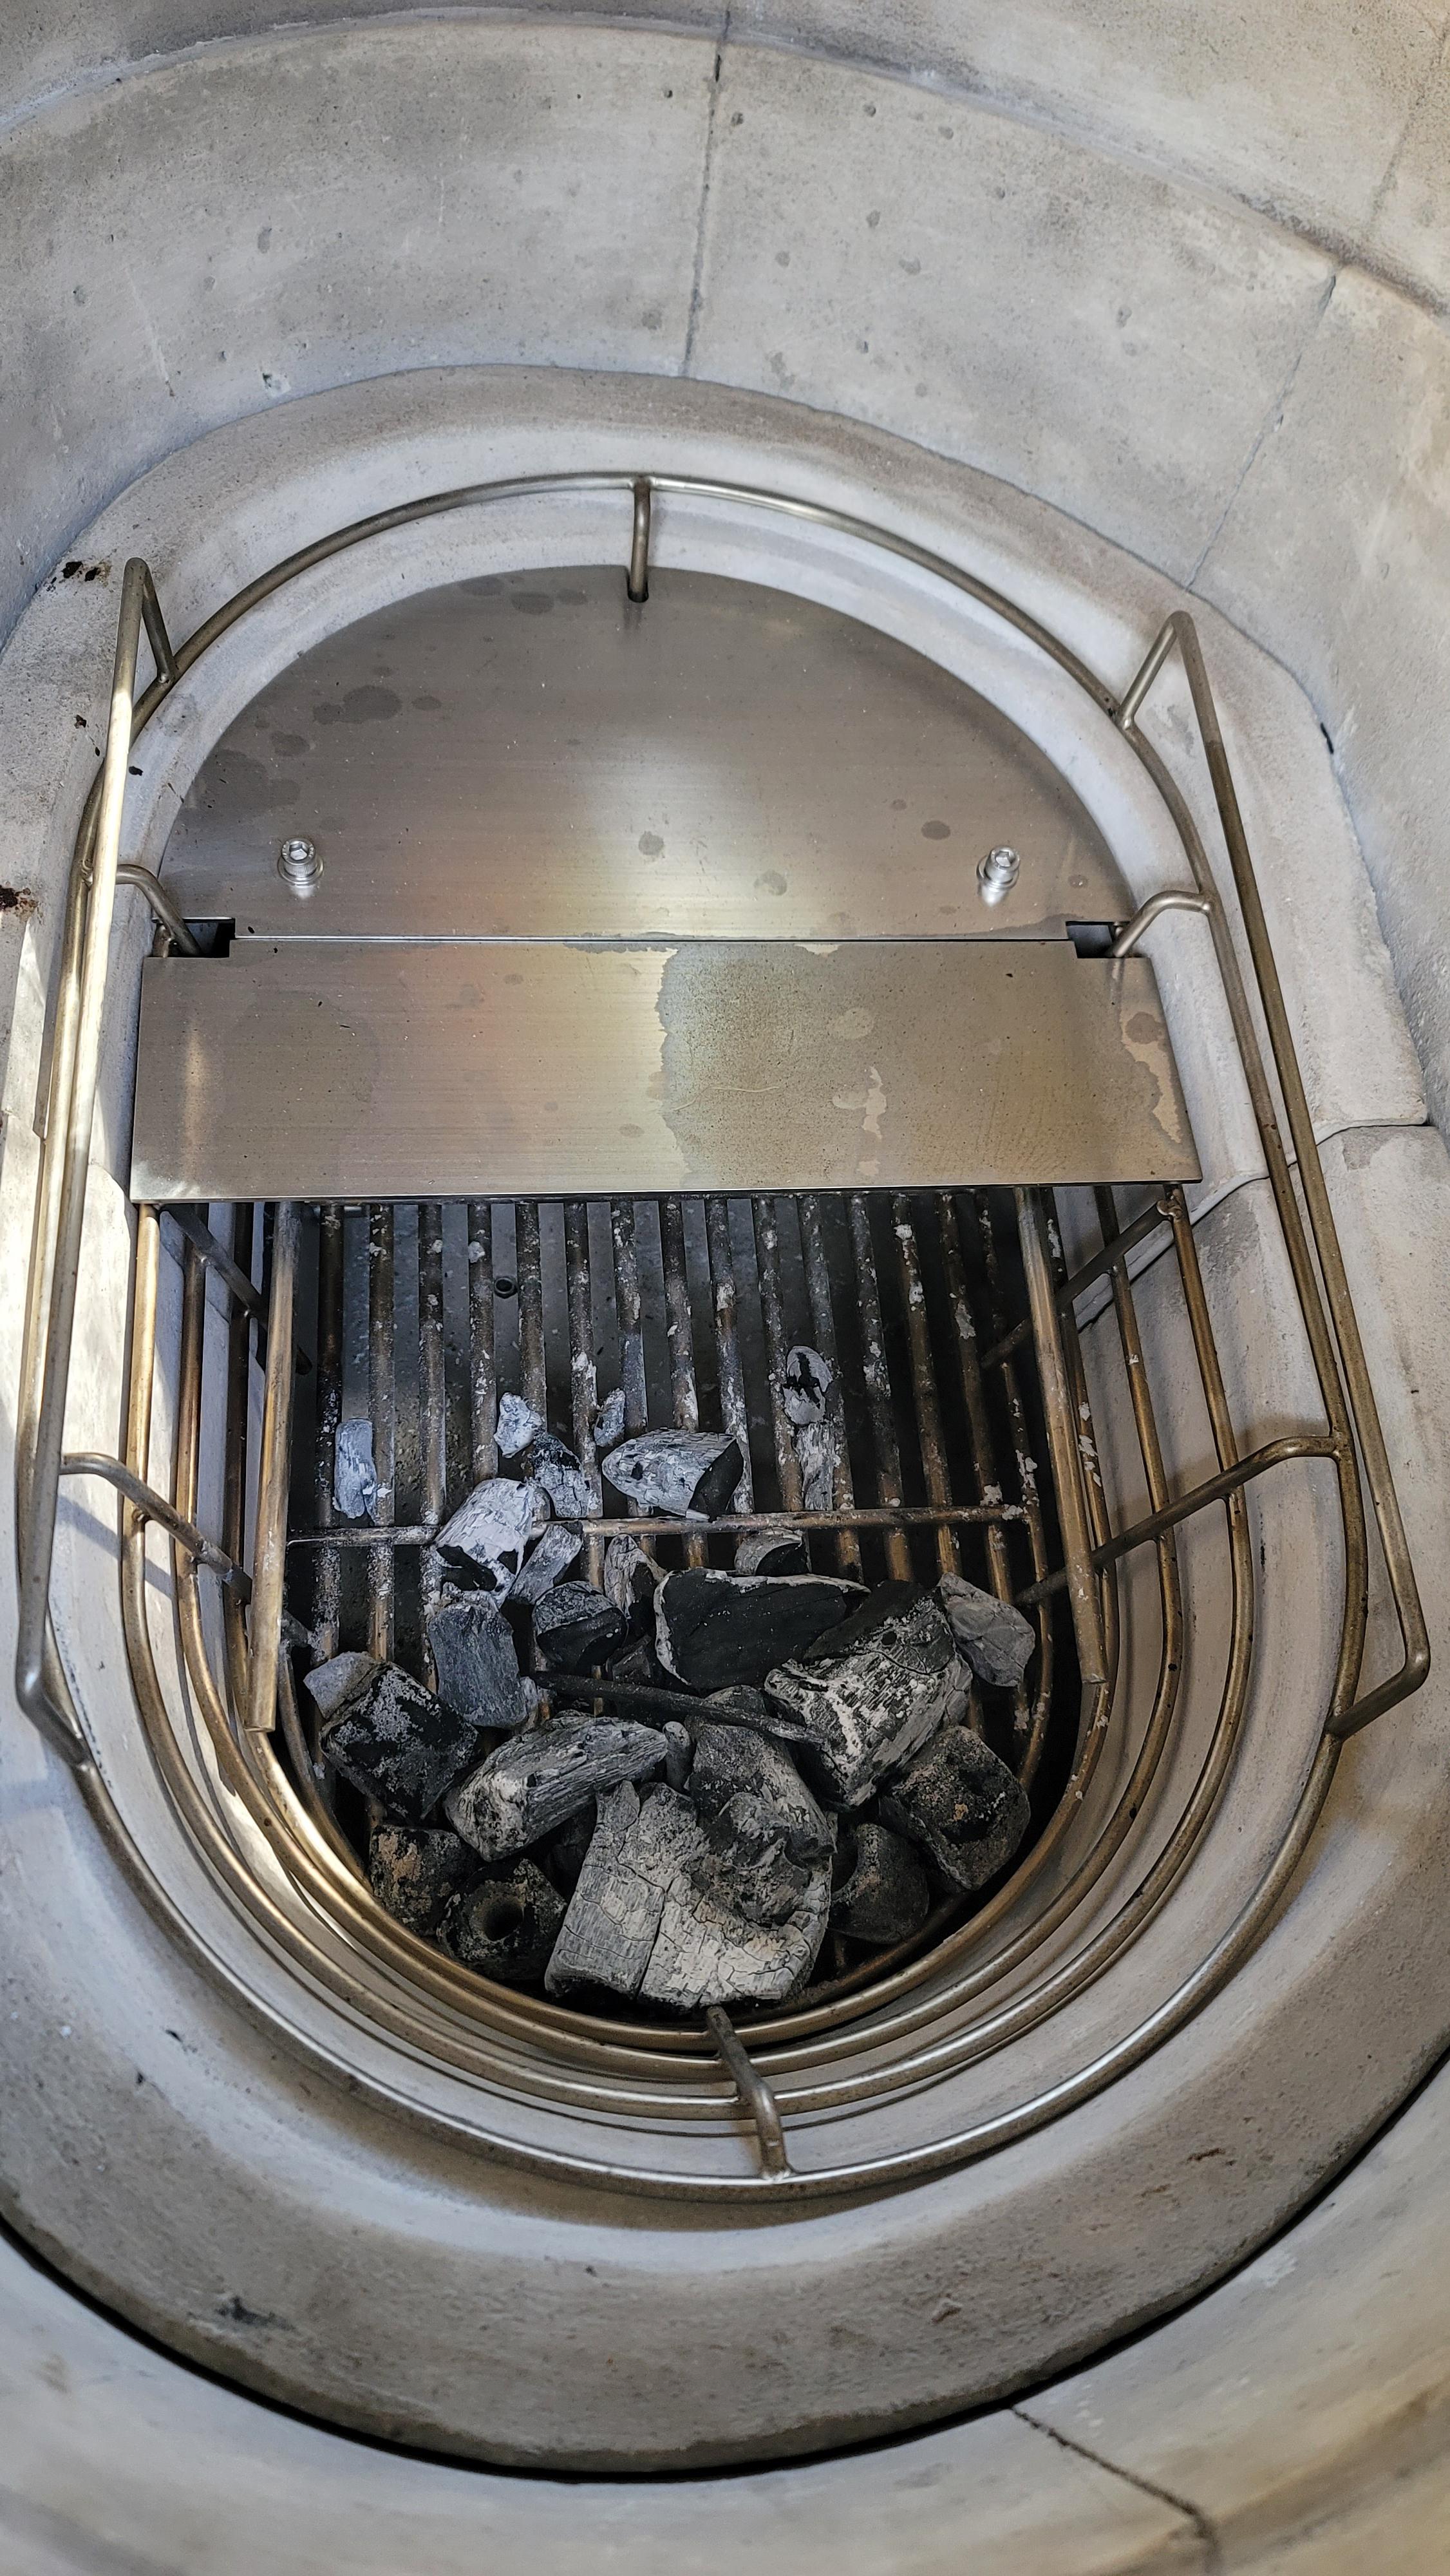
No, use the splitter such that you’re using a half ish basket. I suppose it doesn’t matter that much because you’re only going to use whatever it takes for a given cook, whether half basket full or full basket. Sent from my iPhone using Tapatalk
-
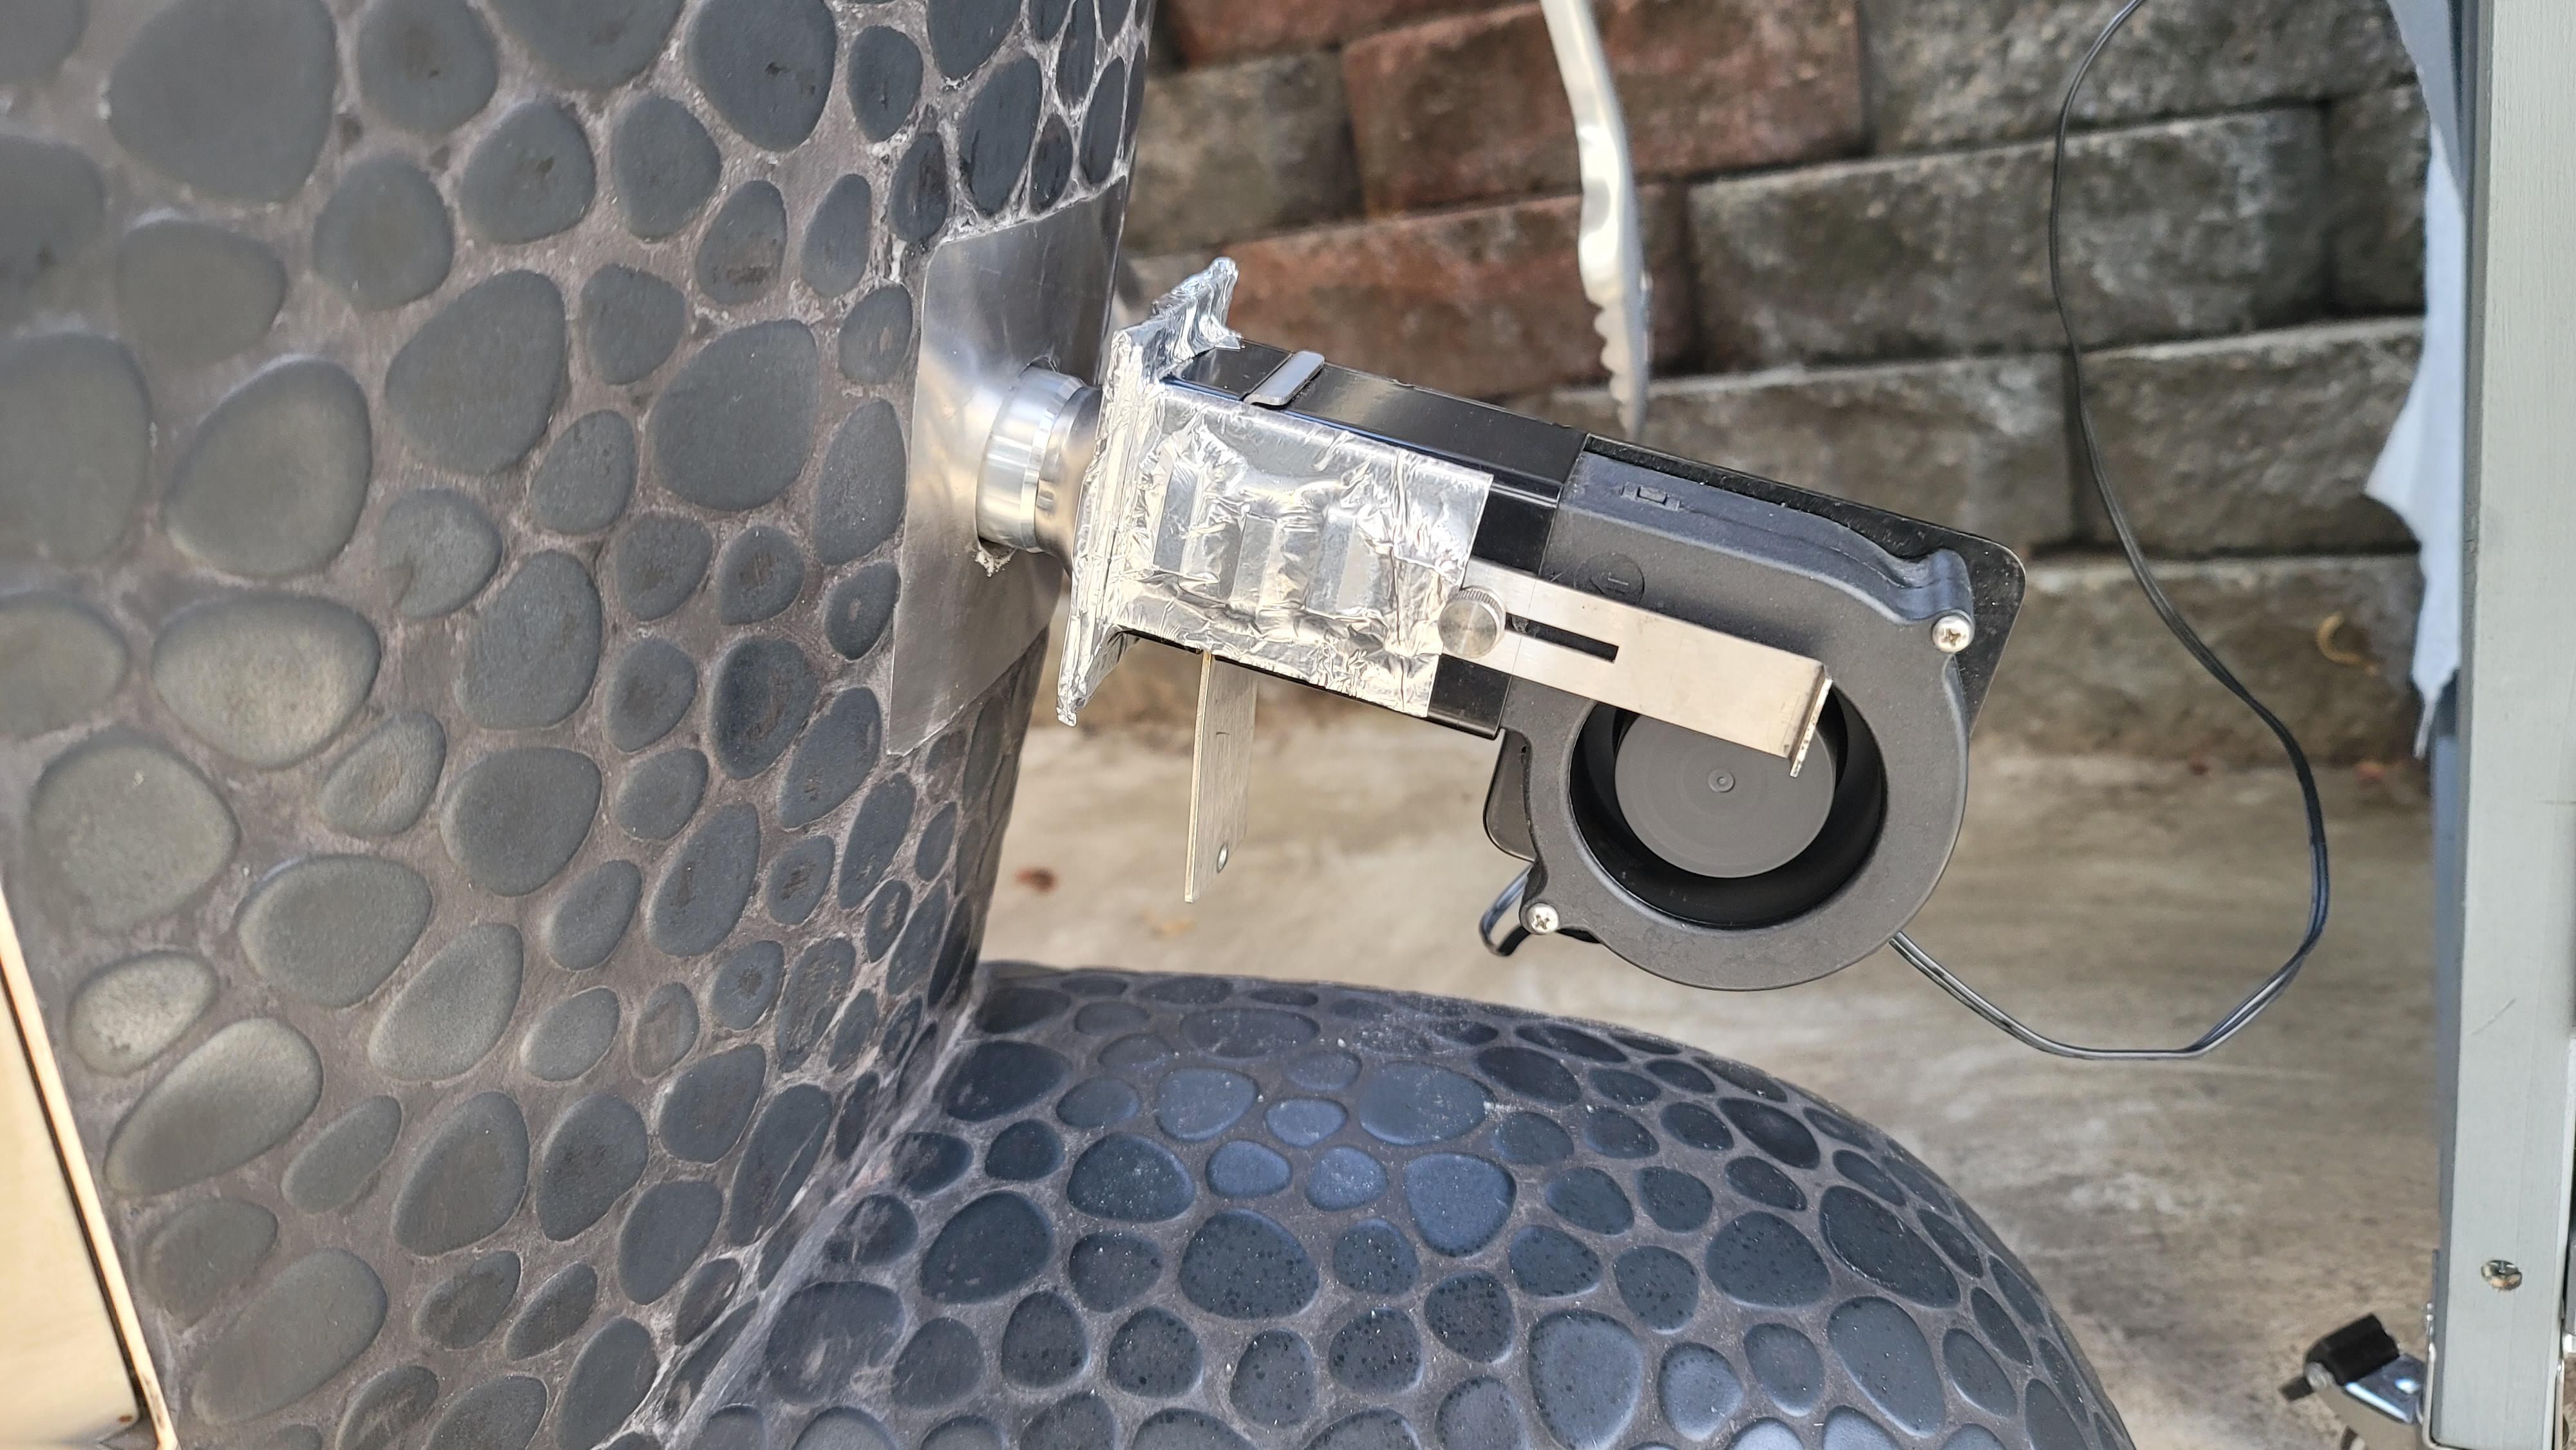
Nice! I haven't noticed a problem with the ash at temperature, the fan doesn't usually kick on at high speed while maintaining a low-and-slow. But I did get a face full of ash when testing it. FWIW, here's mine - I needed to cut slots for the Fireboard mounting rails.
.thumb.jpg.7e5a591e17fdb6d26fc1e9444bc29a13.jpg)
-
@5698k are you suggesting for longer cooks, I completely remove the divider entirely and fill the whole basket underneath the splitter tops? If so, that would make sense! Thanks.
-
Thanks for the tip @jdbower on the Therm works universal mounting kit. I don't own a Dremel so I just used HVAC duct tape to keep my Fireboard fan together and block off the airflow leaks. Works like a charm! However, at 40%+ fan speed, I did notice that it blew a lot of residual ash around at first from the previous cooks (which could go on your food if you turn it on midcook so be mindful of that) so be sure to keep a clean area if you're going to use higher fan speeds midcook. Also, I noticed that because of the angle of attack from point of entry, for the fan to be more efficient, the lump charcoal should be on the right side of the grill, not the left (although they'll both work of course because it's a vacuum). Regardless, I suspect I'll only use this fan setup for higher temp cooks when I'm a bit rushed for time but still want to eat damn good food.
-
100° below target! Perfect. Thank you very much @tony b. I really appreciate it. Perfect starting point for me. I just ordered another temperature probe for my Fireboard so I'll be able to really gauge temps at main grate and lower grate areas as I've read they can really differ. I may have to get some ribeyes now for this weekend.
-
If I'm trying to get going a bit quicker than usual, I'll open up the top more until I'm about 100F below target. Then set the vent for the target. Like you experienced, if you get too close to your target before you close down, you will likely overshoot a bit. No worries. As we've said +/- 50F is nothing to fret about. Happy cooking!
-
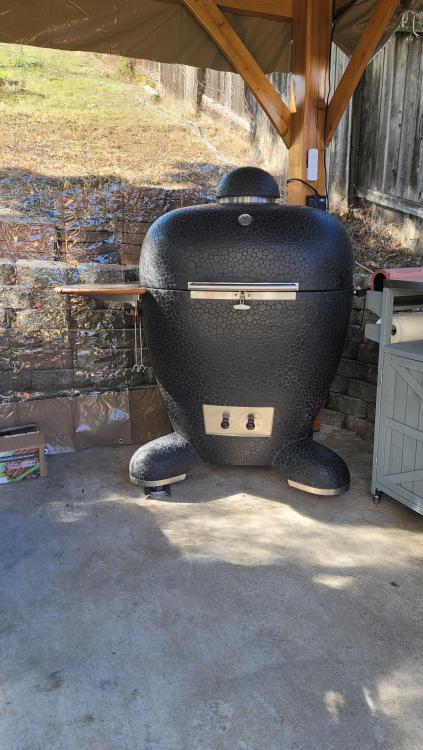
Thanks @Tyrus I appreciate that. I thought of cool names to name it, but nothing stuck. I remember reading a forum article here years ago about how a guy named his KK "Puff" for the dragon, and that's always stuck with me. However, all of the dragon names seem like too much and unrelatable so instead, I've decided to refer to it as "The Forge." I think that's pretty badass/medieval sounding as well, and very fitting for me as I have 3 different flamethrowers and tend to cook with 900°+ high temperatures on my other grills. Now I just gotta get a sign that says "The Forge" to place above it. Thank you very much for the inspiration! Love it!! One question. If I want to speed up the process to get to 225°, and I leave all of the vents open, at what temperature should I start closing the vents off to be safe? 140°? Last time I overshot it, I was around 160°-180° or so (I wasn't paying too much attention) before I closed it off to 1/4 turn + 3rd hole open at the bottom and I landed at 250°. I'm pretty sure I'm not the only one who does this expedited airflow process to get to starting temps, and I know that these KKs heat soak like no other. Thanks in advance.
-
Very nice setup!
-
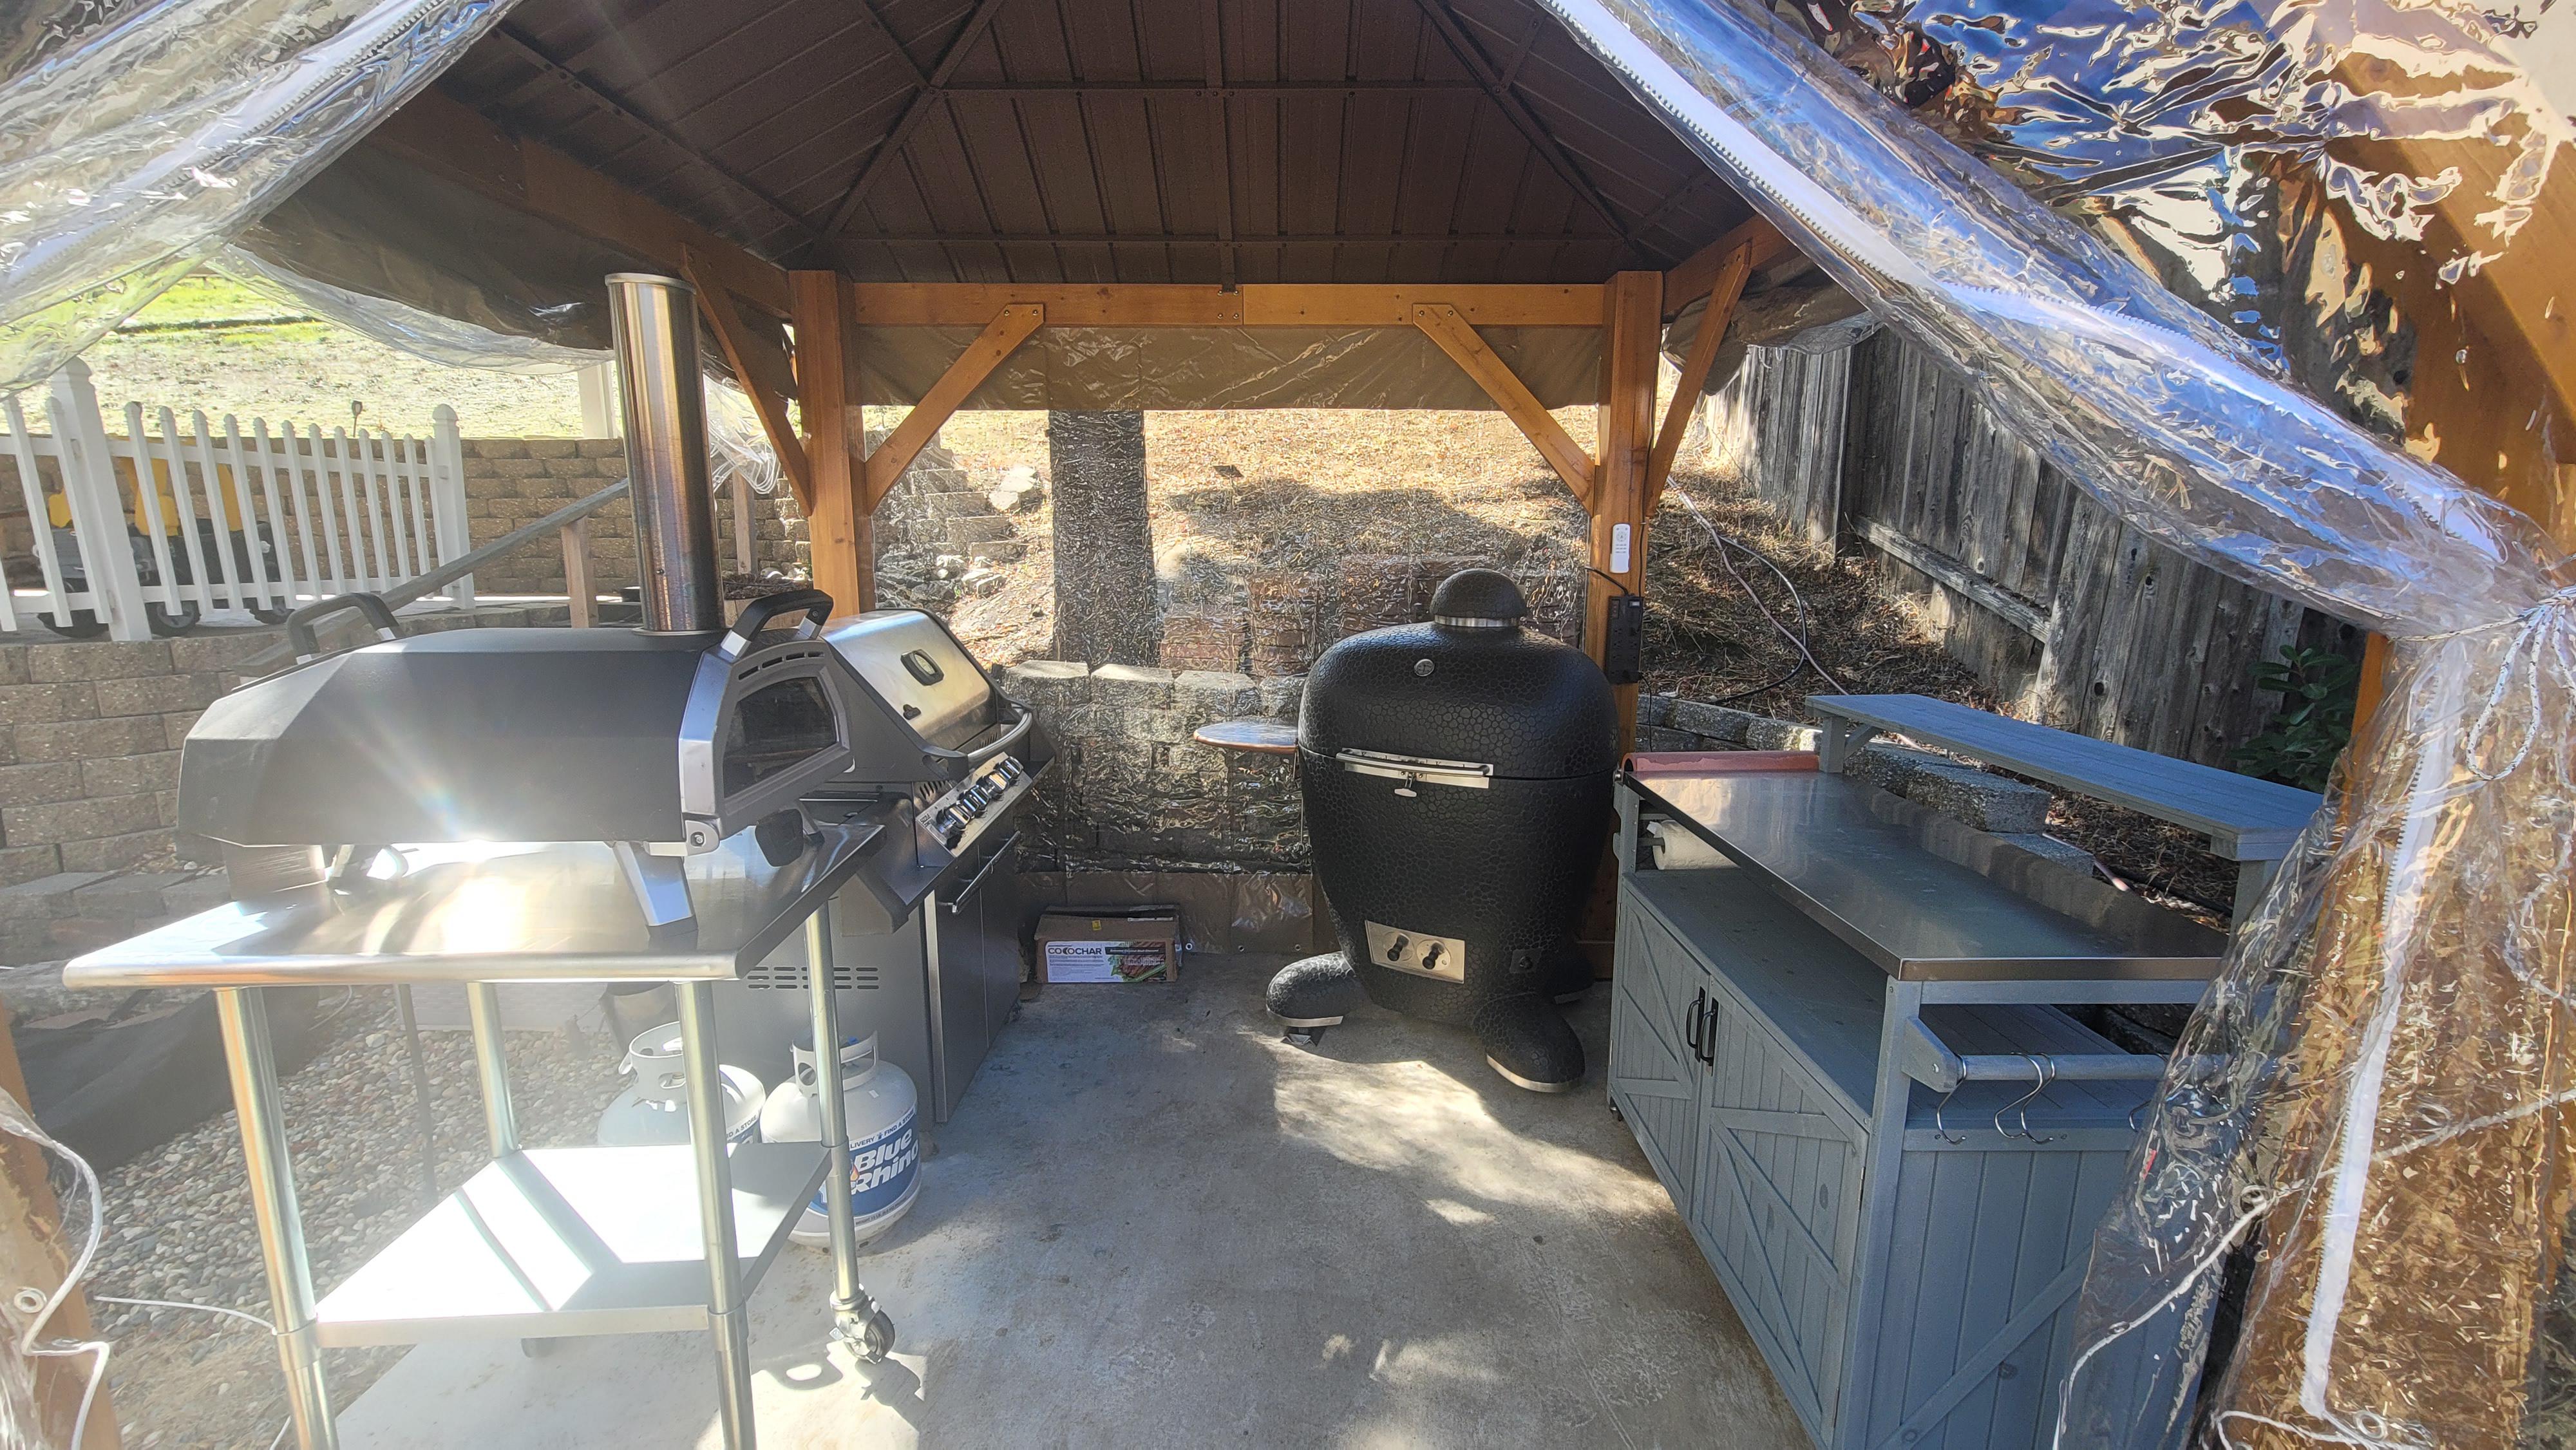
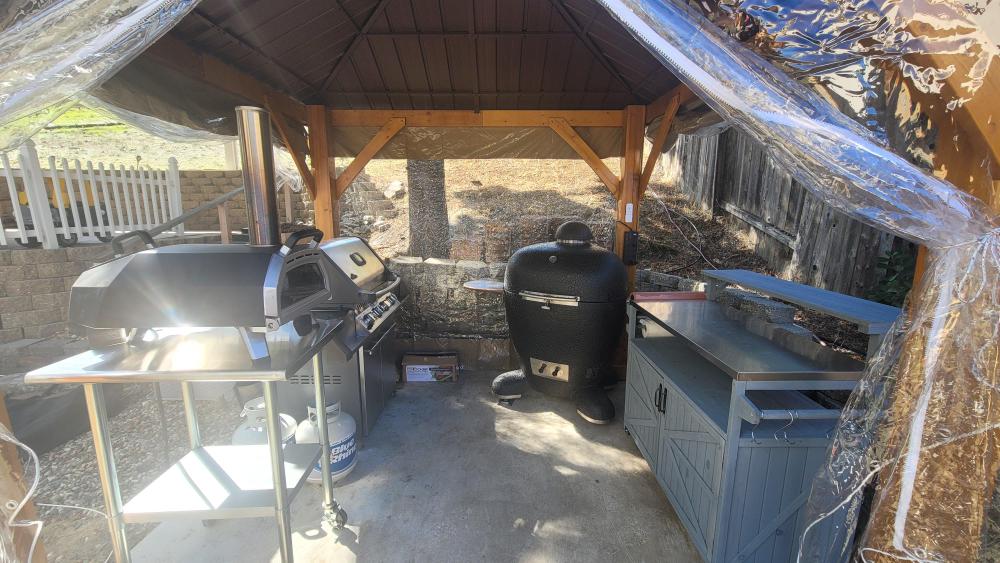
Some more pics of the setup. After years of neglecting the Yoder smoker and not treating it the way I probably should have, I built this gazebo just for the Komodo kamado. My space is tight here (8'x8'), so between these three workhorses, I should have all my needs covered. Additionally, I modified the Napoleon propane grill as well, so I removed one burner and replaced it with an infrared burner that gets over 1000⁰F in 30 seconds. Between that and the Ooni pizza oven, I will never have the need to cook with hot temperatures in this Komodo kamado, and that will preserve the longevity of this beautiful masterpiece.
-
Thanks for sharing. your experiences. My understanding is that once the grout has dried, you can treat your KK as normal. I just went through the process of repairing cracks and filling in the grout. It was a lot messier than I thought it would be (this is a function of my ineptitude). With that said, I used my fingers to push/smooth the grout into the cracks while the KK cooled down from 500F. There was one instance where the tiles were sticking/pushed out and in that situation I used the syringe to squirt into the pocket and pushed in the tiles from the impacted area. Other than that, it felt more manual and I used my fingers to smooth in the grout in cracked areas. My understanding is that the materials (once the tube has been opened) has a short lifespan. I plan to 1) make sure my KK is covered now at all times when not being used and 2) cook as much as I can in the next weeks to check for cracks and fills in with the grout.
-
Thanks guys. Yeah, I've practically read every forum article and watched every KK YT video out there by this point (I've been following this forum for years even without a KK). I did exactly what you all suggested and cooked it at 1/4 turn + 3rd hole open at the bottom (lit half the basket splitter). I suspect maybe I should have been at 1/5th turn instead of 1/4 turn and that's the learning curve that I'm going to have to figure out. I think I also had the vents open until about 160-180° or so (I wasn't paying too much attention) before I closed it off to 1/4 turn as I was trying to promote more airflow after lighting the lump. Perhaps I should have just started off at 1/4 turn to begin with (but alas, patience is a virtue...)? The ribs in the end weren't bad, but I know with a little practice, I'll make them perfect.
-
You know there's somethin to be said about a black KK in pebble finish, not only does it have that mysterious look but it has a medieval touch like a black knight in armor, congrats and happy trails cooking. 250 is the temp I like for ribs, saves me on the cooking time a bit. If you overshot and then put the ribs on it's a little more workable seeing the temp drop 50 degrees from the addition of the meat, then you could make a trim adjustment without too much worry. The great thing is......once your locked in your there to stay and that's a comforting thought. All those ribs and living in wine country, it musta been a beautiful day.
-
Couldn't agree more.
-
For slightly tougher cuts of meat, I recommend a soak in Shio Koji (paste is better than the liquid). But you should cut back on the amount of salt that you use to compensate for the extra umami of the Koji.


.jpg.3f4900bd51619e3ff36263ff7c2496c6.jpg)
.thumb.GIF.006d23b9323146d2dd9055f4e195bc2a.GIF)