
Leaderboard


Popular Content
Showing content with the highest reputation on 11/14/2016 in all areas
-
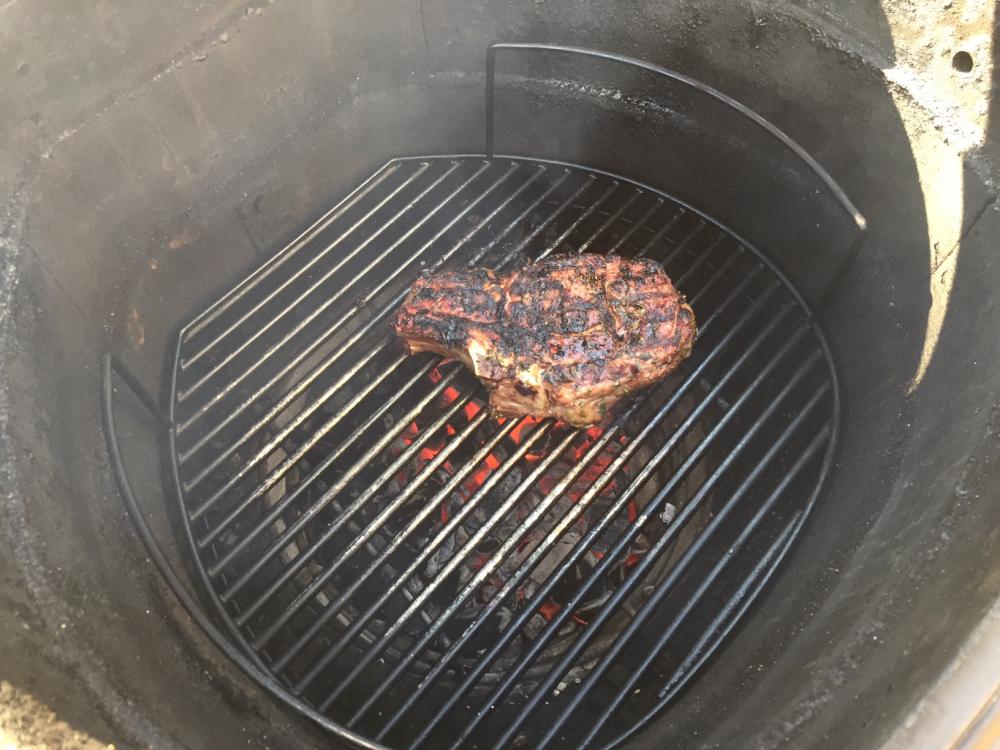
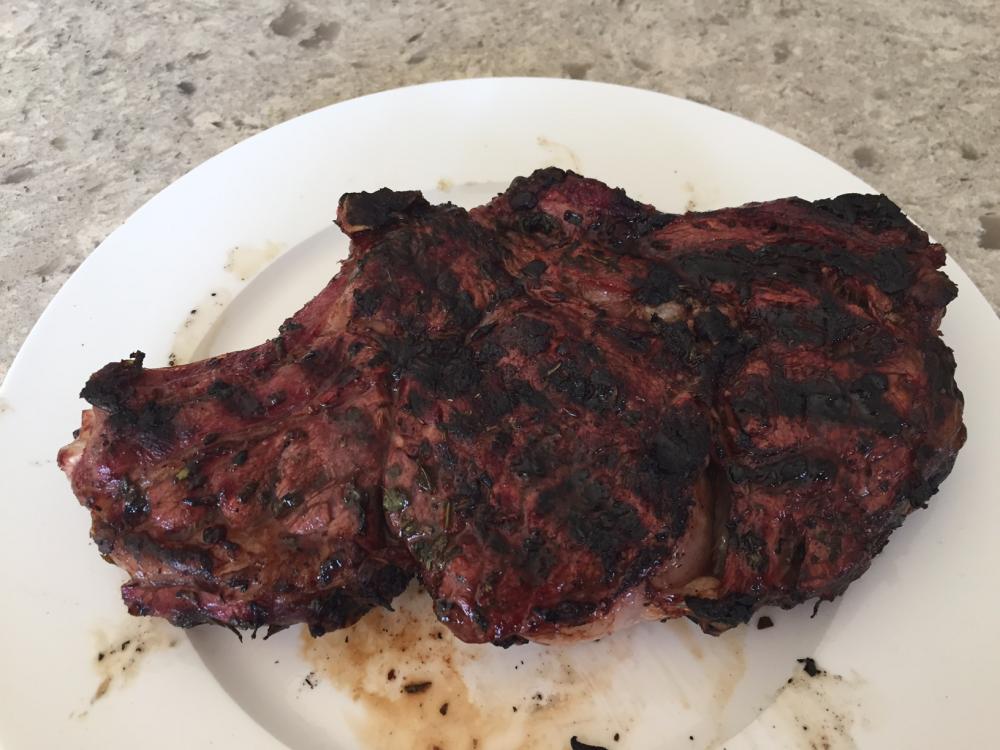
Opps here are the pics:

 3 points
 -
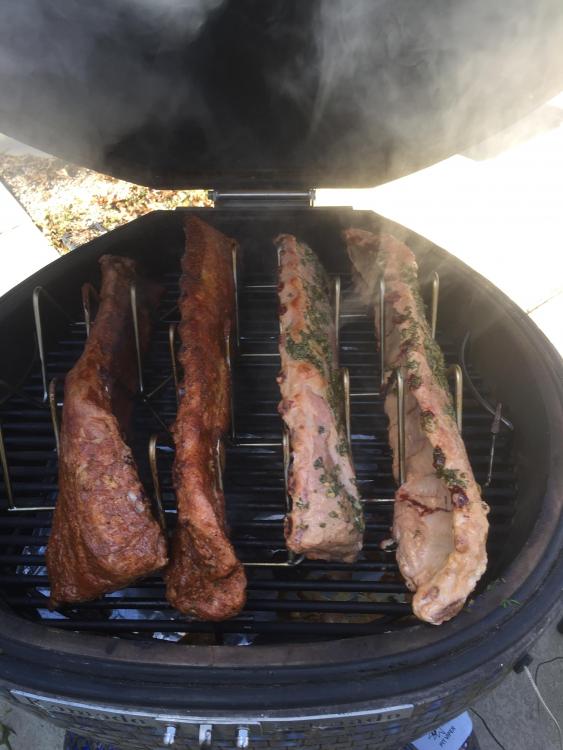
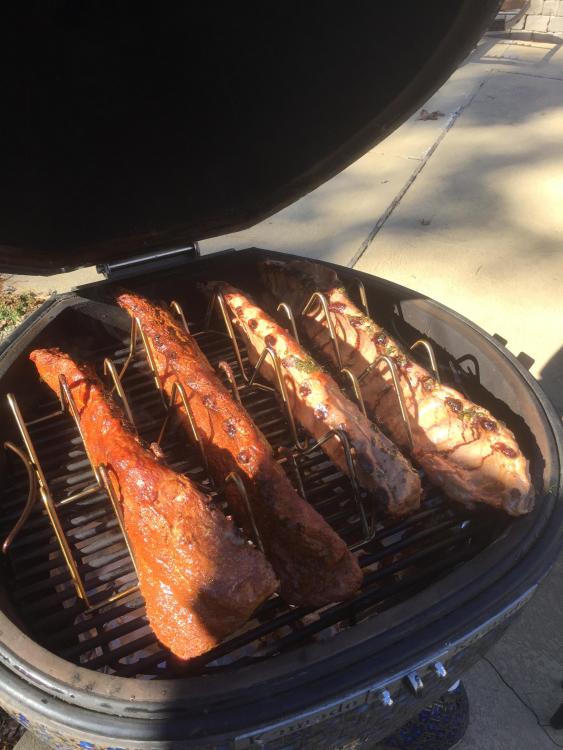
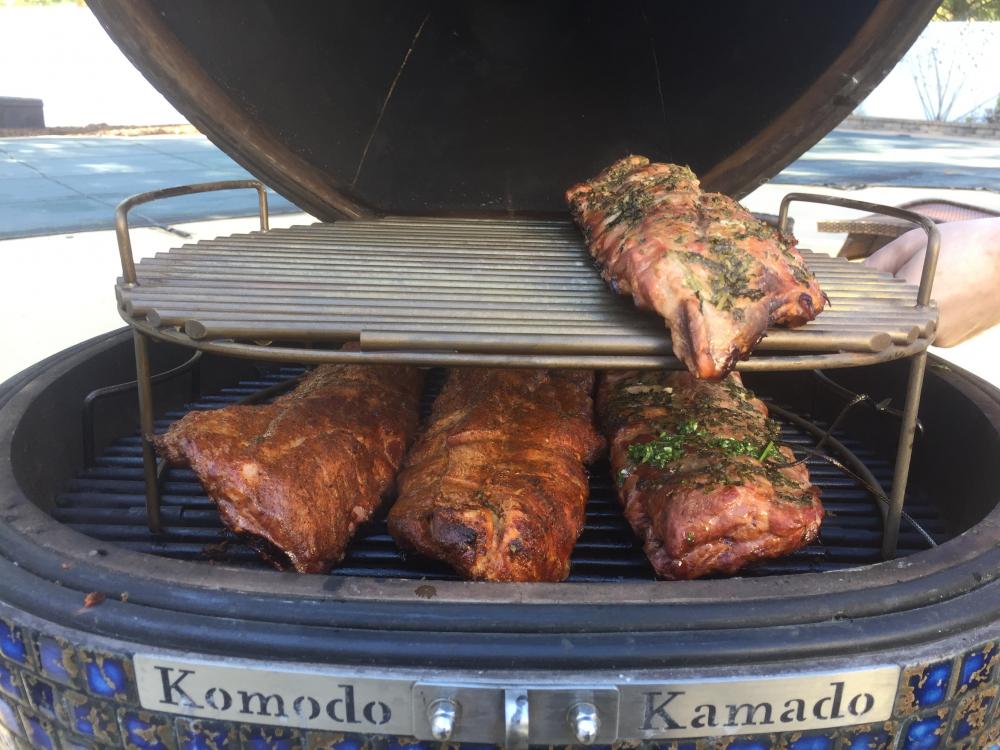
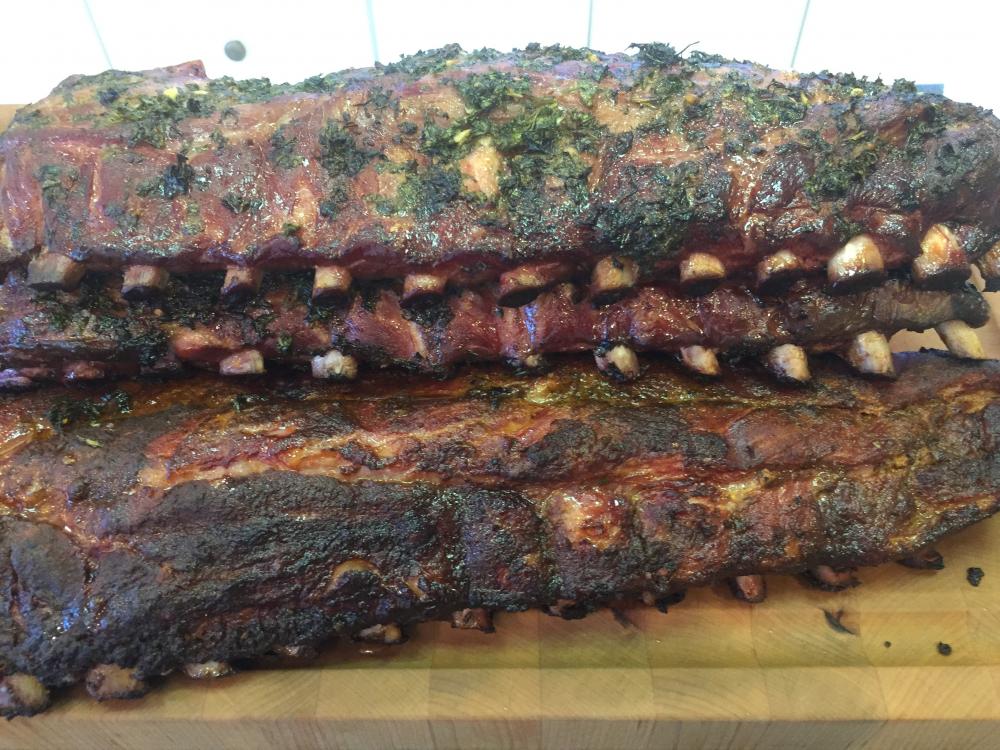
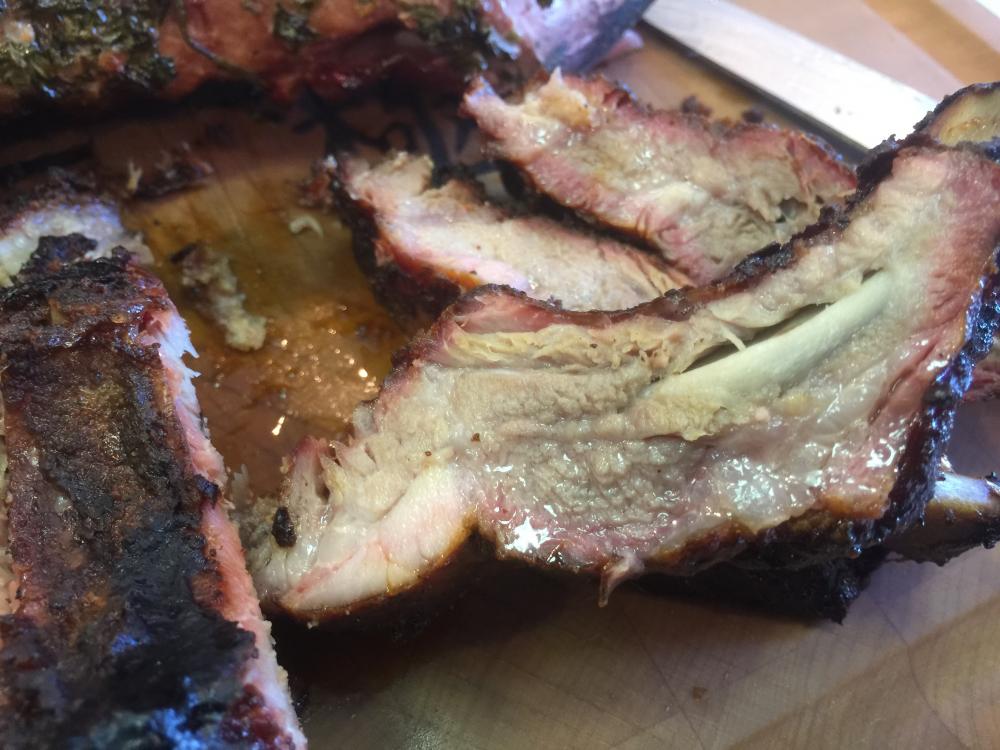
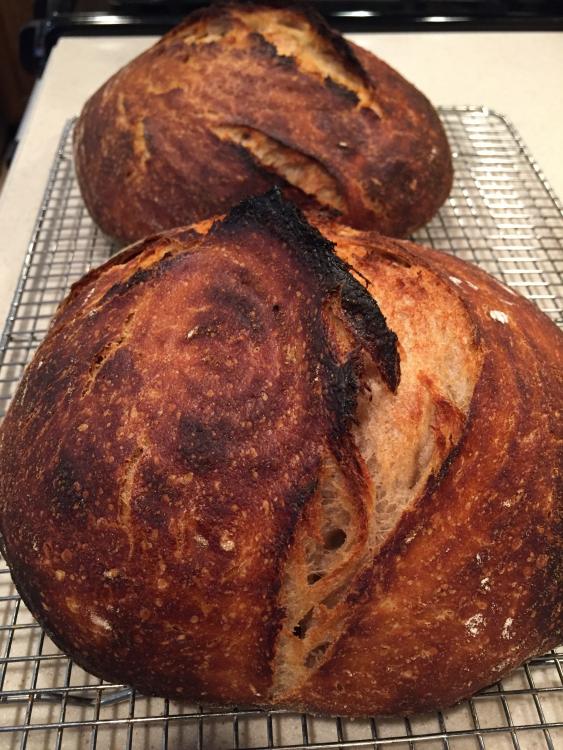
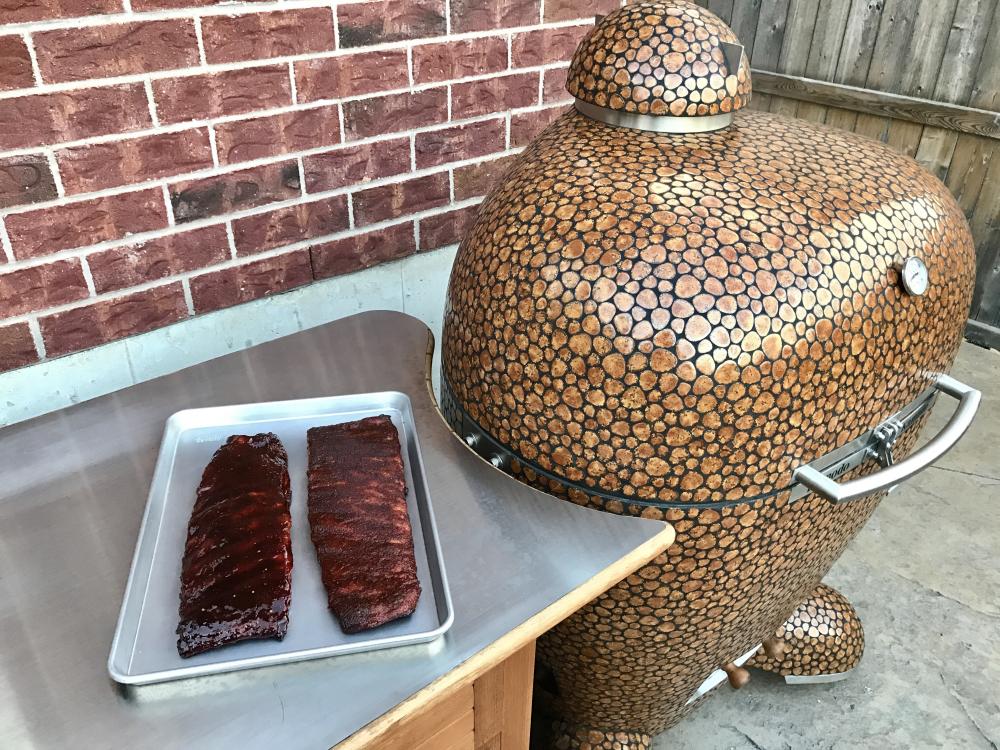
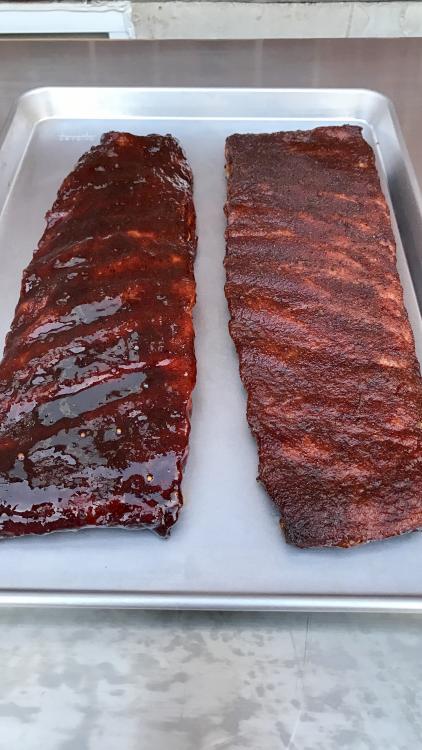
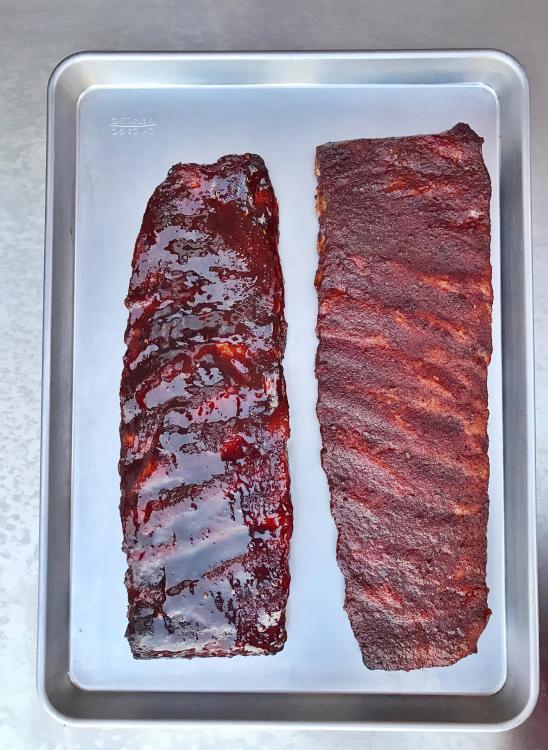
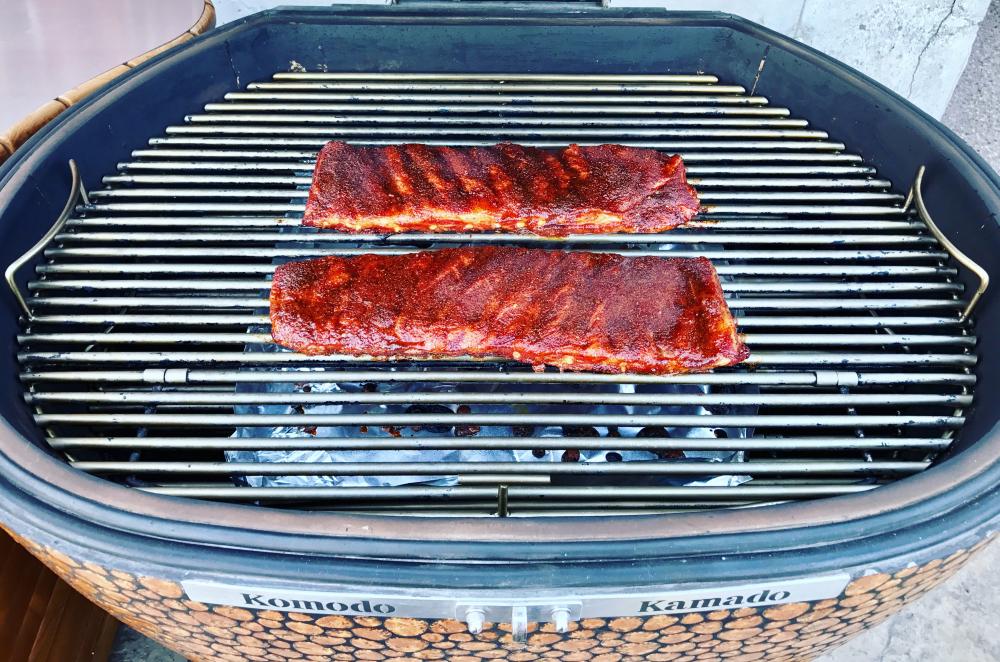
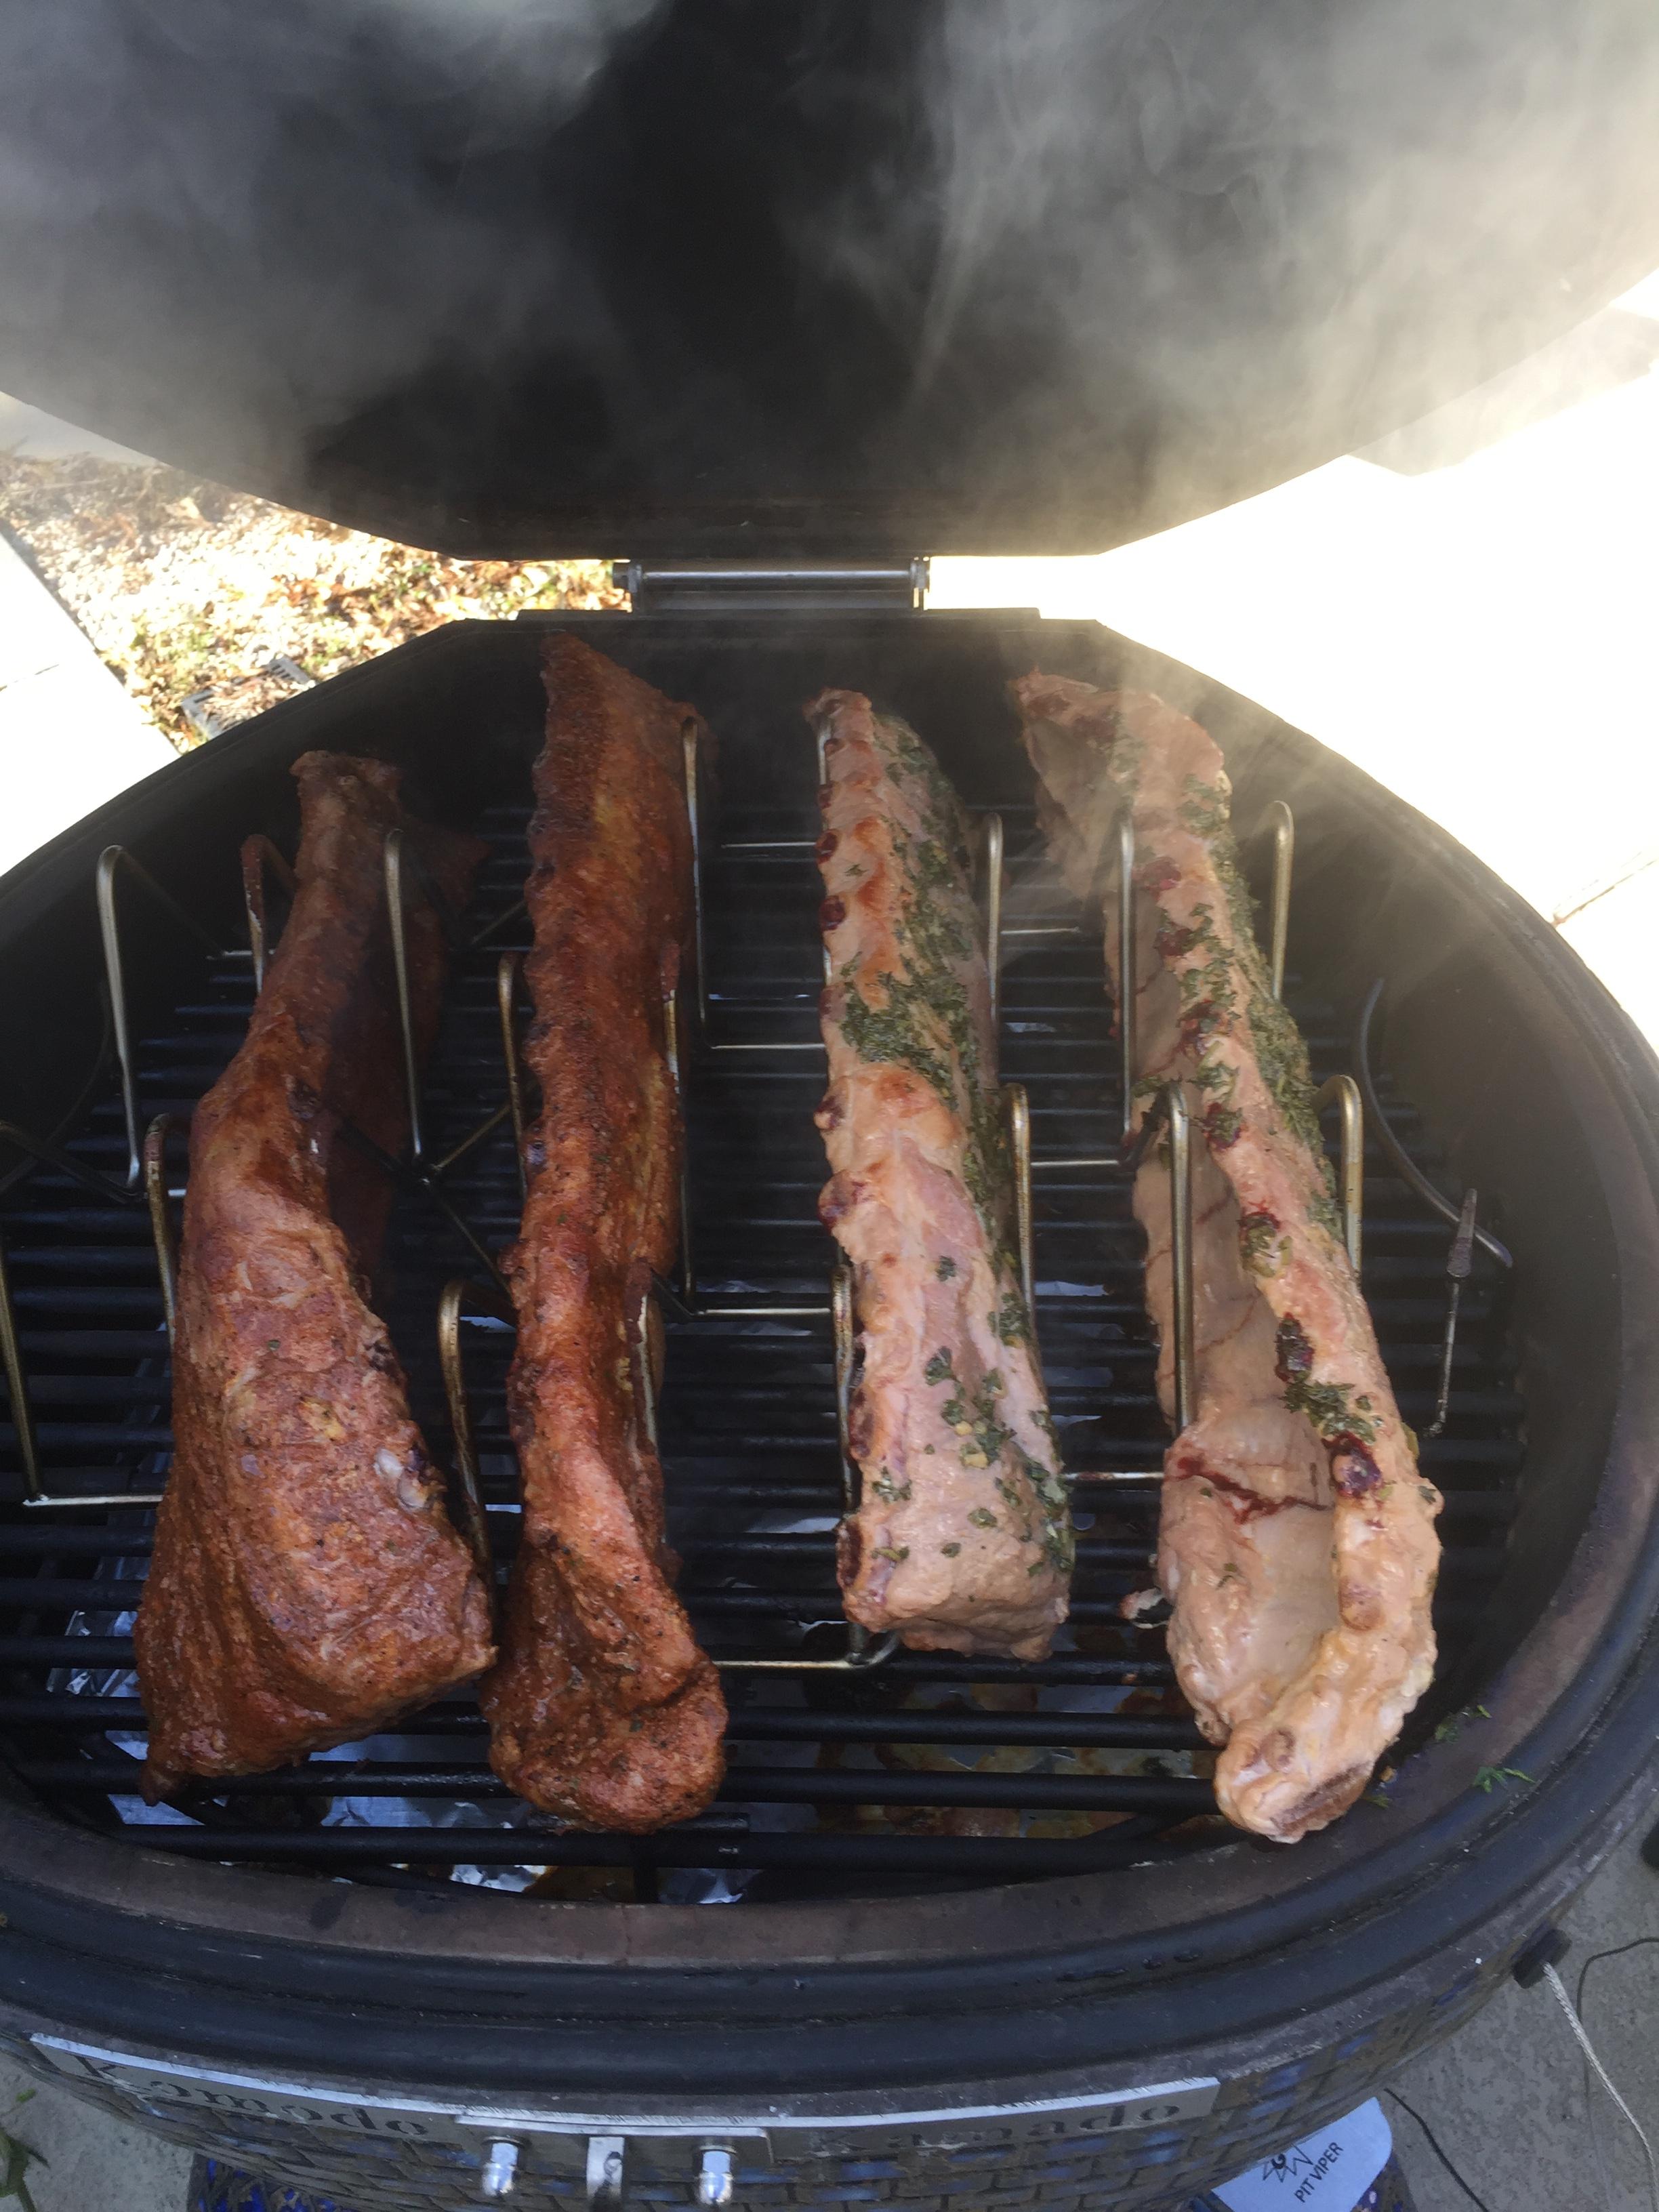
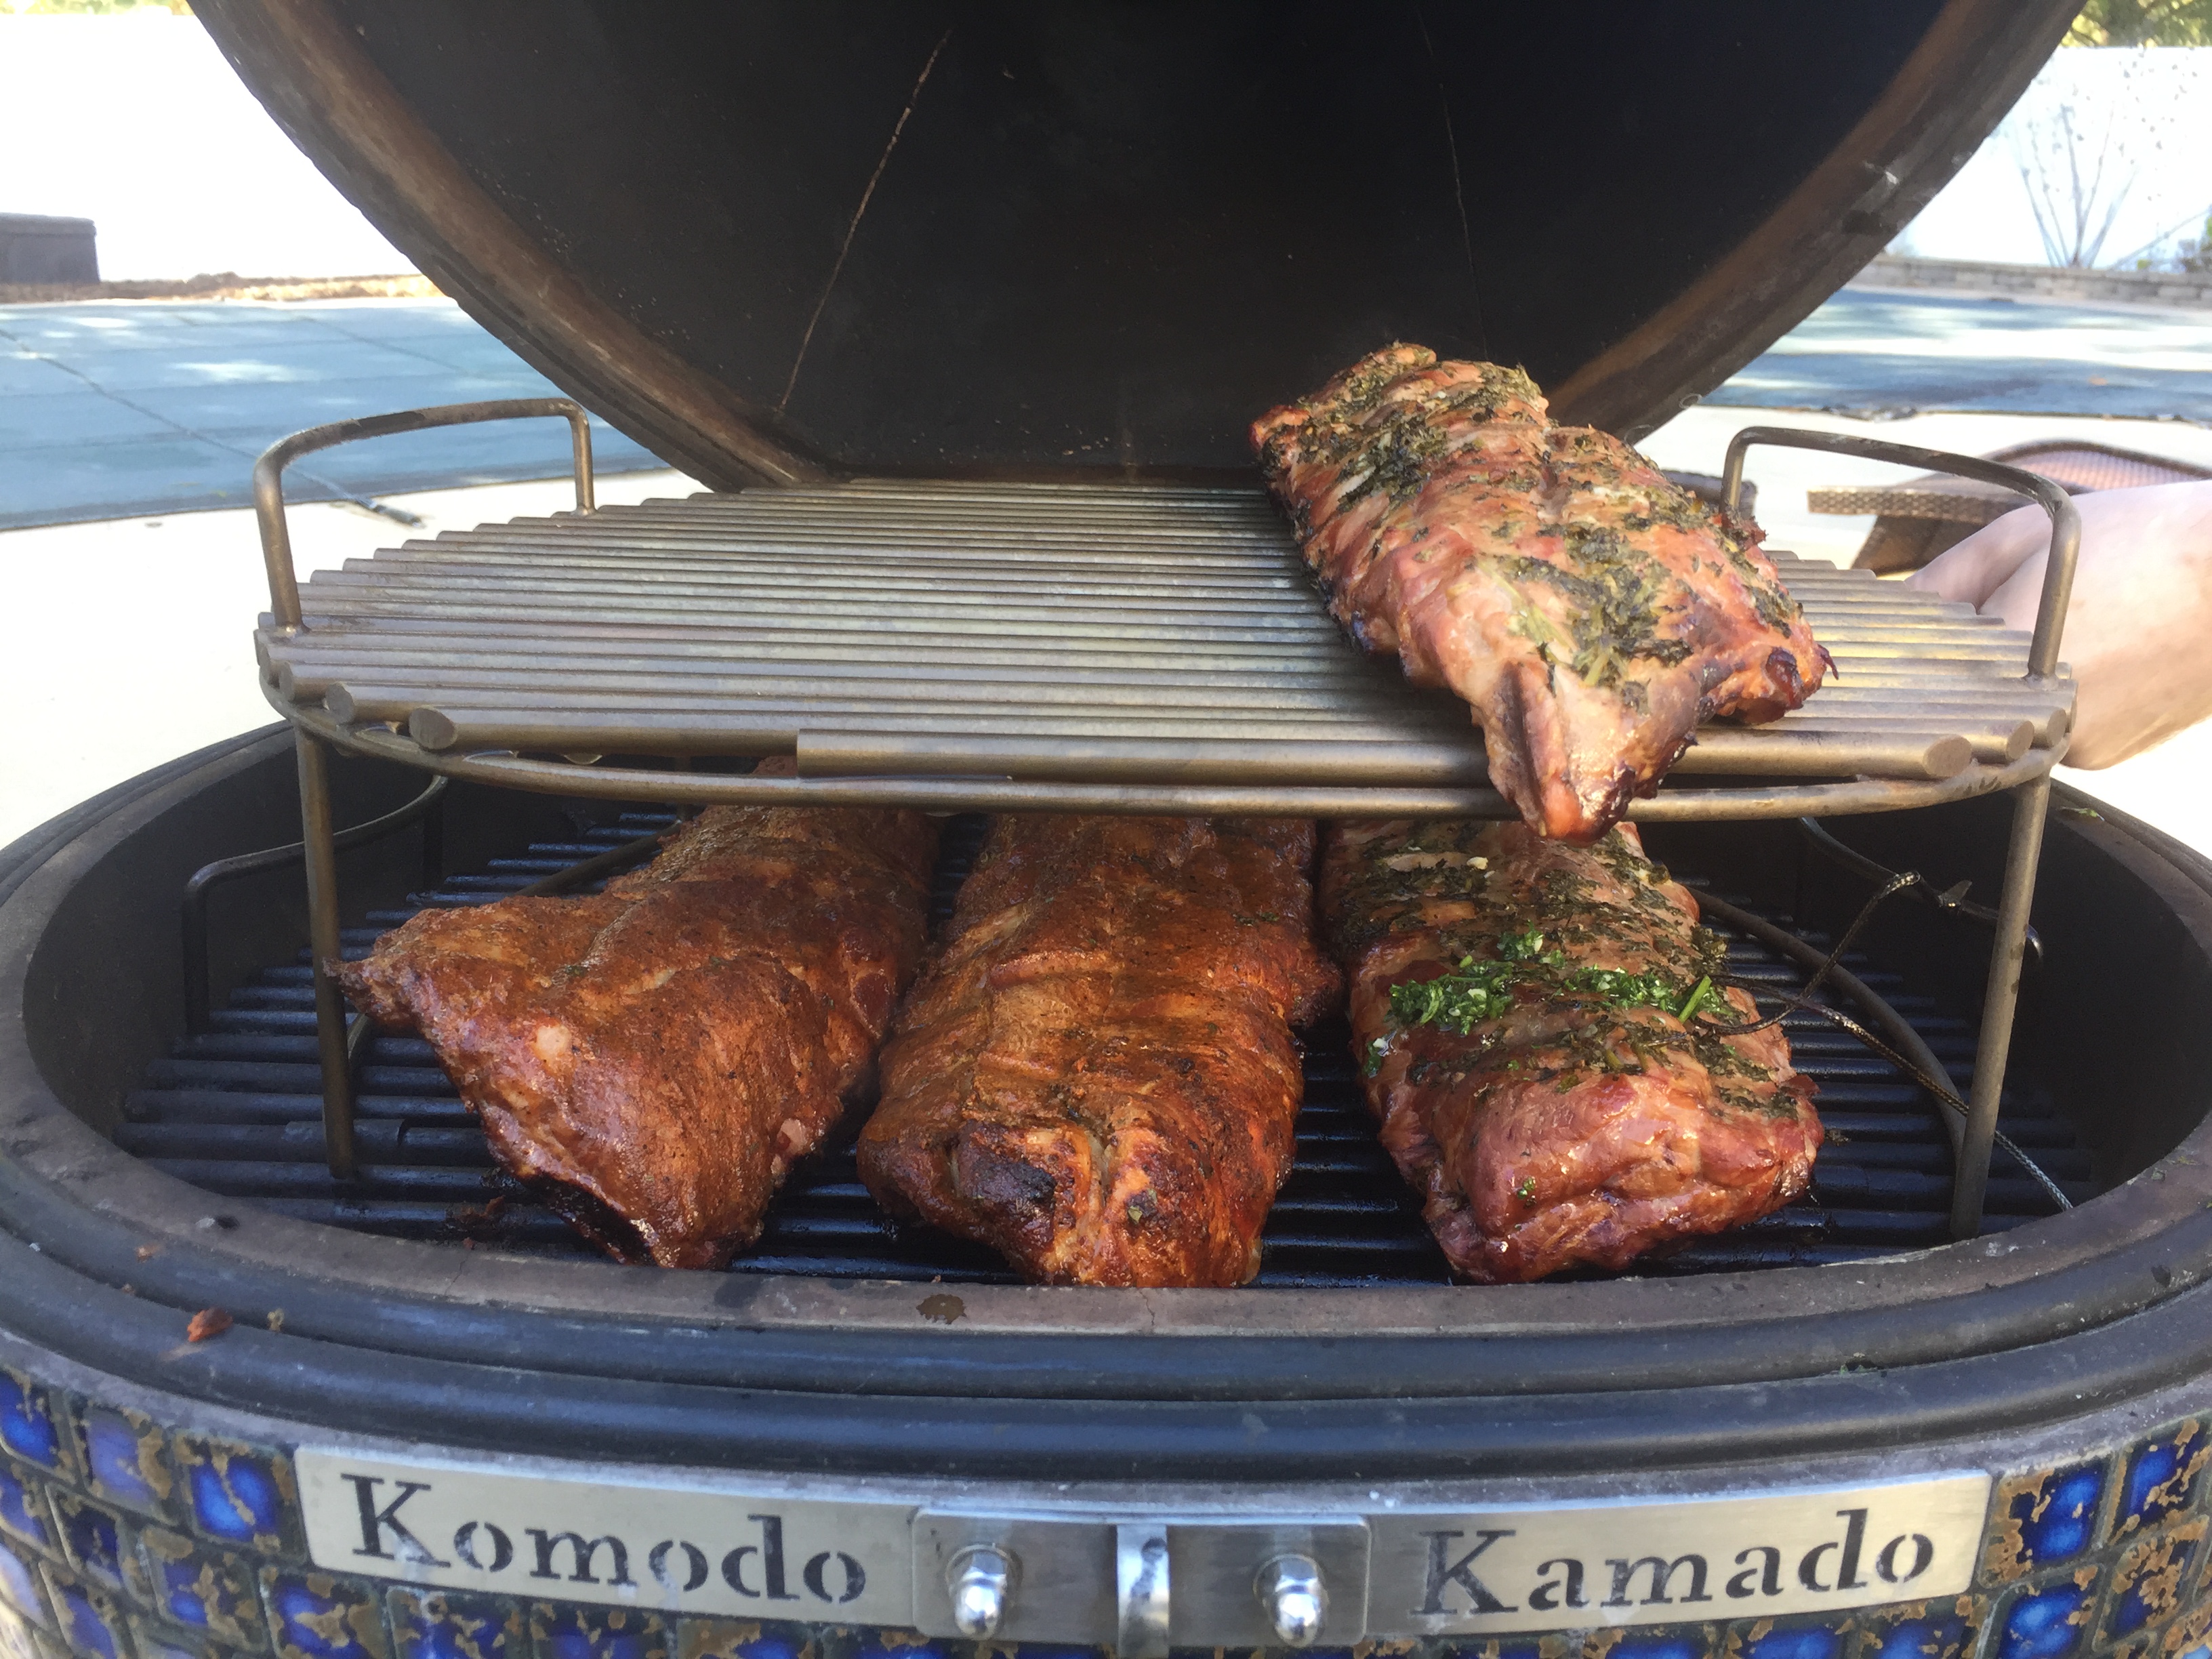
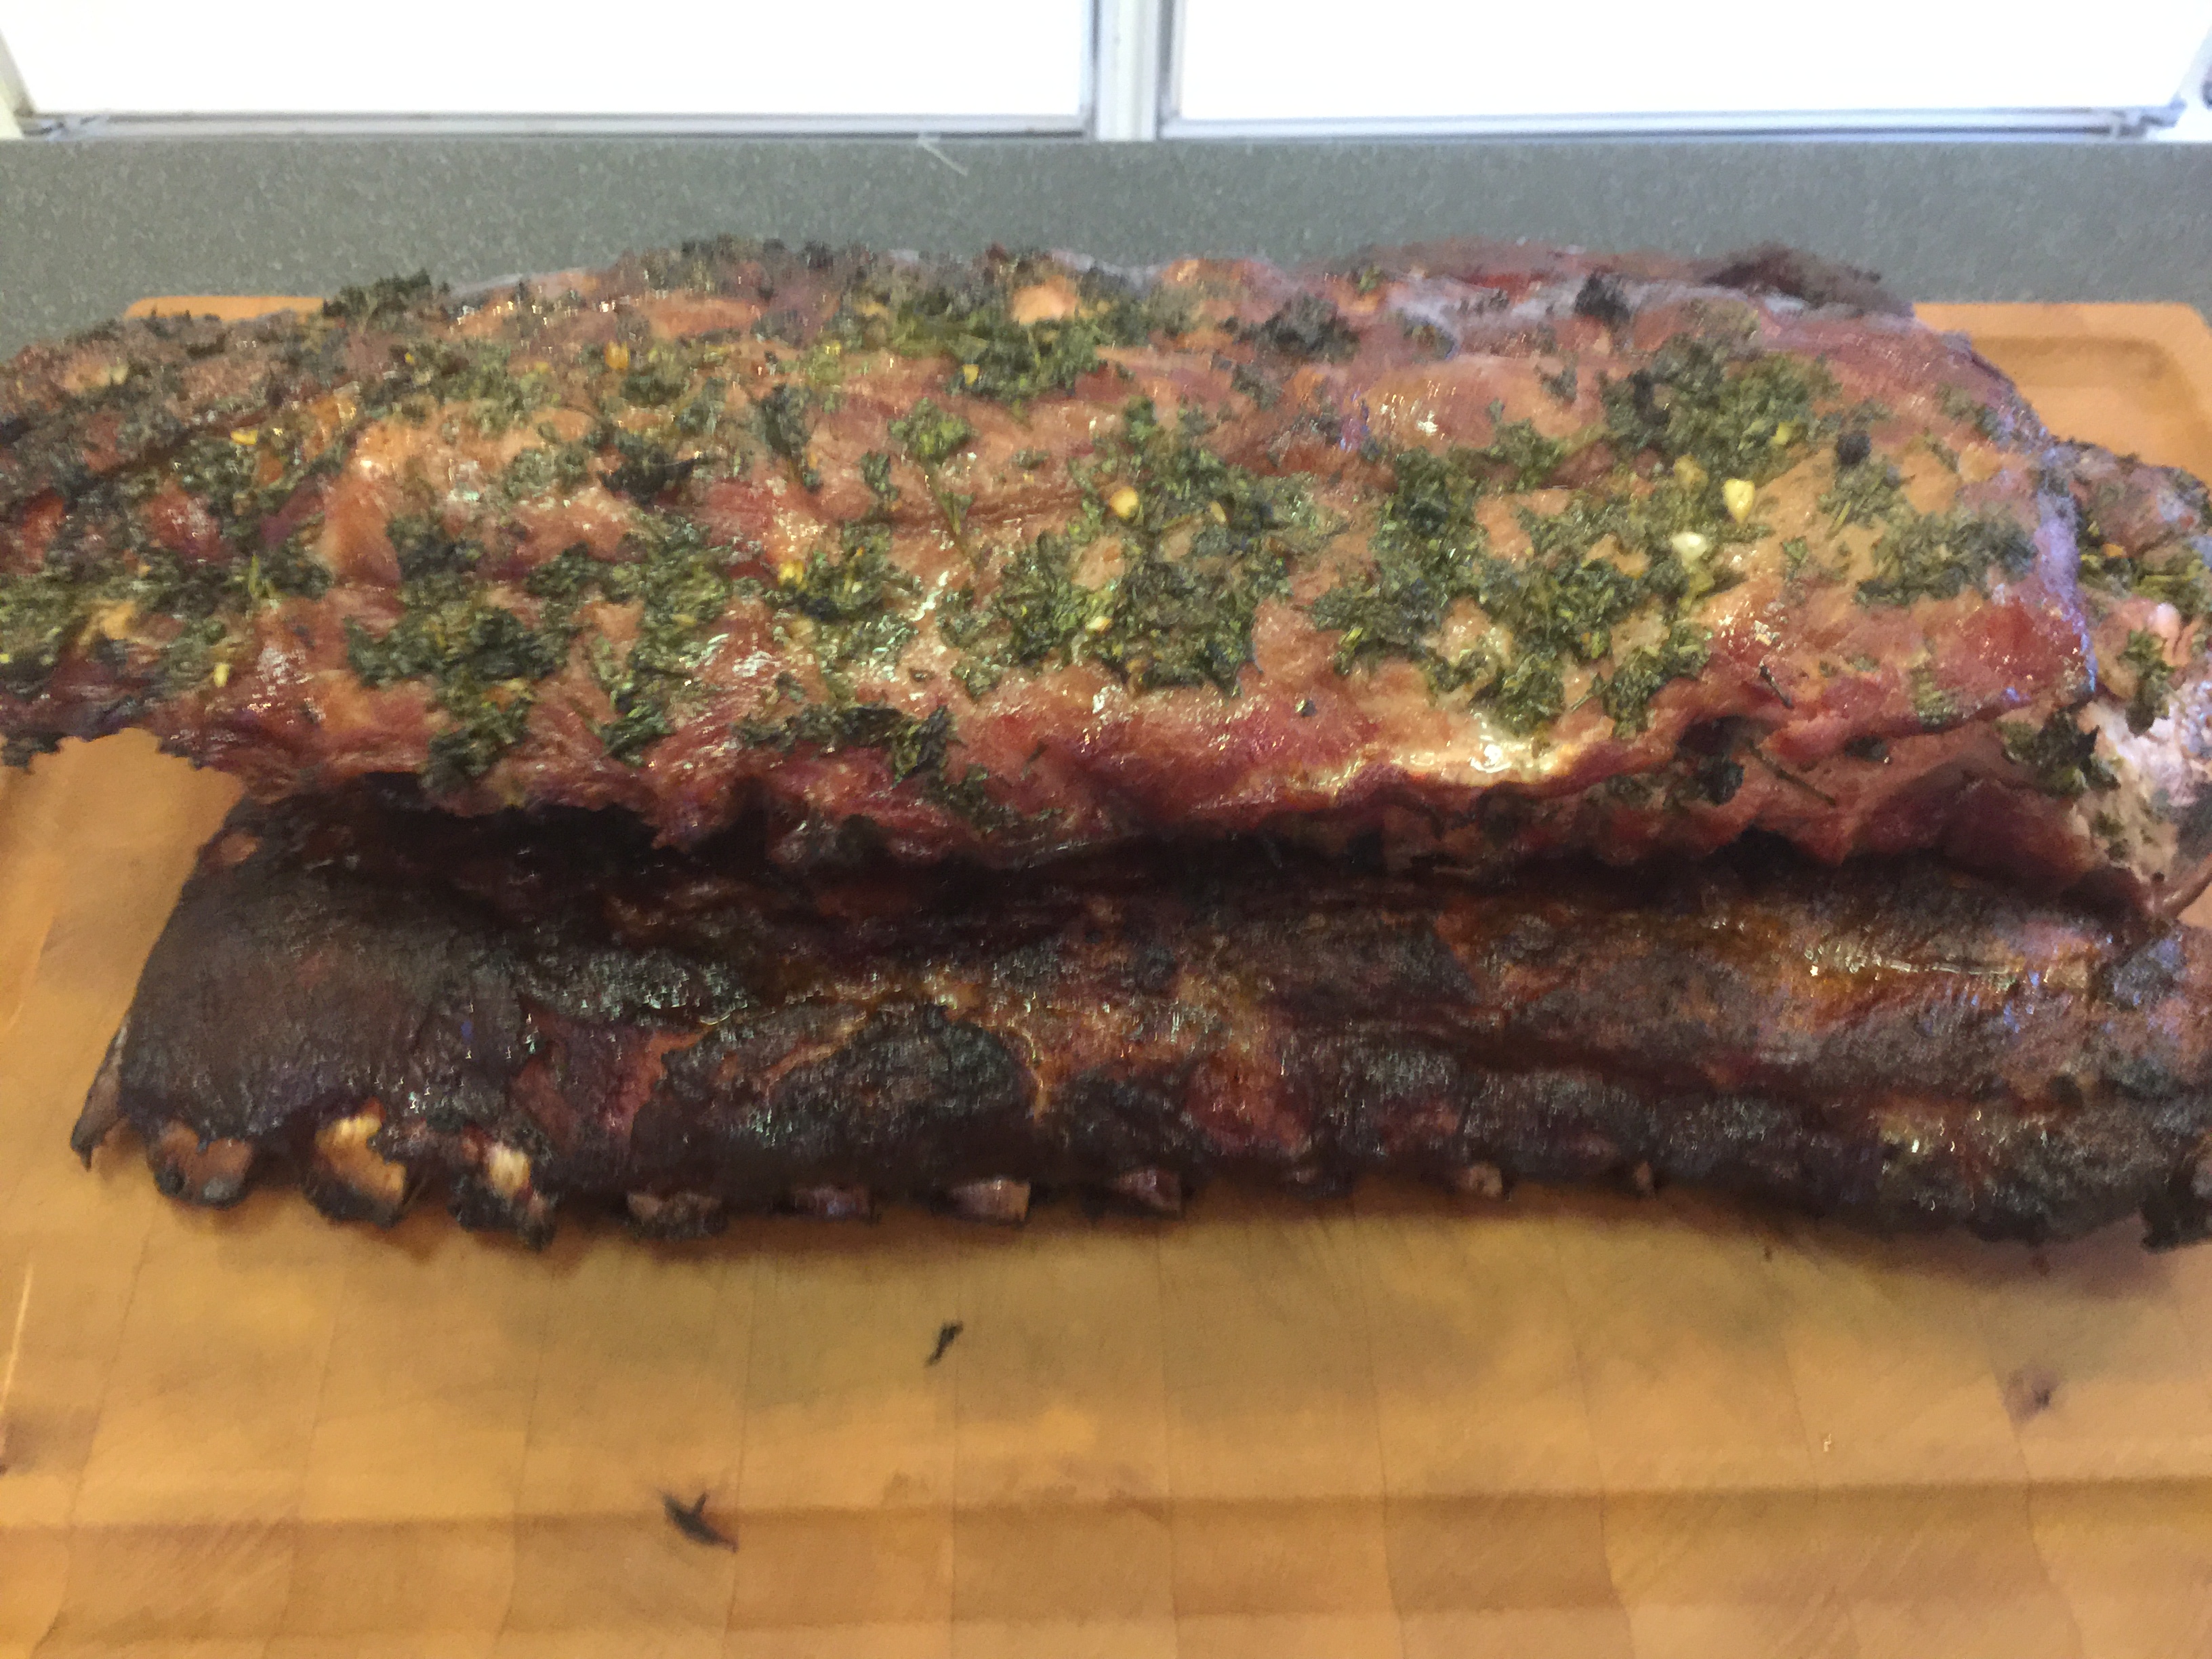
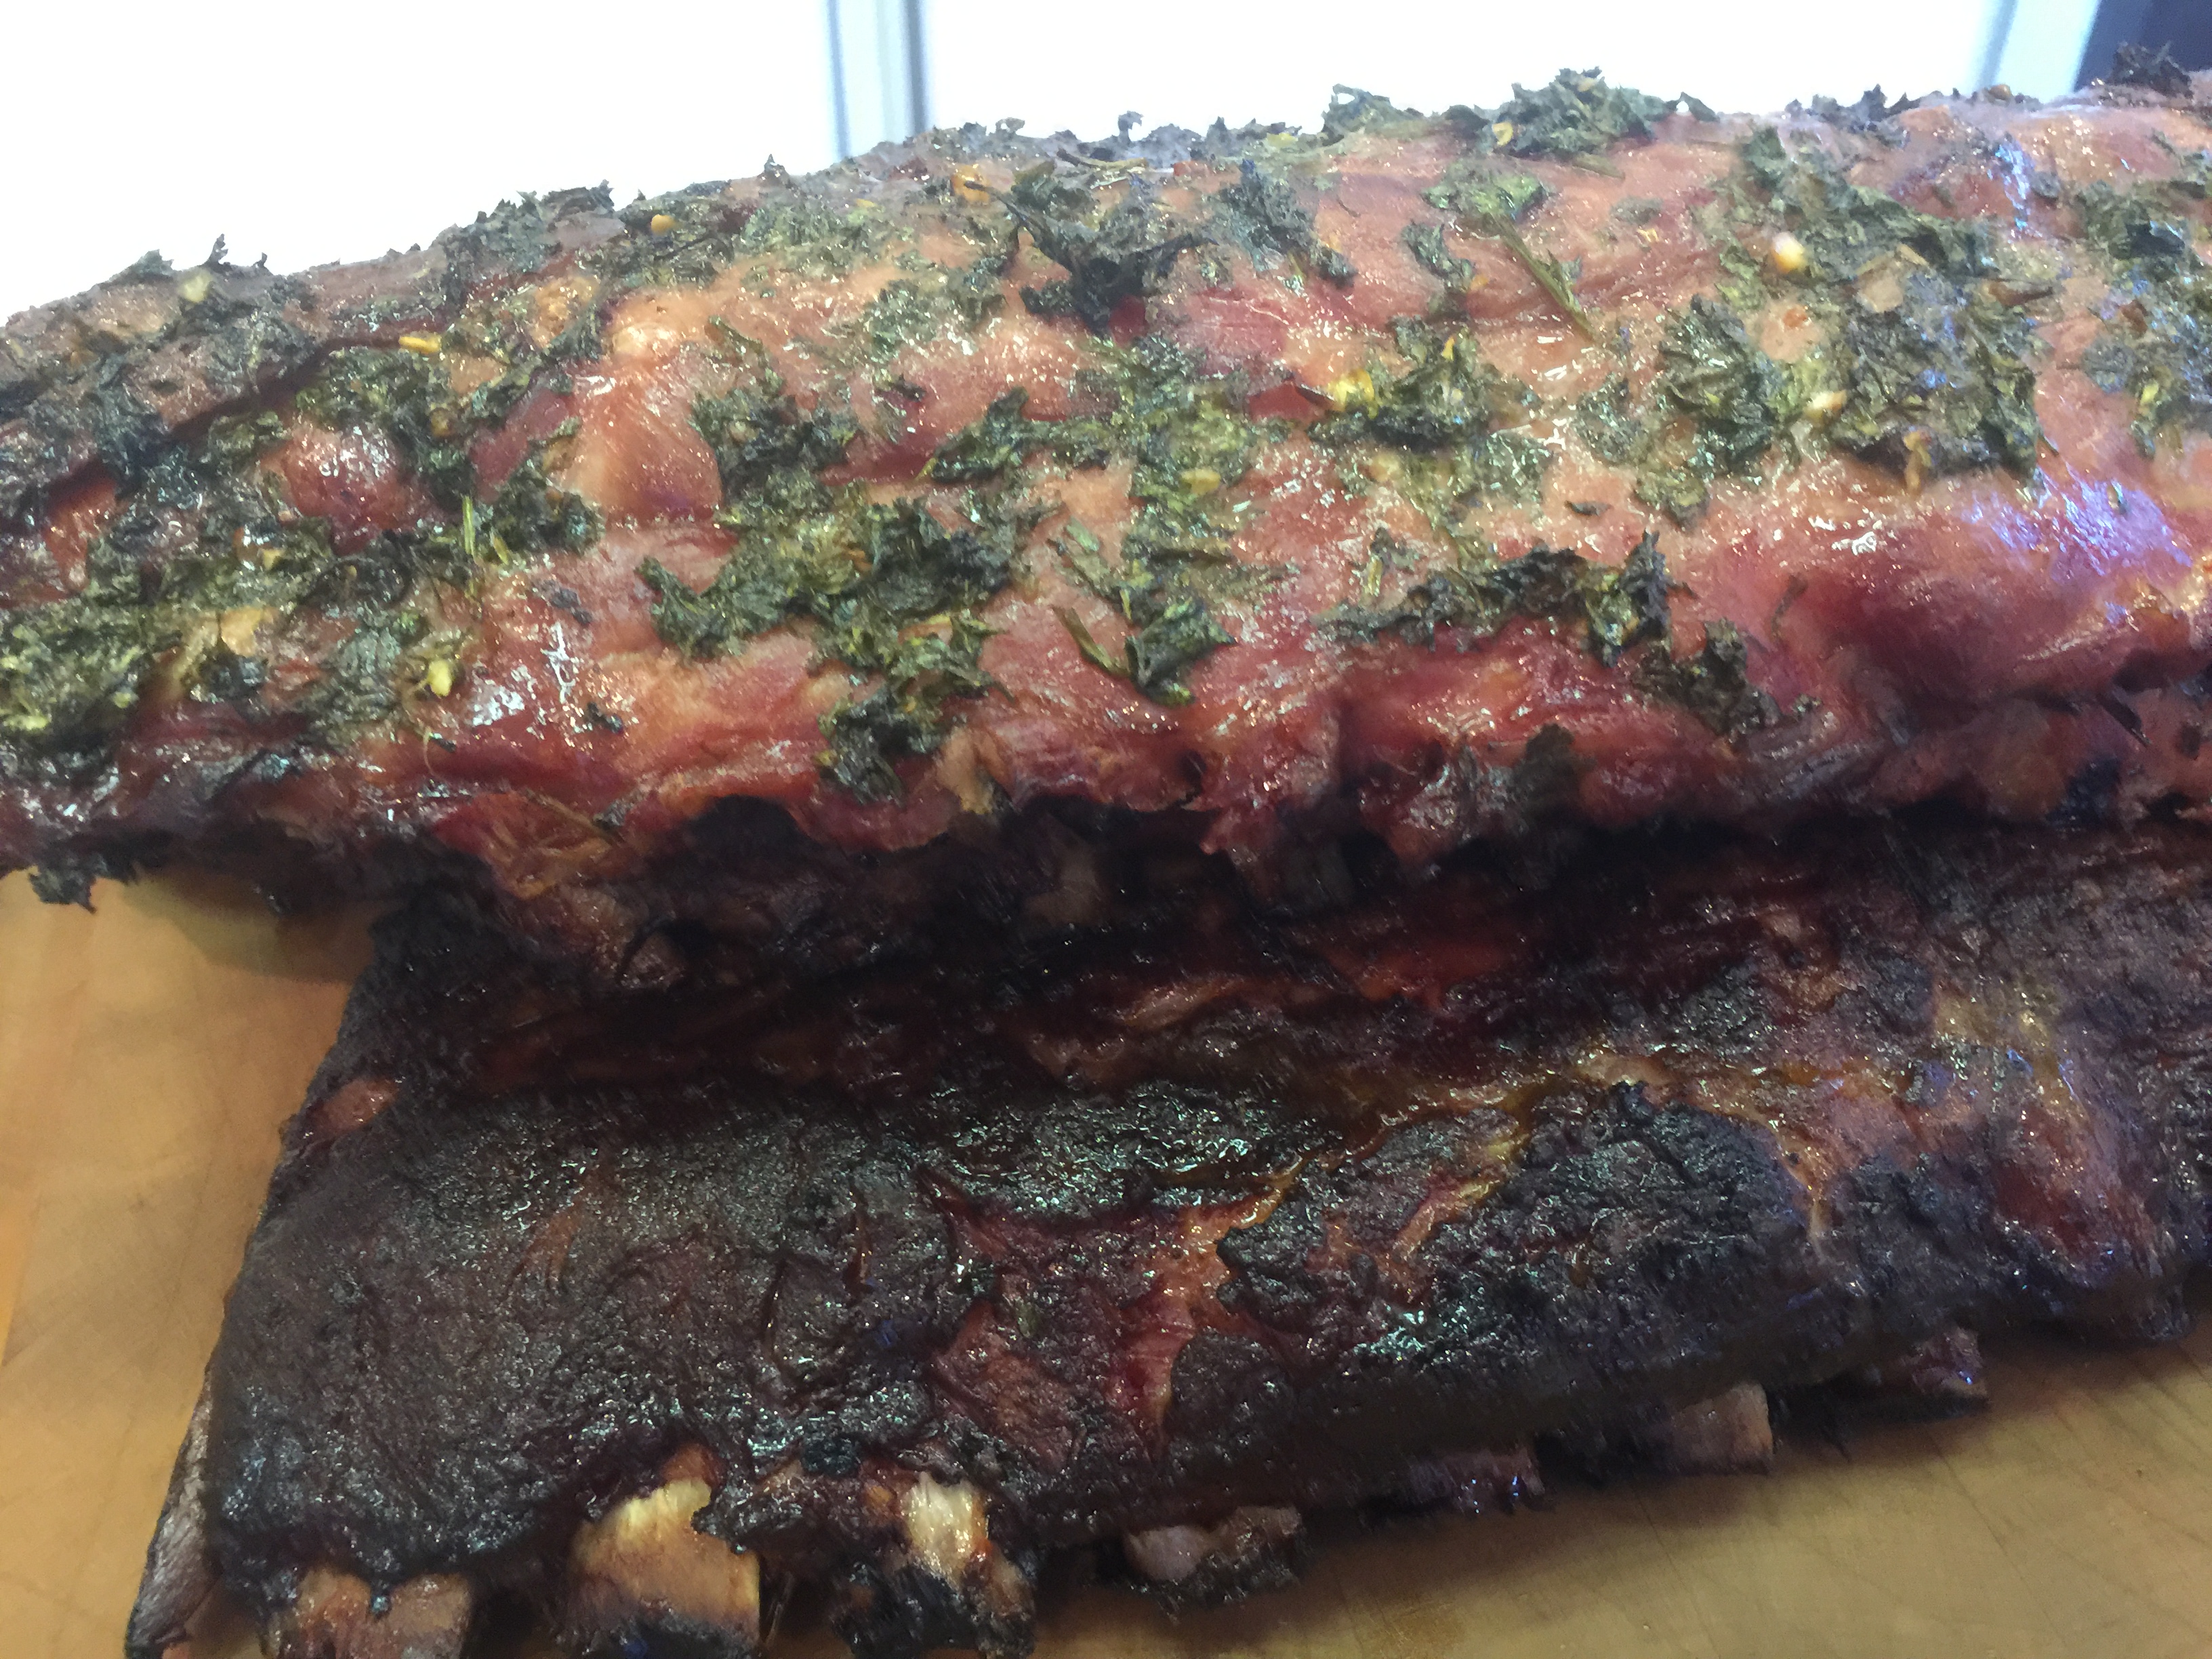
One of the cooks the other day inspired me to do some baby backs with chimichurri. I decided to compare it against one of my favorite pre-made rubs - slap yo daddy all purpose rub. My BIL made a fresh batch of chimichurri last night and we added to the ribs, wrapped them and put them in the fridge overnight. I got up this morning around 7 to fire up the grill. Started the day at 32 degrees outside with a nice frost on the kk By 9, the kk was humming along at 275 and I added the 4 racks; two with my rub and 2 with the chimichurri. Nice combination of smoke and steam coming out of the kk. the smoke pot had been going for about 20 minutes with chunks of applewood. this pic (below) was after about an hour and a half. They got their first spritzing with a apple cider vinegar/apple juice combination. We are about half way into the cook with the pic below. At this point, I wanted to hit the chimichurri ribs with more sauce so I moved everything to the racks. Just before pulling in the pic below. It took about 6.5 hours to get to this point where they passed the "bend" test. Getting ready to cut: This batch may have been my favorite. I really like the chimichurri on the BBR's.


 2 points
 -
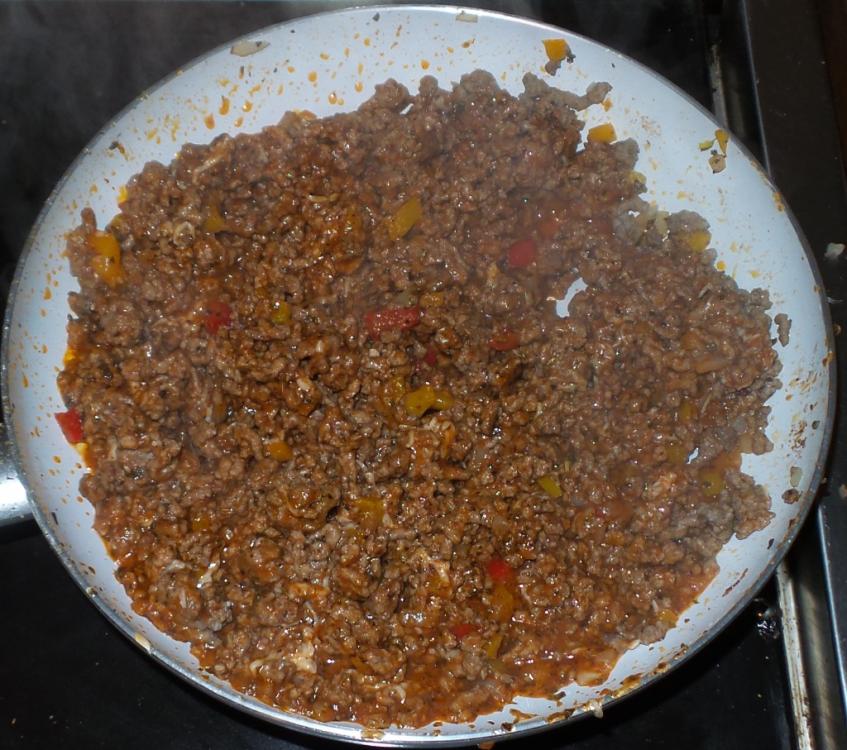
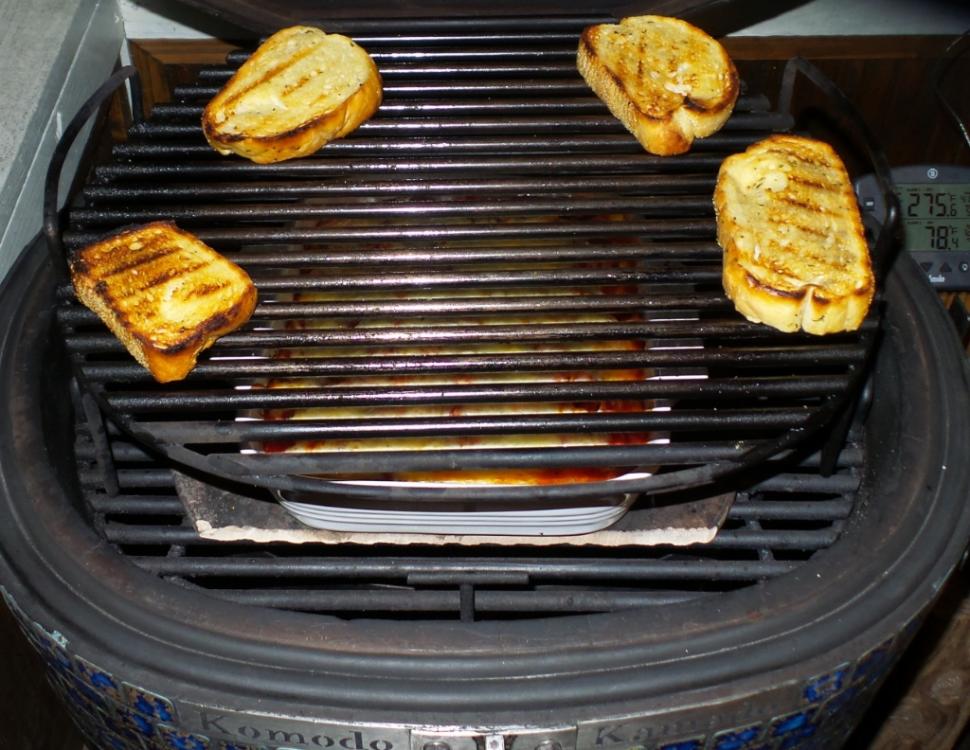
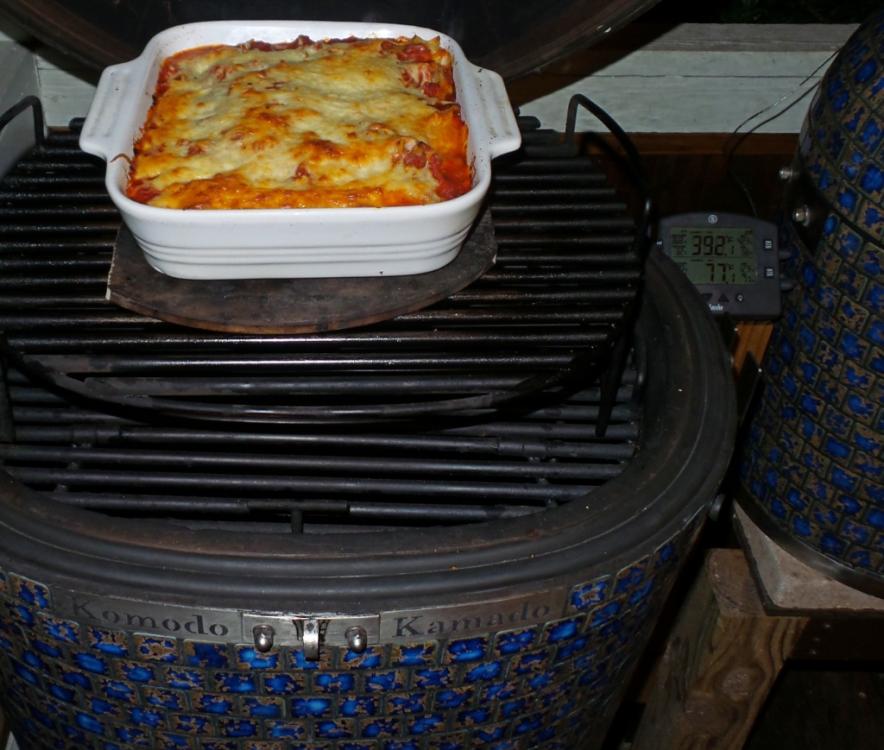
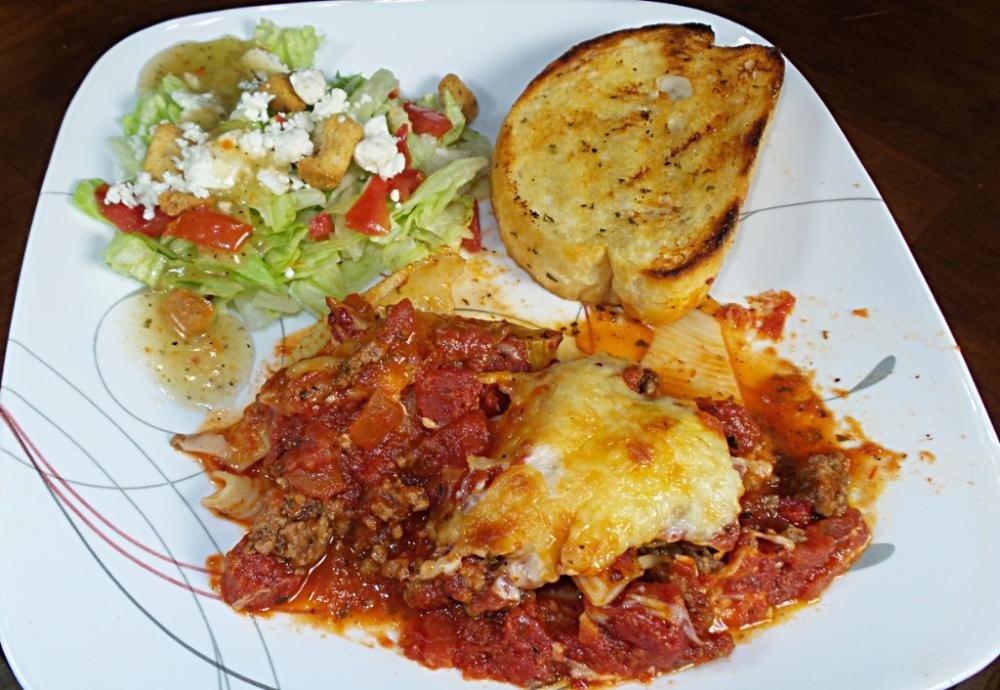
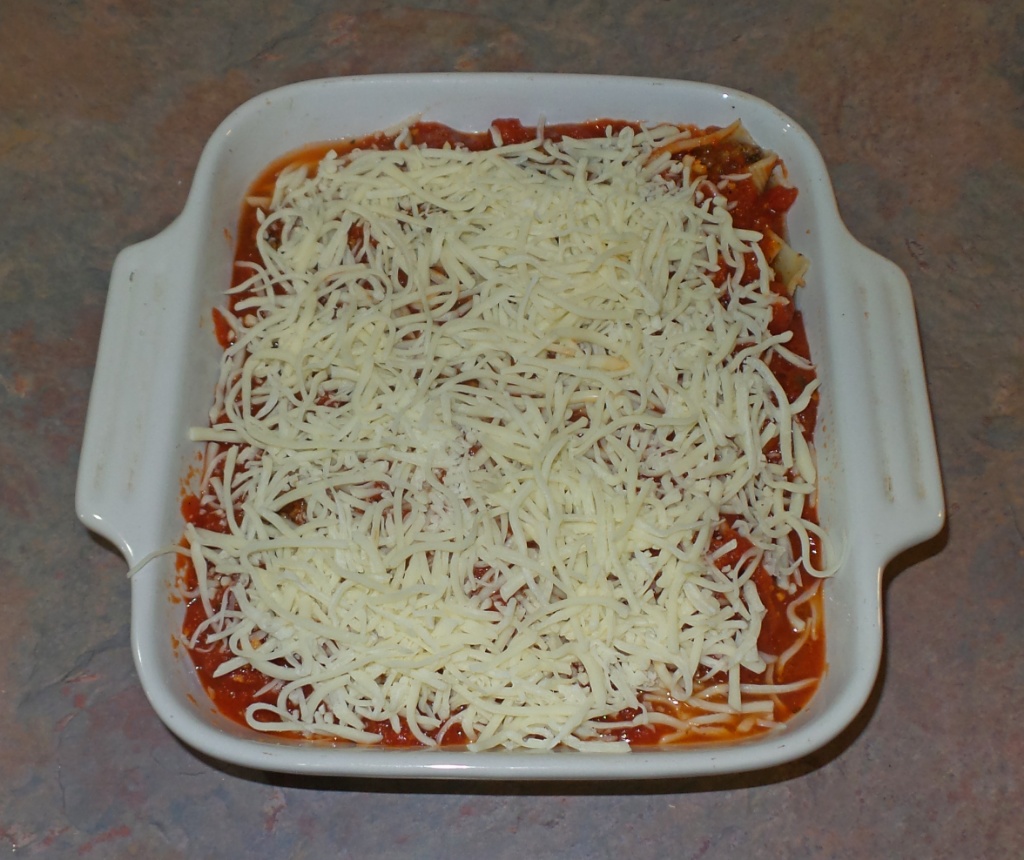
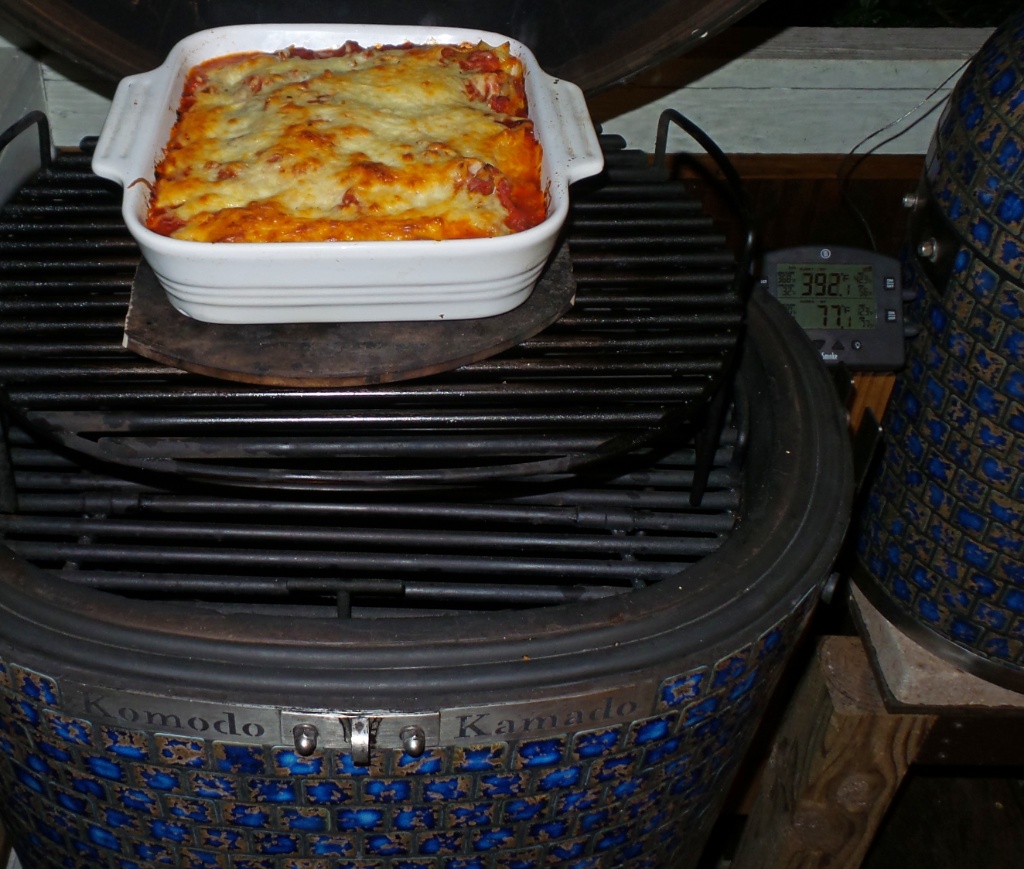
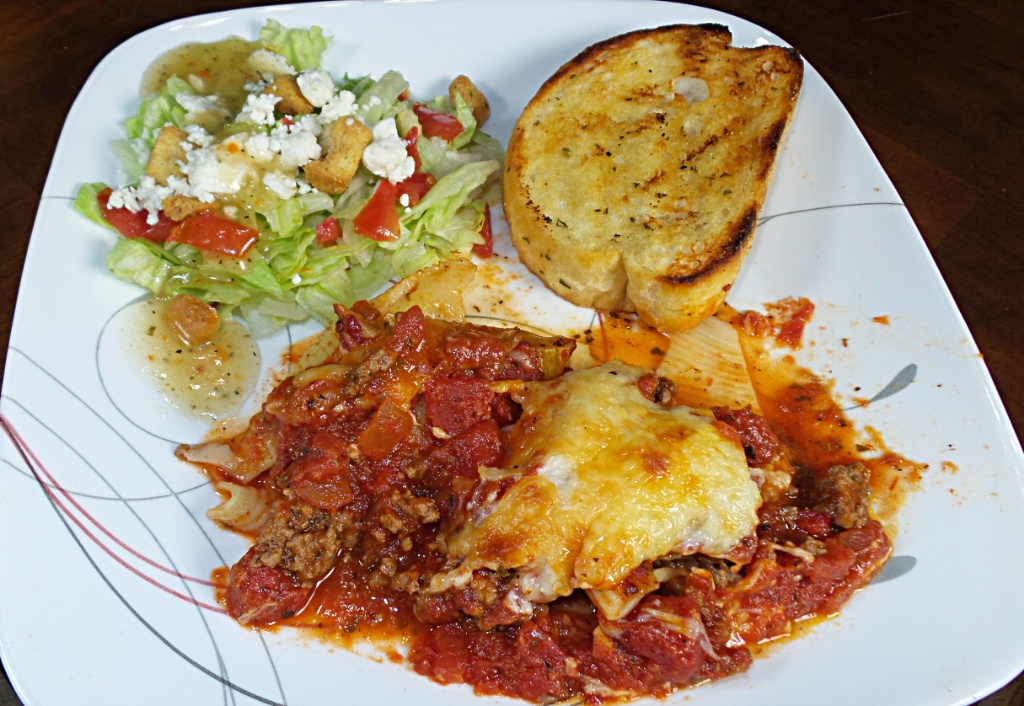
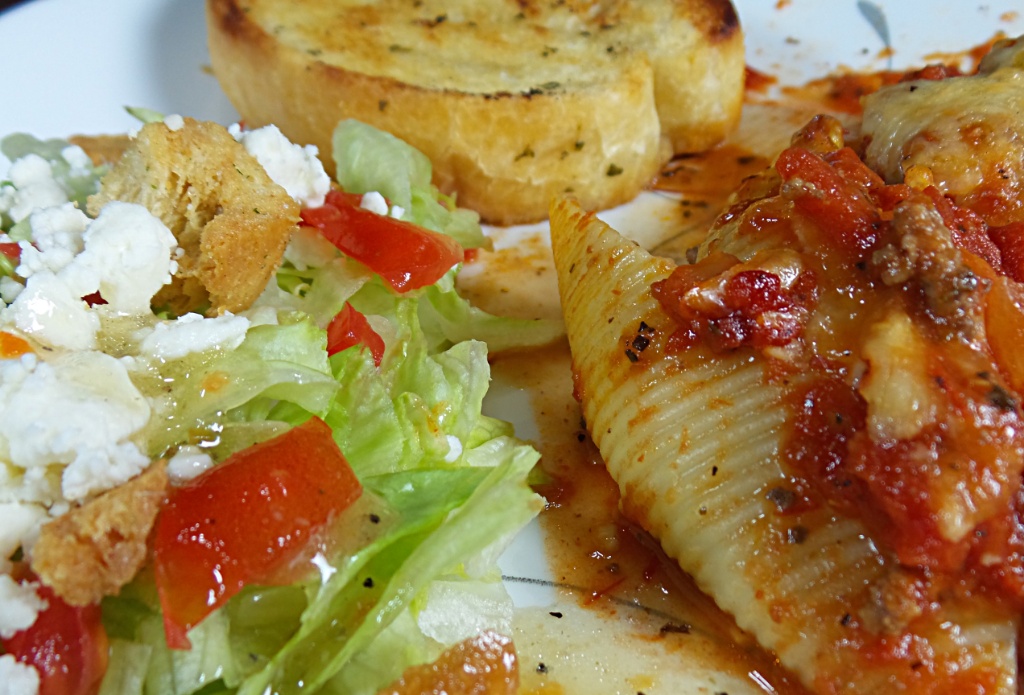
A simple stuffed shells dinner with Texas toast and a side salad. Everything cooked outside even browning the meat on my outdoor burner. The pictures should tell the story. I


 2 points
 -
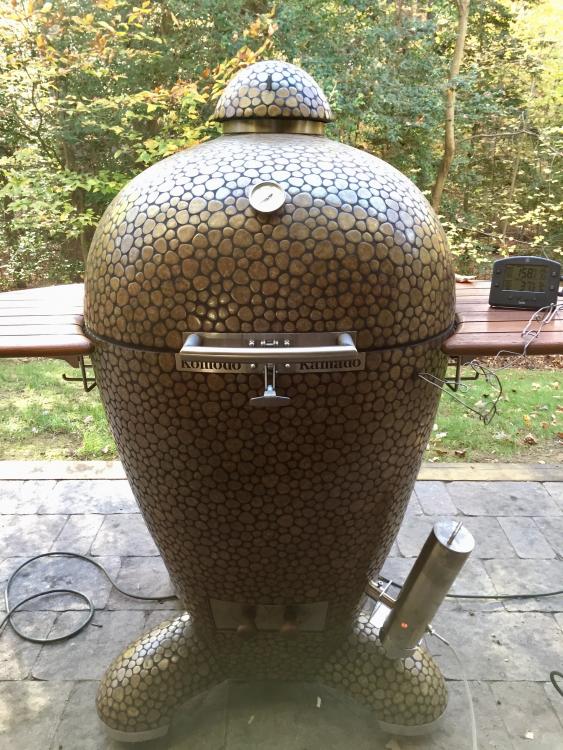
42" Teak Lid Removal Handles. It's big, it's heavy how ya going to lift that lid?
.thumb.jpg.f975e51ec12c8171654df5810da777ea.jpg)
.thumb.jpg.a2199a56531f400cfaca3aaf80504f4d.jpg) 1 point
1 point -
I finally completed my storage unit. I kept trying to design something that used horizontal shelving then ultimately decided that @wilburpan had already designed exactly what I needed - vertical storage. His original thread is here: http://komodokamadoforum.com/topic/6027-built-a-storage-unit-for-my-kk-grill-accessories/#comment-61206 I don't have 1/2 the tools, 1/3 of the patience, or 1/16 of the skills that Wilbur has, but I still managed to get this thing together without too many issues and, more importantly, I didn't even get a splinter! No closeup pictures of my joints, they aren't nearly as tidy as Wilbur's. I'd never done half lap joints before and I did these all with my table saw - it worked well enough. I got better as I went. If you were to look at all of the joints, you could easily piece together the timeline of my build. lol I'd also never ripped down a 2x8 into 2x4s. Doesn't seem like it would be, but it's very difficult to find 'half'. I don't have a planer, so I was stuck with my best attempt at 'half'. I probably should have cut a thin edge off of each side of the 8" width to give me non-rounded edges. Failing that, I should have made sure my flat edges were used in the best direction. I made a few relatively minor changes from Wilbur's design. I put in a 2x4 under the center of each of the platforms (perpendicular to the top boards) so that I could put heavy objects on and not worry about the top boards sagging. Not sure if it was at all necessary, especially on the bottom, but it made me feel better to include them. I also noticed way too late that my shelf frames are upside down from Wilbur's. The middle support should help with that mistake. The second change was that I pegged the lap joints on the dividers - drilled two 1/4" hols and drove in dowels. Again, likely not necessary at all but I'd never done that before and it seemed like a good opportunity to practice. Last, on the lower shelf, I notched out the outside edges of the frame and top boards so that the uprights weren't hanging outside of the top and bottom shelf. In other words, the unit is flush the whole way down both sides. If you look at Wilbur's, his uprights are 'outside' of the shelves. Not sure there is a difference either way structurally. It took me three weekends working on and off to get this built. The wood, screws, and sealer cost me about $60. And I only had to message Wilbur once for assistance! Loaded in here are: the lower/sear grate, deflector, rotisserie basket and motor (in the bin) and smoking CI pot. Not loaded are: the main grate (unlikely this will ever find it's way to this storage bin, but it would fit if I need it to), upper grate, and baking stone (all three of which were in the grill working on some calzones for dinner).1 point
-
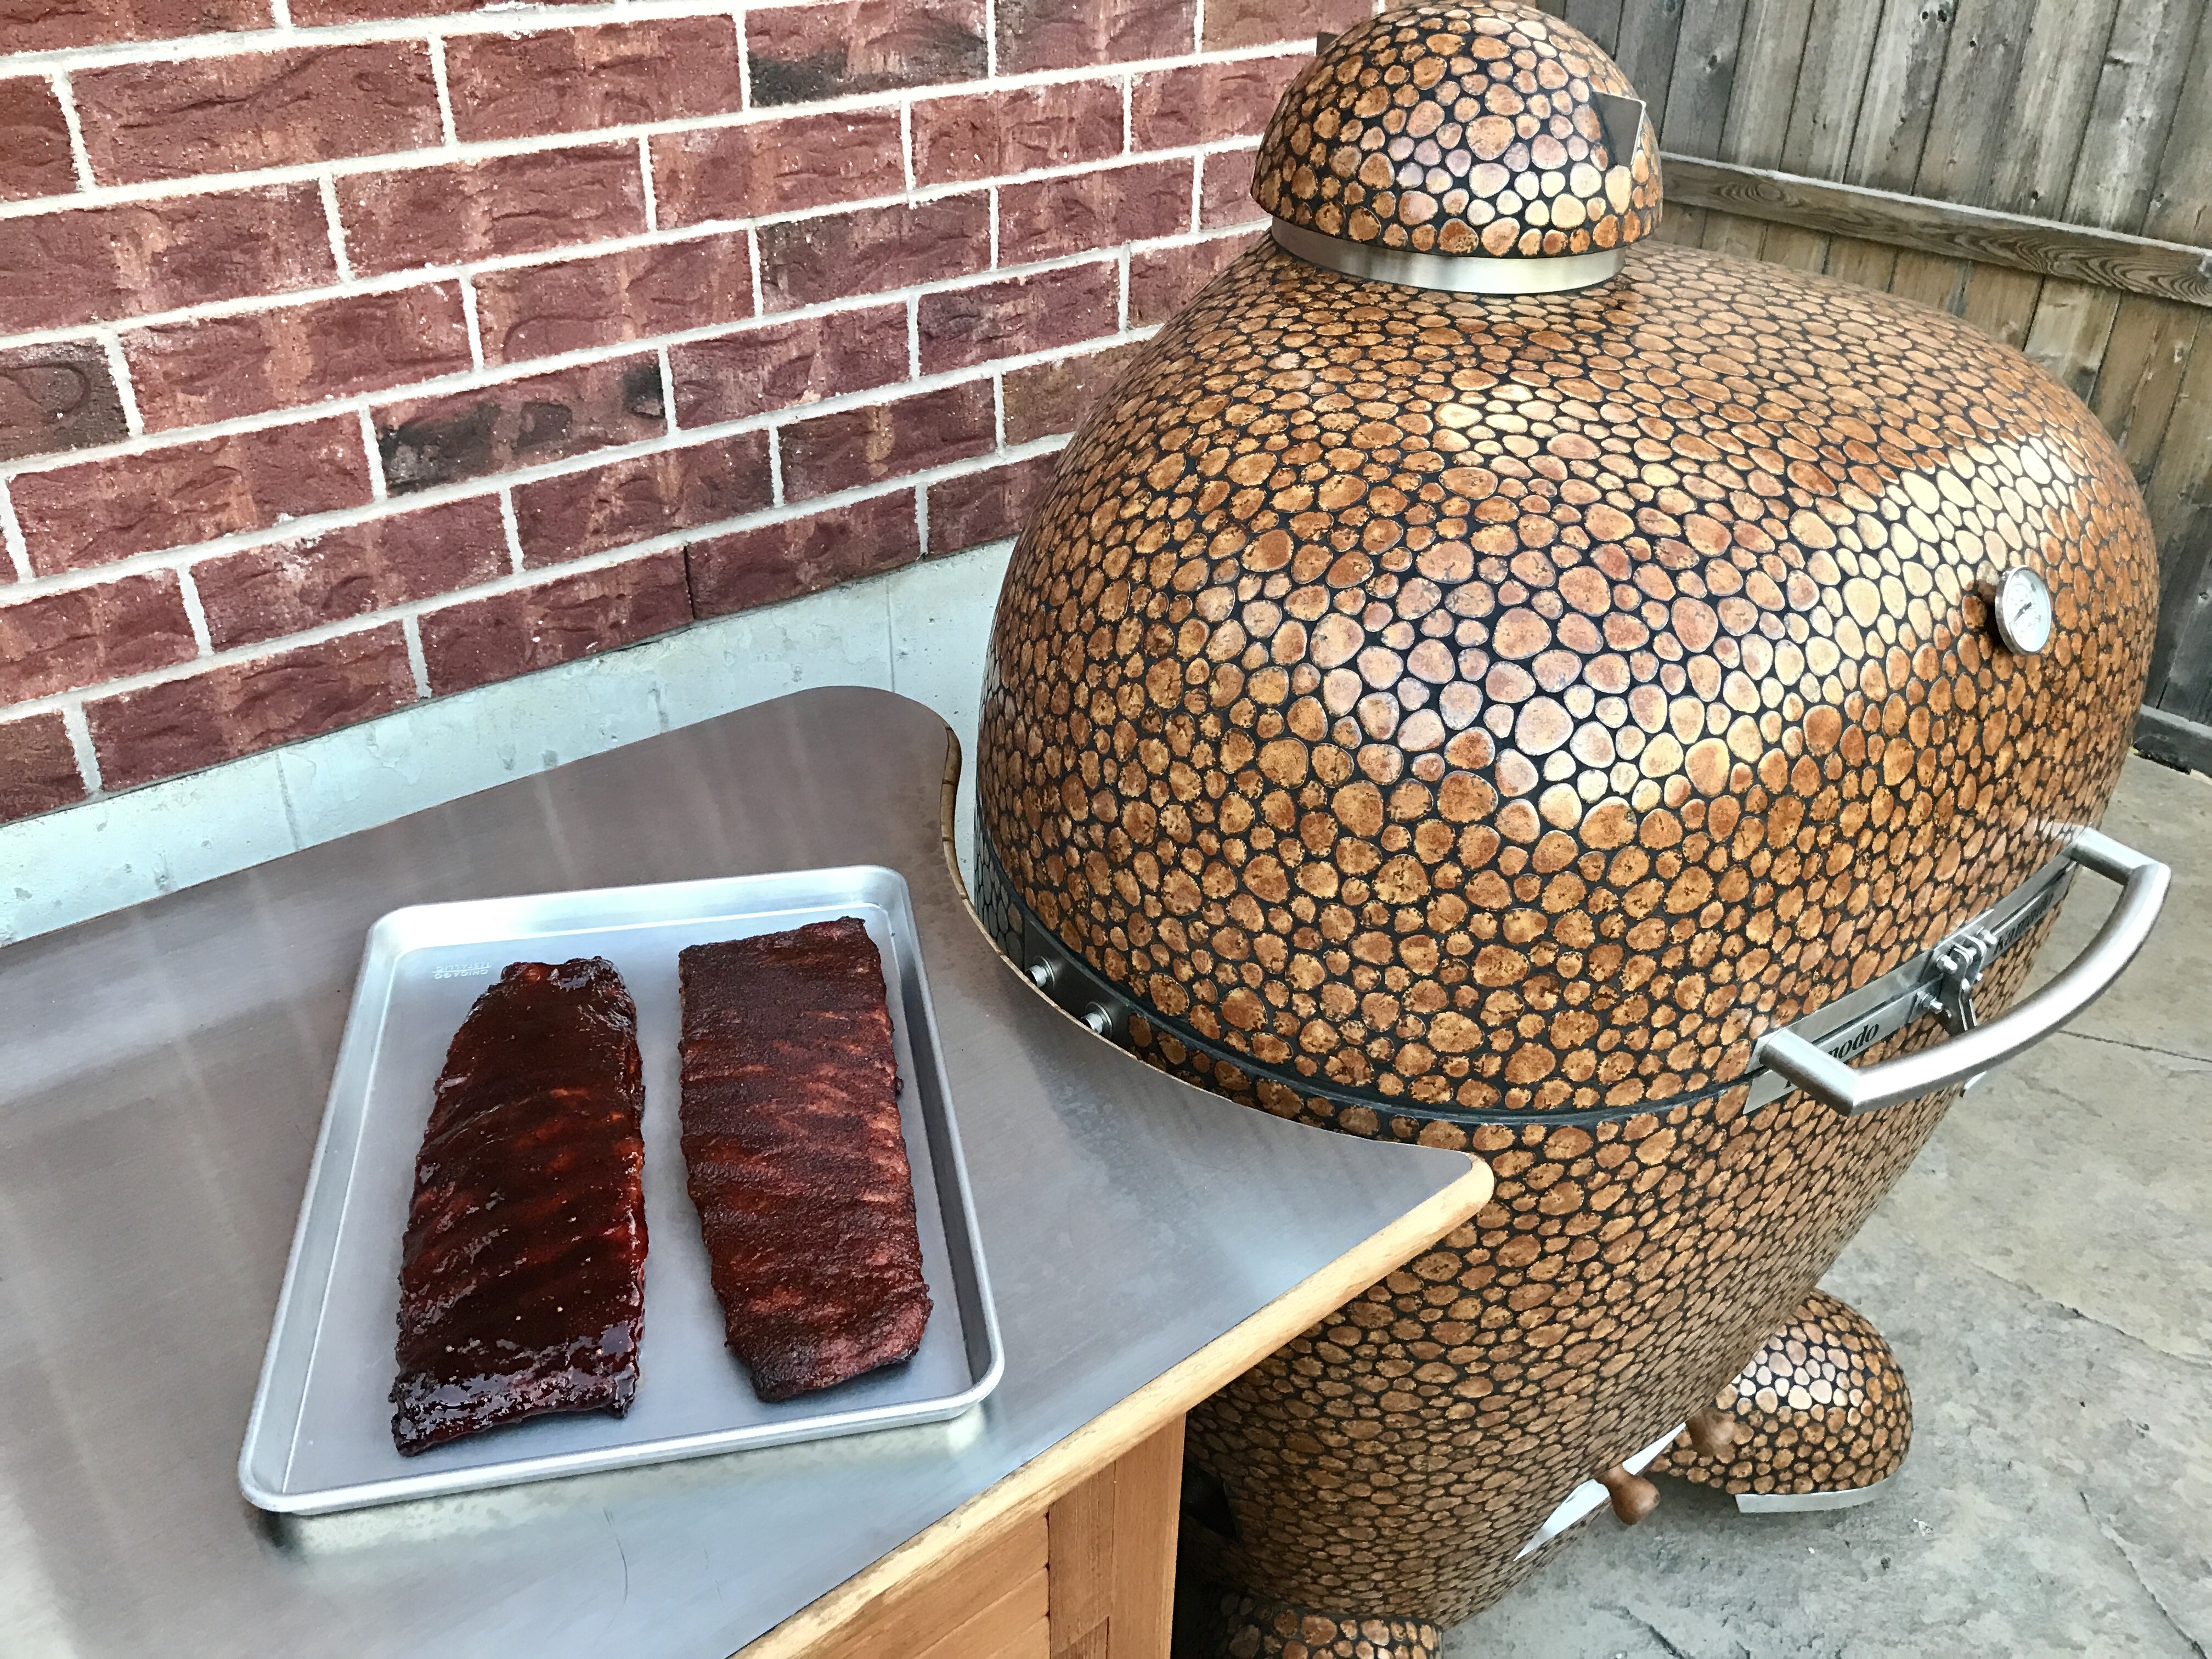
Have some extra time today so thought I would put two racks on for dinner. Kids have hockey tonight so I need them done by 4 ish.1 point
-
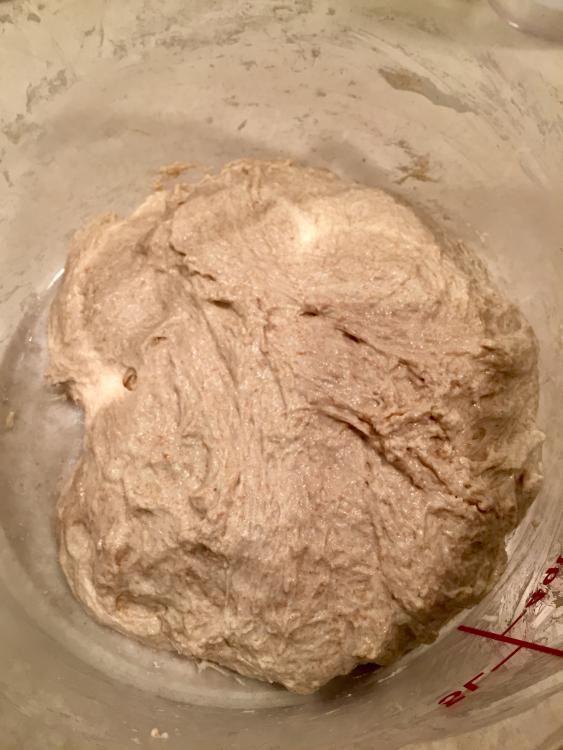
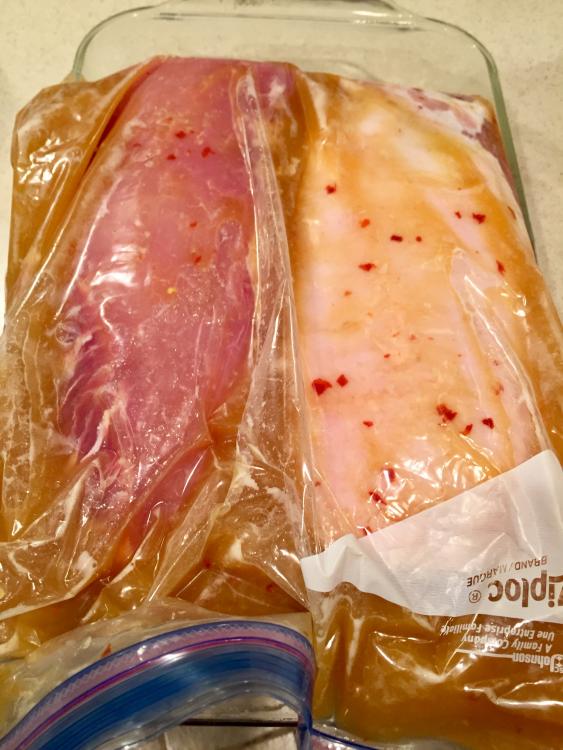
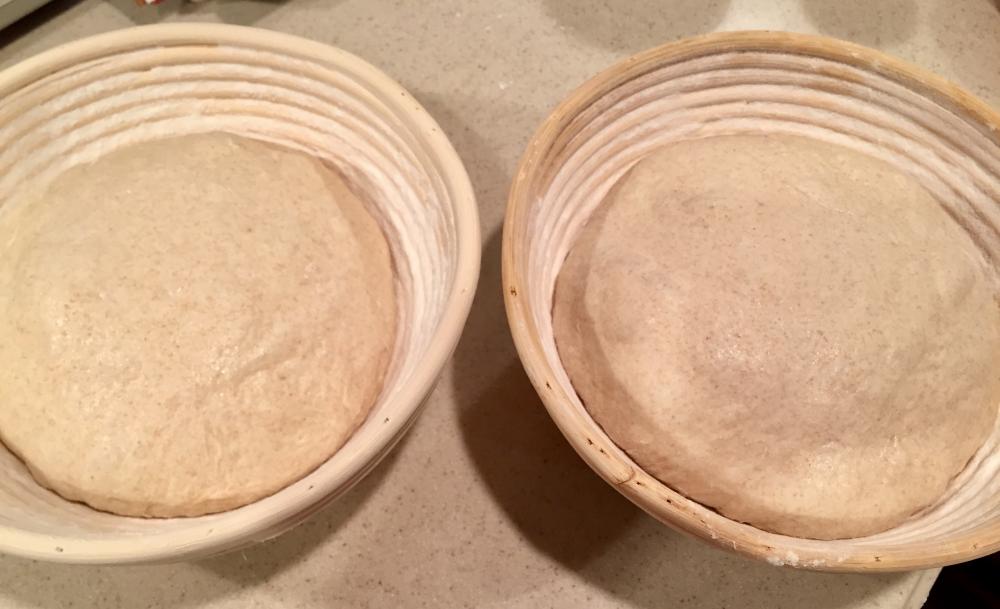
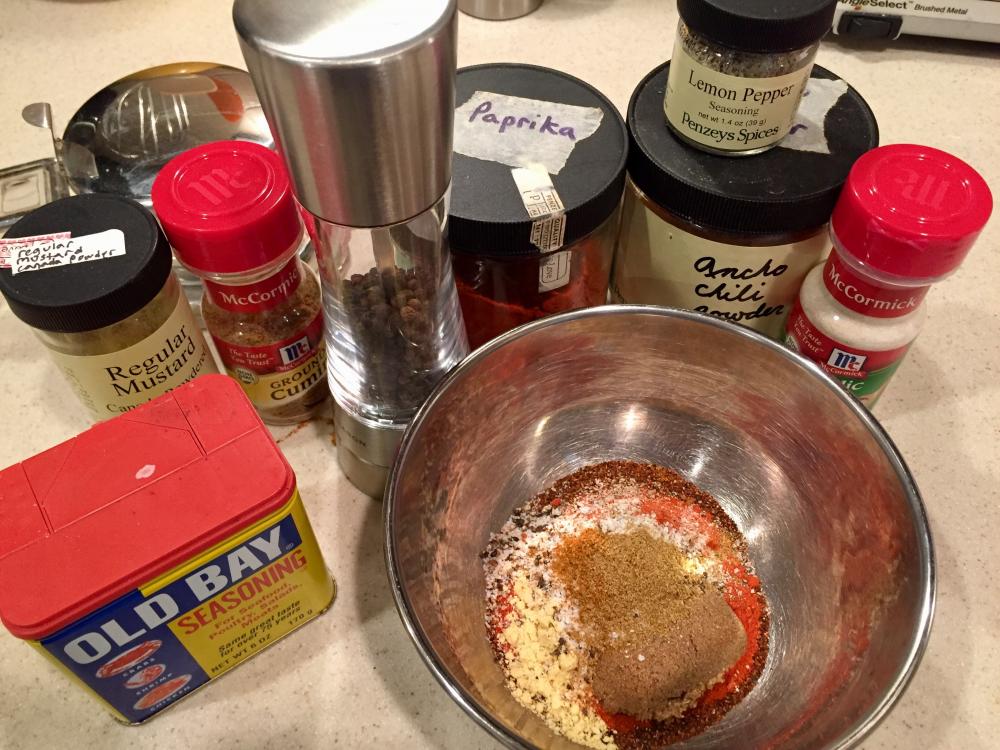
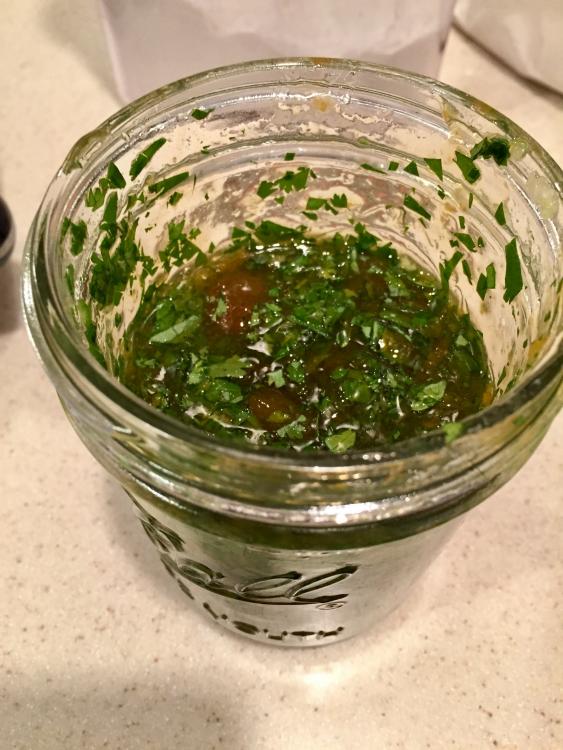
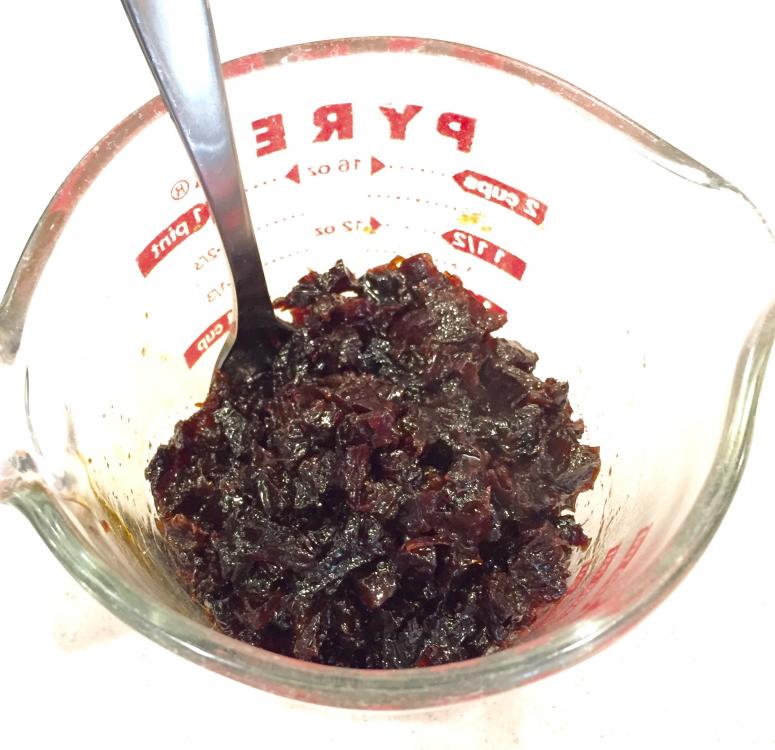
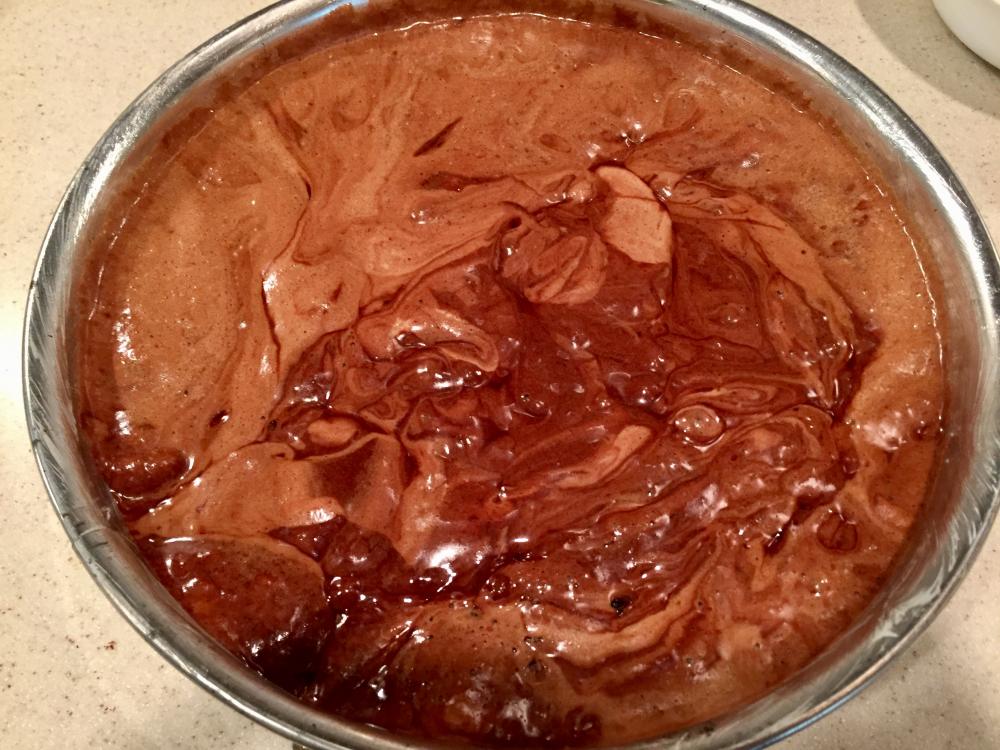
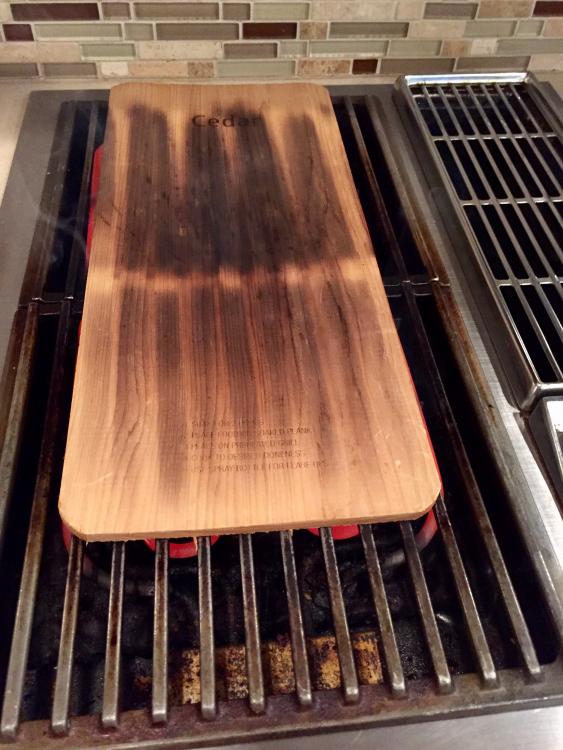
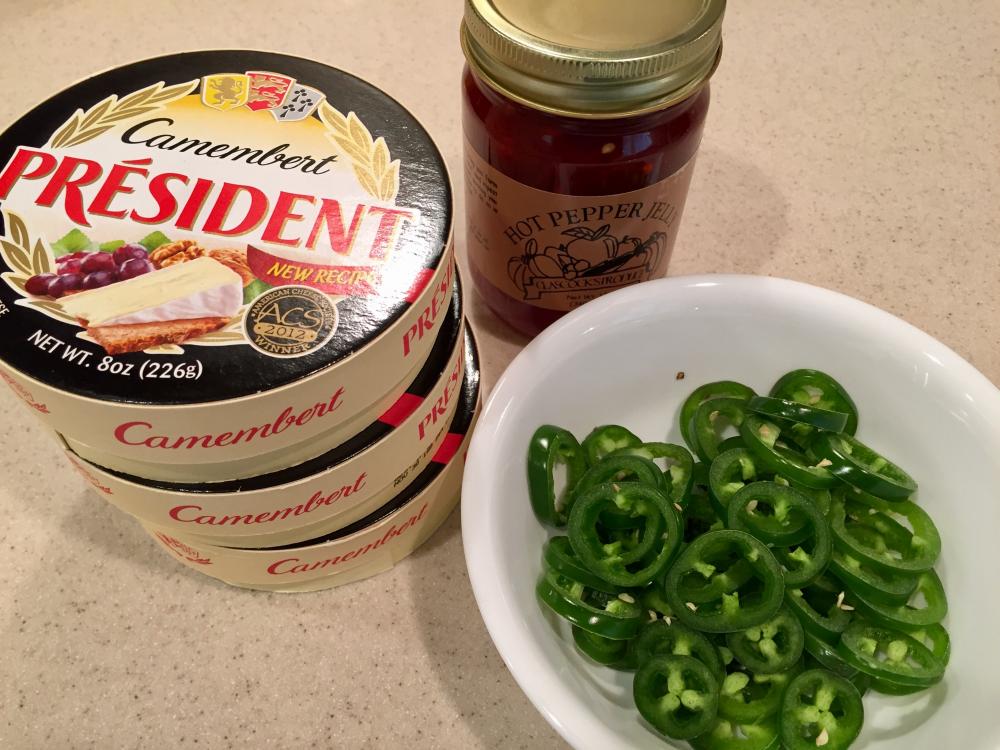
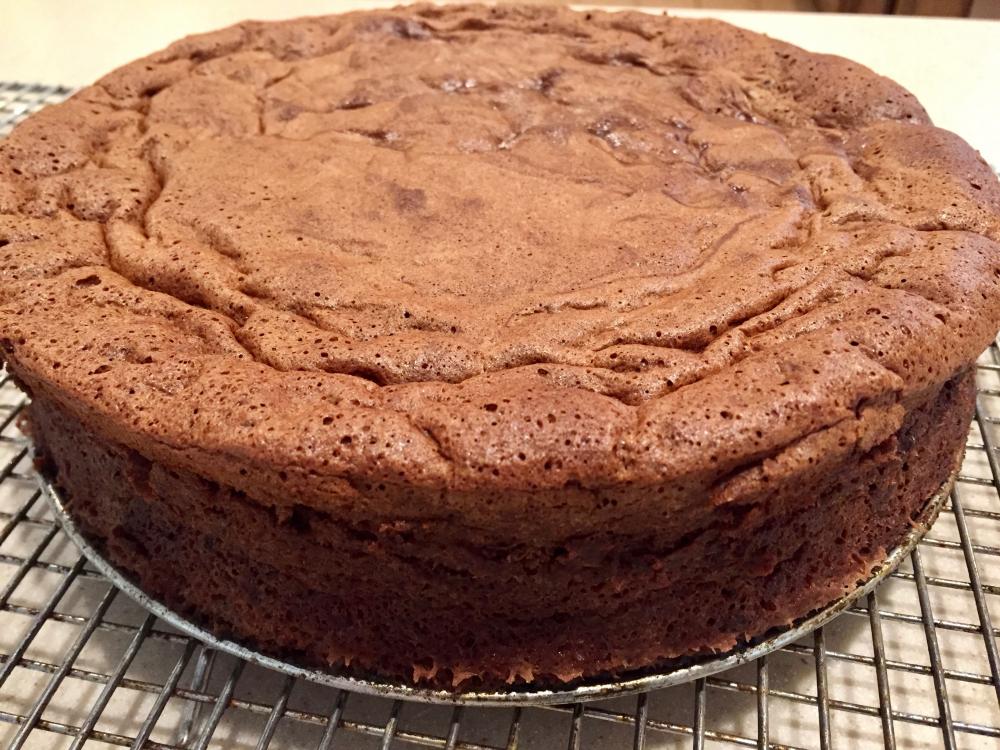
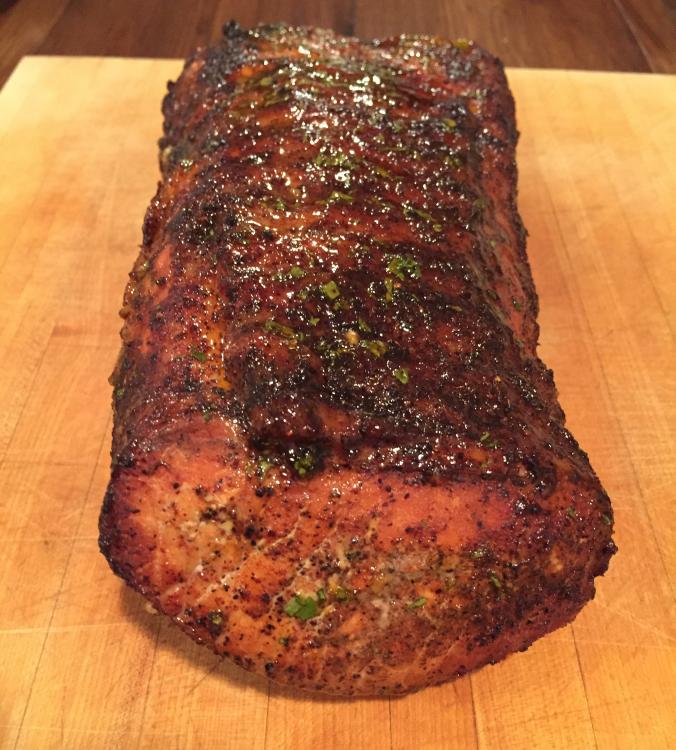
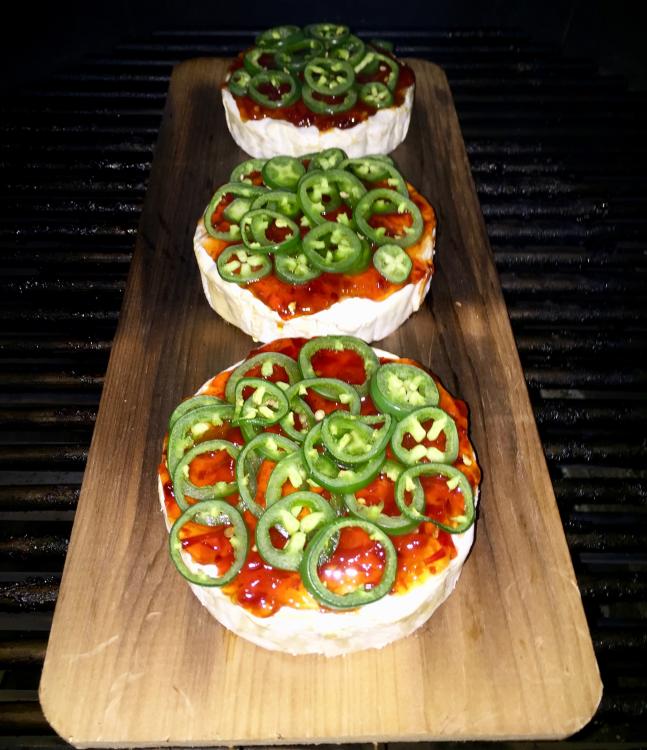
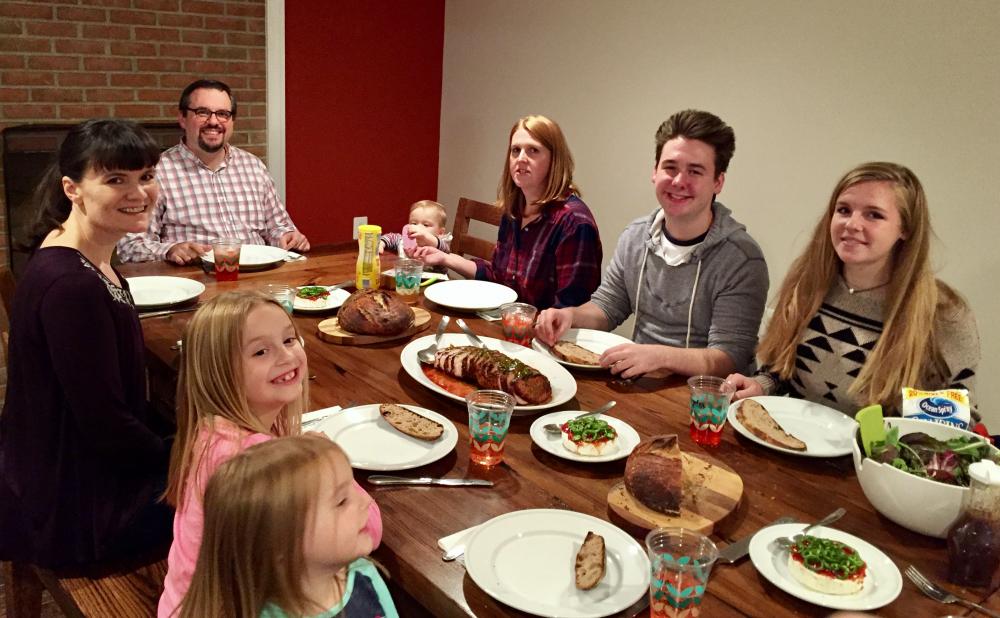
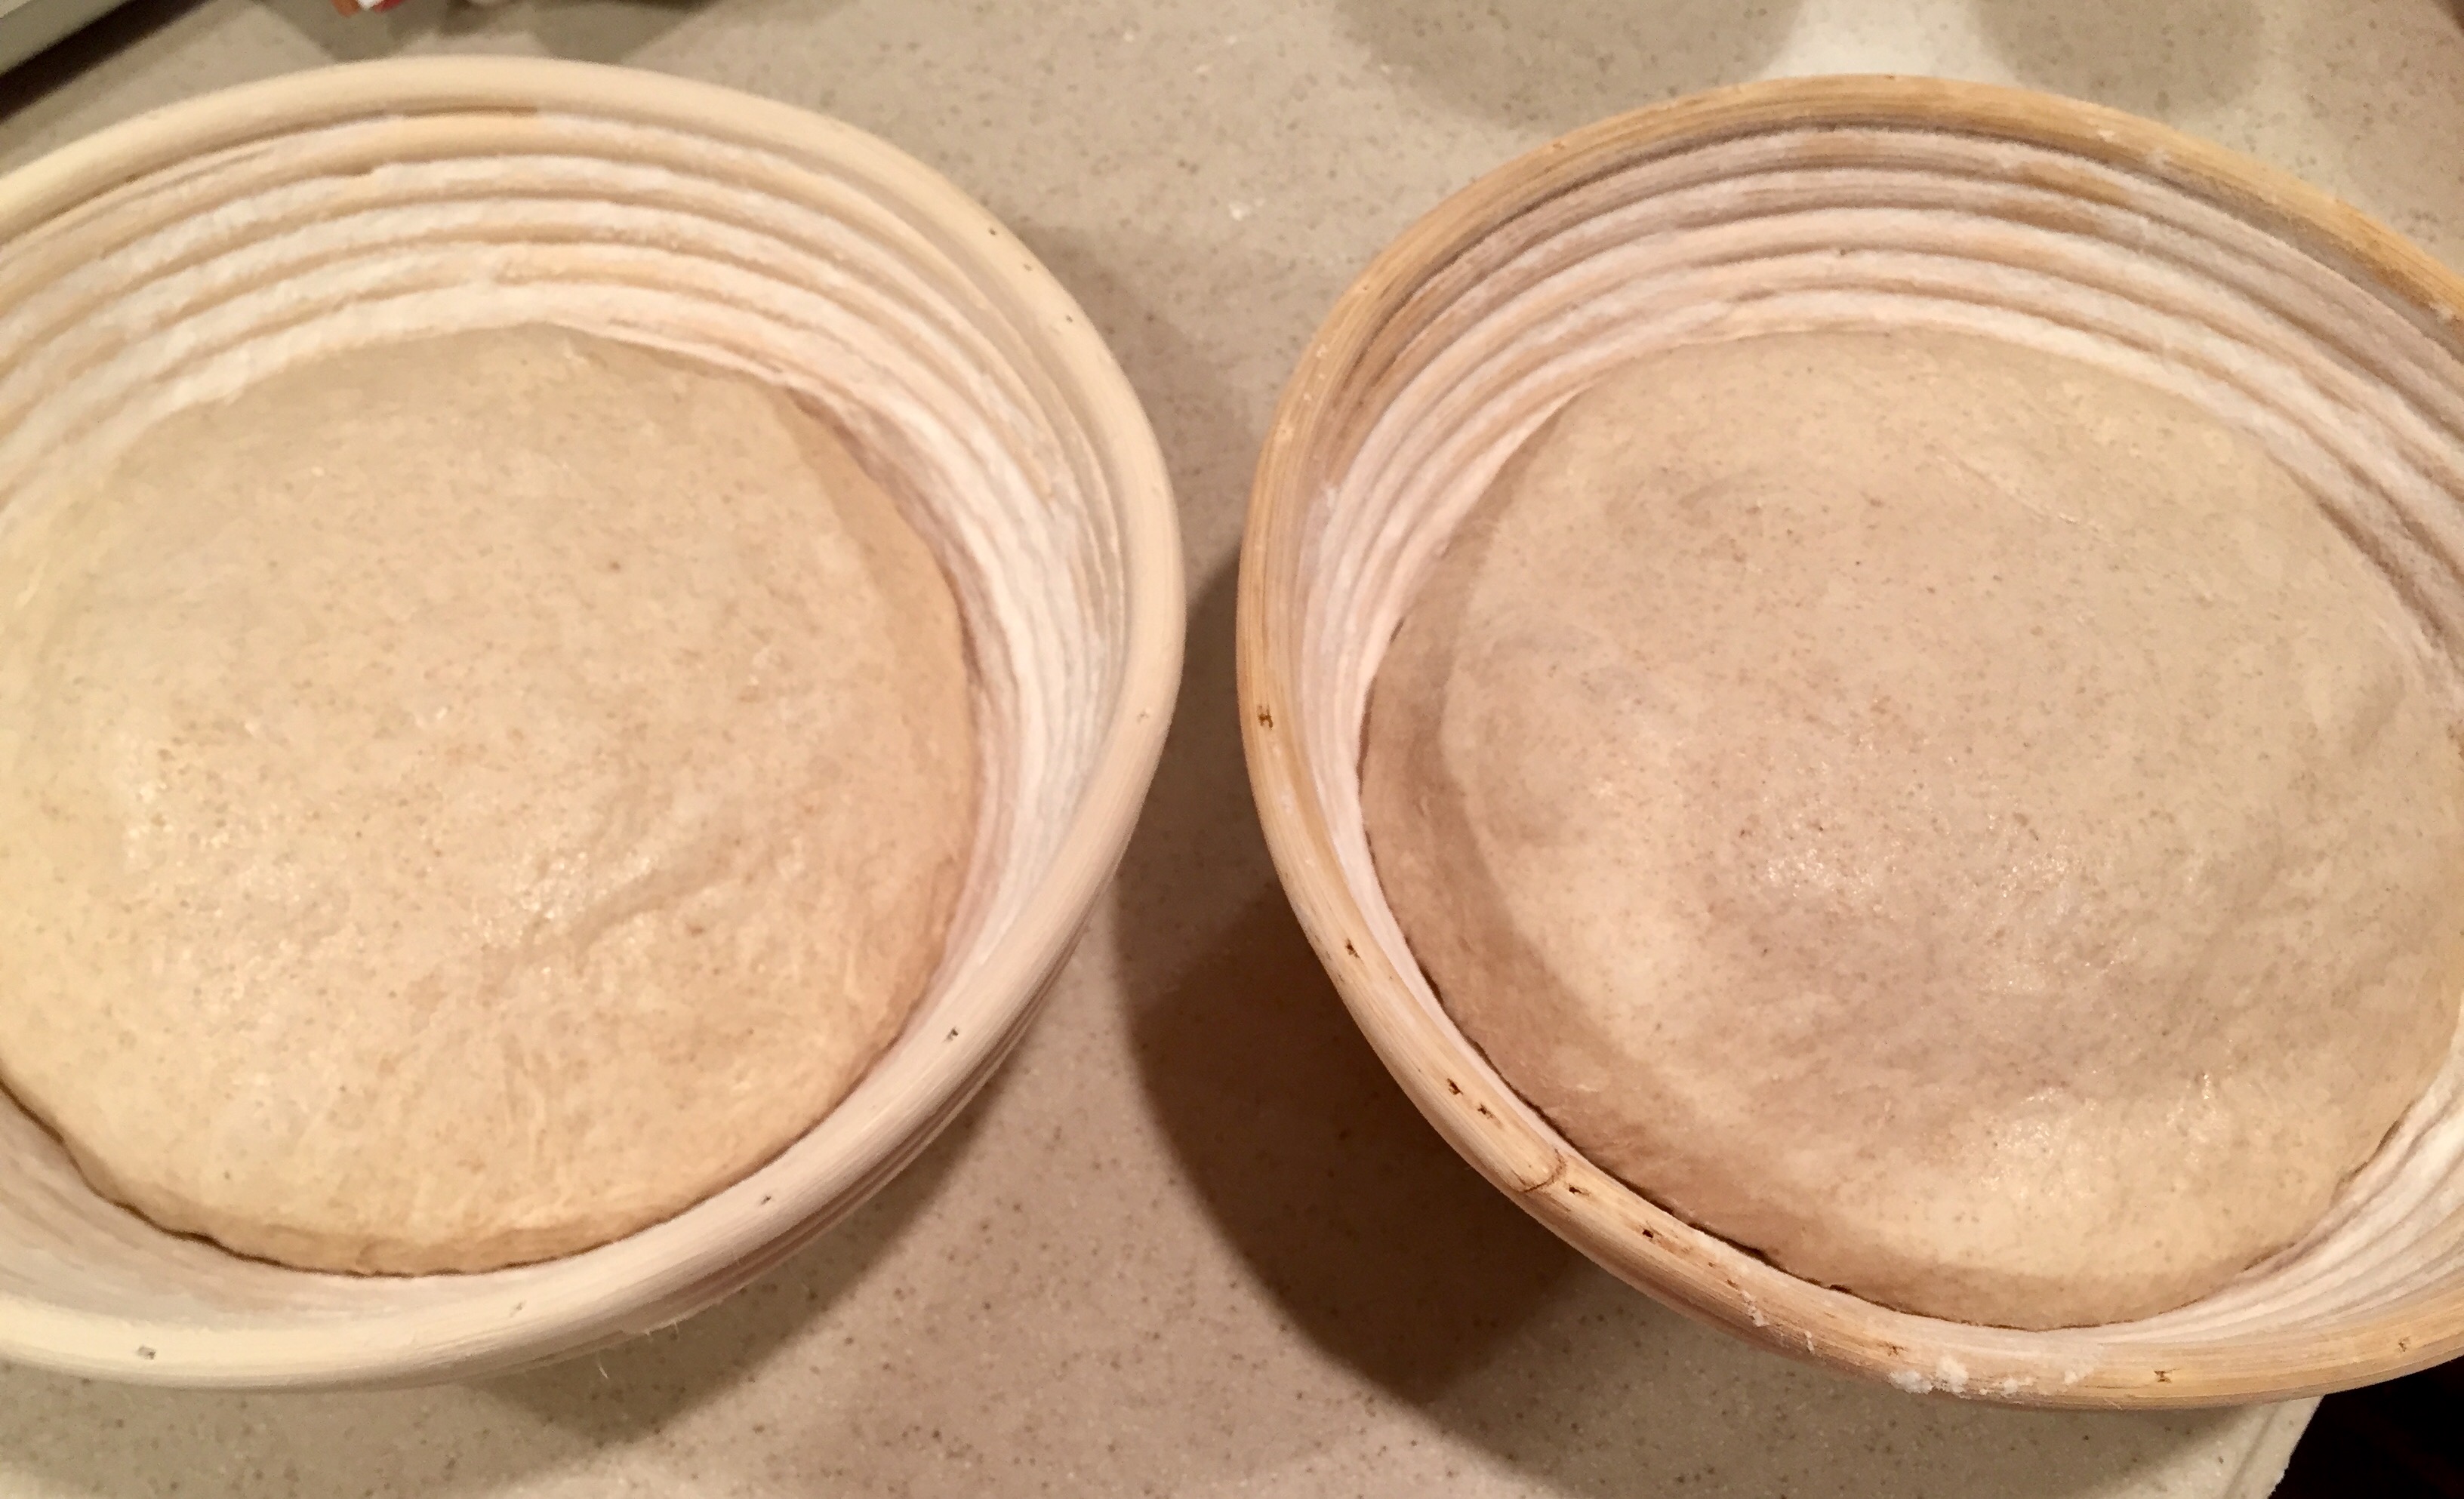
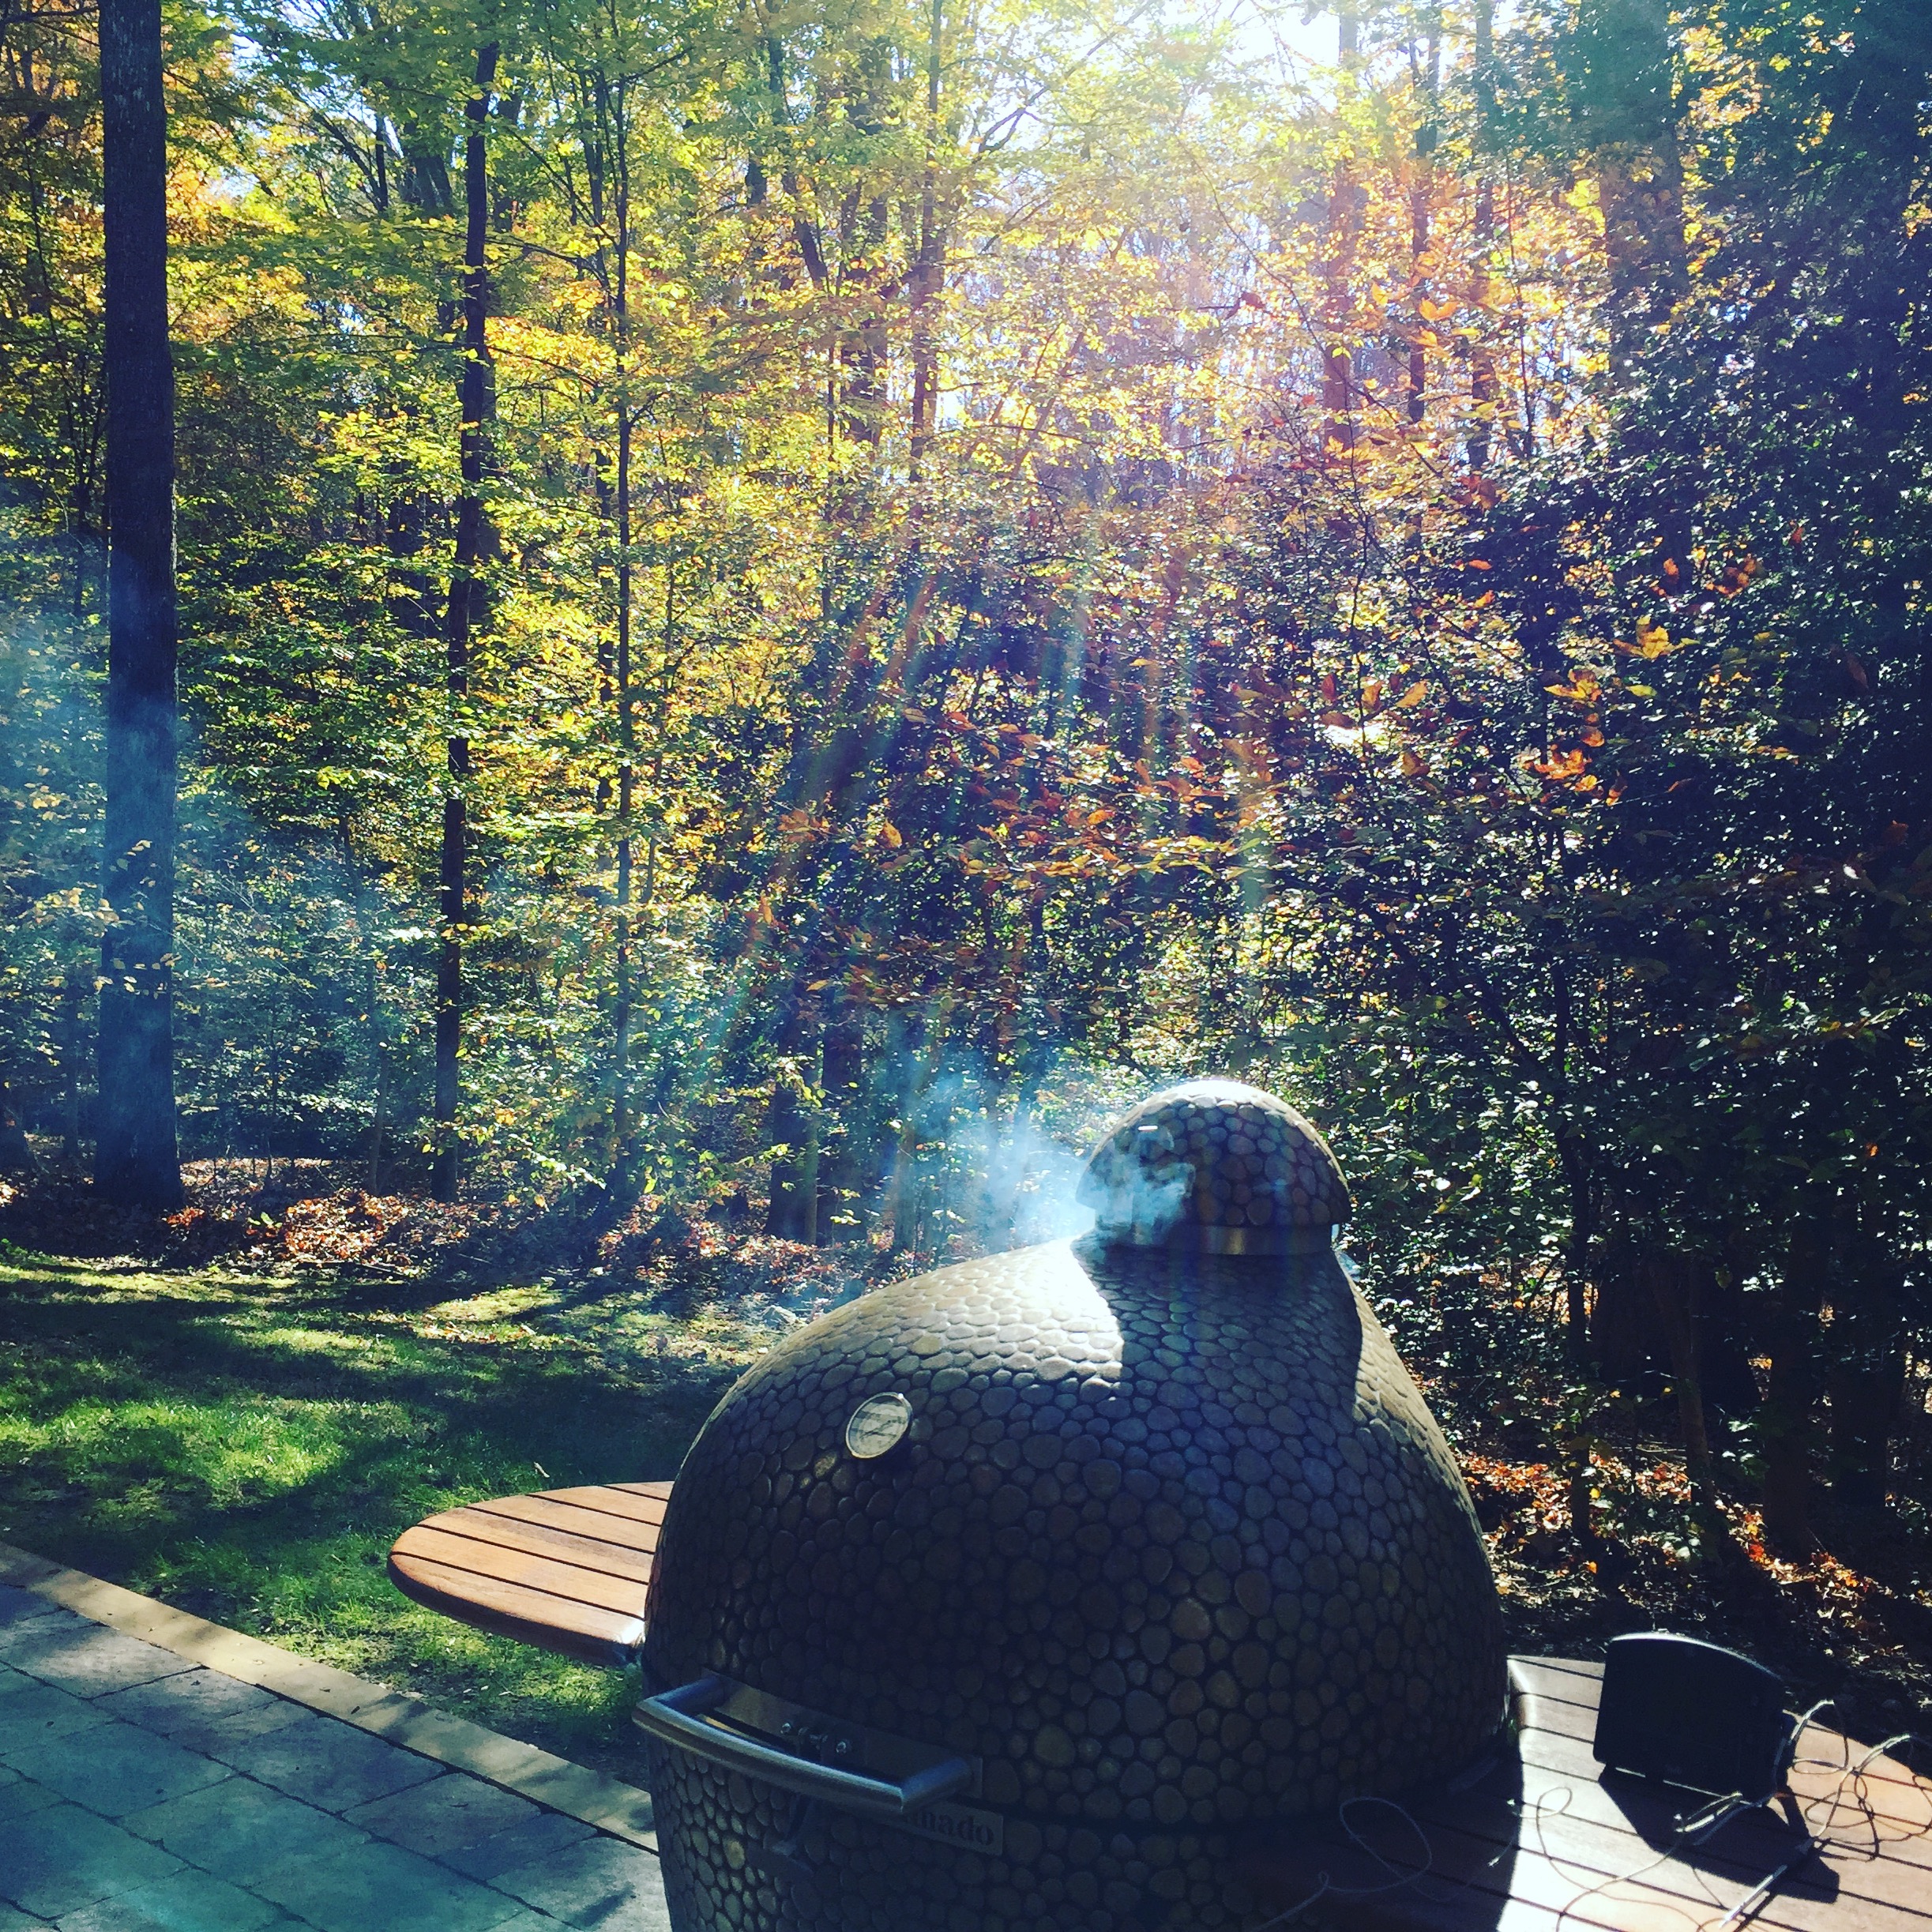
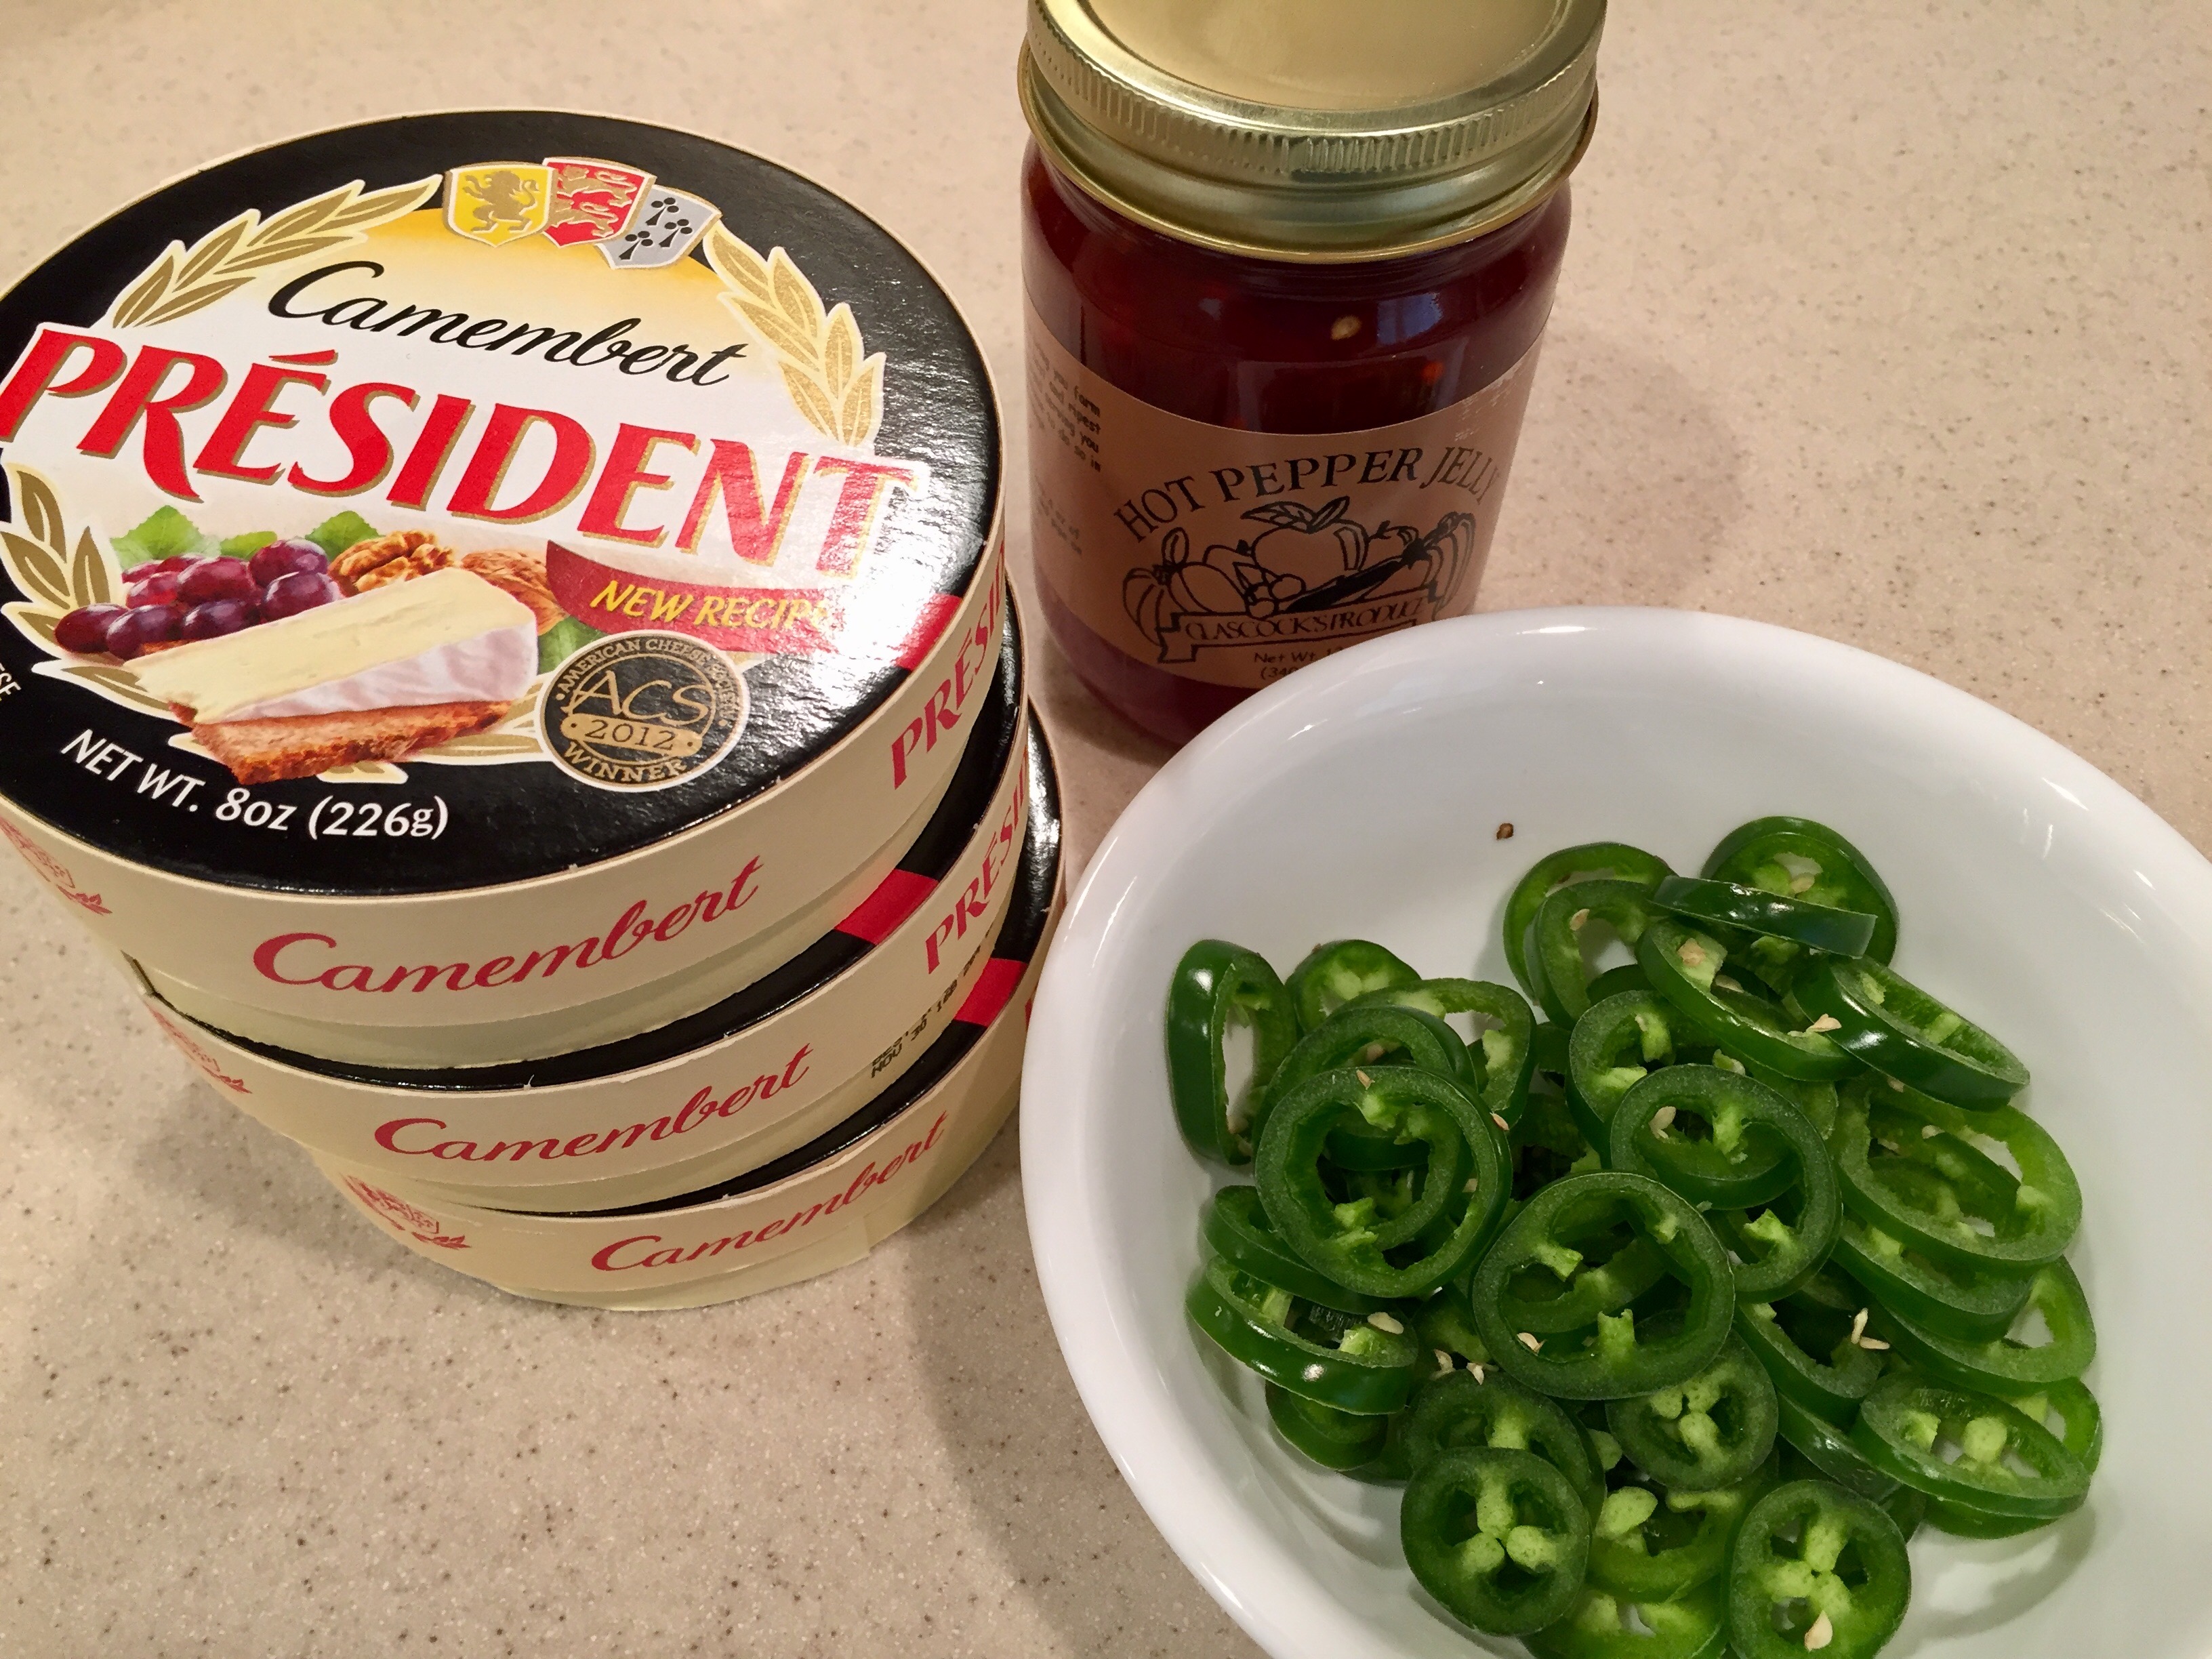
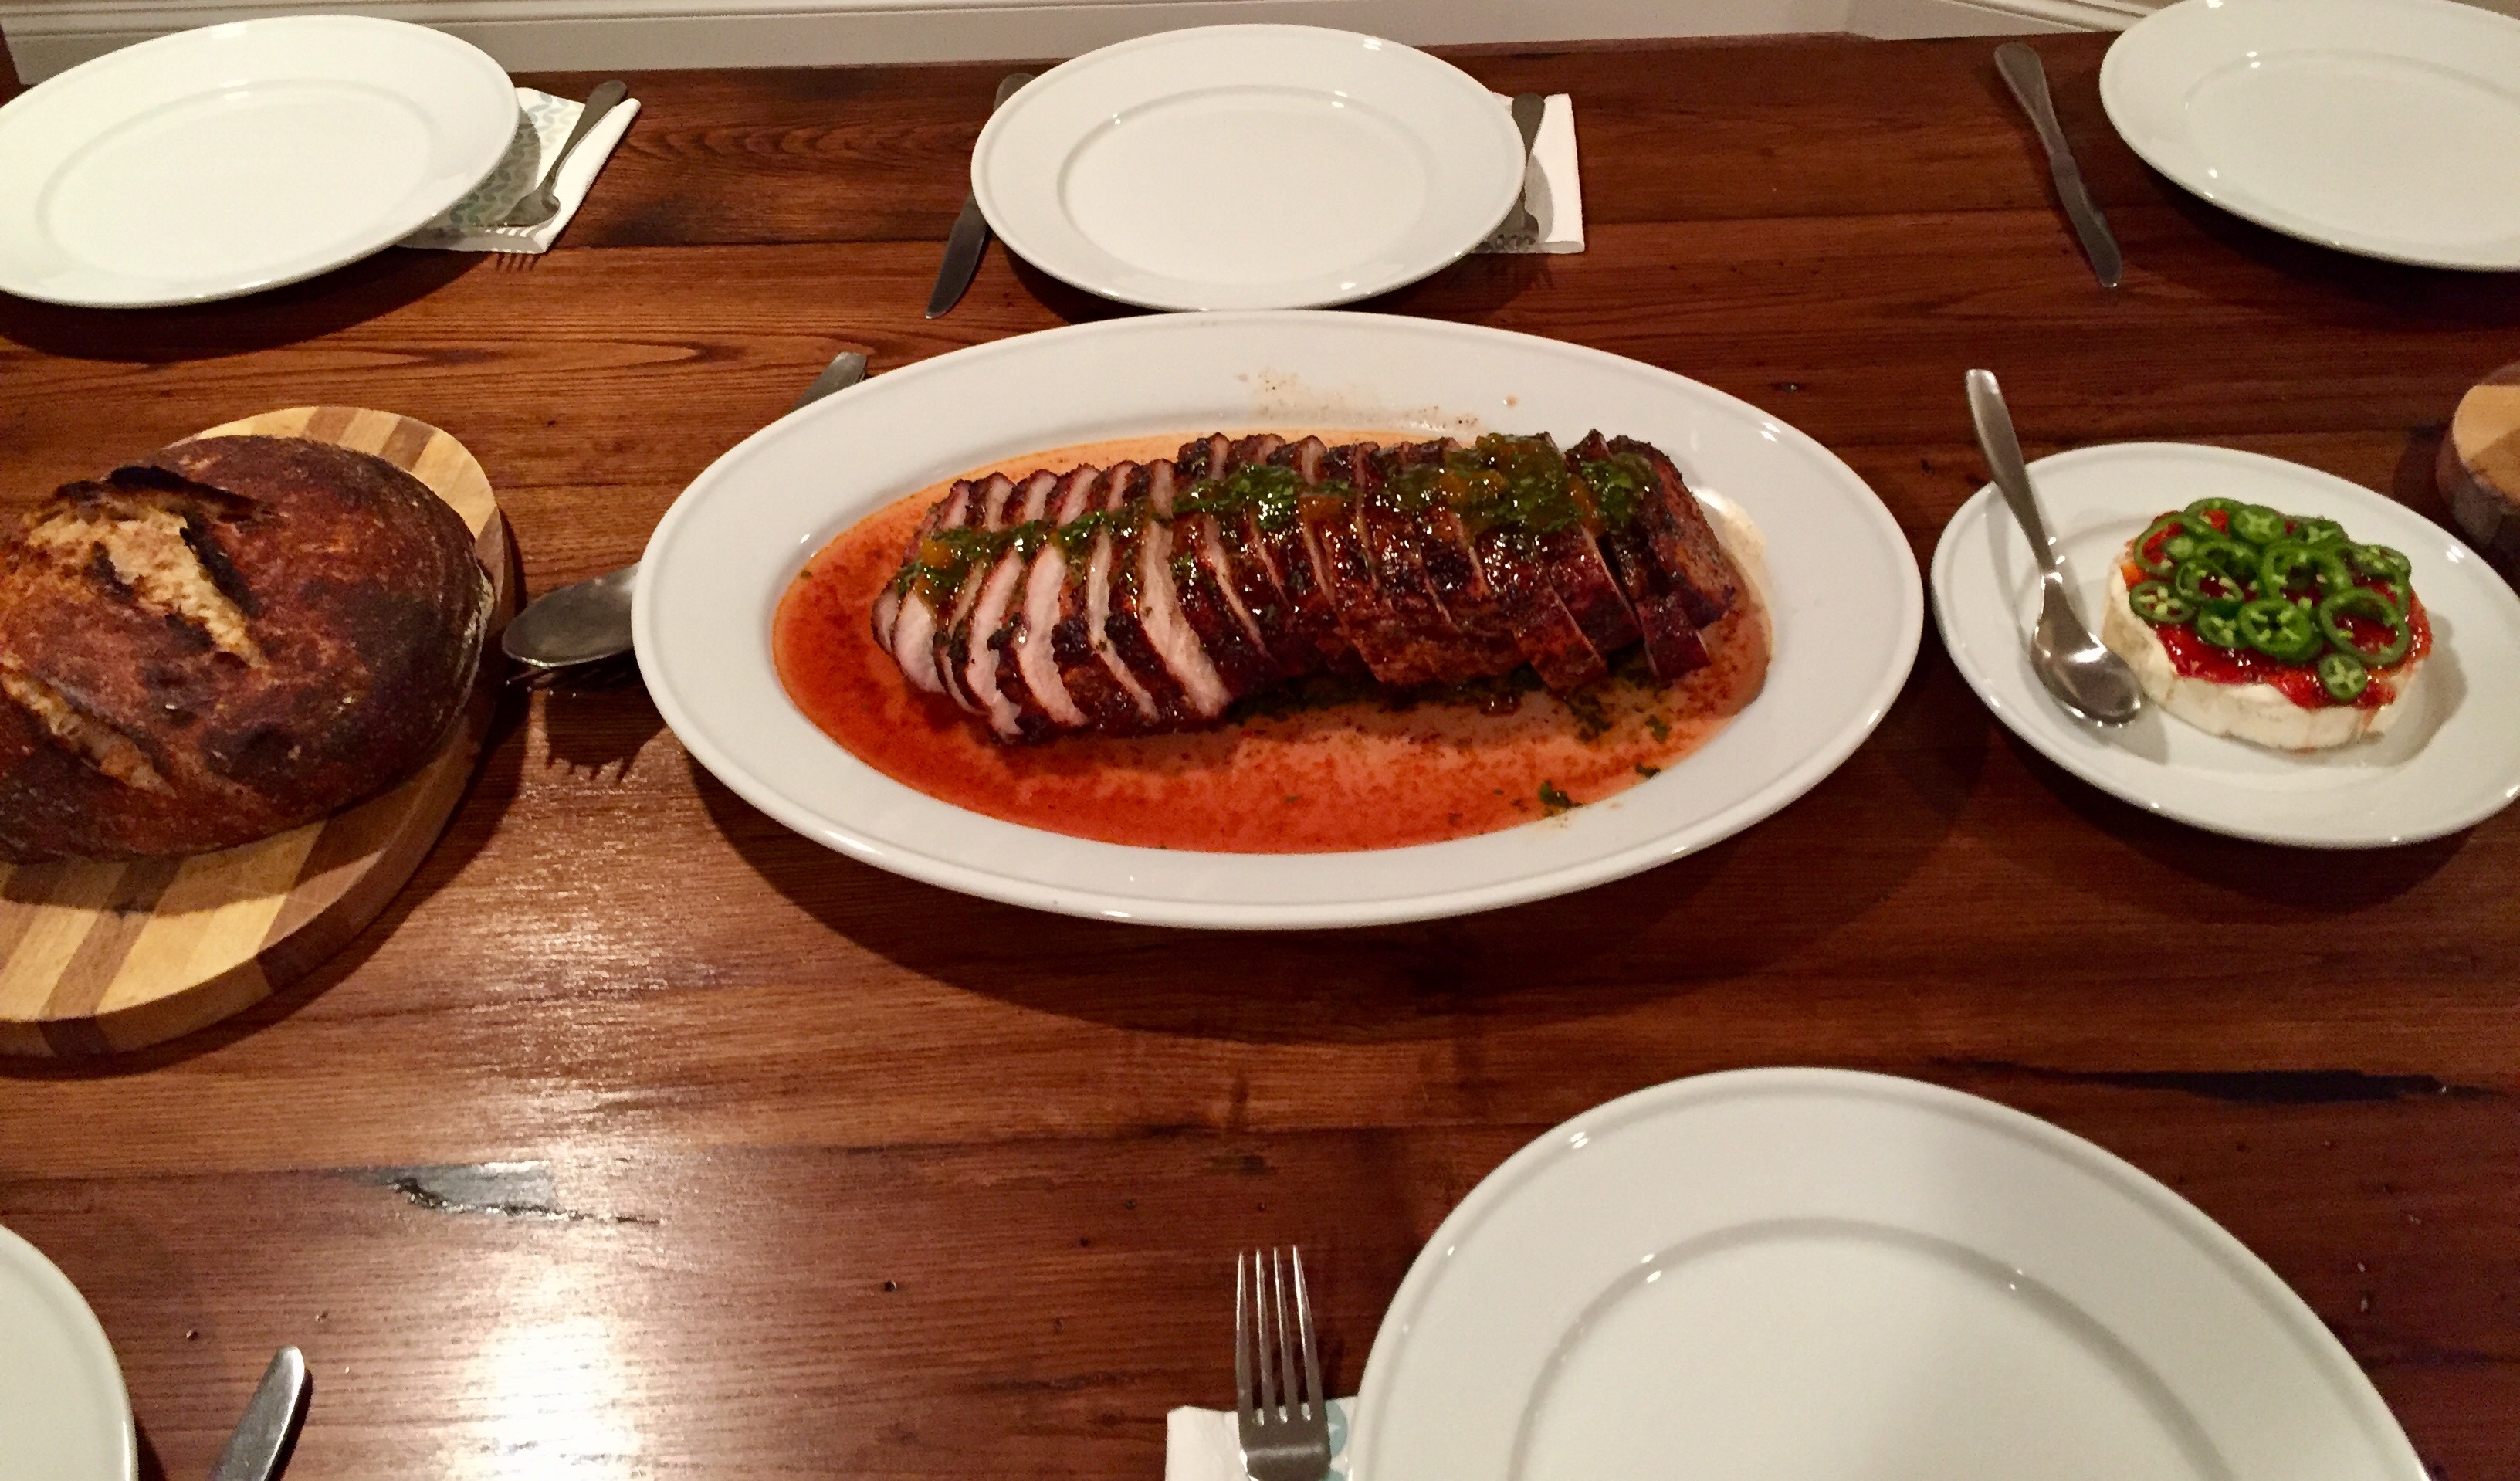
This is my November Guru entry for the "Let Us Give Thanks" challenge. My niece's family -- all eight of them -- will be out of town for Thanksgiving and Christmas, so today is our holiday celebration. We started yesterday with the sourdough. This is a 78% Hydration dough with 30% whole wheat flour and 10% of the entire flour coming from the starter. Here it is after mixing and before the folds and overnight bulk fermentation. Today we did final shaping and into the bannetons for proofing. We baked these in the oven because the KK was busy with other things. A dark chestnut. Just right for this loaf. Early this AM we put the pork loin into a brine of apricot nectar, water, garlic (lots), salt, and sugar. Recipe from Adam Perry Lang. After eight hours, we mixed the rub, and then rubbed up the loins. Onto the KK, using the cold smoker with apple wood chips. Need more pics of that KK: Meanwhile, I prepare the glaze of apricot preserves, cilantro, garlic, and lemon juice. Next, I'm making the prune, rum, chocolate cake. Recipe from Milk Street Kitchen. The prunes, rum, and molasses after a short turn in the microwave. The mixed cake into the springform pan, then into the oven: Out of the oven: Our guests arrive, and Kodi gets re-acquainted with my grand nephew. He's wondering whether this little dude is a puppy or something he can eat: Next, use the indoor grill to pre-char a cedar plank: The pork loin comes off the grill. And the Camembert goes on after cranking the temp to 400. Still cranking apple wood smoke: Finally, everything is ready: Satisfied customers:


 1 point
 -
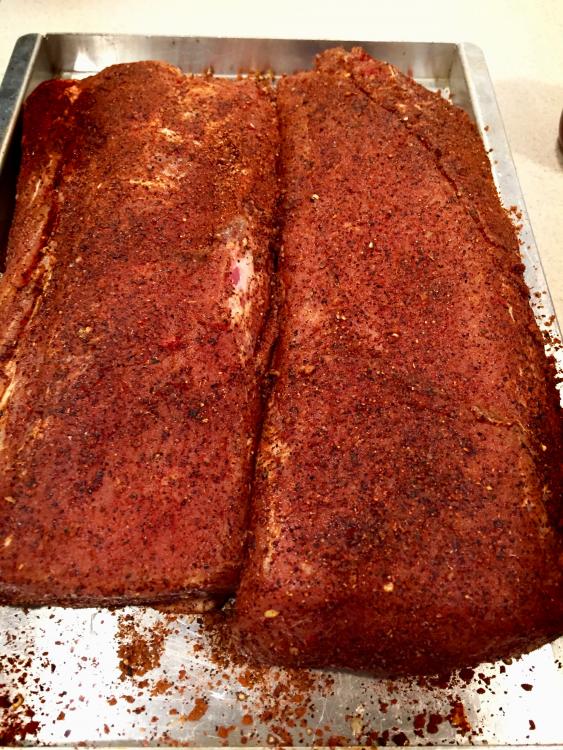
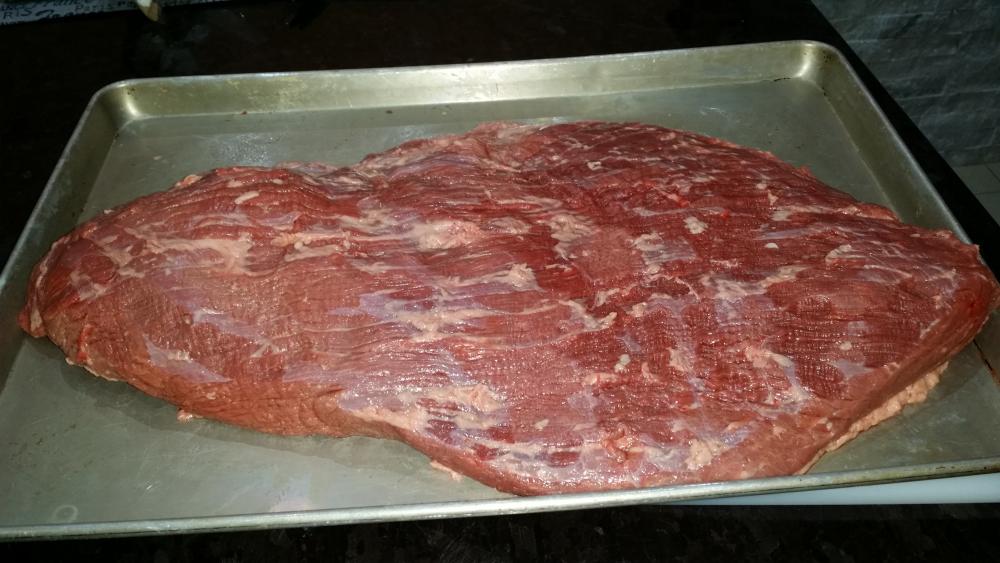
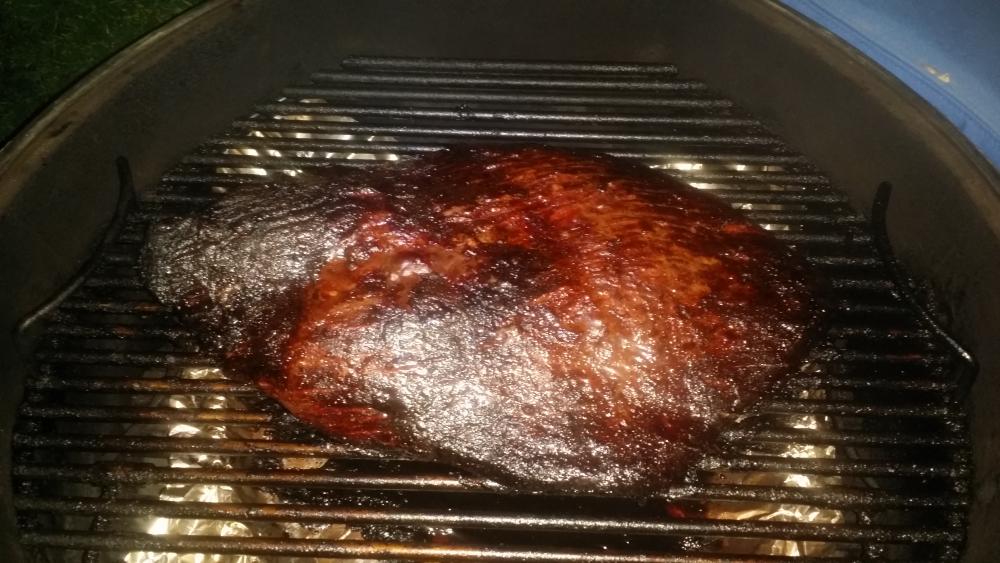
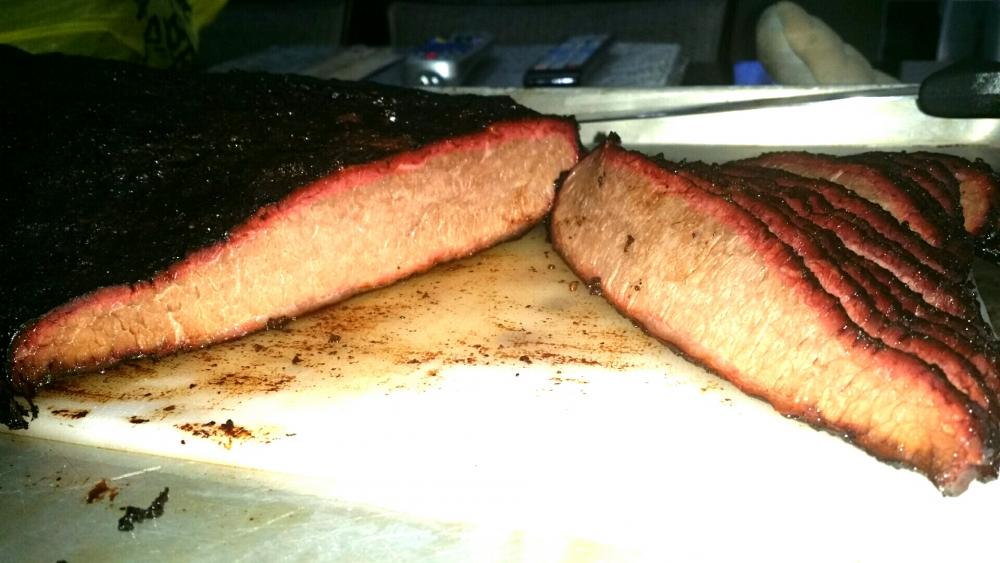
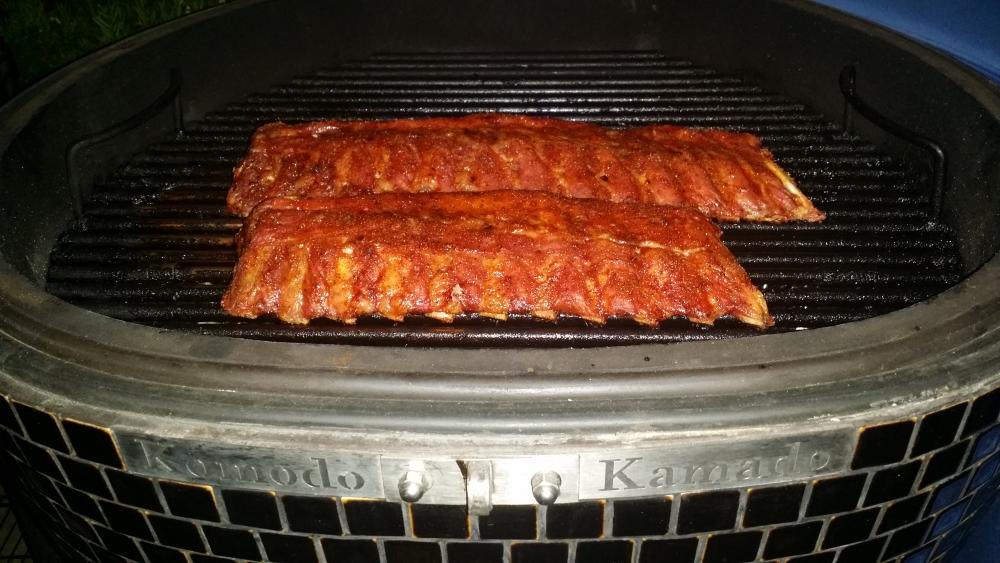
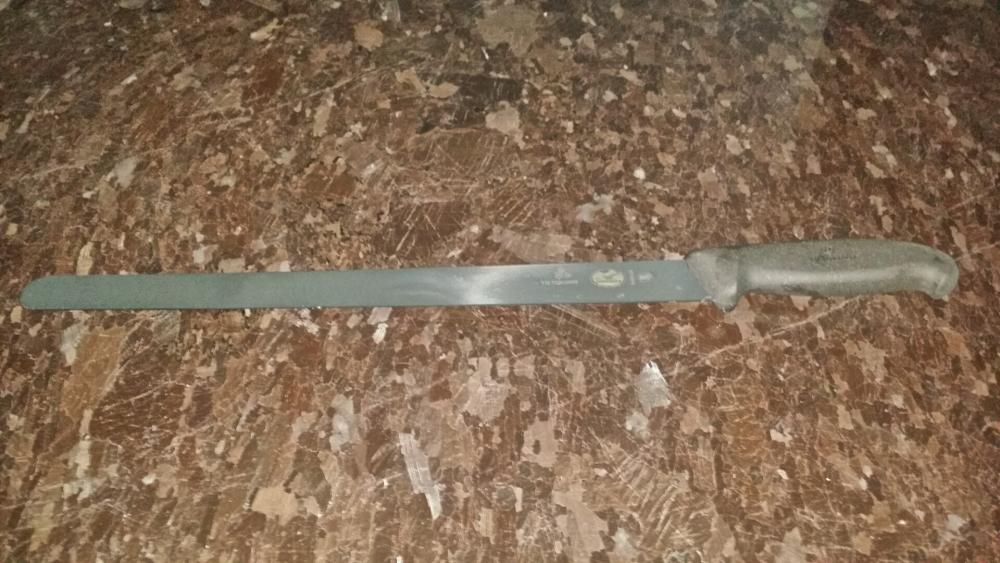
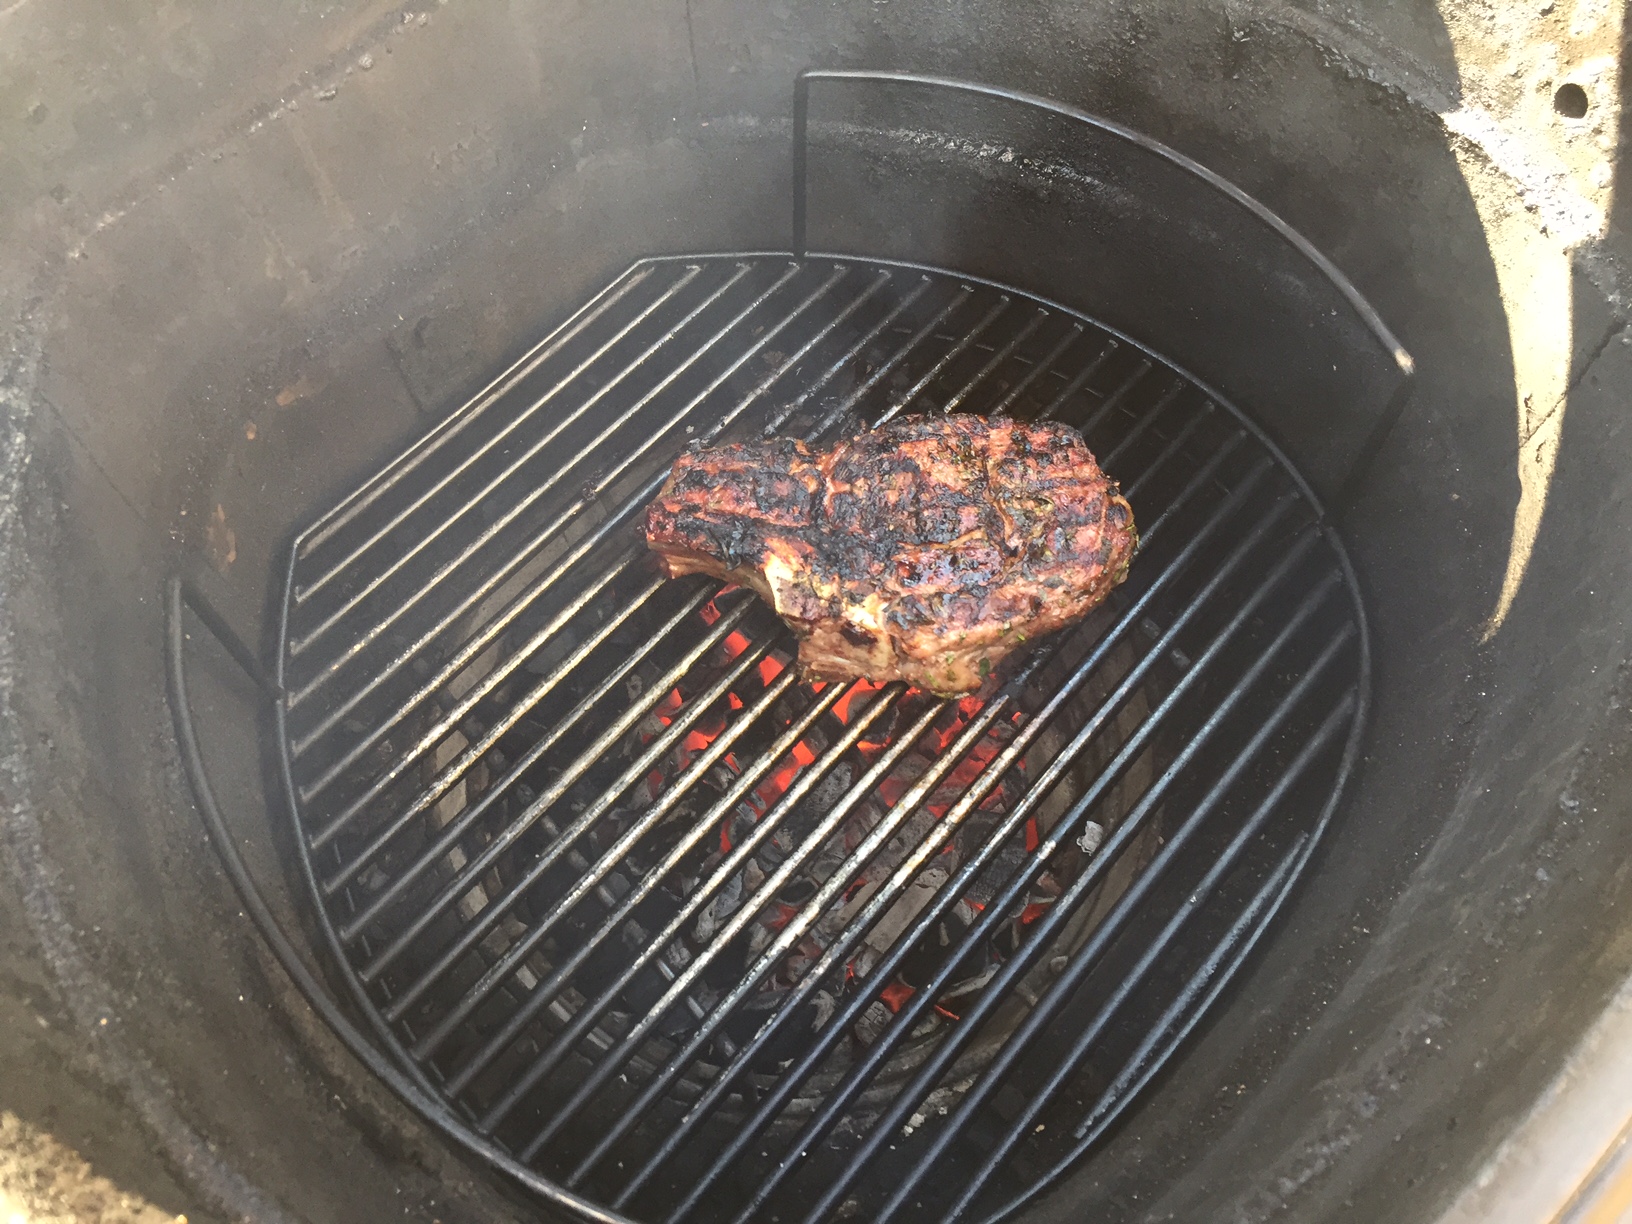
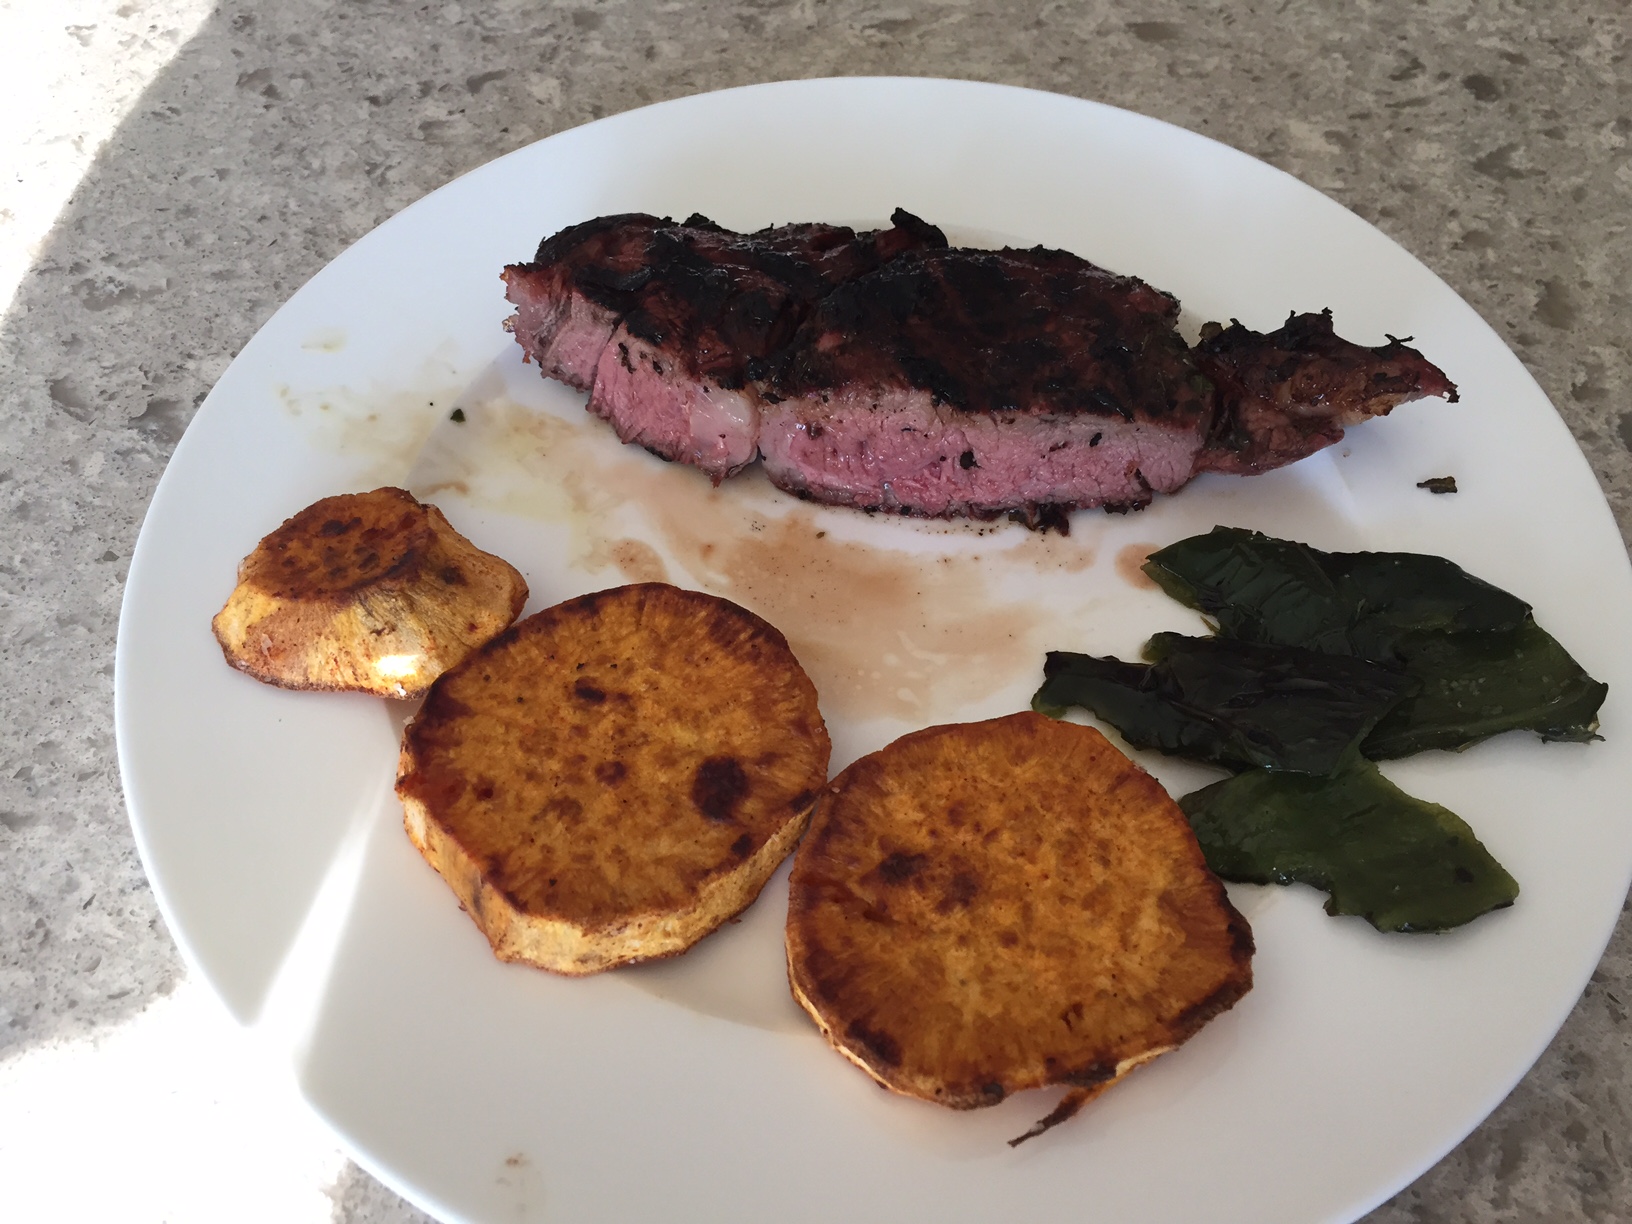
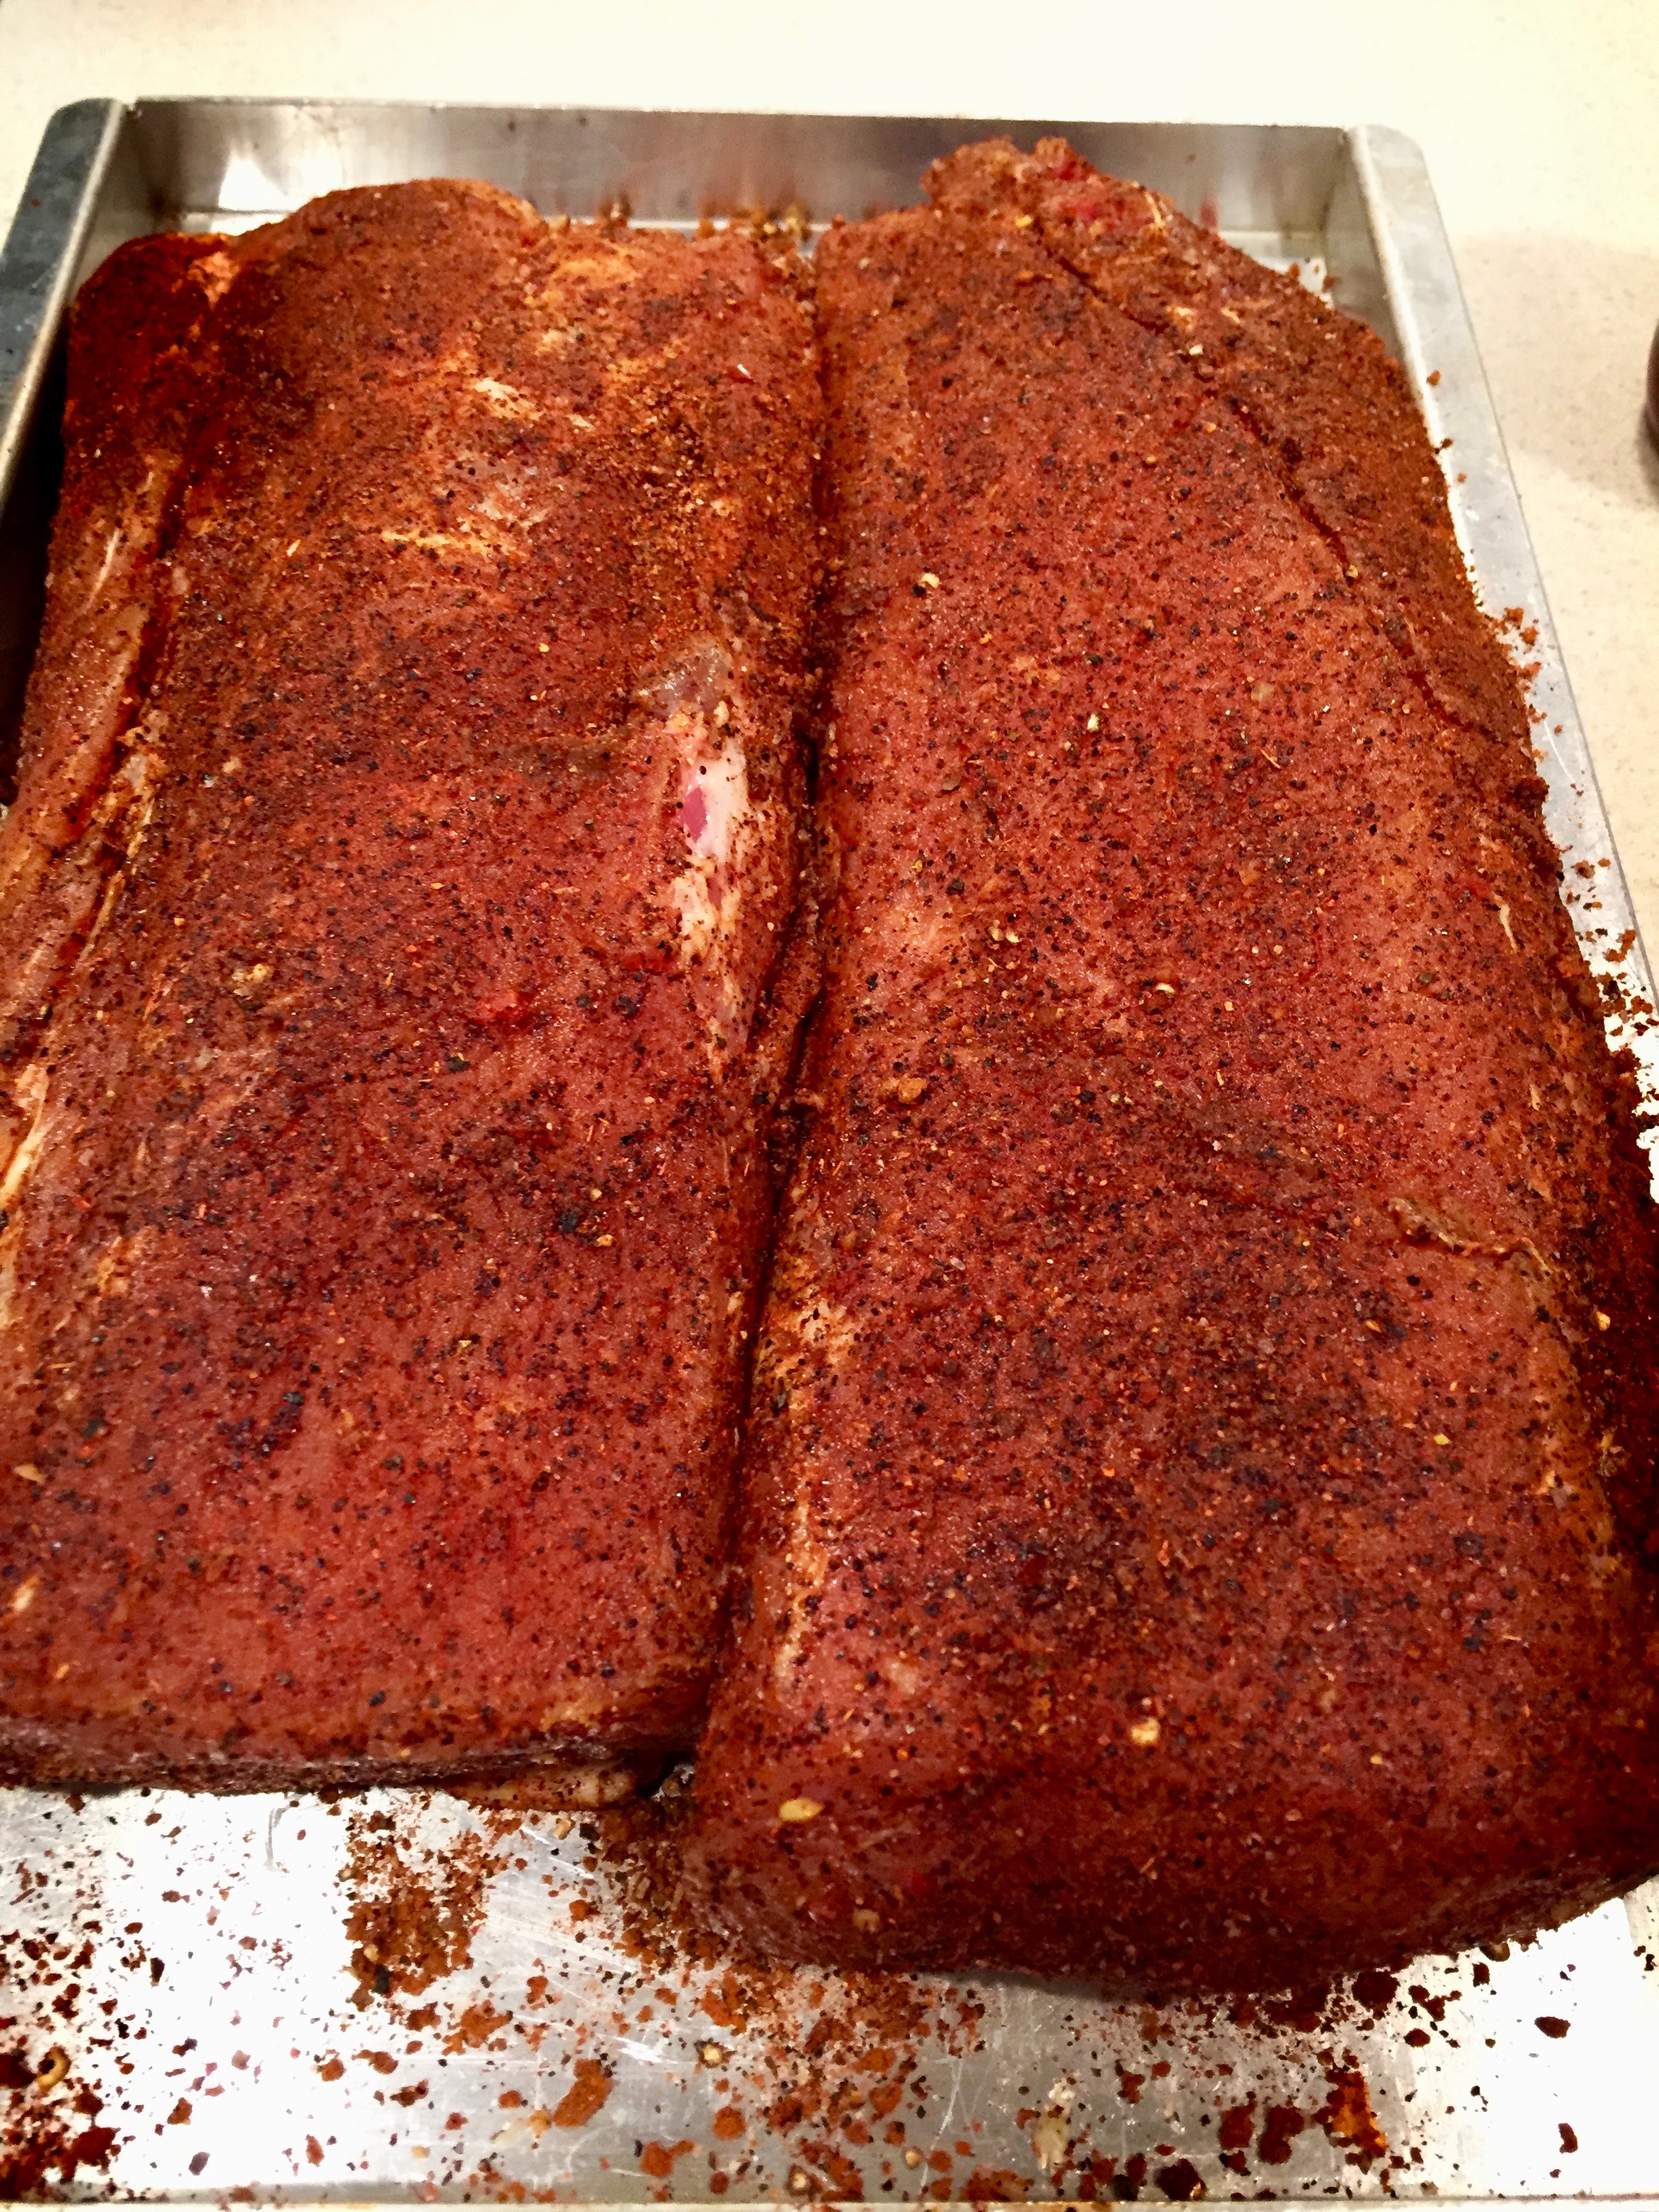
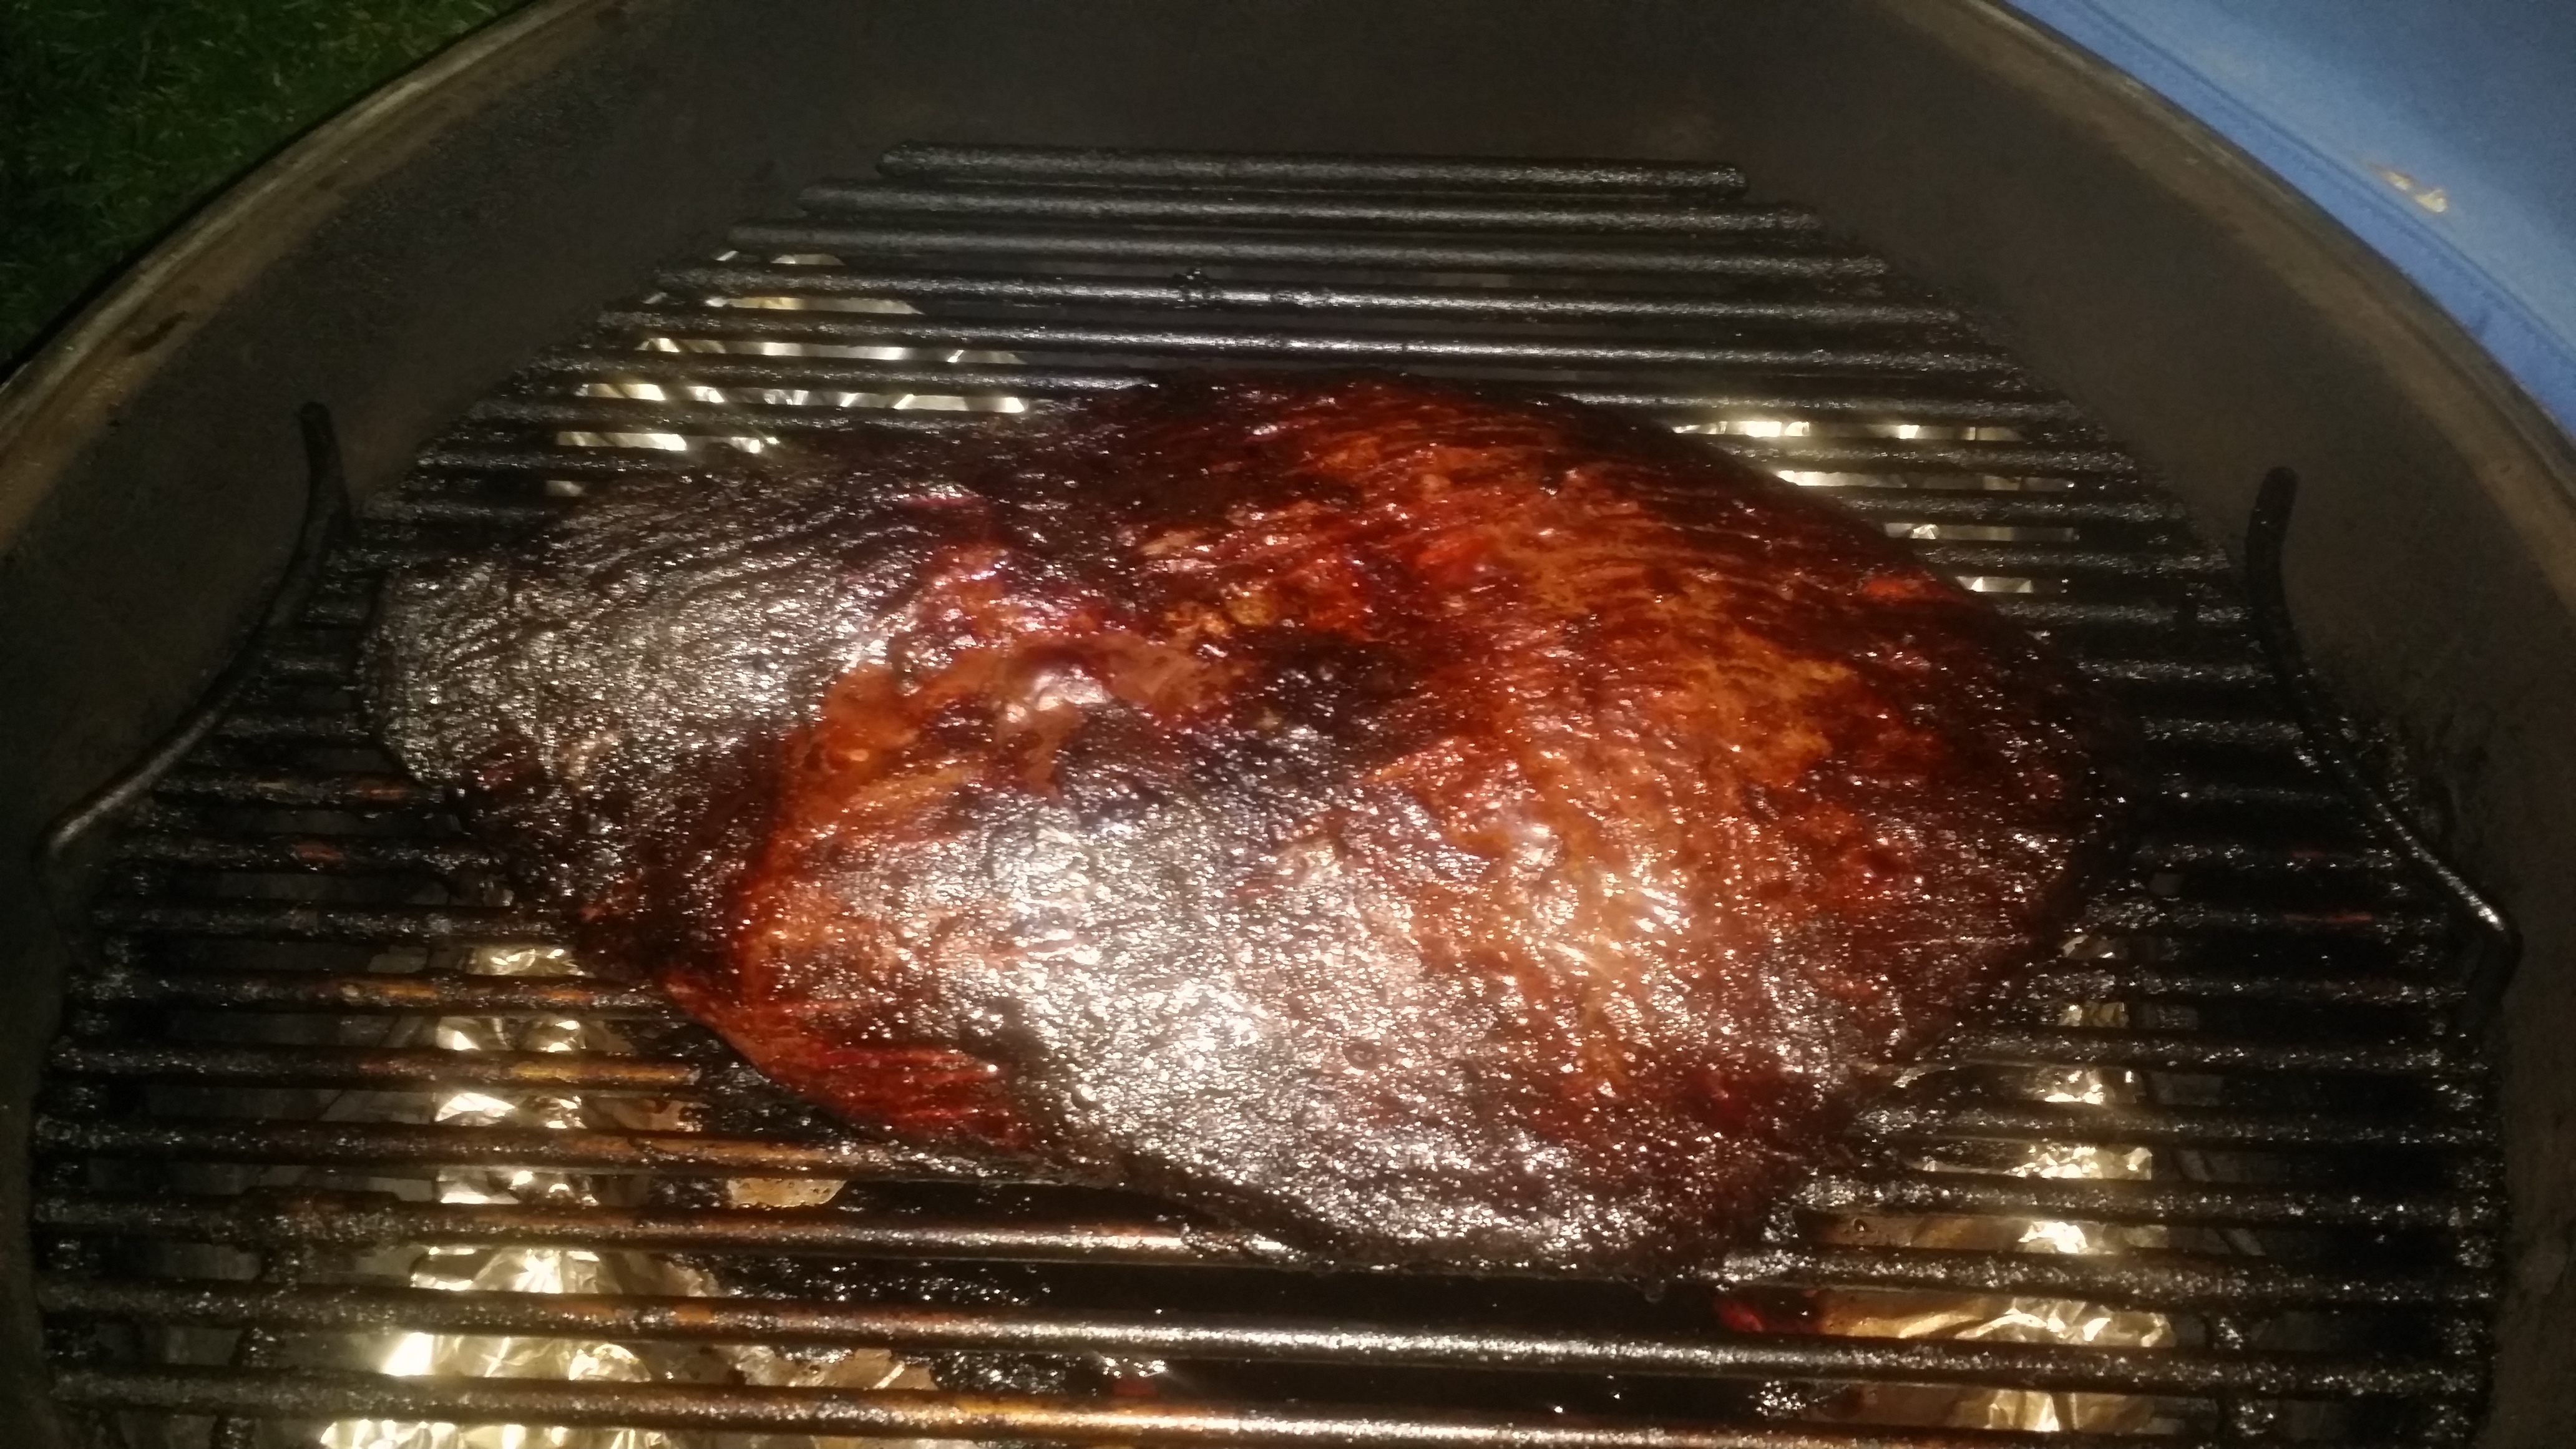
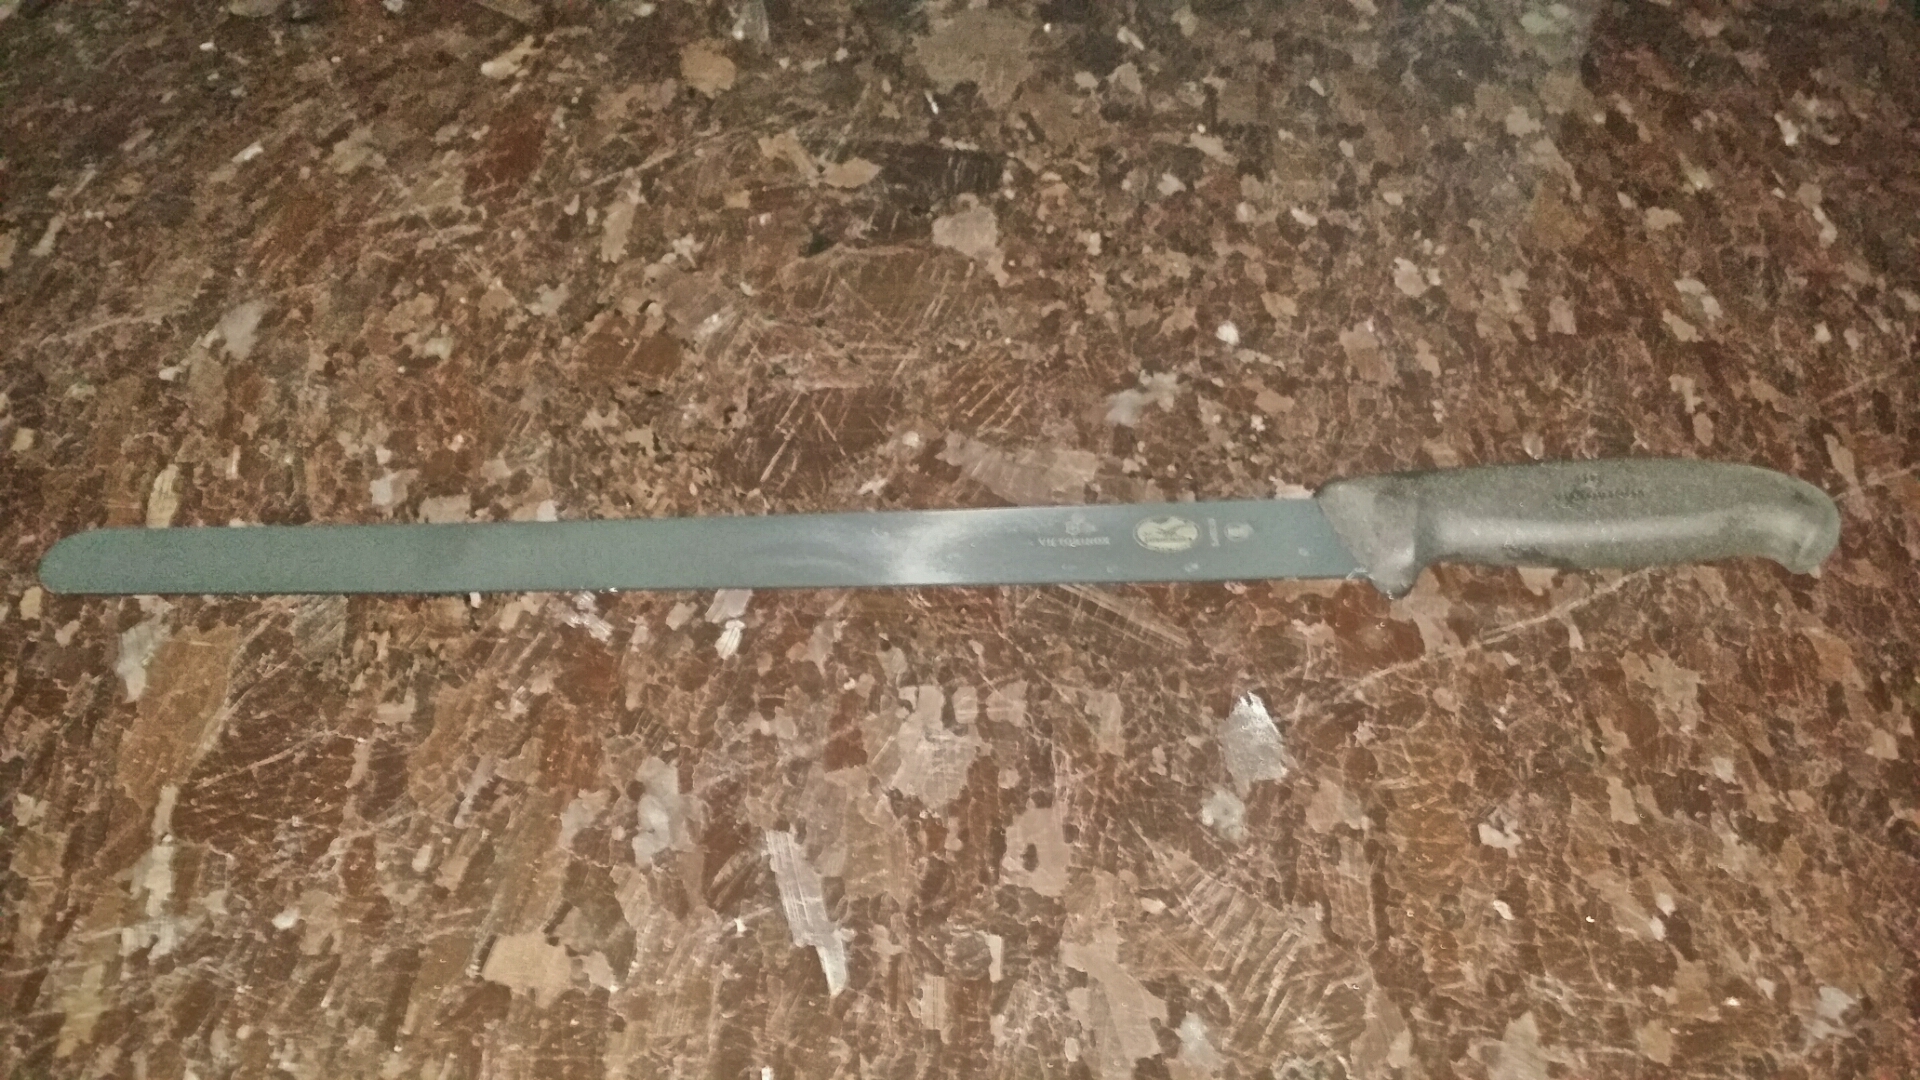
I cooked my first Prime brisket this weekend. It turned out great other then my timing and cook temp. I put the brisket on Saturday night at 11ish just before I went to sleep. I thought I had the vents set for 225f or so but at 5:30am Sunday morning the brisket was just about done. The dome temp was 310f...opps. I closed down both top and bottom vents and let the brisket sit till 7am. I held the brisket till 12:30pm in my oven at 165f. The brisket with all the silverskin removed. Seasoned with Smokin Guns Mild rub Not a very good KK shot its pitch black at 5:30am The sliced brisket and my new brisket knife. The knife is 19" long with the handle. Then I cooked some ribs for latter this week.

 1 point
 -
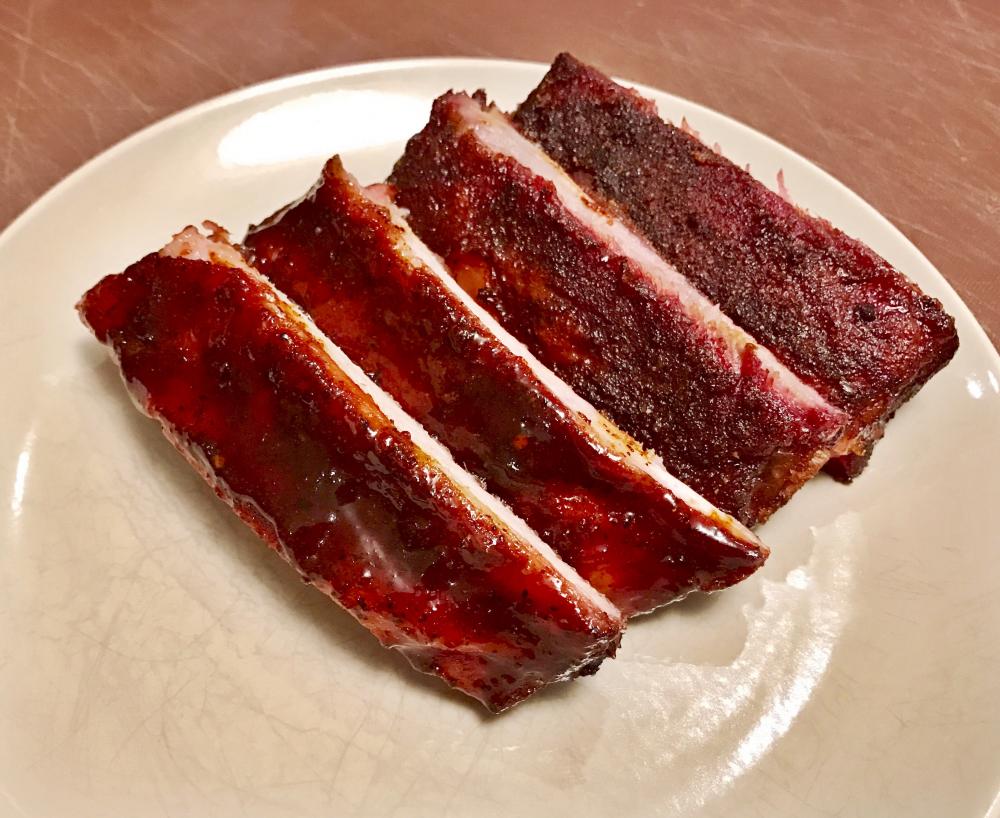
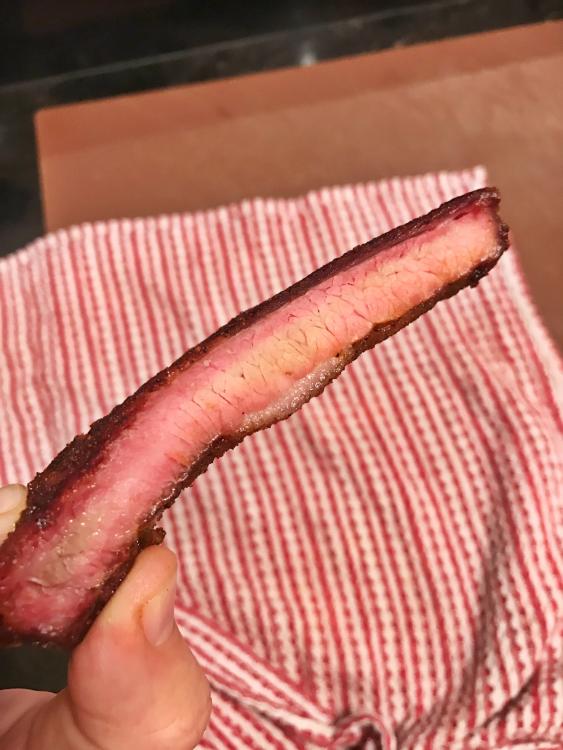
Well they were awesome. Super tender, bite clean off the bone but not sloppy and the rib squirted when I bit into one. Smoke ring was off the charts today
 1 point
 -
1 point
-
Yikes! Susan, you win the ultimate Scary Challenge for that picture! I hope you have a speedy and full recovery! Follow all the doctor's orders!1 point
-
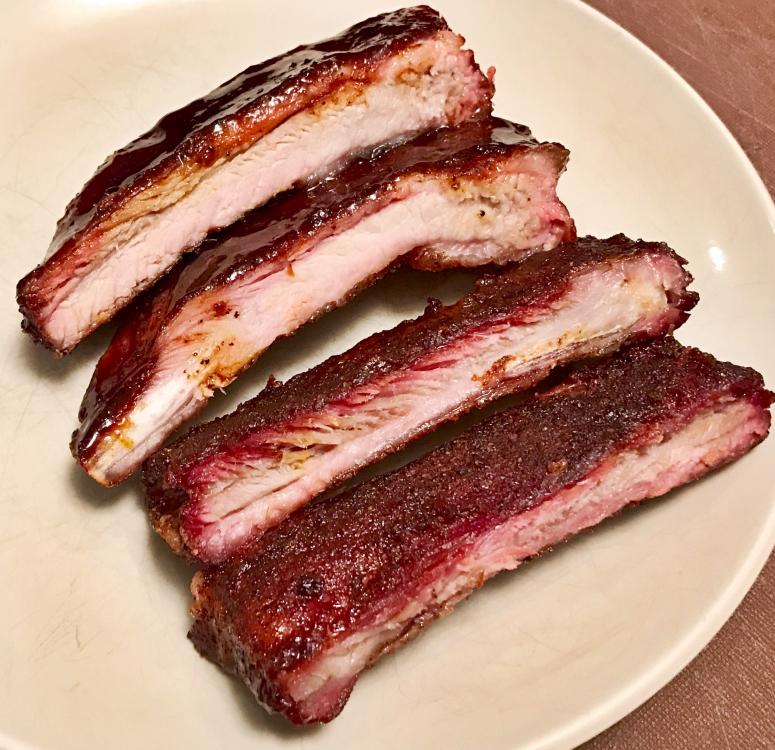
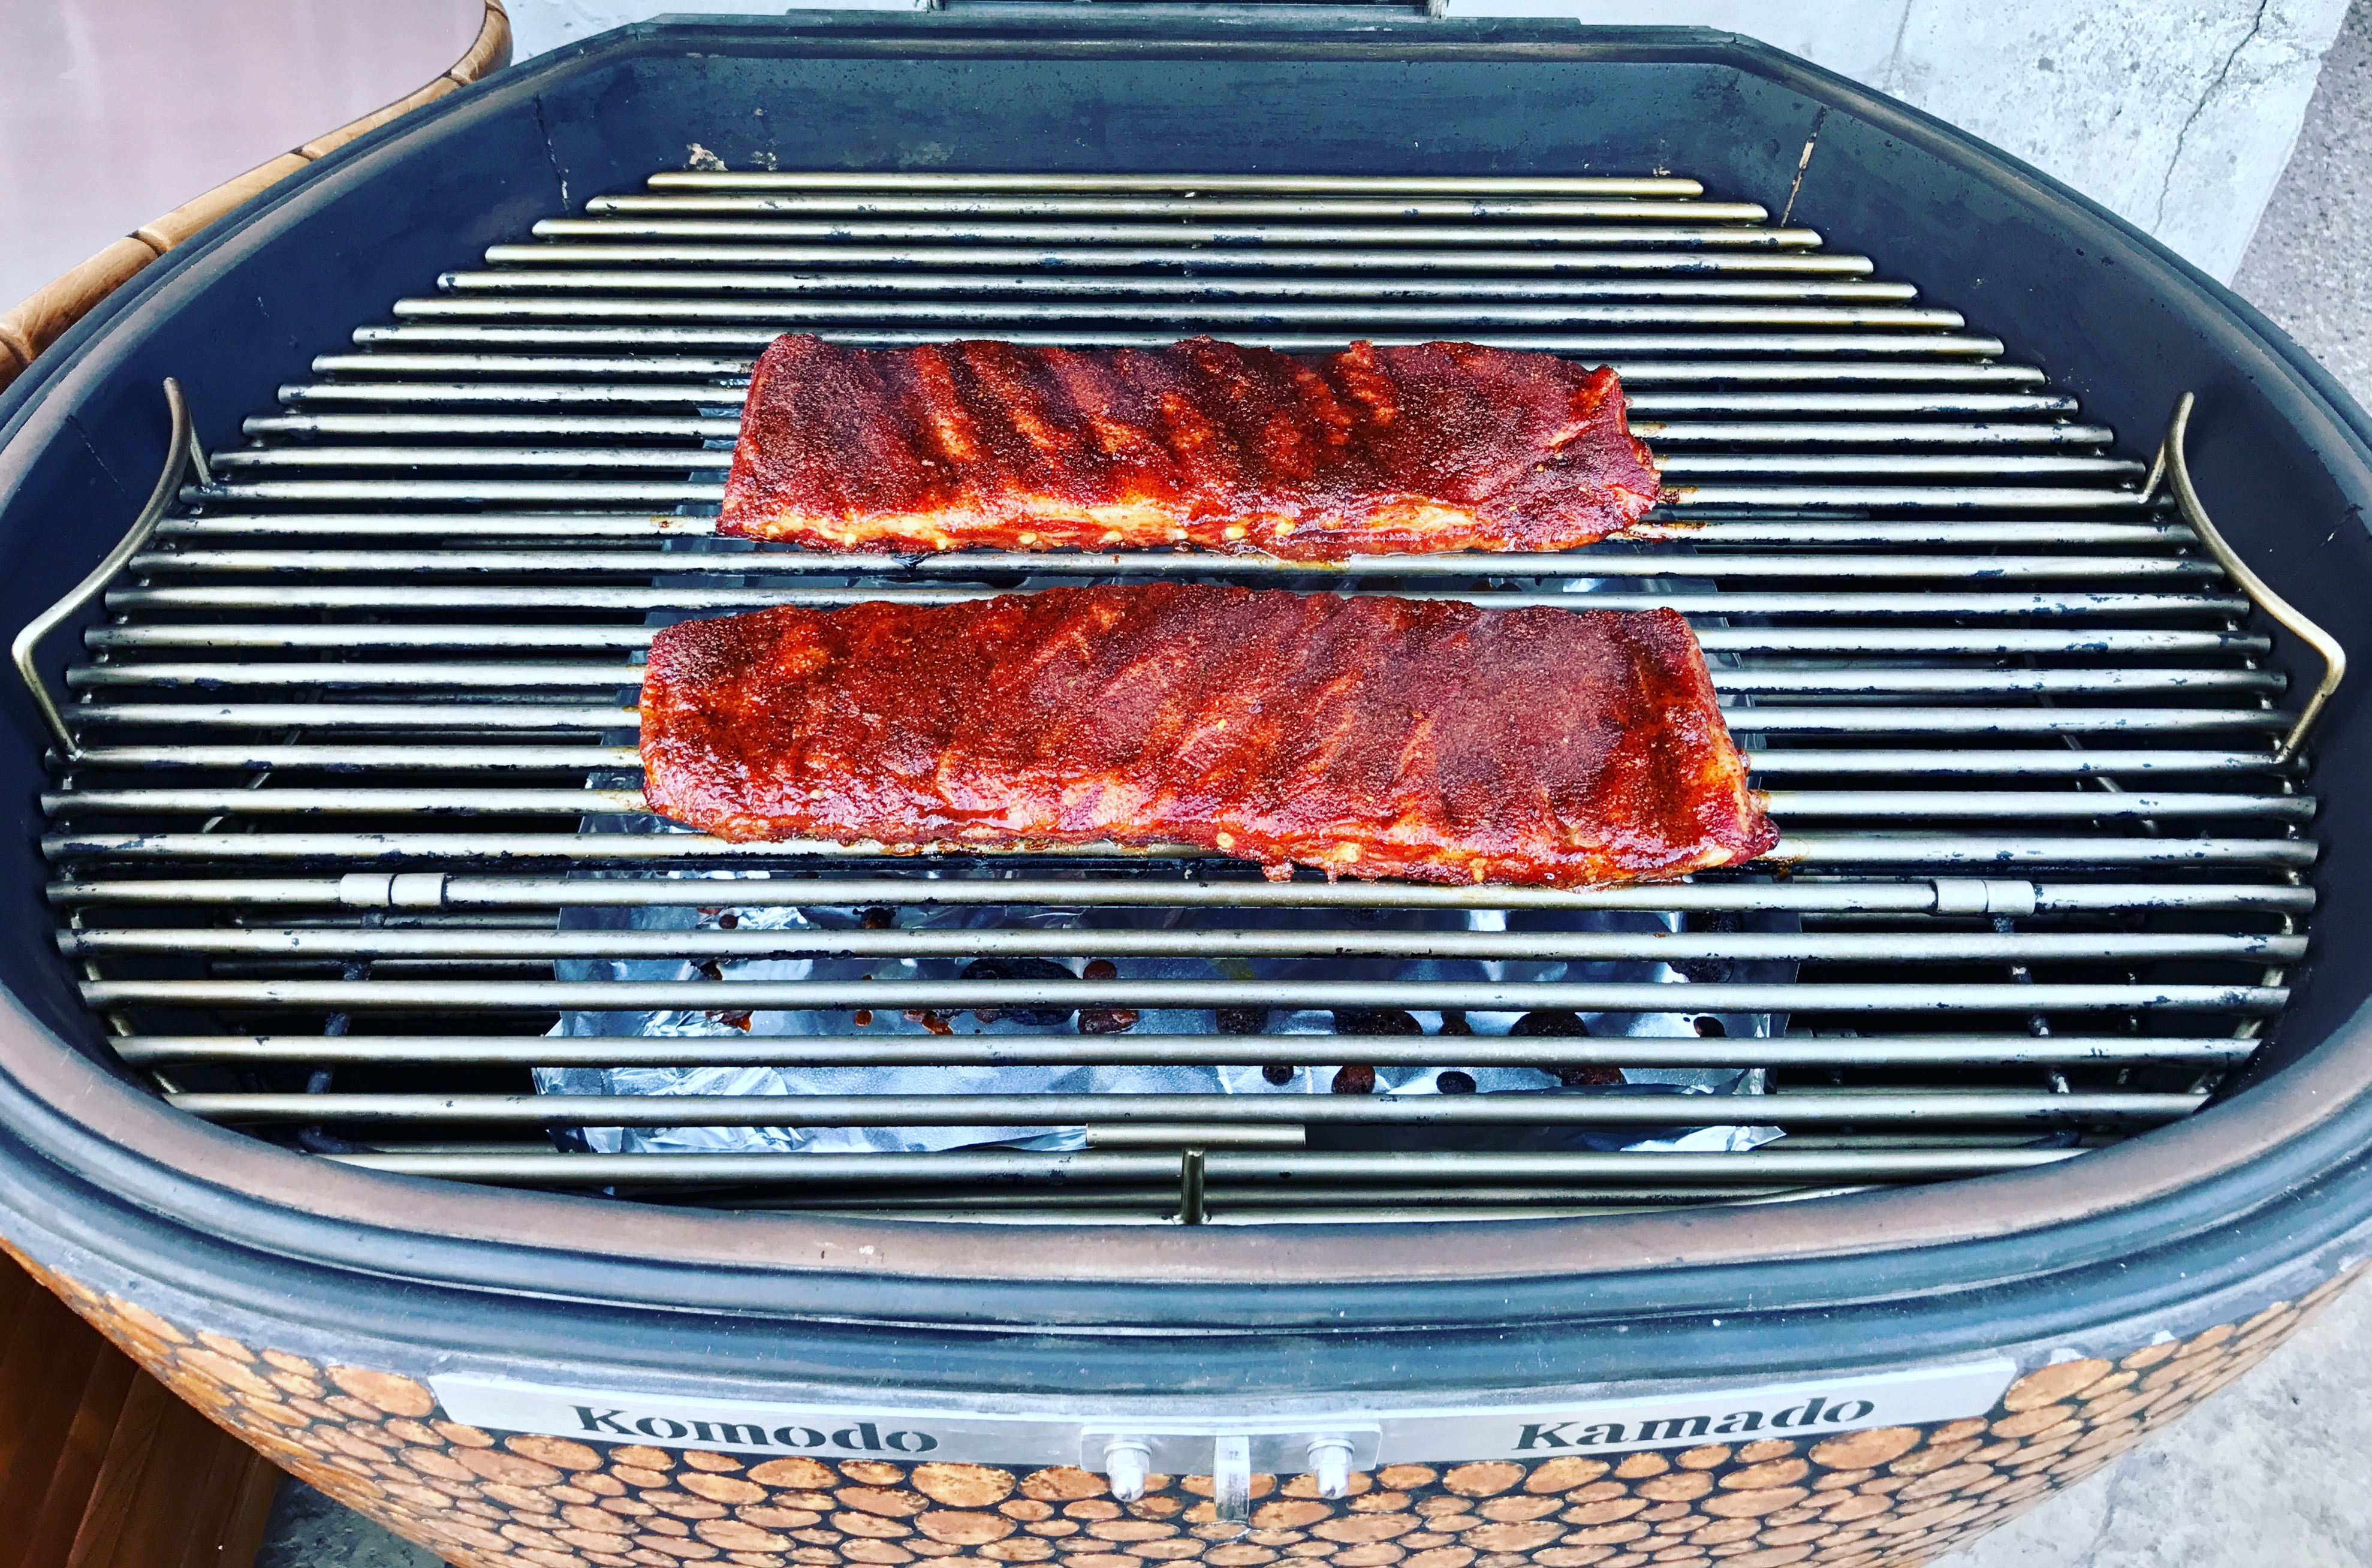
Cooking them at 250 for about 4 to 4.5 hours. Just opened to spritz and loving what I am seeing here
 1 point
 -
Served in Chinese restaurants all over the US.1 point
-
Looks fantastic I've done Asian ribs with mandarins. I think ribs are good with almost everything Sent from my SM-P600 using Tapatalk1 point
-
Holy that sounded terrible but the pictures make it 10x times worse. Please give Susan my best wishes and I hope she gets better real fast. Susan, at least you know Charles will be cooking some extra special meals for you.1 point
-
Friends and great food what could be better.1 point
-
I'm sure the flavor was delicious.1 point
-
Great pictures and looks pretty darn tasty. Thanks for the post it's making my mouth water.1 point
-
The chimichuri ribs look awesome. Great cook.1 point
-
I typically go by sight and feel. I generally start with about 1/2 cup AP flour in the bag and just drizzle water in until I get it where I think it's right. My big lesson was to thoroughly mix it, even past the point where you think it's ready. Since you're not making bread, you don't worry about overworking the dough. I've had several mishaps where a splut (a highly technical term - LOL) of dry flour that was hiding in the middle will squirt out of the bag . Not good.1 point


.jpg.34cbdb755e37f8c3558abc342a56d88b.jpg)
.jpg.06544663affed934e80a0e72195b2c80.jpg)


.thumb.GIF.006d23b9323146d2dd9055f4e195bc2a.GIF)