ThreeDJ16
-
Posts
3,957 -
Joined
-
Last visited
-
Days Won
3
Content Type
Profiles
Forums
Events
Everything posted by ThreeDJ16
-

Fully Open Top Damper Cooking Method (experiental)
ThreeDJ16 replied to mguerra's topic in Techniques
Re: First Rotisserie Cook: Very nice Was just thinking about the lid situation some more and have a possible method someone can try out (I can't get around to it for little while). I am thinking that you maybe able to get enough control over your fire with just the bottom damper that you could leave the top damper all the way open (thus reducing the smoke stagnating around the chicken)? I am guessing this maybe possible for higher temp cooking chicken only, obviously low temps would not be very maintainable like this. Maybe get a proper fire going and then try opening top damper fully and completely choke off bottom damper, if the temps fall, then ever so slightly open the bottom damper. I would start with it closed as it is harder to lower temps than raise them. I hate to say it, but briquettes may lend itself to this situation better than lump. Also, my apologies to Madmedik for us completely going off course to his topic. I will split this topic off tonight.....suggestions to a good split point a welcome. -=J -
Fully Open Top Damper Cooking Method (experiental)
ThreeDJ16 replied to mguerra's topic in Techniques
Re: First Rotisserie Cook: Very nice Just for clarification......I was in no way suggesting that folks use the KK with the lid open for cooking chicken. That would burn up some charcoal. Especially since we use natural lump that basically burns at temps based on the amount of oxygen we supply to it (verses briquettes which tend to burn at lower temps regardless). Was just pointing out the possible difference in flavor. In the next paragraph, the KK used is a very first production GenII without the new elastopolymer grout/adhesive or silicone gaskets. It would probably be a bad idea to do this with a newer KK longer than a couple minutes. Even in my older KK, I don't do this more than a few minutes. With that being said, I actually cook all the time with the lid open. But not for long periods of time (and yes the handle will burn the crap out of you). Usually just long enough for a steak or pork chop on the sear grill. Also, it might surprise you how well you can control the flame on an open KK. With lower damper wide open pulled out....of course raging inferno. Damper pushed all the way in, but open daisy wheel, slightly less hell like. Start closing that daisy wheel and you can actually calm the fire down to very brightly glowing coals, but no flame except when fat drips. With the lid open, flare up are going to happen. Anyway, this was just FYI. -=J -
Fully Open Top Damper Cooking Method (experiental)
ThreeDJ16 replied to mguerra's topic in Techniques
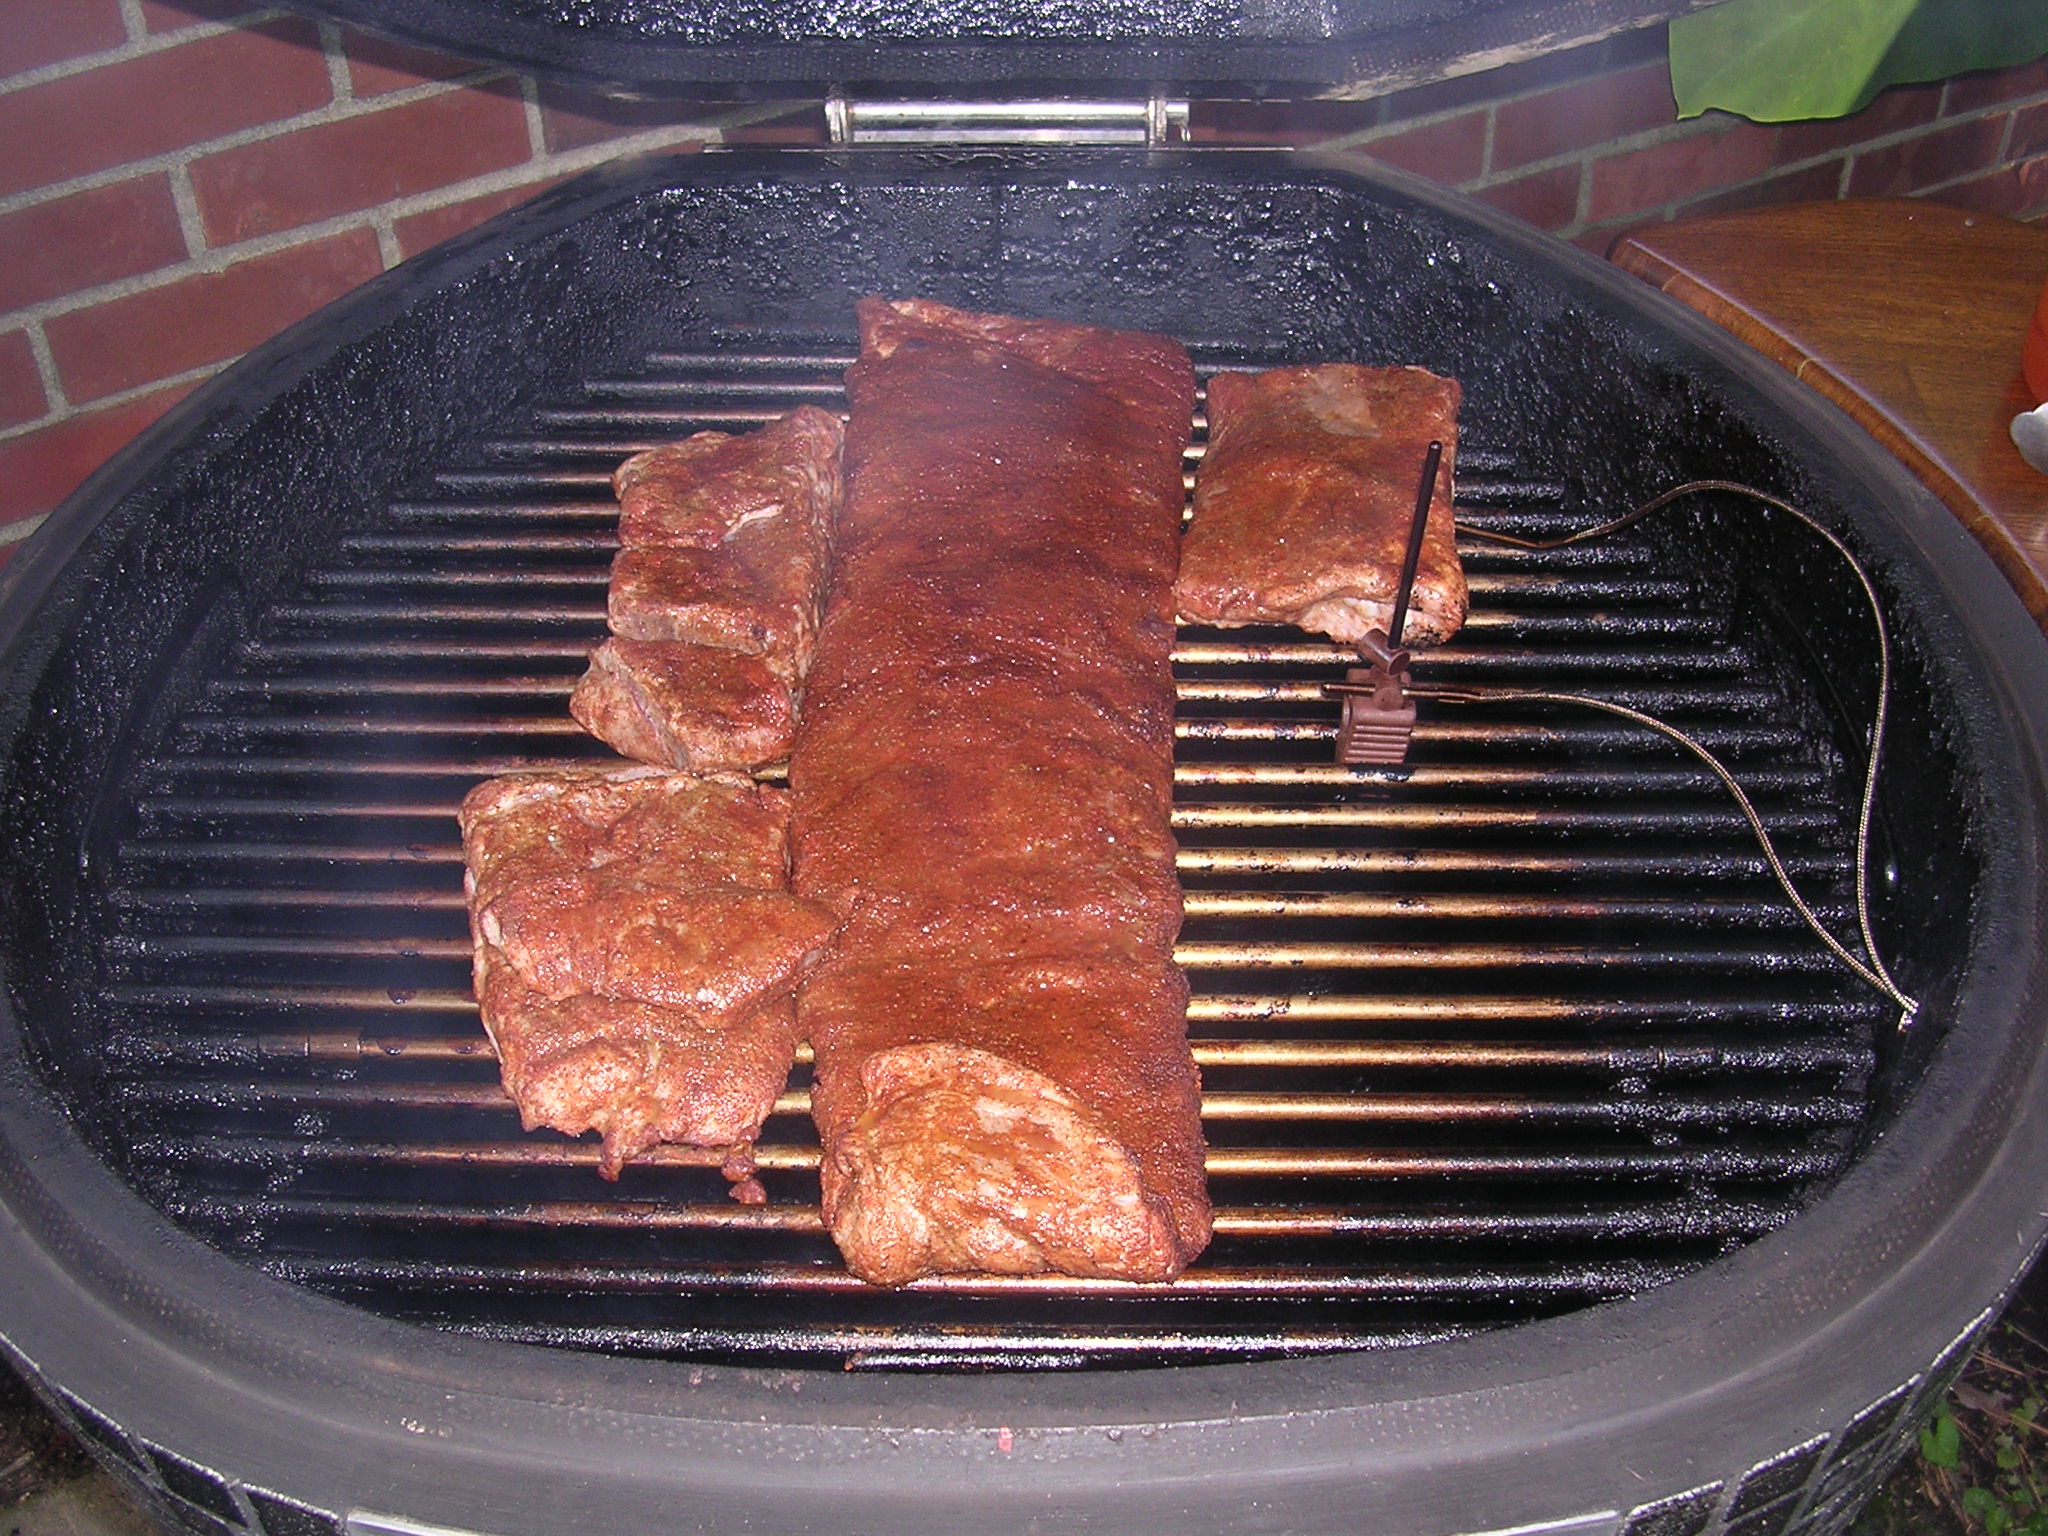
Re: First Rotisserie Cook: Very nice Wondering if the difference comes from the open verse closed lid design. Some people maybe more sensitive to the flavor and the fact it hangs around the meat longer with a closed lid causes it to be stronger. I never worry about it, as that is how chicken has always been cooked around here. Most BBQ joints still using a pit and that serve chicken, are cooking it directly over the coals and fat hitting the coals. It contributes to what makes it taste so good. But with it open, the smoke doesn't hang around it long, nor is it confined to a tight camber with the food. FYI, what a lot of people on the forum have learned, is cooking poultry using the sear grill as a upper grill and cooking high in the dome, yields very consistent, even cooked chicken. I have a rotis too, but like it cooked on the upper grill better, with no deflectors or pans, just direct. At that height from the coals, it is pretty darn even or at worst turning once or twice during a cook. I cooked thighs for chicken fajitas last night that way....fantastic. Actually had to fight with my wife over the skin I pulled off before chopping.....super crispy and so bad for you! I use lower temps till desired doneness (300), then raise to 400 for the finish. -=J -
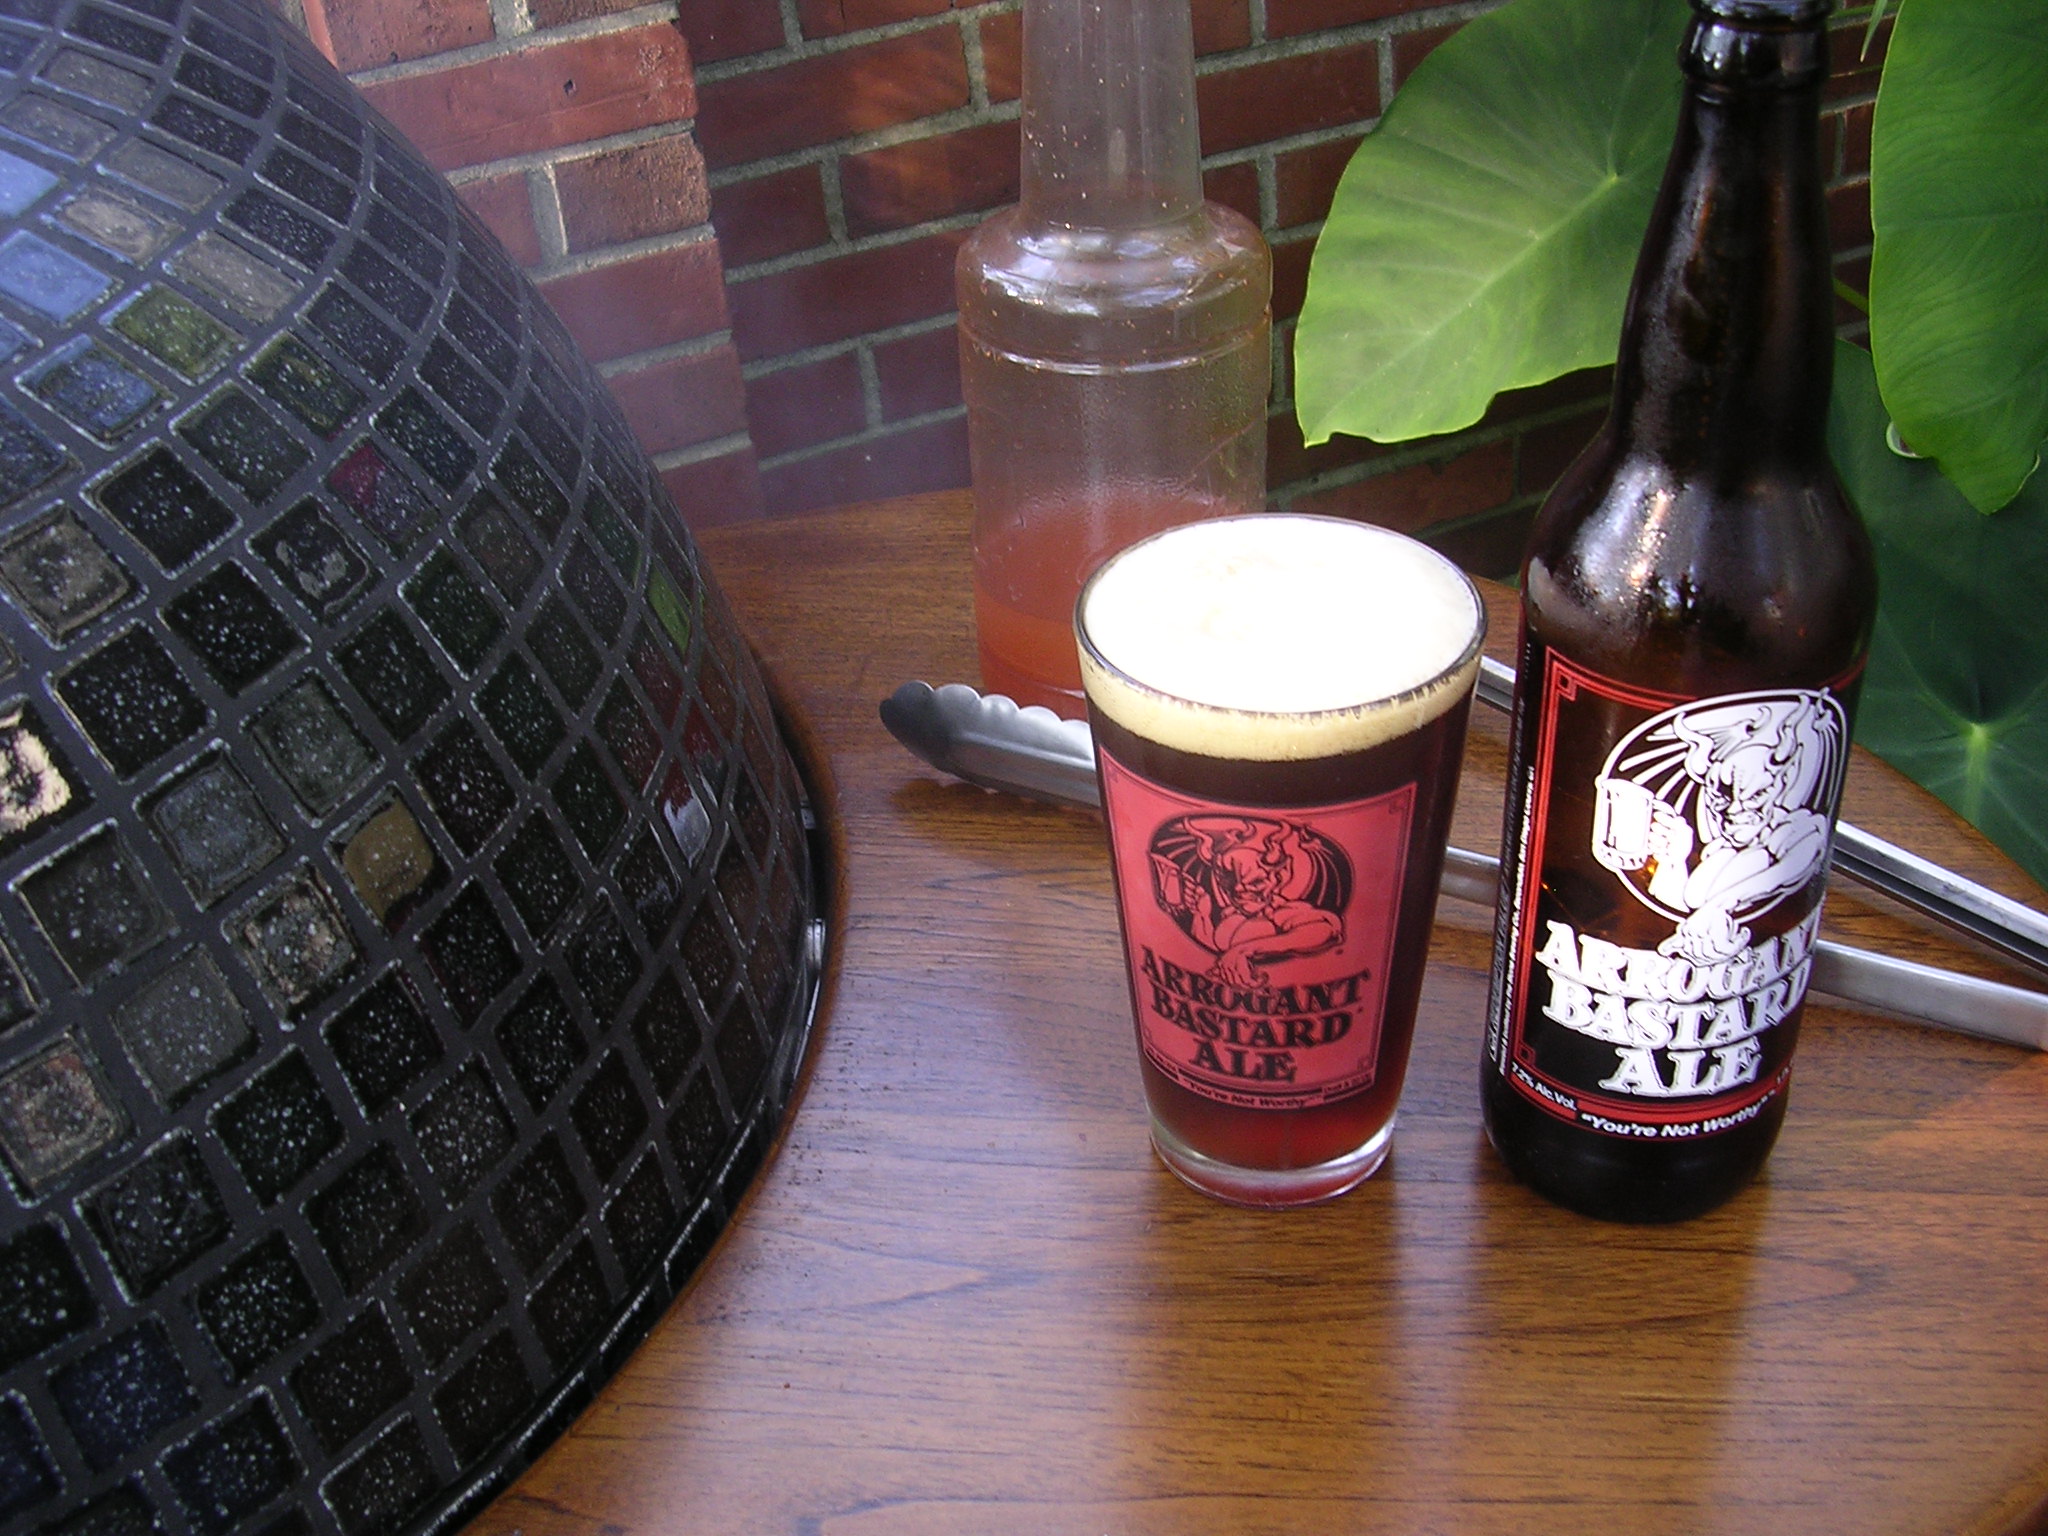
Re: Baby Backs Going to second that beer choice....enjoying as I type! And started a rack of spares..... -=J


-
Re: Pebble tile or Square tile? Glass black square tile!!!! -=J These were pre-side tables...... n66817
-
Three different types of Side Tables available..
ThreeDJ16 replied to DennisLinkletter's topic in KK Features & Accessories
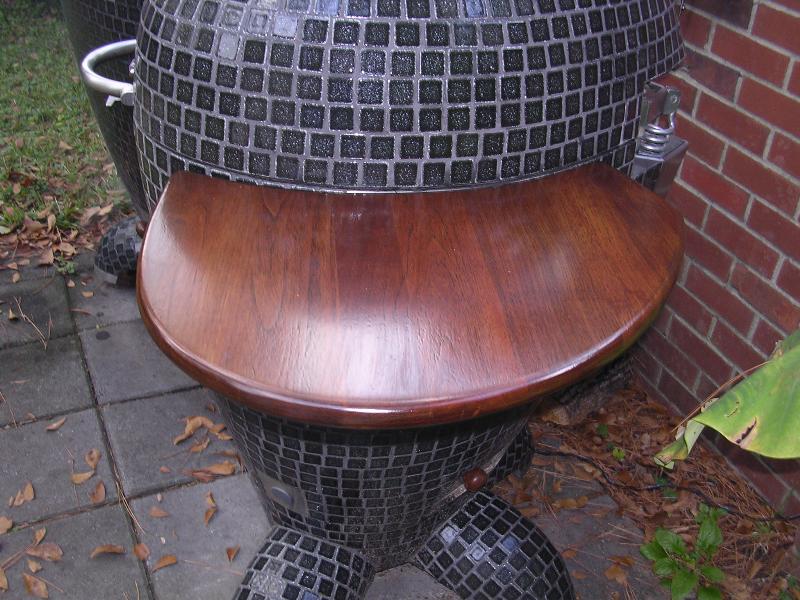
Re: Question about teak.... I stained mine and then used a satin spar varnish which protect from UV (and silvering). It does need a fresh coat or two each season. However, really wish I had thought of using a black wood stain instead. Maybe next time. -=J
-
Please help out by clicking the exclamation point above a post (report post) and flag user tag under their username for obvious spam posts! -=J
-
Re: Newbie 101 So are you up on tax laws here in the states? Meaning of life? Why is the sky blue? Are we there yet? Can we take four more years of change? -=J
-
Re: Newbie 101 Be happy to do so, though not quite there with the Wifi part! And I agree about the controllers.....while the KK is easy to control, it is just a no brainer with a controller. With my homemade one added to the bunch, I am up to 5 controllers! I really like knowing what is going on outside from inside and playing with cool toys! -=J
-
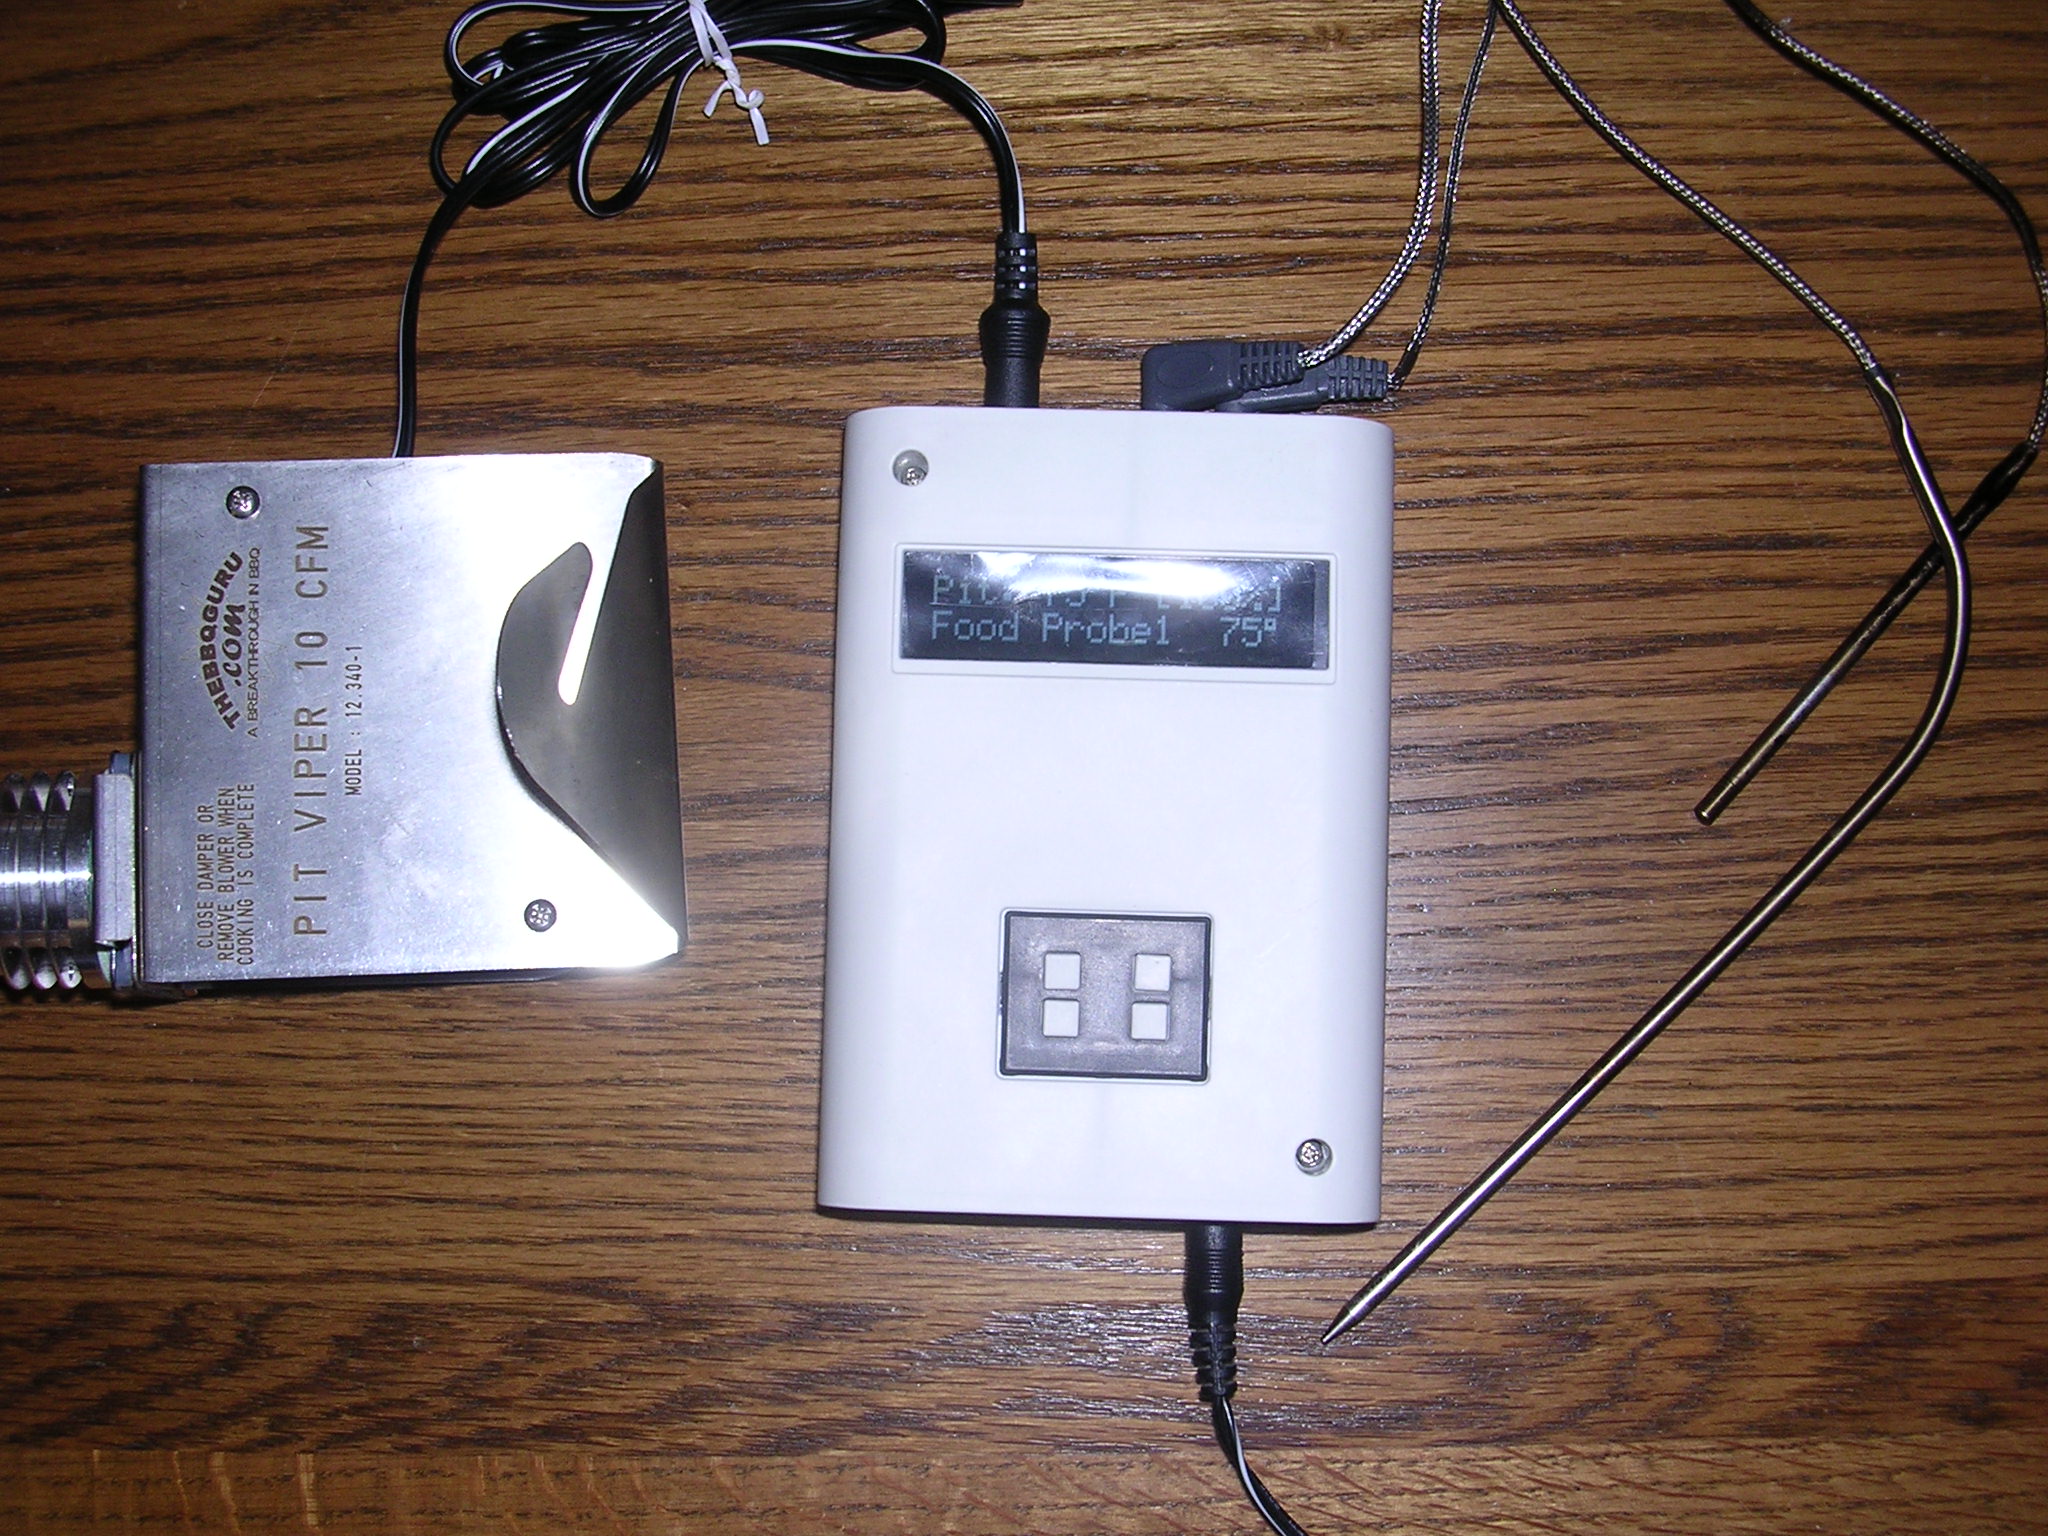
Build Your Own BBQ Controller (w/Wifi)
ThreeDJ16 replied to ThreeDJ16's topic in Jokes, Ribbin' & Misc Banter!
Re: Build Your Own BBQ Controller (w/Wifi) Not my finest wiring job, as it was a major headache getting all those parts on the breadboard to fit into that little case, but it works! The Wifi board is also there, though it is not programmed in yet. Link to case: http://www.adafruit.com/products/271 -=J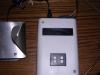


-
Build Your Own BBQ Controller (w/Wifi)
ThreeDJ16 replied to ThreeDJ16's topic in Jokes, Ribbin' & Misc Banter!
Re: Build Your Own BBQ Controller (w/Wifi) Thanks. Everything here is DIY. Besides, my current build controller is all CapnBry's work....his design and programming. It is a very easy one to build and has great instructions/parts lists over at Virtual Weber board. Give it a go building it yourself and you will be very happy with it. -=J -
Build Your Own BBQ Controller (w/Wifi)
ThreeDJ16 replied to ThreeDJ16's topic in Jokes, Ribbin' & Misc Banter!
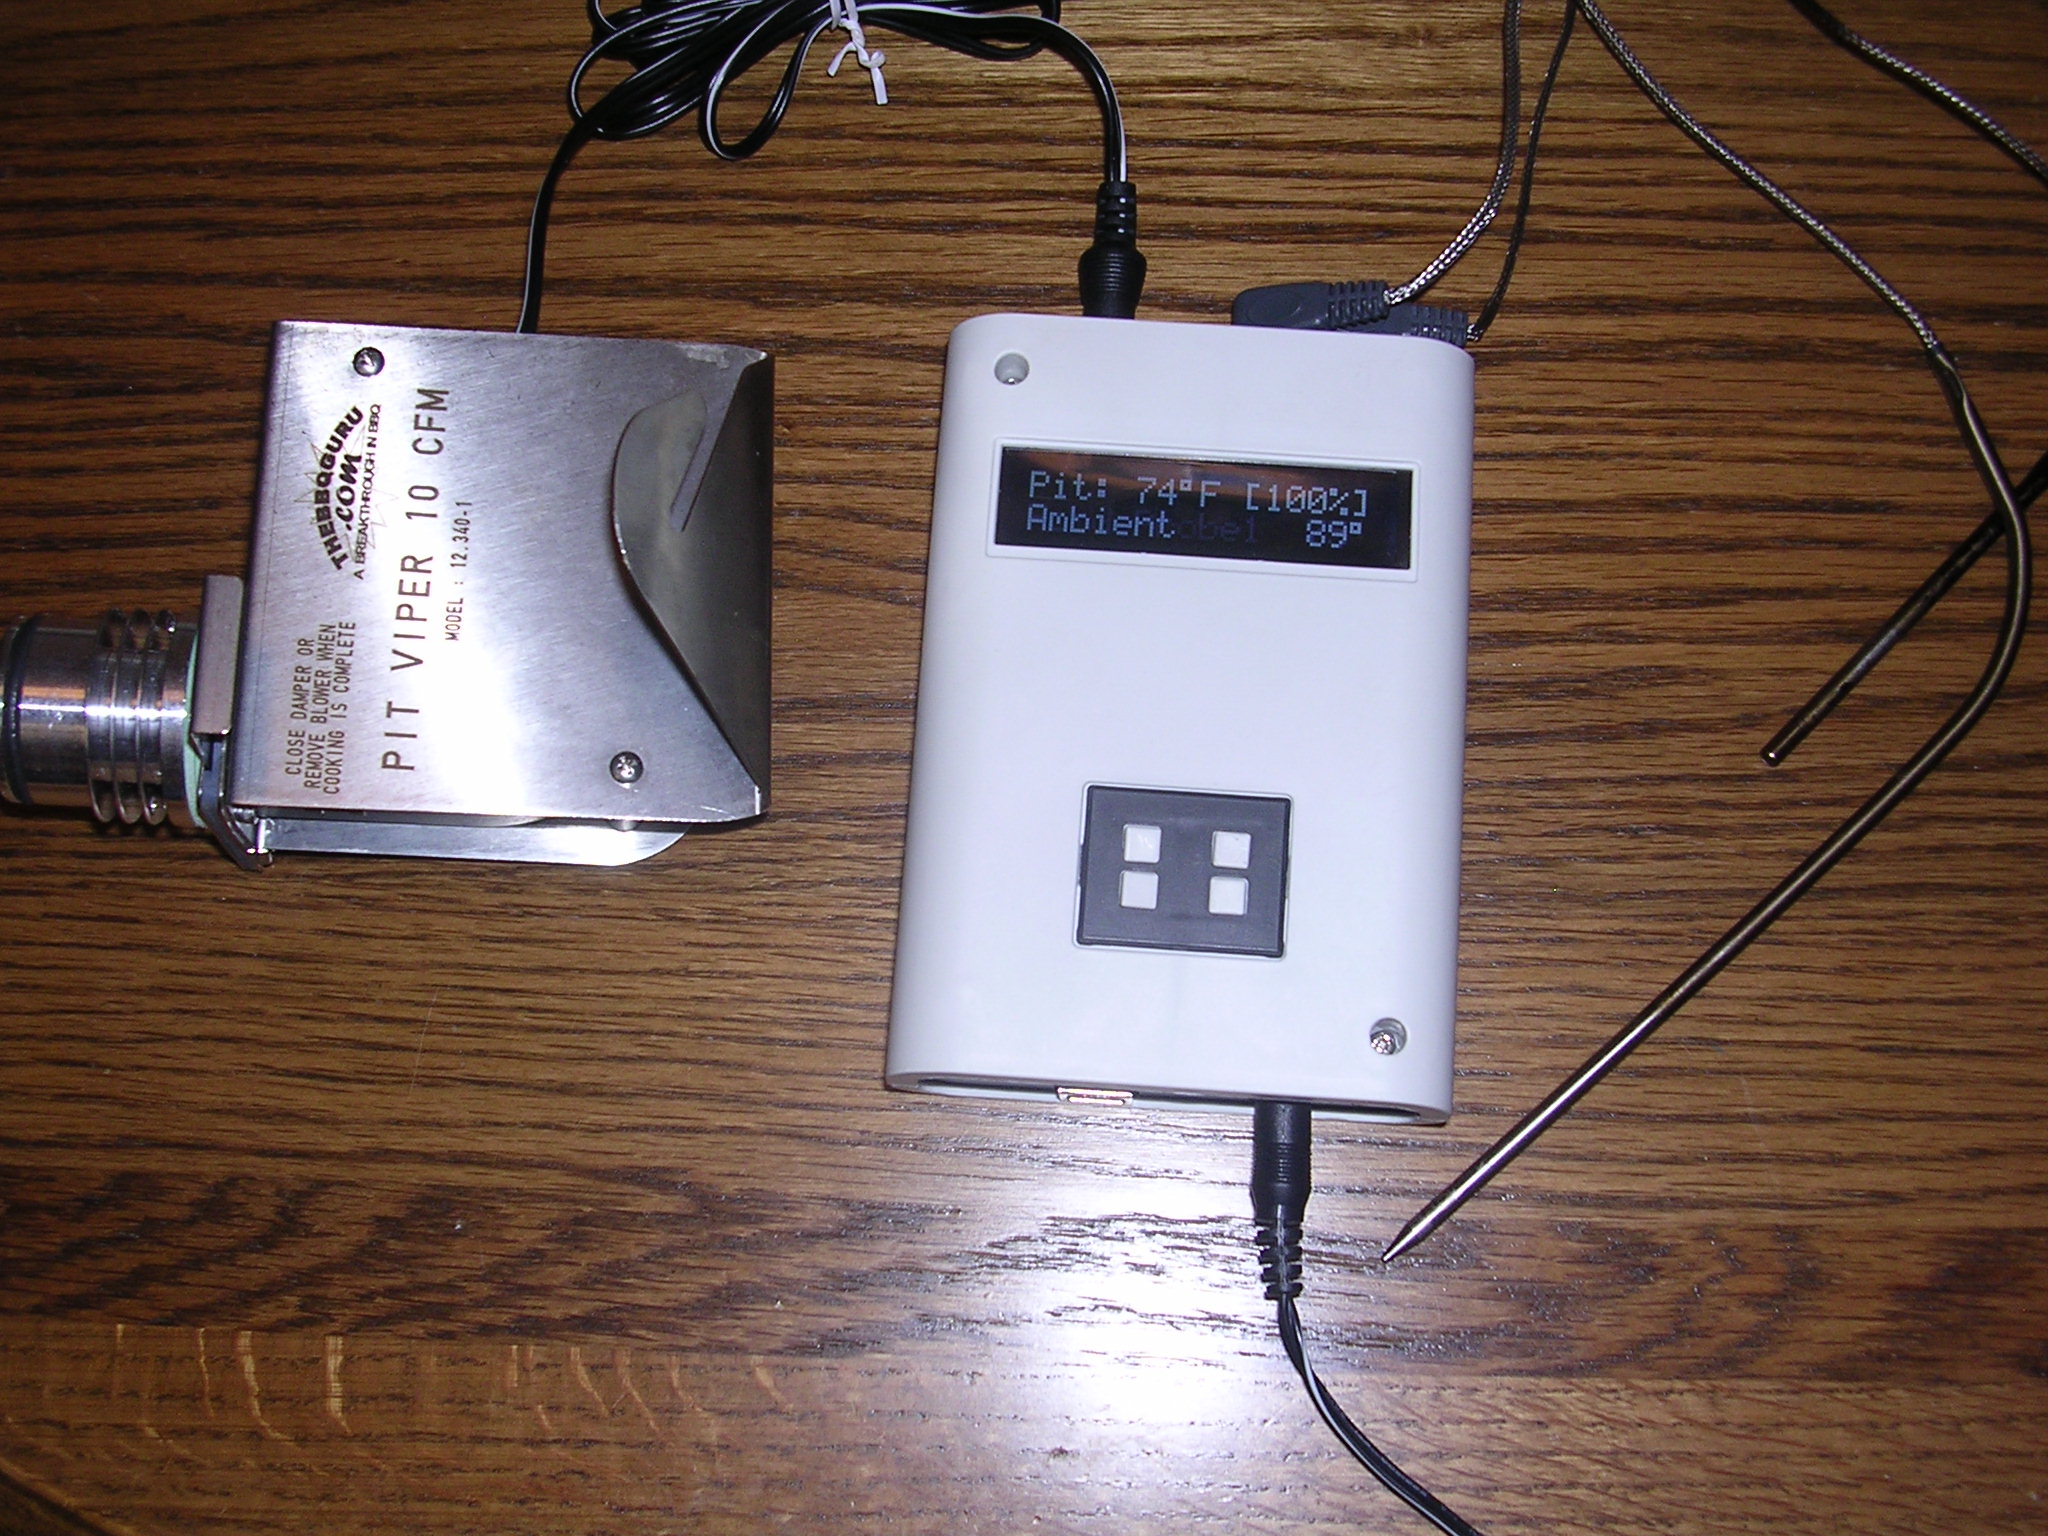
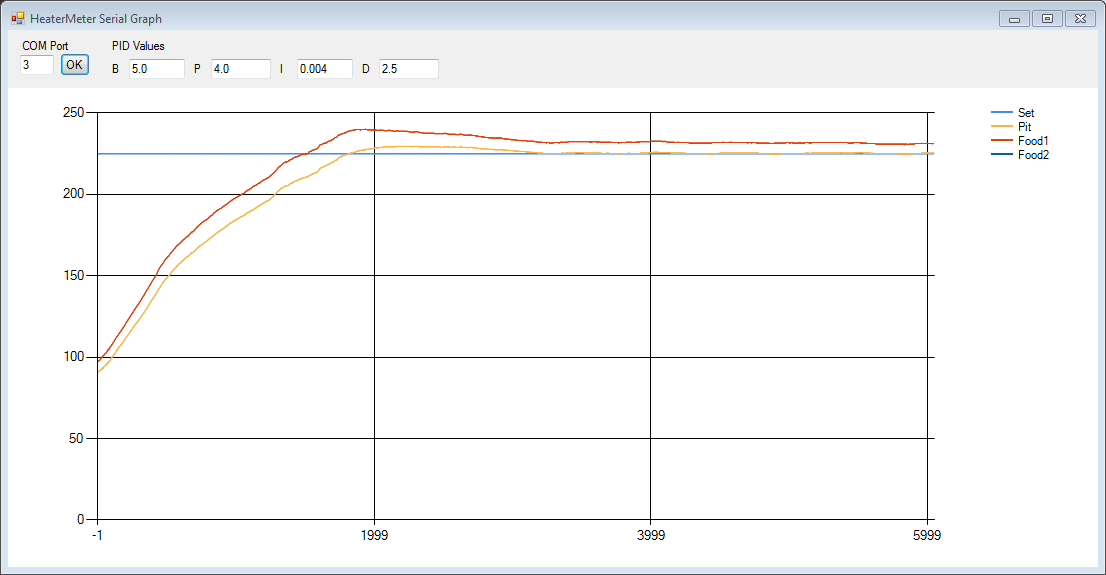
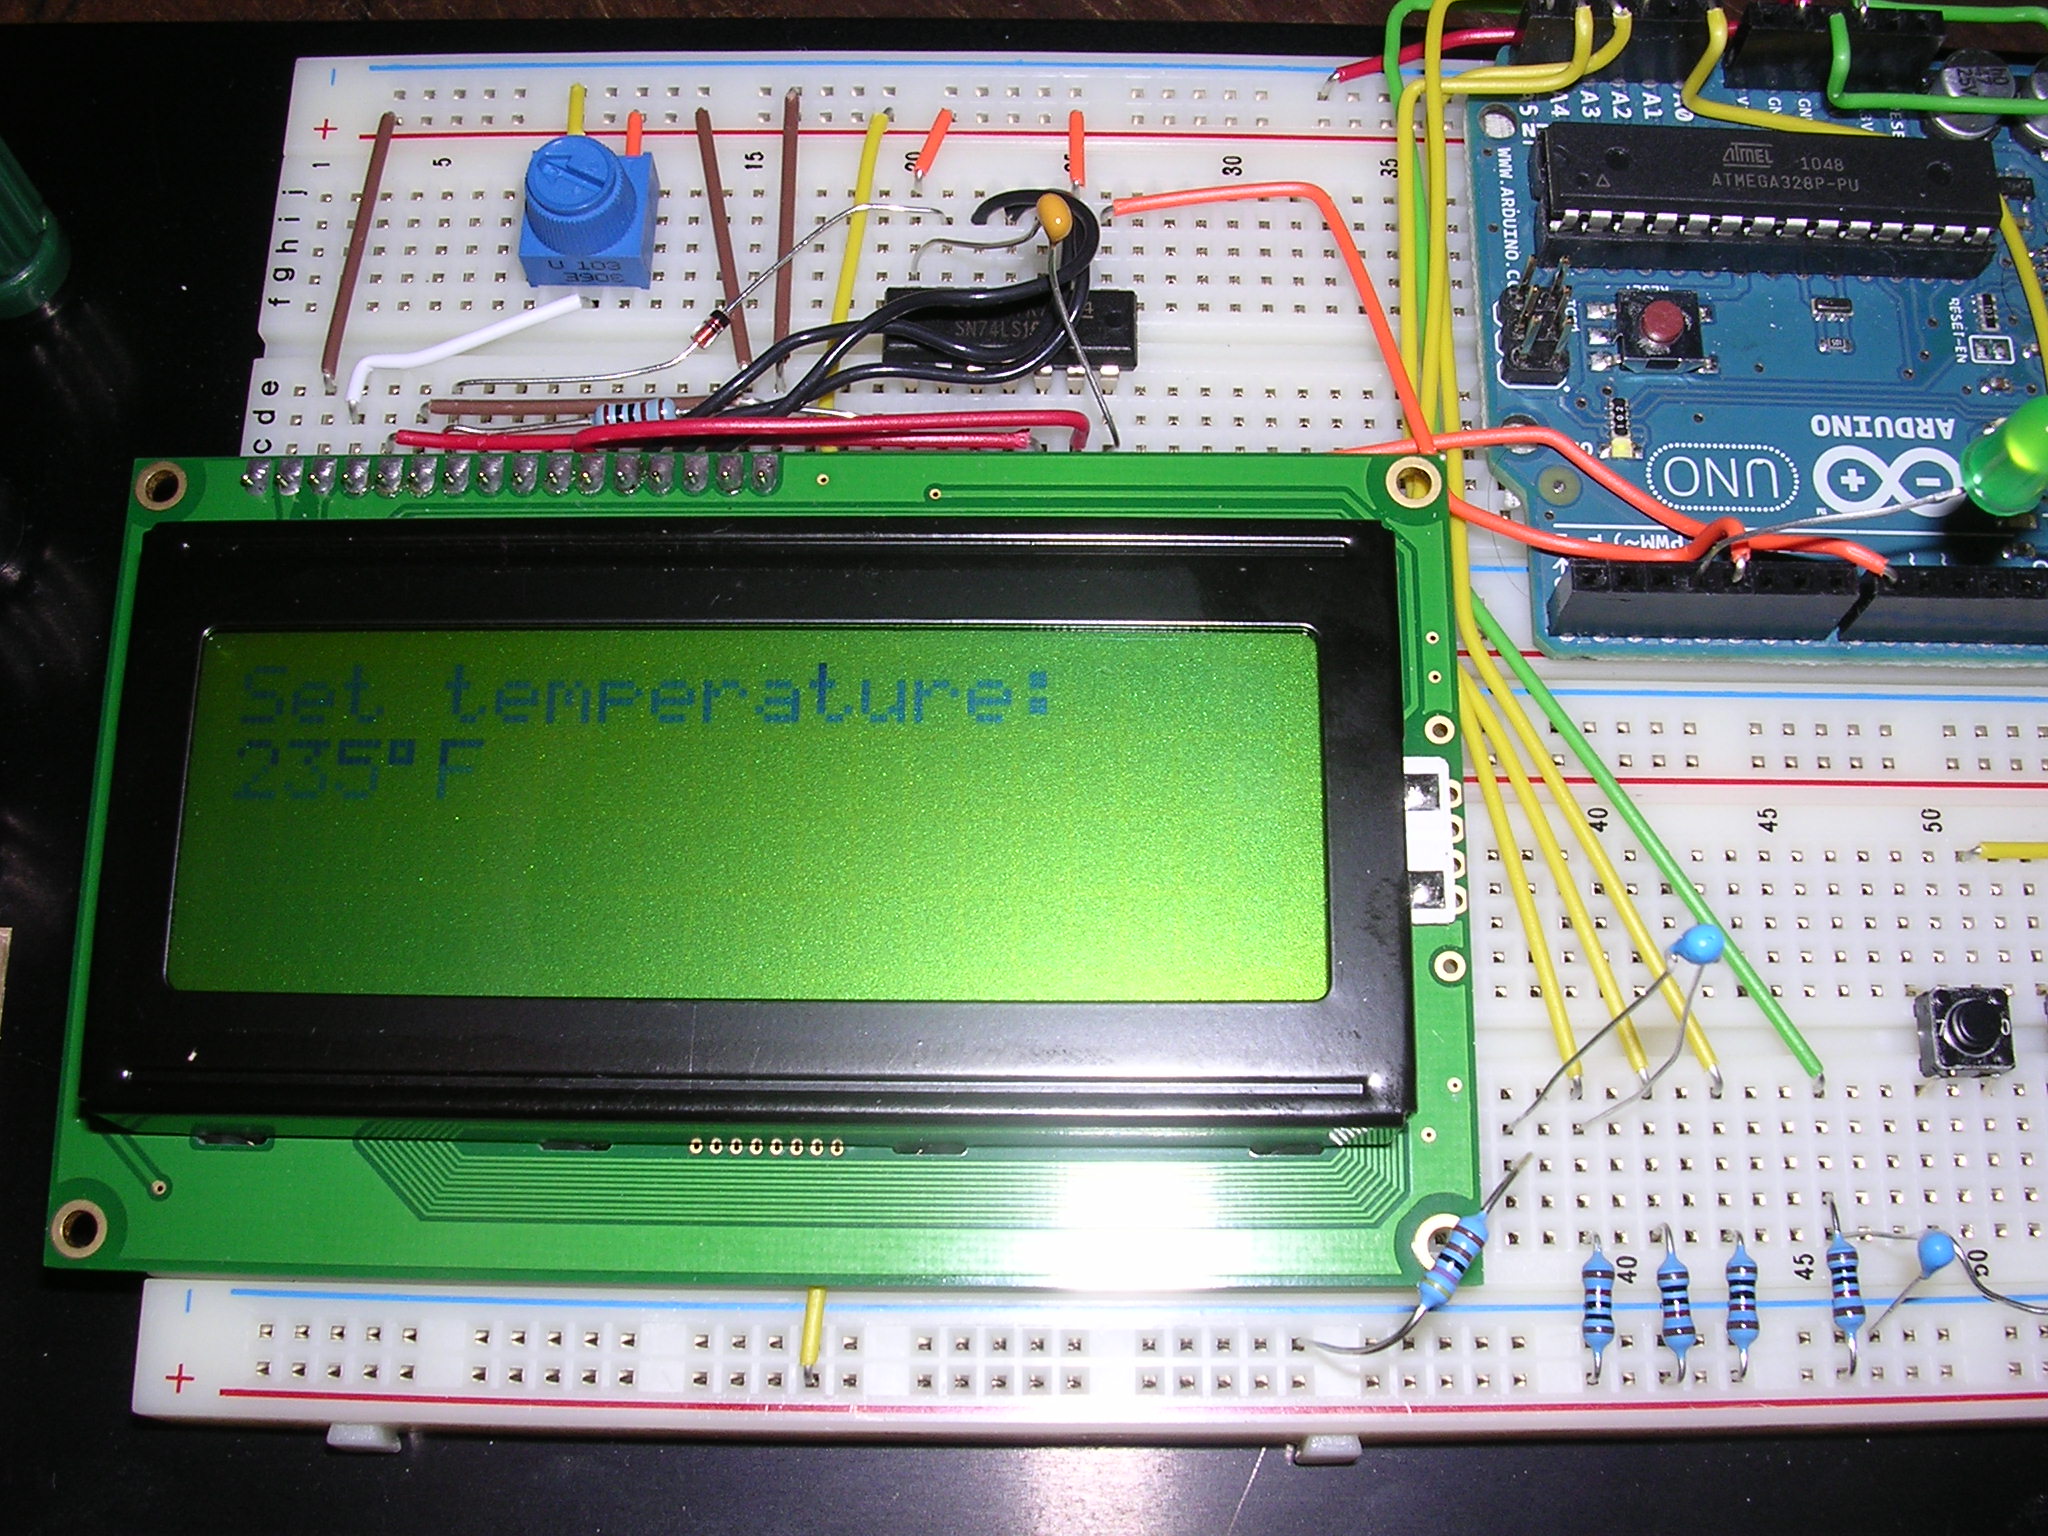
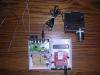
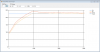
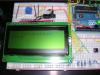
Re: Build Your Own BBQ Controller (w/Wifi) Here are the pics of the first trial run. Just over 1.5 hrs with nothing on it for a test (food 1 probe is at probe tree top and pit probe is at the bottom). And thanks to CapnBry, who was nice enough to provide a serial port graph he made for the HeaterMeter, we can see how nice the results really are. Especially for a sub $100, home built controller. I am pleasantly surprised with the HeaterMeter! Gonna try it with spare ribs tomorrow. Still need to find a case and get the Wifi card working. -=J DSCN2066.JPG[/attachment:10j6j80m] DSCN2064.JPG[/attachment:10j6j80m] Capture.PNG[/attachment:10j6j80m]
-
Build Your Own BBQ Controller (w/Wifi)
ThreeDJ16 replied to ThreeDJ16's topic in Jokes, Ribbin' & Misc Banter!
Re: Build Your Own BBQ Controller (w/Wifi) HeaterMeter tests against an Ametek temp calibrator: Actual___Pit___Food1 32_____34_____32 100_____99_____98 150____149____149 200____199____199 250____250____249 Actually pretty impressed with the accuracy of the thermistor probes. They seem to be a bit less sensitive to change than the TC probes, but for BBQ that is no issue. Going to give it the smoke test next time I am off to check out the PID control. Would be nice if I could get a chart running to trend it. -=J -
Build Your Own BBQ Controller (w/Wifi)
ThreeDJ16 replied to ThreeDJ16's topic in Jokes, Ribbin' & Misc Banter!
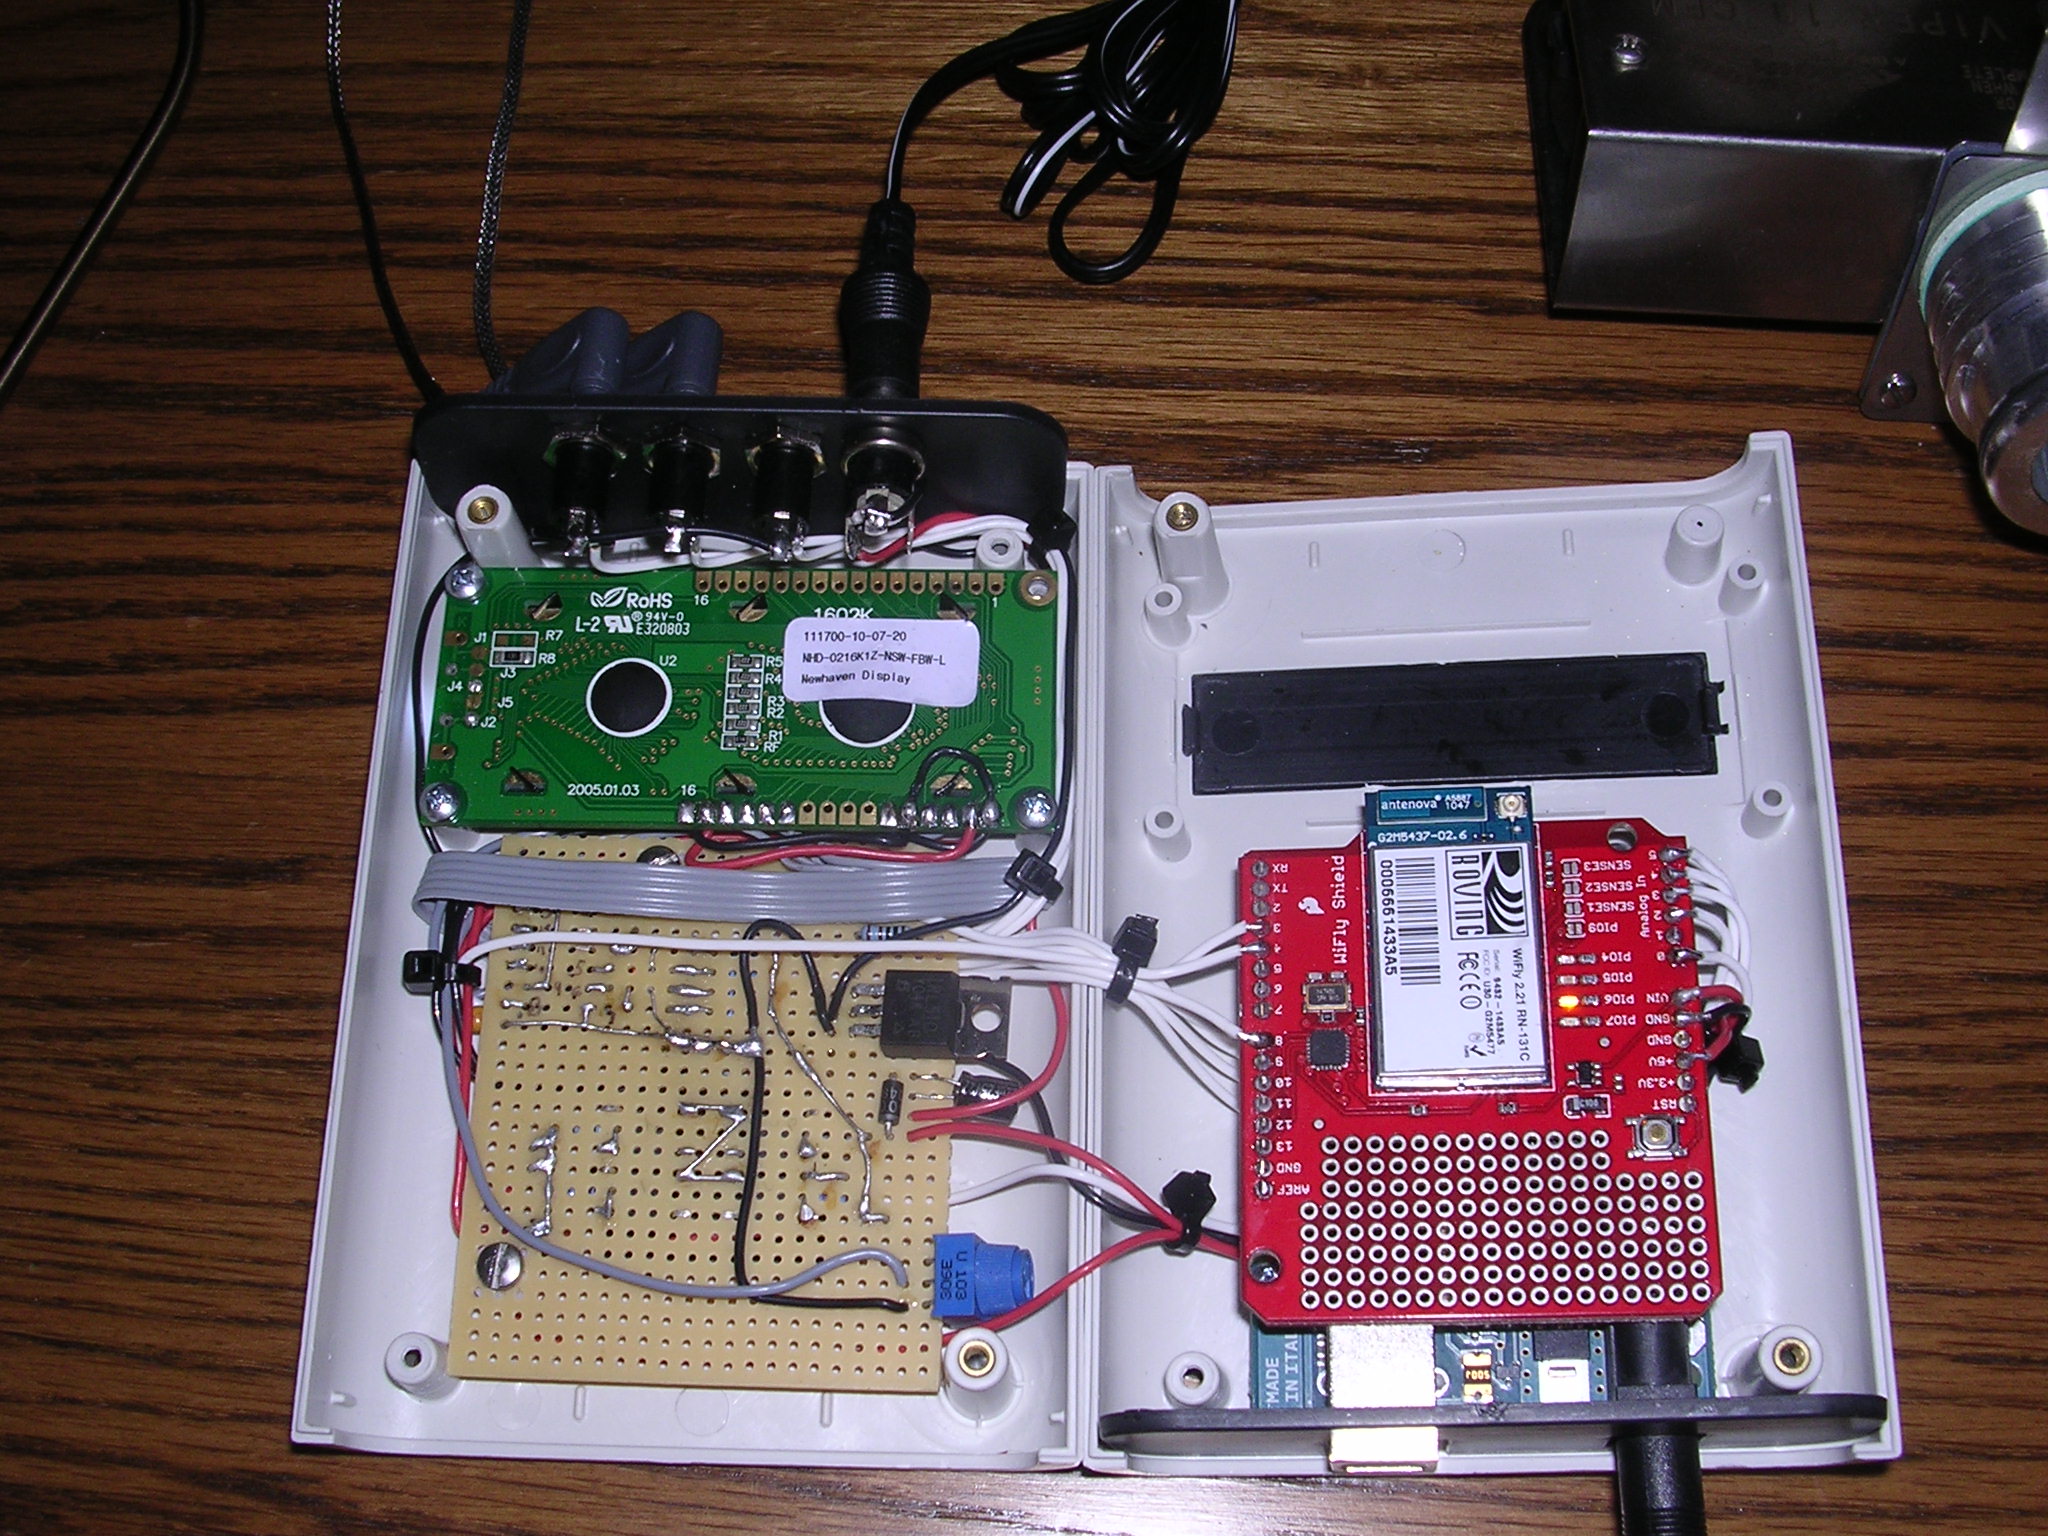
Re: Build Your Own BBQ Controller (w/Wifi) That part is a show stopper. Slightly water resistant is about as good as it gets unless you want to spend mega bucks on water tight connectors. And even then, you need the LCD and buttons to be on the inside or go the expensive alternate. More than likely, the $3 Stoker water resistant case will get revisited for this project. Now, maybe when I get to the final build, might go all out. As for being over your head, I doubt that. CapnBry has done a most excellent job of breaking it down on his HeaterMeter thread @TVWBB and included a simple schematic with parts lists (& links). The program he wrote was as simple as loading it to the Arduino...plug and play with only one change to disable the Wifi side. -=J -
Build Your Own BBQ Controller (w/Wifi)
ThreeDJ16 replied to ThreeDJ16's topic in Jokes, Ribbin' & Misc Banter!
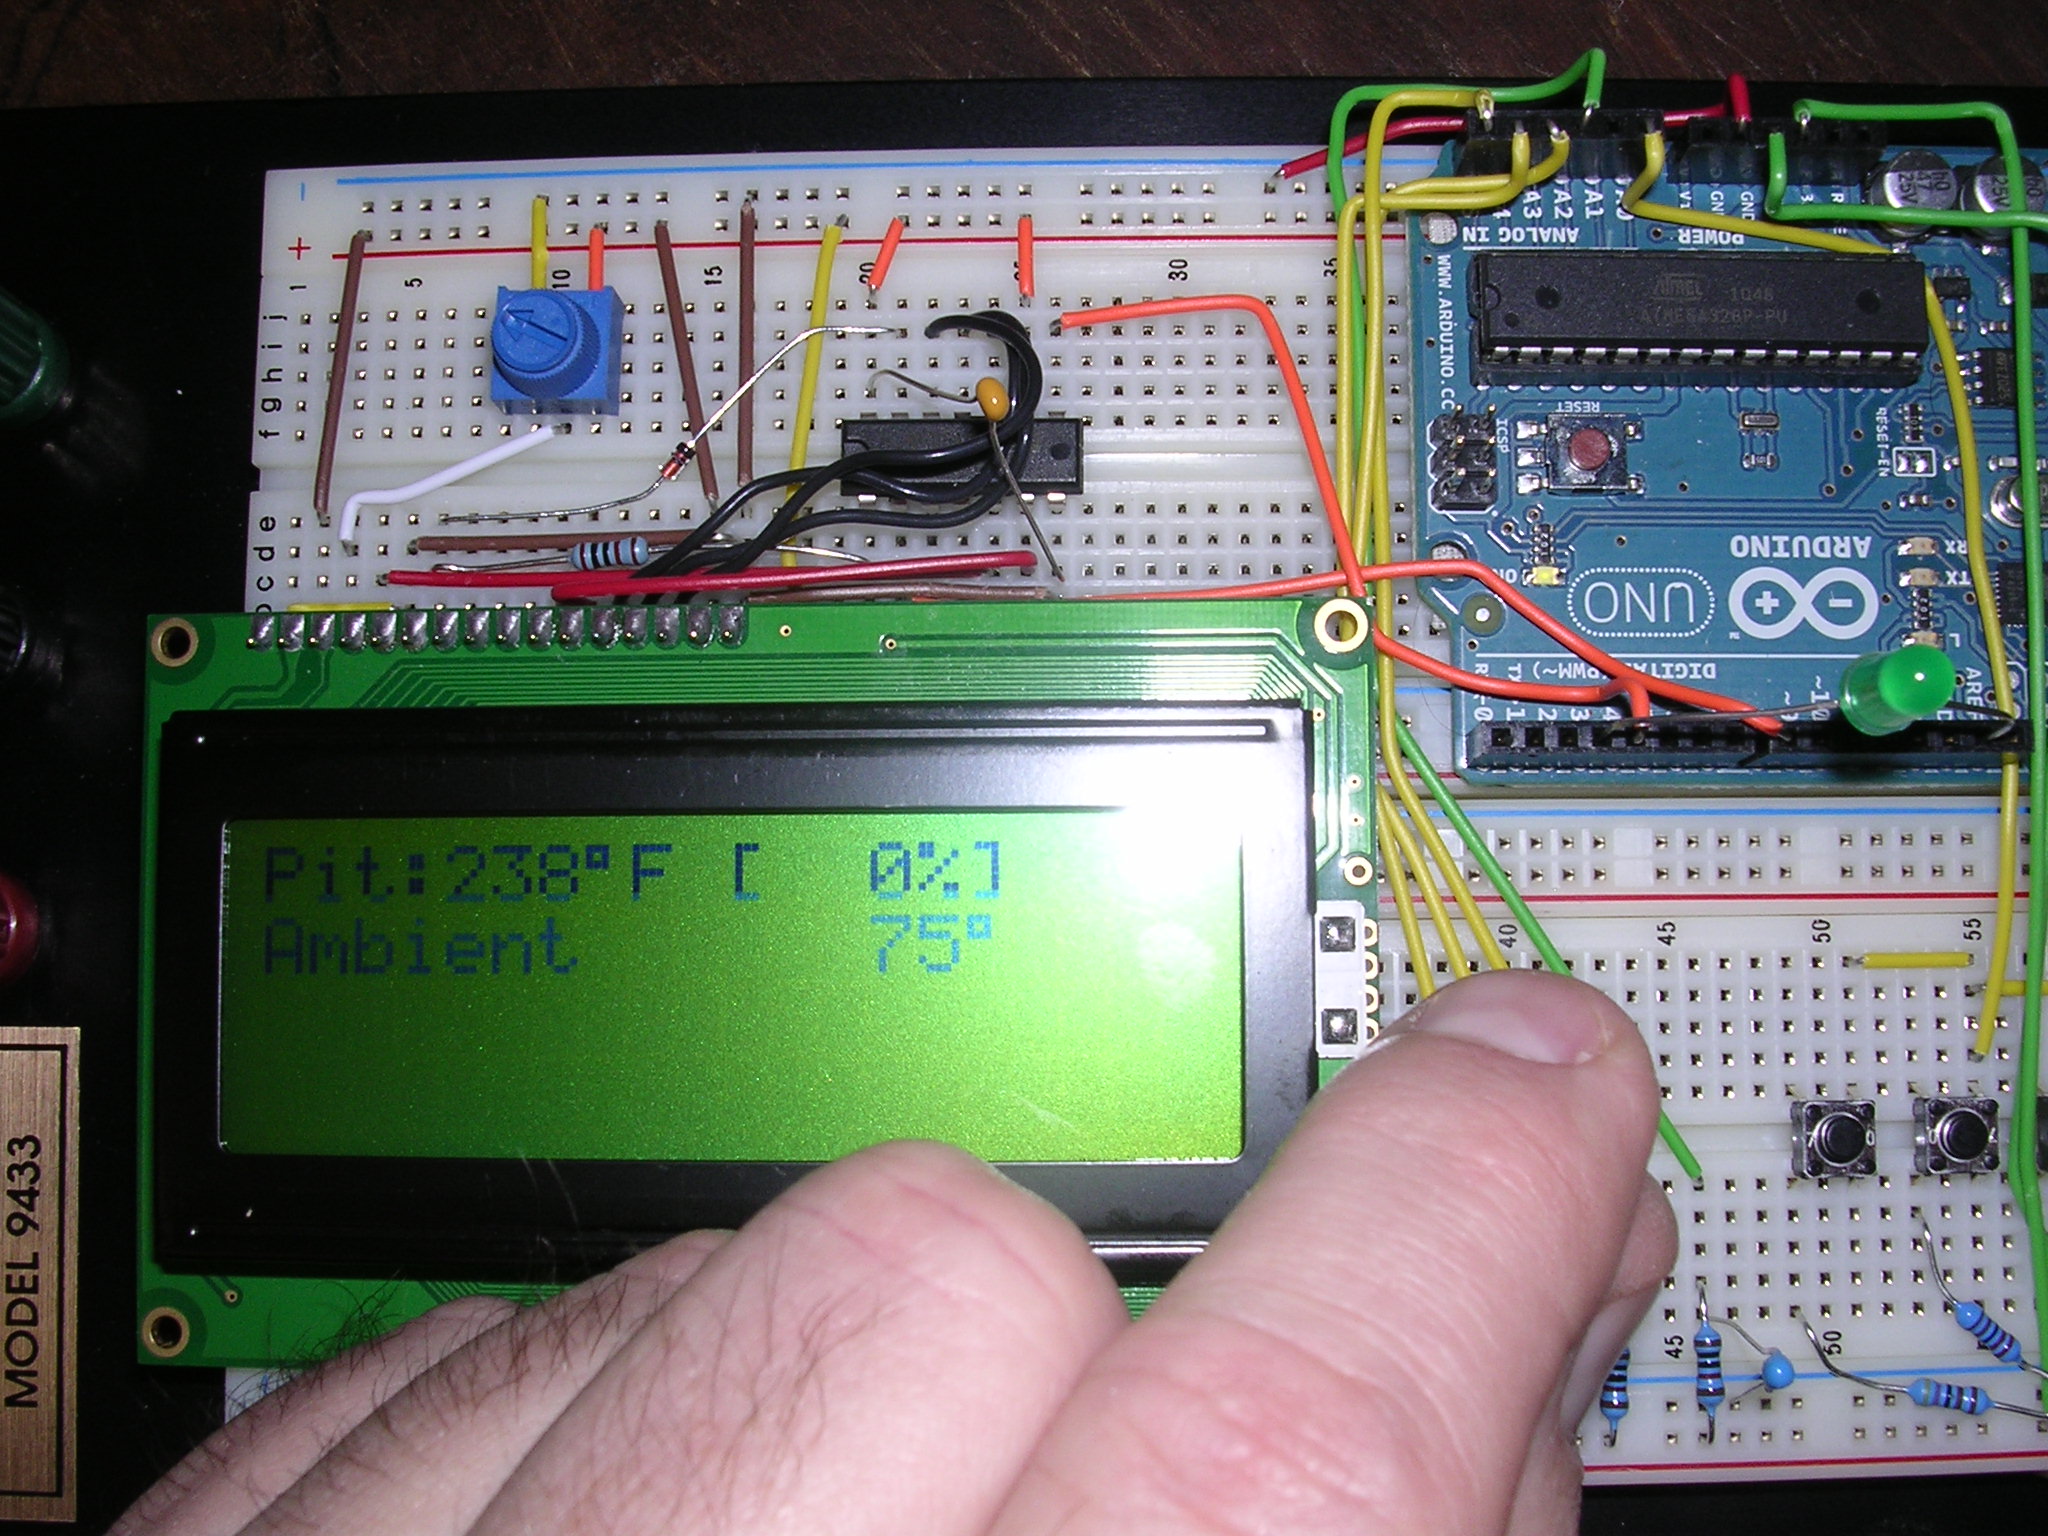
Re: Build Your Own BBQ Controller (w/Wifi) Yeah, that was my spare LCD which already had a header soldered on. But now, I like the larger LCD and may continue using it so I can show all 3 probes, ambient and fan on one screen. The 4x20 was around $3 more than the 2x16....so I splurged...hahaha. -=J -
Build Your Own BBQ Controller (w/Wifi)
ThreeDJ16 replied to ThreeDJ16's topic in Jokes, Ribbin' & Misc Banter!
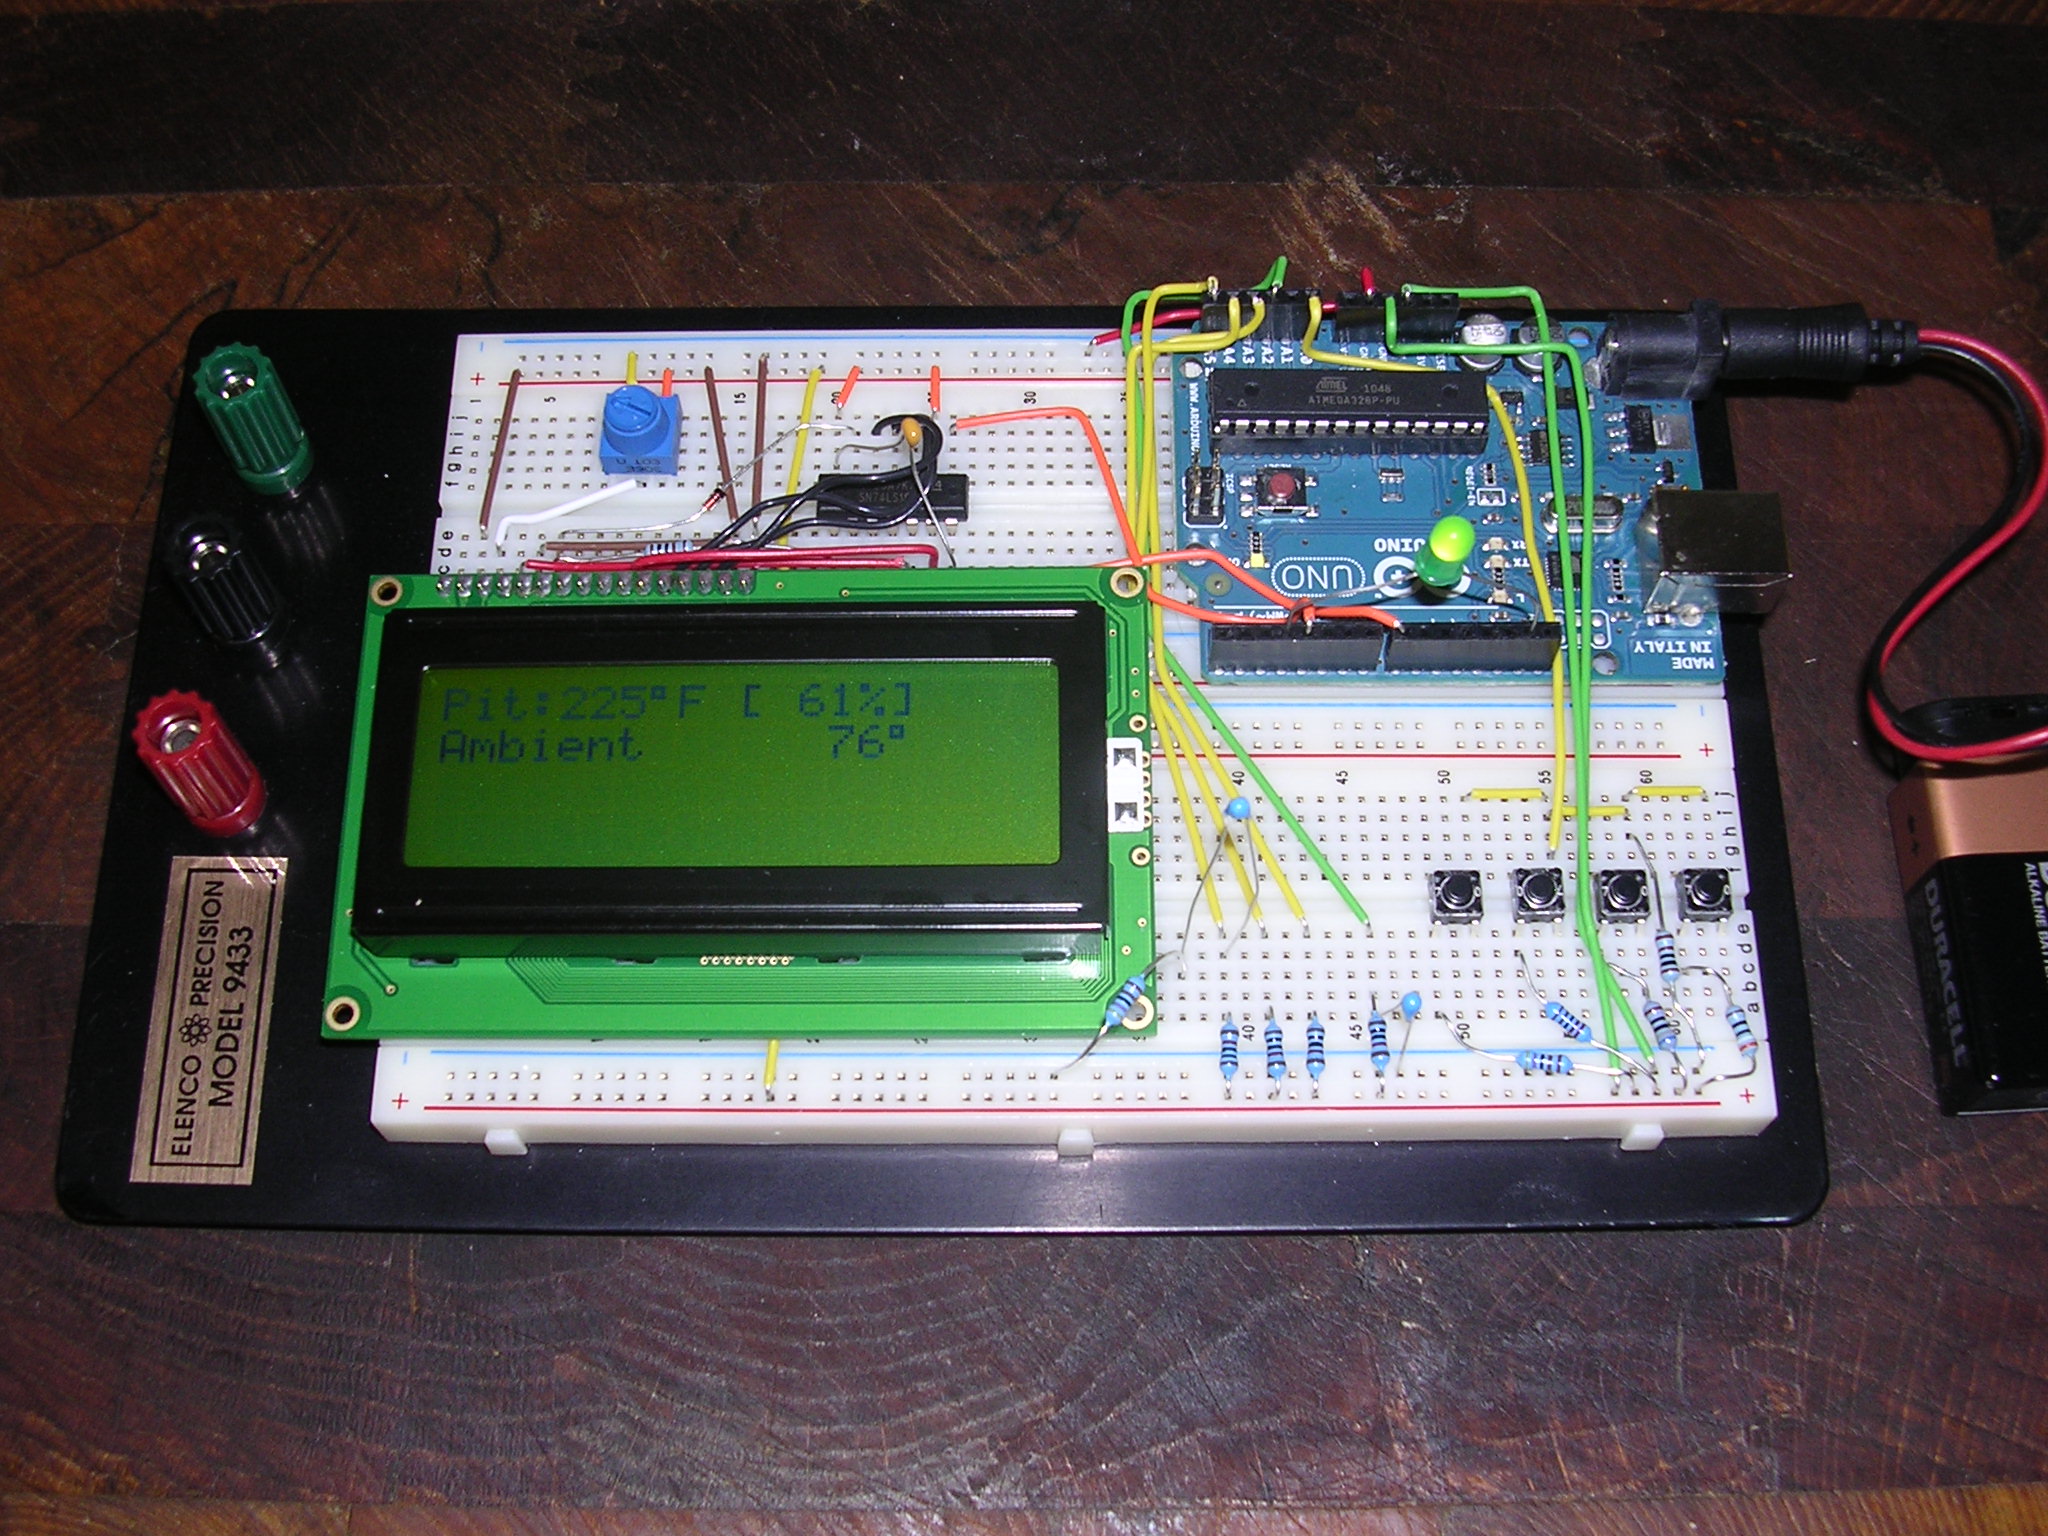
Re: Build Your Own BBQ Controller (w/Wifi) Thanks to CapnBry, his controller is awesome! Here are some pics of a bread board mockup, with the fan output currently going to the big green LED and the probe input being fooled with a thermistor/resistor combo until I actually get them in. Hope soon to get in the probes and give this controller the real smoke test. Couple of neat features that CapnBry already incorporated is the lid open detection (and manual ability to do so) and pause on ramp up to temp setpoint (which can cause over shoot otherwise). Also, instead of the on-off 6sec control that most BBQ controllers use now, his uses a PWM output to actually vary the fan speed! Going to have to do some code changes to get my Sparkfun WiFly shield working in place of the AsyncLab Wifi shield that CapnBry used (they went out of business and that card is no longer available). I already had the shield serving up a web page from my TC4 thermocouple shield....so hopefully, something soon. -=J Considering the number of years it has been since I breadboarded something like this....it is not quite as big a rat's nest and ugly as I thought it would be. Next step....enclosure!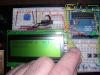

-
Build Your Own BBQ Controller (w/Wifi)
ThreeDJ16 replied to ThreeDJ16's topic in Jokes, Ribbin' & Misc Banter!
Re: Build Your Own BBQ Controller (w/Wifi) Even easier smoker setpoint changes and monitoring? -
Re: Foodsaver Marinating container? Give it a try and let us know. The lid on that one does look different than the one I had implode. I probably would have tried it, had it been available in our Walmart. -=J
-
Re: Foodsaver Marinating container? I don't think the depth add anything, but the lid design seems stronger than the other one I had. Best thing is to go put your hands on them both. The new rectangle lid looks different than the one I had, so go for it. Not like these are a huge investimate!
-
Re: Foodsaver Marinating container? Love mine and use it a lot. Get the biggest one you can find. I had the original rectangle one, wasn't as strong and the lid popped one day during use. Now I have this one (from Walmart) and it seems a lot more sturdy. http://www.walmart.com/ip/FoodSaver-Mar ... 0/10660638 -=J
-
Re: Need help with KK inbox JB, I increased the maximum private message setting per folder to 60. But if you go to your rules, folders, settings tab in the PM section, at the bottom you can set up to either delete oldest messages if it get full or choose to move to another folder (ex; create a new one called overflow). However I suggest also watching the indicator at the top of the PM area and prune messages as it seems auto functions never seem to work how we want them. Oh yeah, not really sure on the messed up folder situation, but I would check in that same settings tab and just add the default name folders back if you deleted them (Inbox, Saved Messages, Outbox, Sent Messages). You would think the system denies the ability to delete default settings....but I have never messed with it...so don't know. Send me a PM if you want me to go in to your account and try to fix it for you (working this weekend so might be slow to respond). -=J
-
Re: Tiny Stoker wireless gateway With a little DIY attitude, I am guessing it would not be hard to add an antenna to extend the range of the Vonets wireless adapter. Been meaning to try it myself, but have so many projects going at once right now. The unit is right at the very end on my range right now (literally, a few feet and it is within range), so I bet the antenna would put it within range. -=J
-
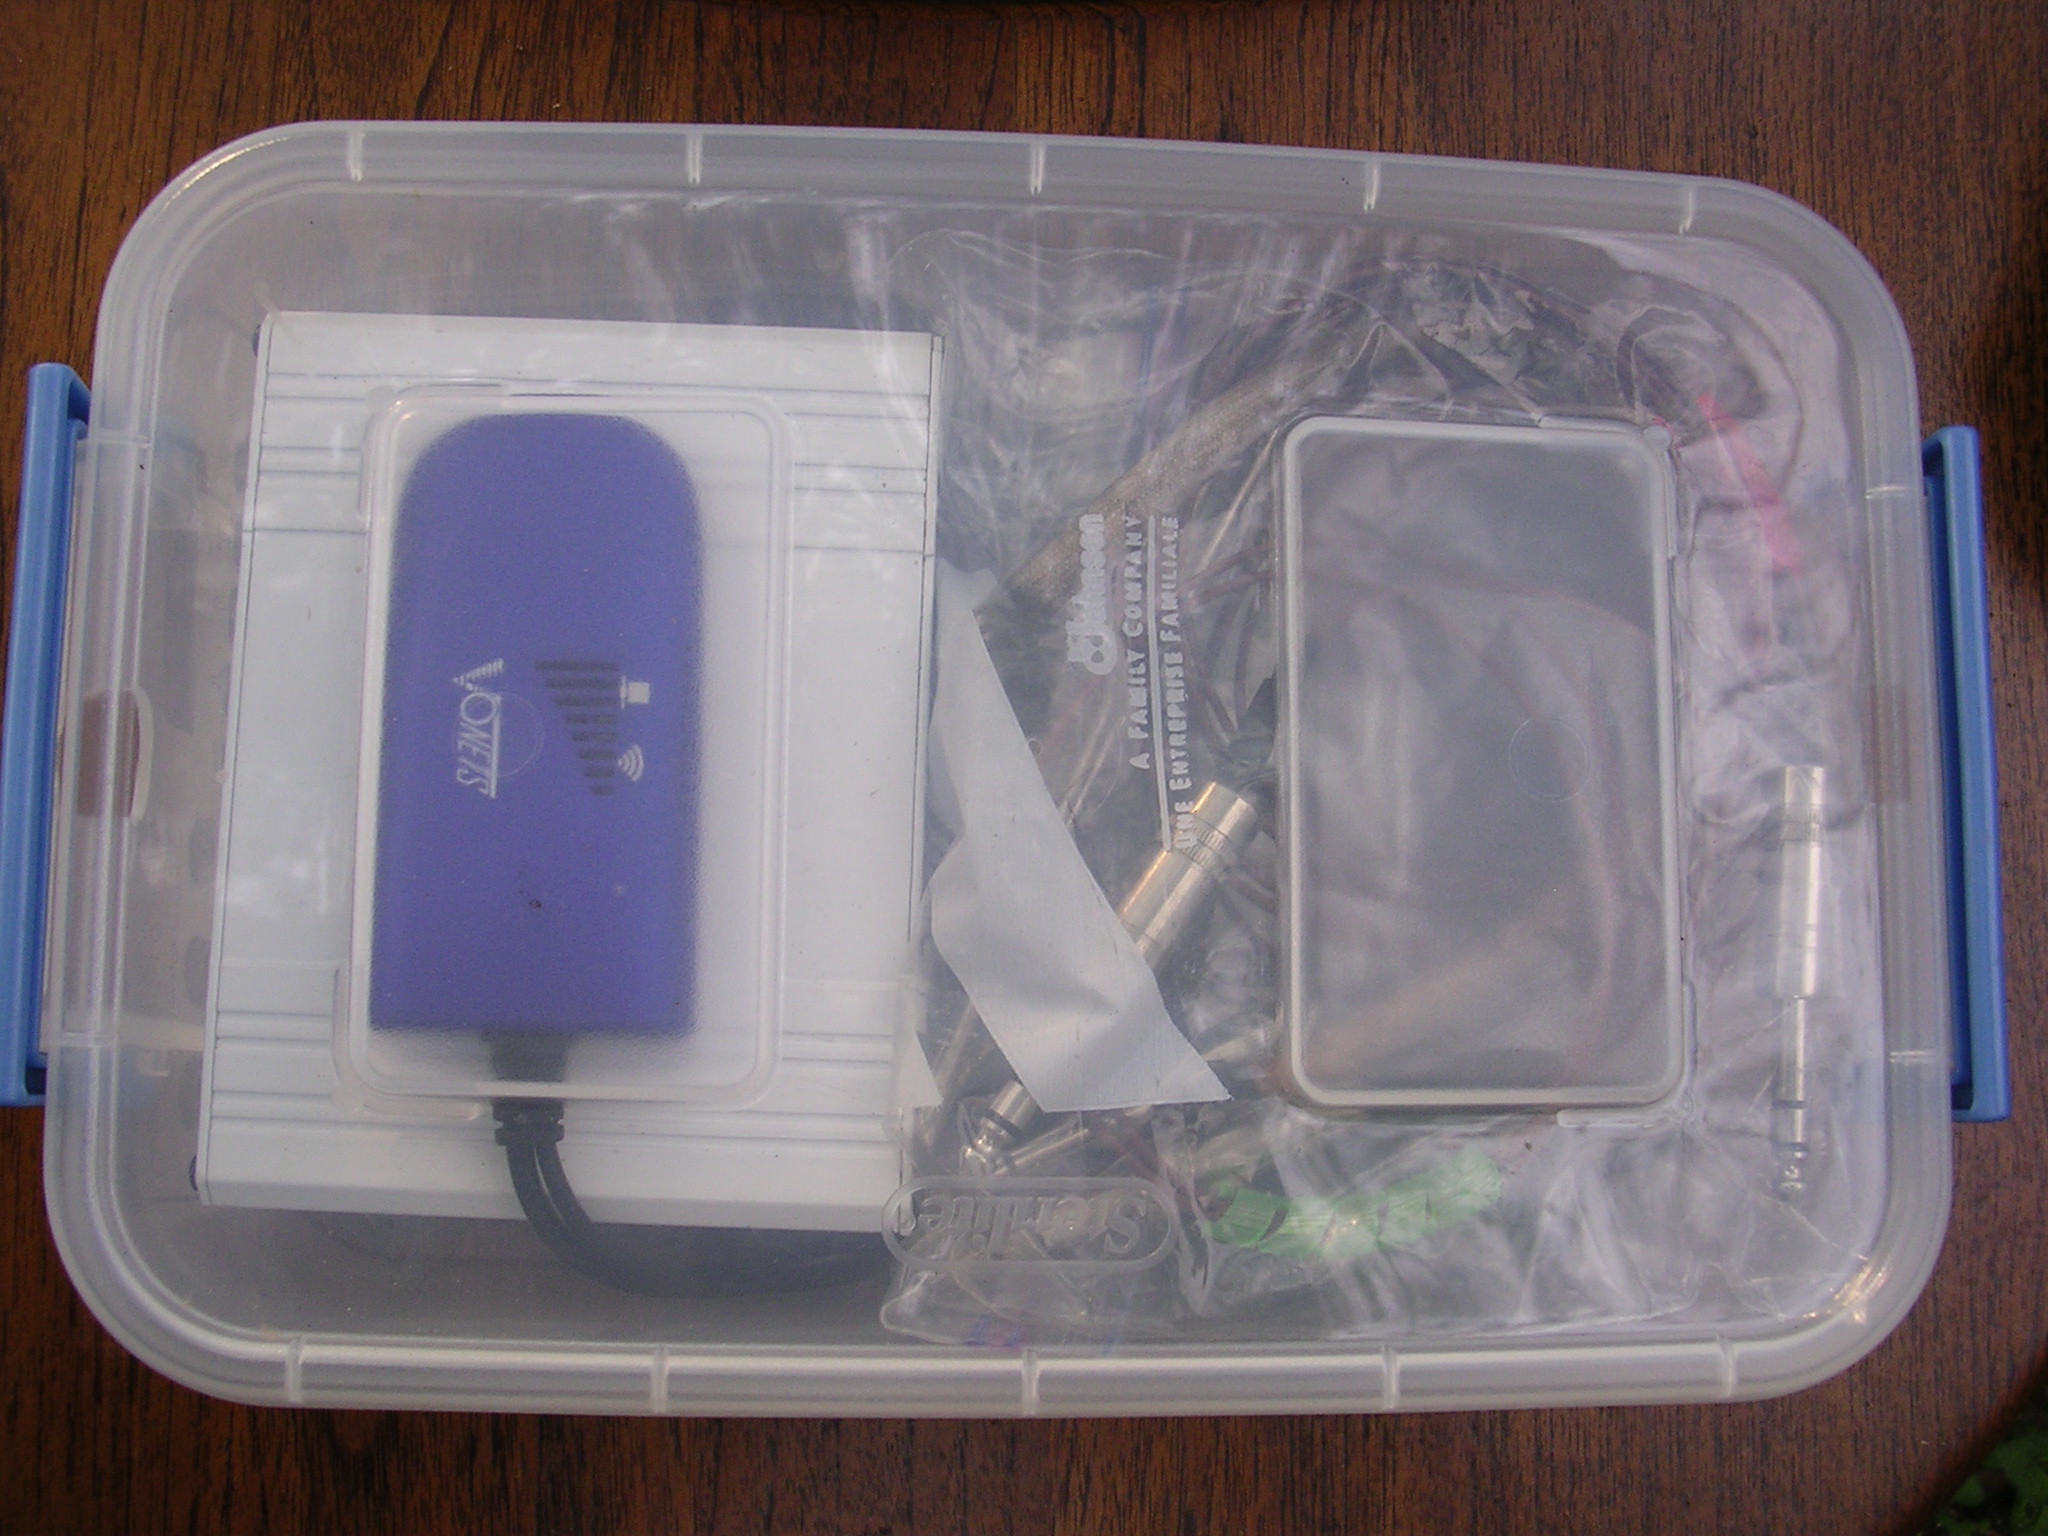
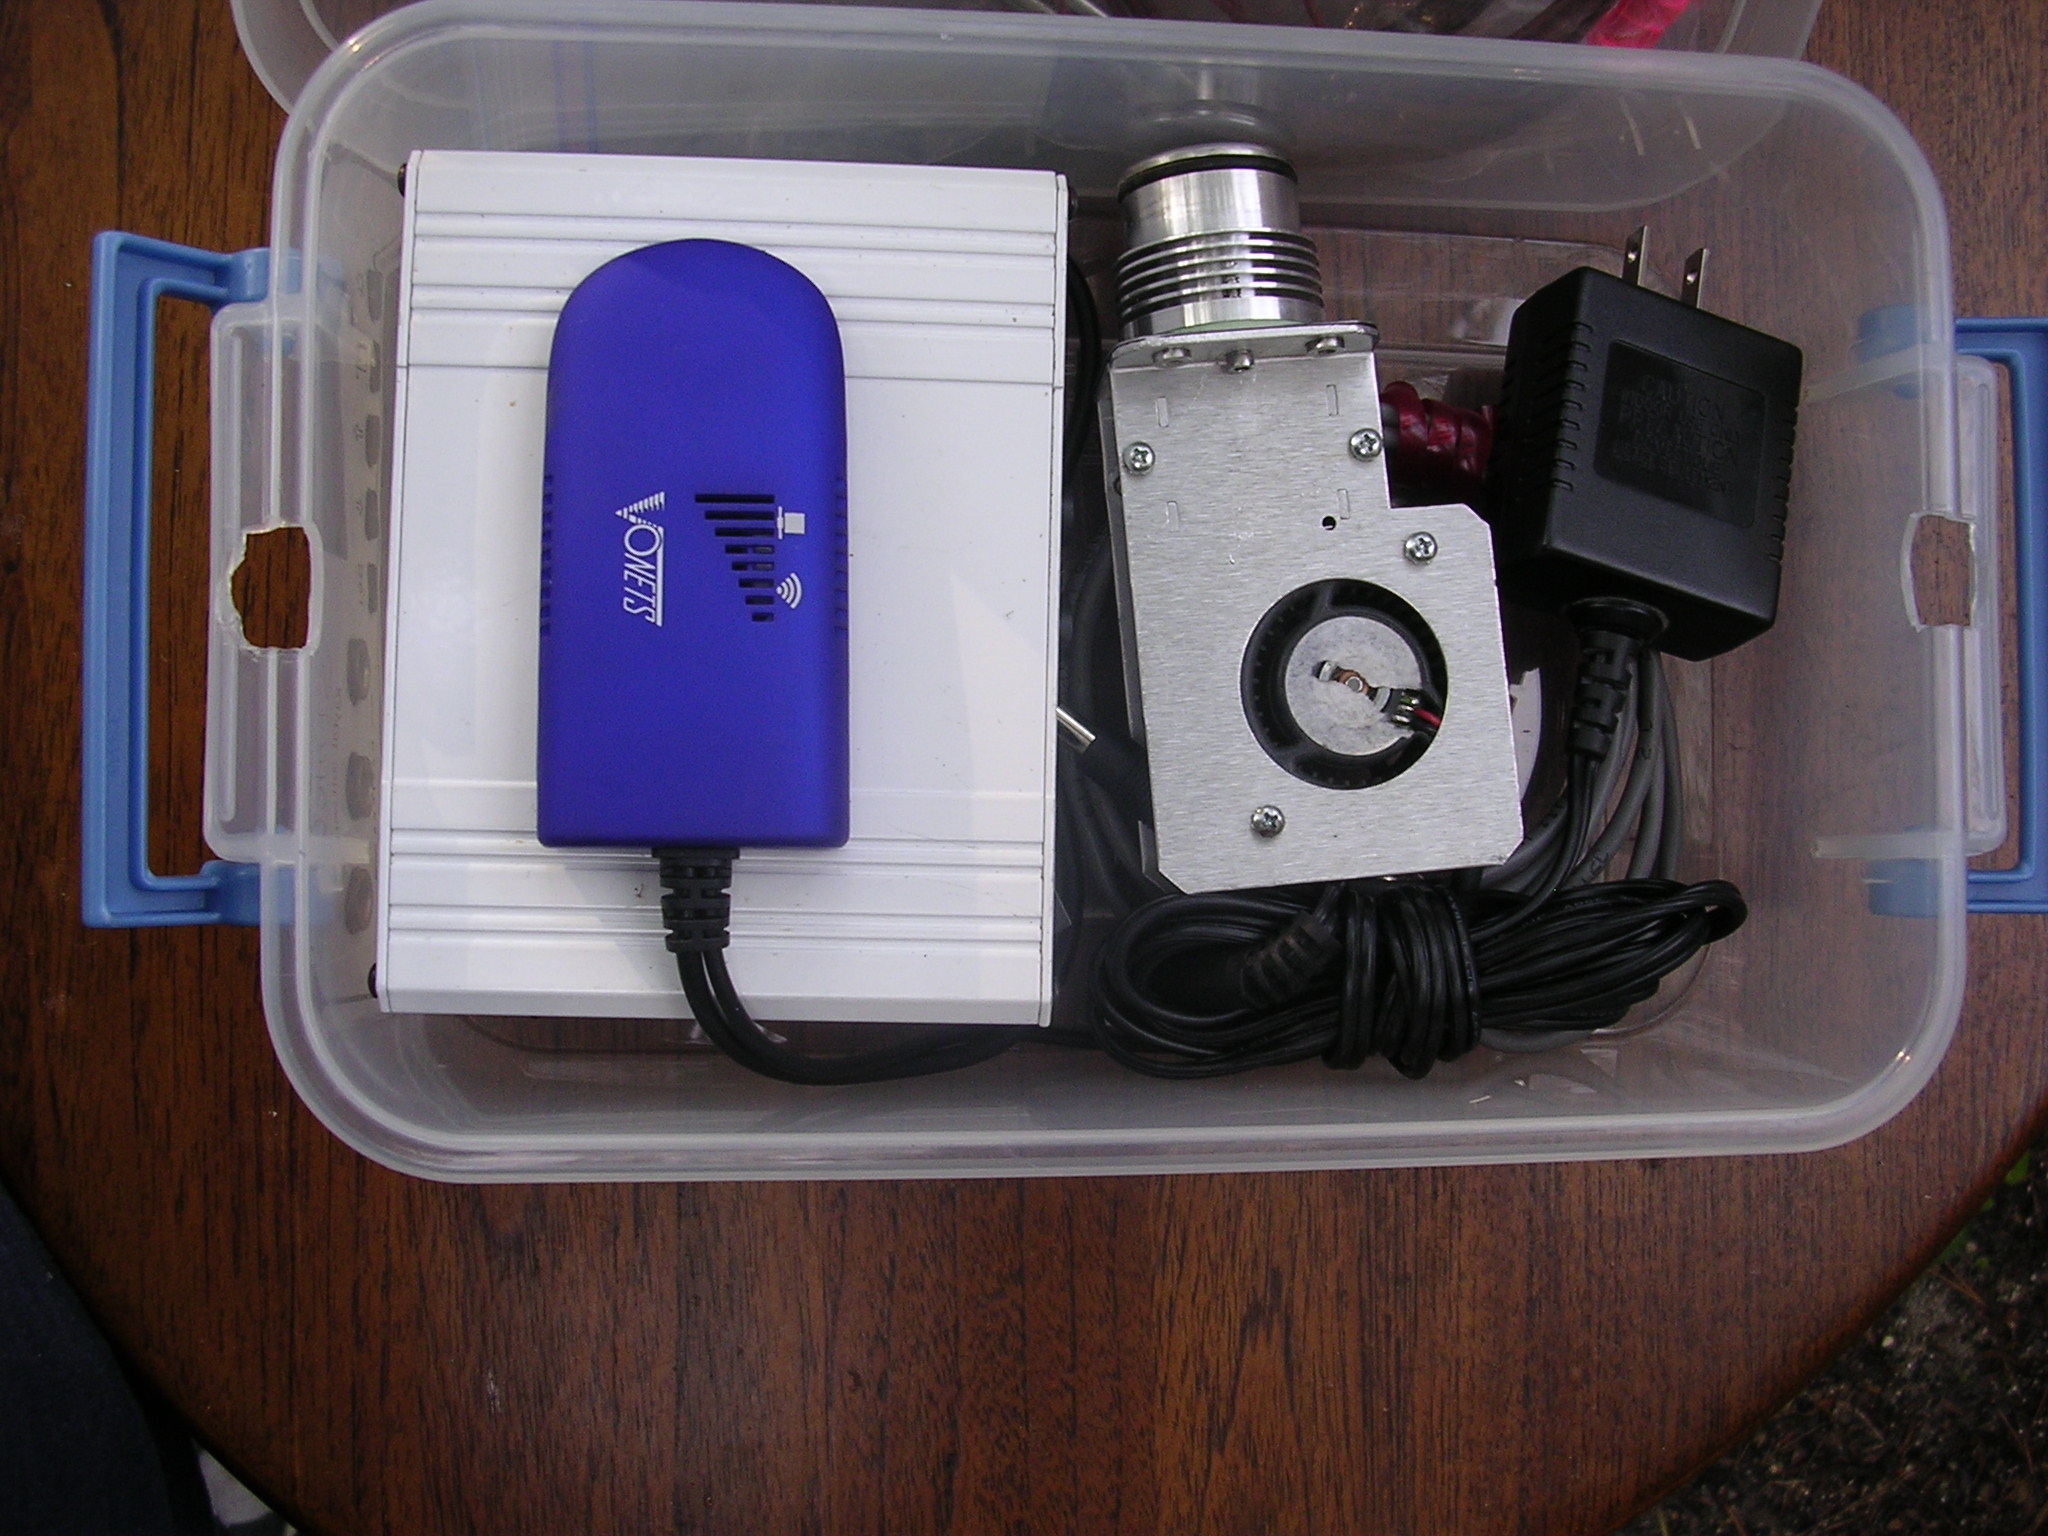
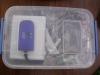
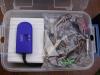
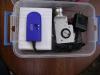
Re: Stoker Enclosure Good idea about the towel....will have to add that. Maybe just a small one at the back and front. Hopefully the enclosure will not burn up that little wireless bridge. So far, I have not noticed it getting too hot. The WRT-54G that I was using before got smoking hot....of course I have modified firmware in it and the transmit power boosted. -=J
-
Re: Stoker Enclosure All packed away until next cook. -=J
-
This enclosure might be a little too fancy or expensive for some of you, but it works great. I can't remember the exact dimensions, but there was only one close in this type of container (approx 6"Wx9.5"Lx3"H). Came from Walmart for under $3. I liked the cover extensions on each end that came out over the handles. This gave me a place to make entry holes and they be protected. I can't imagine even a blowing rain getting more than a few drops inside this enclosure, which would not hurt since the Stoker is on rubber feet. Also, once the cook is done, all parts fit neatly back in box for storage (including fan). -=J Edit - stated box dimension on label are 11 1/2" x 7 3/8" x 3 1/4" and 2.7Qt. But I think my measurements were a little more accurate as to the usable area. Made by Sterilite and model 1713.