Leaderboard
Popular Content
Showing content with the highest reputation on 06/26/2016 in all areas
-
Oh boy, the fish monger had some pristine fresh Pacific King Salmon from Oregon; never a wonder what's for dinner here when that happens . Super sweet organic strawberries from Monterey Bay (Rodriquez Farms), local organic Rocket Arugula & green Rhubarb are factoring into the same dinner. Filled the Twenty-Three with CoffeeChar, heat soaked it for the first of several bakes today: Chioggia Beets. Then the Strawberry-Rhubarb Galette was kissed all over by the CC at 400F. Next up was the King Salmon and King Oyster mushrooms. * Roast-grilled King Salmon * Sautéed King Oyster Mushrooms * Arugula & roasted Chioggia Beet Salad with 15YO Modena Balsamic vinegar & smoked blue cheese crumbles * Strawberry-Rhubarb Galette with a dollop of real maple syrup infused Maple Hill Creamery Greek Yogurt (the best!) The incredibly versatile Komodo Kamado! Nothing else compares.3 points
-
OK, so I did another experiment with the koji rice. Like I said before, this time I did some sirloin (fortunately on sale at the local market). Two similar sized pieces - one rubbed with the koji rice and the other with flaked Kosher salt. Air dried/aged in the fridge for 3 days. Here they are right out of the fridge after the 3rd day. Koji rice on the left and salt rubbed on the right. The salt rubbed steak is quite dry/firm on the surface, but pliable. Washed off the koji rice and dried with a paper towel. You'll notice the similarity now in surface textures. Rub mix is Dizzy Pig Raising the Steaks and Cow Lick. I oiled the steaks lightly and then applied the rub. Onto the KK on the sear grate. Dome temp at 500F, with a small chunk of mesquite. Toothpick is in the salted one. After a couple of flips (about 30 seconds per) Done. Rested and sliced open. You can see that there's some textural differences between them. Koji on the left, Salted on the right. Plated, with a nice ear of corn and a twice baked potato, and some sauteed mushrooms for the steaks. OK, for the results. There were very noticeable differences between the two steaks. The salted one was drier (less moist), but had a more intense beefy flavor. A tad salty too. (Note: I didn't rinse it before applying the rub.) The koji steak was softer and had a hint of that malty flavor I picked up the first time. This time I made sure to rinse the steak thoroughly and rubbed it well with a paper towel to remove as much of the rice as I could before applying the rub. Both were very tasty steaks, just different. I leaned toward the salted one, as I liked the more intense beefy flavor. Next time, I'll rinse it before applying the rub and may only go 2 days of air drying in the fridge. So, in conclusion, I didn't find that the koji rice rub accelerated the aging process any more than just a good Kosher salt rub. It was a tad moister and a bit softer than the salted one. I think if the salted one had only be dried for 2 days, that they would be more similar in texture. I did prefer the beefier taste of the salted one. I still have about 1/2 a bag of the koji rice left, so I might try it again with a tougher cut, like a flank steak.3 points
-
Cross posted from KG...hopefully the pictures work. So I like to try new things so I thought I'd do lamb shanks in my koko kamado. I decided to go with shanks because I know they lend themselves well to low and slow cooks and I was feeling like Greek so I decided to do greek inspired lamb. In the morning I made a marinade of lemon juice, zest, garlic, salt,rosemary and olive oil. Put it in gallon zip log baga and let it rest for a few hours.. Now I also wanted to try capturing some of the drippings in some potatoes that were seasoned with most of the same things the lamb was. Then I fired up my koko kamado and threw the lamb on the top rack knowing I would be putting the potatoes on the main rack. An hour or so later I put the potatoes on. While those were cooking I made some tzatziki and marinated tomatoes, cucumbers, and red onions. I ended up having to foil wrap these guys because 3 hours wasn't enough. Eventually they got tender. I also ended up having to drain the lamb fat off the potates and fry them in a CI pan because the lamb drippings were way, way too much! Then I put this in a pita half with the marinated veggies, and sauce (the pitas were huge and I thought I would never eat 2......I did so I shouldn't have cut it in a half, it definitely would have made a better picture) sprinkled some feta on the potates and that was it!2 points
-
I've been using this dough recipe for all things galette's for several years and found it best to my liking. I like the addition of cornmeal...textural and flavor...that lends itself to the rustic nature of galettes. From Diana's Desserts: www.dianasdesserts.com Servings: Makes 2 8-inch Galettes Comments: If you're easily seduced by the pale blush of a ripe peach, you'll be captivated by this lovely dessert, a rustic take on peach pie. You don't need any special skills to assemble what the French call a galette, just a rolling pin. The recipe we use comes from the wonderful "Baking With Julia" by Dorie Greenspan. The cookbook's recipe calls for mixed berries, but any juicy fruit will do. Simply vary the amount of sugar according to the fruit's natural sweetness. *Note: The dough recipe makes enough for two 8-inch galettes. If you're making two, you'll need to double the ingredients for the filling. Ingredients: FOR THE DOUGH: 3 tablespoons sour cream (or yogurt or buttermilk) 1/3 cup ice water 1 cup all-purpose flour 1/4 cup yellow cornmeal 1 teaspoon granulated sugar 1/2 teaspoon salt 7 tablespoons cold unsalted butter, cut into 6 to 8 pieces FOR THE FRUIT FILLING: 1 1/2 cups sliced, peeled peaches 1 tablespoon plus 1 teaspoon sugar 1 tablespoon honey (optional) 1 tablespoon cold unsalted butter Instructions: TO MAKE THE DOUGH BY HAND: Stir the sour cream and ice water together in a small bowl and set aside. Put the flour, cornmeal, sugar and salt in a large bowl and stir with a fork to mix. Drop the butter pieces into the bowl, tossing them once or twice to coat with flour. With a pastry blender or two knives, cut the butter into the flour, aiming for pieces of butter that range in size from bread crumbs to small peas. The smaller pieces will make the dough tender, the larger ones will make it flaky. Sprinkle the sour cream mixture over the dough, a tablespoon at a time, tossing with a fork to evenly distribute it. After you've added all the sour cream, the dough should be moist enough to stick together when pressed; if it's not, add additional cold water, a teaspoon at a time. With your hands, gather the curds of dough together. (It will be soft and malleable.) Divide the dough in half, pressing each piece into a disk, wrap them in plastic and refrigerate for at least 2 hours.2 points
-
2 points
-
Historically, it's been the only troublesome item on the KK. A lot of it had to do with the motor supplier changing things, so the motor bracket's would fit anymore, the shaft length was off, etc. Dennis has compensated over the years and is finally gotten most of the issues fixed by modifying things on his end - like the new adjustable mounting bracket for the motor and adjustable motor shafts. The cotter pins are should be the final fix. I solved my un-screwing problems by using Loctite on the motor shaft, once I got the adjustment correct, reversing the motor spin, and figuring out the left/right configuration on the basket shafts. I've label the basket with permanent marker - "spring" and "motor," so I know which shaft goes in which end.2 points
-
I flew to Bandung, west Java with the family this weekend to see some Akita puppies. As some of you may remember I had an Akita that passed about 5 years ago but my daughter was too small/young to get another one. She's grownup now and so it's time to bring another Akita home. This is the beautiful lil' bitch we fell in love with.. Her father is a formidable to say the least.. Even momma has some meat on her..1 point
-
Start with the ripest pineapple you can find (as yellow as possible). . Cut the top off. (I think you could do this without cutting the top off) . Hold both ends and twist in opposite directions until you have just the leafy top. . Peel leaves off one at a time going around the top until you have removed 3 or 4 rows. . Plant shallow in potting soil. Water generously and place in full sunlight. . This is one we started a couple of months ago. The leaves with brown tips are original growth. Lots of nice new leaves. It's growth is really starting to kick into high gear now that full summer is on us and I imagine the roots are starting to take hold. . This fall will have to bring them inside like house plants. Next spring will replant in a bigger pot and put back outside. . Middle of next summer I'll cut an apple in half and put it in the middle of the upper leaf area. Cover with plastic overnight. Next day remove plastic and apple. The chemicals emitted from the apple will trick the pineapple plant into thinking it's time to grow a pineapple. Hopefully by end of next summer I'll have homegrown Pineapples . Will occasionally update this thread as the months go by. There are more complicated methods for doing this but looking at the pictures from the one a couple of months old this simple method works just fine. Reef's Bistro1 point
-
1 point
-
Susan - today is our Pastor's 51 birthday. BIG party at the church this evening. Fajitas is the main course at the request of Fr. Prakash. Whoever suspected that a priest from India living in central Oklahoam would want Mexican food for his birthday dinner!1 point
-
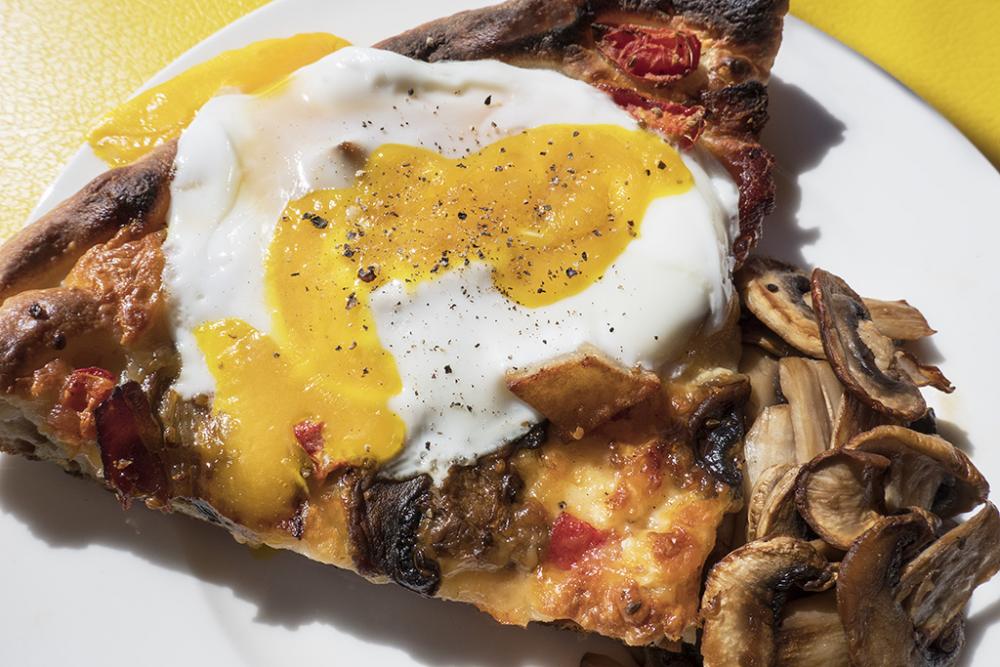
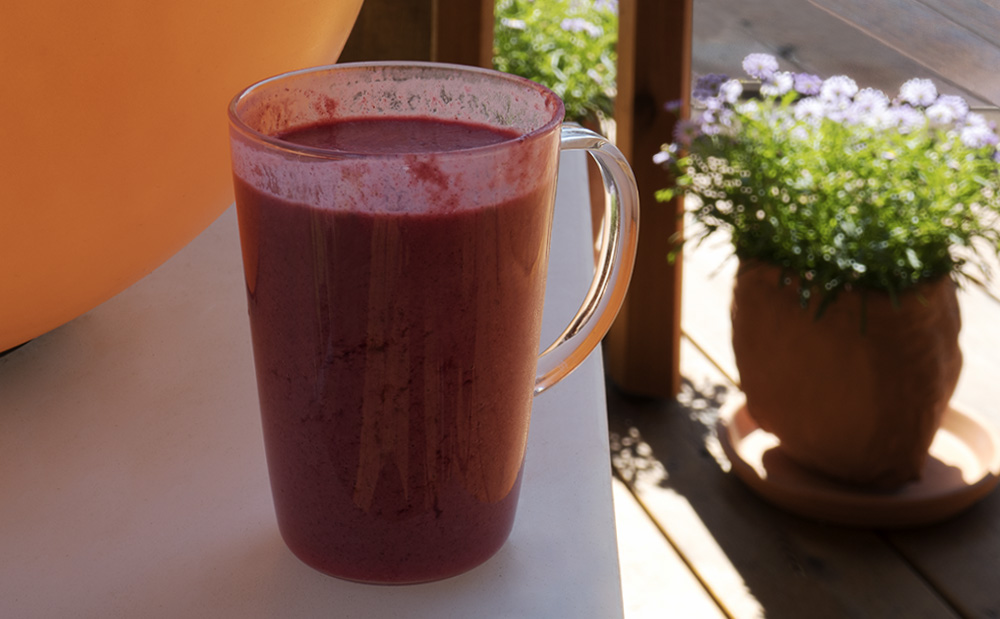
Finished off that breakfast pizza this morning right after seeing that the plants were watered and the critters fed. I have a new and unwelcome guest this morning- He is heading for underneath the wood shed. It had better not jump out and grab my feet. eek! Time to settle down and eat breakfast. and the really healthy part, a fruit smoothie.1 point
-
By temperament it bothers me deeply that so many of our fellow creatures have two eyes, a nose and a mouth. We're all cribbing the same arbitrary code. What's wonderful about mathematics is waking up to a new universe each morning. My first memory of school was a student teacher stepping before my kindergarten class for the first time, tentatively leading us in a game of Simon Says. I got half the class to play backwards, and she left the room in tears. This is how I'm wired. Dennis isn't exactly the temperament to leave any solution alone, which is why the KK is so wonderful. One mode of problem solving is to maintain an acute awareness of all anomalies. (This is one theme of Thomas Kuhn's The Structure of Scientific Revolutions.) I do own a small Weber charcoal grill, and I'm sometimes tempted to fire it up. I always use the KK instead (it's tidier, for one, and any fire is more surely contained) but the geometry is different. I recall vividly roadside chicken in Thailand, grilled on rather primitive setups, but with very attentive charcoal handling, and a close distance between the coals and the birds. I used a similar rental setup, much larger scale, to grill many chickens for a wedding. The birds were supposed to be a throw away item, for kids who wouldn't eat steak, but they were the hit of the meal, and I'm still trying to sort out why. This is an anomaly. I miss that chicken. I love the chicken I make on the KK, but it isn't that chicken, and I still can't figure out how to make that chicken. Insuring that all airflow in a KK passes through the charcoal is an interesting issue I hadn't considered. For most scenarios, this together with great insulation is responsible for the unusual efficiency of a KK. However, a small fire isn't "most scenarios", and a small fire down in a split basket is pretty far away, even from the lower grate. I'm very tempted by the KK Charcoal Basket Splitter ($128); it will pay for itself, making more efficient use of charcoal lump in roasting scenarios. For "spot grilling" like blackening two red bell peppers for a Spanish dish, I'm going to build the smallest viable fire, and I want it mere inches away from my lower grill. The $40 Broil King is ideal for such moments. If I do go to a local metal shop to cut some steel plate, what I probably want is a plate that replaces the lower grill, with a hole that holds the KK charcoal basket. For those times when one wants a closer, perhaps smaller fire. After all, why not take advantage of the KK equipment; this problem already has a solution! I suppose I should have just said this is an empirical question.1 point
-
Thank you Mk, tinyfish, Aussie and CC.. I just told ck last night, it was time for me to cook something new. Don't know if I can make something to out do the carrot cake and ladyfinger cake. They both were alot of work... But ill think of something.. Got ckreef sister coming up the end of July so maybe then i will come up with a idea. Mrs. Reef's Bistro1 point
-
I just made baked beans from scratch for the first time two days ago on my kk. Blew those canned things out of the water. I need to try adding vinegar as in your recipe next time! Yours look magnificent.1 point
-
1 point
-
1 point
-
Great Ribs Aussie.. The most important thing is... You are grilling with the best of them. Droolicous cook. Mrs. Reef's Bistro1 point
-
1 point
-
CC those look like great Tacos. Ckreef and I ate at Taco Hell today.. But i bet yours would have been much much better. Great cook. Mrs. Reef's Bistro1 point
-
1 point
-
Cheers everyone it is exciting might have to pull out my grand mothers box brownie lol I will try and get as many pics as possible Outback Kamado Bar and Grill♨1 point
-
1 point
-
finished everything up right on time and I am very pleased with the overall turn out of these two cuts. These were for my cousin who is having a surprise BBQ for her husband. He is a huge fan of BBQ so I hope that I did it right. We should soon see if he approved. From the samples that I took, I think they were about perfect and the butt1 point
-
1 point
-
1 point
-
And the excitement build down under! Now the anticipation builds at a much faster pace! Enjoy, Chris. Why does it never get old sharing in the excitement of waiting with a new KKer for the arrival, uncrating, and first cook? I just love this part … Chris, please take lots of pics. We're all living vicariously through you!1 point
-
Basically yes but things screw together then you spin in the opposite direction of one of the screw in connections so it wants to unscrew. Happened to me one time, I used blue locktite and wrenched it together as tight as I could. Hasn't happened since. . Dennis has now come up with improved parts that go together with a cotter pin to permanently solve the problem. There is a thread on here showing the new improved parts. Reef's Bistro1 point
-
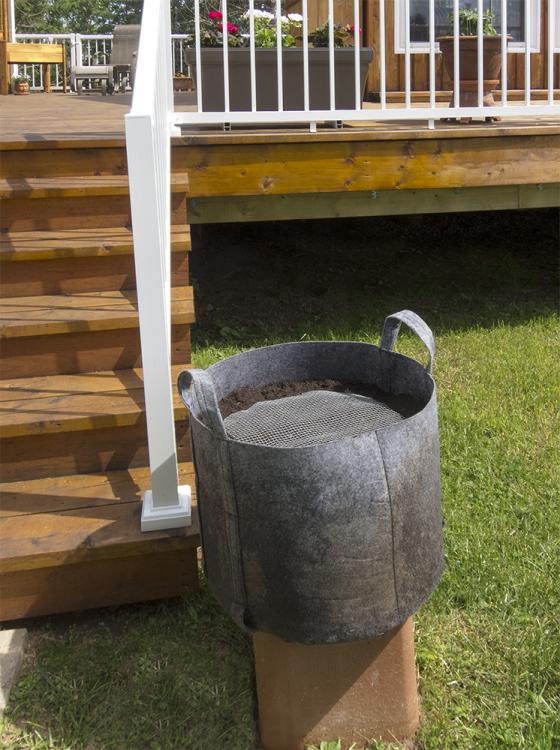
I've been thinking that I should do a potato bag but never made the time to so it until SK pushed me over the edge with here already sprouted potato plants.;) Thanks, SK. I'll be thinking you when I pull the first potato months from now.:) I put wire screen to keep some of the critters from digging in the bag.1 point
-
Susan - I really do love home grown potatoes. And I think the plants themselves are something really beautiful as well. Alas, I am cursed with the Black Thumb of Death!1 point
-
1 point
-
5" dial - that's friggin' yuge! Yes, YUGE! (Been watching too much of the NH primary!) Tell this person the trick is to turn the thermometer so that their desired/target dome temperature is at the High Noon position. You can immediately tell where the actual temperature is by relative position of the needle to 12 o'clock. This can easily be done from several feet away, as in my case, from inside my patio door in the winter. Don't need a yuge dial.1 point


.thumb.jpeg.40bacc1d996b046876f5404f2a7dc4e7.jpeg)

.jpeg.21b3cf39ce395333d6cb7d78dc5eaa76.jpeg)


