Leaderboard
Popular Content
Showing content with the highest reputation on 02/17/2021 in all areas
-
Hi All, I kind of jumped on Kirby's welcome post, so I figured I should start my own. I have been lurking for quite awhile and really enjoying the stories and all the pictures of the great cooks. I currently have a Kamado Joe classic that will be 4 years old next month. I am starting to experience the size limitations and was looking at the Big Joe, but if I'm going to spend $2500 on that, I decided I owed it to myself to explore the KK, more money but no broken fireboxes, cracked lids etc. I came here to specifically look at the 23", thinking adding that to my classic would pretty well cover most of my cooks. The more I read and the more pictures I look at, I am thinking I may want to go with the BB 32, which I guess will definitely cover all my cooks. I probably do 70% grilling and 30% low and slow, mostly butts, ribs and briskets, and grilling is chicken, seafood and steaks. My wife and I are empty nesters, but lots of family is nearby and most events end up at our house with me grilling for 6-15 people, which is why I typically go for the large protein cooks. I haven't pulled the trigger yet, but I feel my resistance weakening.7 points
-
7 points
-
5 points
-
Hi @GrillnBrew. Welcome again. @RokDokand @tony b are likely to be interested in your grill and brew combo. The 32 is a no brainer for the level of use that you describe. Like @buzilo, I learned my lesson the hard way. In spite of advice to the contrary I went for a 21 and 23. I have since sold them and now have a 32, 23 and 16. Whatever you do, don't become a one kamado/one grill household. The versatility of cooking at different temps on two different cookers can't be beat, particularly when you don't want to have to keep dashing into the IDK to cook some parts of the meal.3 points
-
3 points
-
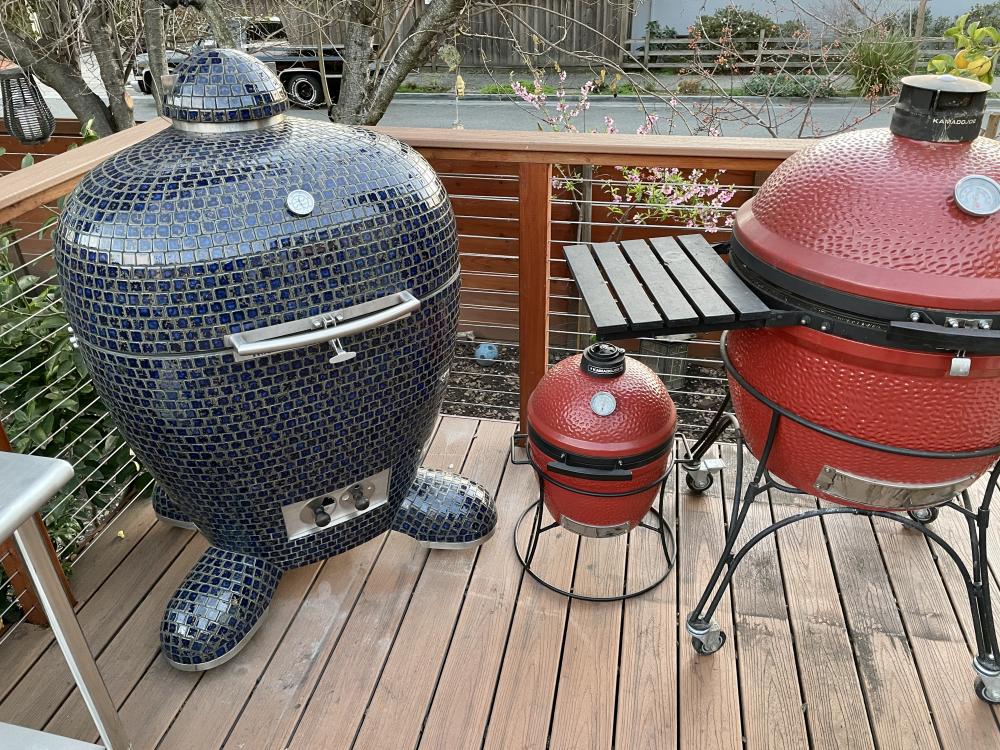
Hello all. Bought a slightly used 23’’ cobalt blue KK this fall. Been reading here and cooking a lot and decided it’s time to say hello. Nice to be part of this lively community2 points
-
2 points
-
ROFLMAO! We finally got above zero today! High was +7F. We might get to freezing on Sunday??2 points
-
Smart planning. It's easy to blow your budget when it comes to KK's and accessories. I've spent a LOT of money over the years, but at least some of it is spread out over time. Plus, when I got mine, there weren't as many accessories to splurge on then.2 points
-
Steven Raichlen’s caveman reverse seared choice grade NY Strip W/pepper medley (I added some Serrano’s for heat). Washed down with some Yuengling Lager and Heady Topper IPA. I can not wait to get my Komodo Kamado 21”! [emoji482] Sent from my iPhone using Tapatalk2 points
-
@KidCactus - @tekobo is correct; 1/8 turn is too open for 225F. Just barely off the seat so you just see smoke exiting the top vent should put you in the 225F range. I don't always start out a cook with a full basket - generally out of pure laziness. I gauge how much is in there and what type of cook am I doing - temperature & time, and add charcoal as needed. If I'm doing a butt or a brisket, I'll seriously load up the basket then.2 points
-
1 point
-
I'm curious to hear everyone's opinion on getting the absolute cleanest best tasting smoke in a Kamado. I think a big reason people don't like the taste of some charcoal produced BBQ is due to the mistake of adding dirty, thick, creosote, volatile smoking wood smoke to the food during the cooking process. I have seen many methods popular here within this forum for producing clean smoke: 1- Throwing wood on top of the hot burning coals and waiting for the thick white smoke to clear up and burn off all of the gross tasting volatile compounds in the wood before putting your meat on the grill. The advantage I see to this is that you get extremely clean smoke. The disadvantage I see with this method is that it's hard to control how long the wood will burn and it may burn up too fast not providing you with enough smoke throughout the length of the cook, for this reason I believe this method is better with larger wood chunks for extended smoke times. 2- Building a smoke pot made out of cast iron with three 1/8" holes drilled on the bottom and a flour paste glue to secure the lid or an MSR stainless pot with the holes drilled in the lid for the same purpose. I have never used this method but as I understand the advantage/concept of this is to smolder the wood in an oxygen restricted environment and create pressurized smoke to shoot out the bottom of the holes back into the charcoal fire burning off the volatile compounds in the wood within the charcoal fire before the volatile compounds make there way to your food. More advantages as I understand is that this method does a good job of producing thin blue smoke for extended periods of time and creates a little pile of homemade charcoal within the pot. The disadvantages of this method that I can see is I've heard throwing the pot on top of your charcoal fire can potentially extinguish your fire, it is also creating a barrier for the heat to enter into the dome. 3- Putting the wood chunks on bottom of the charcoal. This method is pioneered by Harry Soo a BBQ champion (he uses Weber Smoky Mountain's). I have ran meat probes at the bottom of my charcoal basket and it takes hours to get the temp at the bottom of the charcoal basket to get above 400 degrees when you are cooking at BBQ temperatures in a Kamado. Kamado's are just so well insulated that such little burning charcoal is needed to keep them at BBQ temps that I believe the smoking wood has a hard time getting to proper smoking temperature at the bottom of the basket. Steven Raichlen suggests that wood smoke production burning/smoldering at 590 degrees Fahrenheit is the ideal temperature for producing good tasting smoke. The advantages I see with wood chunks on the bottom is the wood smolders for a long time producing smoke over a long period of time and the smoke is somewhat purified when it travels through the burning coal burning off some of the volatile compounds. 4- Using the Hot/Cold smoker that KK manufactures. This method I'm very new to. Many have touted it as producing the cleanest smoke possible, others have said it is hard to keep lit. Dennis Linkletter tried to explain the philosophy of the Hot/Cold smoker to me and I don't know if I completely understand how it produces the best smoke. Dennis recommends microwaving your wood for 5 minutes to dry it out first before putting it in the hot/cold smoker. If I understand right Dennis said that it smolders the wood at low temperatures and the wood alcohol/volatile compounds in the wood burn out in the wood at a very slow rate (not all at once like if you throw your wood on top of the burning charcoal). Apparently a lot of the volatile compounds burn off at the sight of the cold smoker in very small doses that won't flavor your food badly. The advantages to this is that it is an external unit allowing you to have complete control over the smoke production during a cook. You can add smoke through the entire cook and stop it at anytime. The downsides I see is it does add some additional airflow to the cooker but this probably can be compensated by closing your vents more (the smoke comes through above the charcoal rather then through the charcoal so it probably doesn't fuel the fire a ton). The only thing I don't quite understand is does the hot/cold smoker really get the temperature of the wood you are supplying it to high enough temps to get the best cleanest tasting smoke? Curious to hear your thoughts. So let me know what method do you use to provide the absolute best tasting smoke to your cooks? What method do you think works best and why? I'm nerdy about this stuff so the more details and technical you are the better, thanks.1 point
-
They are very easy to watch Jeff. Sent from my iPhone using Tapatalk1 point
-
A hobby????? RD and tony are too professional to call it a hobby. You guys run rings around most commercial brewers from what I’ve seen. Sent from my iPhone using Tapatalk1 point
-
Hi Pequod, my success using a chimney is very hit and miss. I have found starting binchotan easiest in a KK, interspersed with a few cocochar briquettes. The fact that the pieces of binchotan are long and stay whole makes it relatively easy to lift them out of the KK and into the konro using a set of fire tongs. The things we do for our stomachs.1 point
-
We send them with an information loaded email when the grills are delivered.. I'll zip one out to you.1 point
-
I watched a couple of these last night - they make me feel a little silly for having all of this expensive cooking gear!1 point
-
My primary chimney use case is Binchotan. Only way I've found to get it lit and go nuclear enough for the Konro.1 point
-
That's funny, I have a similar use case. I use my KK to heat up the coals needed to create an even bed in my Argentinian barbecue. I just put the amount I need into the KK fire basket, light it and come back when they are glowing. The Rapicca gloves have made the transfer of the fire basket to the Argie Barbie much less perilous!1 point
-
This is actually one of the few times I’ve ever used the chimney (I wanted an even bed of hot ashed over coals on top for the caveman sear. I normally just light a small portion of the charcoal with my grill Gun inside the Kamado itself. Sent from my iPhone using Tapatalk1 point
-
Tee hee. You do have a lot to use up! Nice looking dinner Tony. Thanks Mac, and Tanya. Looking forward to trying this out. The concept of "crumbled bacon" is super odd to this non-American. Pancetta or lardons make everything better so I will ride with that. I am very pleased to say, Forrest, that you won't need that chimney configuration to light your KK. I look forward to your delight when you learn how efficient it is at acting as its own chimney.1 point
-
1 point
-
@BOC mine arrived yours should be close! It exceeds all my expectations! It is gorgeous and amazing!1 point
-
Well I dropped some serious coin today (for me at least). If you are a young grasshopper like myself it is good to compartmentalize your funds when you got it. I set most of the cost aside for my 21” KK with a gift card to use once my KK is ready for the 2 month boat ride. So stoked for this cooker! [emoji4] Sent from my iPhone using Tapatalk1 point
-
I did and here it is. Baked Beans from Tanya Add to 1 pound of softened yellow eyed beans: 1 medium onion 1/4C crumbled bacon ¼ C +2T maple syrup 1/3C +2.6T brown sugar 3T molasses 3T ketchup 3t dry mustard 1t salt 1t pepper Soak or parboil beans (around 60 mins or so) until they are soft. It there is too much liquid in the pot use a ladle to scoop some off but save it in case you need it later. Do not rinse the beans! You just need enough liquid to just cover the beans. Add all the above ingredients and bake at 350F for 2 hours or so, if you need more liquid use what you ladled off earlier. You can also use a lower temp. and a longer time. Depend upon how you like them.1 point
-
1 point
-
Hi there @KidCactus I usually only have the top vent just cracked open to maintain 110C. 1/8th on my 23 would be too much to achieve maintain that temp. I do have the bottom vent open on one of the larger right hand holes, with the left hand bottom vent closed. Do get there I start with all vents wide open, hit about 80C and then wind back to the settings above. I always start with a full charcoal basket at the start of each cook. In fact, that is part of my routine once the KK has cooled down: sweep out if I have done a few cooks, top up the charcoal basket, open up the top and bottom vents and cover up with Sunbrella cover.1 point
-
Kid cactus you have nailed that tri tip. As Tyrus said, check everything is sealed, and do you have the lid closed to the second bump? Top flue 1/8th and the bottom can still be 5- 10mm open. Less than that and my fire goes out. Fill your basket with each cook. No advantage to a smaller basket of charcoal, and it’s a pain if you run out mid cook. Tyrus the colour on the outside of that steak is very pretty. Sent from my iPhone using Tapatalk1 point
-
Nice job, perfecto./// Check for air leaks and make sure you have a good seal around the doors, flush. Does it shut down without all the coal disappearing?1 point
-
Hey @Laurie, I wouldn't fess up to adding the chicken fat. Just say it tastes extra good for some other reason 🤪 @Syzygies, we are quits. The Netherton Foundry was recommended by @Sir Bill. A lovely place to go to just look at stuff. So well made. I have a paella pan from them too. All good. I get that a food processor probably won't be up to it. The Husband walked by a minute ago. Not impressed with the thought of a new piece of kit that he thinks I don't need. The Stone Wet Grinder is on my wishlist. Will do more investigating before i dive in.1 point
-
1 point
-
Rokdok it sounds like you have done your penance and it’s time to treat yourself. My journey from discovery to in investment took 3 years. Once you and mrs RD start discussing colour preferences, the job is done. Besides, a KK will enhance her flower beds if you have cooked on a Weber for 25 years, you will nail the KK techniques very quickly. any photos of that giant oven?1 point
-
I bet you didn't. I can't remember a time that my chunks burned completely in my kk. I use roughly 2-4 3" chunks, and I put them on the hot spot in the coals about 30 minutes before I plan to add my protiens. The air flow is so low that it doesn't allow a conventional fire with flames and the wood burns similarly to the coal, a slow smolder. Robert1 point


Bull.thumb.jpg.50d347aabd71178c9d9a16b7663cfa1a.jpg)
