Leaderboard


Popular Content
Showing content with the highest reputation on 11/22/2016 in all areas
-
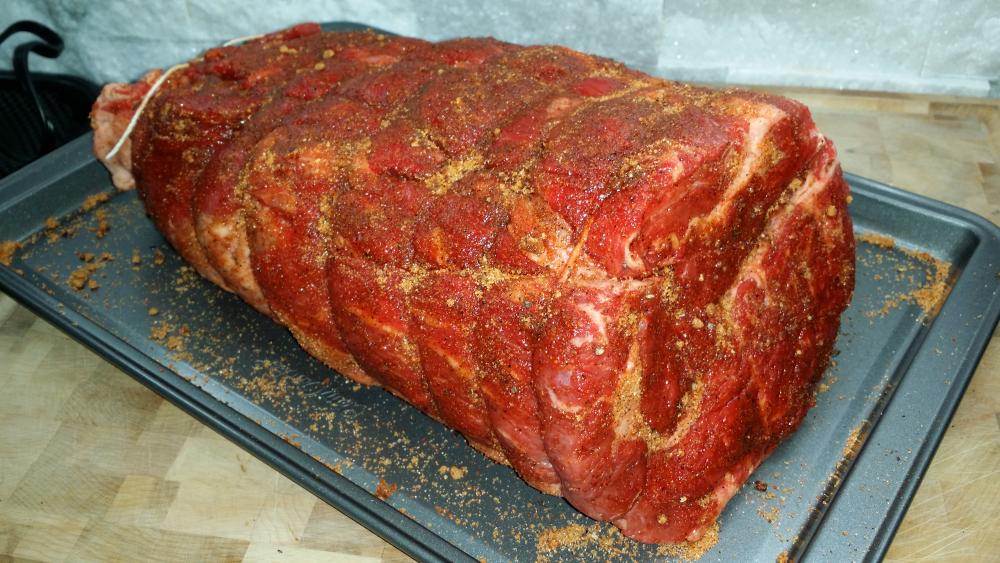
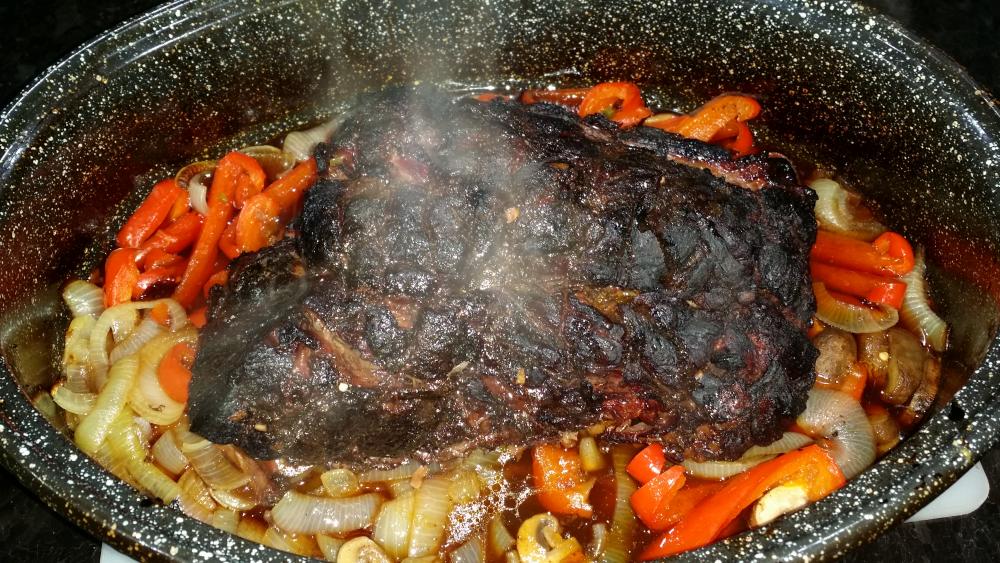
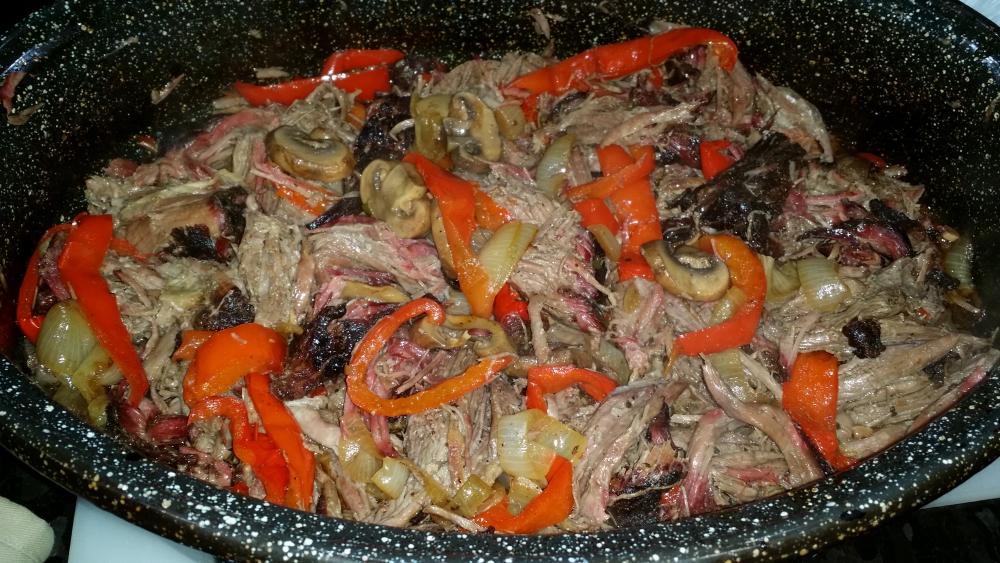
My butcher had chuck/blade roasts on sale so I picked one up. Bigger then I wanted at 9 lbs...oh well. Cooked indirect at 250f till 165f then into a covered pan with some wine and Worcestershire sauce and a bunch of garlic cloves. Moved covered pan to oven at 350f for a few more hours. Then I added sliced peppers, onions and mushrooms. Back into the oven till fork tender. I must warn you no KK photo, deleted my mistake. Seasoned with a combo of three rubs Texas Original rub, Eat Bbq and Cimarron Docs Sweet rib rub.
 5 points
 -
Sent from my SM-P600 using Tapatalk3 points
-
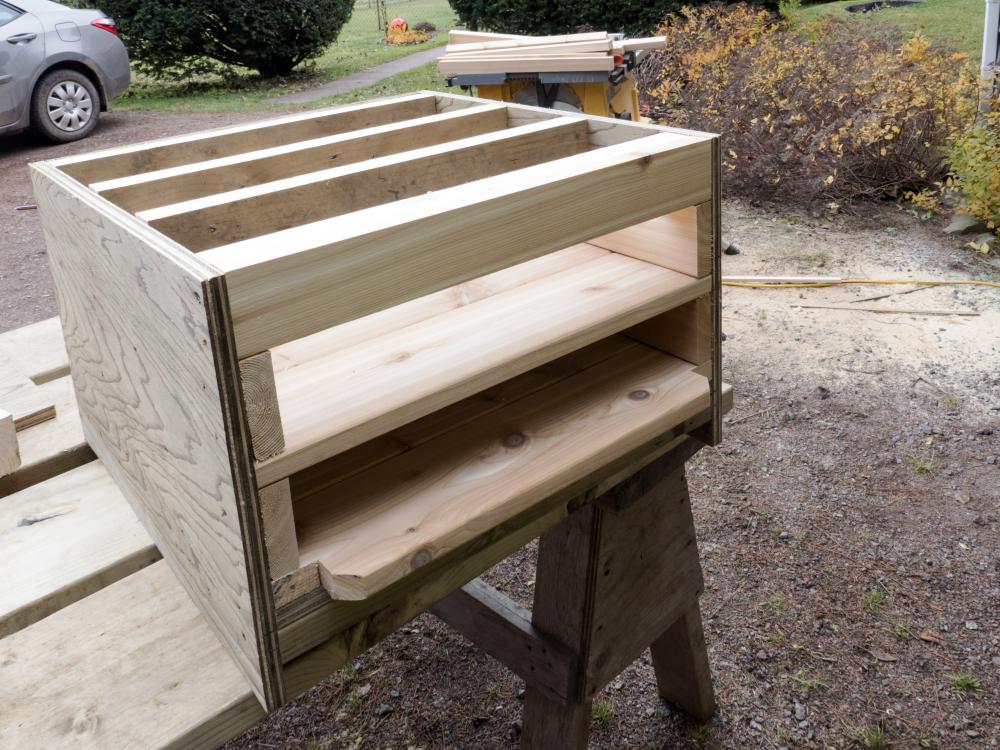
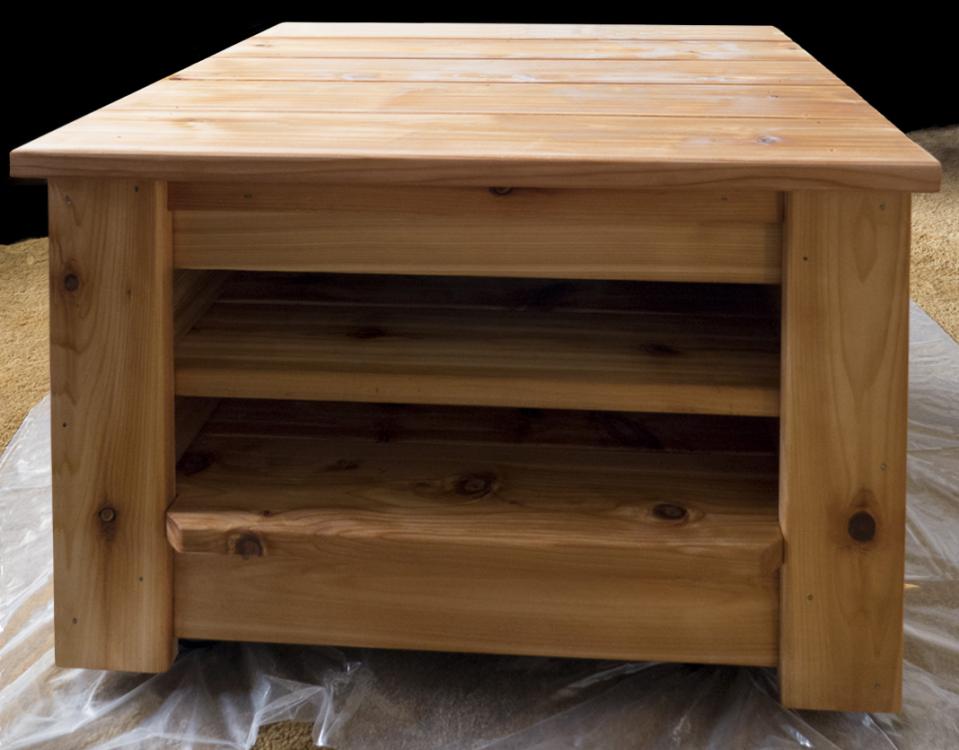
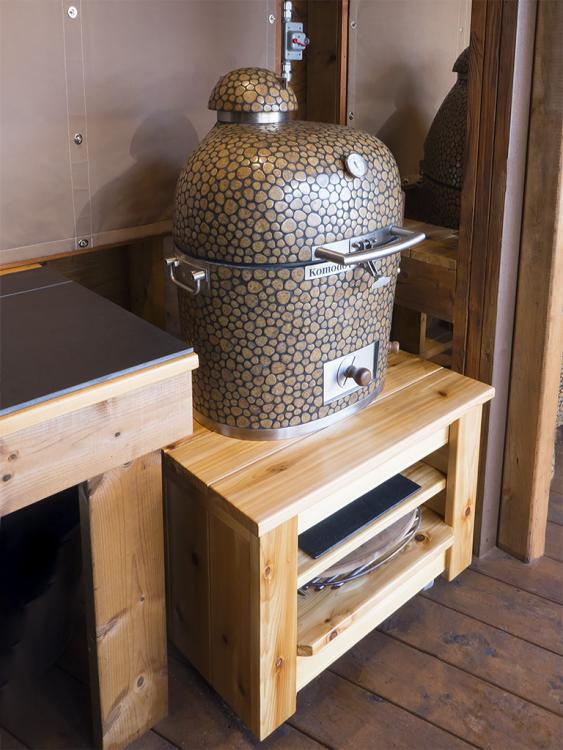
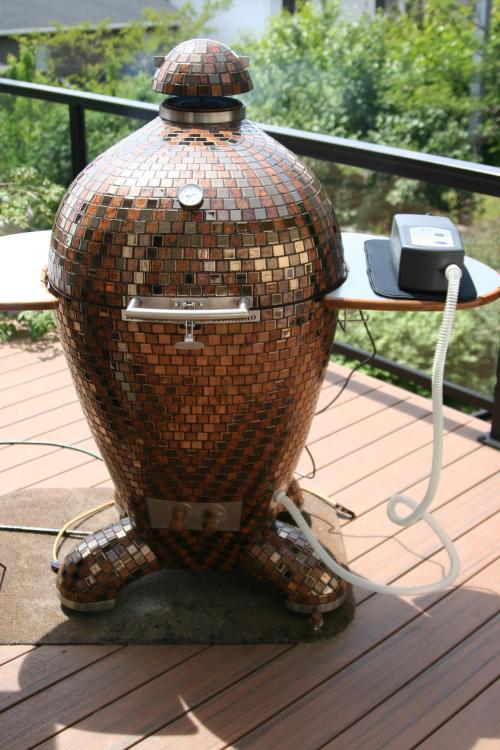
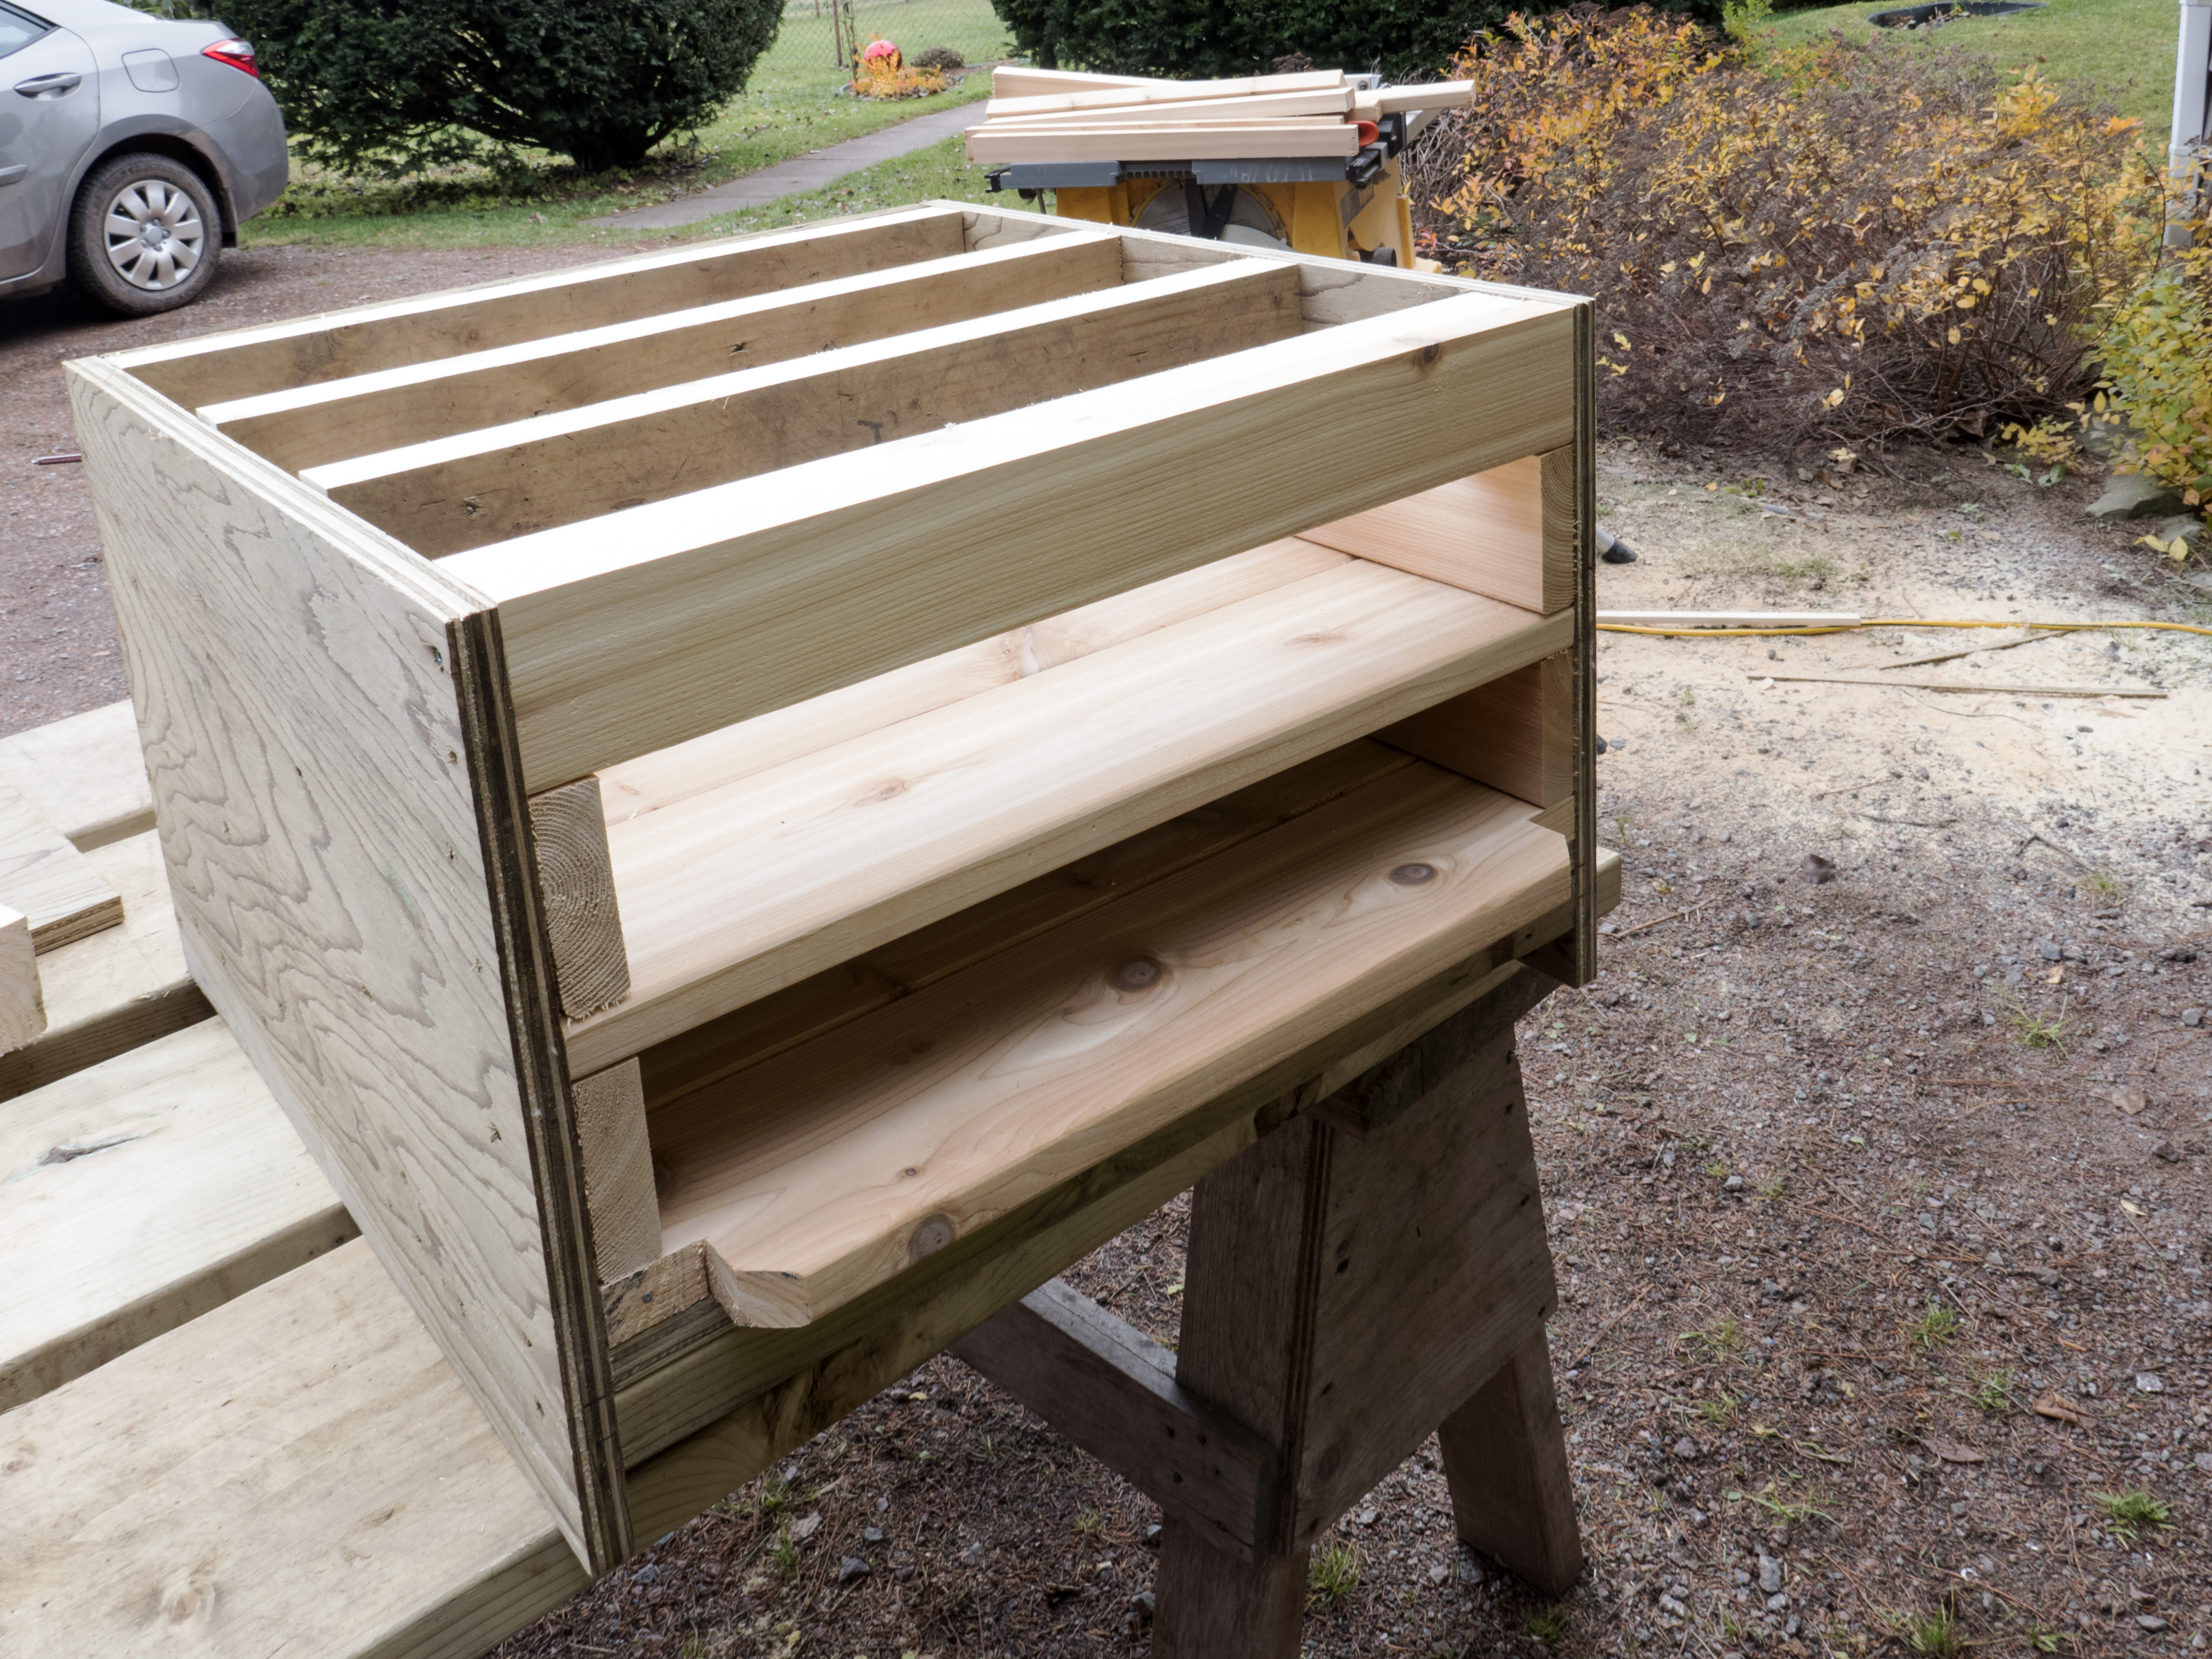
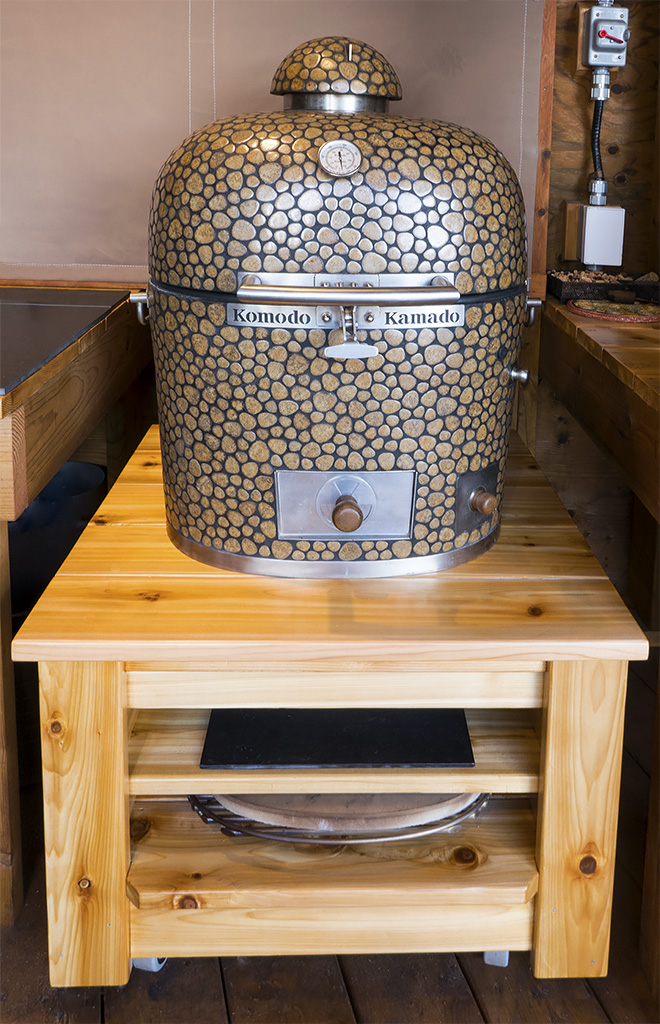
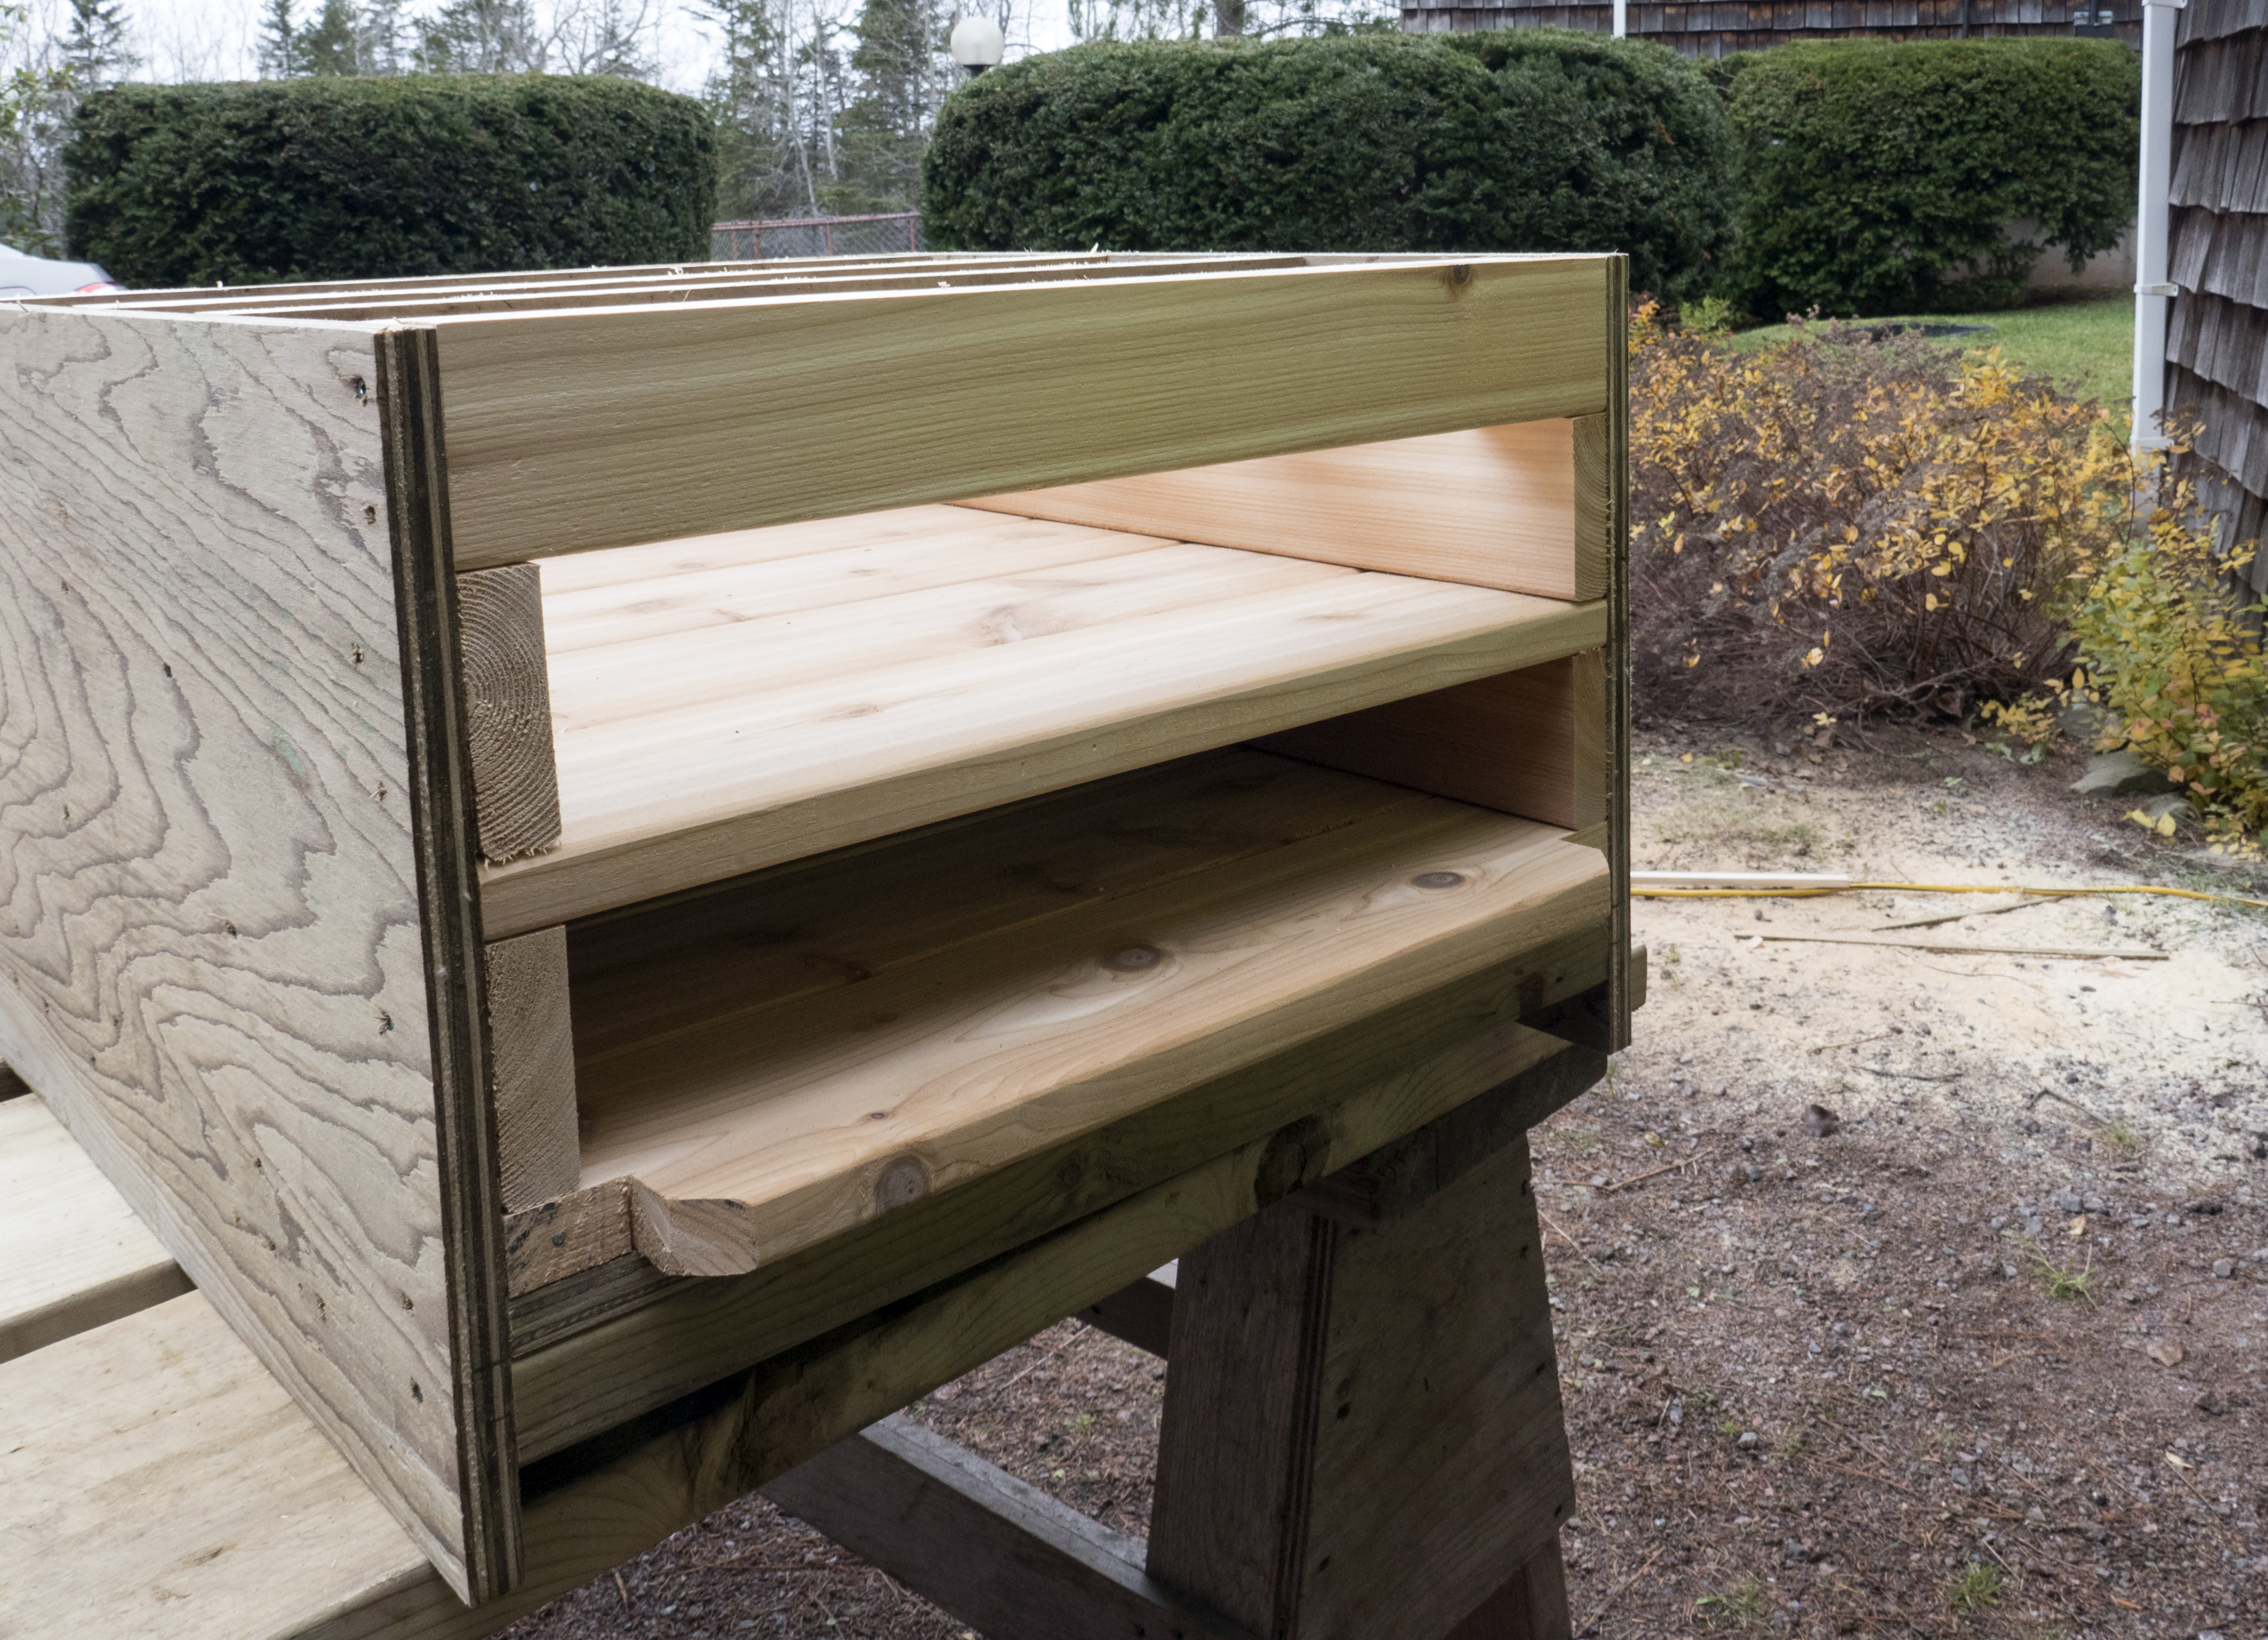
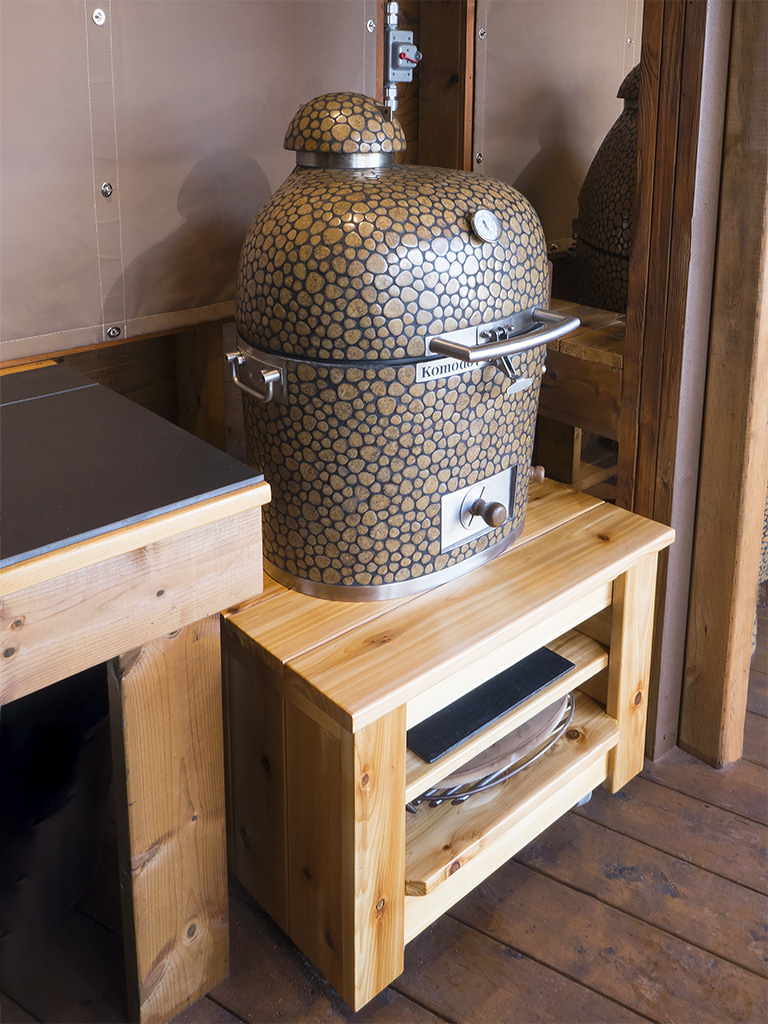
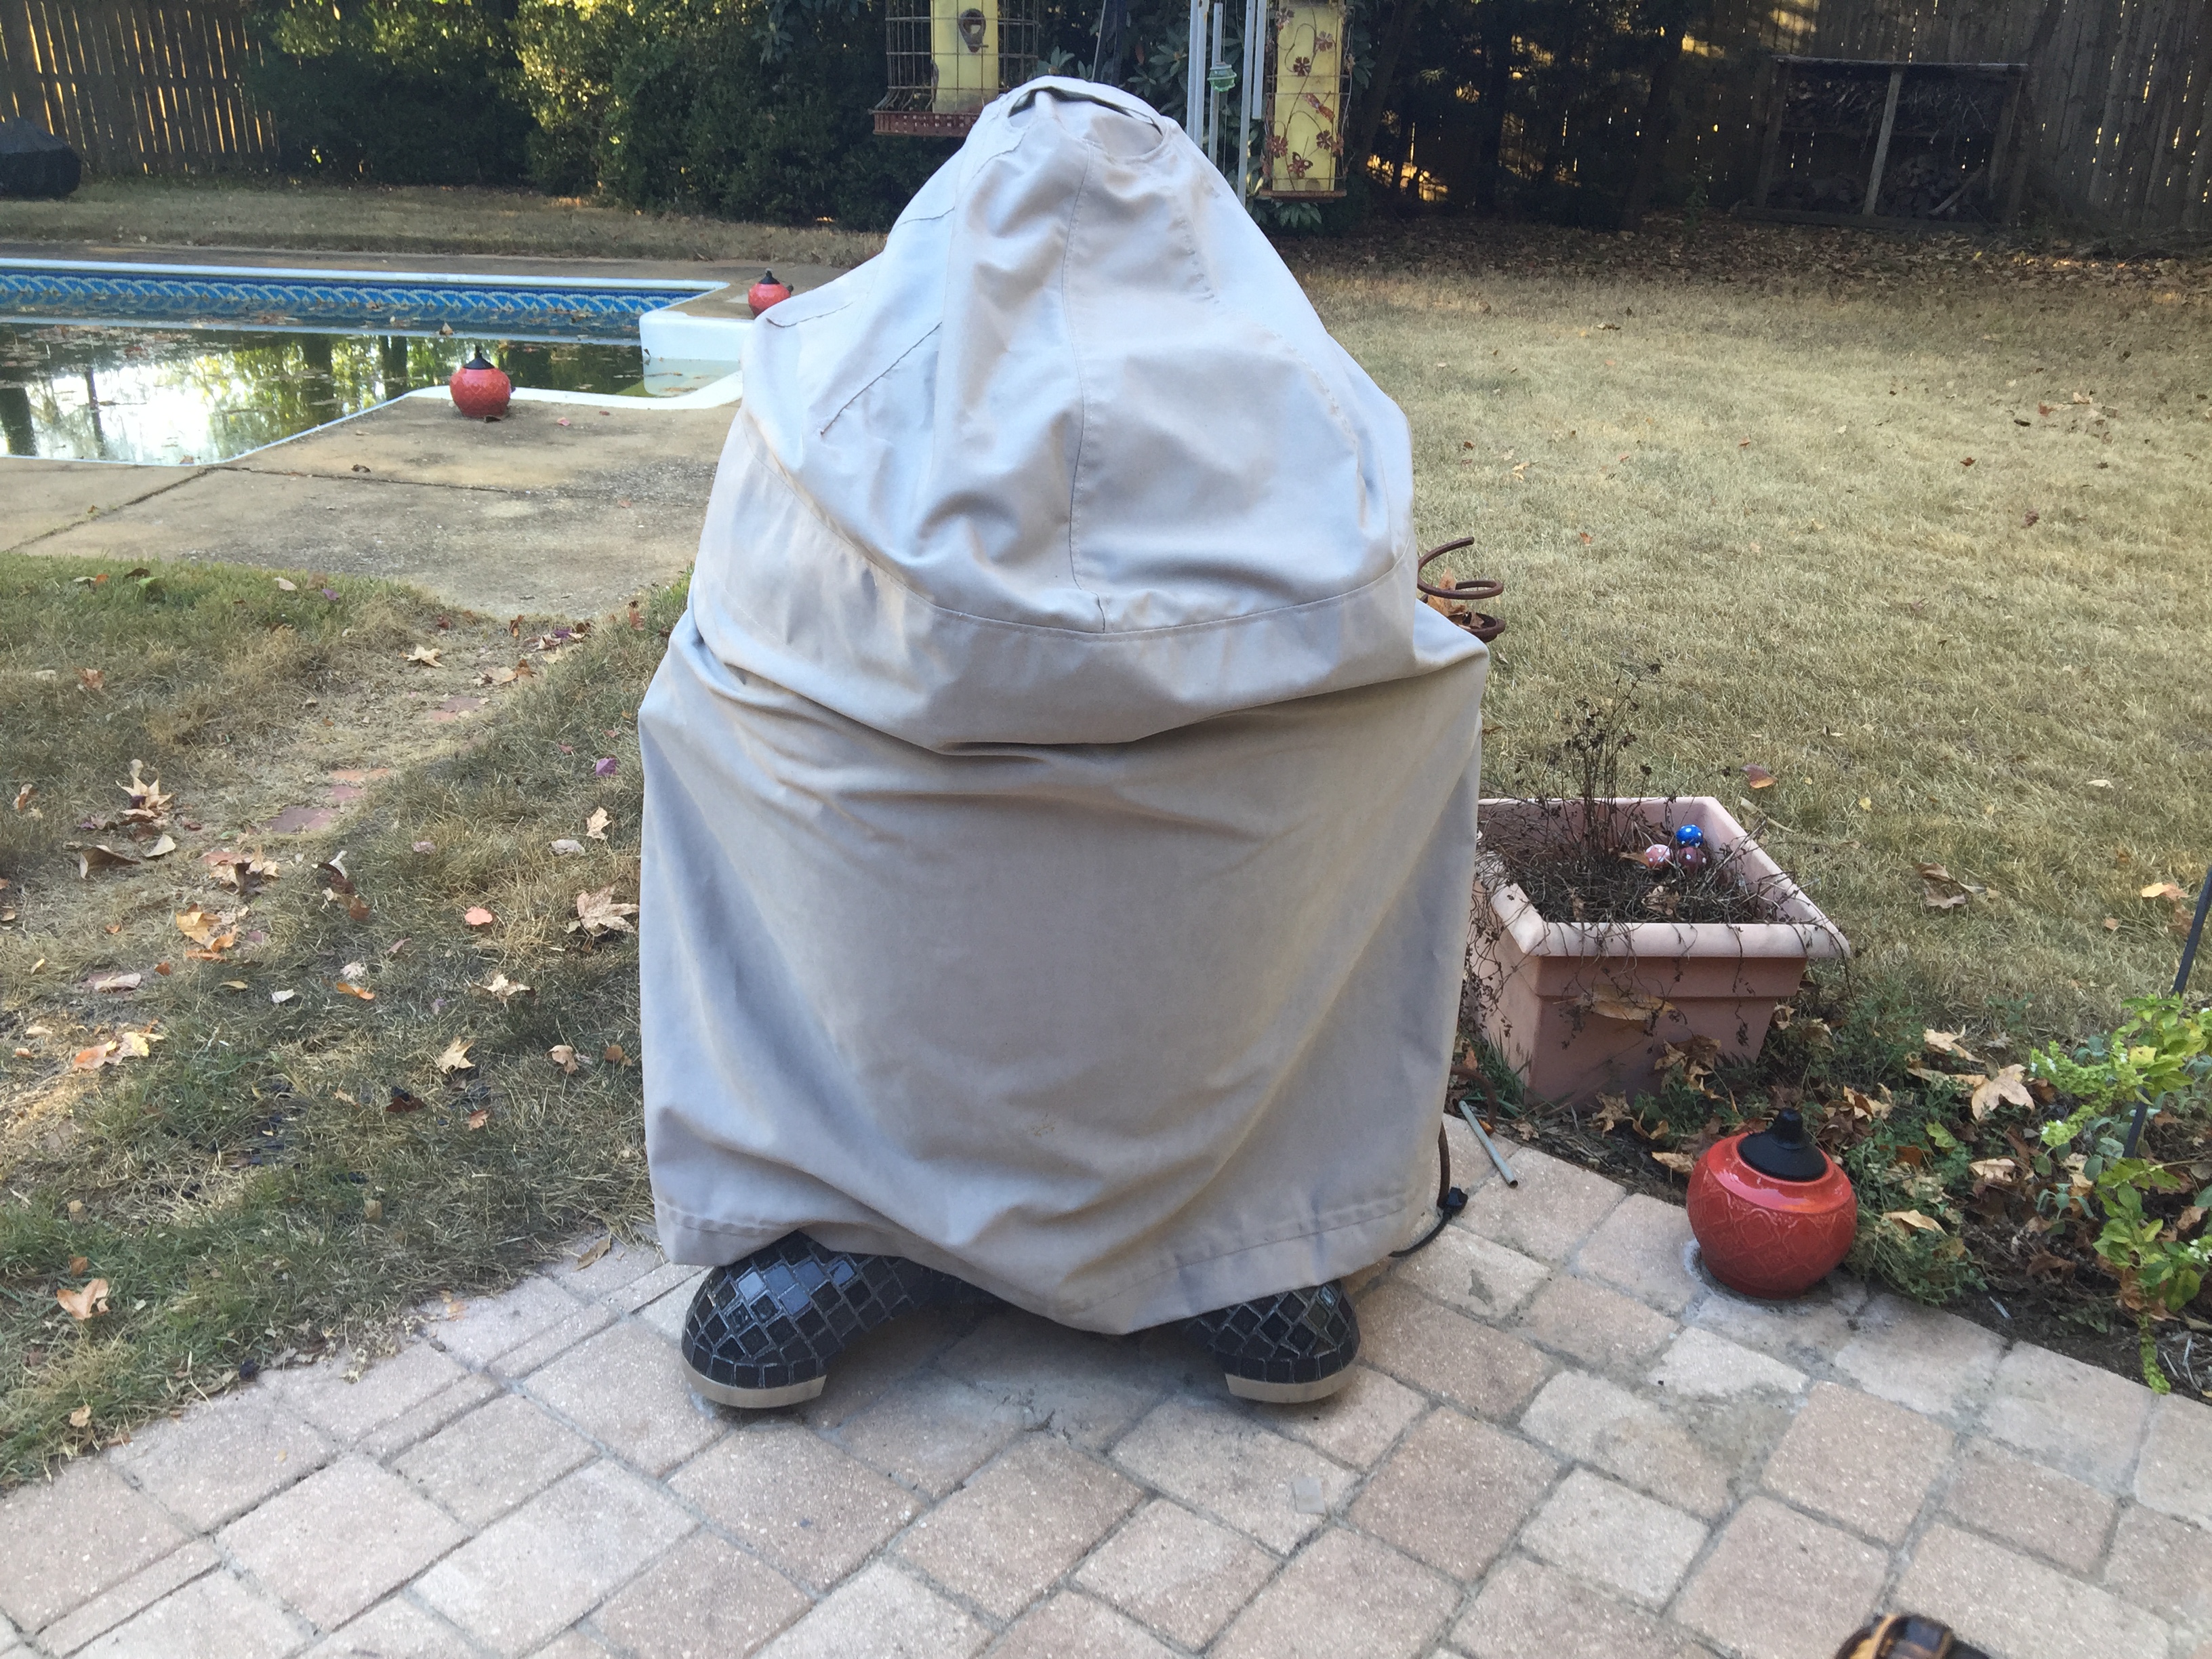
Finally have a stand for my little 16 inch KK. Rolls around like a charm using just use one hand and the handle. This is a heavy duty cart- It is getting dark but we are nearly done. It is too cold to do the finish outside so we dragged it into the living room. YIKES. Here it is with one coat of varnish 2 more to go. So far no accidents. Today we put it on the deck and topped it with Little Ms. Pebbles sister to Pebbles. Let's pull it out into the light. View from the dining room sliding glass door. You just know where LMP is going to be when the snow arrives, yes, right in front of the door. I have most of the shutters and shades up to keep the snow out of my ODK. I need to find some tiles to put on the shelves to keep them from getting all marked up.


 2 points
 -
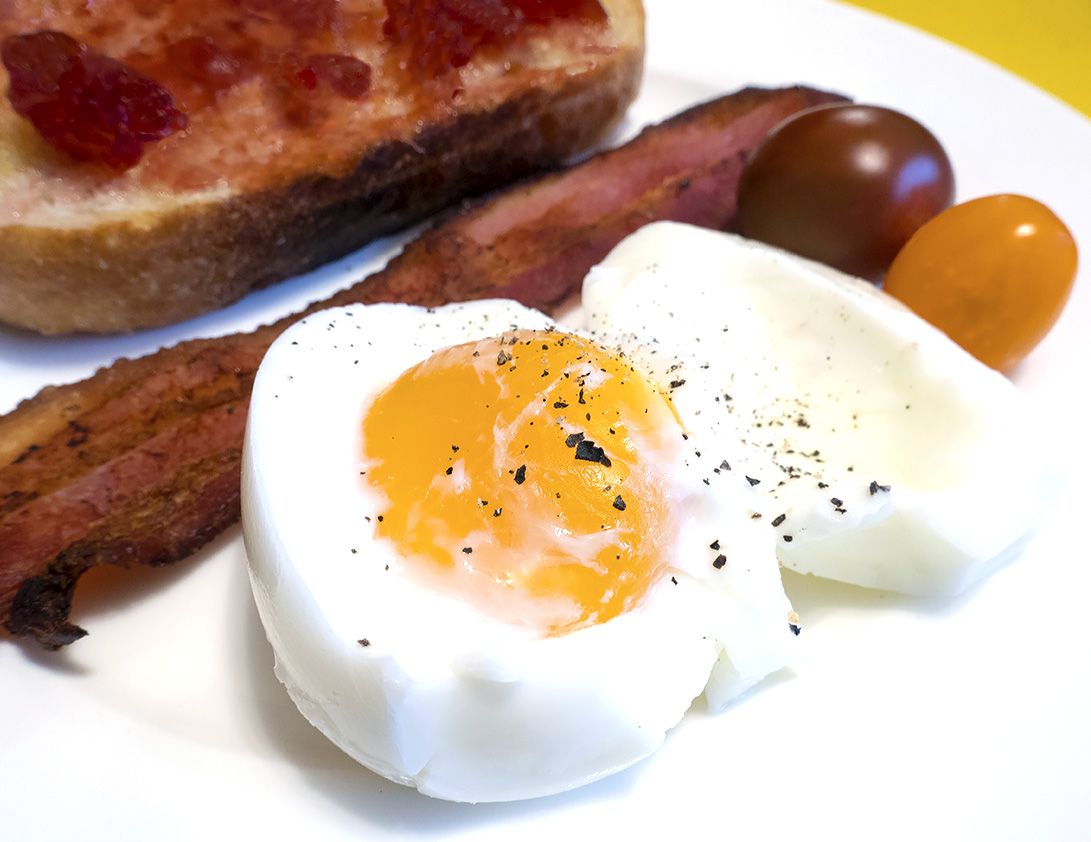
Couldn't resist one more PC egg, if you use a very dull knife and you are very careful you can expose the egg yolk. A little poke and watch it run.

 2 points
 -
This procedure probably applies to all the sizes. You will need a helper, a 5mm Allen head wrench and a 14mm closed end box wrench. Both of these wrenches are supplied by Dennis with the grill. If you can get hold of a 14mm socket wrench this procedure will go a bit quicker. Have helper open the dome just enough so you can get to the top 2 bolts securing the spring cover. Using the supplied 5mm Allen head wrench loosen (but do not remove) these 2 bolts. Pull the spring cover back far enough so it clears the 2 bolts then lift it straight up and off. Have helper hold the dome in the completely open position. Make sure you have a capable helper because as the spring loosens and finally comes off the dome will get very heavy. Make sure they are ready for this. Using the supplied 14mm closed end box wrench (or 14mm socket wrench) completely remove the hinge spring bolt from the bottom of the spring. (this will take some turns as the bolt is 1"+ inside the spring) Once the bolt is removed from the spring have the helper gently lower the dome back down. At this point you should be able to remove the spring from the hinge. Remove the Cotter pin from the end of the hinge pin. Gently drive/pull the hinge pin out the other side. Helper may need to wiggle the dome up and down about 1/2" to help this along. The dome is now completely free from the base. Have one person on each side. Have a third helper open the dome just enough to get your fingers in there then lift the dome up and off. Set it down so it slightly overhangs the edge of a sturdy table so the weight of the dome is not resting on the front latch. Well that's it. Took longer to type this then it did to actually remove the dome. Installation procedure is the same but in reverse. Be careful when setting the dome back down on the base so your fingers or more importantly the gaskets don't get crushed - LOL. Once everything is back together you will need to adjust the spring tension by slowly adjusting the bottom spring bolt. Check for proper spring tension frequently. To much tension and the dome will fly open when you unlatch it. Too little tension and the dome will slam closed on it's own. I like my tension just enough so it's not fully auto opening and so it will stay in any position if I (or an unruly guest) lets go of the handle when sneaking a peak.1 point
-
So the other day I posted a question about how I was going to cook rack of lamb. It turned out very very well. I based my cook on an APL recipe, after getting advice from Andyscalso (I think I spelled that correctly, from kamado guru) I decided to omit the chili powder all together. I also tweaked it a little based on my tastes. The lamb was so good... I ate four of these pieces..... then again I had ran 6 miles earlier and they took longer than I thought so I was starving!!!! Still... is there nothing that is not vastly improved by kamado cooking? I feel that the light smoke profile complimented the lamb perfectly.1 point
-
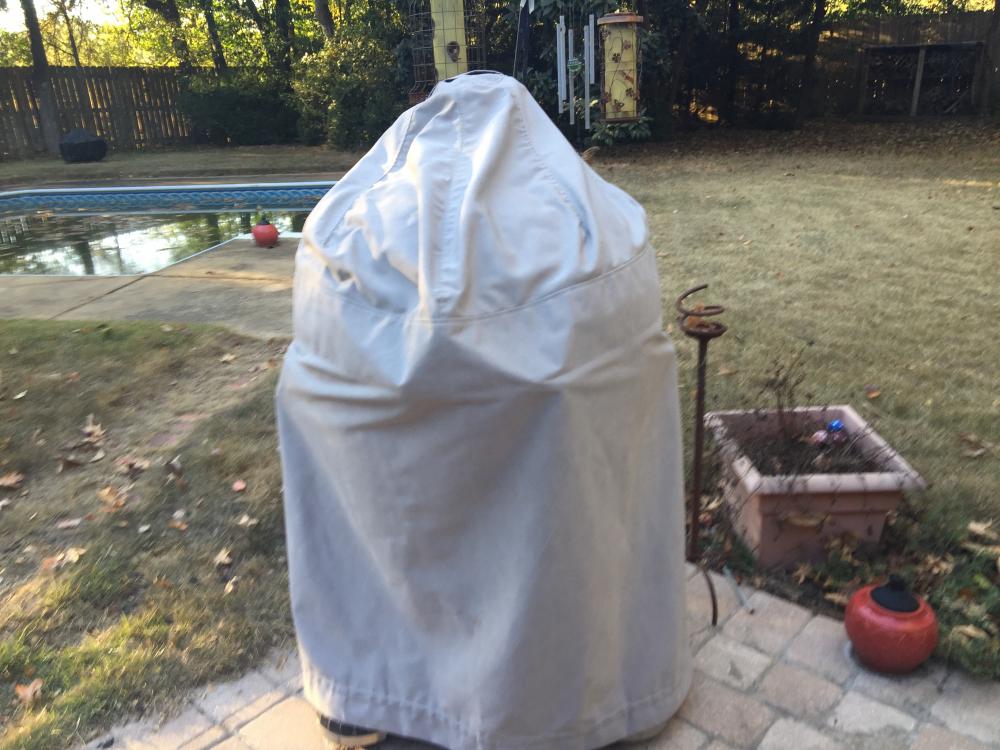
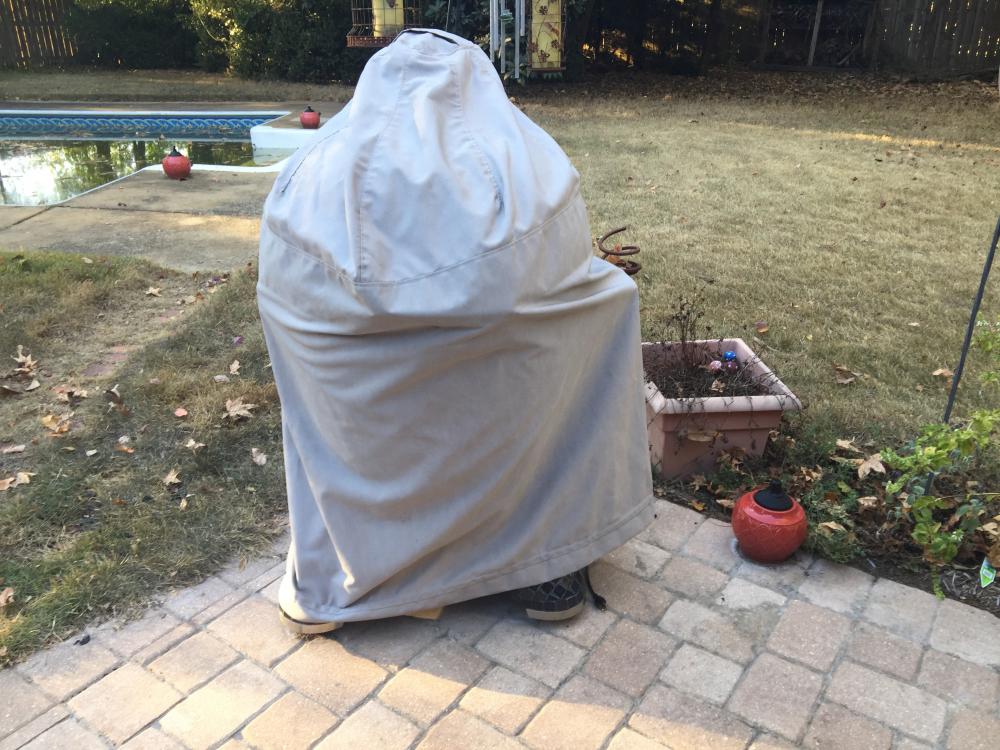
It depends on your definition of 'fit'. Here are some pictures I grabbed for you of the cover on my 23": 1. The accessory pins are installed on the left side (this is my normal storage): 2. The roti is installed on the right (no accessory pins on left): 3. Both the roti (right) and accessory pins (left) are installed. It takes a bit more effort to get the cover on with the rotisserie motor installed, a pull here, a tug there, but it does go on. It may wear out the cover faster, though.

 1 point
 -
Yes there is still tension on the spring when the dome is in the open position. I have posted 2 different threads. One is how to adjust your spring tension the other one is step by step with pictures for removing the dome. Check them out as the procedure is the same for all KK's.1 point
-
Yeah, if I don't get a fair offer, I'll just keep it. Oh darn, I've got to keep a super nice kamado. First world problems, right? lol1 point
-
I wondered how they were going to get that pin out.....now I know!1 point
-
Yup. Now that @FotonDrv has access to the Owner's area, look up my thread titled "Mischief Managed" there to see an example of this.1 point
-
That is a question for Dennis. I would use a few 2x4s on ground with maybe cushions or foam on top to rest lid on. That will allow you to get your hands under it again later to lift it. The ones that were damaged was that the entire weight of the lid rested on a few tiles and they popped off1 point
-
You are right, just a manner of speaking, "put your feet up" meant take it easy.1 point
-
Oh my! That looks awful and mighty painful! Time for her to put her feet up and let others take care of her. Be sure that she gets some PT down the road to regain full use of the finger back.1 point
-
Wow that gives me the shivers. I hope you're not in to much pain. You're lucky you didn't lose your finger that's that's bad.1 point
-
That is the pin sticking out of her knuckle. Something to grip with the pliers when they go to pull it out.1 point
-
Just be mindful of how you place that lid down. I have seen a few that had tiles close to the edge pop off from the weight of the lid resting on a few tiles.1 point
-
I am used to the metal detectors going off at the airport just another inconvenience. Sorry to hear about the cancer I hope that the radiation takes care of it for you. Have a happy Thanksgiving1 point
-
I have been planning to do that. I understand that a long handles wrench is provided to loosen the hinge and or spring but until I look at it I do not know enough about how to remove it. My question would be is there ANY tension on that big spring once the lid it up? I have wide nylon lifting straps, usually used for overhead cranes, that I can wrap around the KK and then fasten to the front of my MINI Cooper with the towing eye bolt (really nice feature) so I can watch it as it goes down that slope as a couple of people steady the top for side to side or forward tipping. Moving big heavy unwieldy things is always a challenge. I plan on photographing the entire process so as disasters happen it can be used as a "What NOT to do" demonstration1 point
-
I was doing pretty good until I got old. Now I have a steel plate in my neck the steel ball in my left shoulder and a steel ball in my left hip. I'm afraid to jump into the deep end of the swimming pool with all that steel I would probably stink right to the bottom lol1 point
-
It would probably be a good idea to take the top off,that way it won't be so top-heavy. Plus the top weighs about 200 lbs1 point
-
I have my 19"KK on a rolling cart. It just about took off on me just rolling it down a landscape trailer ramp (18" drop over 3 feet). I would strongly recommend having your much heavier KK strapped and totally secured to a winch / car / come-along with a backup safety harness. Once that cooker takes off on you, there will be no stopping it. I was lucky that mine didn't slide off the cart. Slow and steady is the key to moving that cooker. Don't let it get off balance going up/down ramps/stairs. It was scary for a few seconds just going down 18". Your project would be a challenge for professional riggers.1 point
-
To be 53, I'm very surprised that this is my first ever broken bone,growing up on a farm with so much kid mischief. I was a bit of a Tom boy. The best thing for me is, I am not on any kind of medicine for any related health issues. I rarely ever have to take Tylenol. I feel very blessed to be able to say that. The only thing I really am concerned with is there is so much Cancer that runs in my family.. I pray I don't carry that gene. Mrs. Reef's Bistro1 point
-
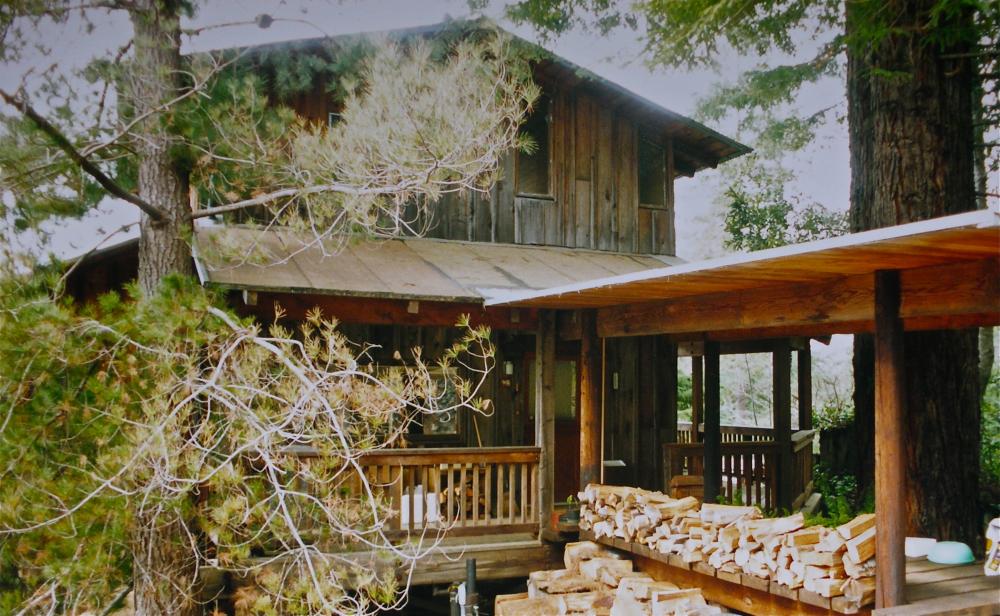
Thanks for sharing..............two beautiful homes!!!! I would have a heart attack if I ran into a bear like you did. I must have been eaten by one in a former life. I could not sleep for a week after watching the bear attack in the movie The Revenant.1 point
-
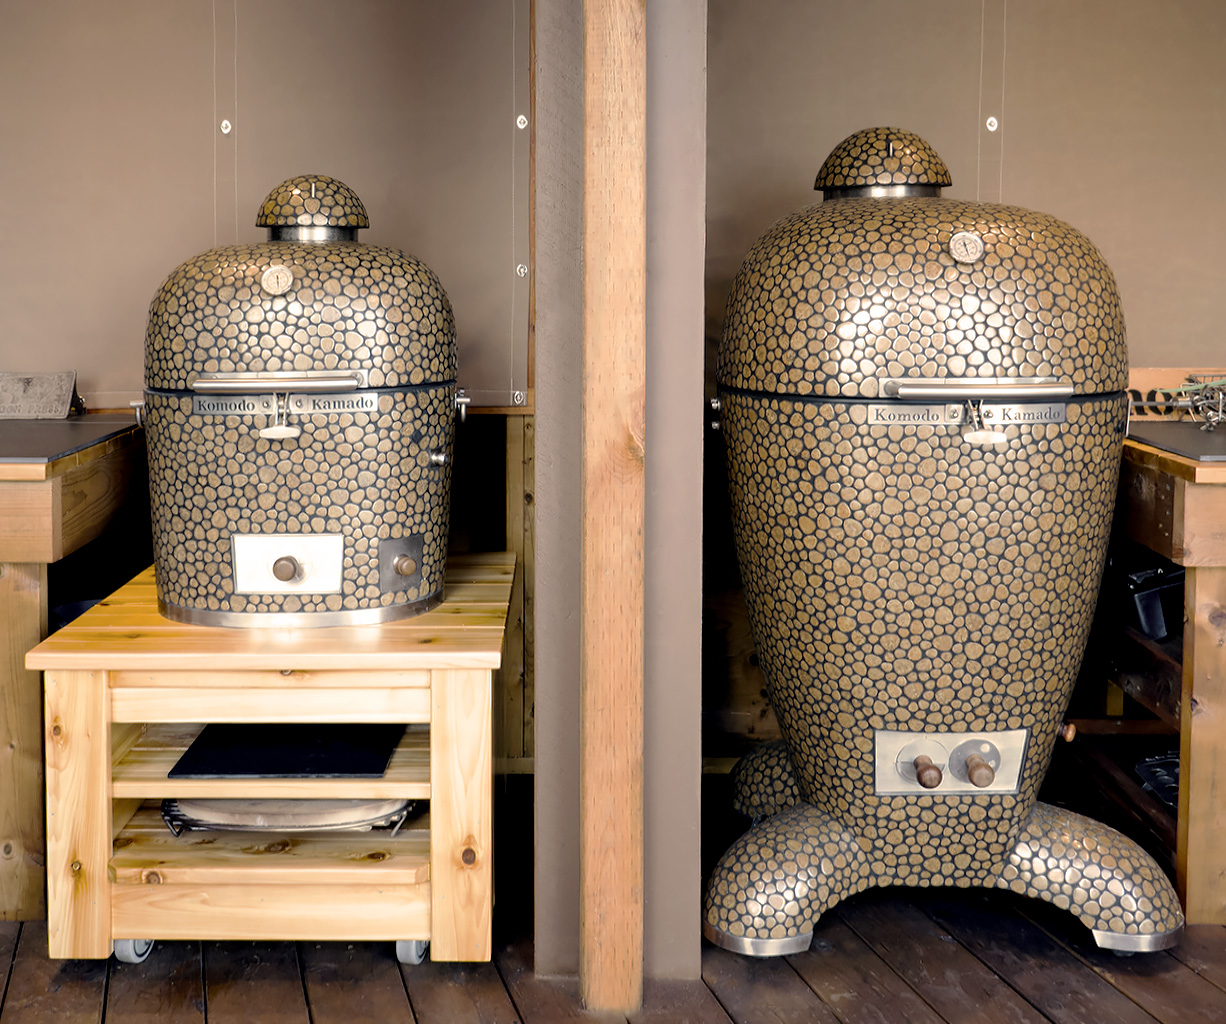
Very nice! The more I see of your 16, the more I want one. Two 16's equals a 32, right?1 point
-
Very nice meal.1 point
-
A great meal that is fast to prepare...yum!1 point
-
That looks like a lovely dinner Sent from my iPhone using Tapatalk1 point
-
Try acupuncture for pain if that is possible where you live. It really helped me with multiple muscle/skeletal issues. And yes Tony B, scar have much more interesting stories. I could write a long book and my medical file is an ever expanding testament to those ideas I do not have tattoos but I would wager that they are less painful initially, physically, but can lead to emotional misgivings in the future.1 point
-
oh man! get better Mrs. Skreef1 point
-
the 32" has 4 stones in total. 2 more rectangular pieces are to allow for larger cuts. They cover from front to back with no gap, only larger gaps along the sides. This allows for a large cut of meat to not get burnt on its edges. The second set, more shaped like the KK, rounded edges are for standard smoking. They should have a gap all the way around to allow for heat to rise around the outer edge. You will also have a stainless frame that clips onto the charcoal basket and that is what the stones sit on. In all honesty, you do not need them. Add the lower grate and add a double layer of foil on it. The fire to grill distance is further apart then the standard kamado. This allows for an amazing cook without the need to use the bulky stones. Trust us.... it works great!1 point
-
I don't but you basically have 4 heavy duty blue ropes, one on each leg. We stuck a 2x4 through one side of the kk and one on the other side. A guy on each end of the wood and 2 guys stabilizing the kk as it was lifted. Piece of cake but heavy as a Mother F.....1 point
-
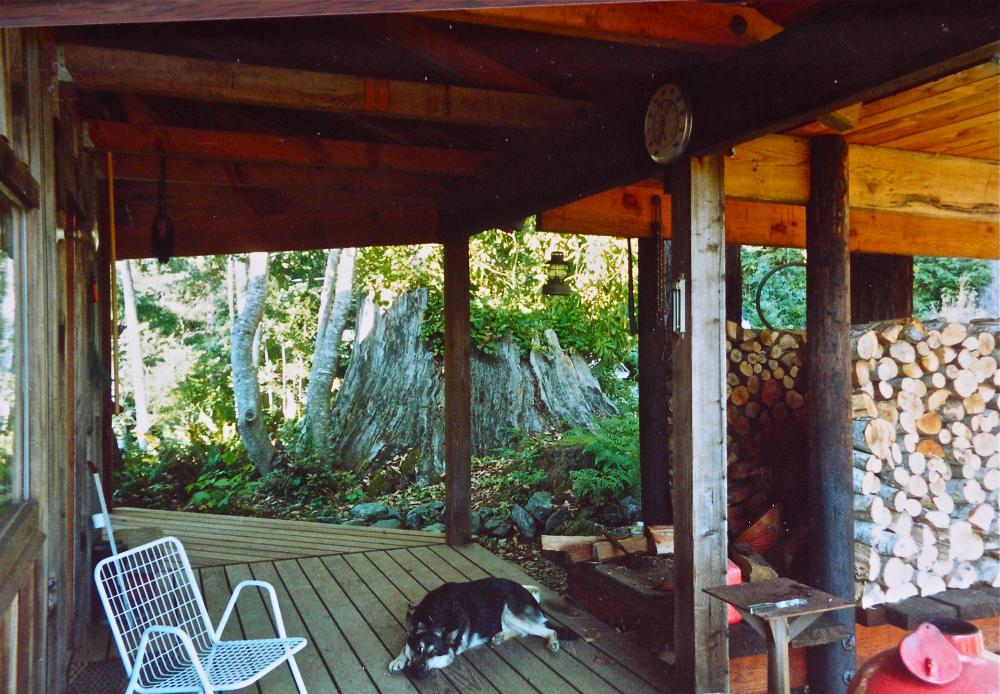
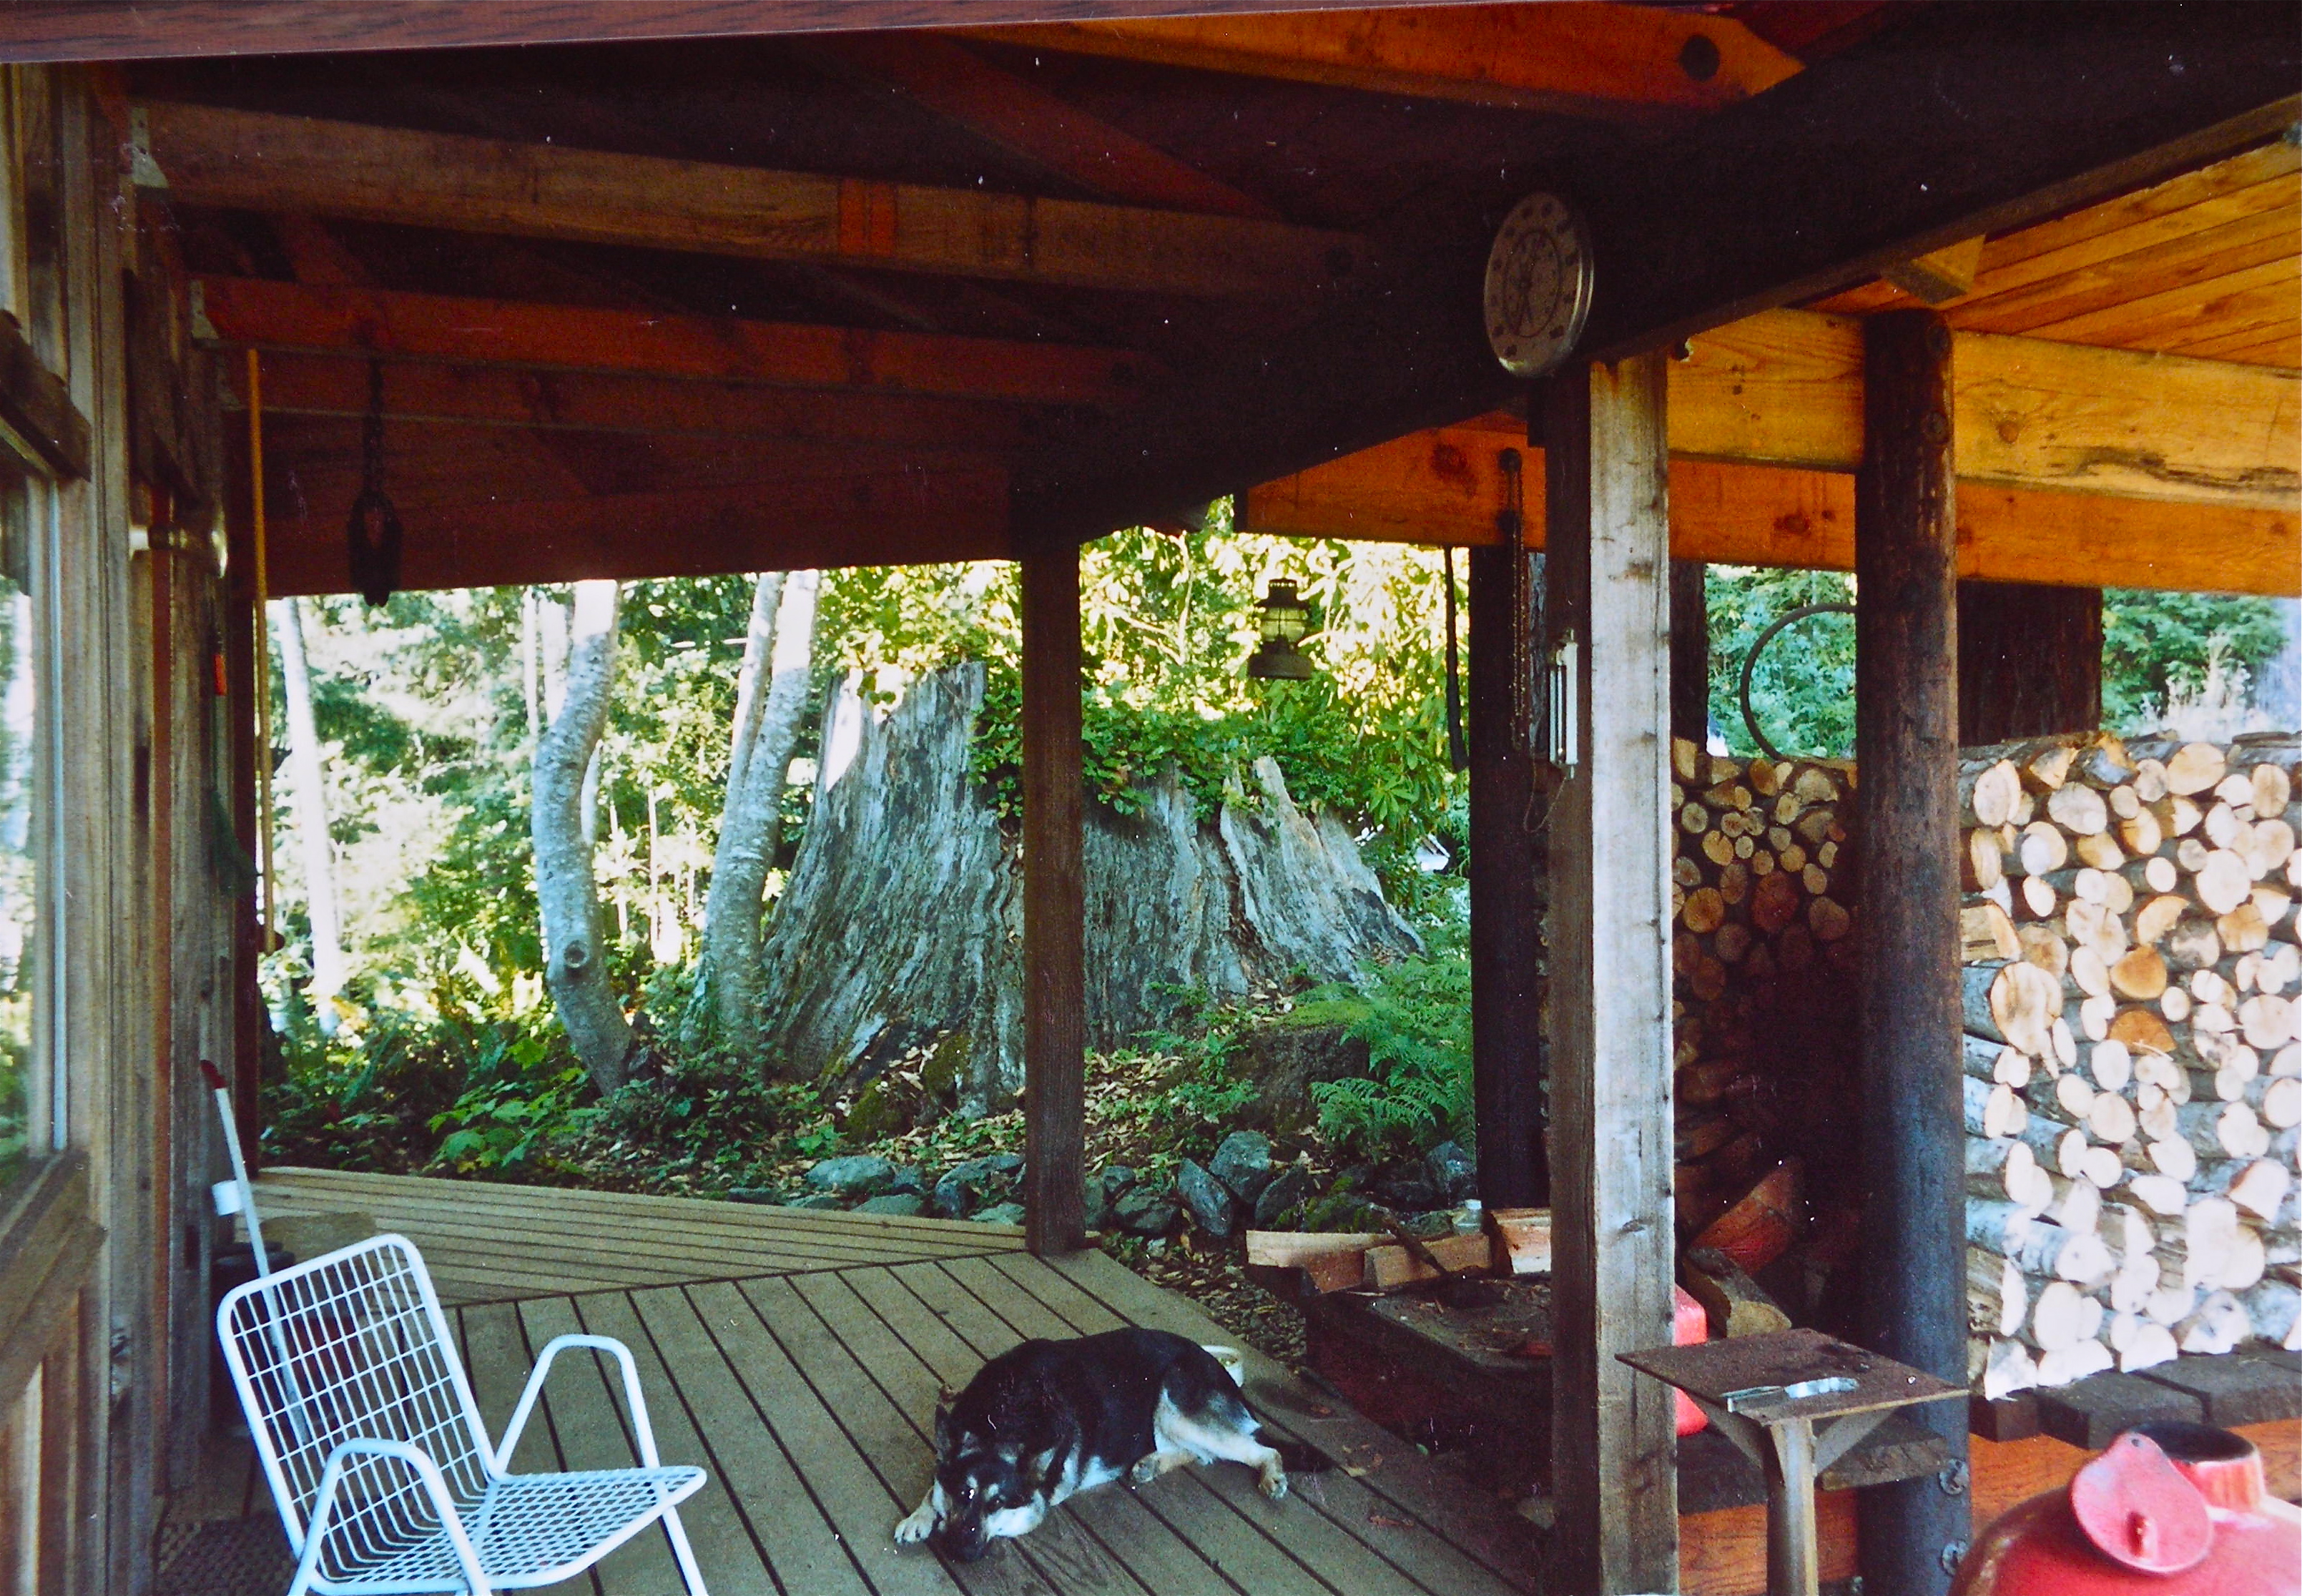
You bet I did! Funny though, it was a glass topped dutch door.... The bear stood up and spread its arms so my adrenaline was really pumping. I had not been that pumped since a particular firefight in Vietnam, so it prompted me into researching how to get rid of problematic bears without killing it. Man, there is a whole lot of info and bears and I can tell you what doesn't work Bear was between the door and the dog. Dog prudently retreated but unfortunately did not utter a peep to warn me. Neither dog did since I had 2 at the time. They also would not make a sound when the mountain lion was cruising the meadow.
 1 point
 -
Looking good,Aussie.:)1 point
-
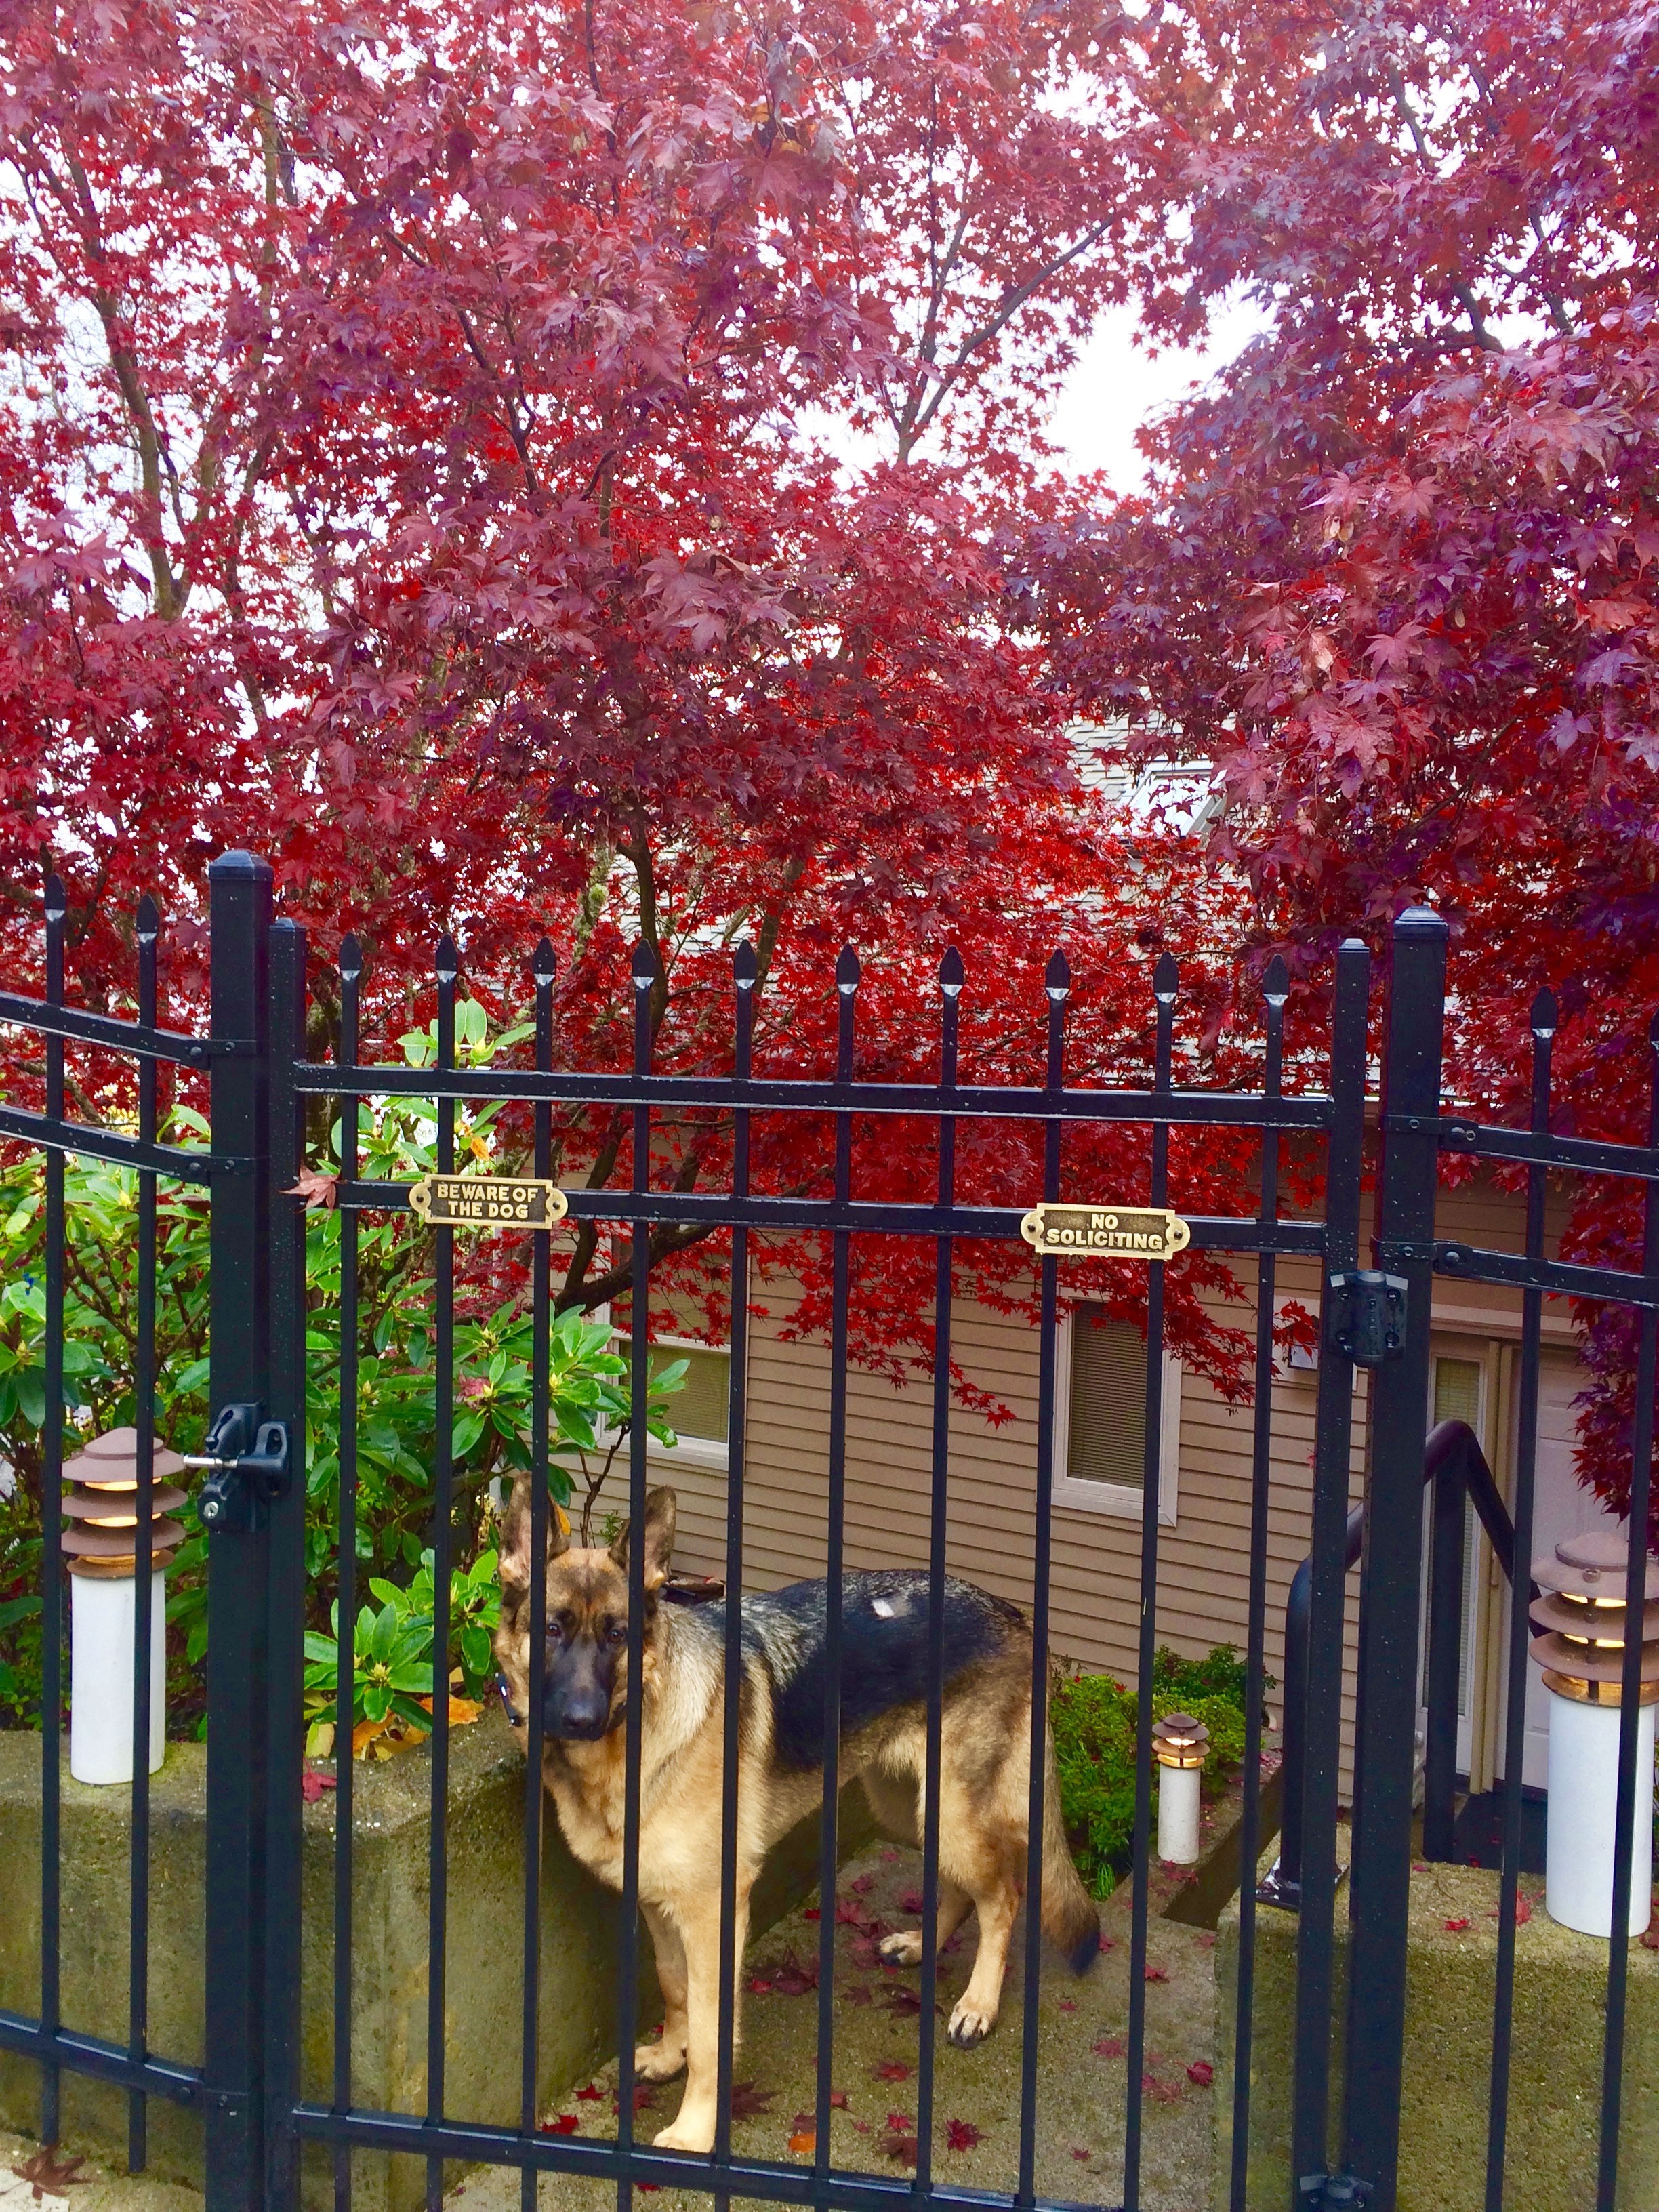
I like the discussion about the coyote and wondered when someone would say Wiley Coyote. So why not Wiley C. ? I personally am going to name mine (a 32"), when it arrives, Bear. The photo in my Profile shows a Kamado and a dog. I encountered a bear where the dog is sleeping on one dark night. Opened the door, which is 4 ft from the dog, and the bear stood up! Very impressive and got an immediate reaction from me!!1 point
-
Officially it's Anthony, but I go by Tony (among other names that have been given to me over the years by "friends" - LOL!)1 point
-
I just ordered the 32 because my wife is always asking, after I start to cook something, "Can we cook this too?"1 point
-
My company did not wait around. They moved fast. So thankful I work for a company who put my well being top priority. Very pleased.1 point
-
Nice looking taco cook.1 point
-
LIke the saying goes, Scars are better than tattoos because they come with more interesting stories!1 point
-
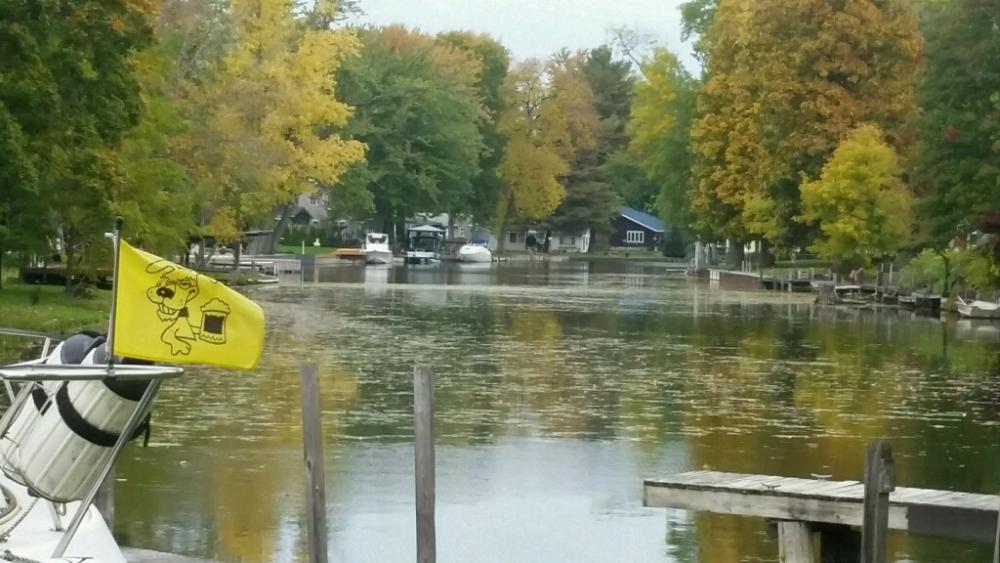
We just started getting a little bit of color in our trees. A couple of photos at the marina from yesterday.
 1 point
 -
Western Washington State color.

 1 point
 -
Congratulations. Perth the new up and coming KK destination.1 point
-
The brandywine maples along the driveway have turned colours.
 1 point
 -
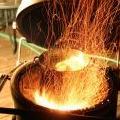
After using a Mapp torch, a Looftlighter, wax cubes and every other durn thing I finally settled on a charcoal chimney, a brown paper bag, and an old blowdryer. You get a raging hot fire in 7 minutes.1 point
-
Here is a quick picture. Soon all the maples will be a beautiful red.
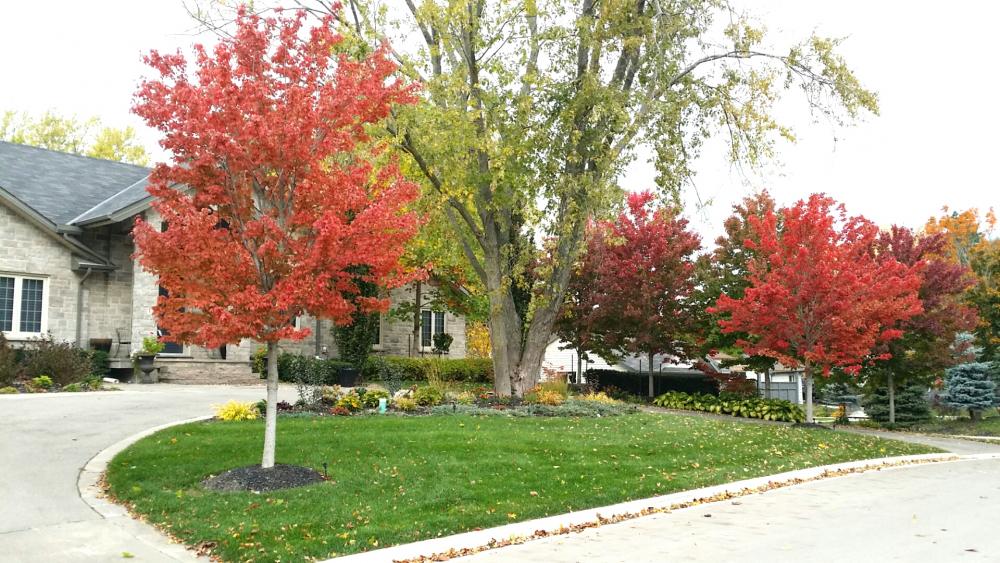 1 point
 -
I found the torch works well for spot lighting, but it still takes awhile for the unit to get heat soaked for grilling, at least a lot longer than it took for my #7 Kamado. My son got a spark in his eye the first time he lit with the MAPP torch so I have goggles at the ready now. Since I like to do prep work work while the KK is coming up to temperature, I decided to expand on the hair dryer idea so I didn't have to hold it. I had an old CPAP hanging around. This worked great!
 1 point
 -
Having just done this - there is a super long 5mm hex key that came with my grill - I only found it after I had completed the task but what the heh!! - loosen the two points at the top of the stainless v at the back of the grill, swing this off, then you can unwind the spring from below with a 19mm wrench or similar - have the lid tilted back while you do this(but supported so it doesn't slump as you loosen the spring). Undo completely, remove supports from lid and ease it closed. Then take the pin out that holds the lid in place. I'll put photo's up tomorrow - all of this is for the ultimate 23 , but I expect it's similar on most of the grills.1 point
-
Nice writeup! Thanks!1 point


.thumb.GIF.006d23b9323146d2dd9055f4e195bc2a.GIF)