Leaderboard

.thumb.GIF.006d23b9323146d2dd9055f4e195bc2a.GIF)


Popular Content
Showing content with the highest reputation on 01/07/2020 in all areas
-
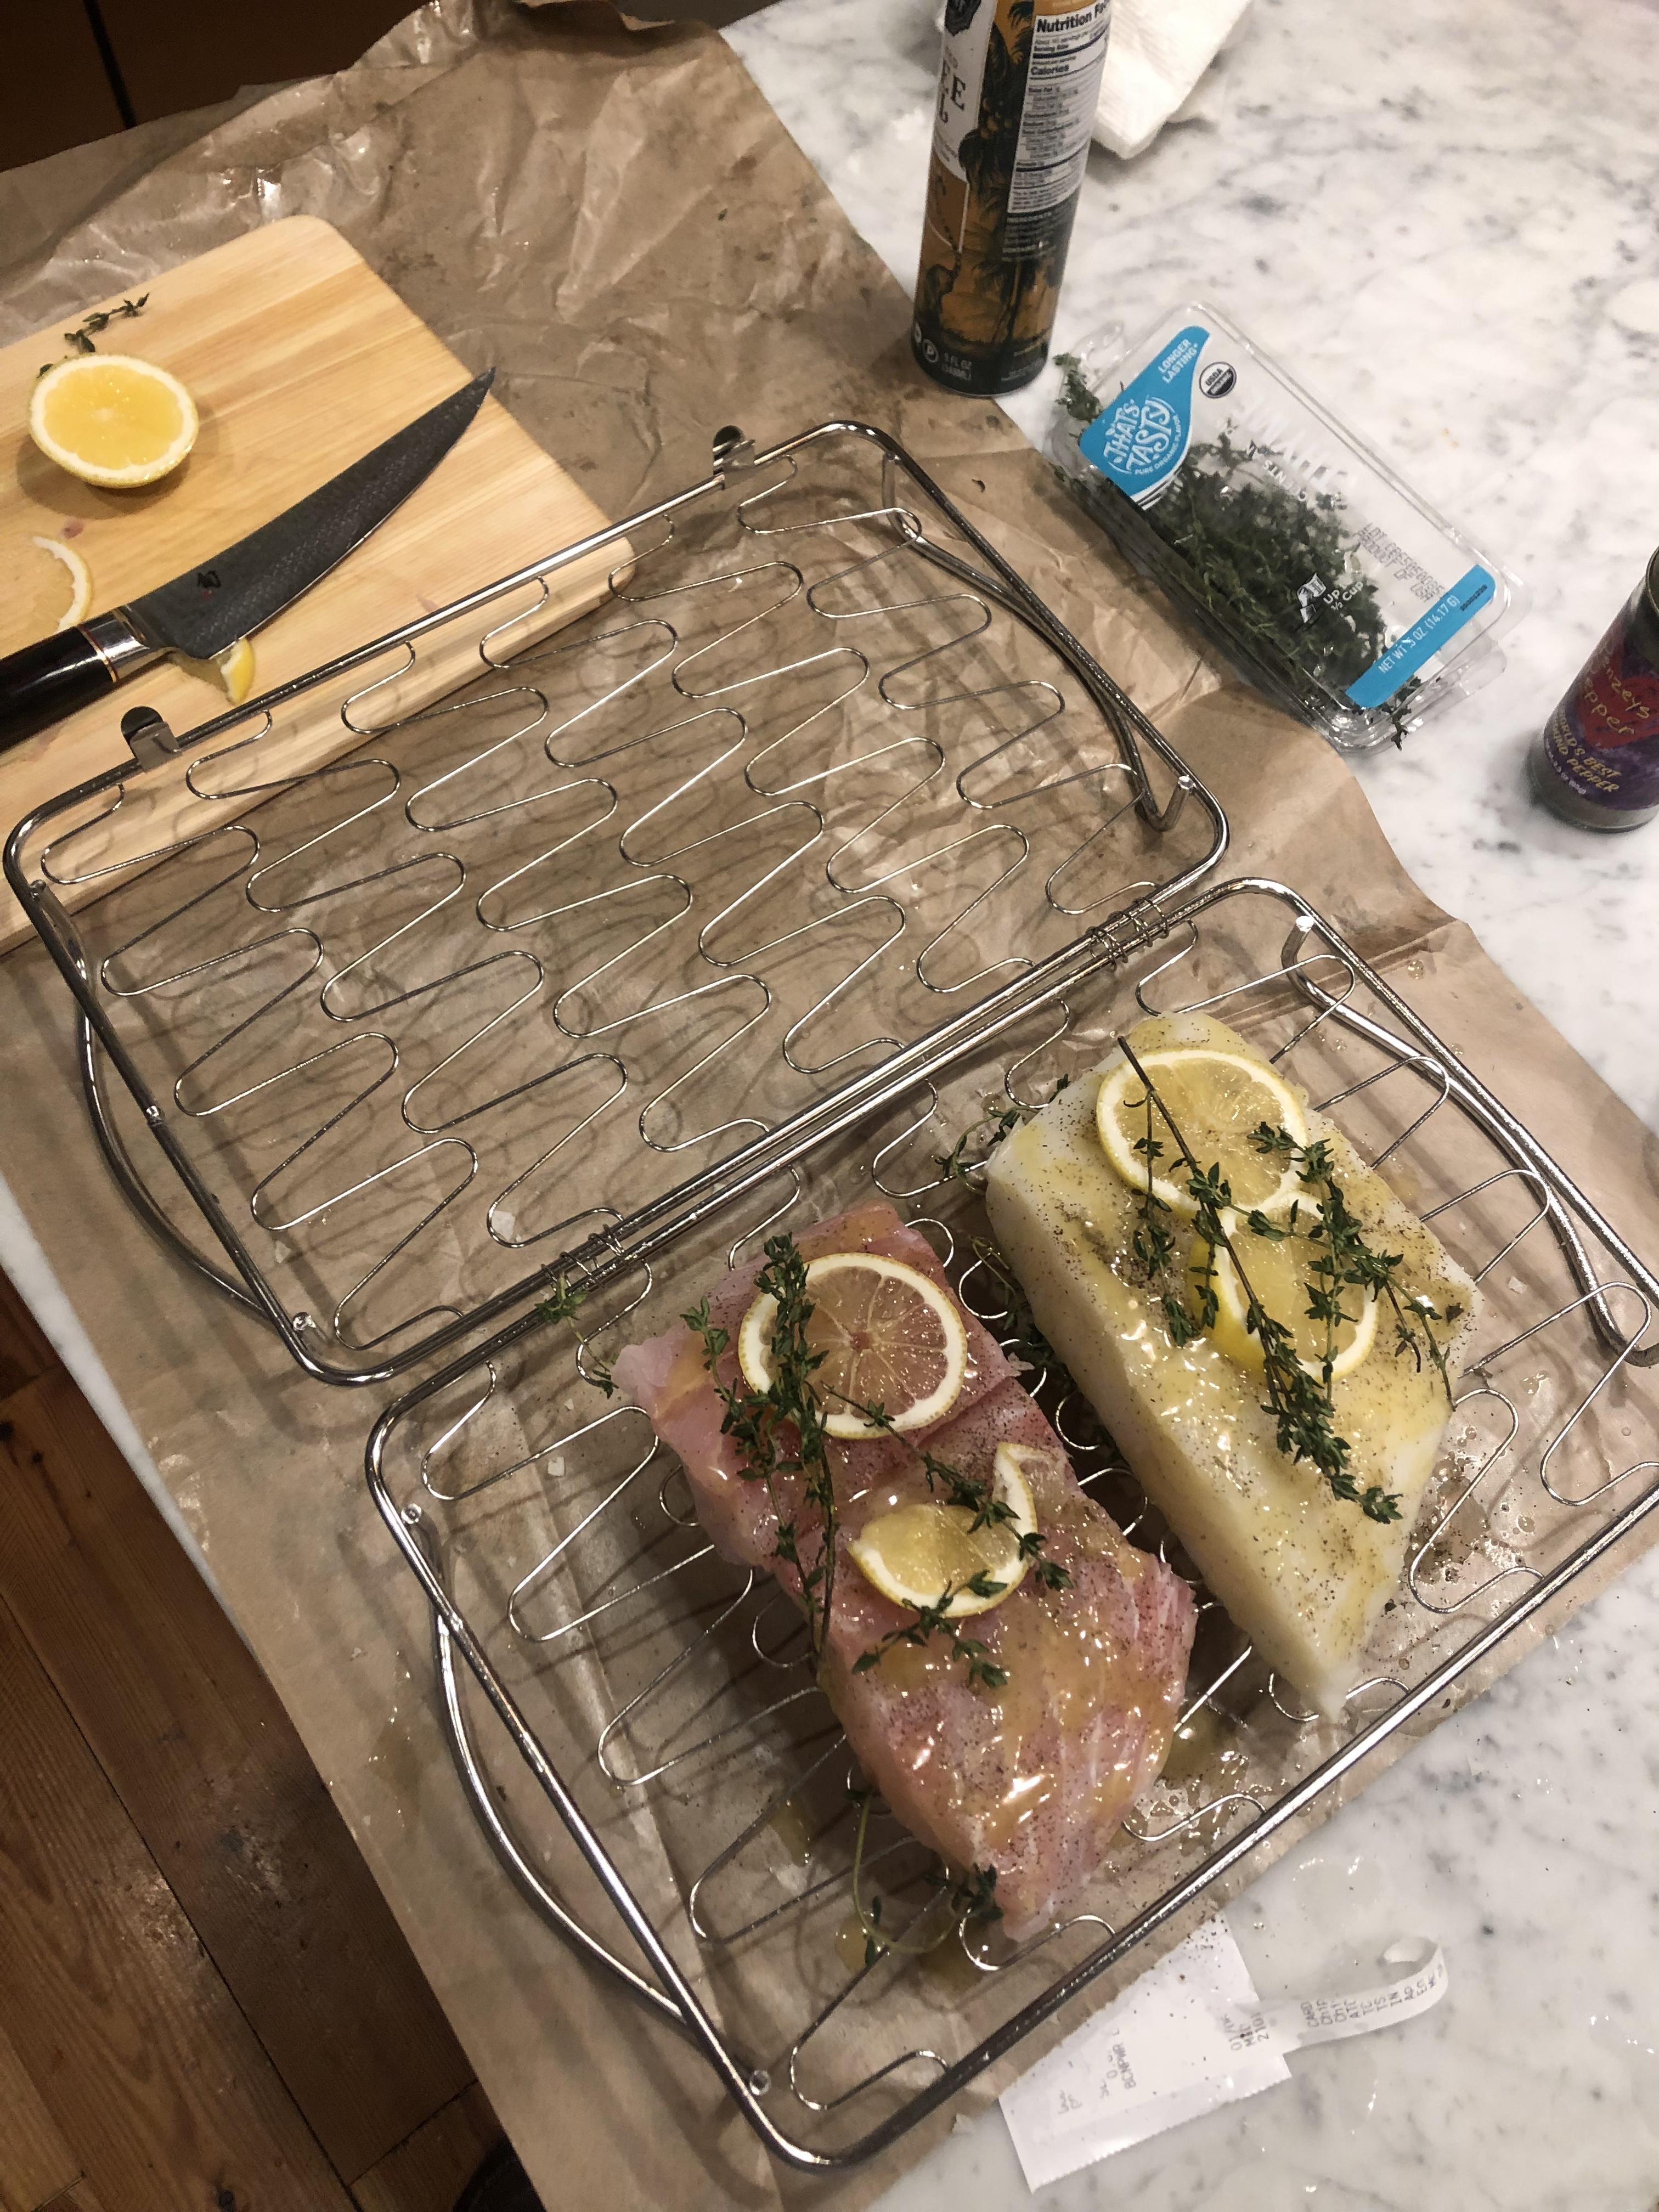
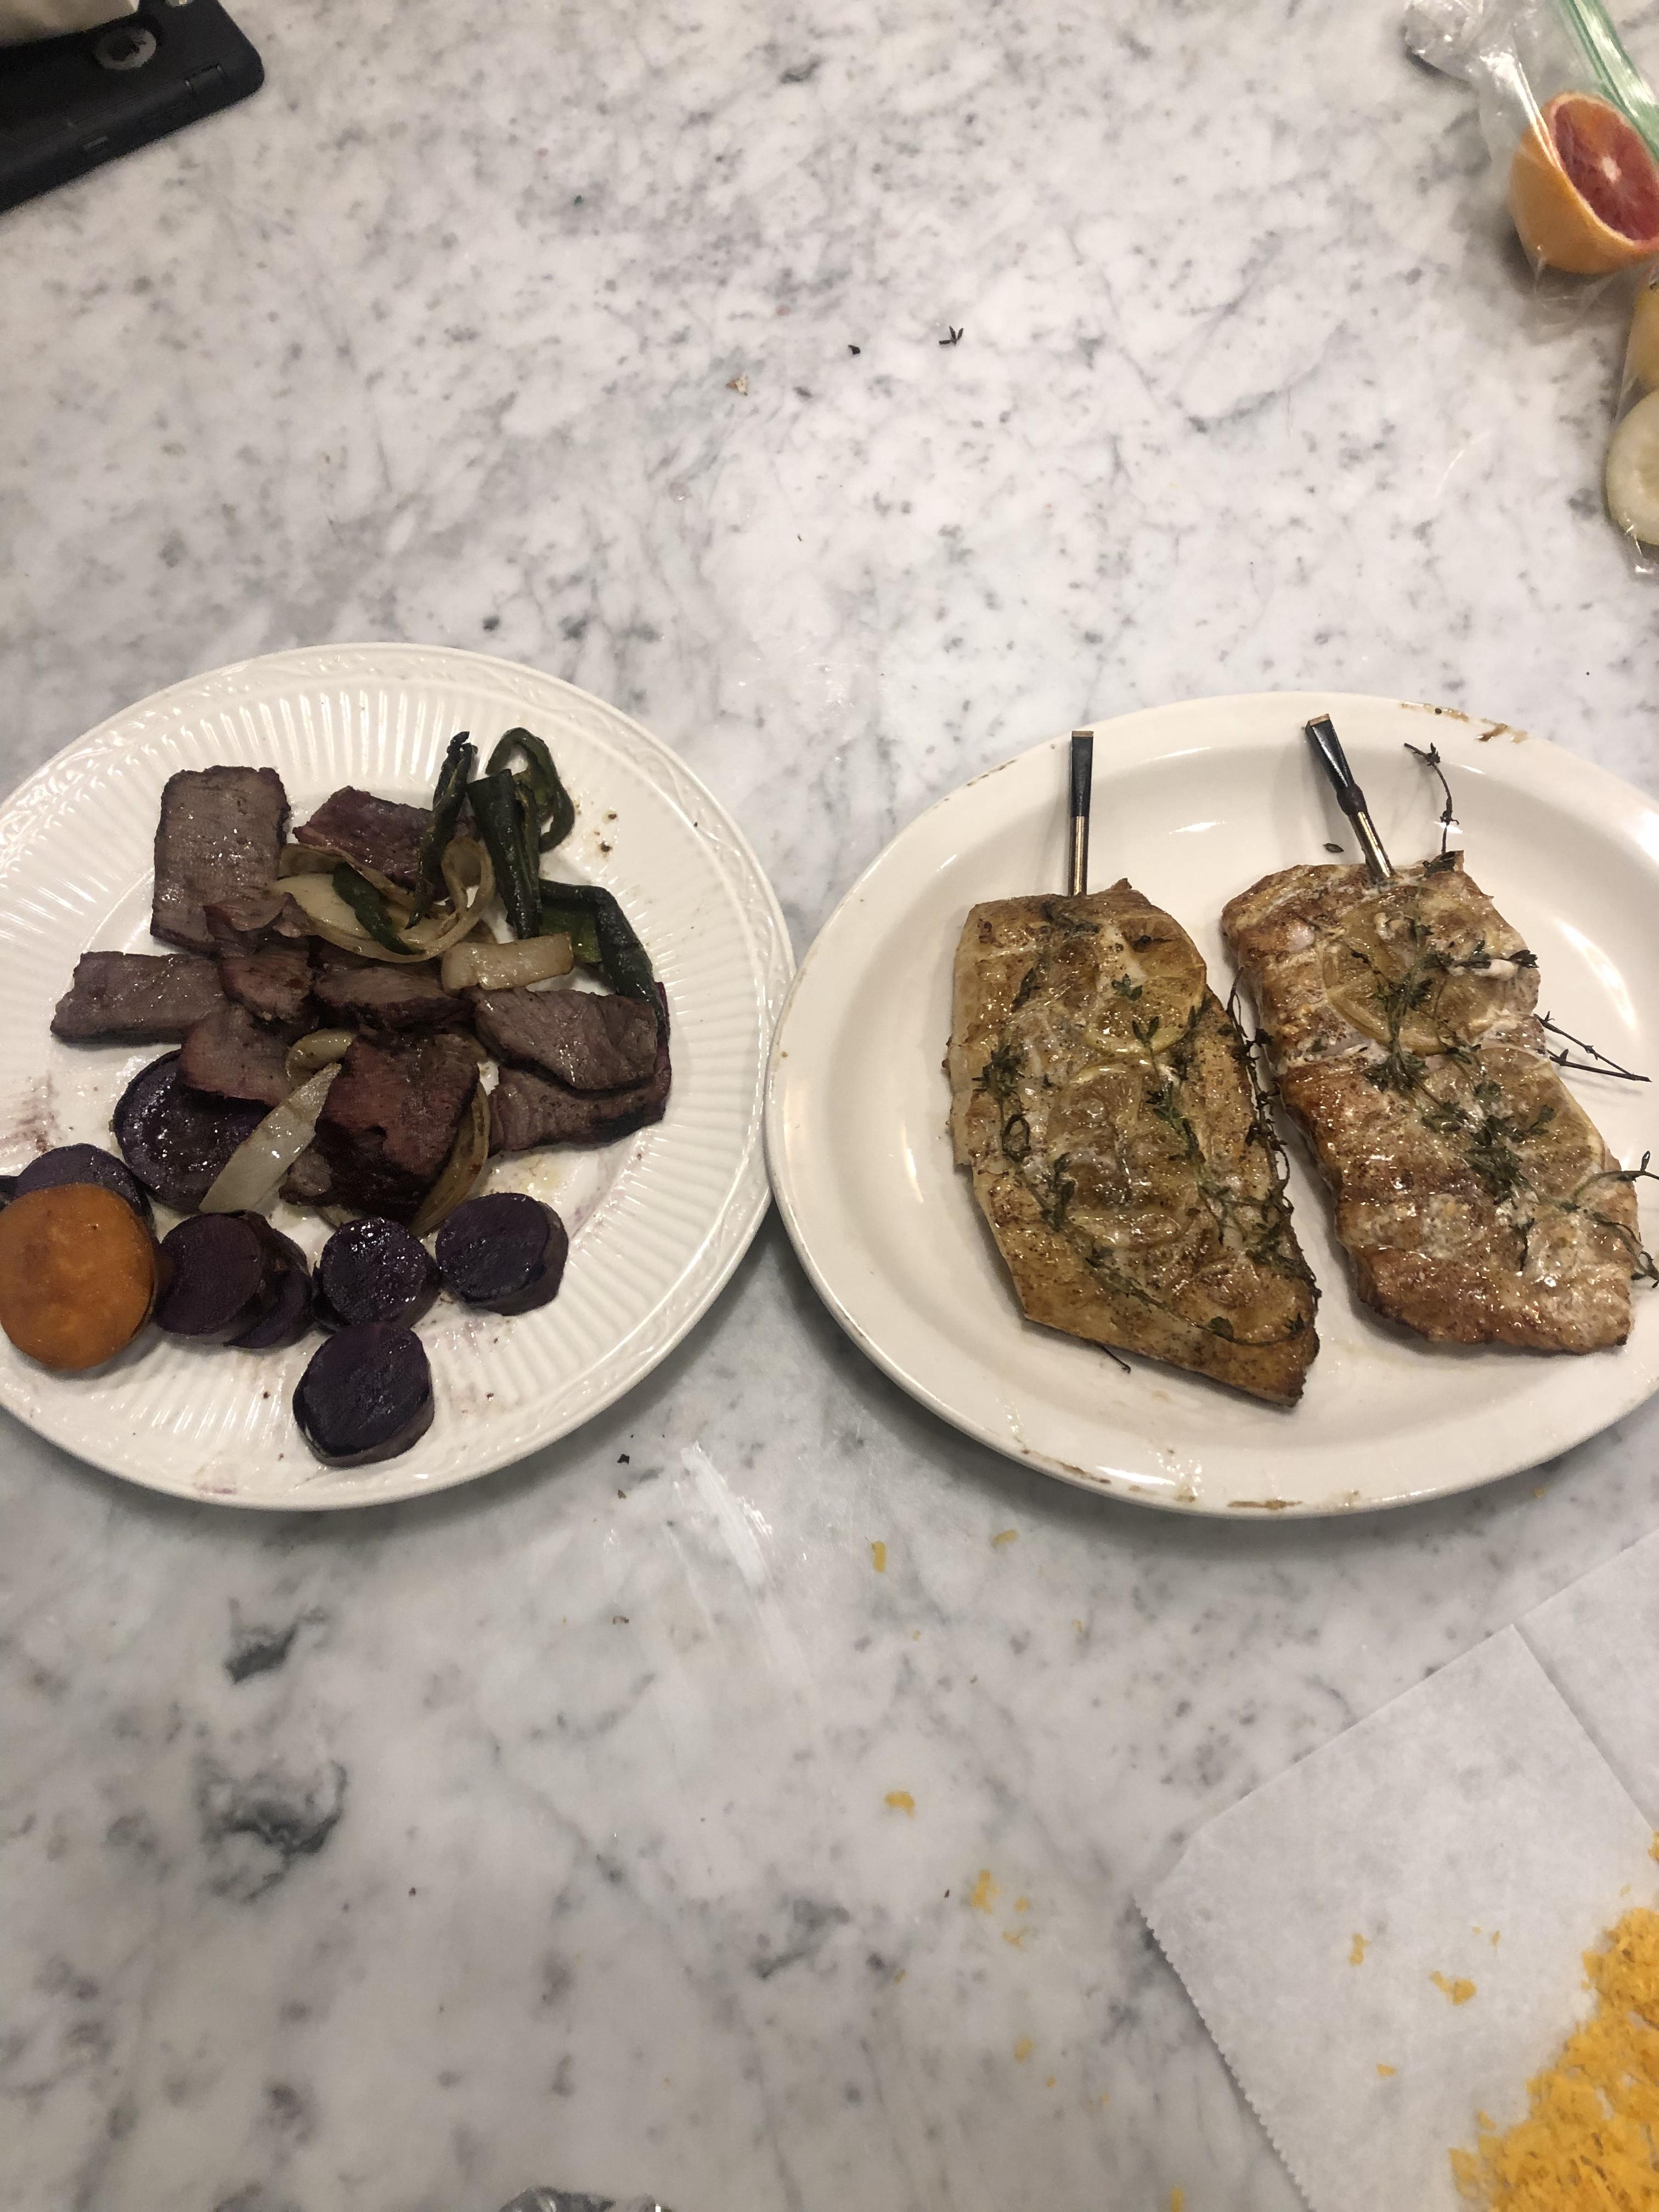
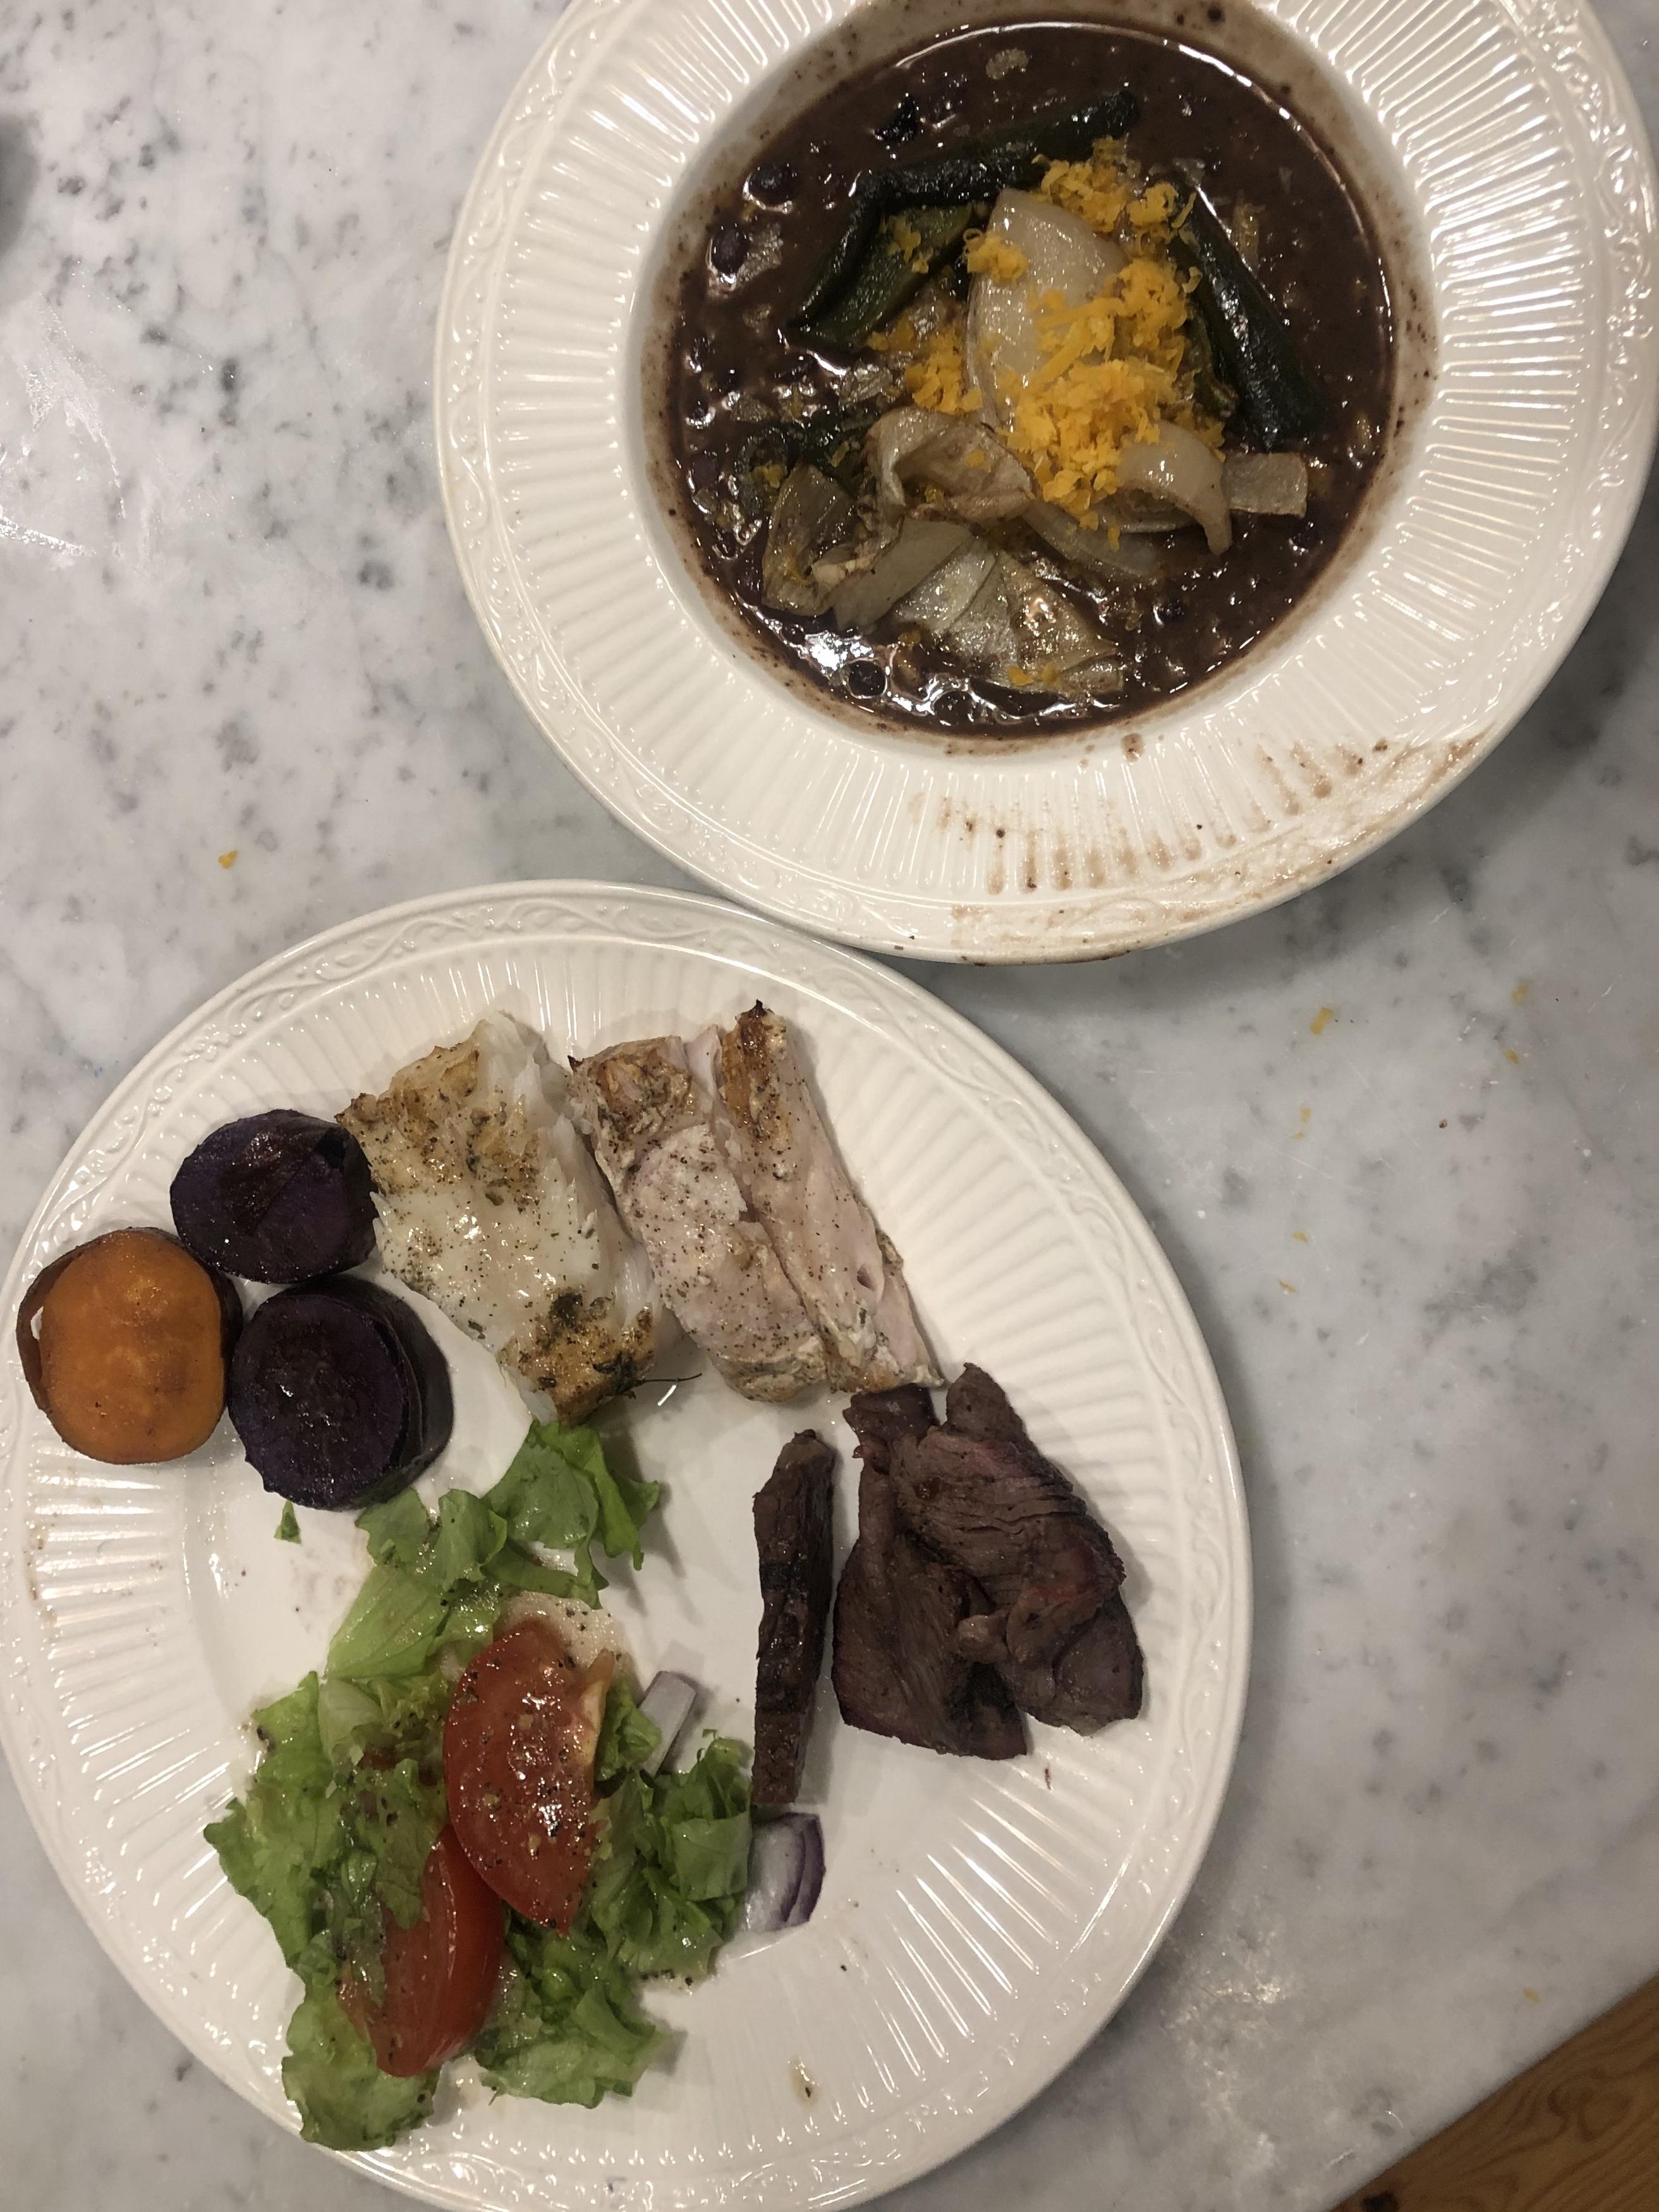
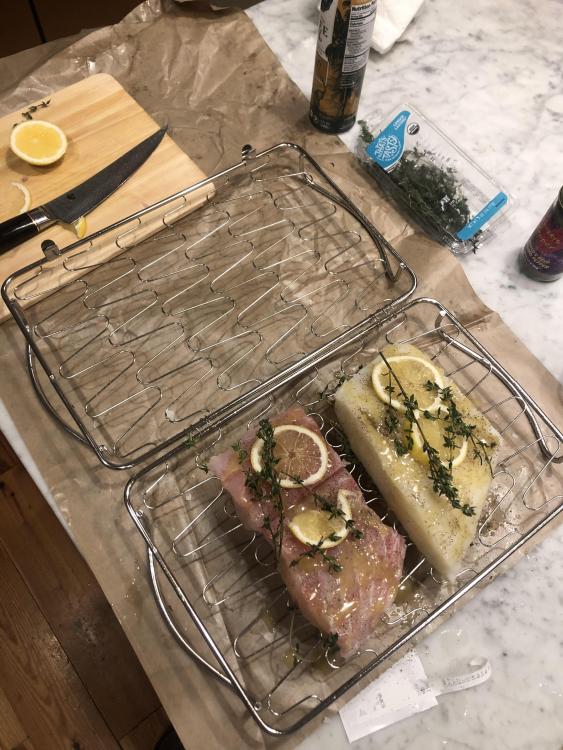
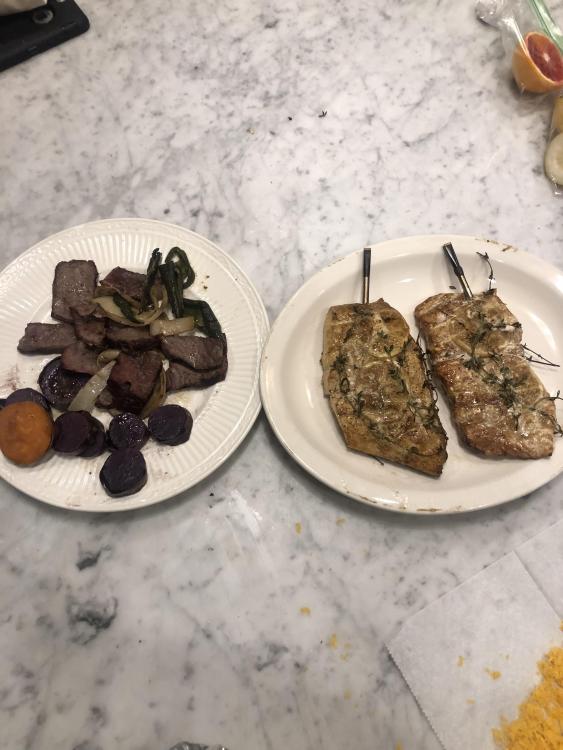
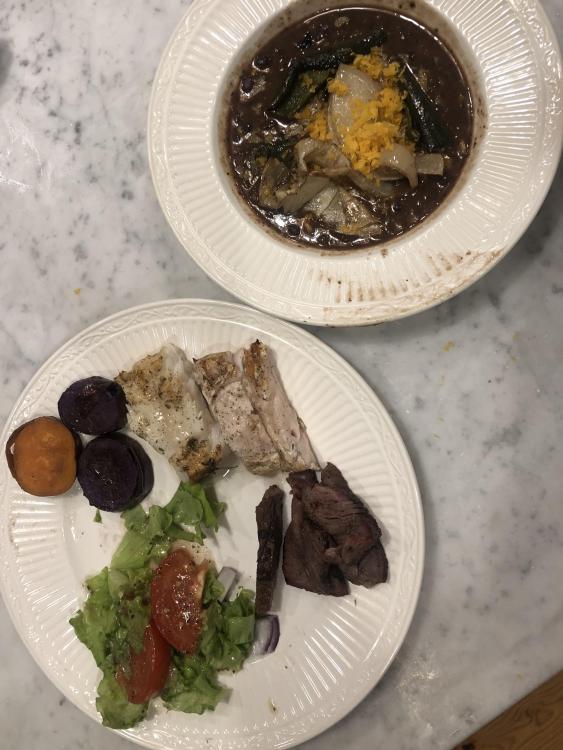
Grilled some Chilean Sea Bass and Gulf Grouper on the the 32BB to go with my leftover KK grilled steak from last night. Kept it simple after work today. My daughter made Cuban black bean soup with the leftover grilled onions and poblano peppers from last night. Nothing went to waste.
 6 points
 -
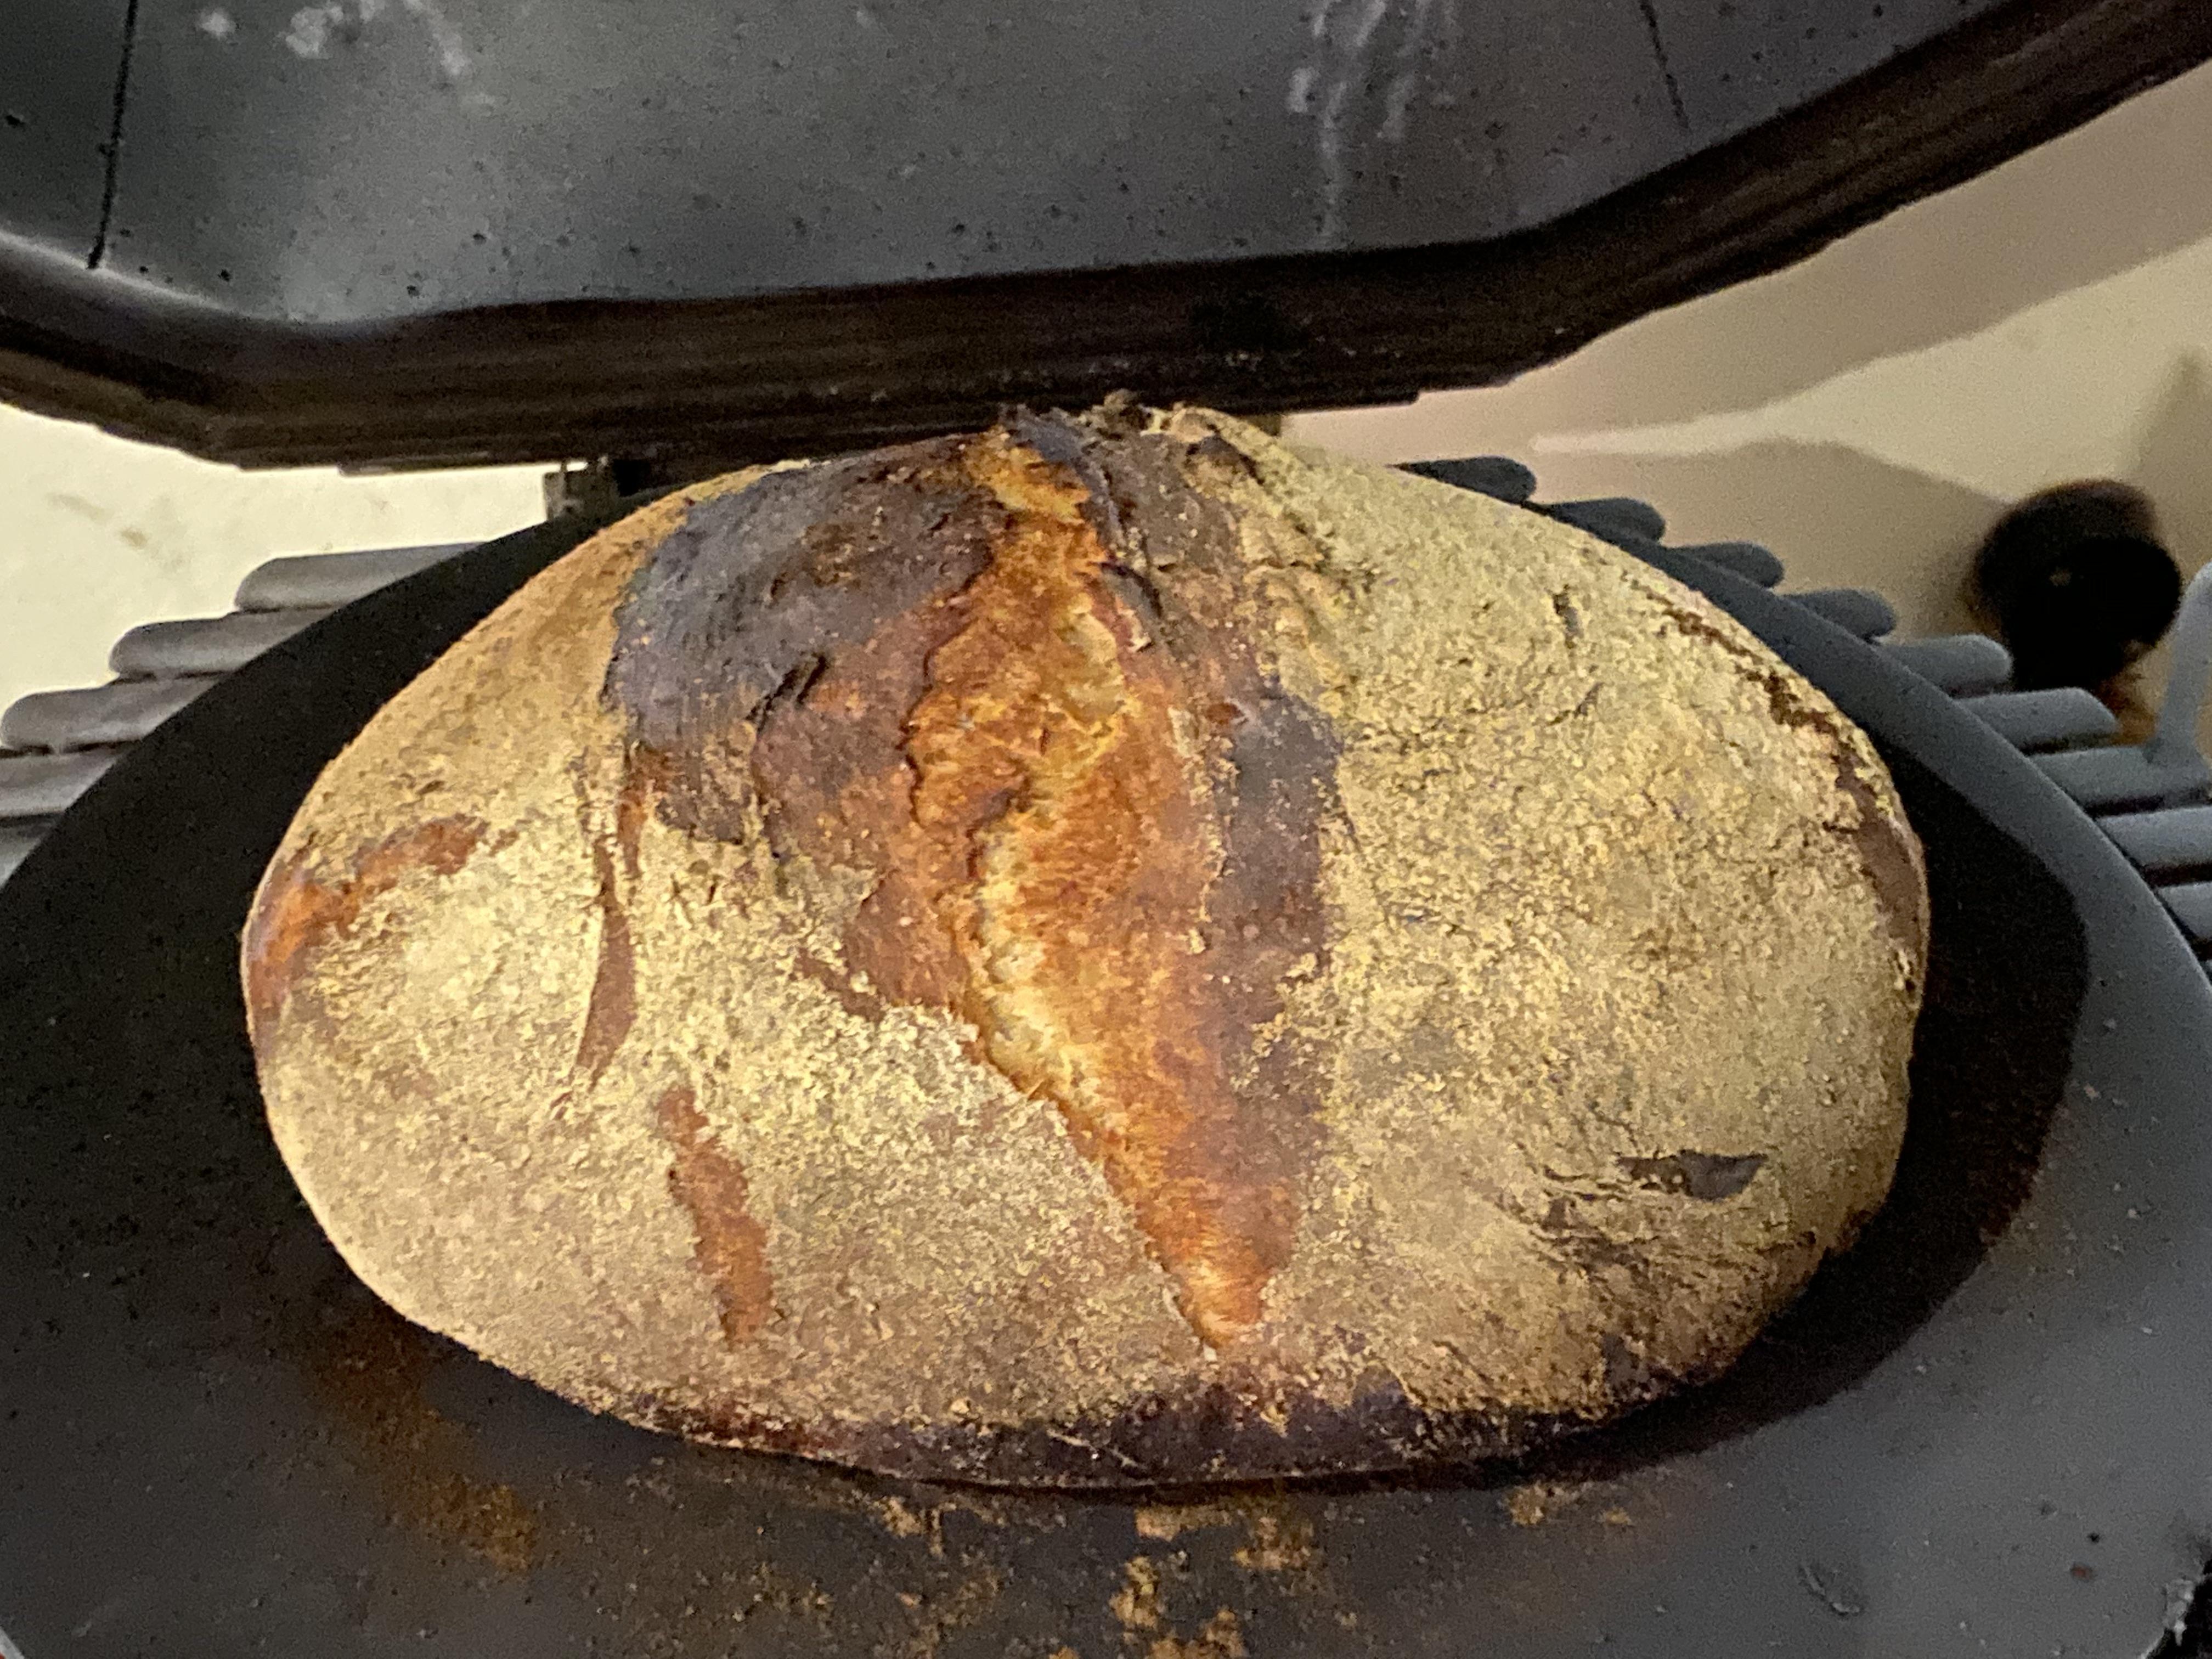
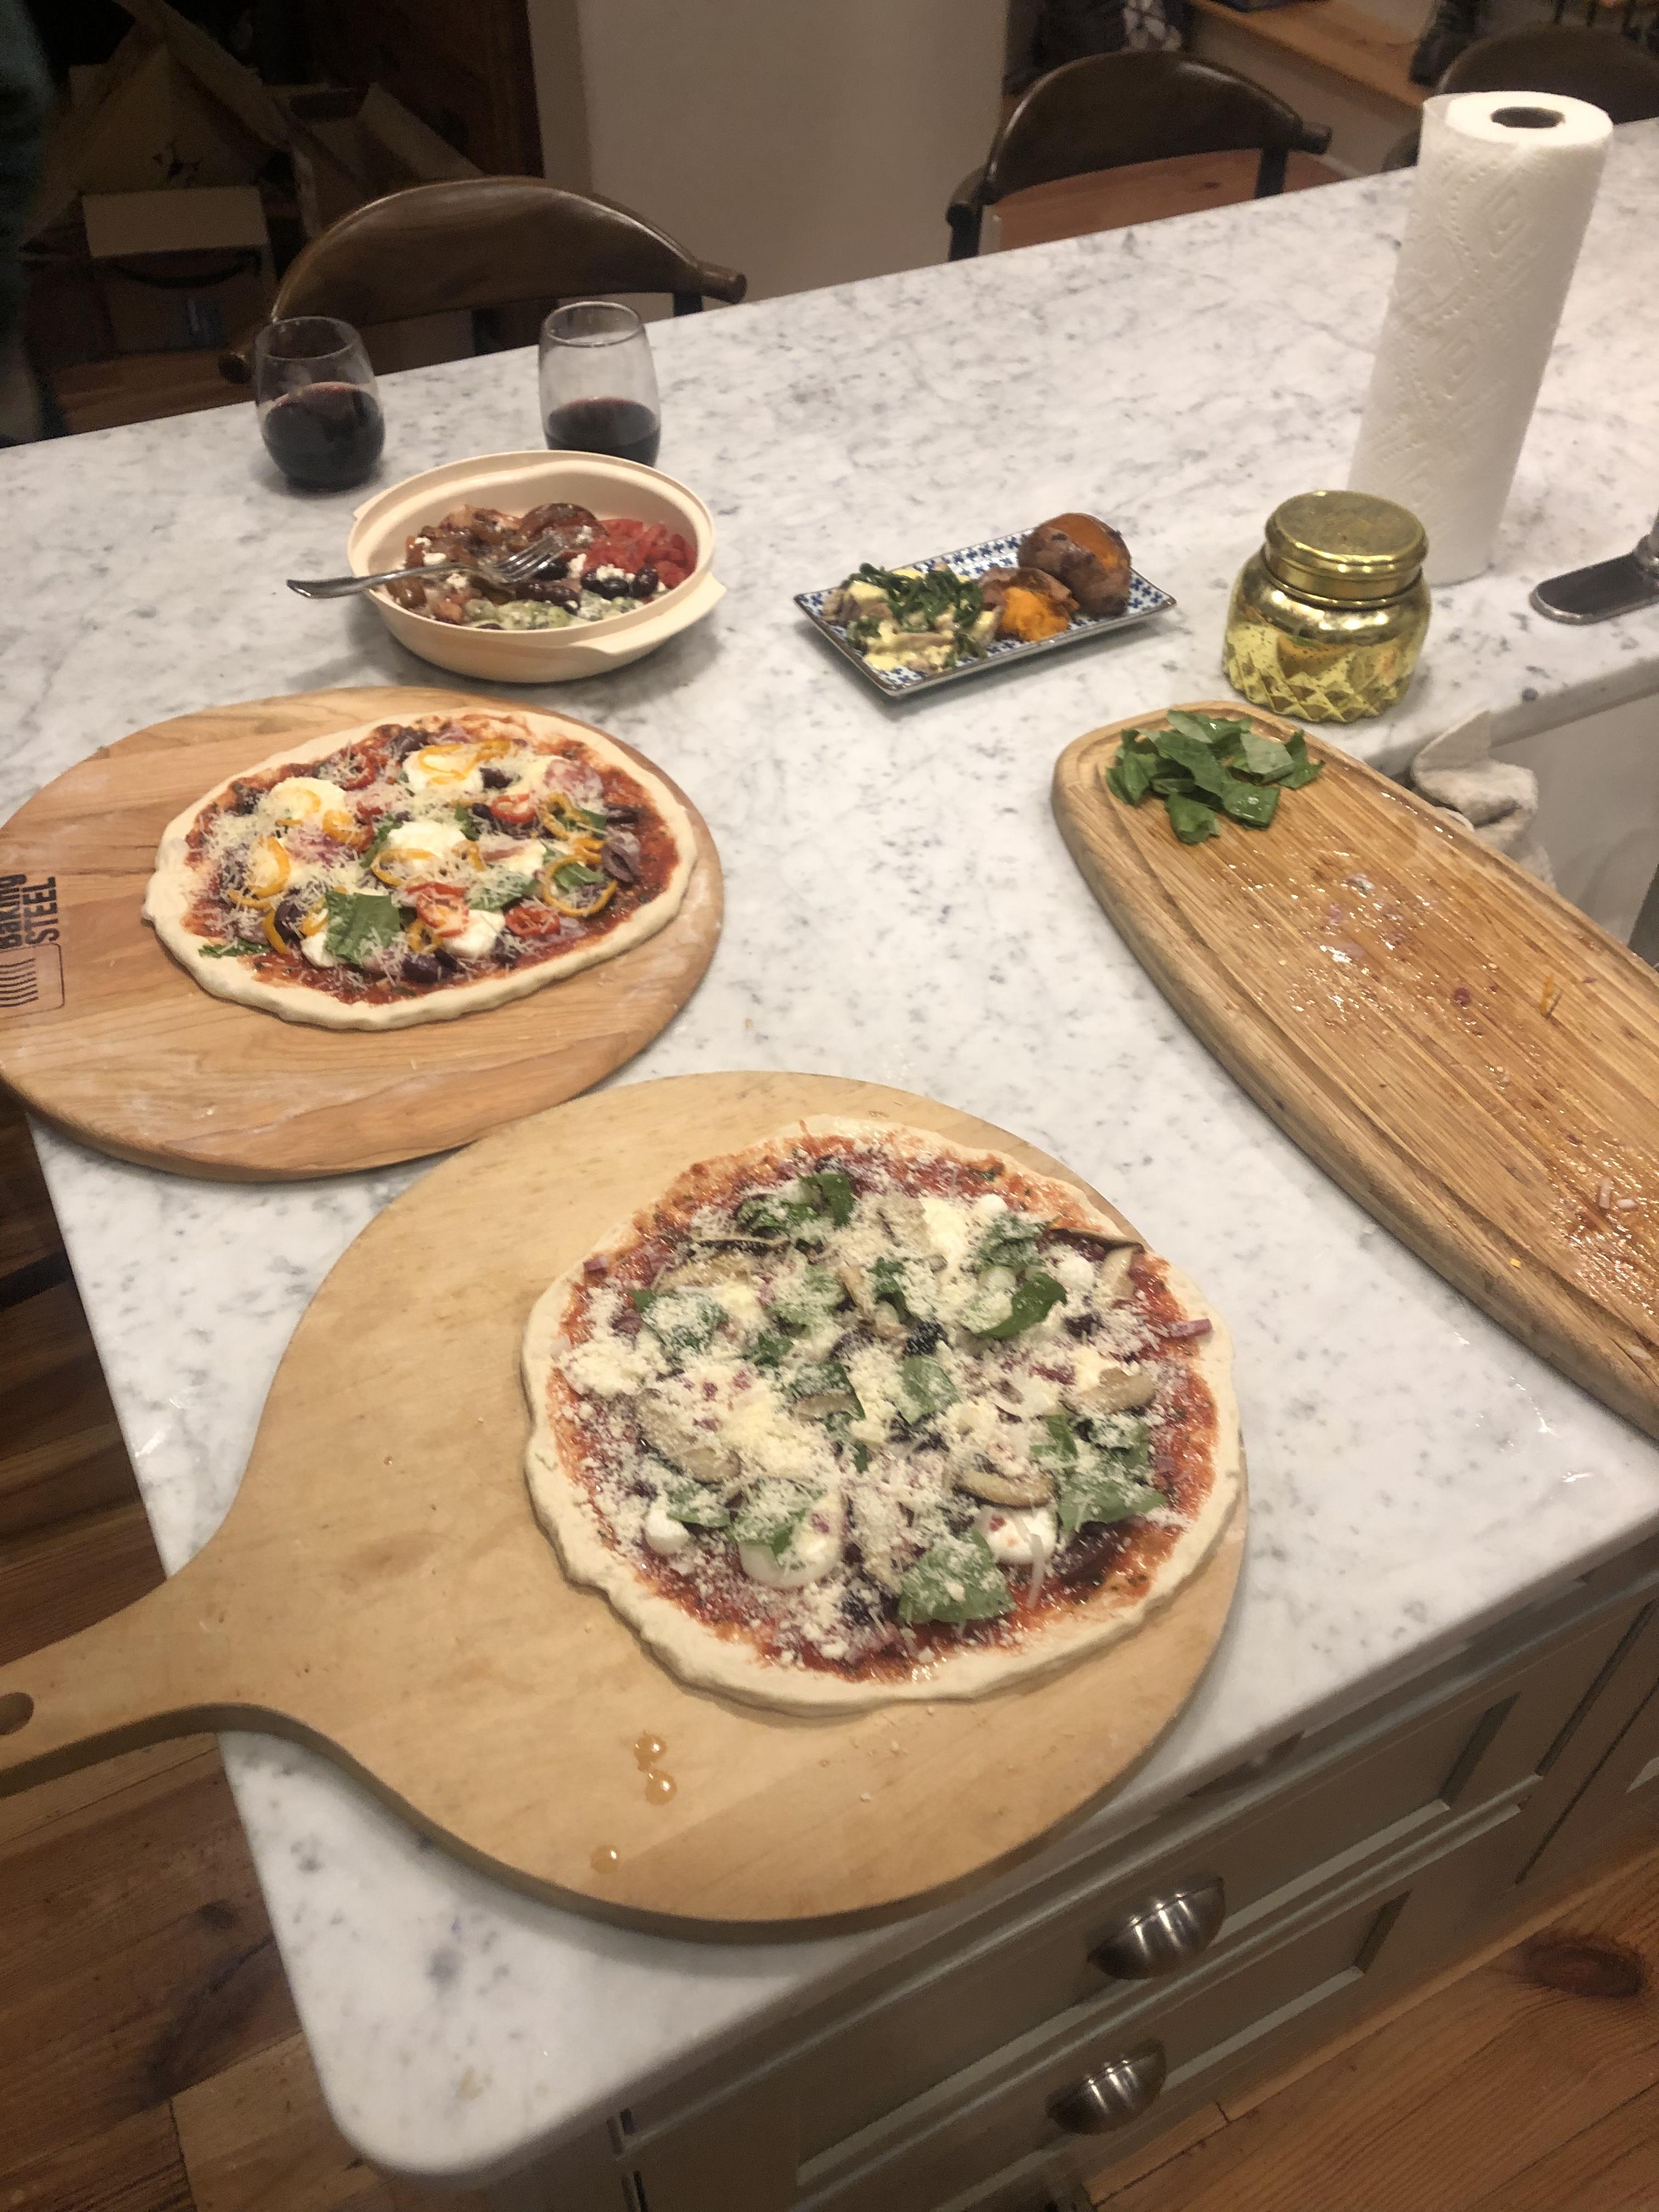
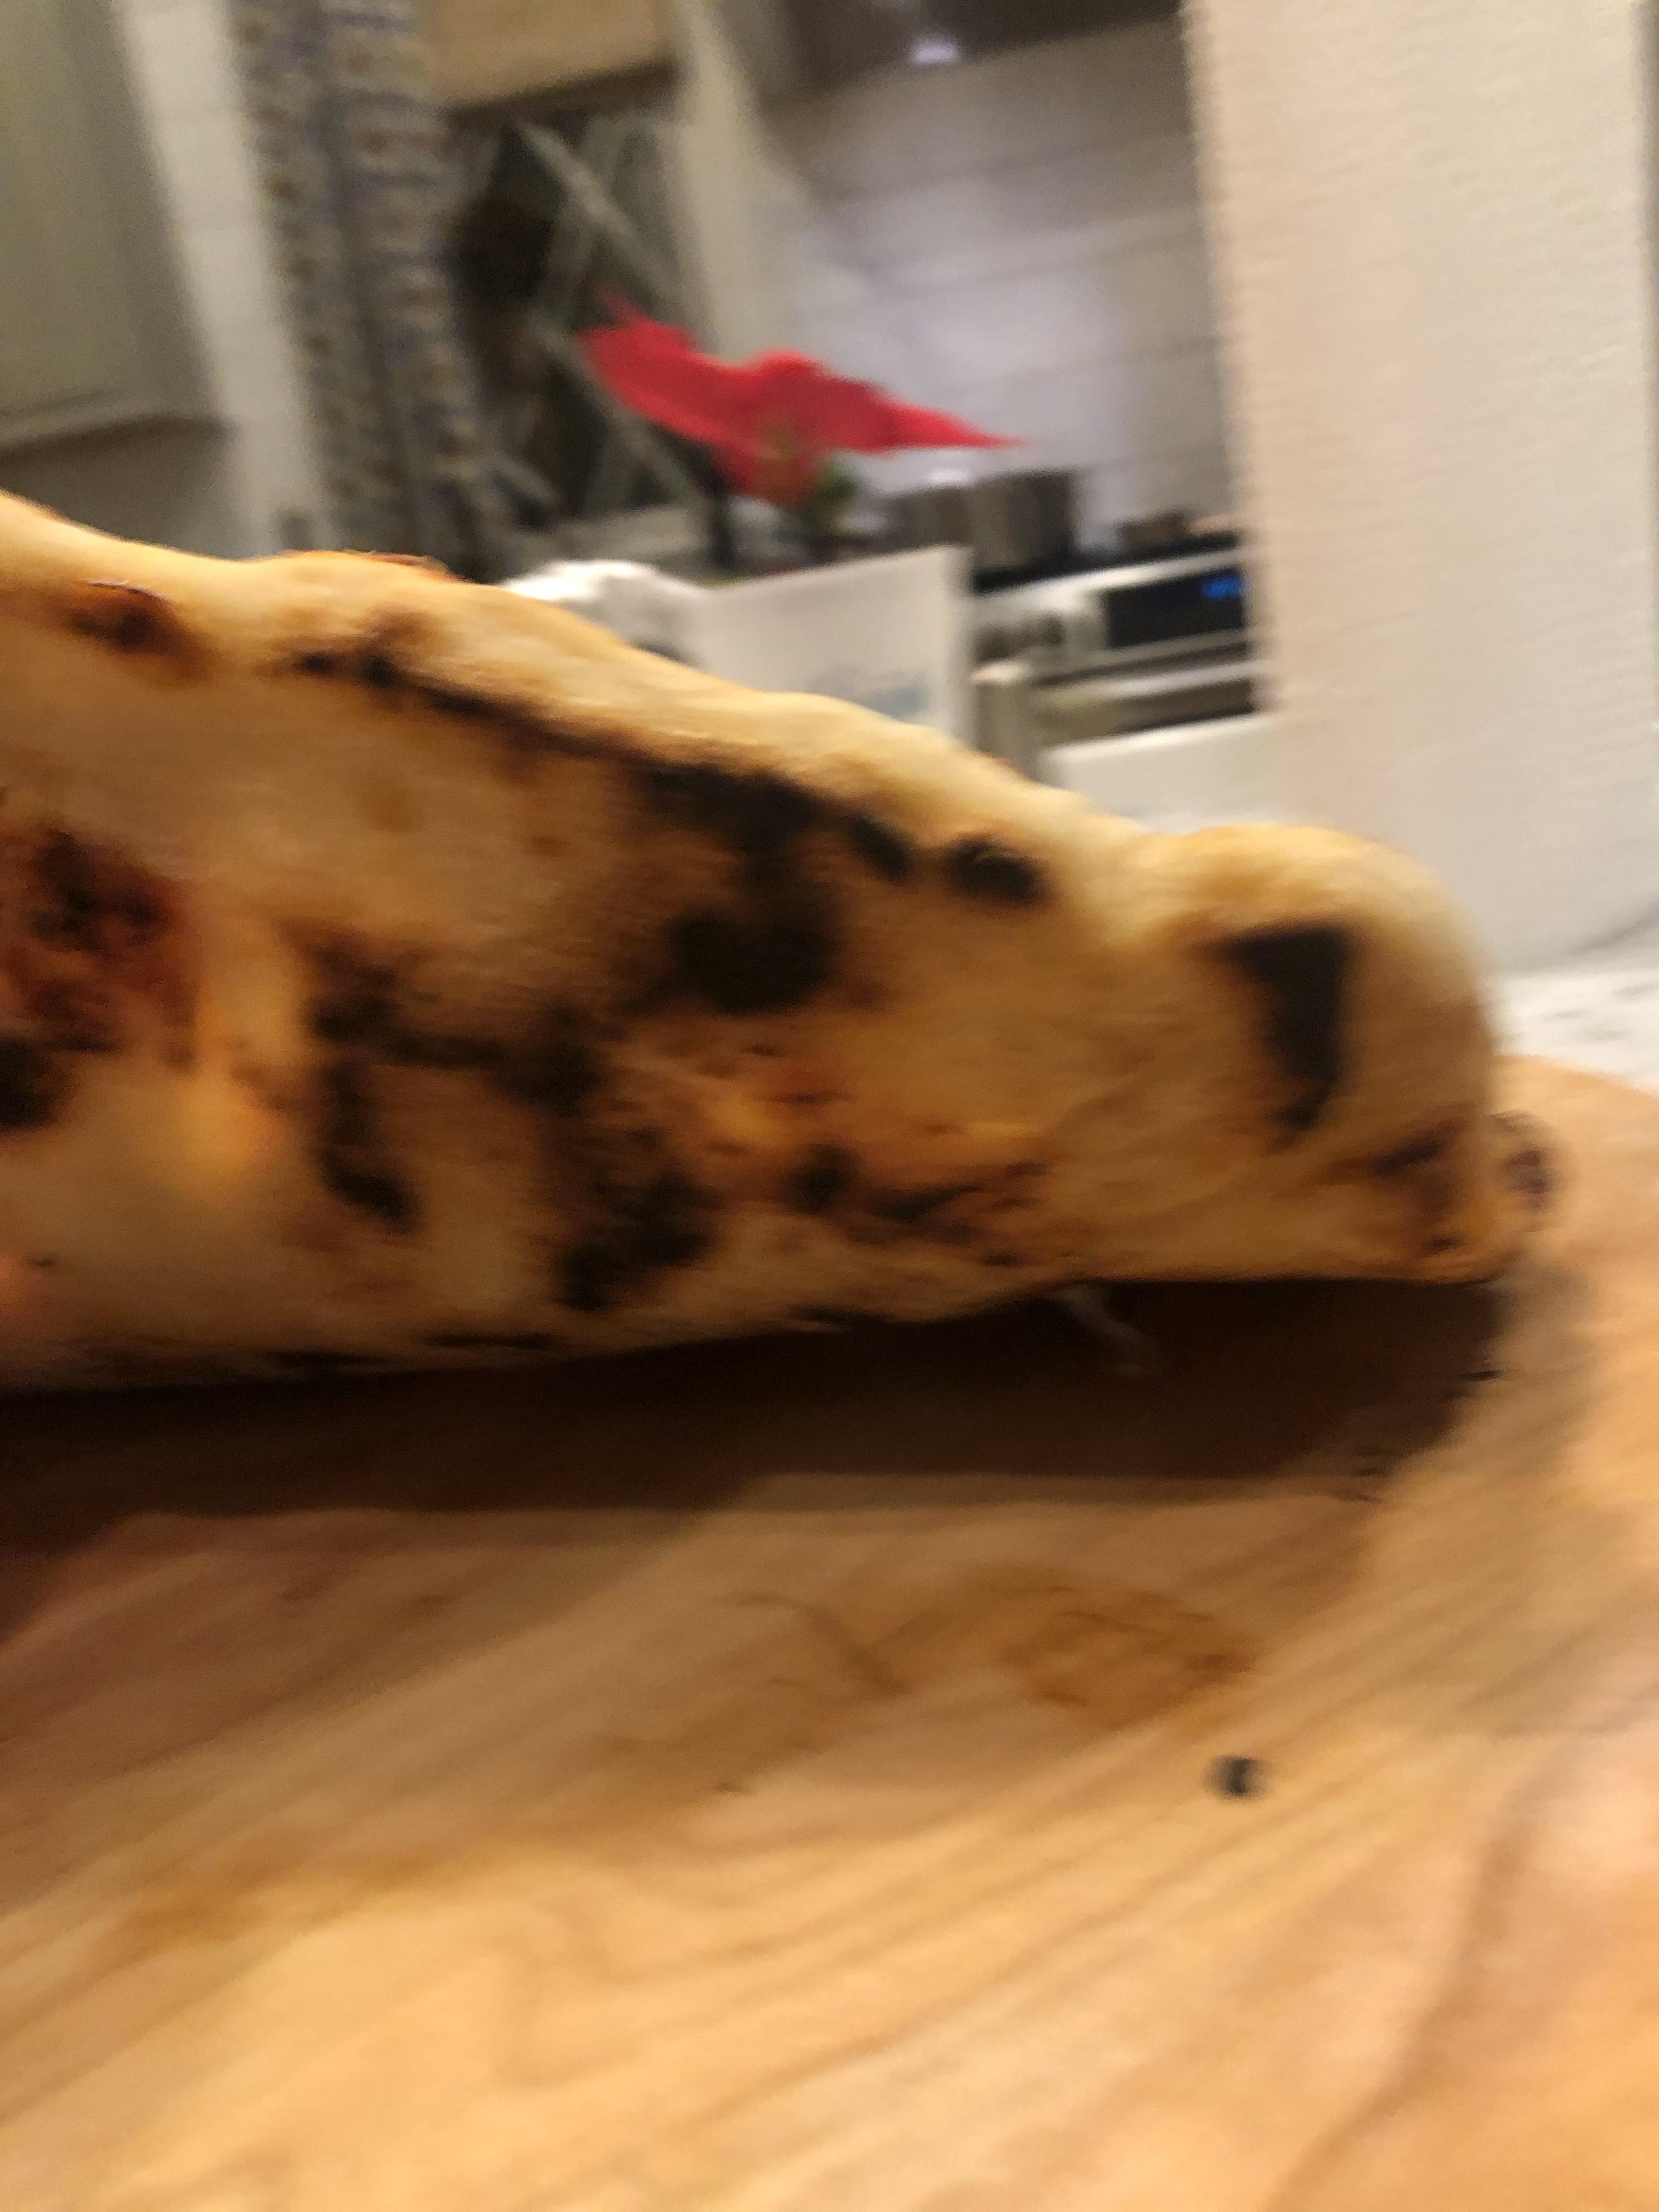
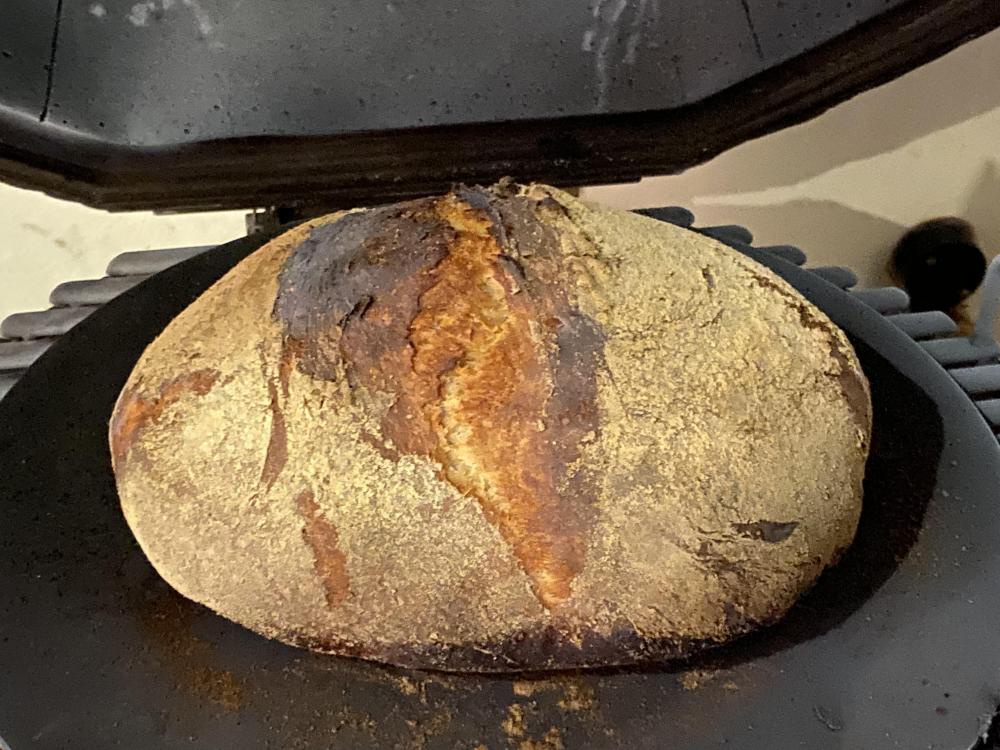
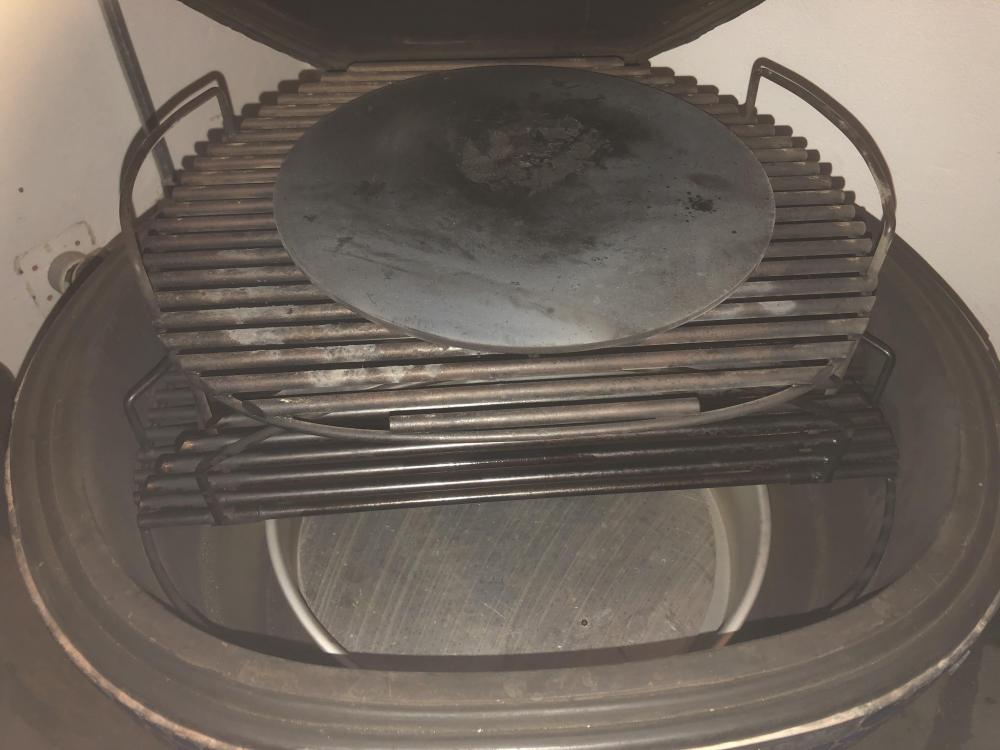
I have spent the last few months practising bread making in the KK. Thank you to all who have gone before for all your guidance. This post is a chance to document what I have learned and to ask others to share their journeys too. First, taking inspiration from @Pequod's KK as a steam oven post and @Syzygies' updates, here is all the kit set up in my KK, See here if you want to learn more: I heat soak the KK and contents for at least an hour before introducing the shaped loaf and, very quickly afterwards, some chunks of ice onto the aluminium disc below. Before I did it I was really worried about how to introduce the ice and anticipated a big, dangerous whoosh of steam. It is more gentle than that and, once the ice is in, I shut the lid quickly to get this: 492D96A9-6CE0-476E-A2A3-A0114D77ADF5.mov It is too cold to stand outside checking how long the steam lasts. Will do that one day. My ambition was to test the difference between a loaf cooked without steam: and one cooked with: The one cooked with steam is prettier. I do not have the right vocabulary to describe the bread, yet, but we found the crust on the steam cooked loaf more pliable. I cannot for the life of me remember which loaf was which in the next picture. I think the steamed one is on the left. More experimenting to do and I am looking forward to making baguettes soon.


 4 points
 -
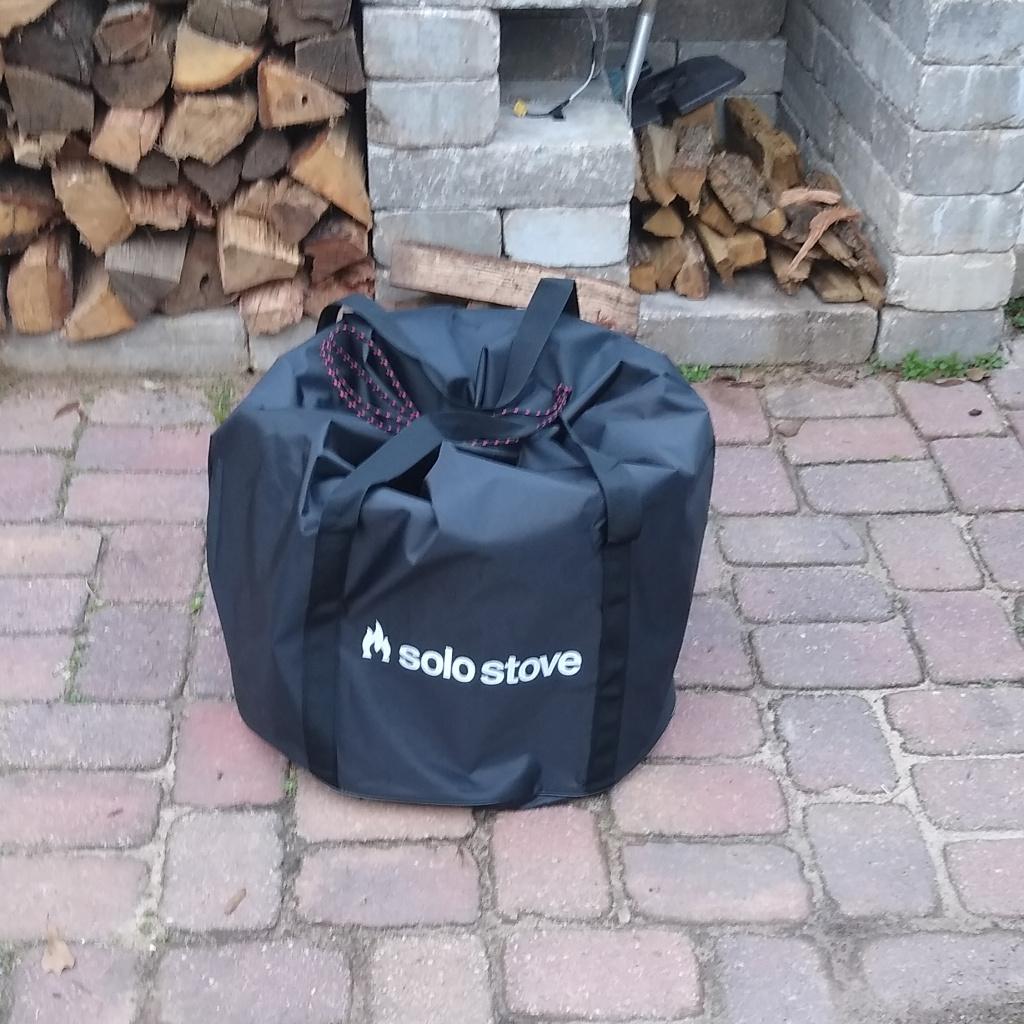
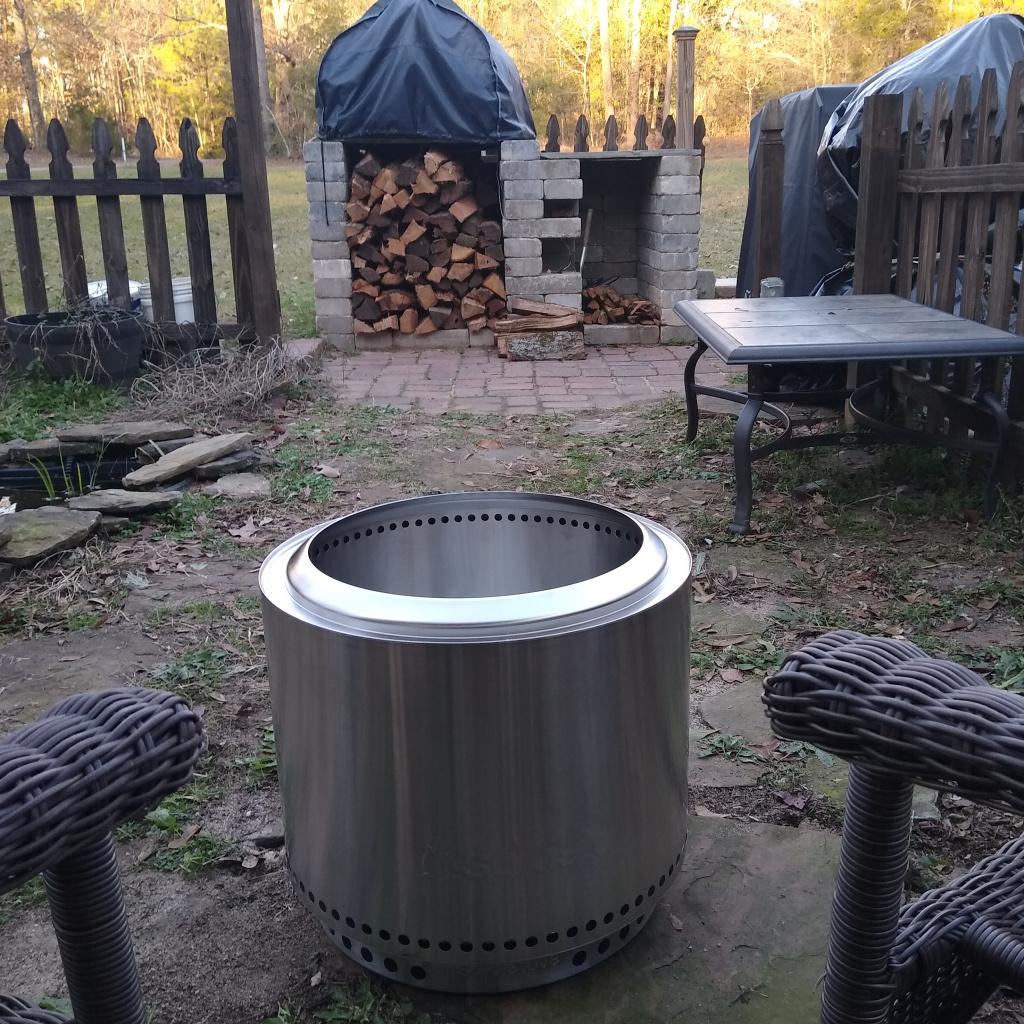
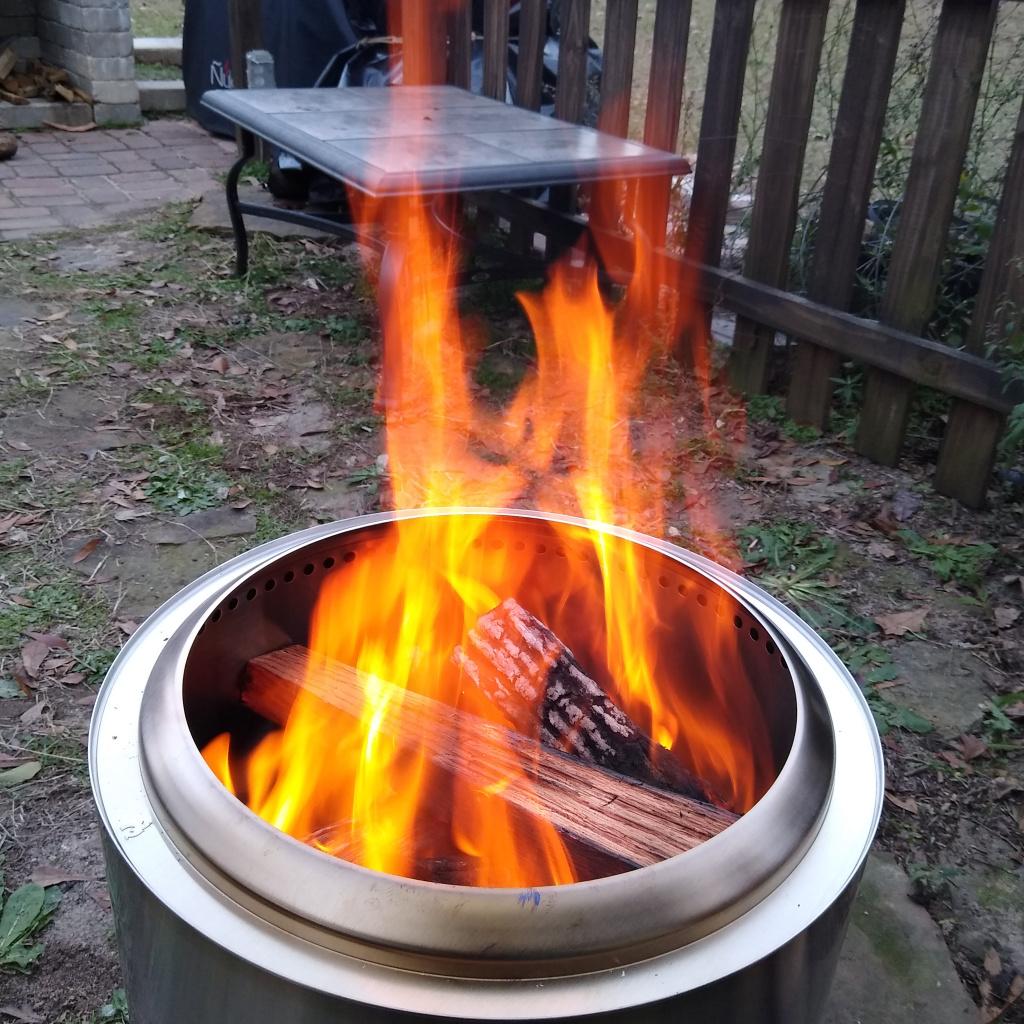
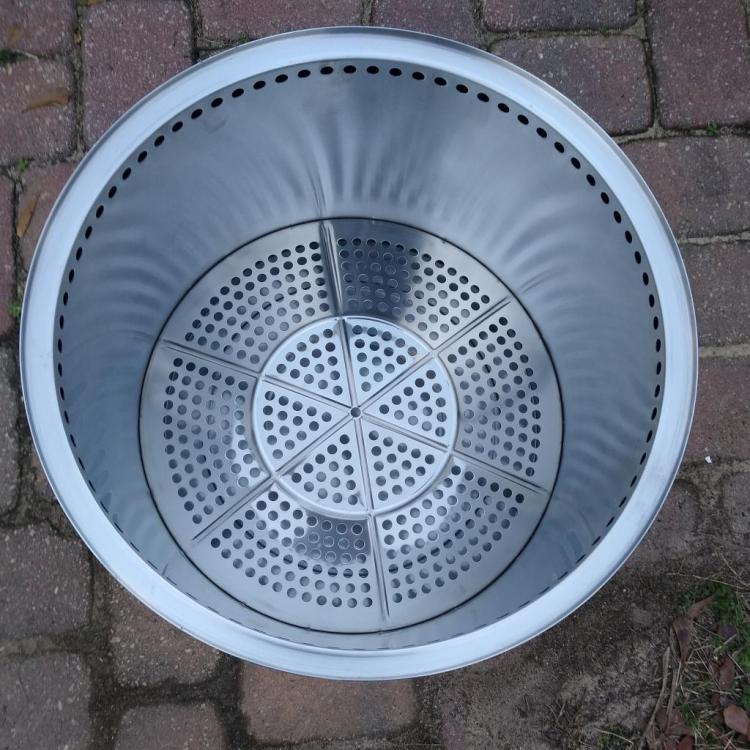
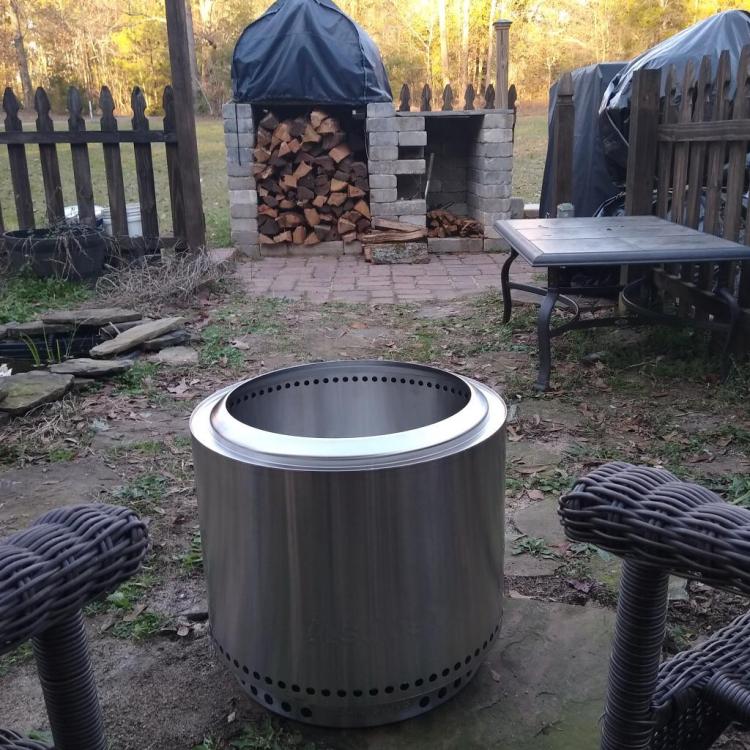
For the last two years Mrs skreef has wanted me to pull the old rust bucket of a fire pit out of the bone yard. It was such a rust bucket I just couldn't do it. Then @Syzygies posted a link to the Solo Stove website. I poked around that website and found the Solo Stove Bonfire fire pit. After reading numerous reviews and watching many videos I knew this would be just perfect for Mrs skreef. It would allow us to have a nice looking fire pit in the BBQ garden. Ordered Thursday night. It arrived on Monday. It came with a nice, heavy duty carry bag. From the pictures I've seen it appears they have upgraded the coal plate. It is a slight dome shape with extra ridges to help prevent it from warping. Here it is in the BBQ garden. Also looking at the box it appears they now include the small lower stand. That allows air under the unit so you don't burn/scorch whatever it's sitting on. Super easy to light. A fire starter, a little kindling and a few bigger logs. Fire it up and within 20 minutes or so it's off to the races. Once going good it really is basically smoke-free. Here is a short video showing the secondary burn effect. Although a little pricey it's a well built SS unit with a lifetime warranty. Everything they say about it is true. It pumps out the heat. The only con I could see - if you're sitting around the fire, your legs from your shins down won't get any heat. It's a small con for having a smoke-free fire. I highly recommend it and both me and Mrs skreef feel it was one of our better accessories to the BBQ garden.


 4 points
 -
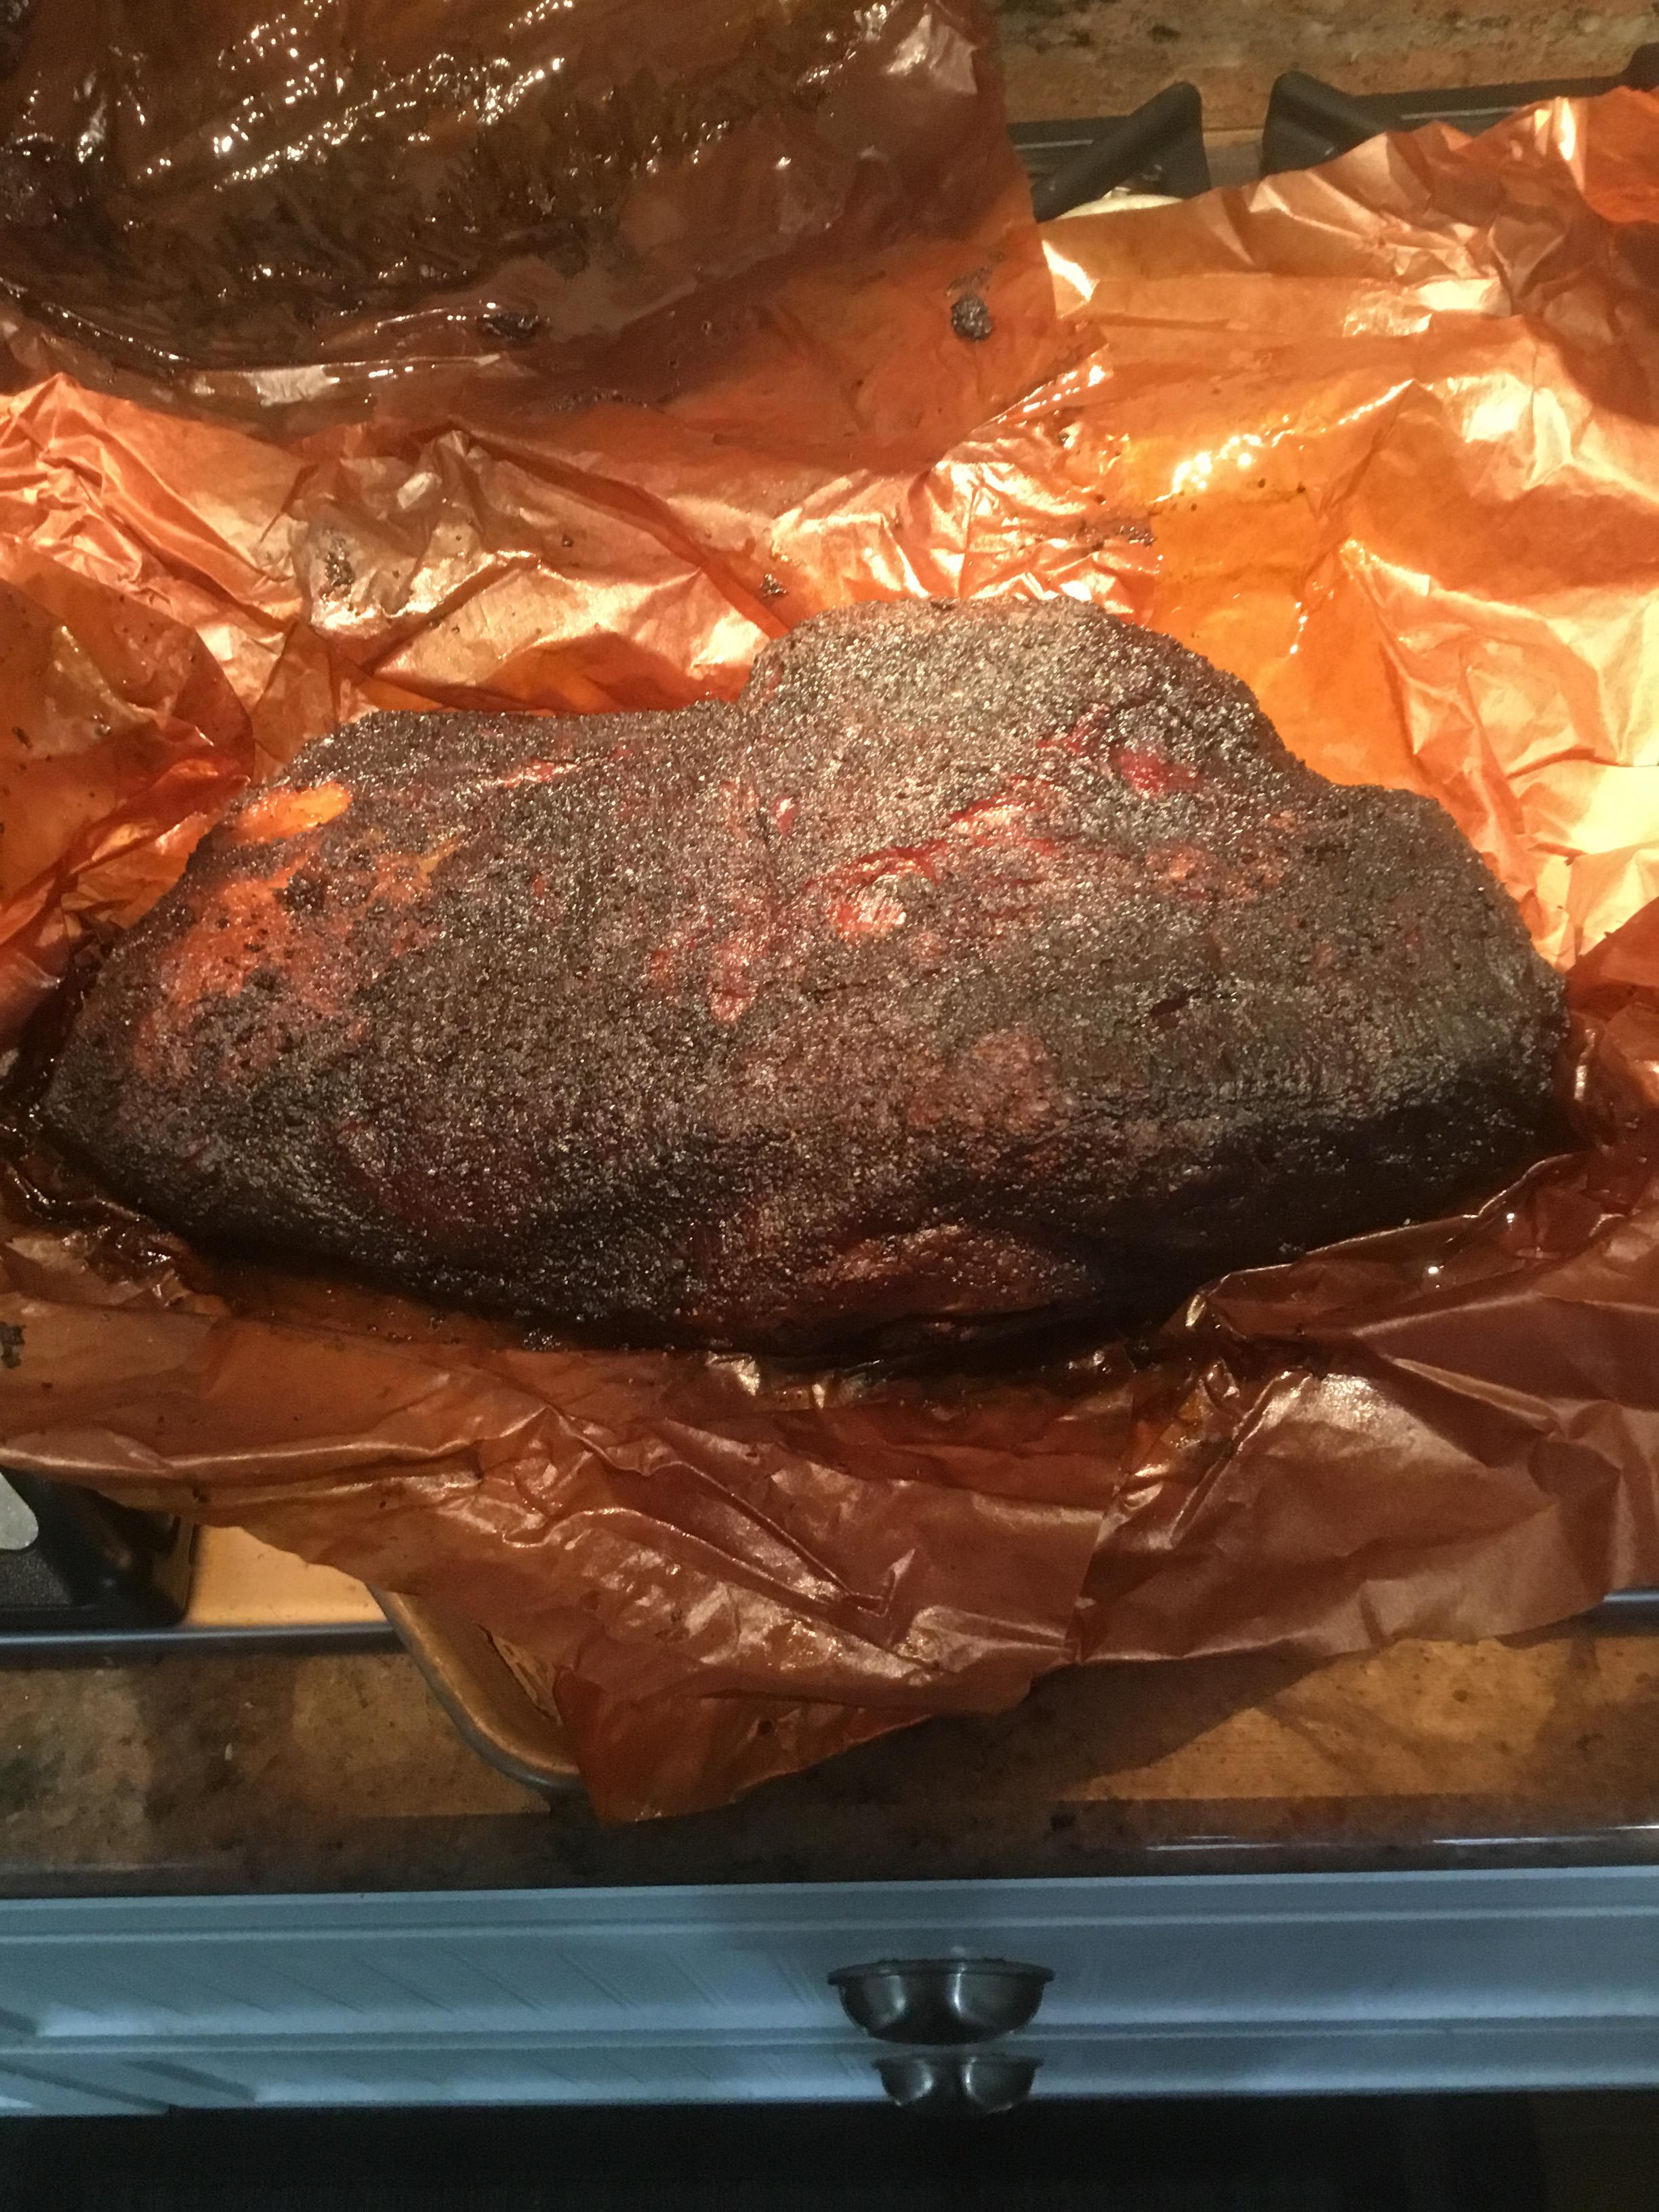
Tony B: yes, I think you are quite correct about the heat setting. Dennis told me sometime back to only fire up a limited portion of the charcoal/wood reserve- he suggested "a baseball size", and then get the KK to the desired temp and turn the top vent all the way closed, then open it up maybe a 1/4 to 1/2 turn and stabelize the airflow/temp. I am still fine tuning my technique, since I am surprised at how quickly the KK ramps up sometimes. Once it gets to 300*, it is very difficult to get it back down to a 250 or so range. I would like to get to the point where I can run it at 225 (perfect for babyback ribs) but I need to improve my low-low technique. As to the wrap: yes, I put the brisket on at 300* (here's where I wish I could have dialed it back to 250-275) at 11PM and go up around 4:30AM and wrapped it tightly in butcher's paper, a la Franklin's instructions. It was about 165-170* at that time. It stayed in the KK until 11AM, when it finally hit 203* and I took it off, left it on the cutting board to rest for 90 minutes before tried it. It was very, very good. I gave 2/3rds to my daughter and her family (husband and 3 kids) and we had some for lunch and again for dinner. Done with brisket now for a few weeks!3 points
-
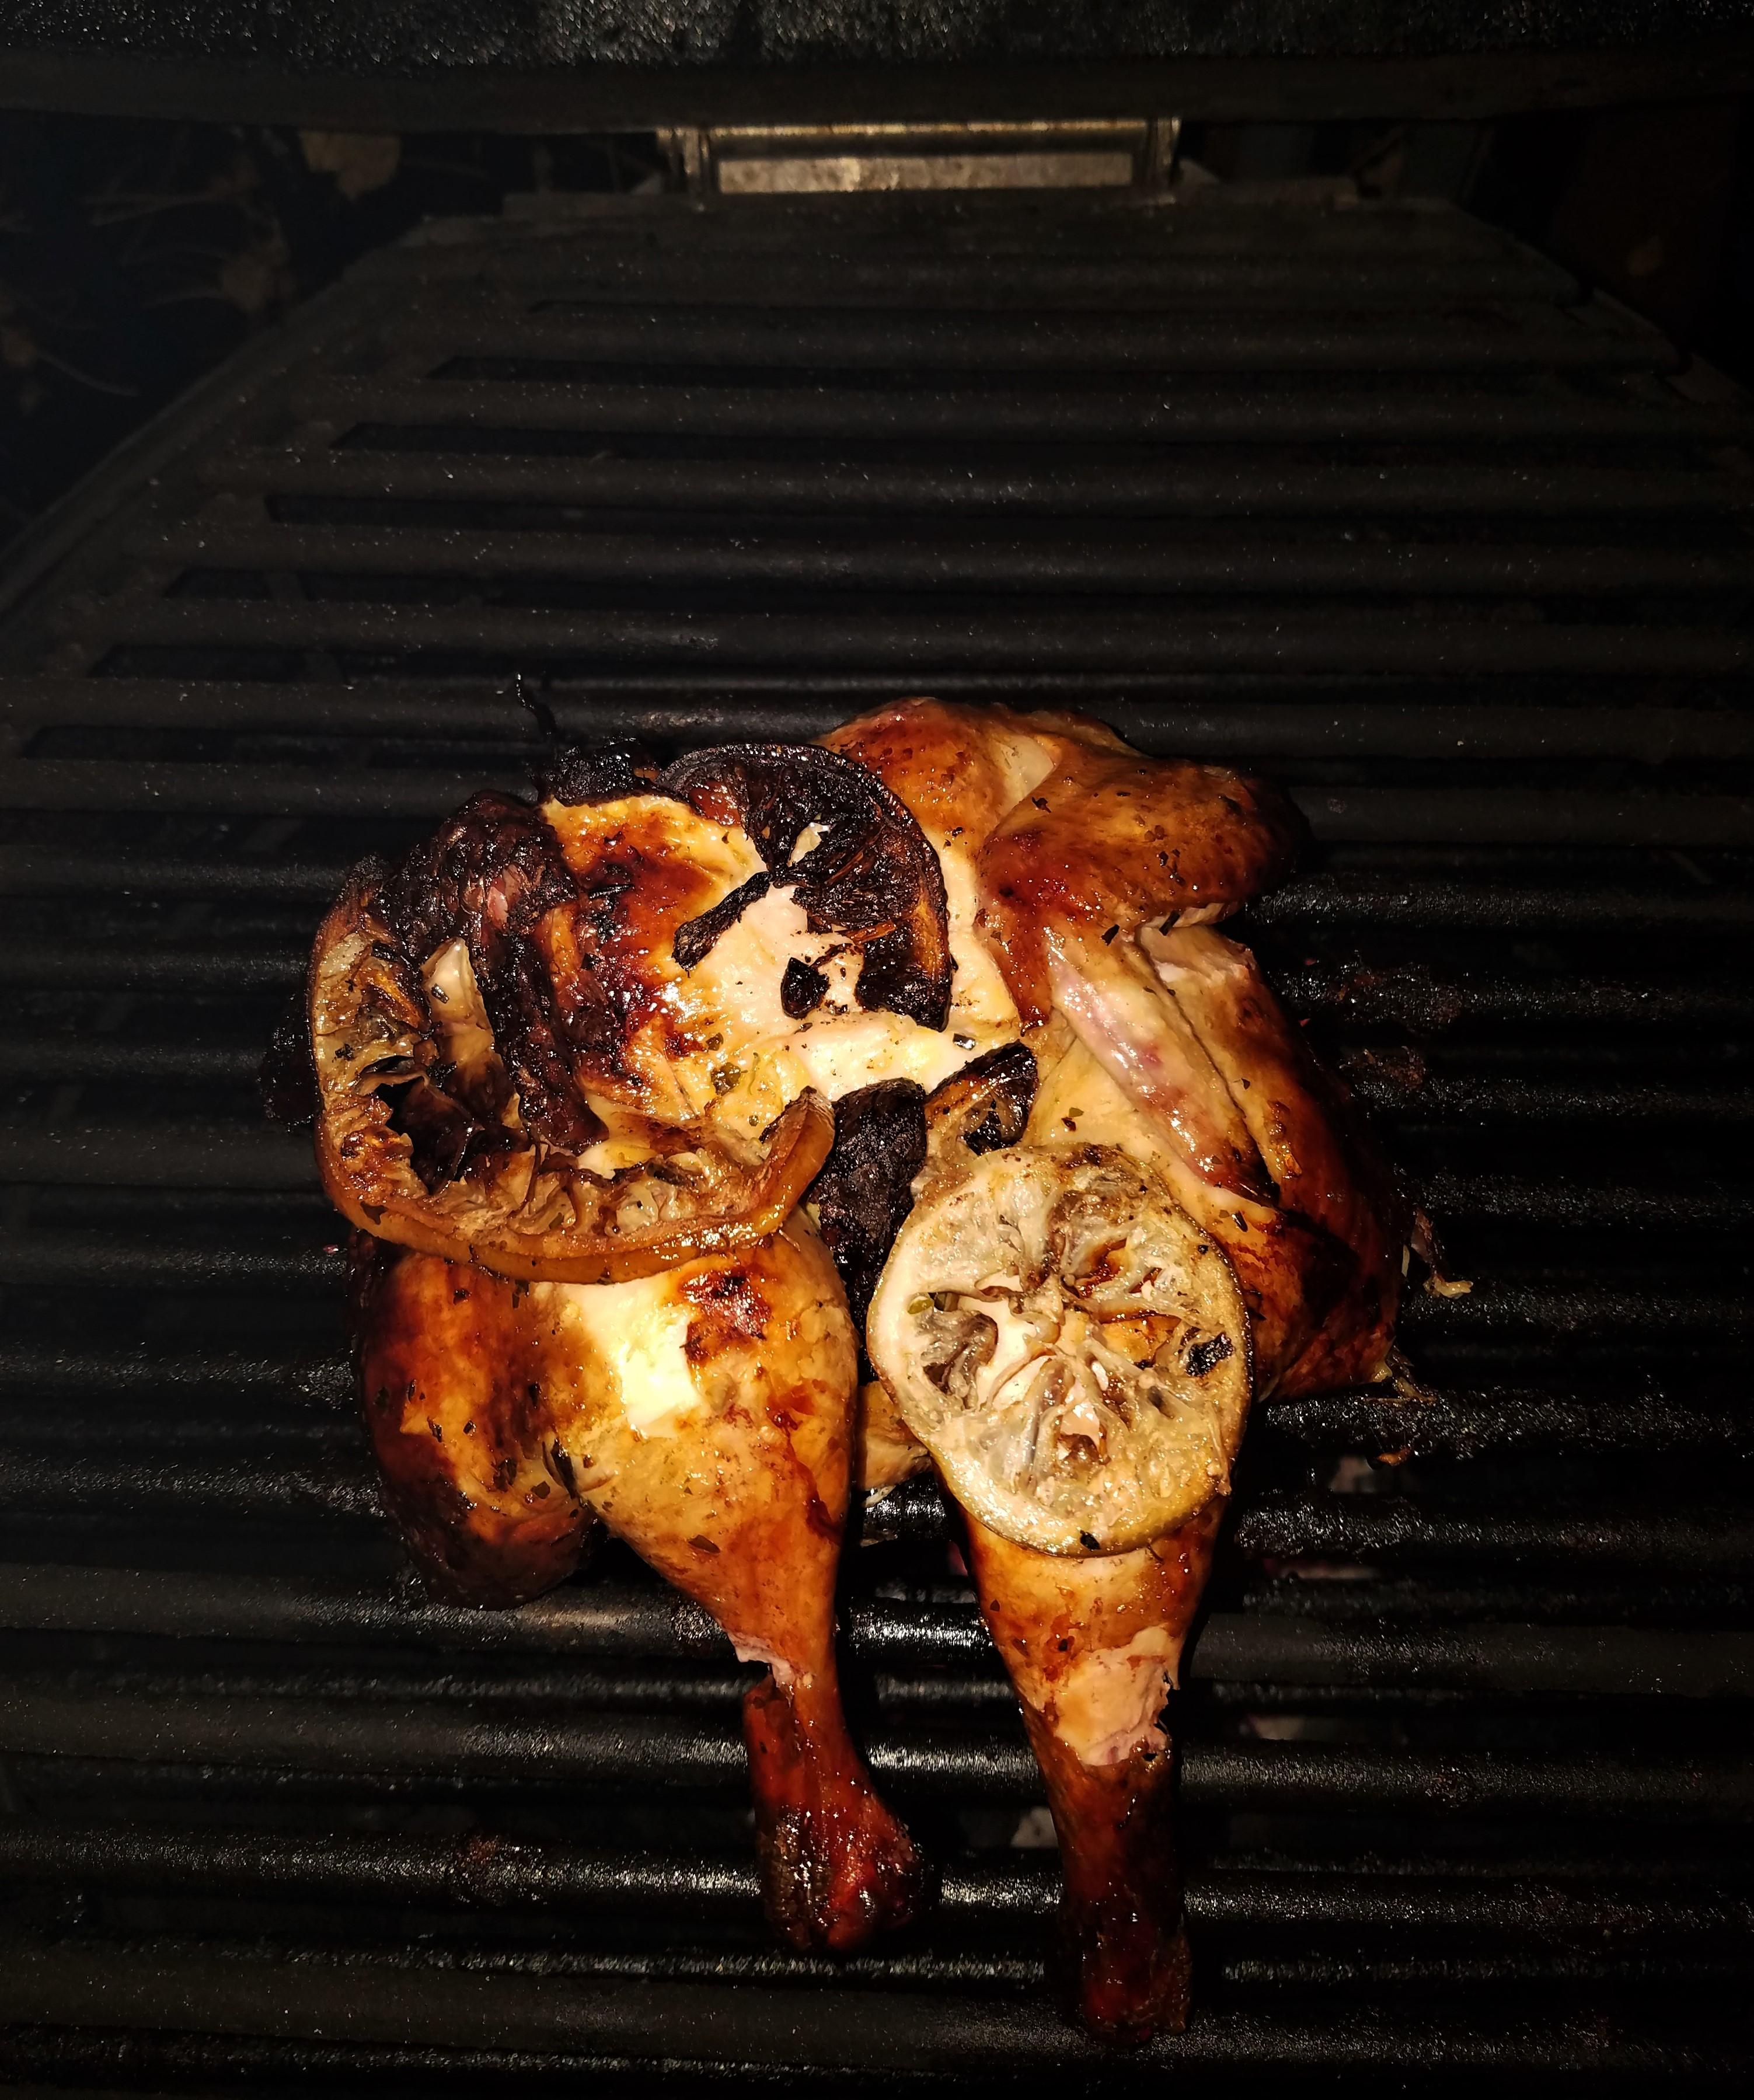
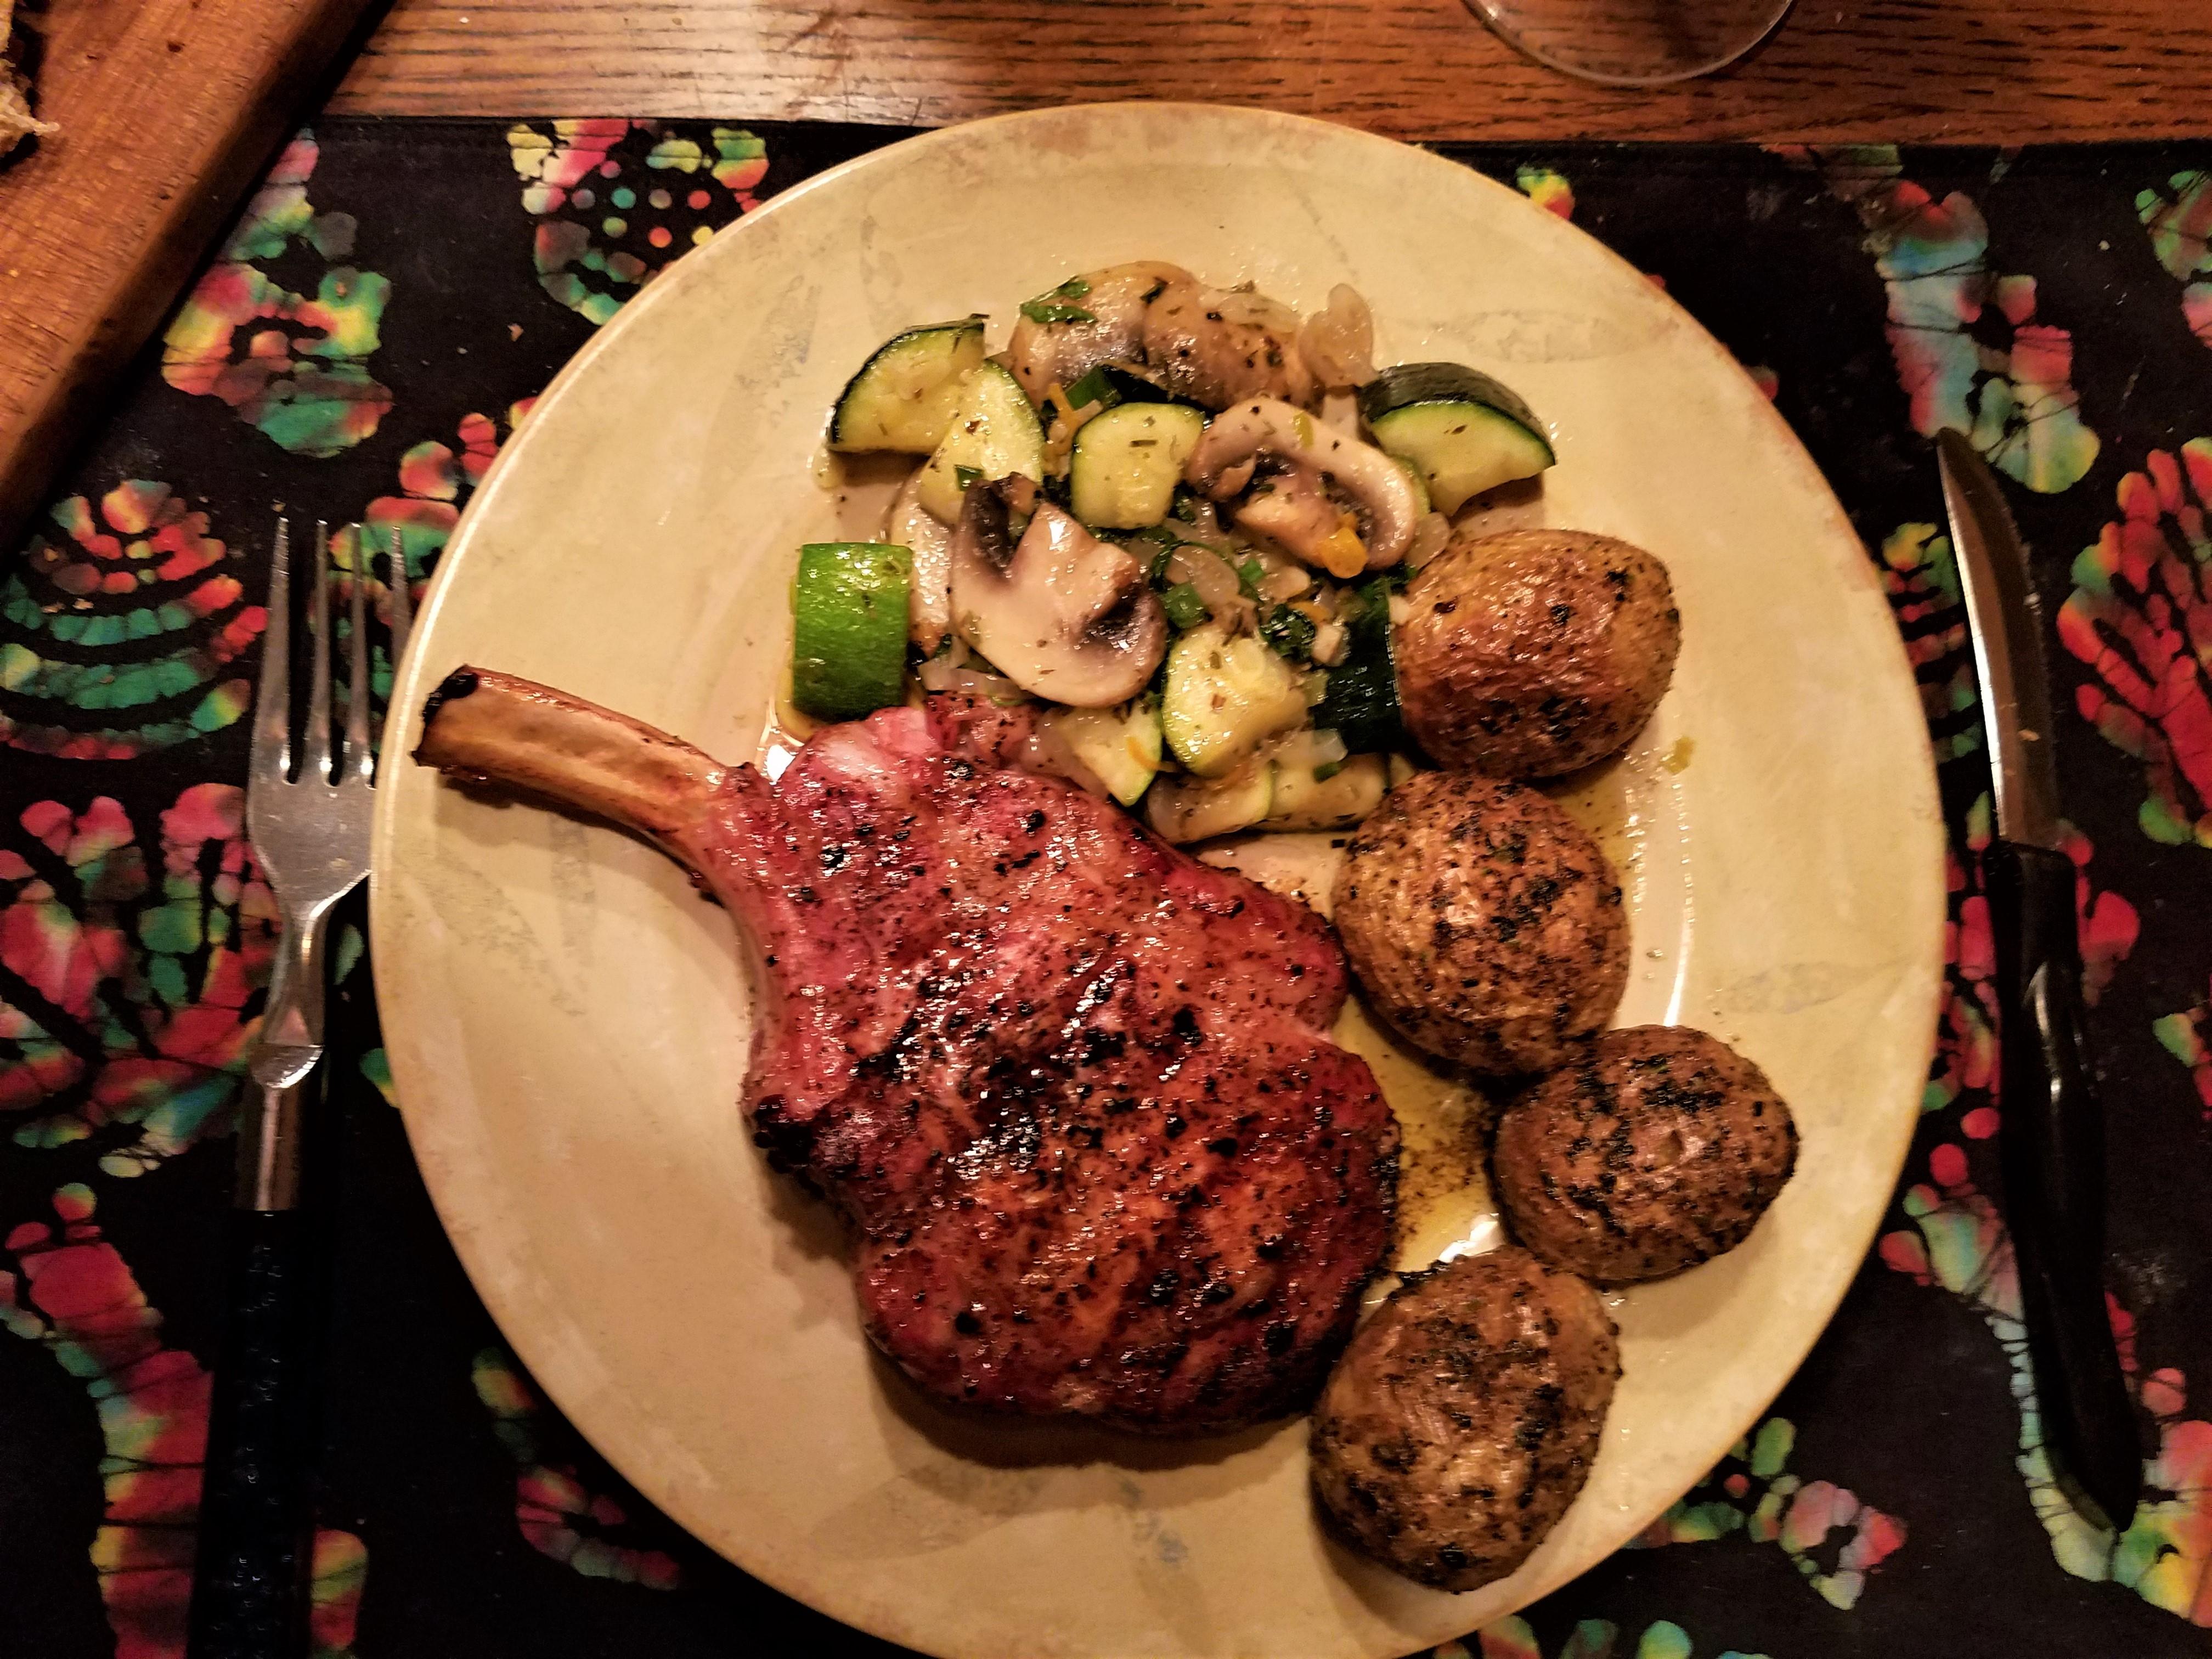
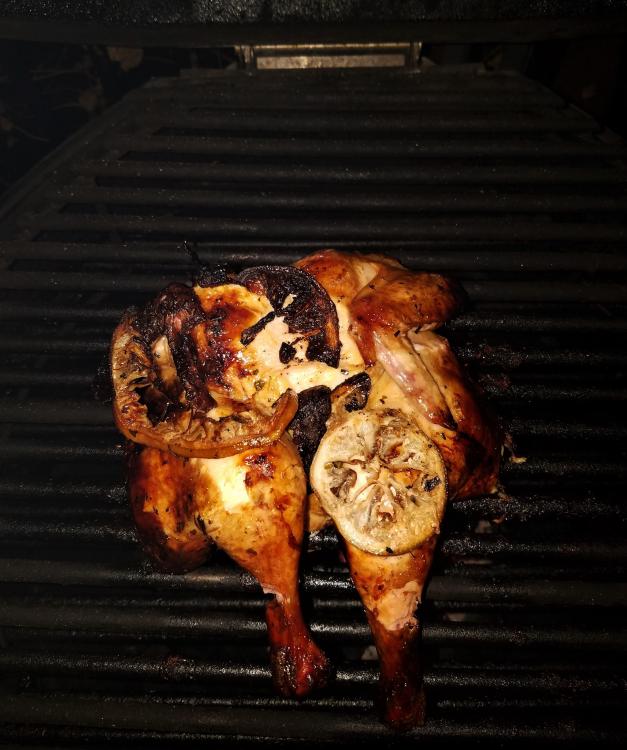
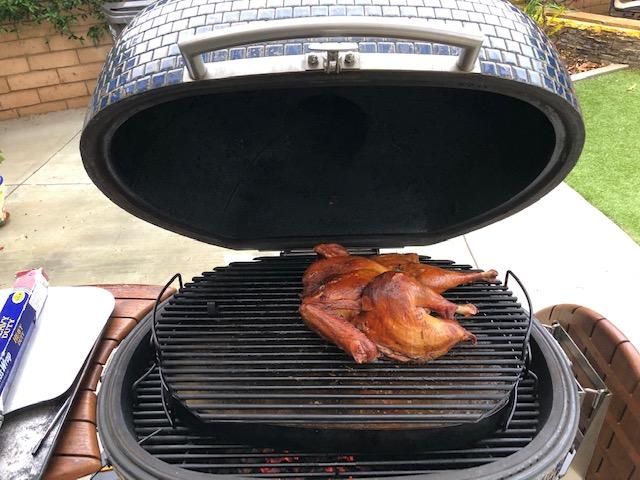
Bucked up to the gale force winds yesterday and did a roadkill chicken on the upper grate. It was a Lemon-Rosemary bird from Trader Joe's. I added nothing to it this time. In the past, I amp'ed it up with some lemon pepper, but it was a bit overkill. Went KISS this time! Direct @ 375F with hickory and peach chunks. Plated with lemon, mint risotto and sautéed veggies (zucchini, broccoli and green beans).
 3 points
 -
Thanks for all the responses. Getting one 32" past she who must be obeyed was step one. If I were to try for a second, it had better be the 42" cause I'd have to live in it. I'm excited to get my order in and play!!2 points
-
Would grace any table Tekebo. Has a medieval charm about it and beautifully crusted ta boot.2 points
-
Yeah it does look very tasty, nice cook Tony2 points
-
And if it gets really bad, I mean really bad....wear a scarf to bed, never know.2 points
-
Looks super tasty, Tony.2 points
-
Great advice Tyrus. From this point forward, I can’t trust my family alone with my KK cooked ribeye steak. I’m carrying it with me.2 points
-
Very interesting configuration. With that you appear to have created a more balanced top heat source. I like it. Definitely stealing this one (pun intended).2 points
-
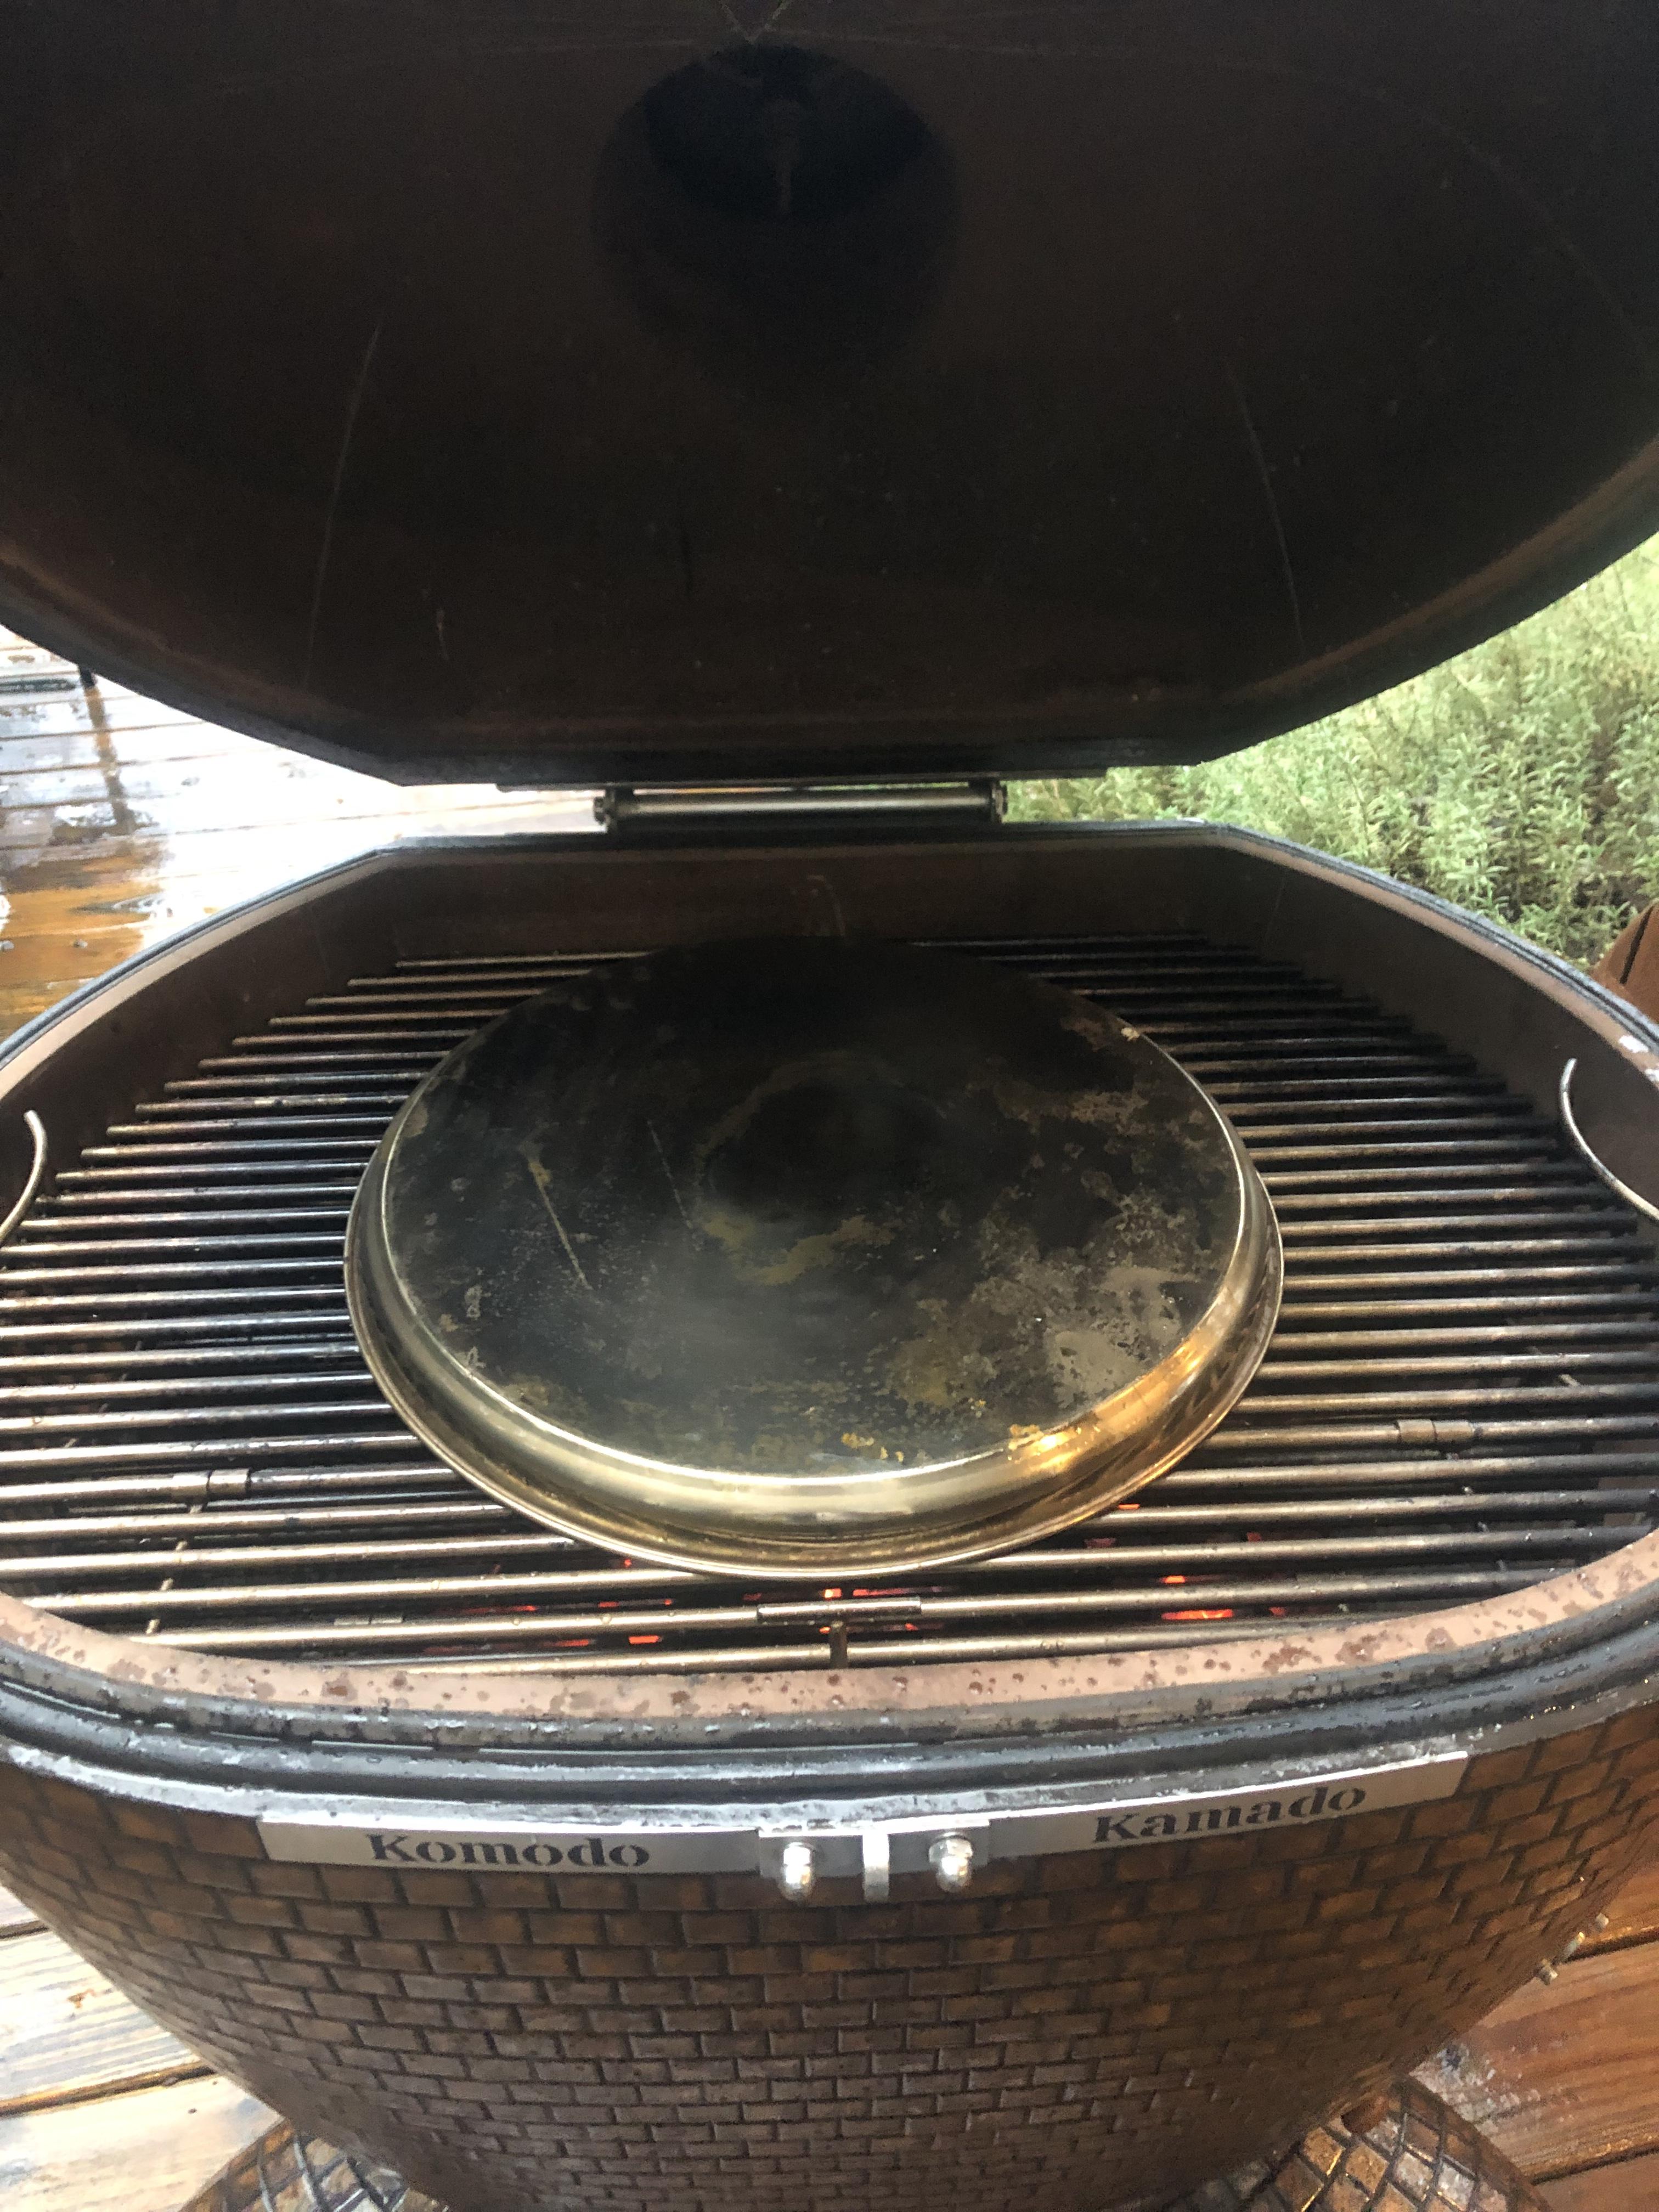
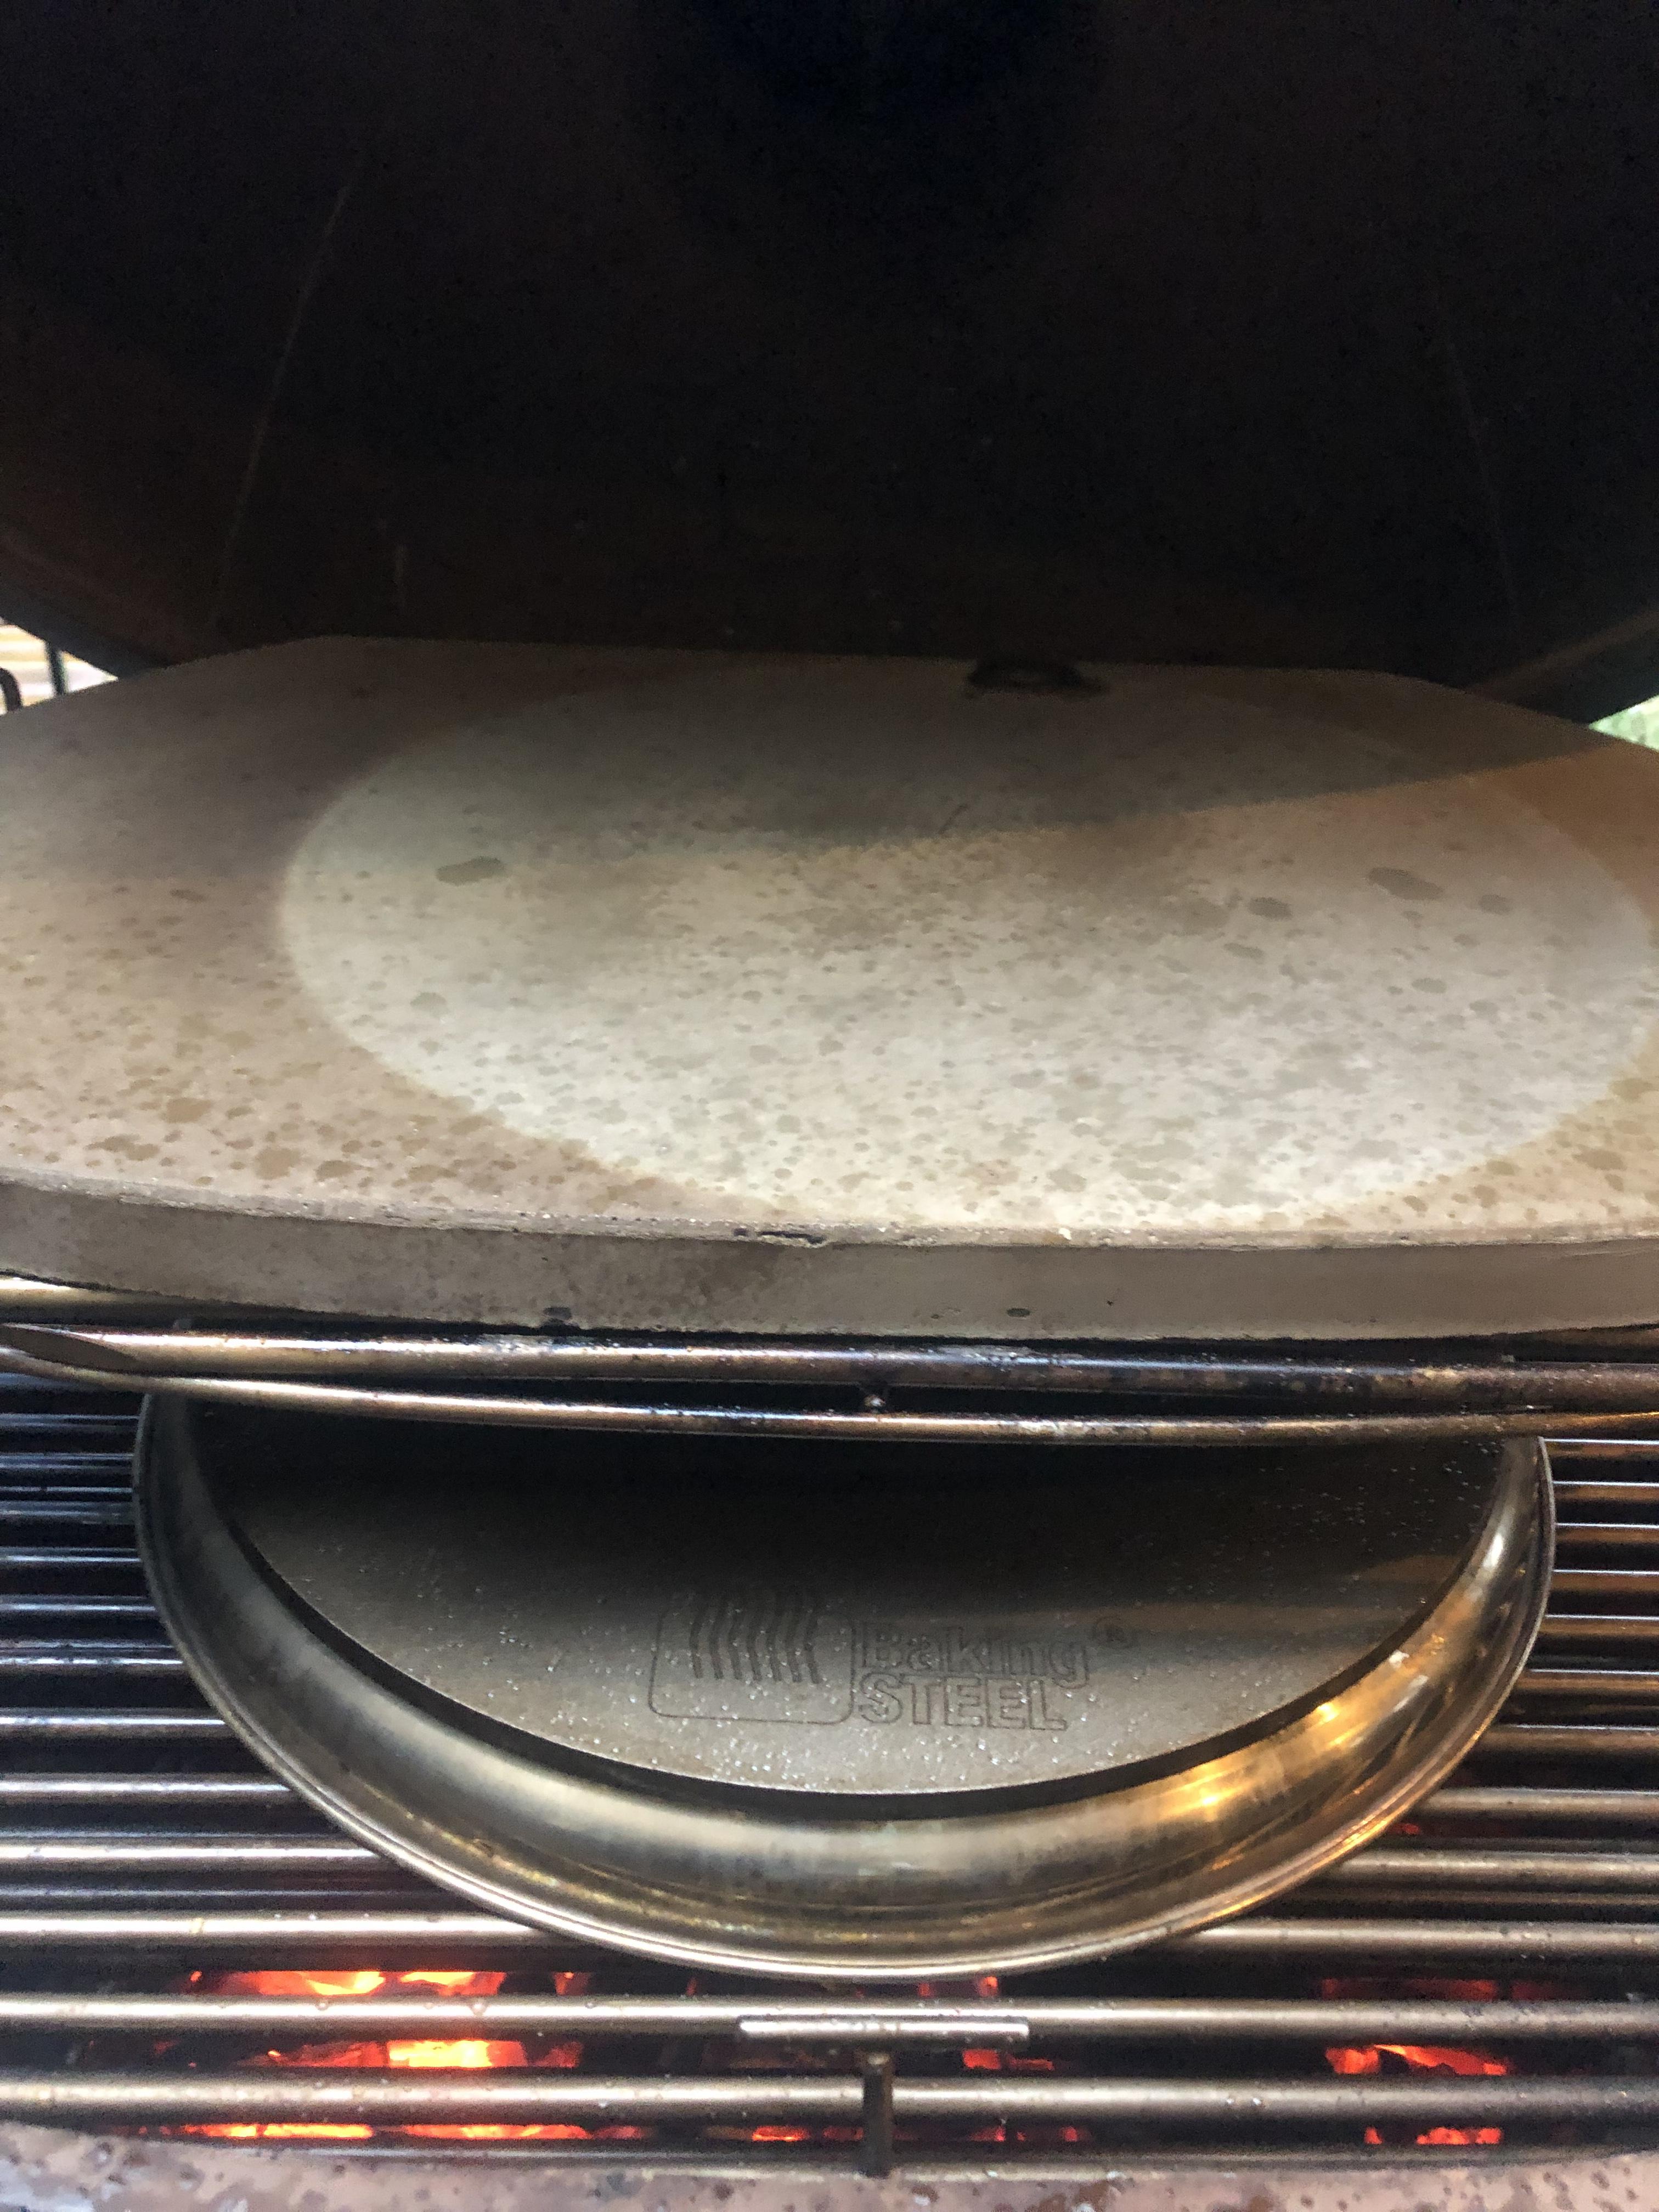
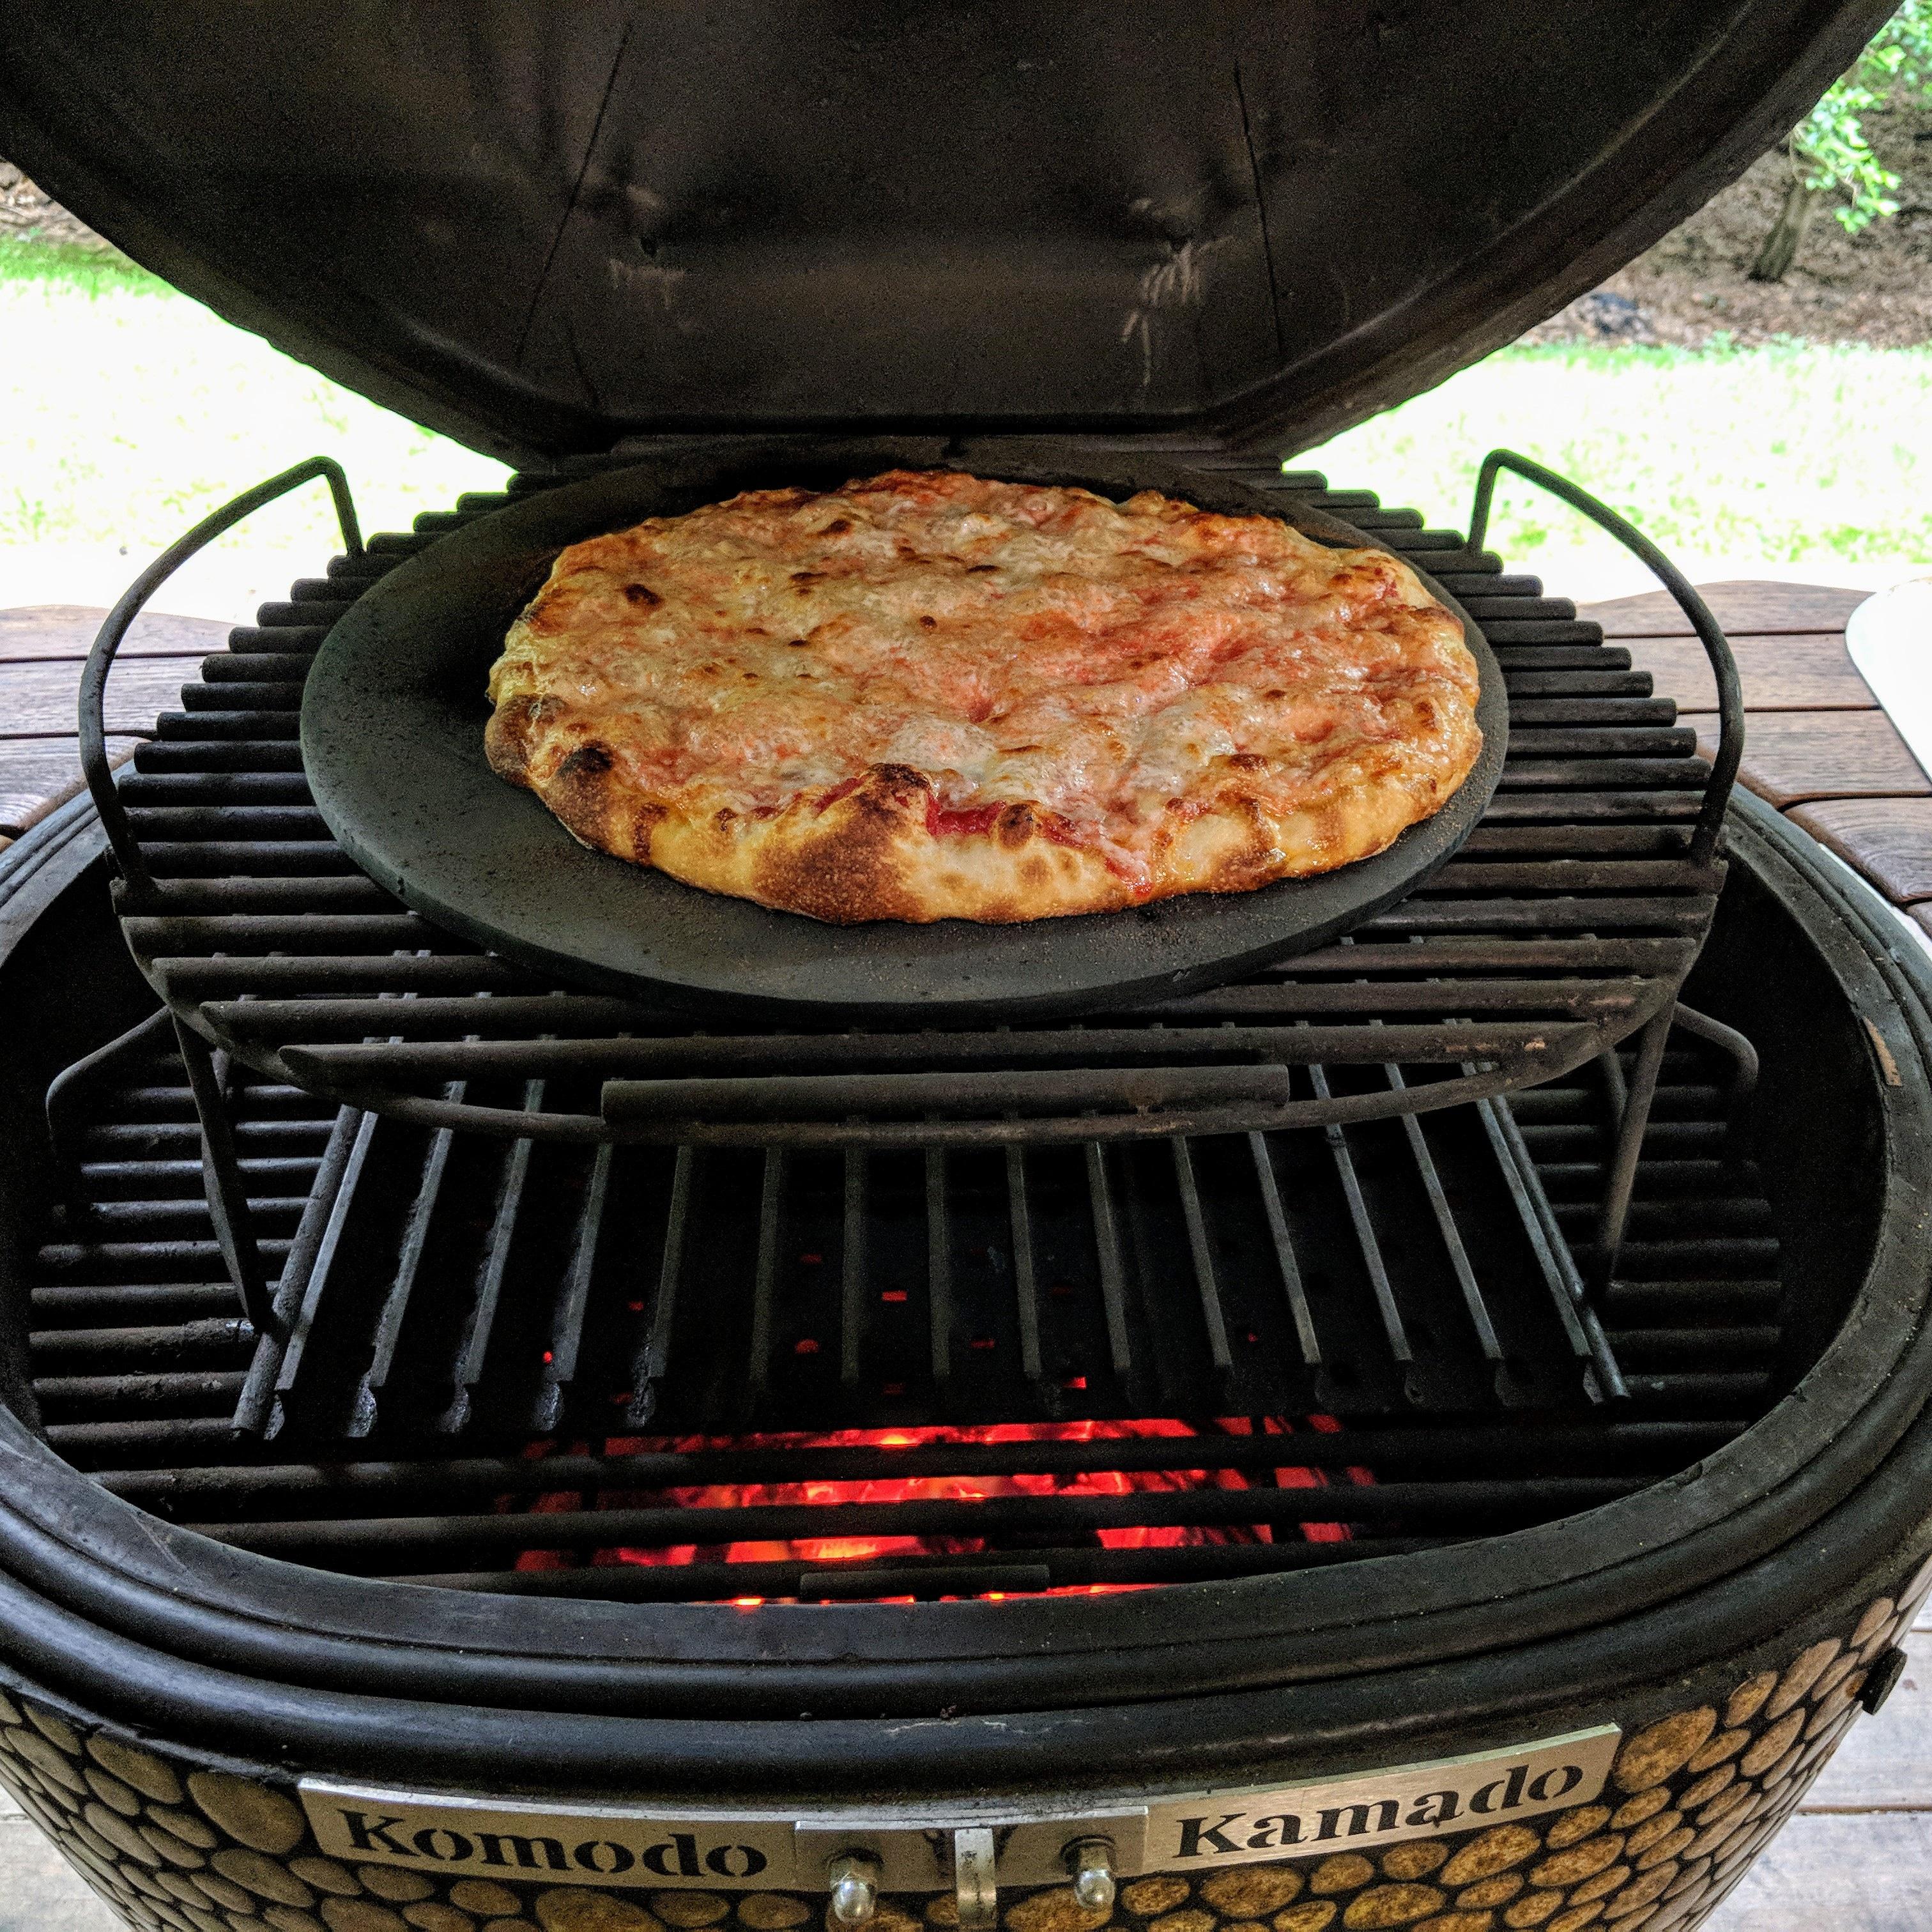
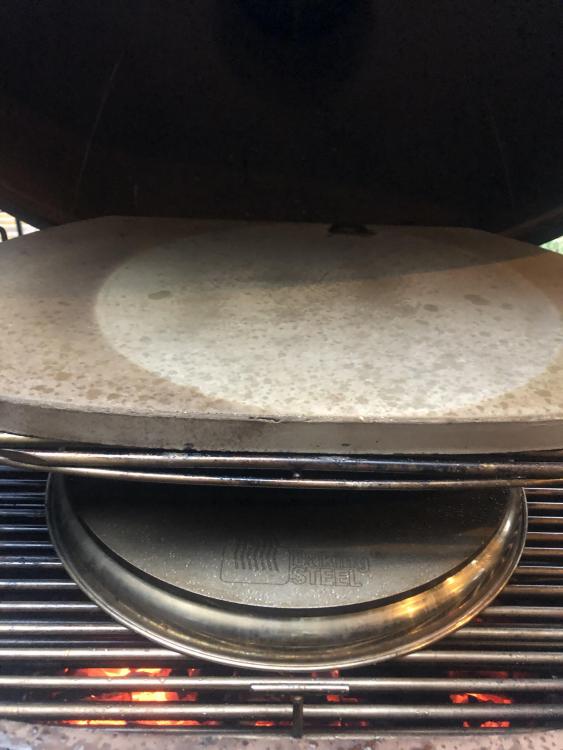
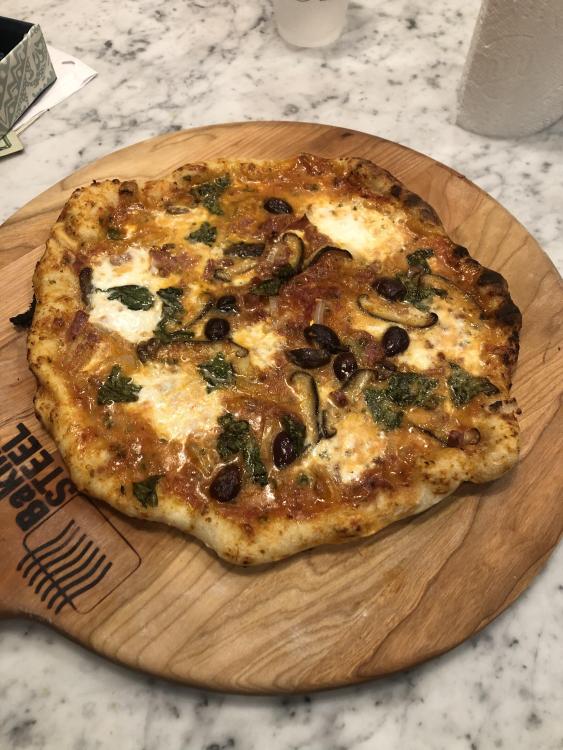
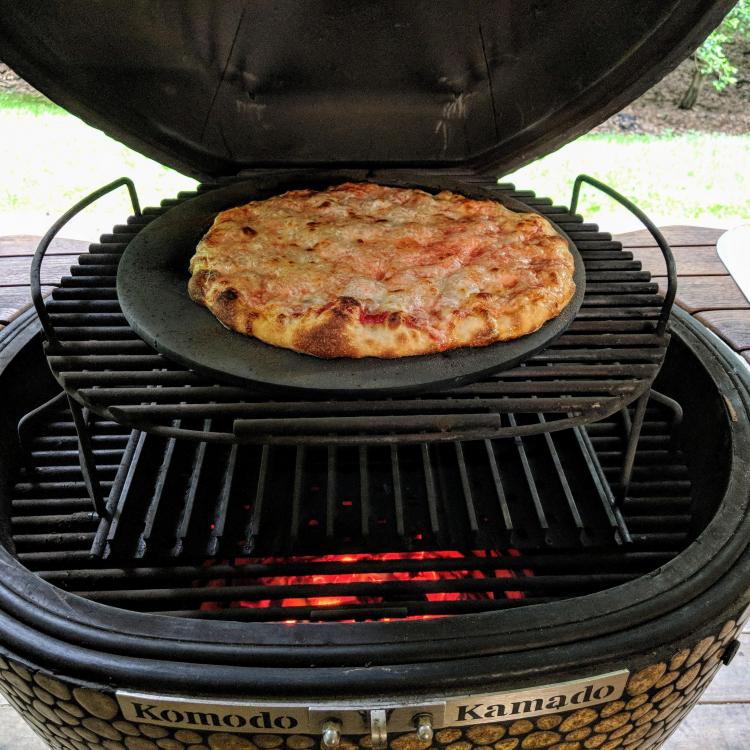
I tried Dennis’s recommendation of using a pizza steel. It made a great pizza. The crust was excellent. I used a 3/8” thick 16” diameter pizza steel. I was at 475 degrees for about 1 hour on the 32BB before adding the pizza. I also used parchment paper to help slide the pizza on and off easily. With the setup, I also used the 32BB pizza stone and inverted the KK pan with the pizza steel on top of the pan. So the pizza was cooked between the elevated pizza steel and the bottom of the pizza stone. See photos of setup. I used a temp gun and checked a few areas prior to the cook. The pizza steel was trending around 625, the bottom of the pizza stone 575, and the top of the pizza stone 525 with the 32BB at 475 degrees. It took 6 minutes to cook the pizza. I also cooked a pizza on top of the pizza stone as a comparison, it took 9 minutes to cook and was good but lacked the char and extra crisp on the bottom of the pizza. The pizza dough is Neapolitan style homemade recipe from “Glen an Friends Cooking”.


 1 point
 -
This started as a 15 lb prime brisket ( thank you, Costco): pretty much followed all of Aaron Franklin’s methods for trimming, slather, seasoned with 50/50 salt and pepper. Into the 32” KK at 11 pm last night, off at 10:45 this morning at a perfect 203*. Got up at 4:30 am and wrapped in butcher paper. Used large lump Komodo charcoal and post oak. Temps were 275-300 ( would have preferred 250-75, but what the heck). Impressions: I usually don’t have access to post oak and use fruitwoods. This is noticeably more of an acrid smoke flavor (in a good way) than the sweetness I get from the cherry or apple. I think it is a better match for the beef brisket, though I will stay with fruitwoods for pork. Bark was excellent, brisket completely done and tender. After really ruining the first 4 briskets I tried, the last two have been excellent...I think I’ve got this.
 1 point
 -
This has all been SO encouraging. I'm sooooo excited to get mine!!!1 point
-
Amen to that MacKenzie1 point
-
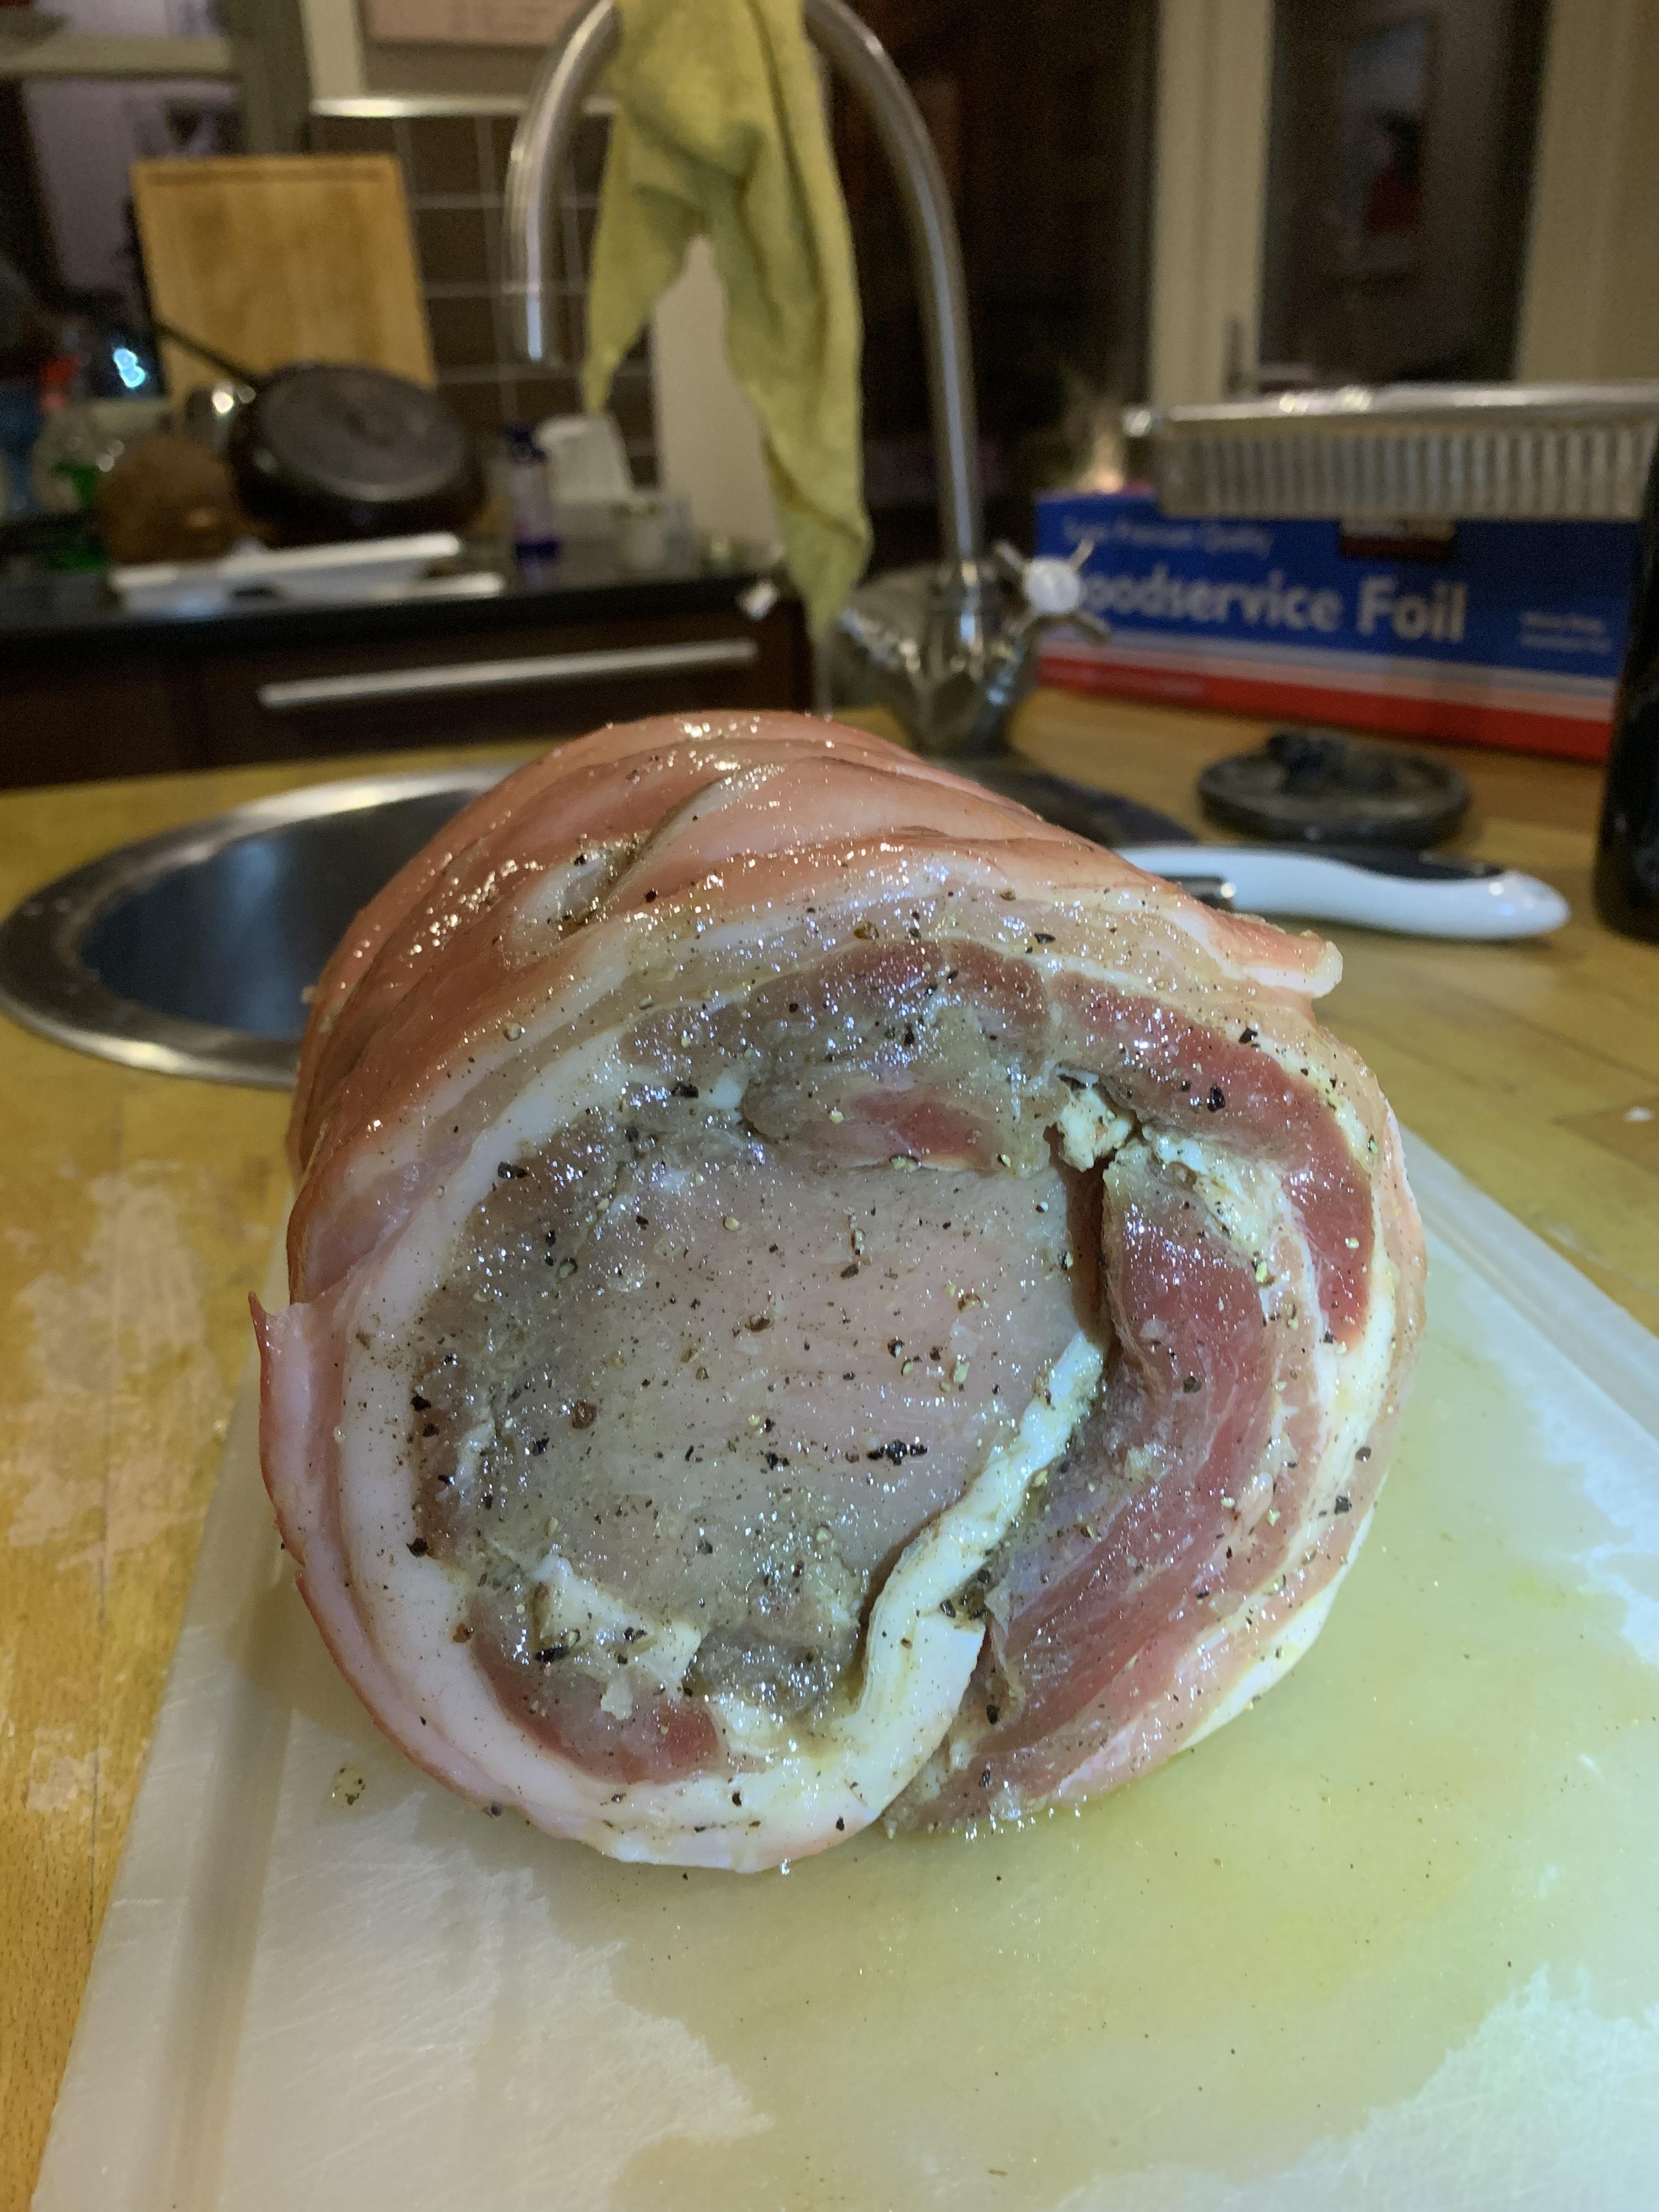
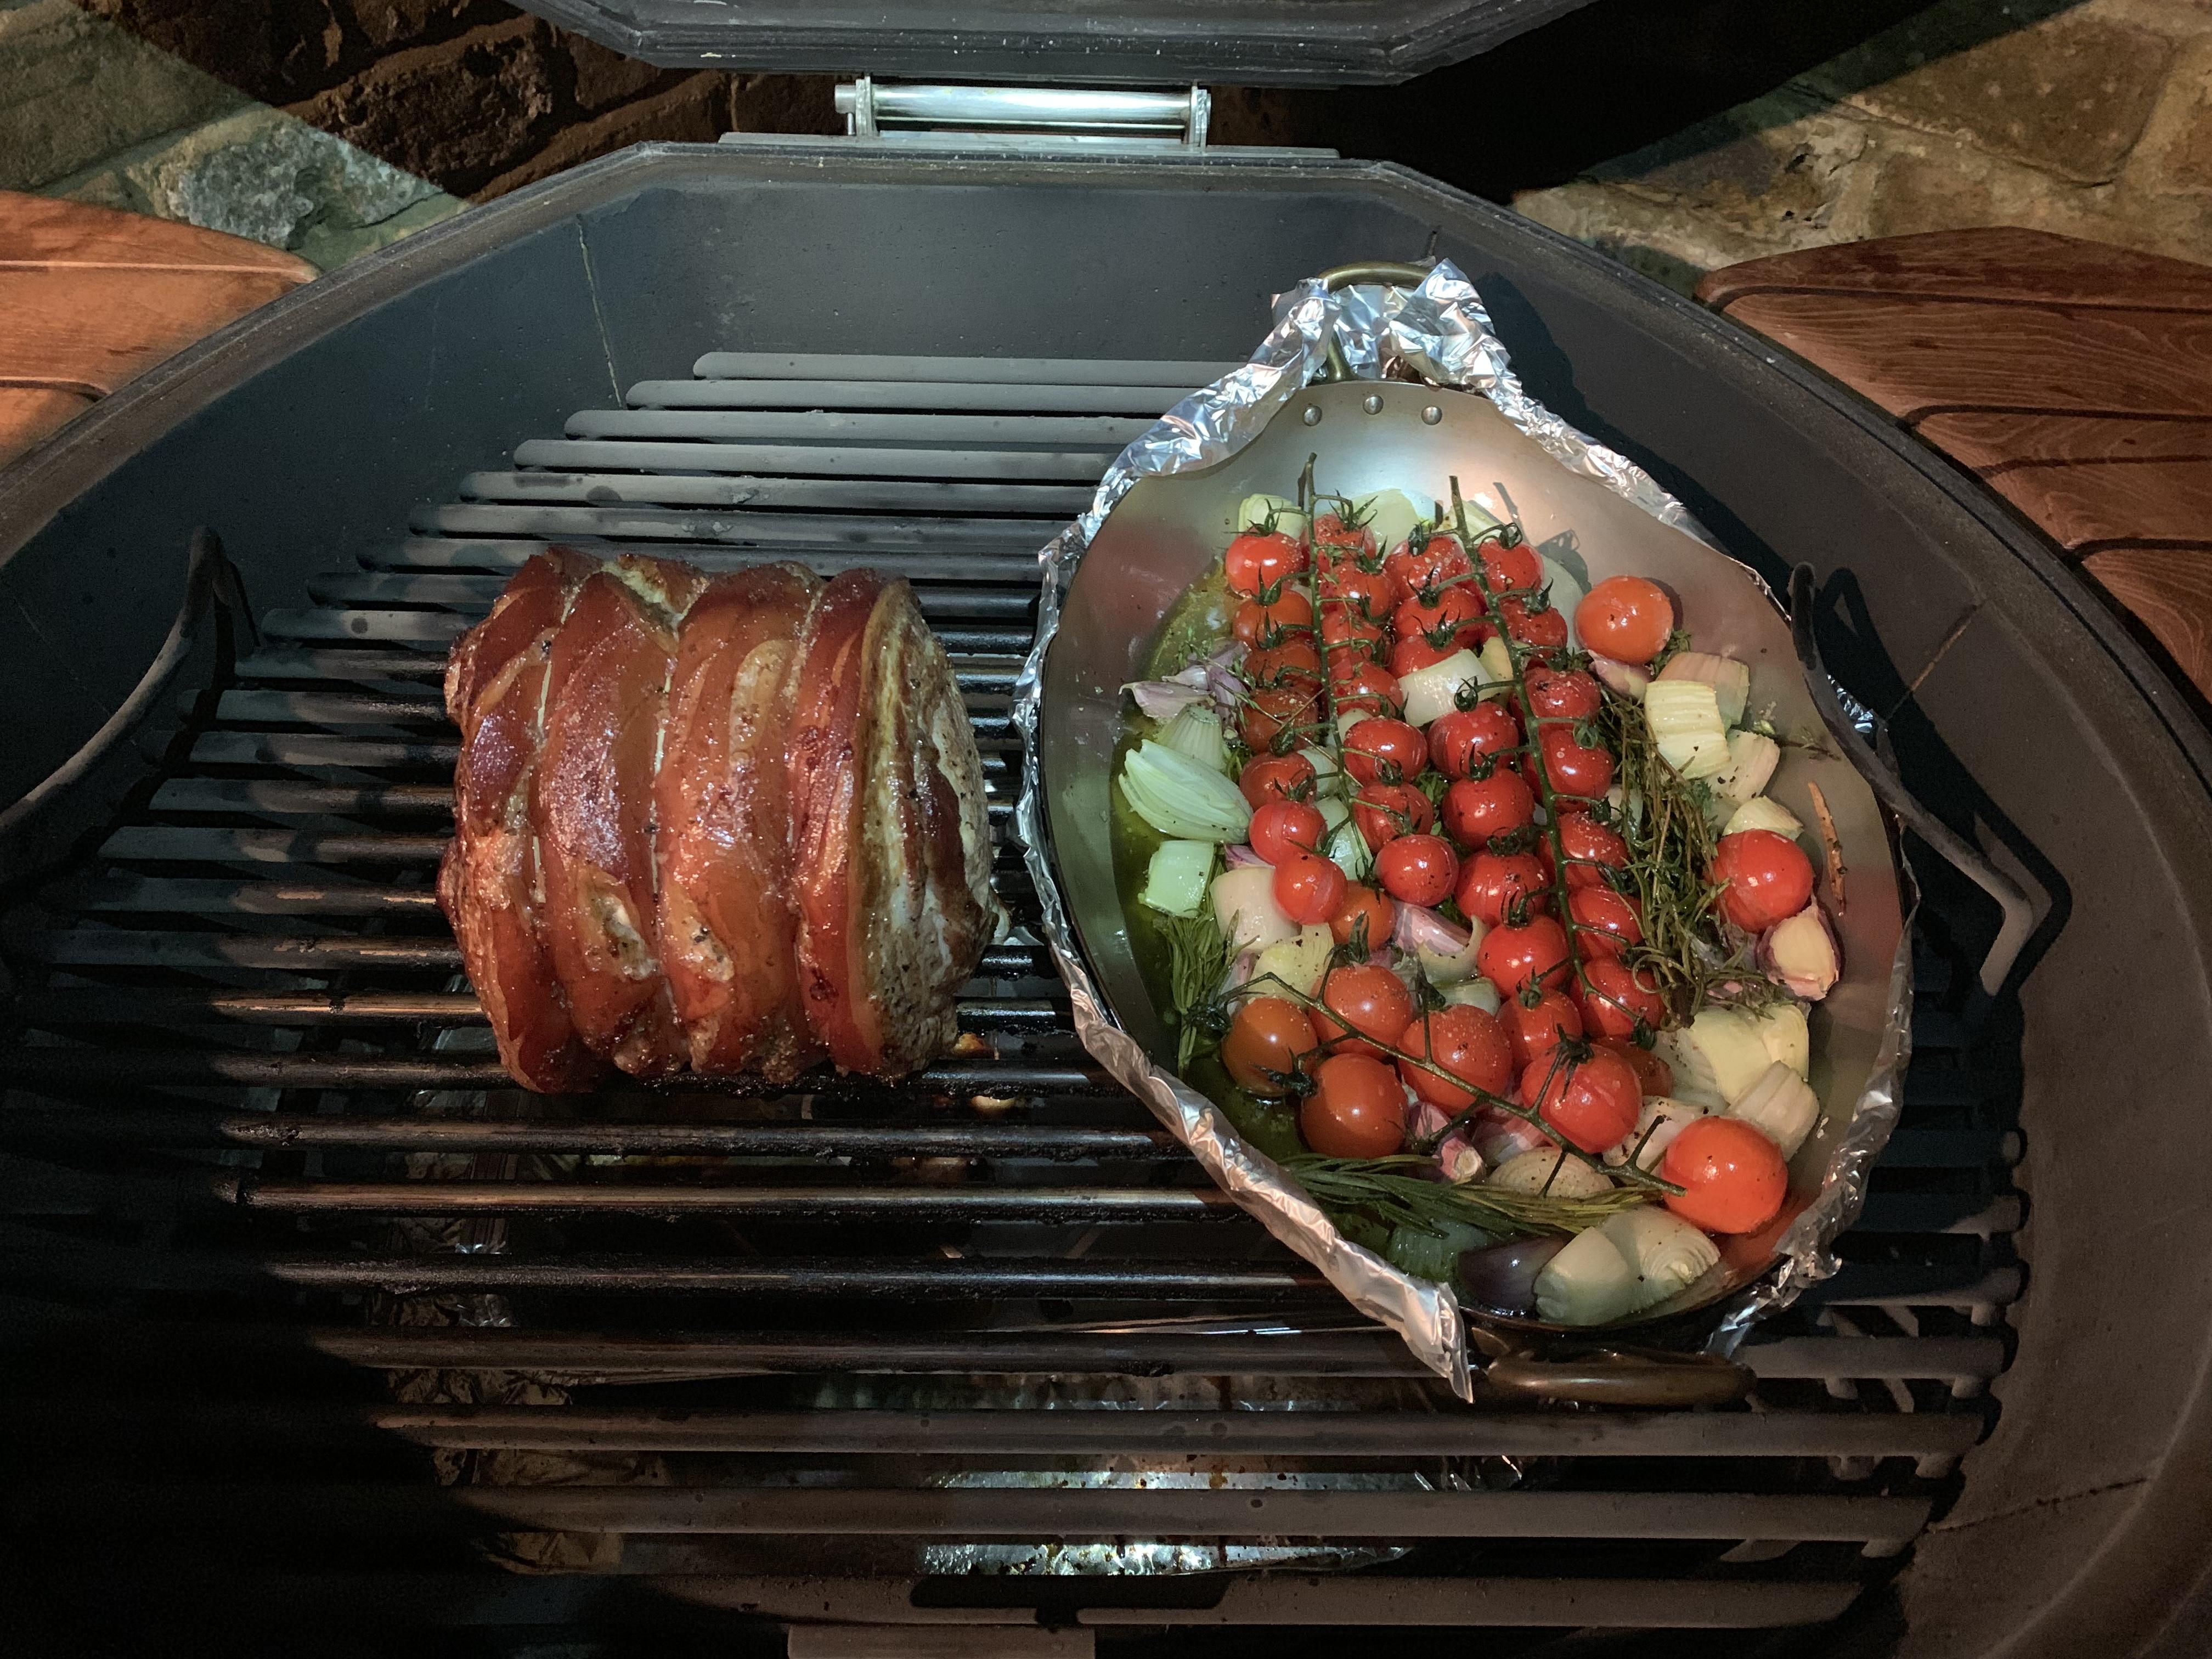
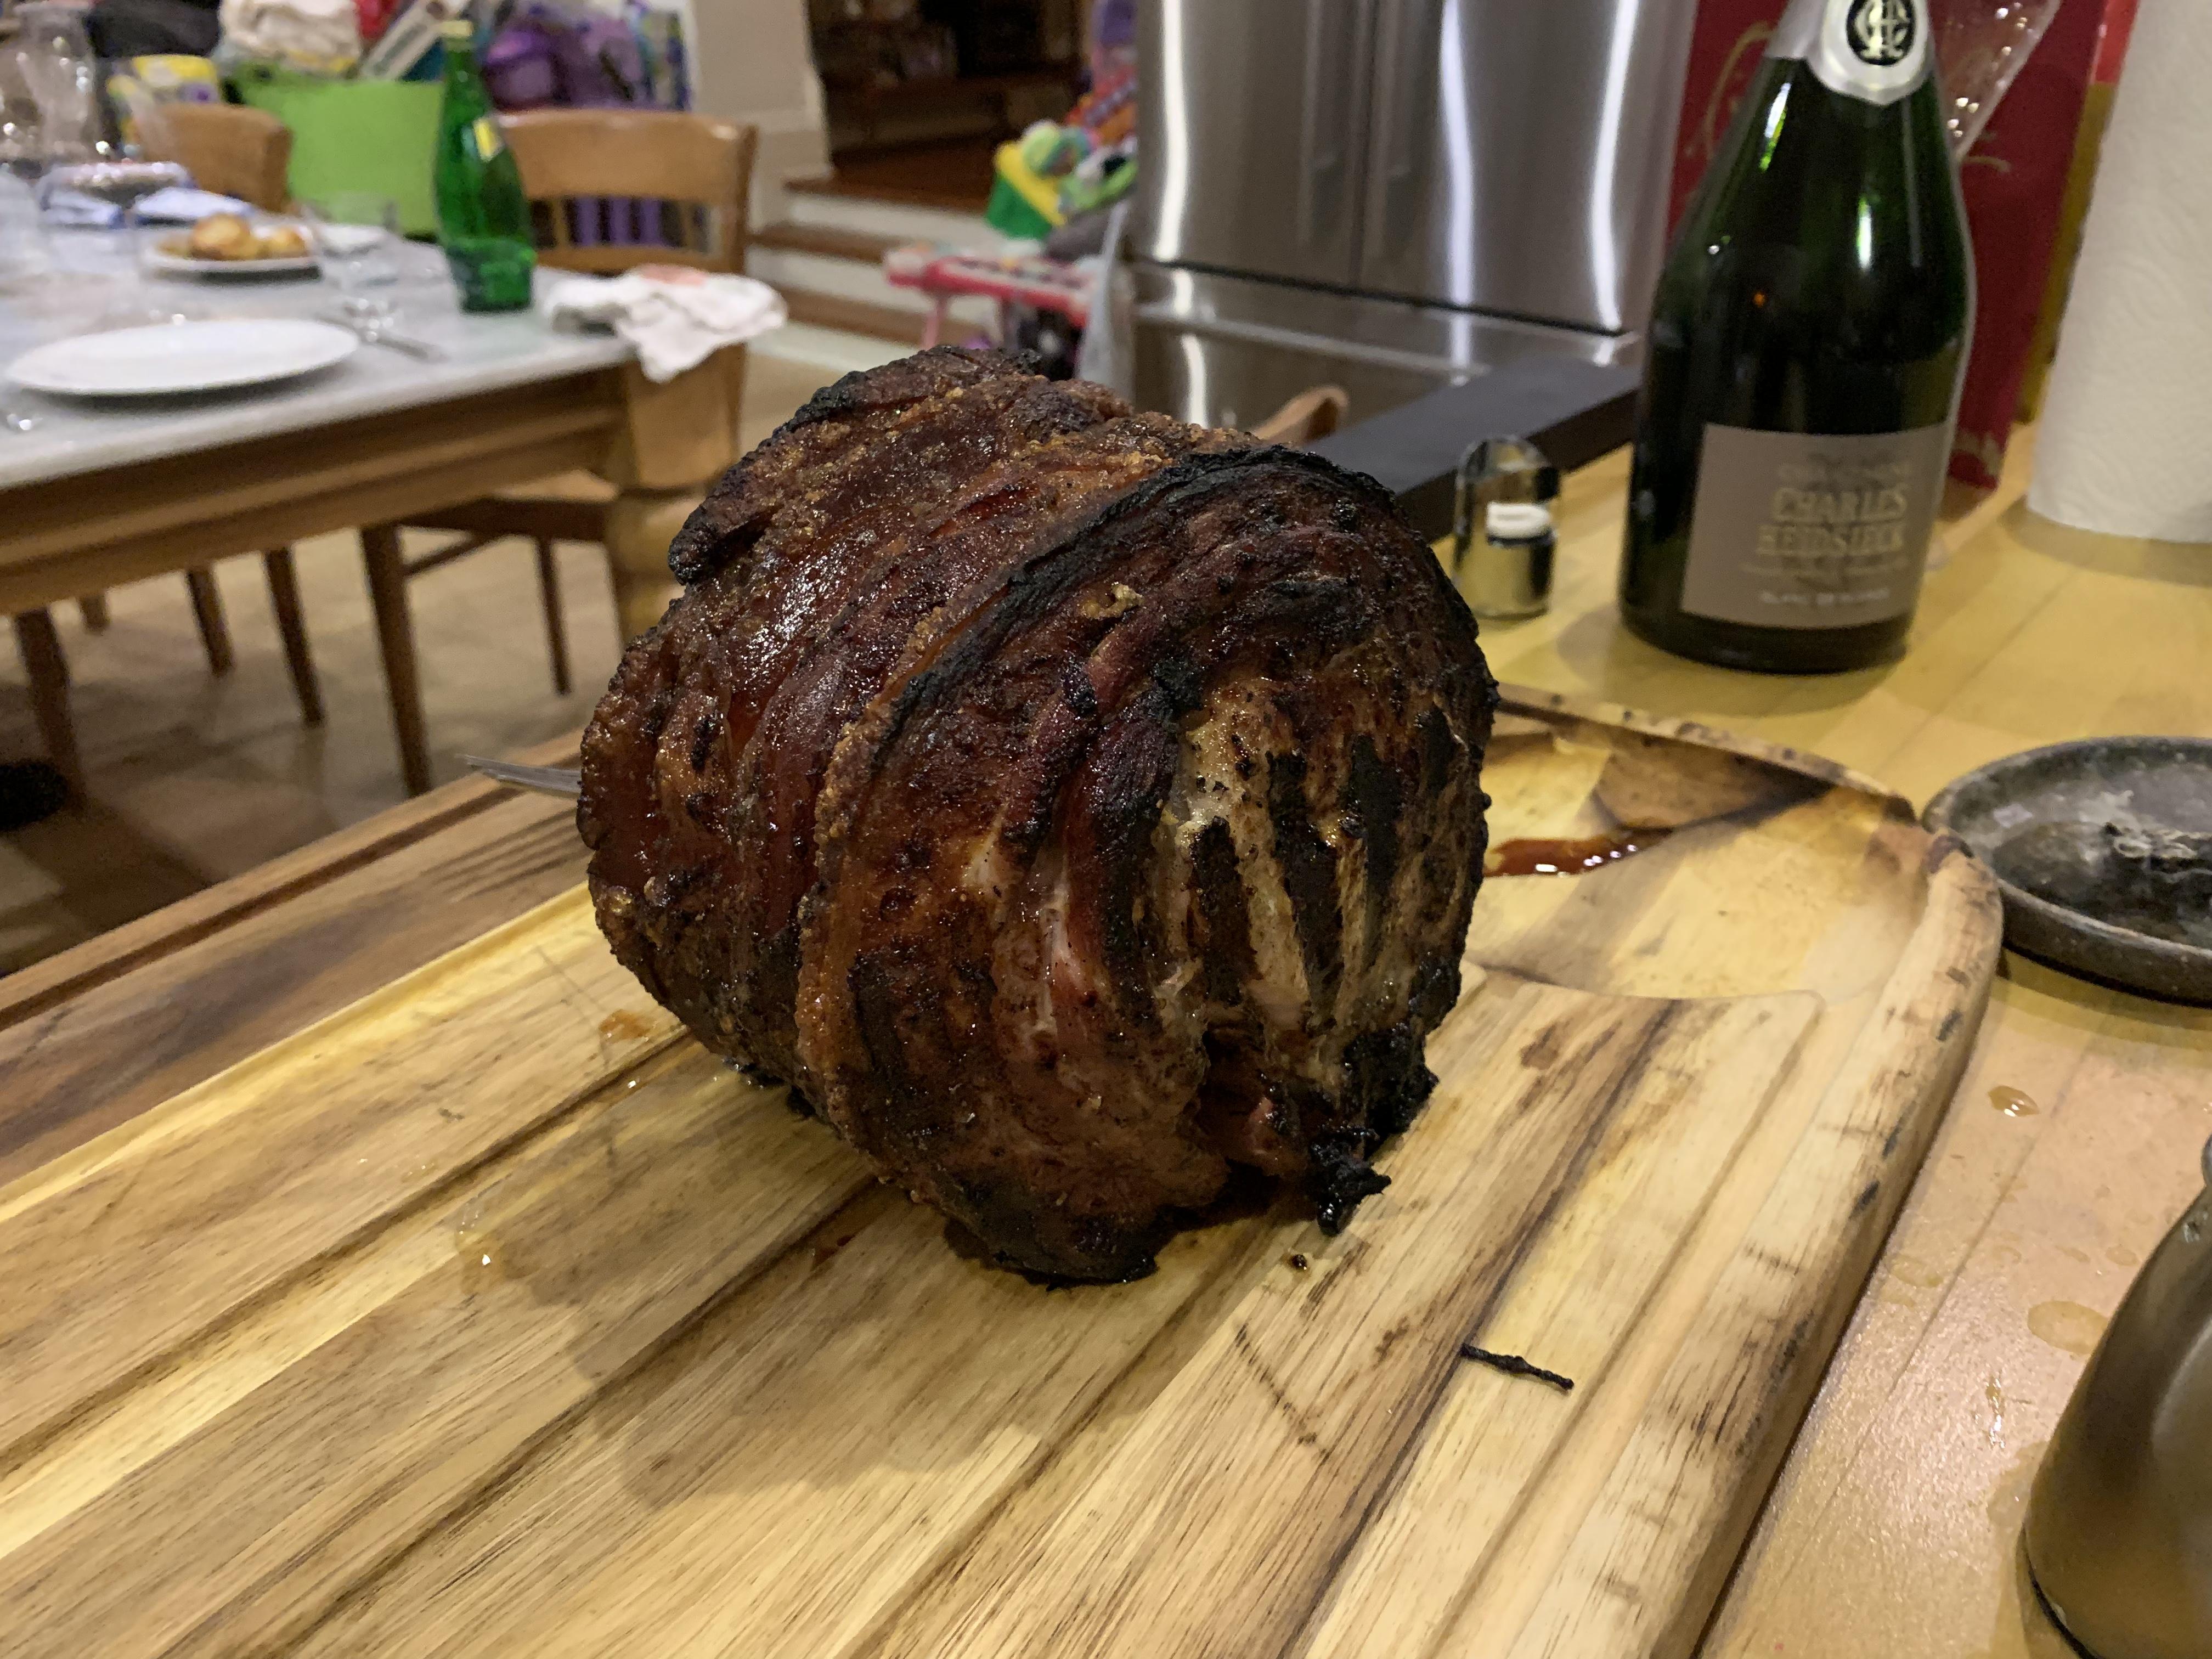
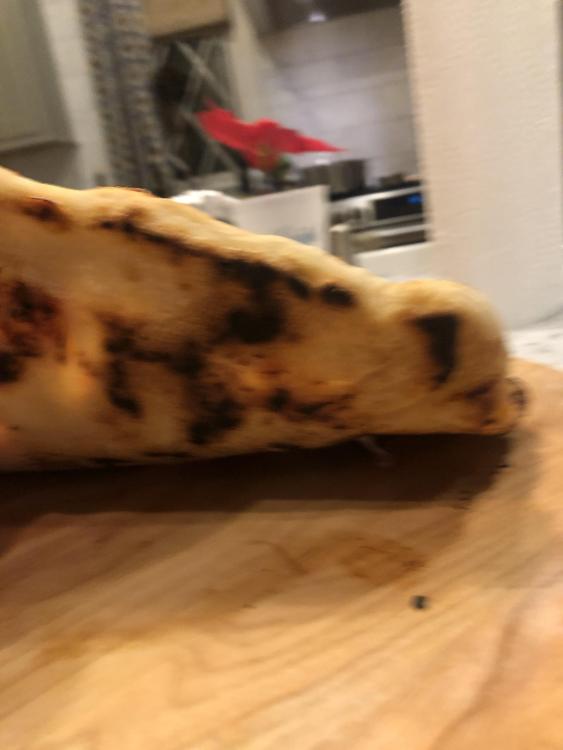
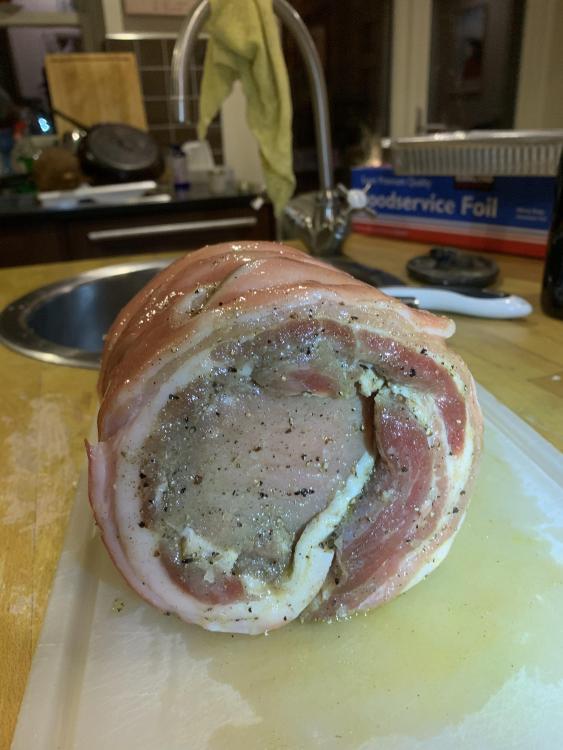
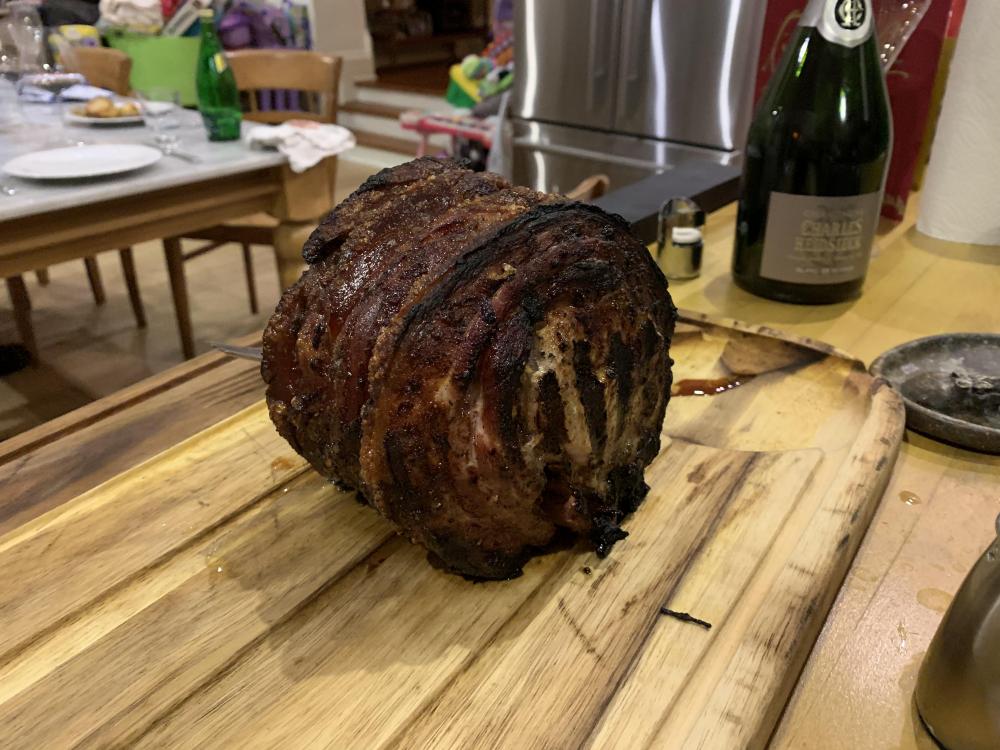
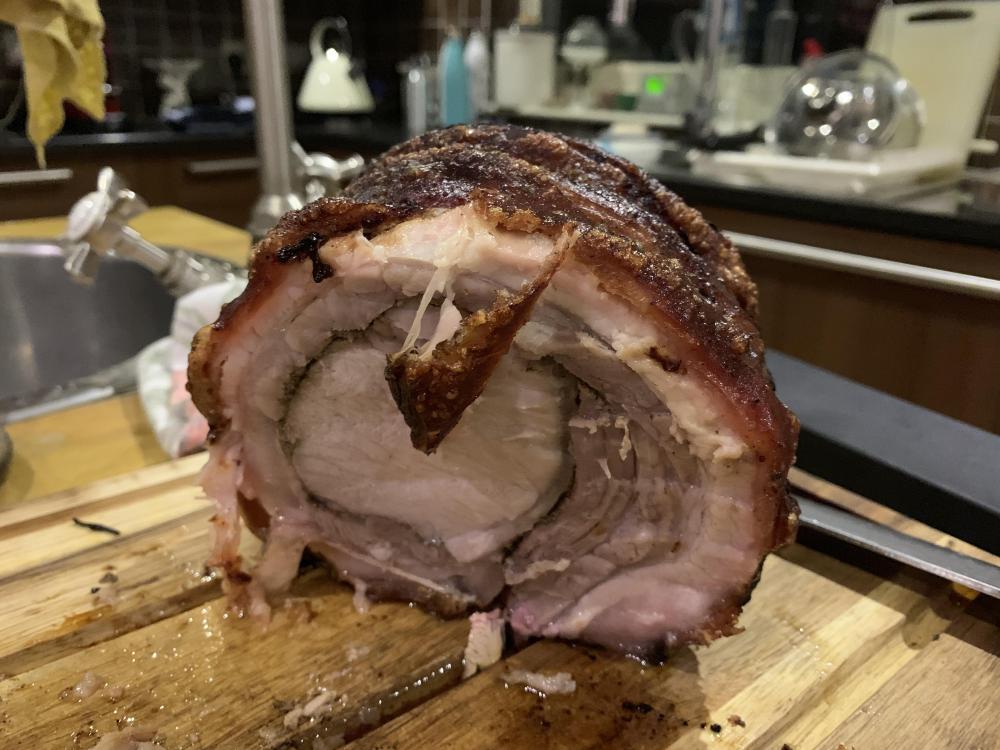
New Year’s Eve porchetta with roast tomatoes and onions. Will defo do again.

 1 point
 -
I'm going to sound like a shill for Trader Joe's, but last night was a TJ porkchop. Direct, main grate, hickory and apple wood chunks, 325F. Dusted with Eat Barbeque rub. Plated with roasted potatoes and more sautéed veggies.
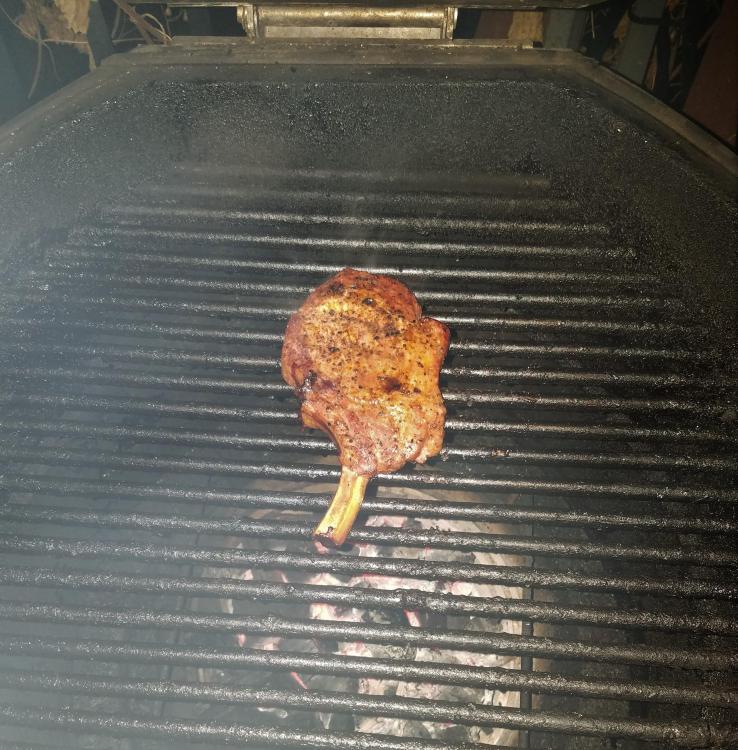
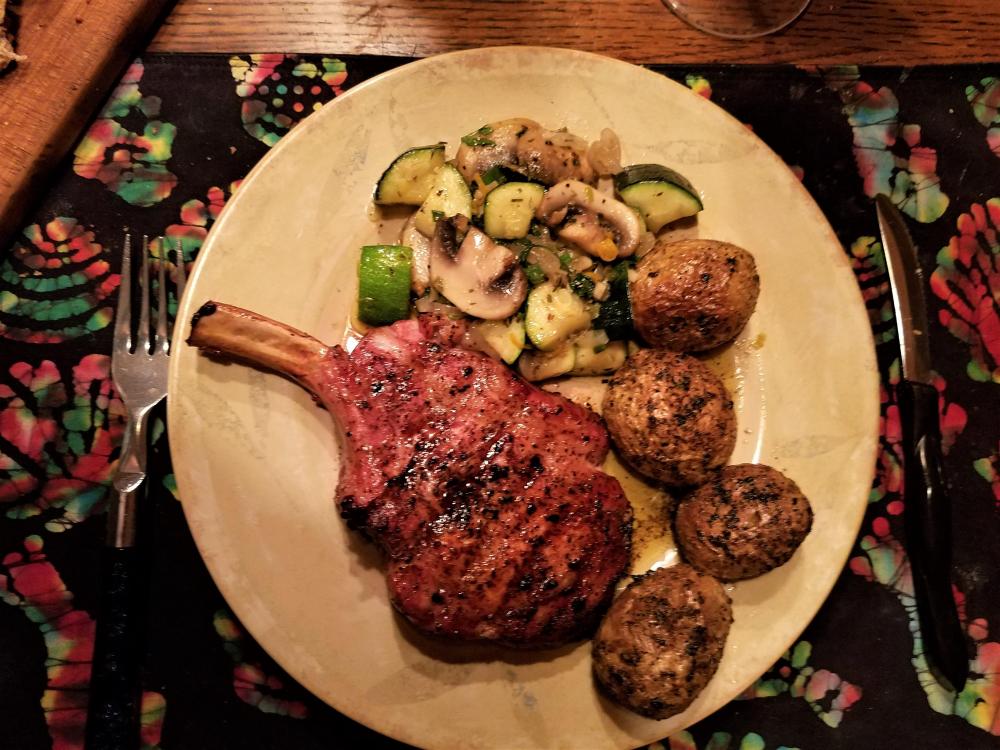 1 point
 -
How about three lol I know someone on the forum has three.1 point
-
1 point
-
This is a better pic Sent from my SM-T835 using Tapatalk1 point
-
Nicley done mate loos terrific Yum Sent from my SM-T835 using Tapatalk1 point
-
Nice chunky fillets of fish looks tasty Sent from my SM-T835 using Tapatalk1 point
-
Interesting. I’ve been using the stone on the highest rack. I’ve lately been experimenting with a heat soaked stone around 650 and using 00 flour. I was shocked to have my last pizza bottom burn after two minutes. Anyone here have an idea why my 00 flour crust would burn so quickly? Sent from my iPhone using Tapatalk1 point
-
Tekobo, steam or no steam they both deeeelicious! I want a taste lol. I like your video1 point
-
I’m not sure it’s even of all that much benefit in an oven. I like Tiny Gemignani and The Pizza Bible (far more so than Forkish’s Elephants of Pizza), but have never seen a need for the second steel. One in a KK or oven makes an awesome crust. Can’t imagine the baking steel shuffle really improves on it.1 point
-
I came across a technique for IDK pizza cooking which uses two steels: https://shop.bakingsteel.com/collections/steels/products/respect-the-craft-baking-steels Curious. Would this be of benefit in a KK?1 point
-
1 point
-
Forgot to take pictures while on KK. Temp was at 550 and took 12 minutes1 point
-
Those ribs look delicious Aussie! Salad looks delish also.1 point
-
Ribs turned out great had a great bark..carved.. and plated.. tasted so good . Sent from my SM-T835 using Tapatalk1 point
-
Dry brined, butter injected and Smoking tasty Amazes me how small it looks on the 32
 1 point
 -
Definitely an interesting setup. Never thought of using my Grill Grates as a heat deflector but it totally makes sense. Going to try that idea soon. Other than low-n-slow or grilling, most everything I cook on the KK - side dishes etc... Are always cooked on the upper rack. It just does a better more consistent cook. (not totally related but thought I would mention it)1 point
-
This has been my setup along the line Dennis suggests. Baking Steel on upper grate preheated at 550 on the dome thermometer with Grill Grates beneath as a heat deflector. Now that I look at it again, seems I got pretty even top heat on this. Think I'm gonna go make me a pizza...
 1 point
 -
Anytime there is browning involved I suggest using the upper grate.. this puts your food closer to the heat coming off the walls/ceiling. I'd also suggest trying putting the baking steel directly onto the grate without anything between it and your fire. If adjusting the heat does not get the top bottom balance you need, then you can shield the bottom with something to reduce the baking steels's heat while increasing the top heat. Of course what you want is to find a temp that the crust gets the leoparding you want and the top browned just right. If you find the steel too hot at the temp that cooks the top how you like.. even adding some foil underneath the baking steel on the main grate will reduce the steel's temp.. you don't necessarily need to block all the direct hot air, covering up half the area will drop the temp less than the whole steel of course so you can fine tune.... Have fun post photos!1 point
-
Cool setup.1 point
-
Tasty looking pizza.1 point
-
Well it's that time of year to put the left over ham bone in the freezer for winter stock .And get another one for bugger all what it cost 5 days ago lol . Smoked over jam wood. Sent from my SM-T835 using Tapatalk1 point
-
I gave a leg a bit of brown sugar rub. .smoked over cherry. And made a special cherry glaze..looking good.. Sent from my SM-T835 using Tapatalk1 point
-
Hey Tekobo, yes I’m happy to share this recipe. (Just don’t tell my sister!) 4 cups AP Flour, 2 tsp salt, 2 tsp Baking Powder, 2 TBS Olive oil. 2 cups of Water, 1 cup of yellow cornmeal. Directions: Mix flour & Salt together. Add baking powder and mix again. Add Oil and break up oil into flour into small pieces and set aside. Add yellow cornmeal and water together is small pot and heat until cornmeal and water fully blend together. Let it cool down until you can handle (about 100 degree F.) Add yellow cornmeal mixture to flour mixture and form / knead into a large ball. Once it’s the right texture then break off into individual balls (a little larger than golf ball size). Place back into original mixing bowl. From this recipe I typically yield about 18 tortillas. If possible and you have time cover bowl with damp cloth and then cover the whole bowl in foil. Hand roll with a rolling pin until 8-10” diameter. Heat up cast iron pan until very hot...Place tortillas on hot cast iron until it starts to bubble (about 10 seconds) then flip over and do the second side. That’s about it. Some comments based on years of experience. In the old days my family likely used Lard but most of us now use Olive oil. For the yellow cornmeal the finer the texture the better. I now use “Goya brand” “Pre-cooked” yellow cornmeal. This is super fine and I no longer have to cook the cornmeal...just add warm water. It will take practice / experience to achieve the right texture....if to dry the edges of the tortillas will be jagged.....too moist and the dough will stick to your rolling pin and be hard to work with. One other trick that seems to make the the final tortillas somewhat silky is to proof the dough for 30 minutes to a couple of hours. The dough doesn’t really rise but it seems to make them more pliable / soft. Try to use minimal flour for dusting etc as any dry flour on the surface can / will burn when cooking the tortillas and not too desirable. Some of the lucky family members have cast iron rounds that come from the old cast iron stoves in which you had a fire below. These are about 9-10” diameter and about 1/4” thick. These work grate as there is not as much mass so you don’t have to pre-heat these as long. When heating to eat you’ll learn that we Mexicans all have gas stoves and heat tortillas directly over the flame.....many of us like a little burn on the tortillas. These tortillas are nothing like you can buy in the store and 100% make any taco better. I have never seen store bought tortillas like these...they are typically either corn or flour. Great for enchiladas......everything. If you decide to make these please let me know how they turn out for you! Best, Paul1 point