Leaderboard


Popular Content
Showing content with the highest reputation on 05/13/2019 in all areas
-
I recently did another attempt at deep dish. I mostly followed real deep dish and used about 15% more dough so it fit properly in the lloyds 12” pan. I used all corn oil this time. It came right out of the pan and the crust had a great flaky consistency. Sent from my iPhone using Tapatalk5 points
-
As promised, pics of the final event. Slow roasted lamb shoulder with Yorkshire pudding and roast veggies. As usual, the KK performed flawlessly. http:// Sent from my iPhone using Tapatalk5 points
-
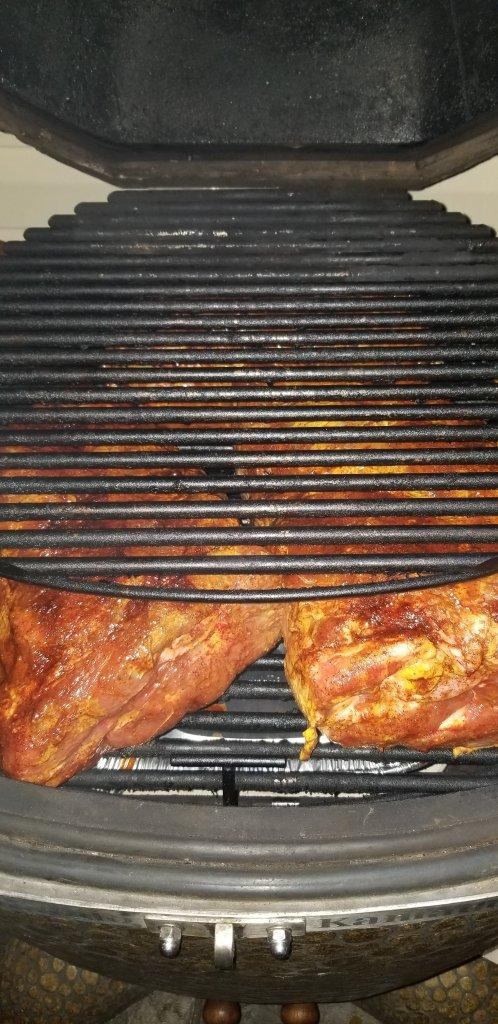
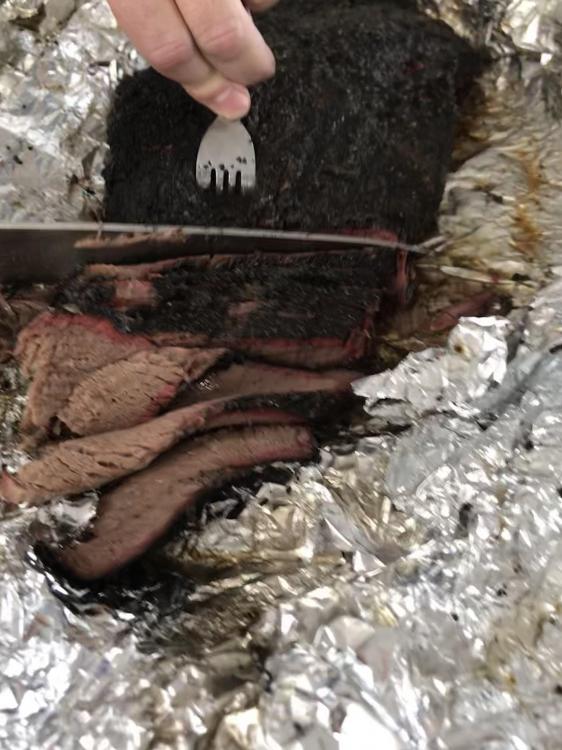
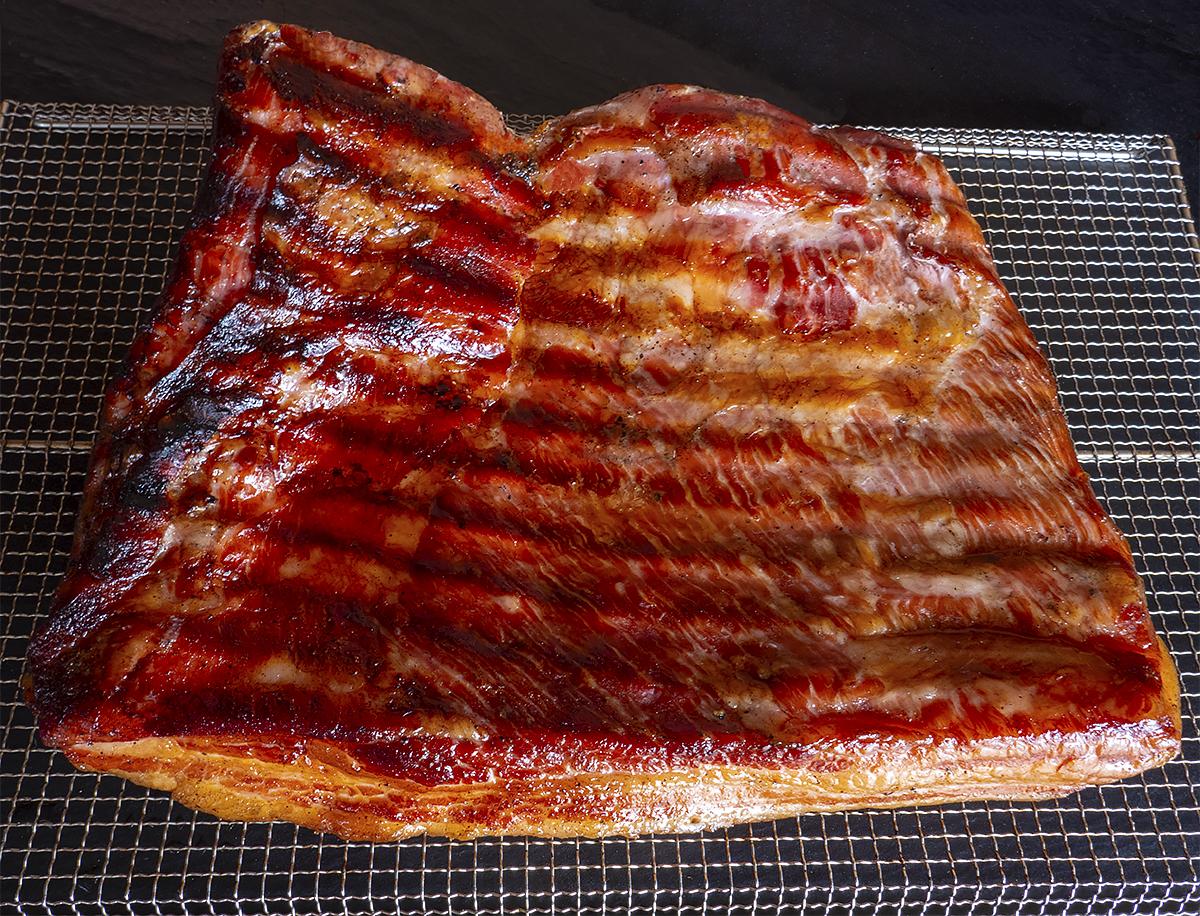
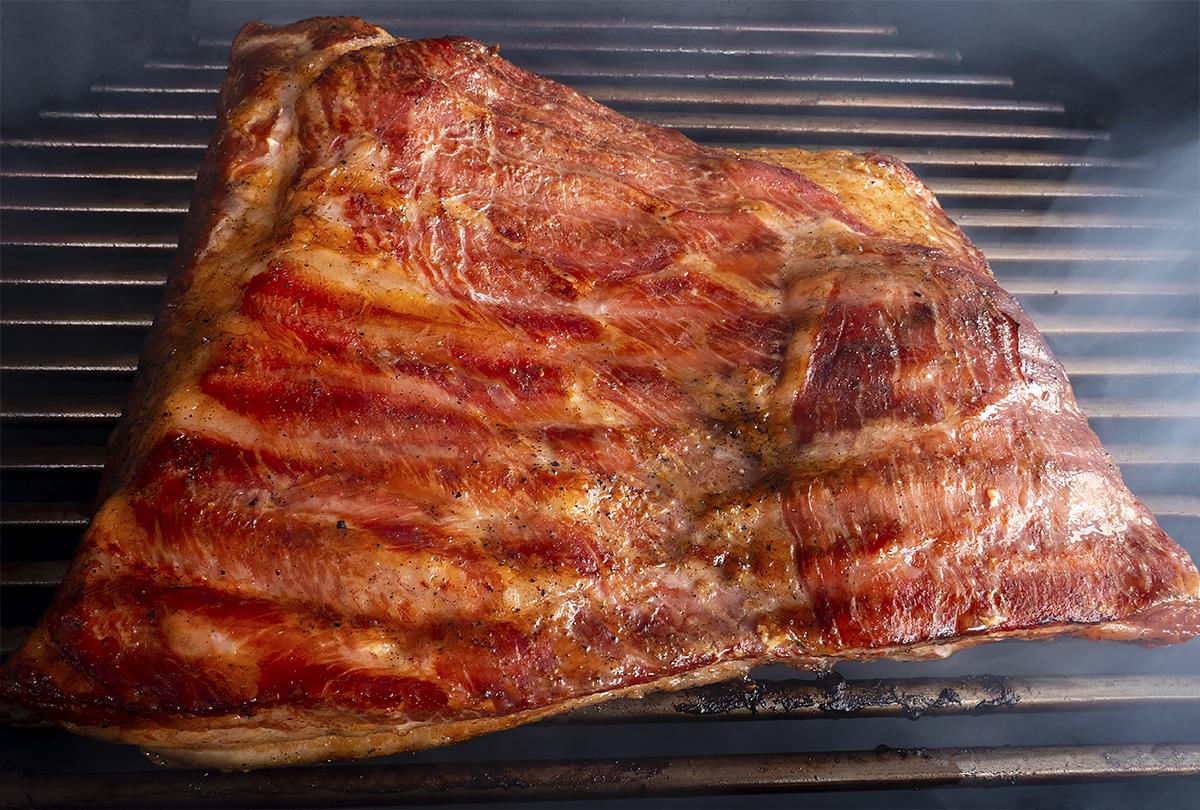
Smoked two pieces of cured pork belly this morning, letting it cool for slicing later. The second piece. I put both on the KK at the same time but one finished well before the other. Here is the second piece.

 4 points
 -
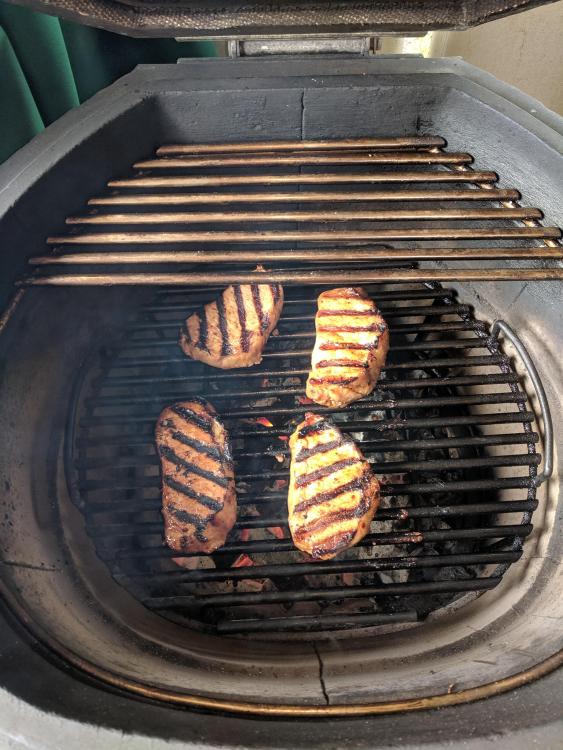
Spun a Tri Tip .gave it some rub.. Looking good. . Ready for a rest. . And sliced. . Plated with a nice salad. . Sent from my SM-T835 using Tapatalk4 points
-
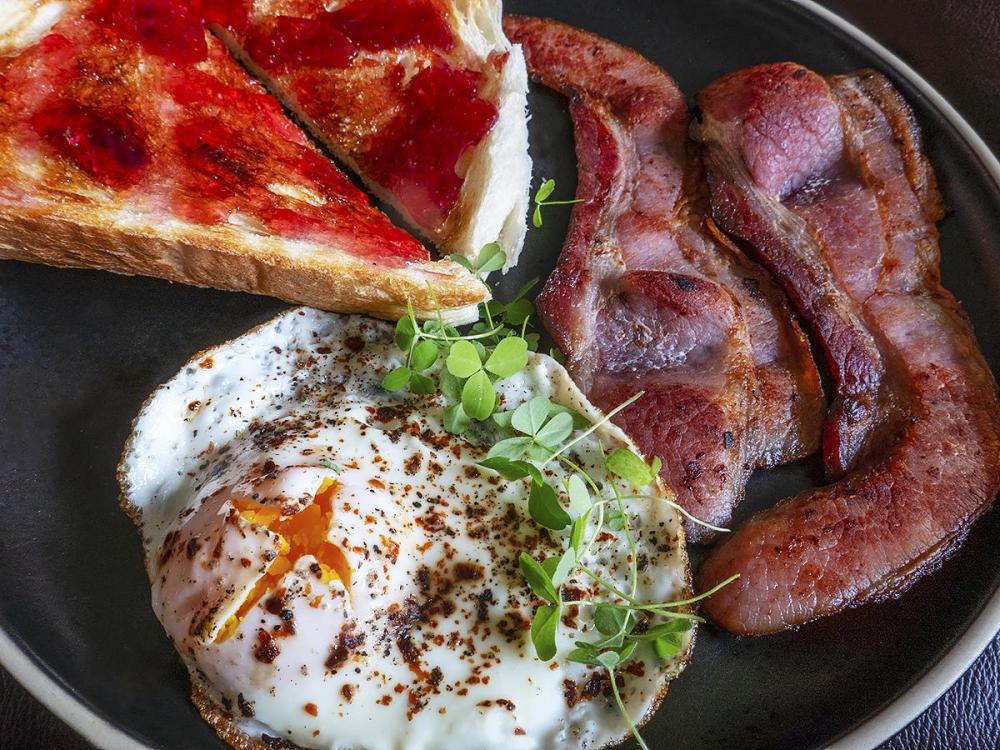
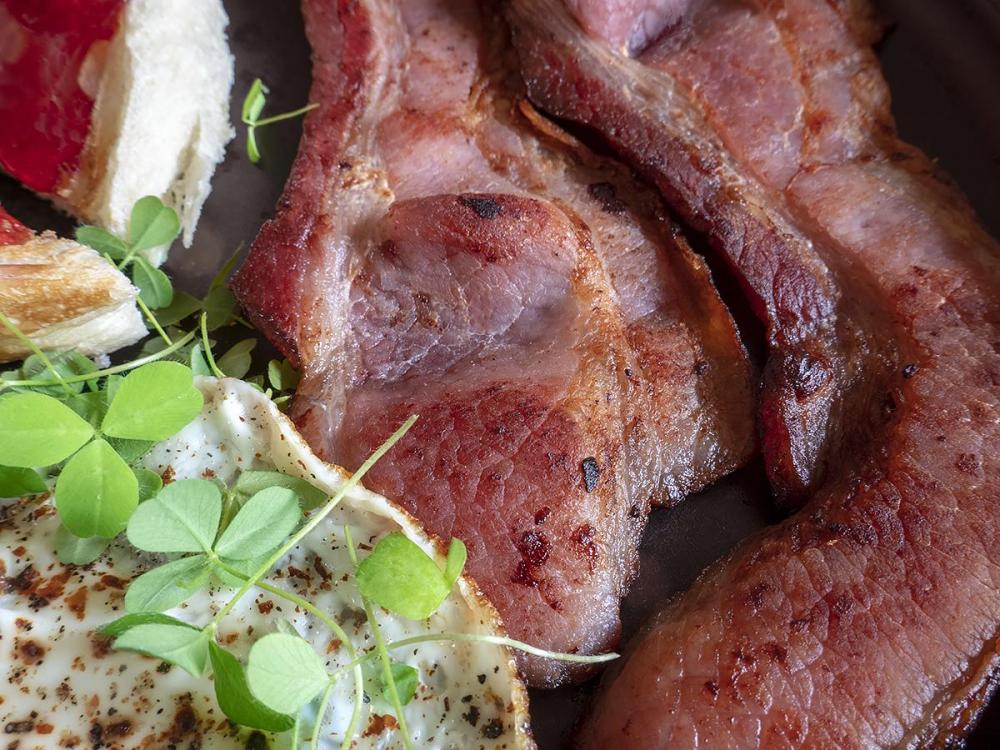
You just know that I had to test that bacon for breakfast. I have enough bacon to last until the next batch of cold weather in the fall.
 3 points
 -
It shouldn't be a surprise but first up Brisket was well above expectations. Cooked for 4.5hours up to 165 then a further 3.3 hours up to 202. hardest part was trimming as I’d not done that before. A big tick for the KK again
 3 points
 -
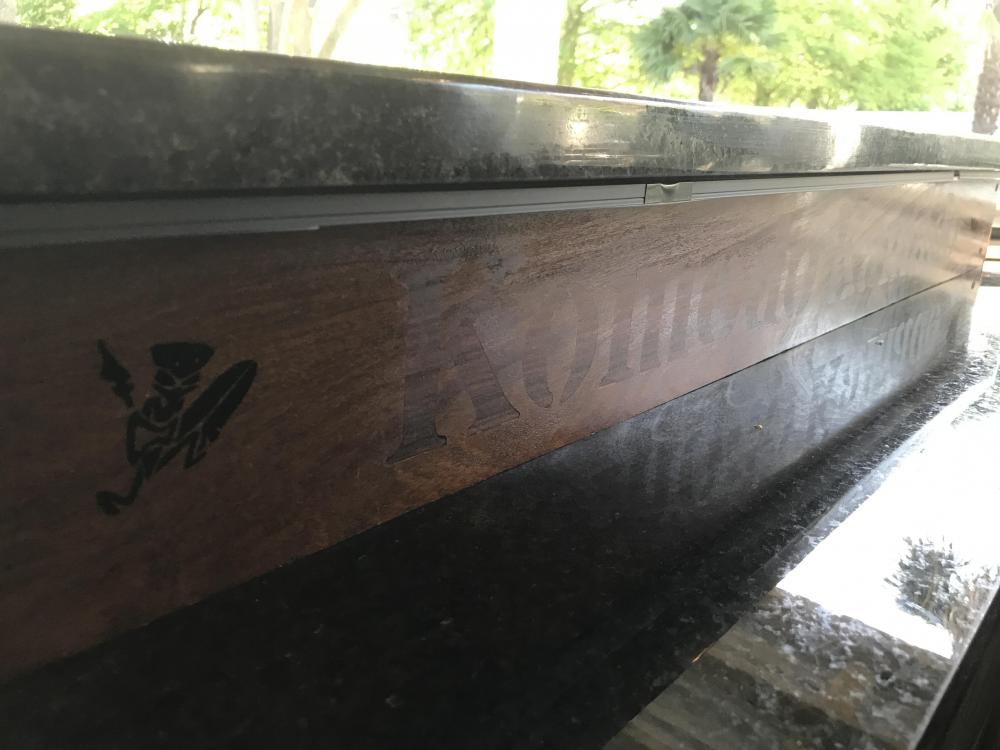
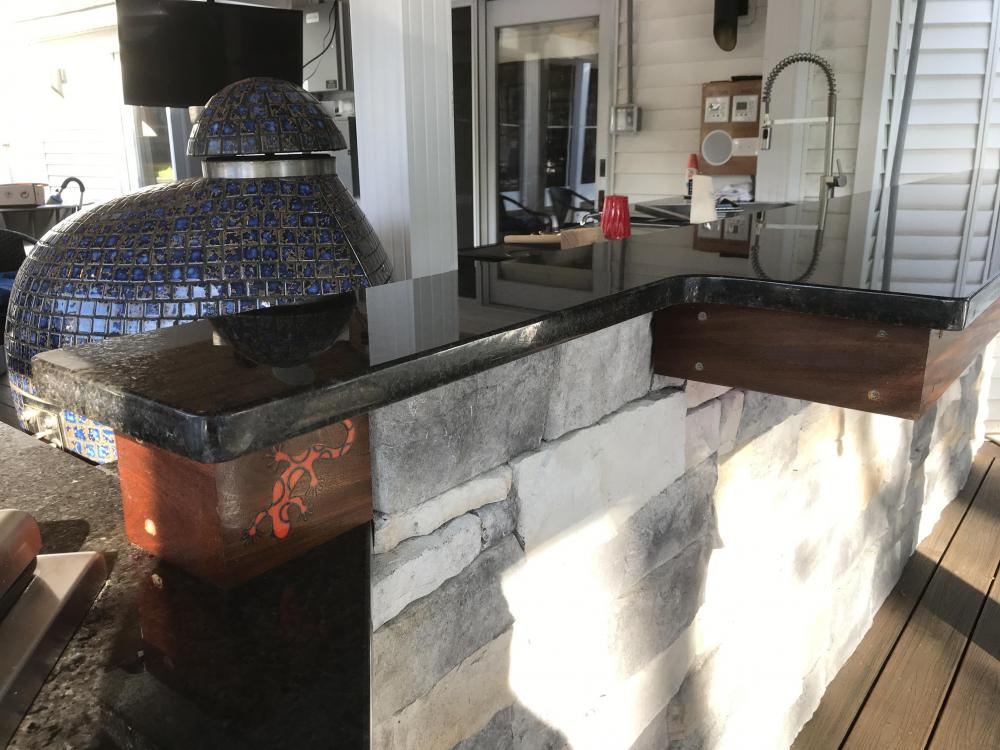
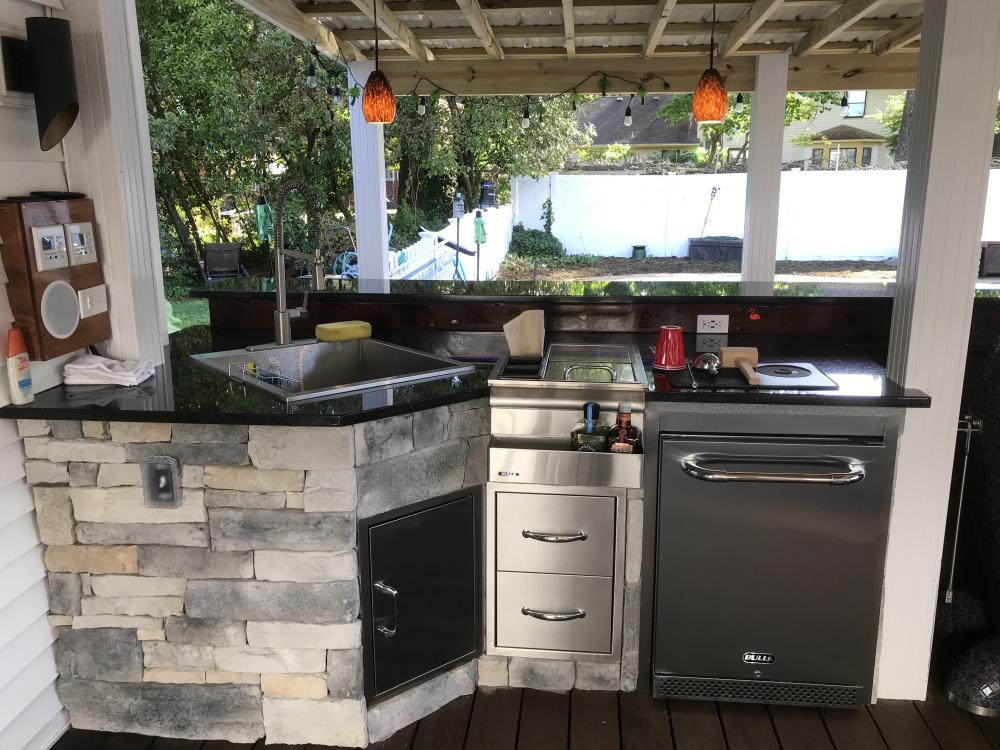
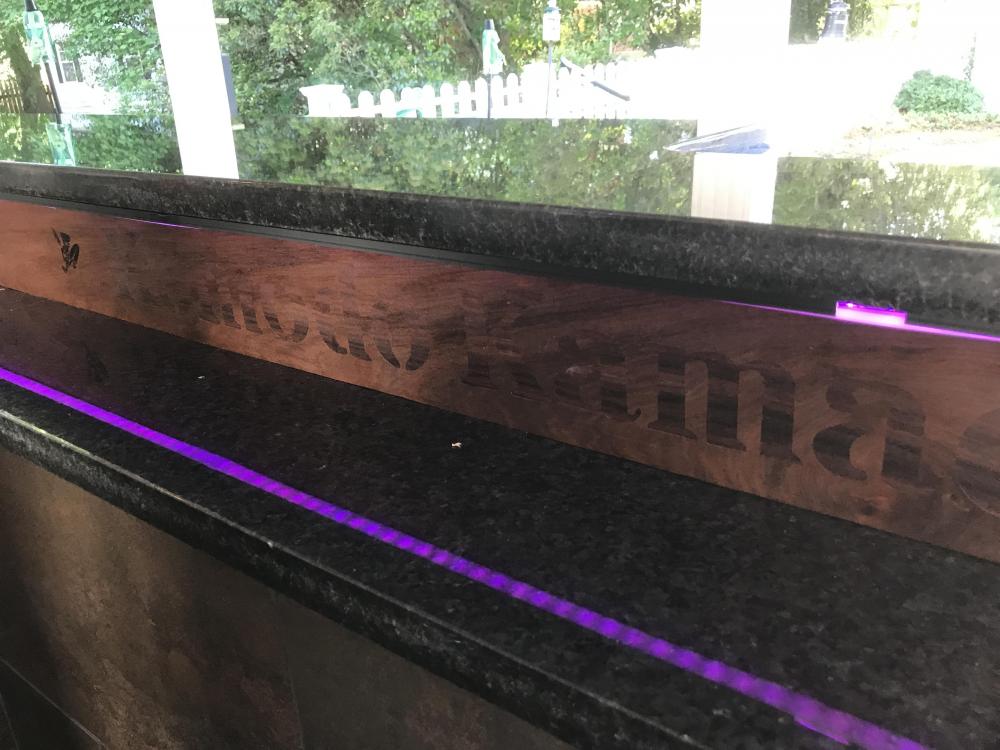
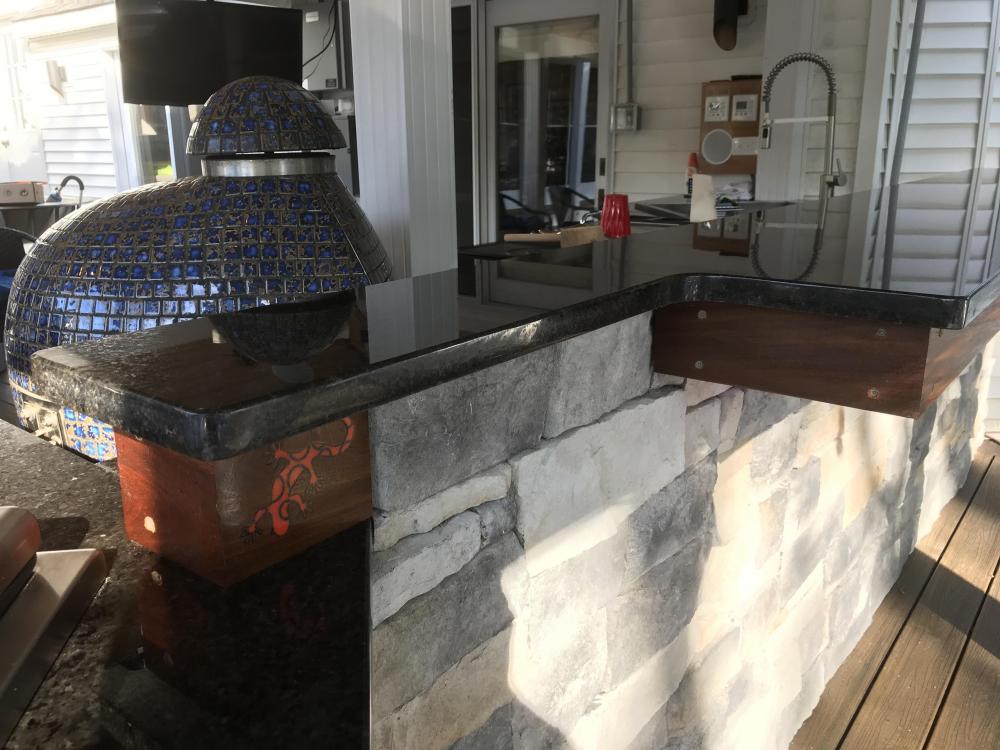
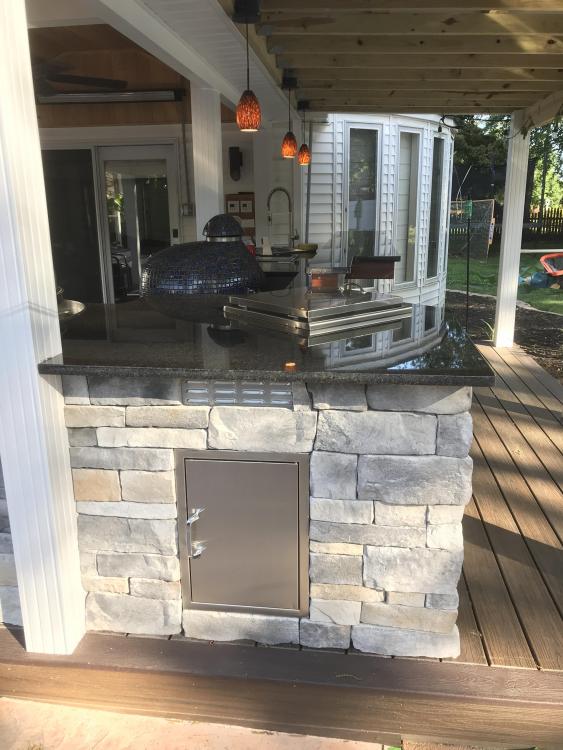
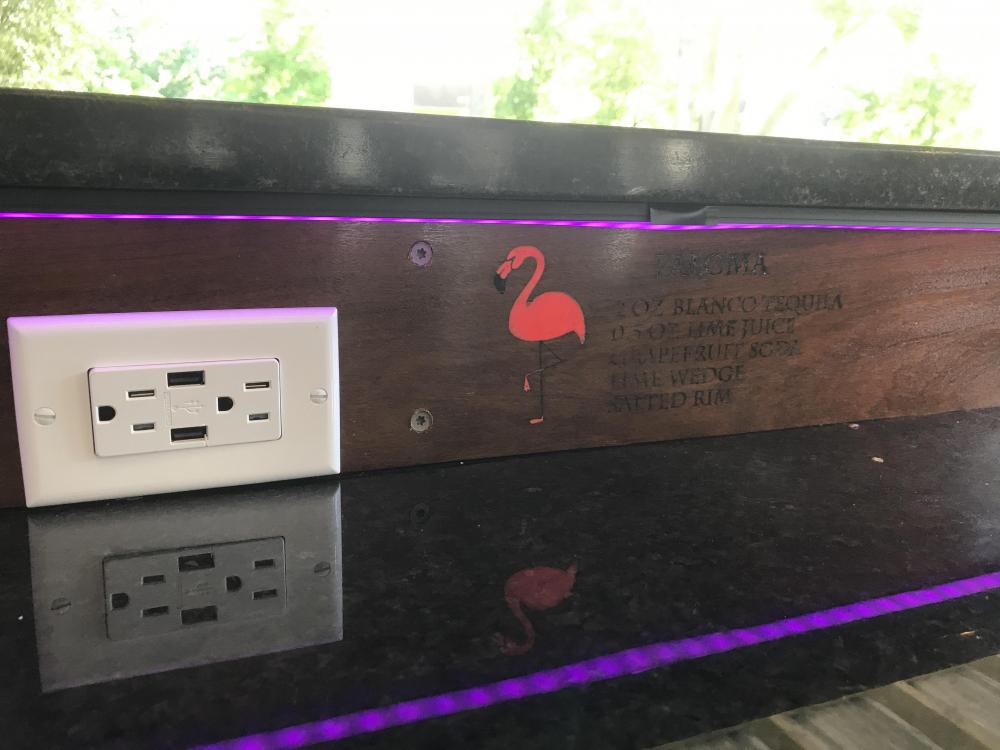
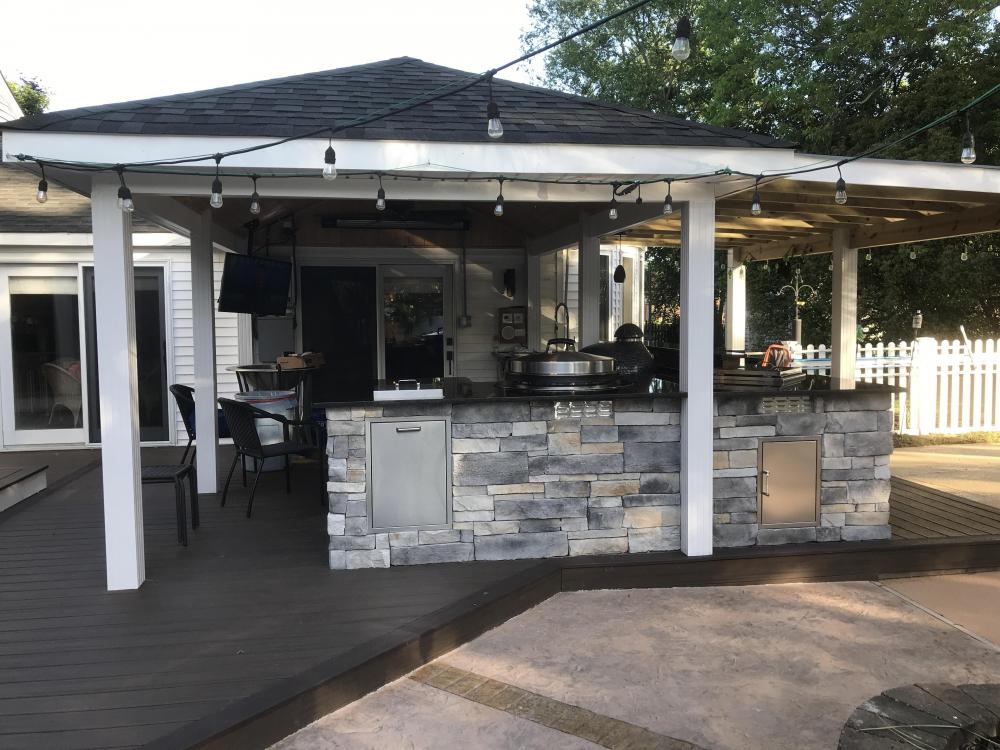
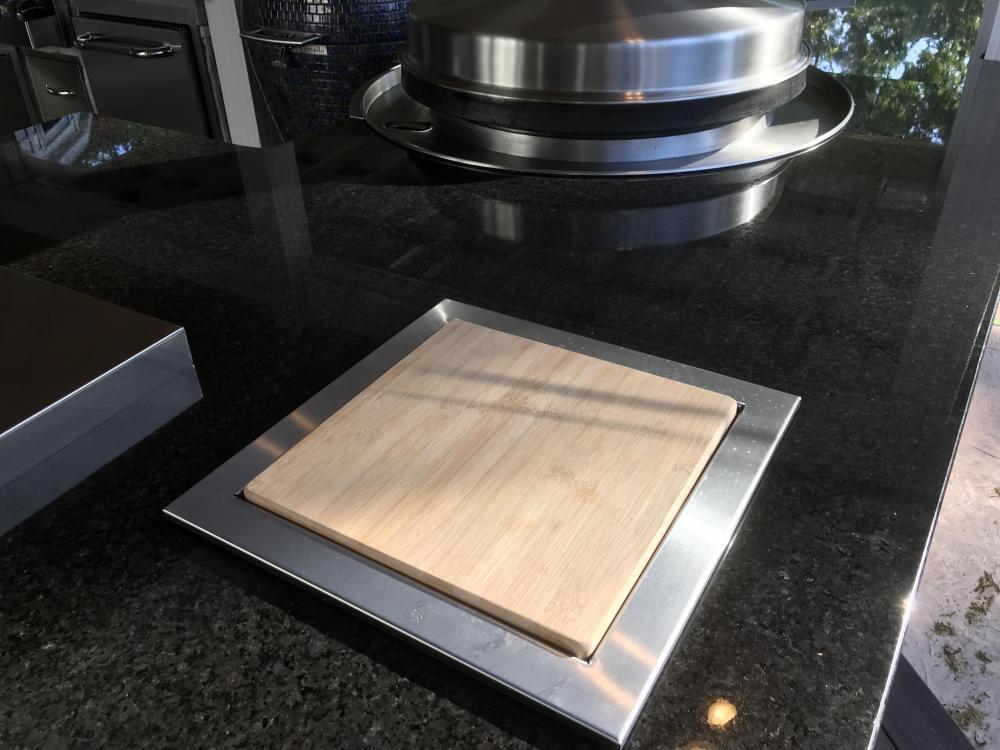
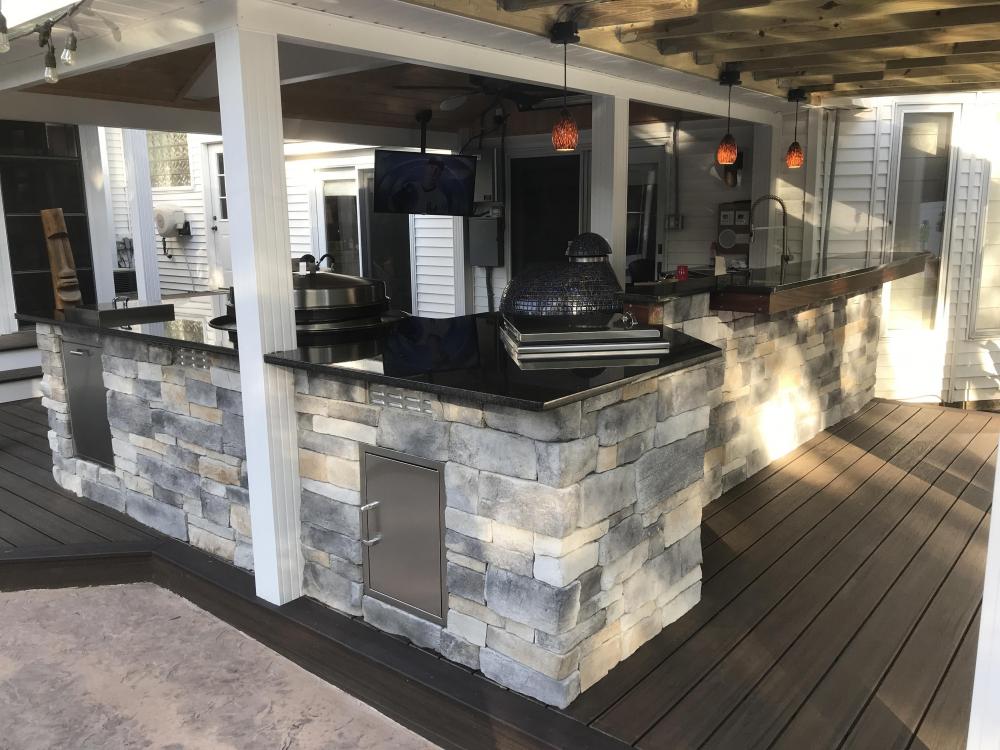
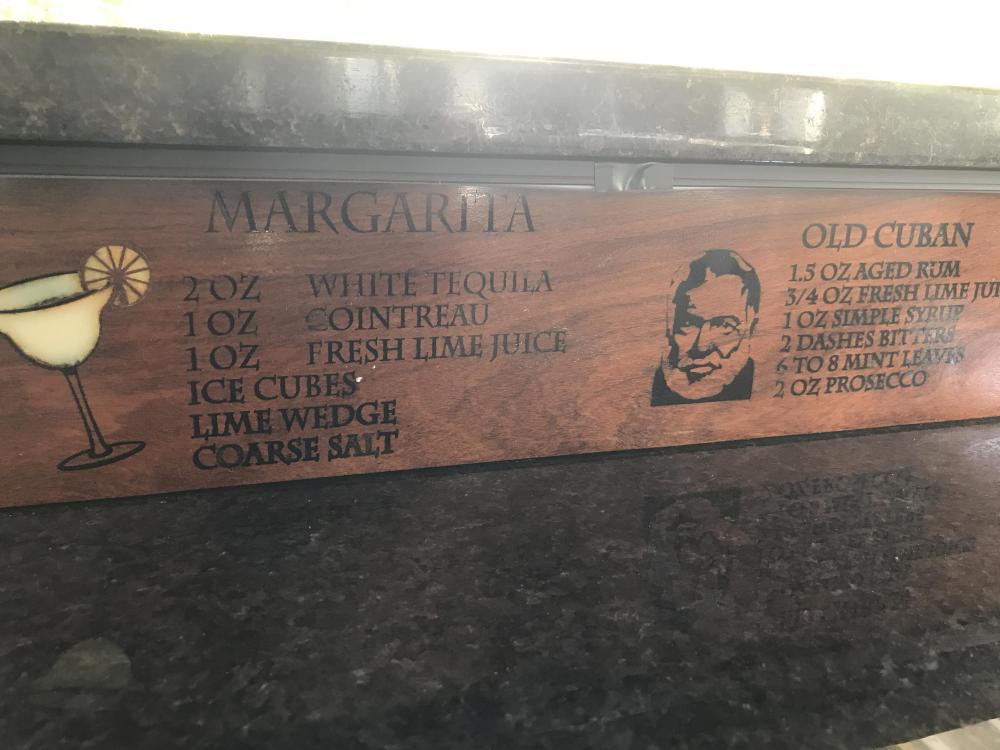
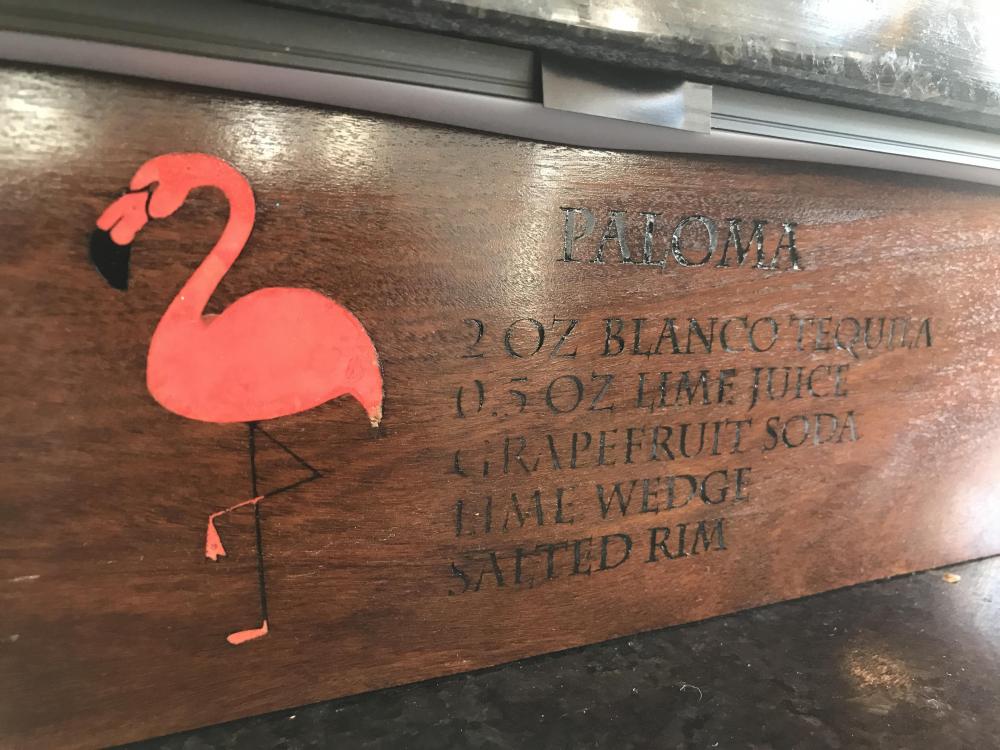
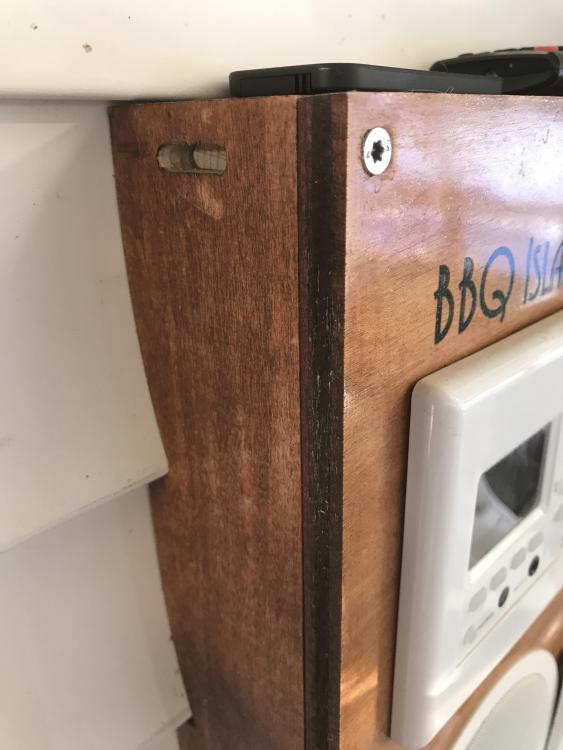
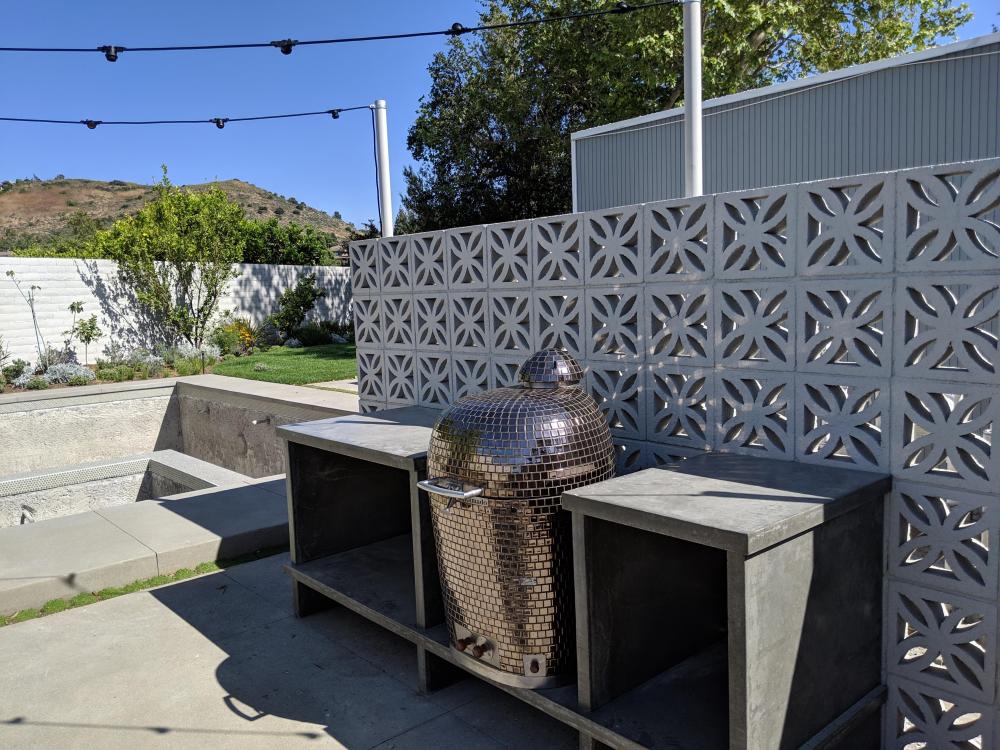
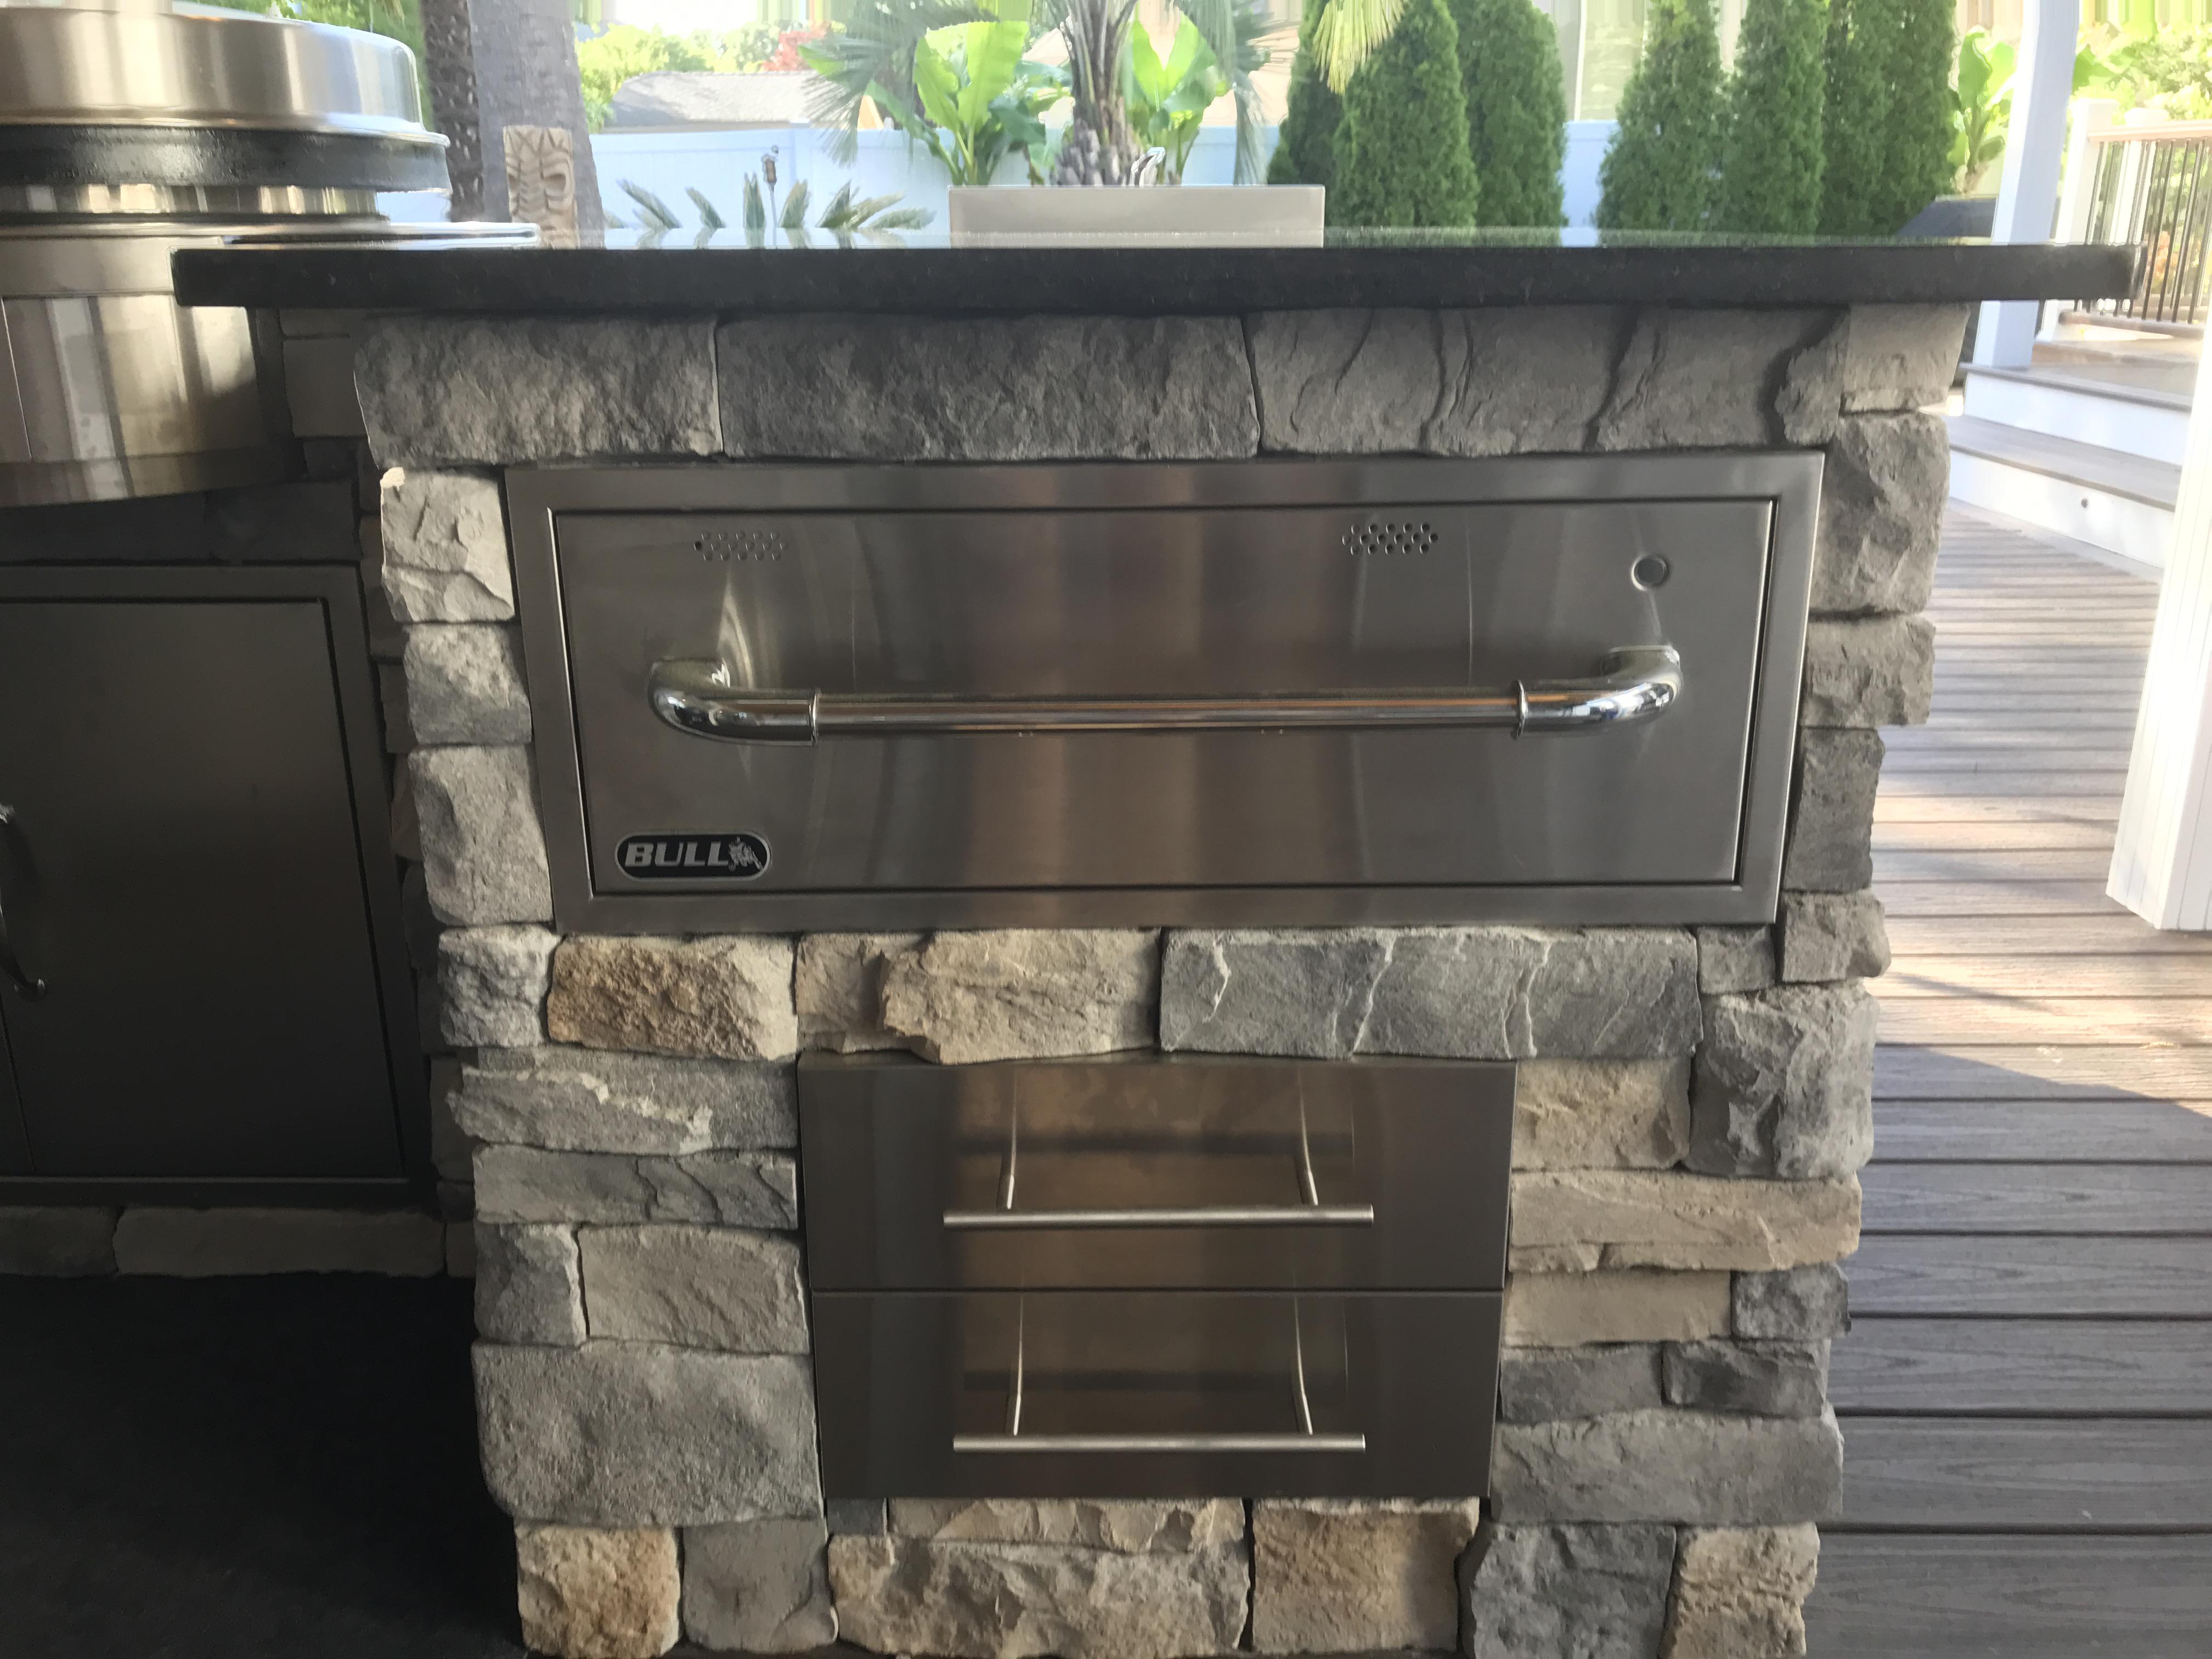
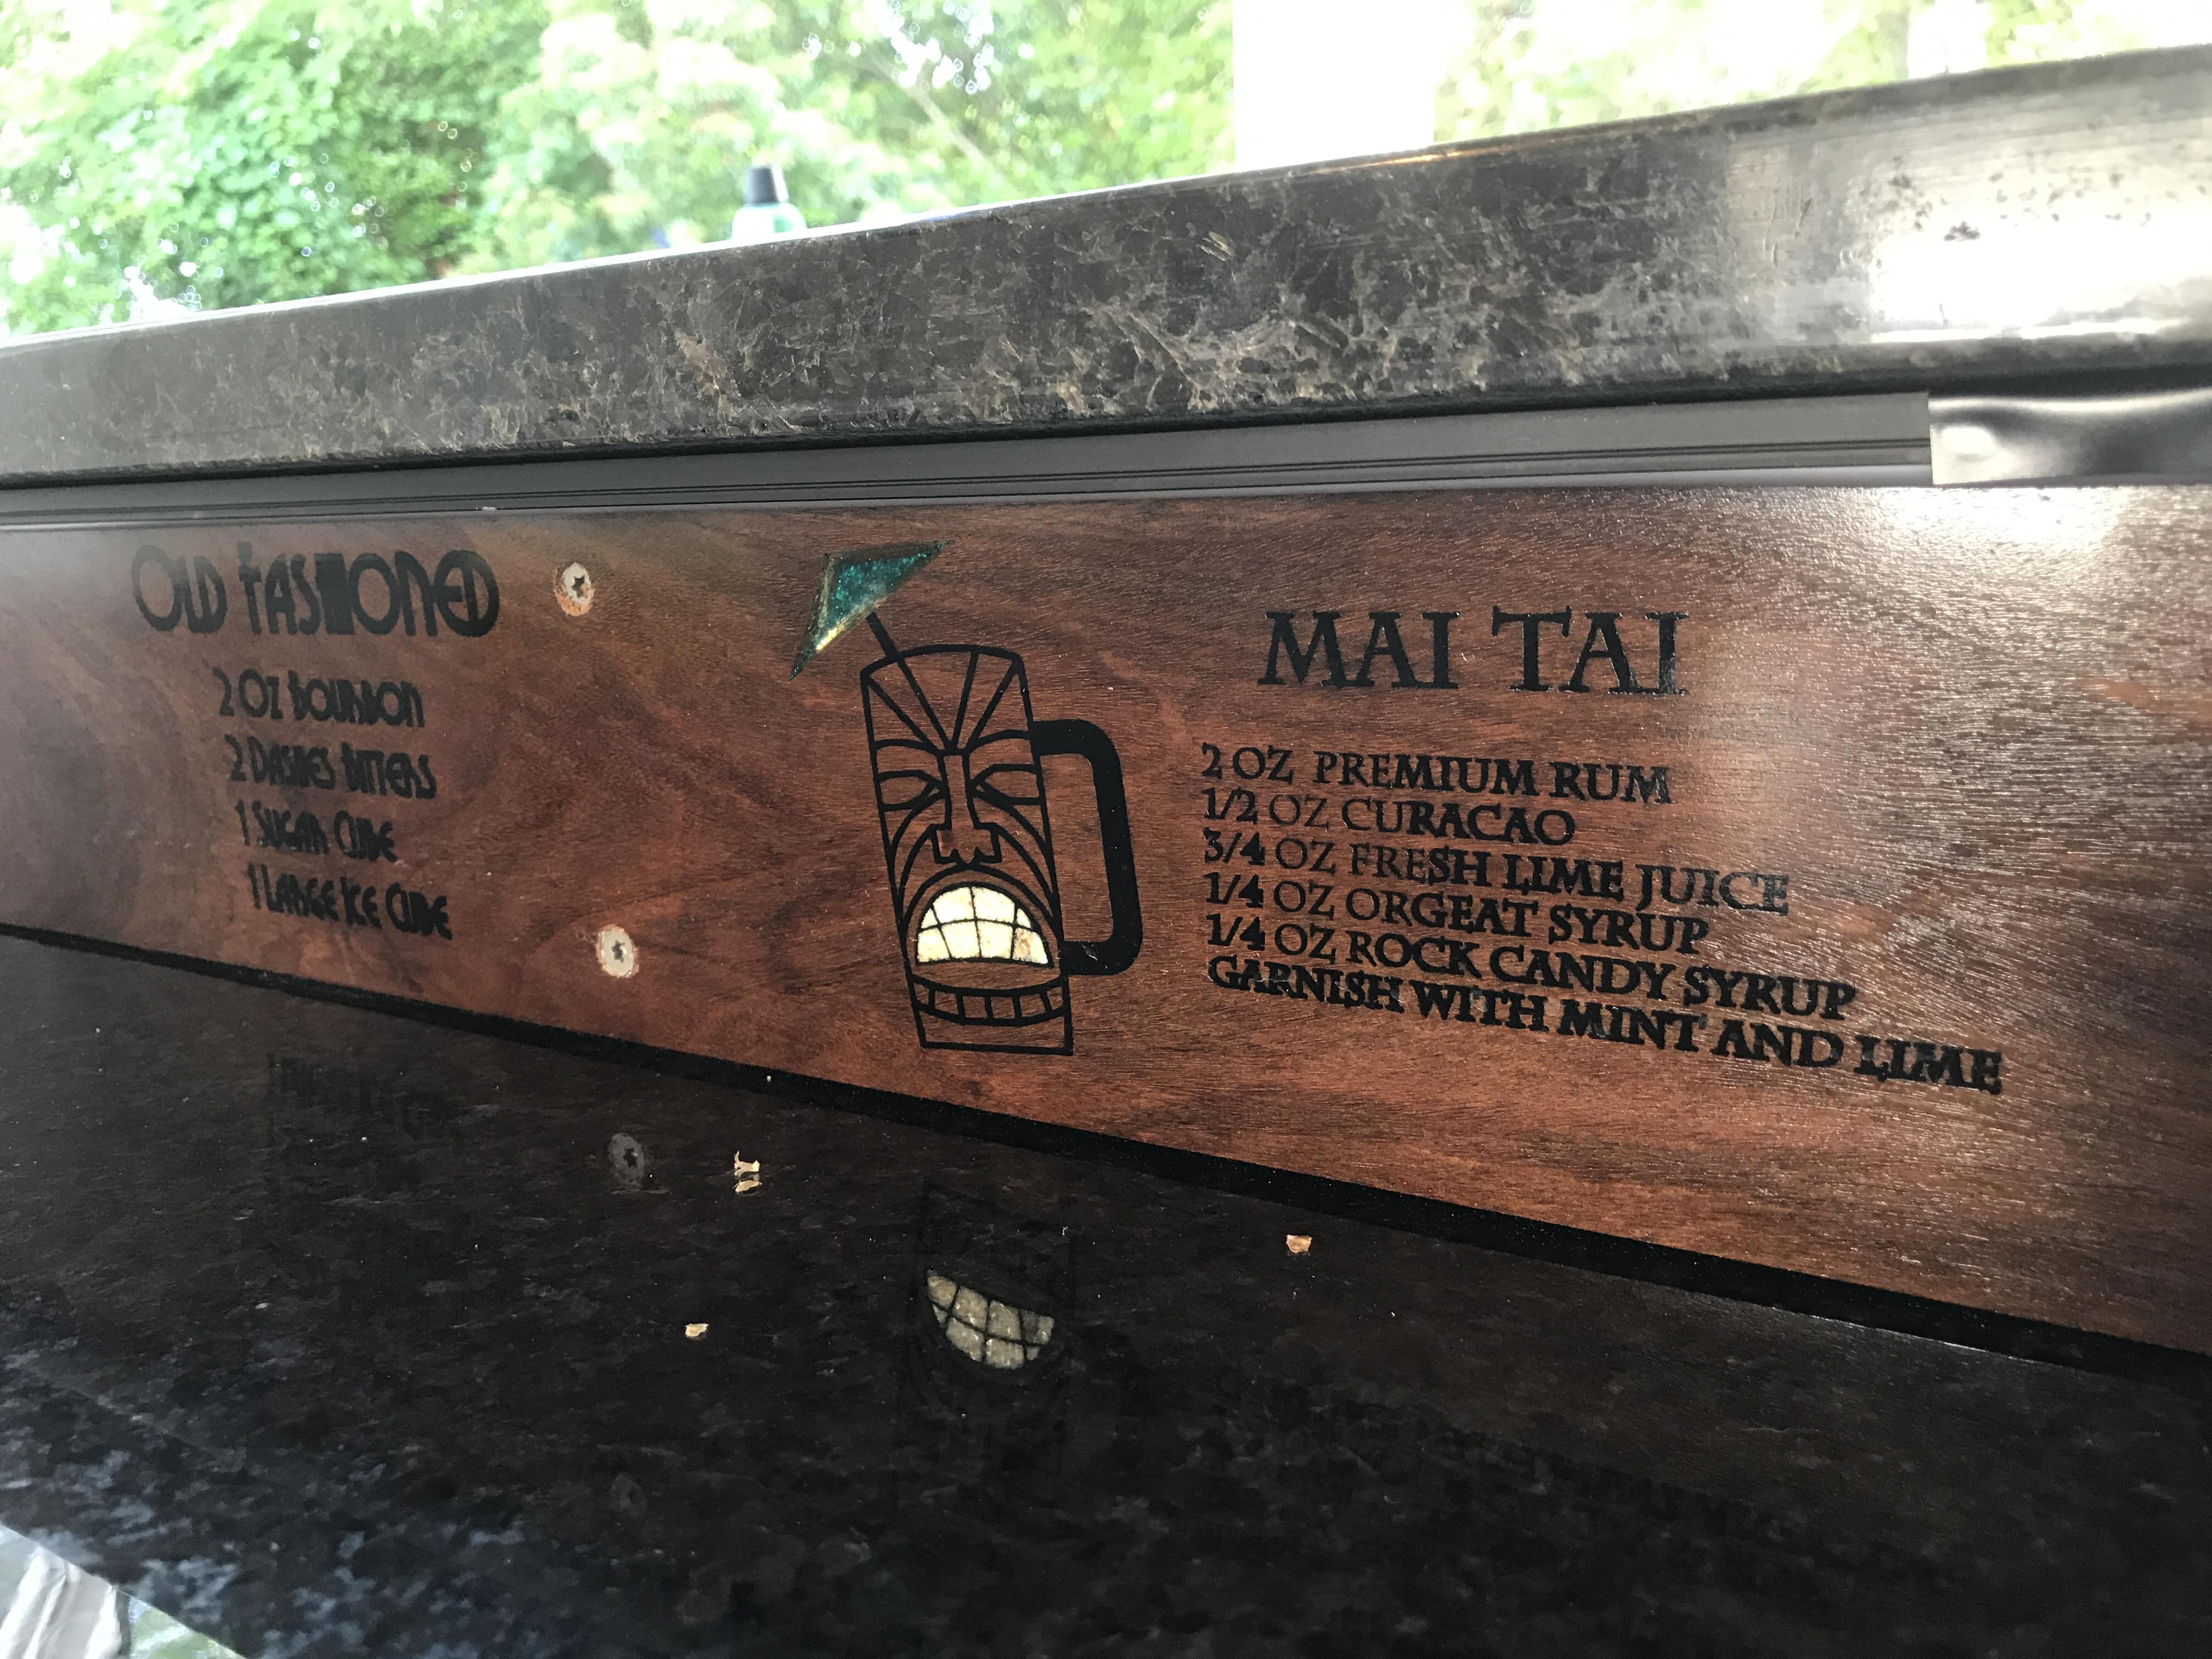
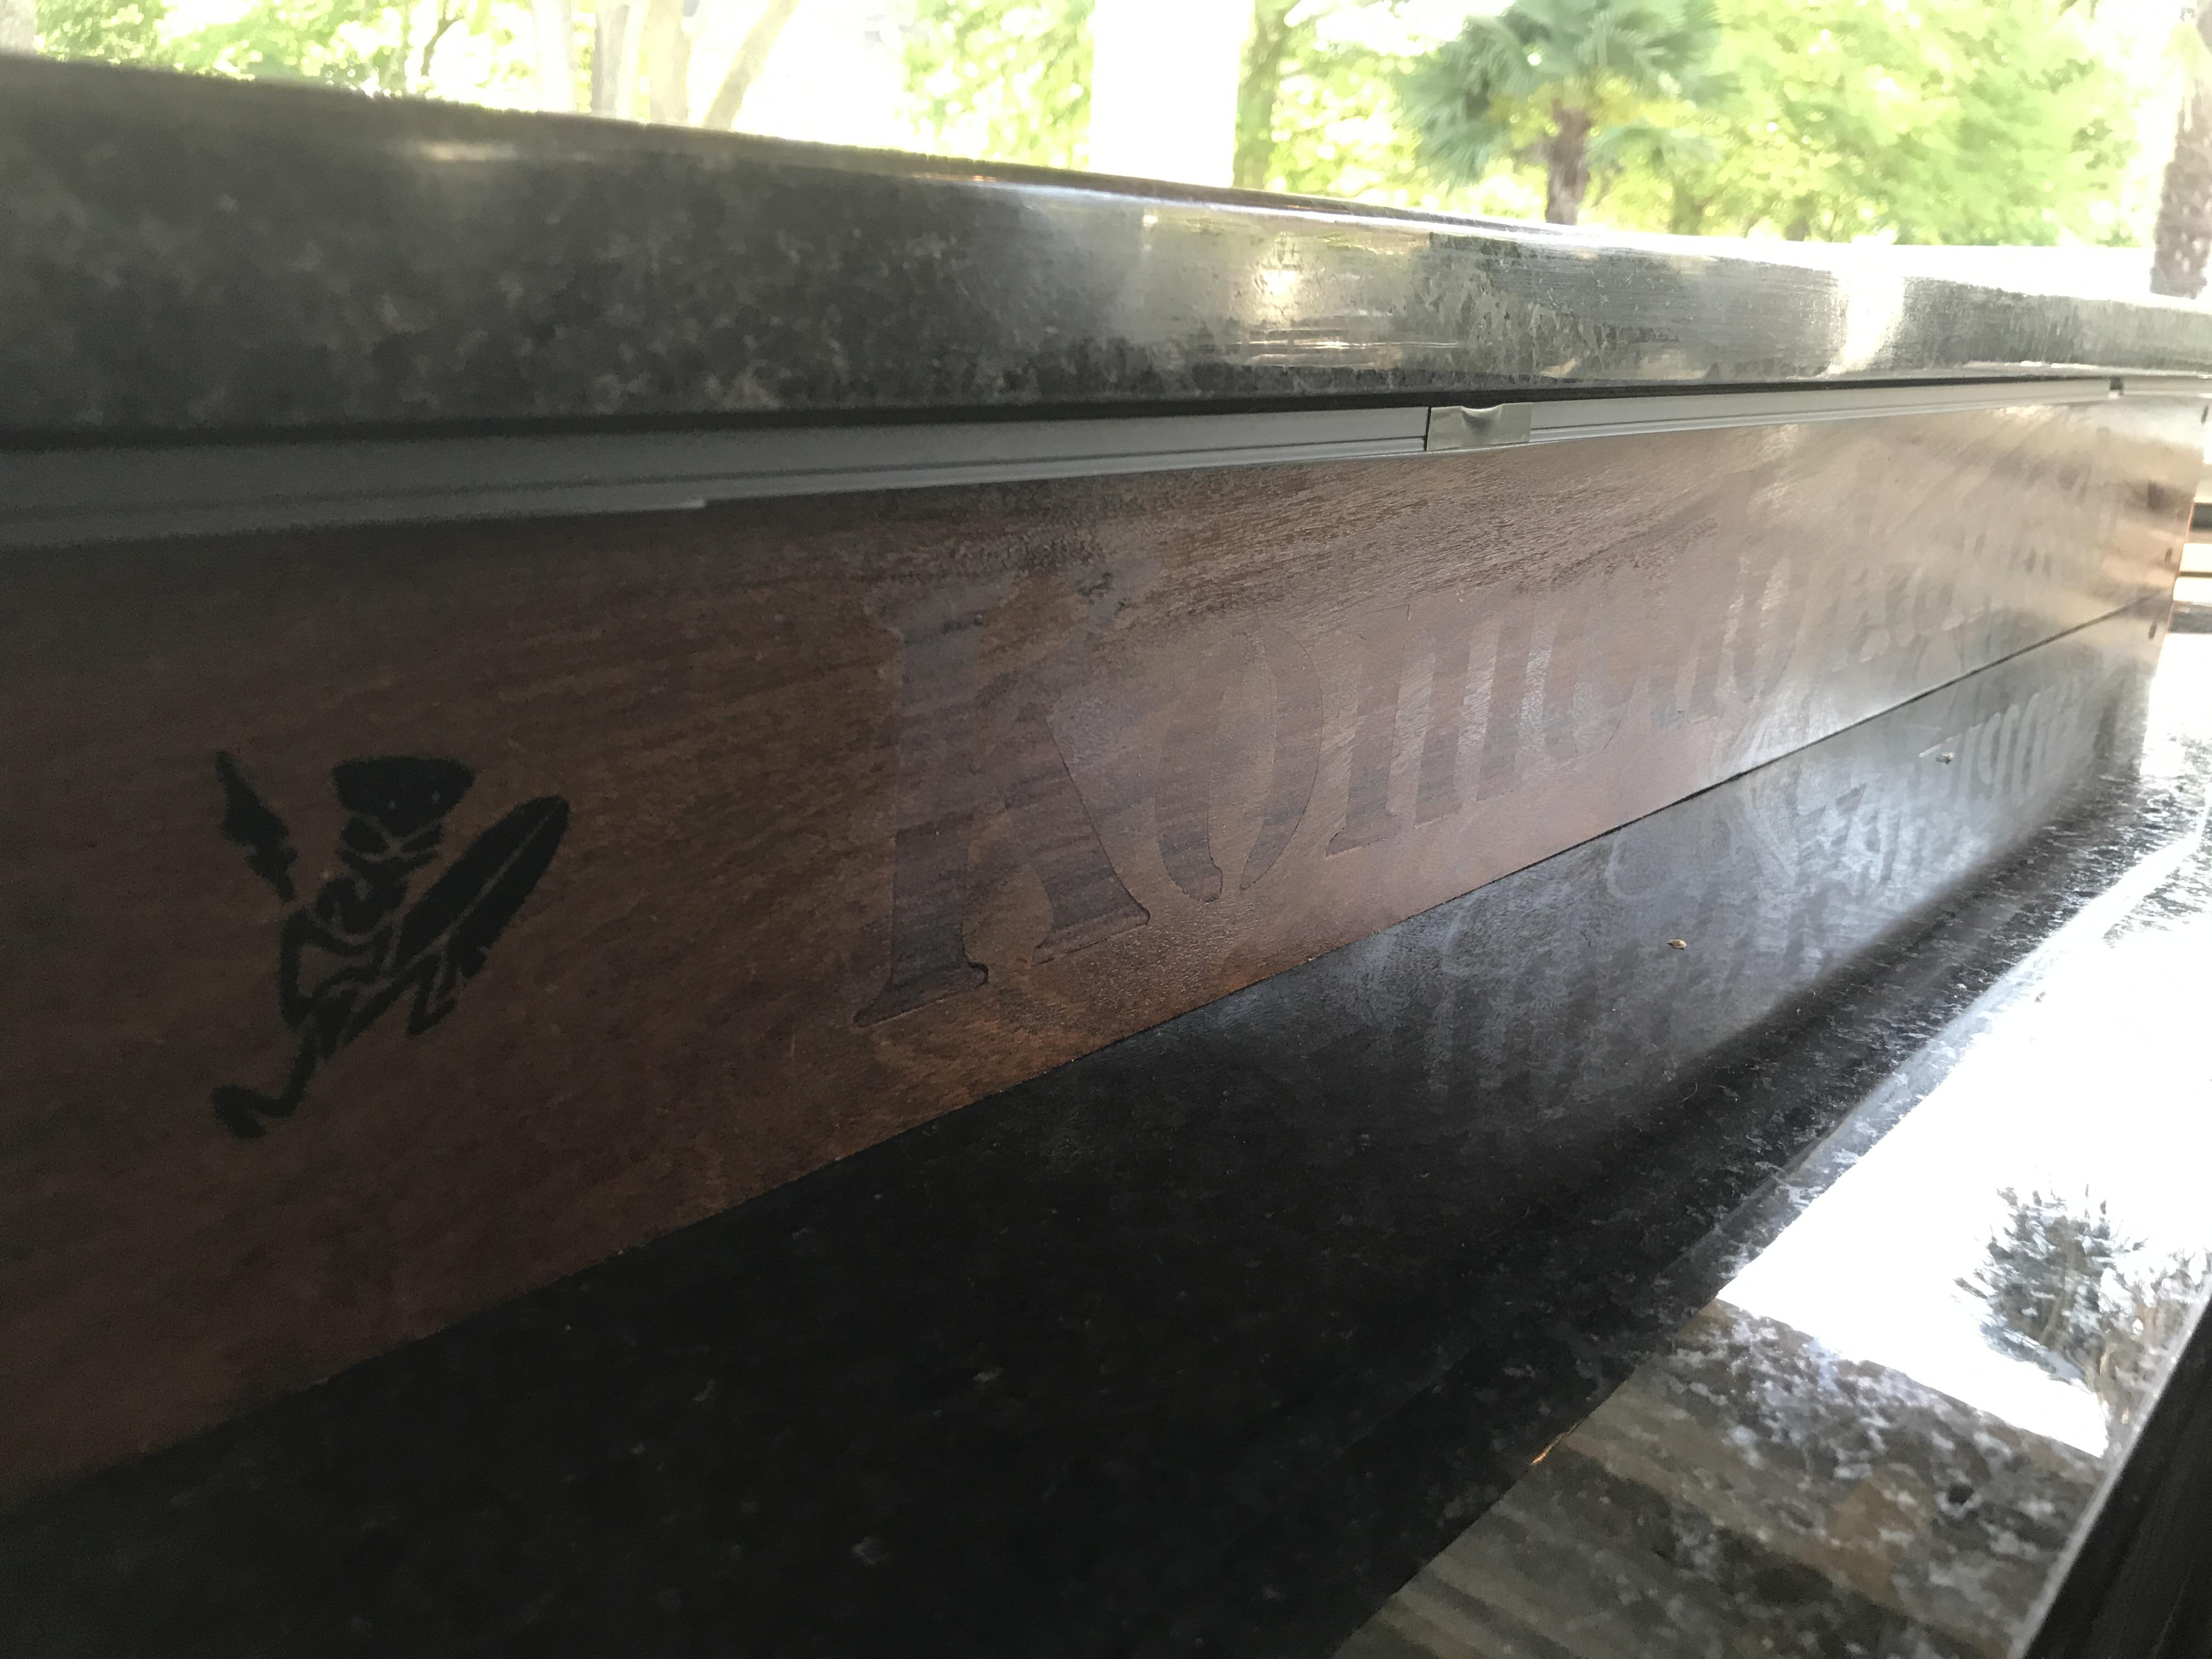
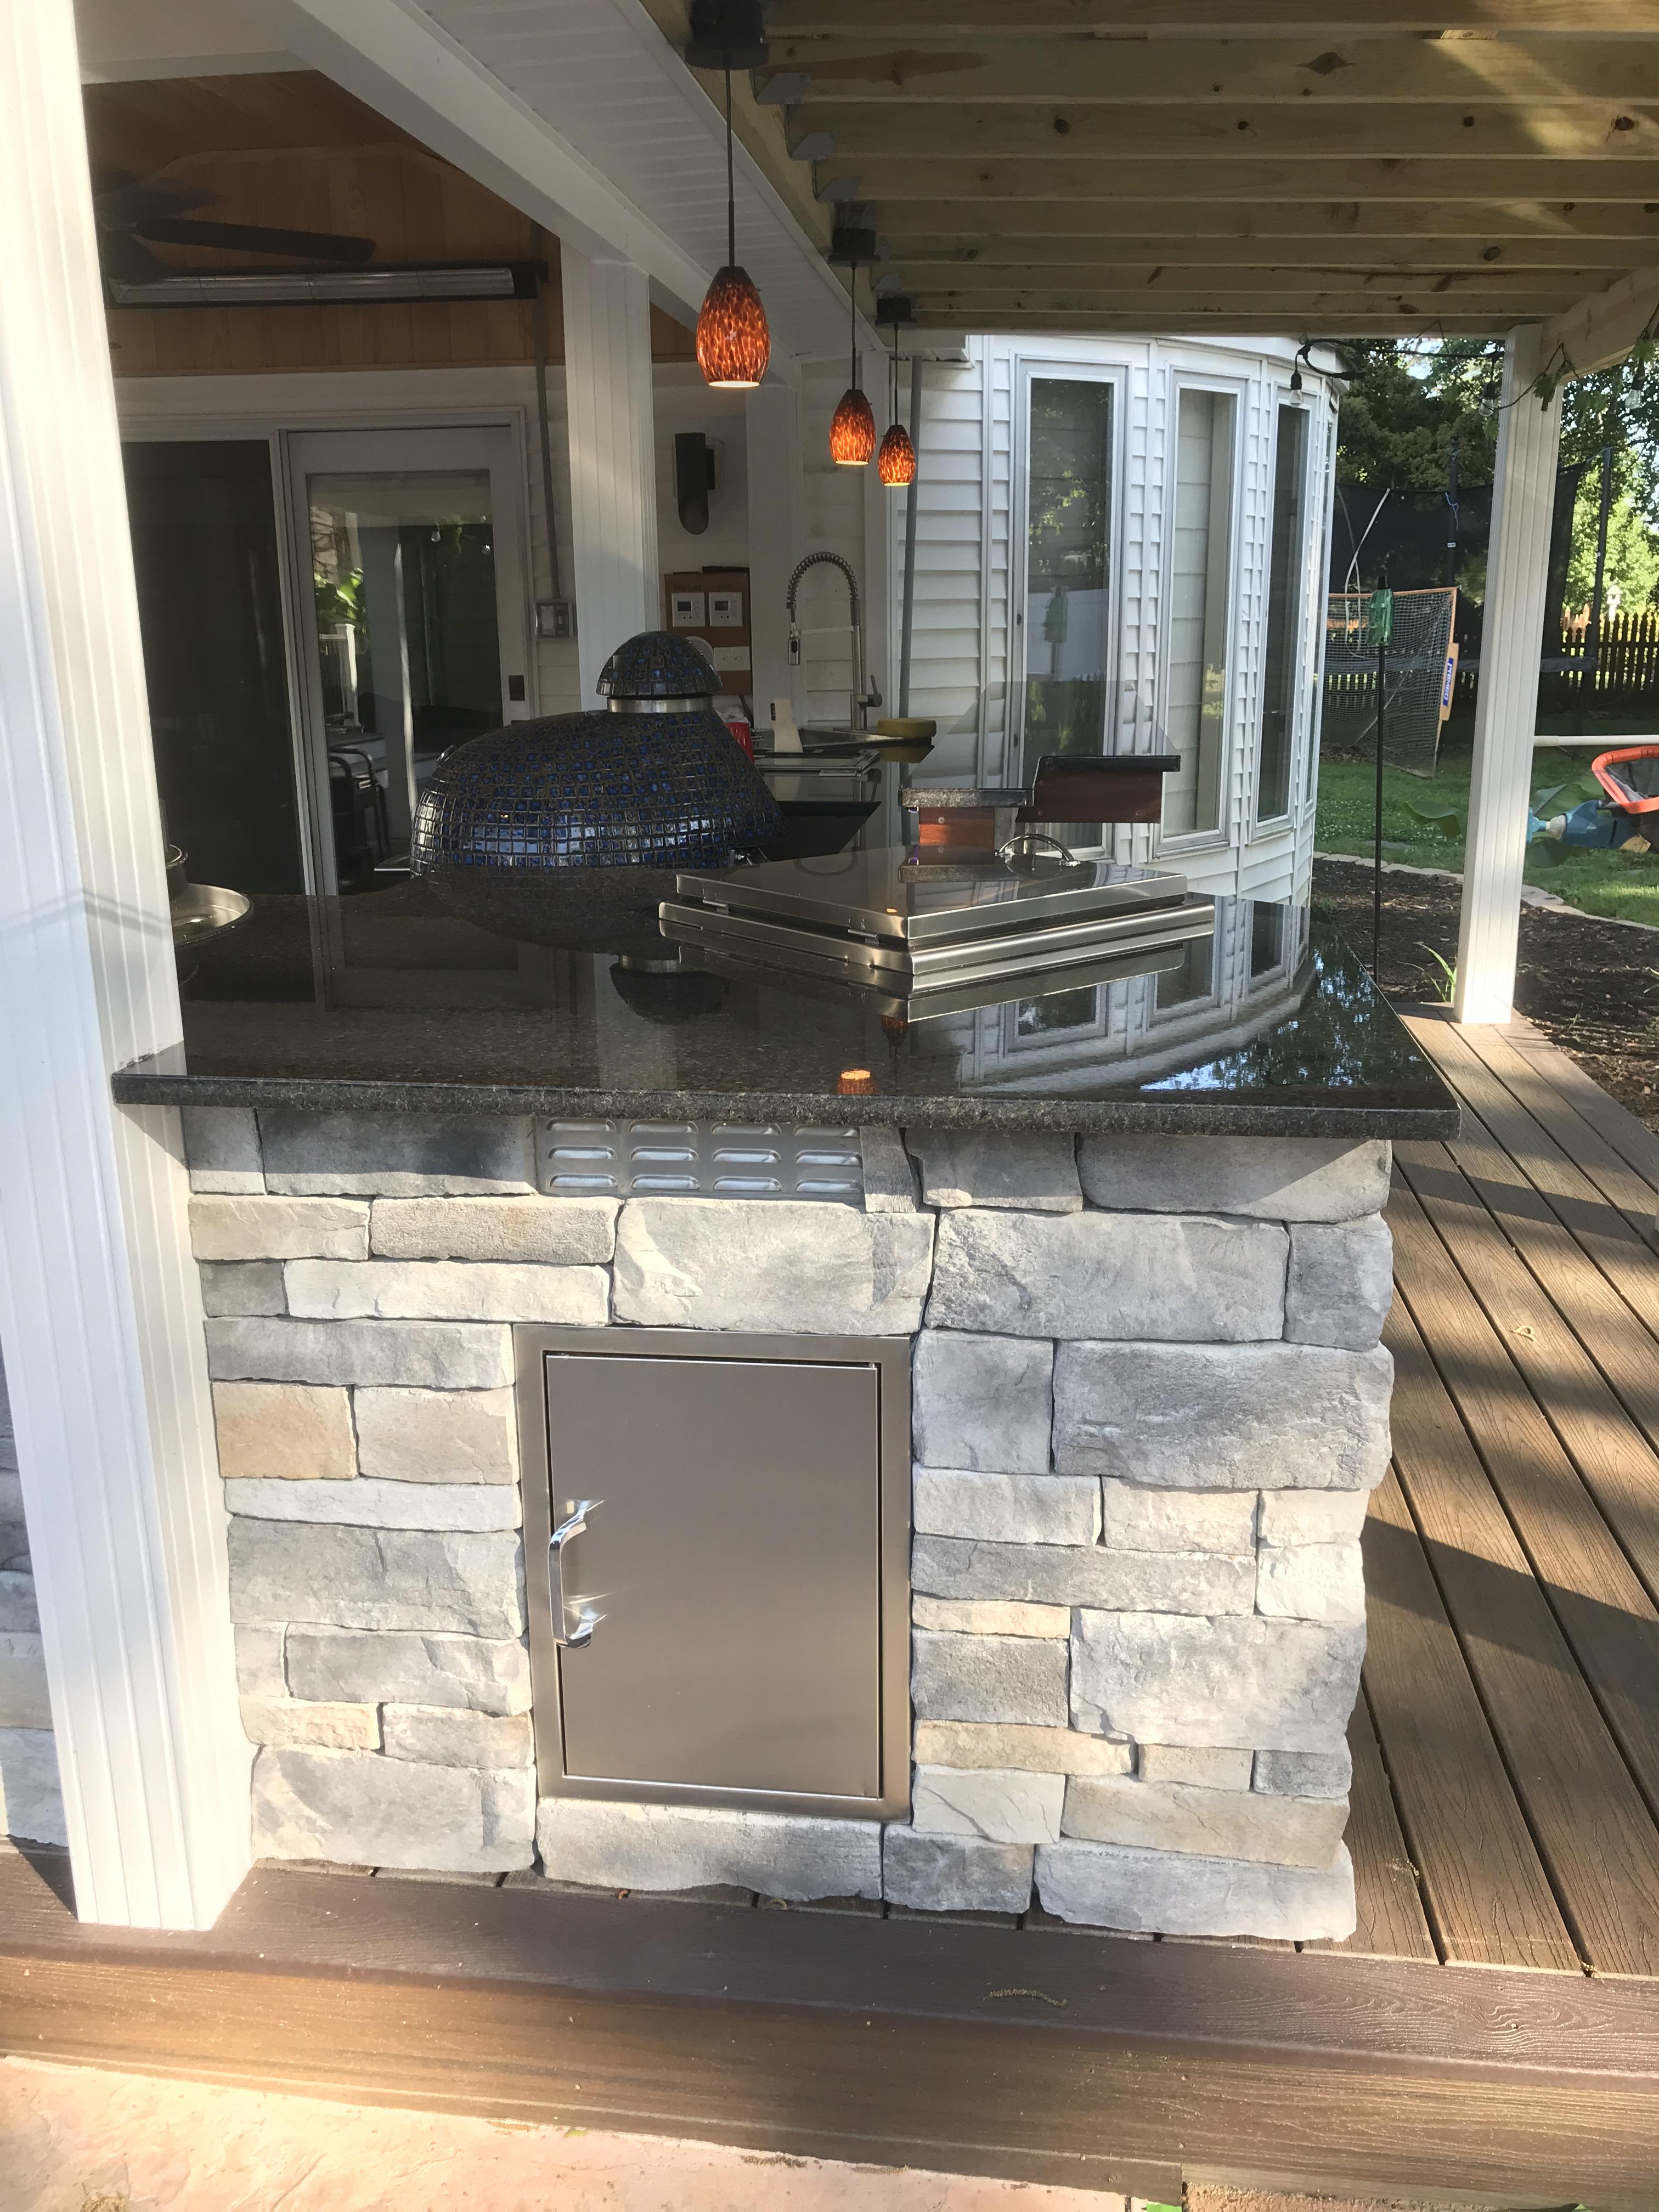
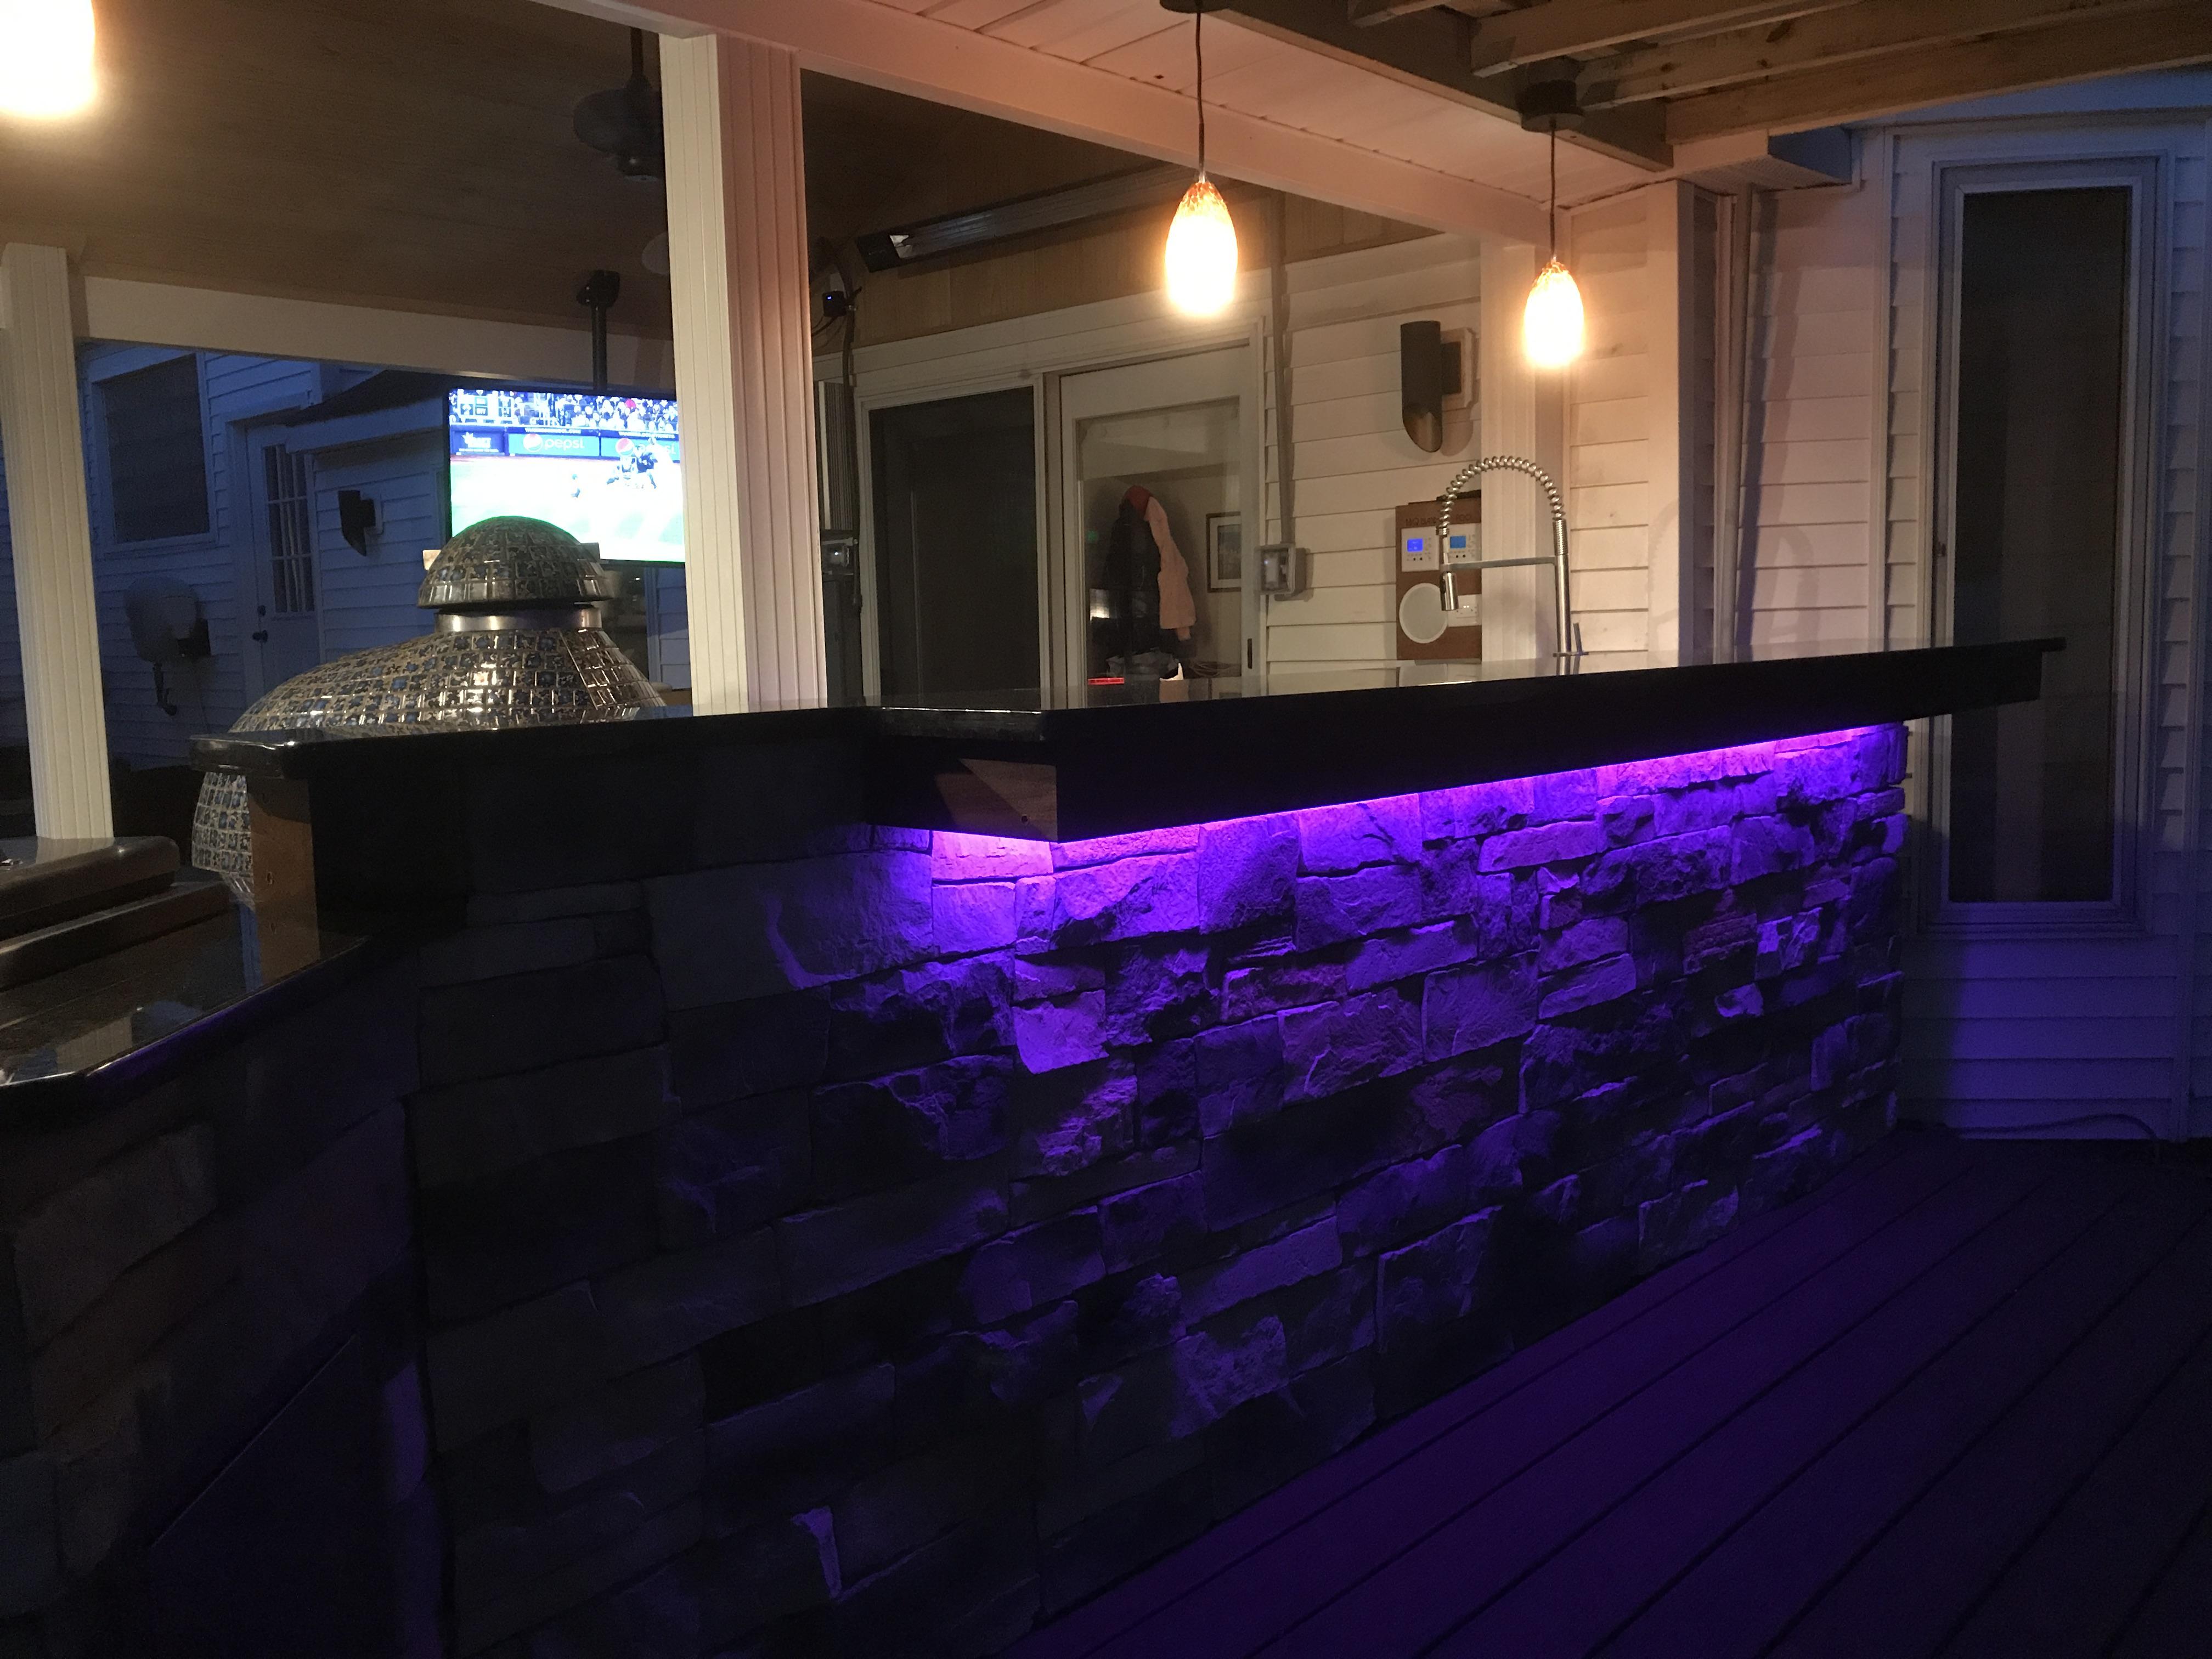
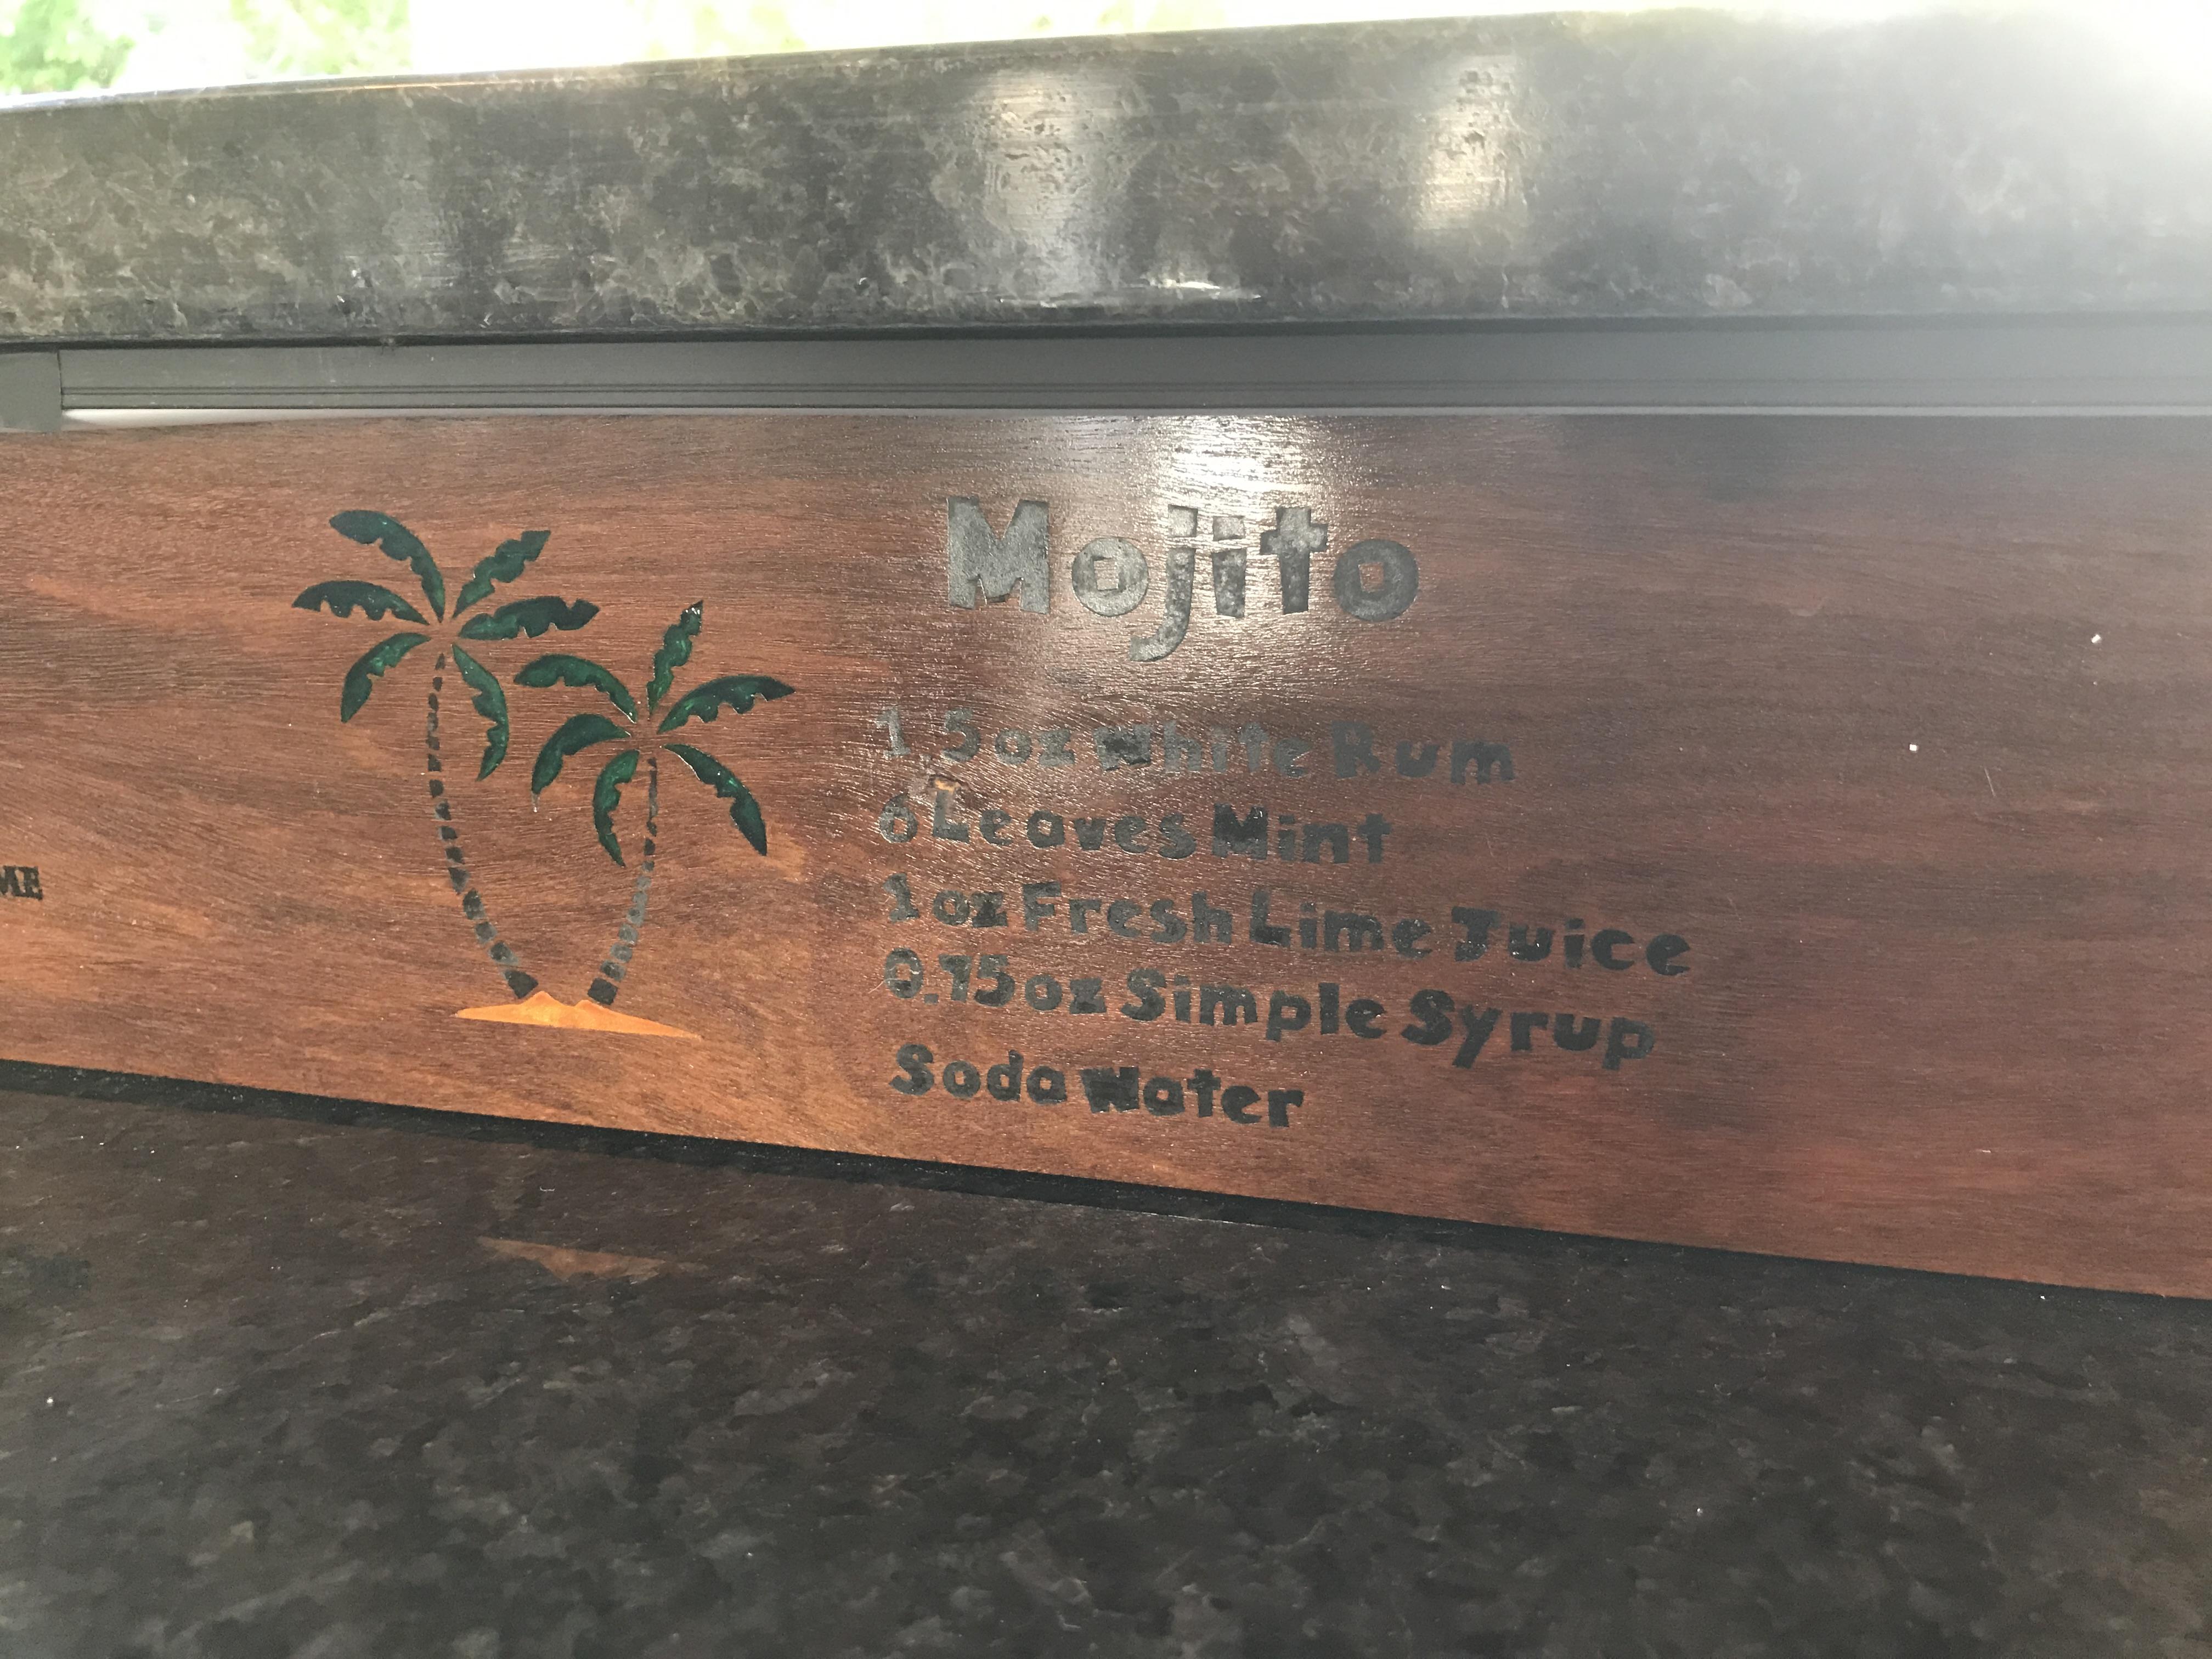
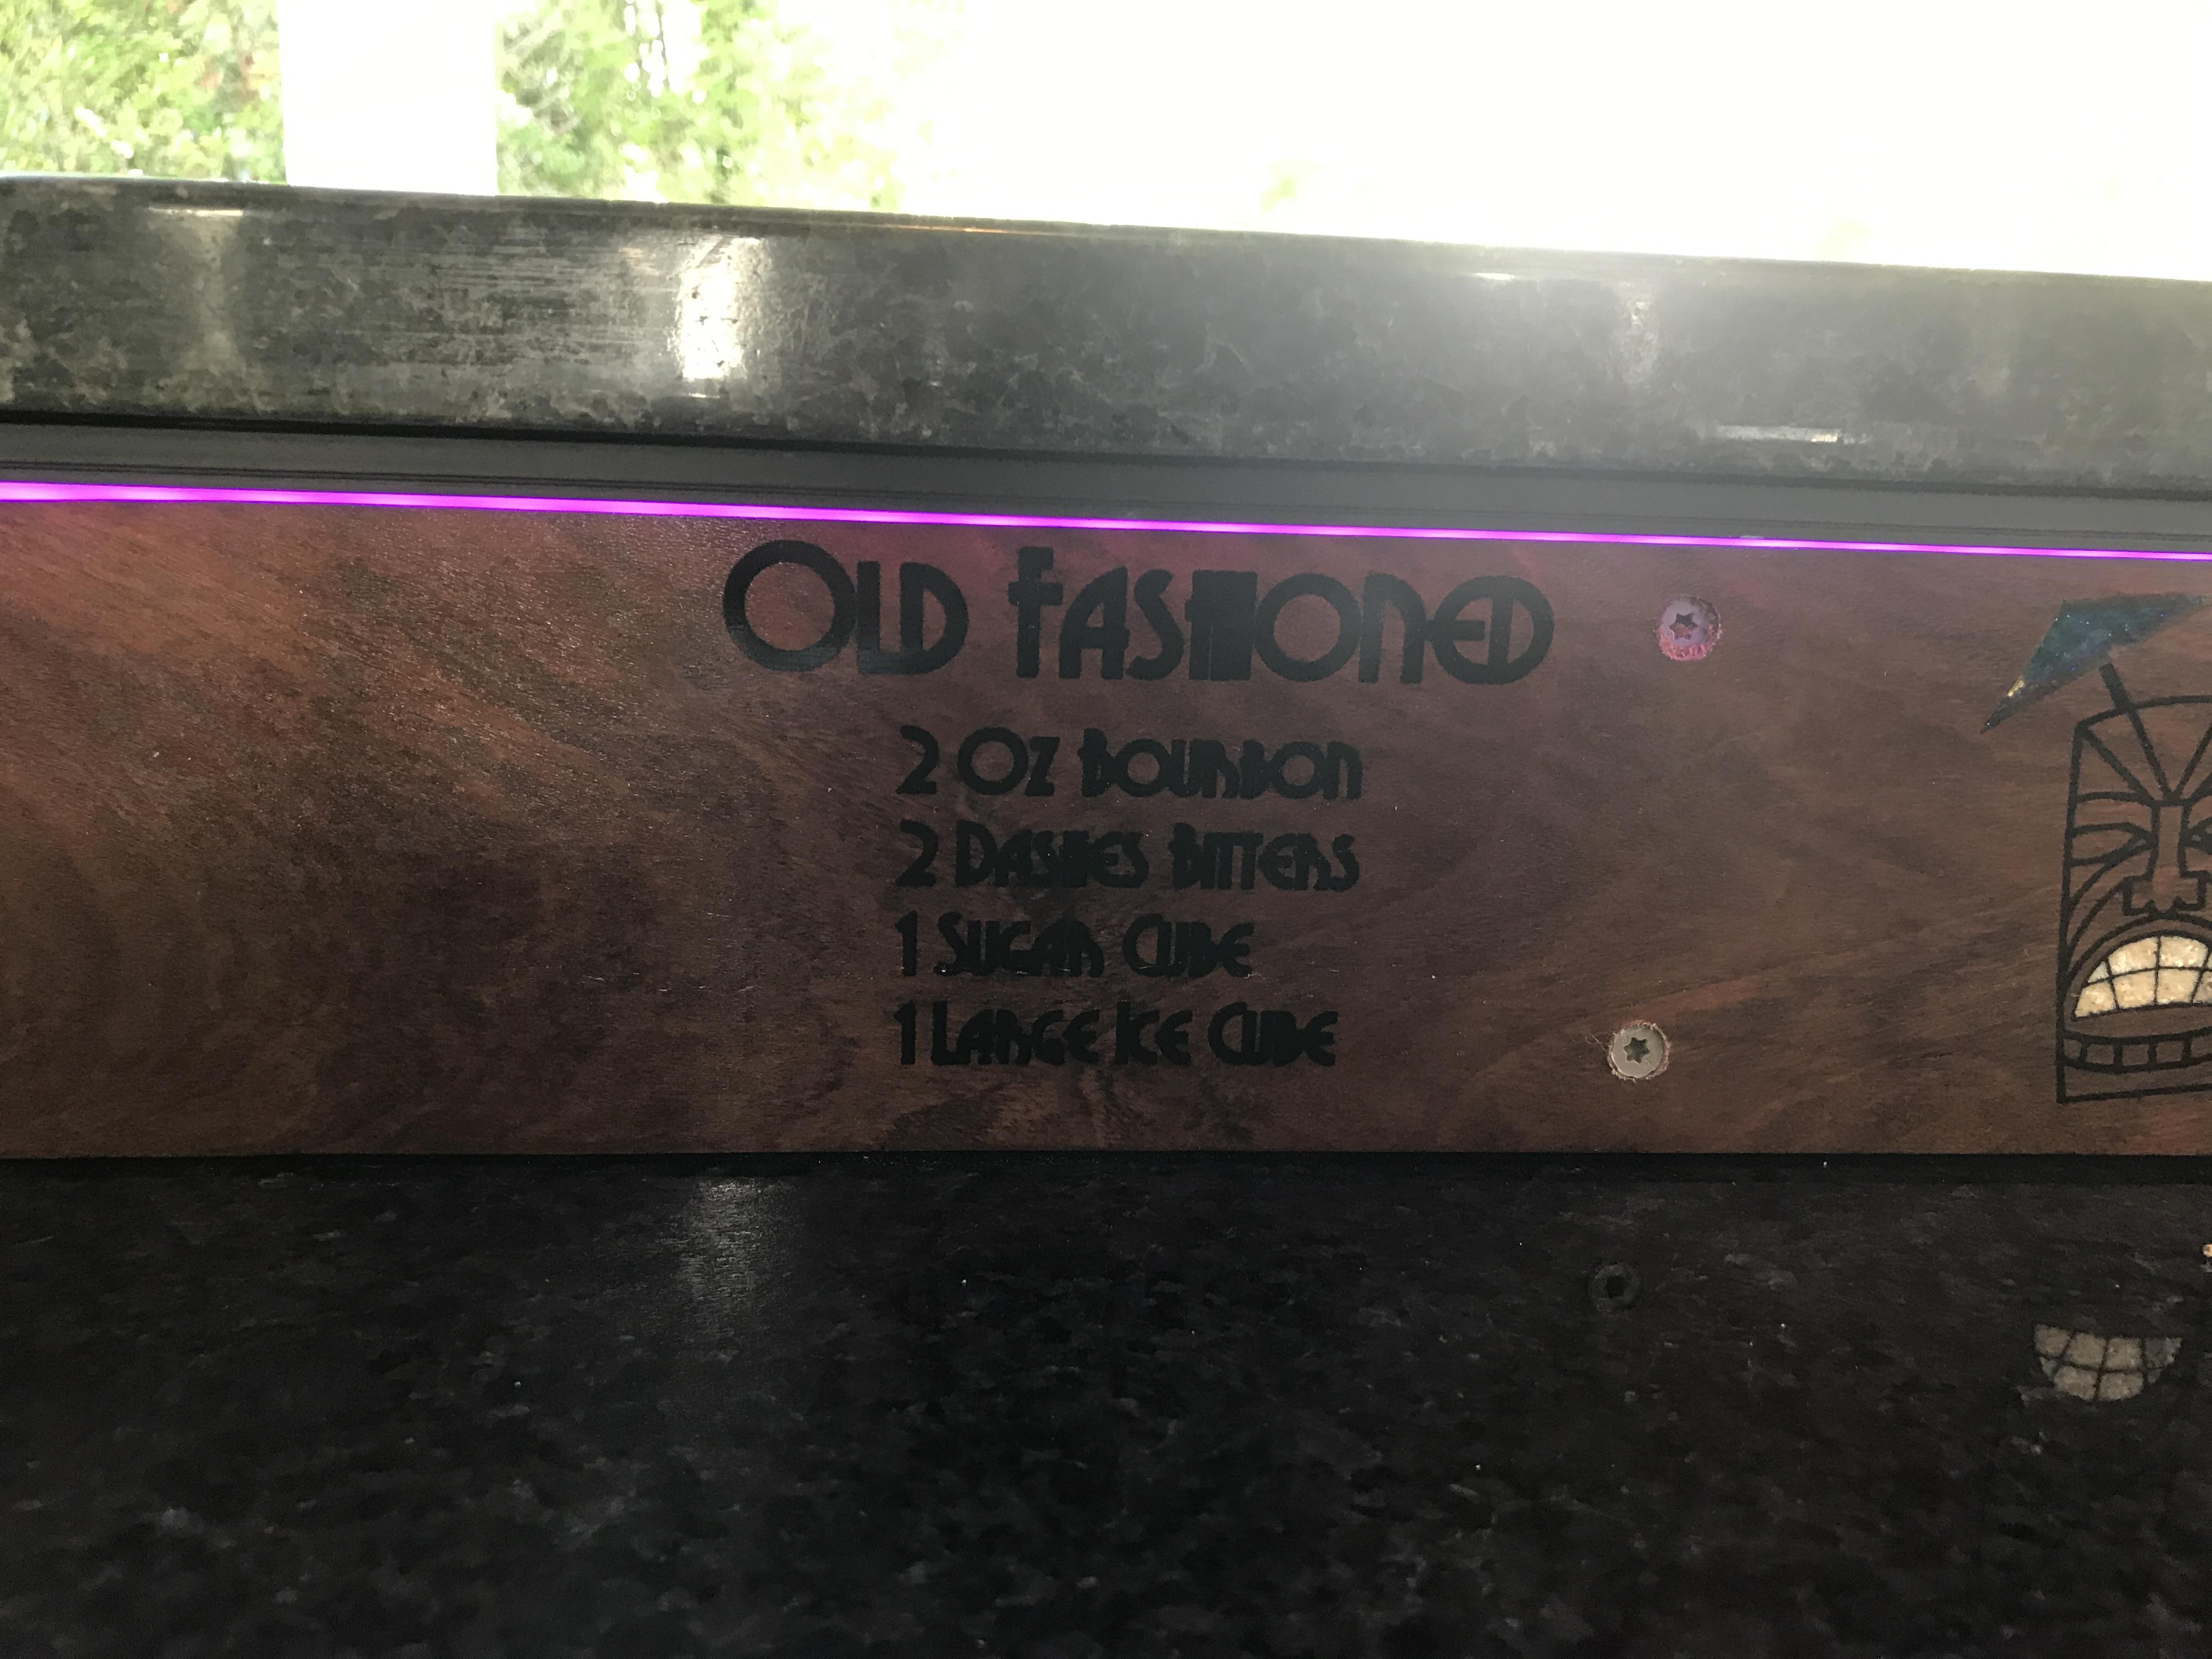
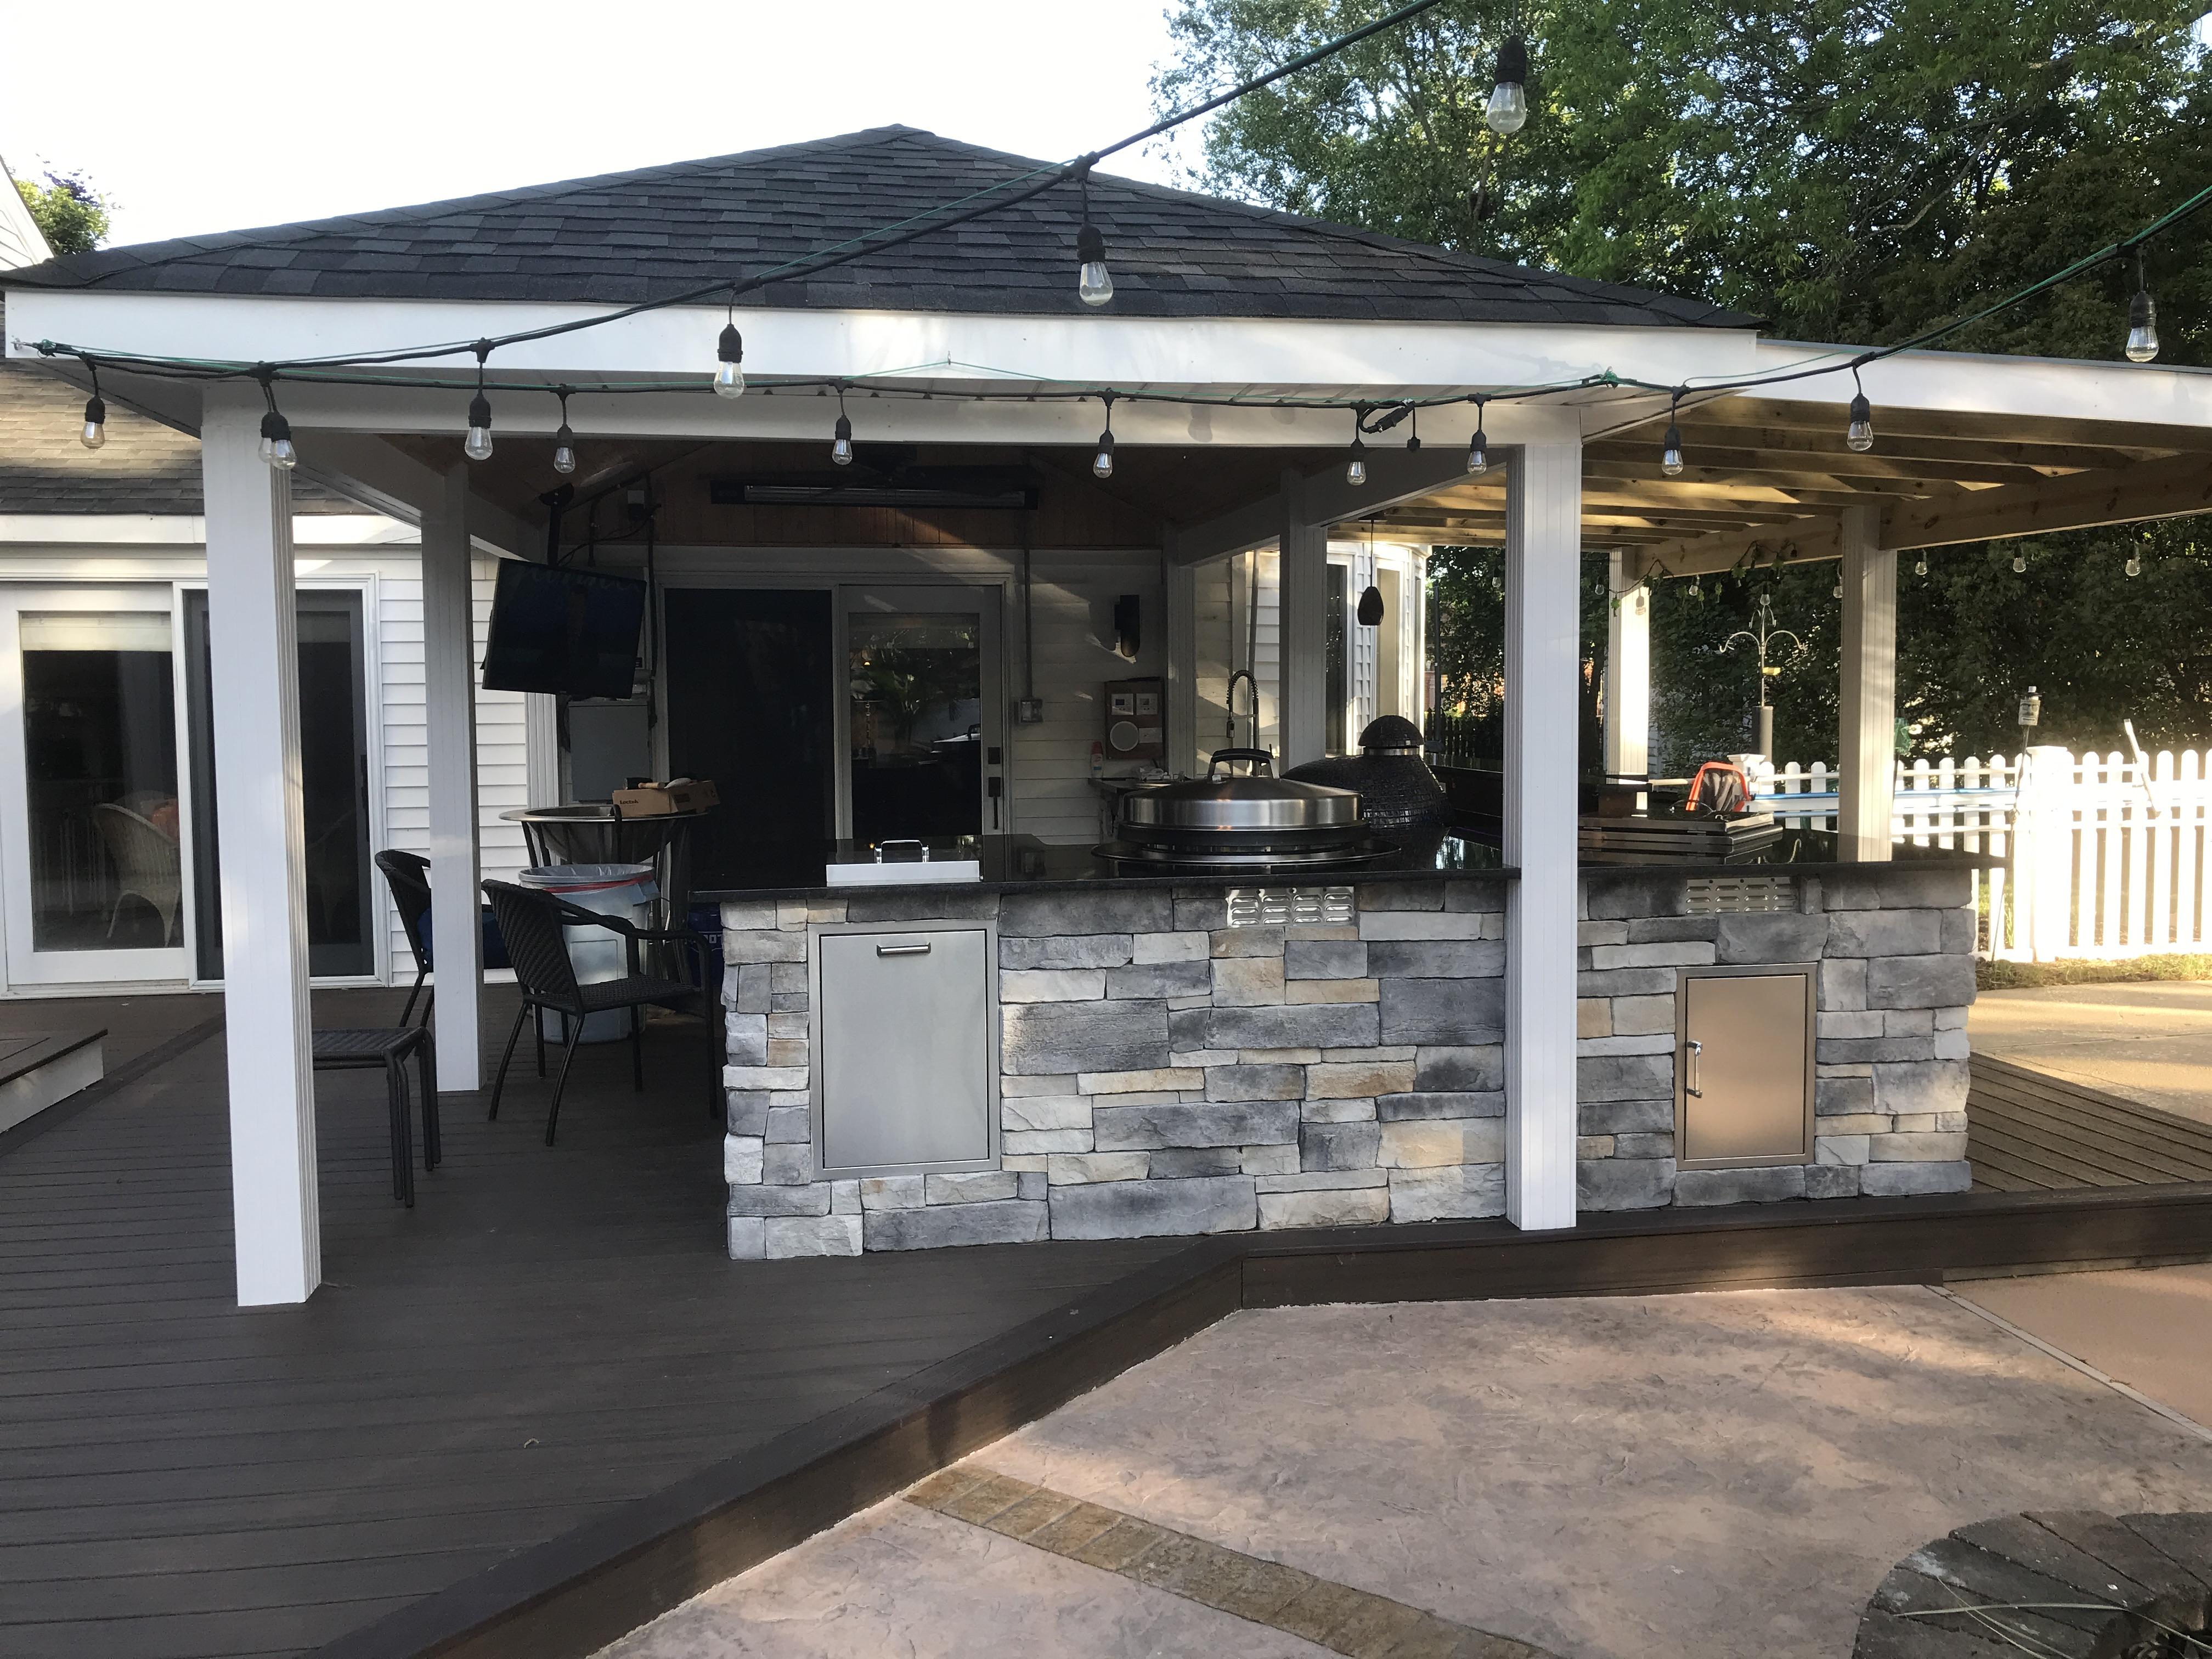
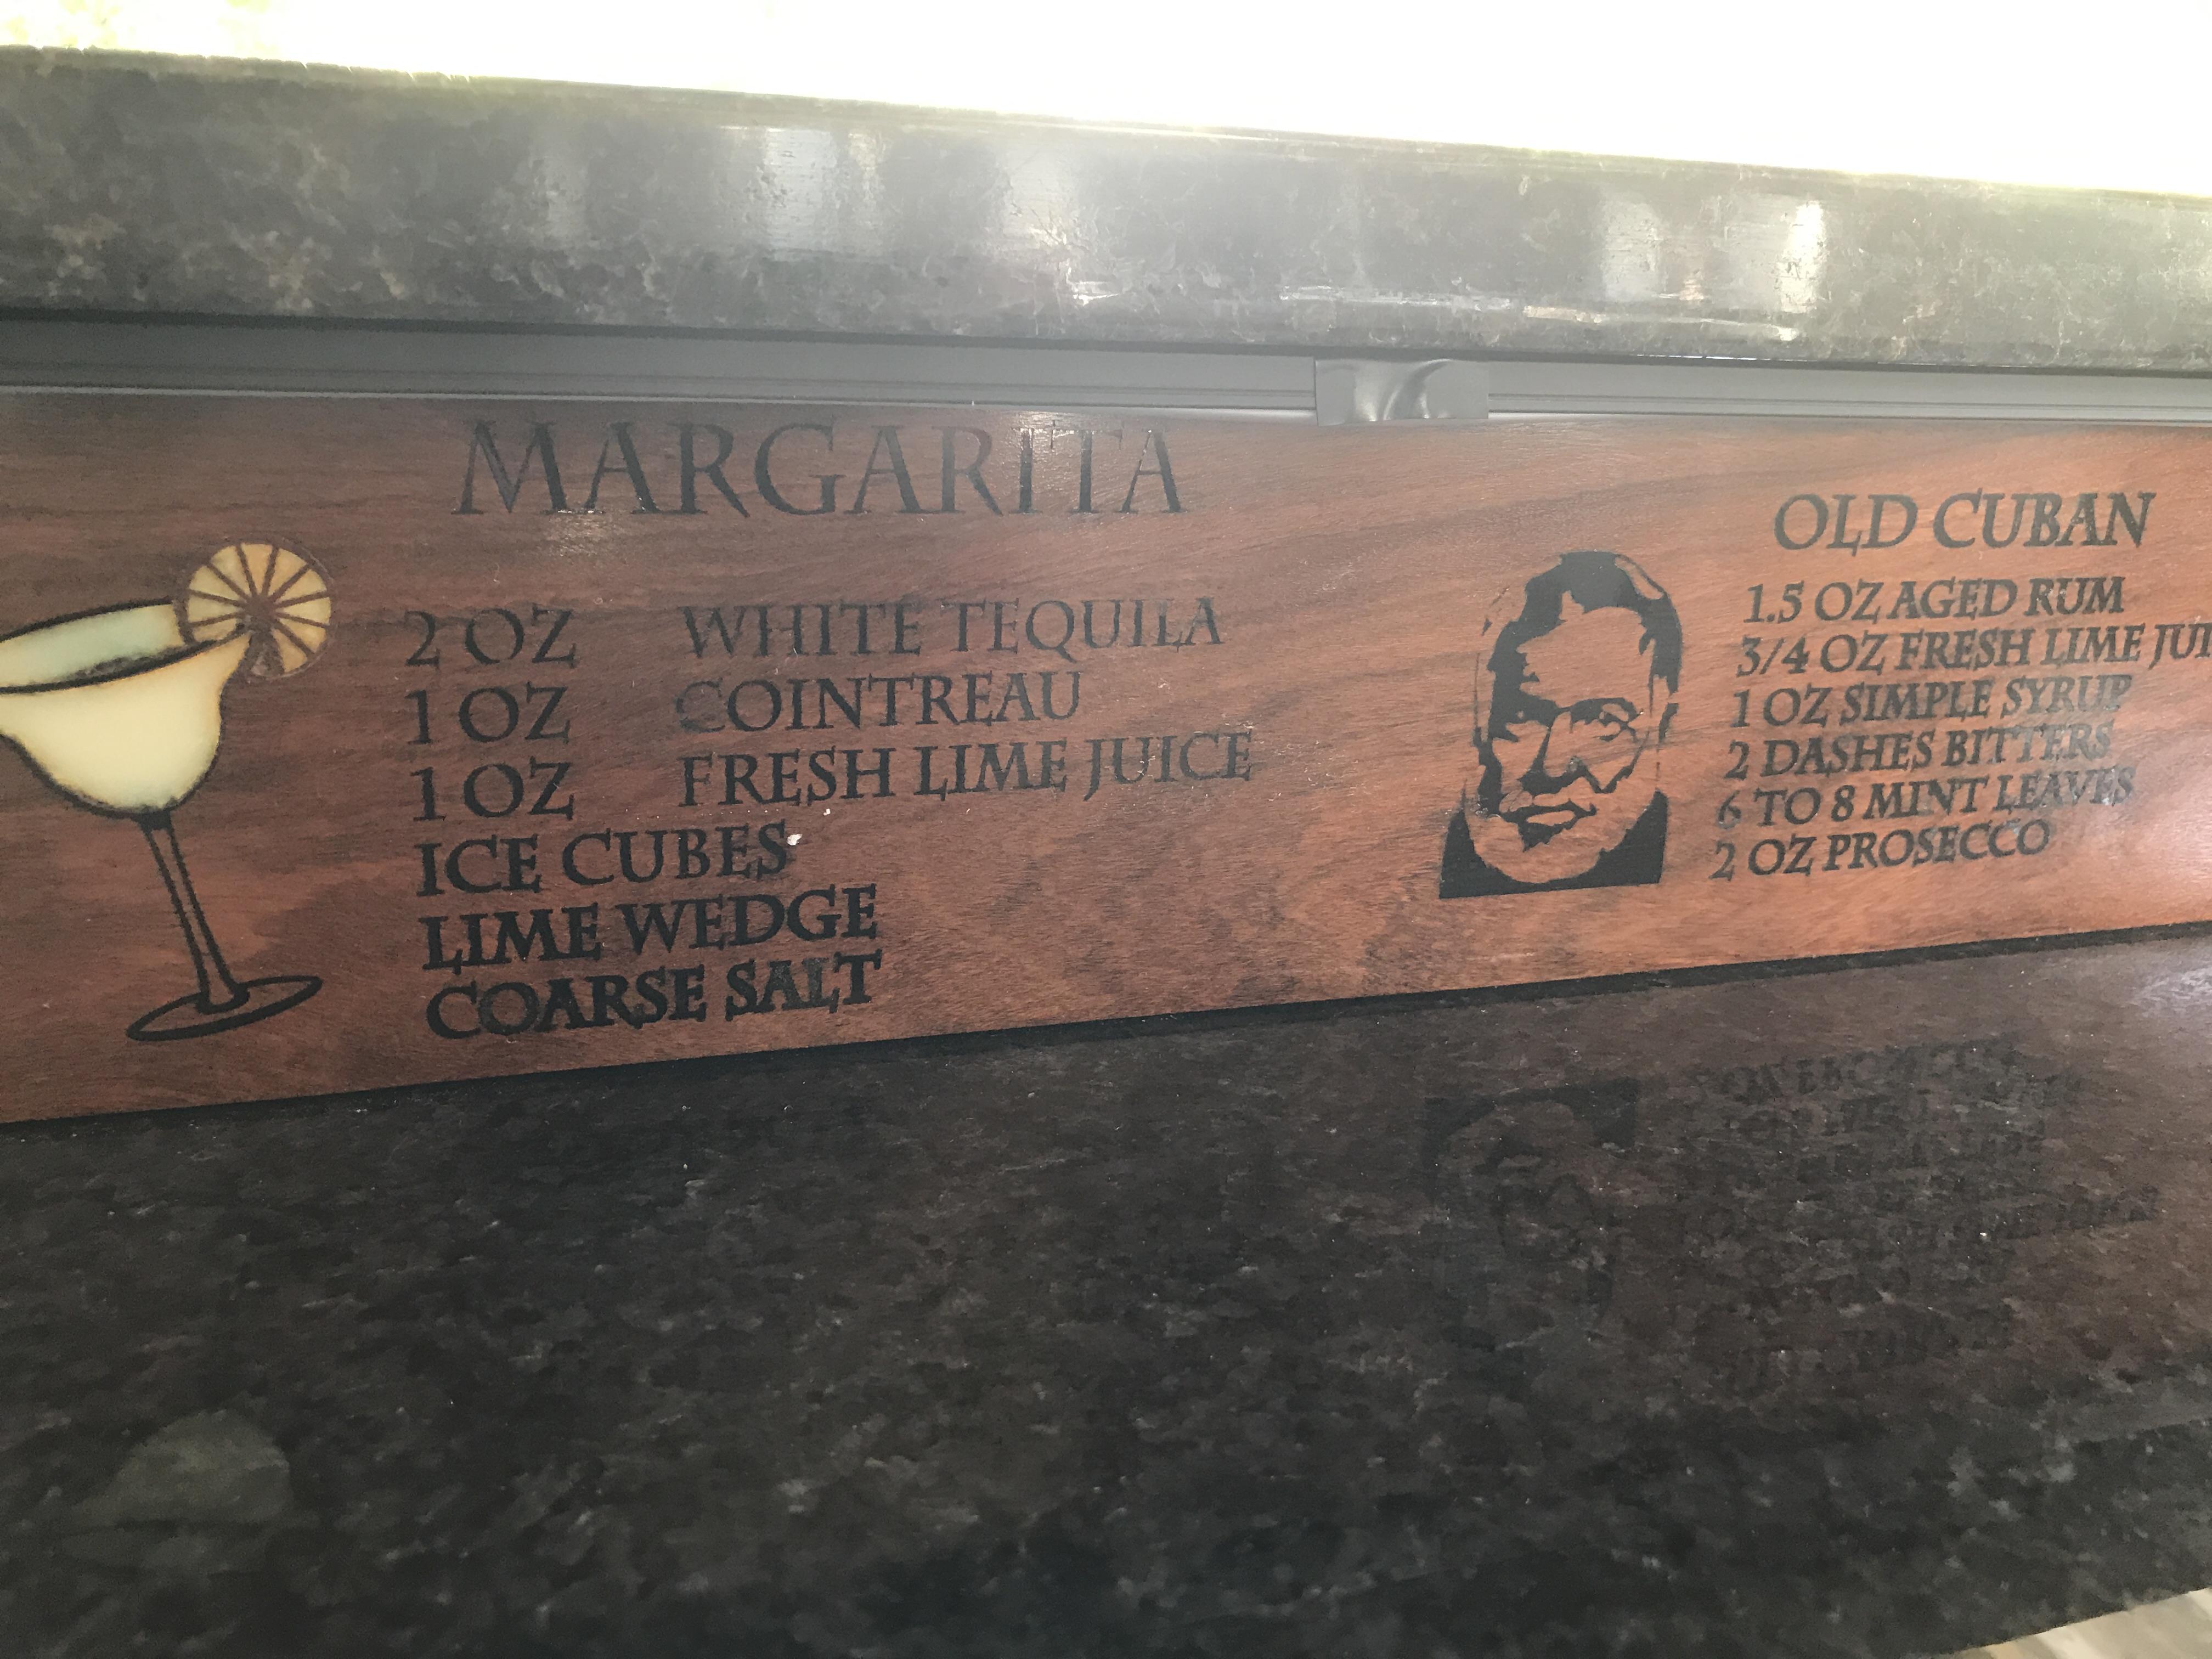
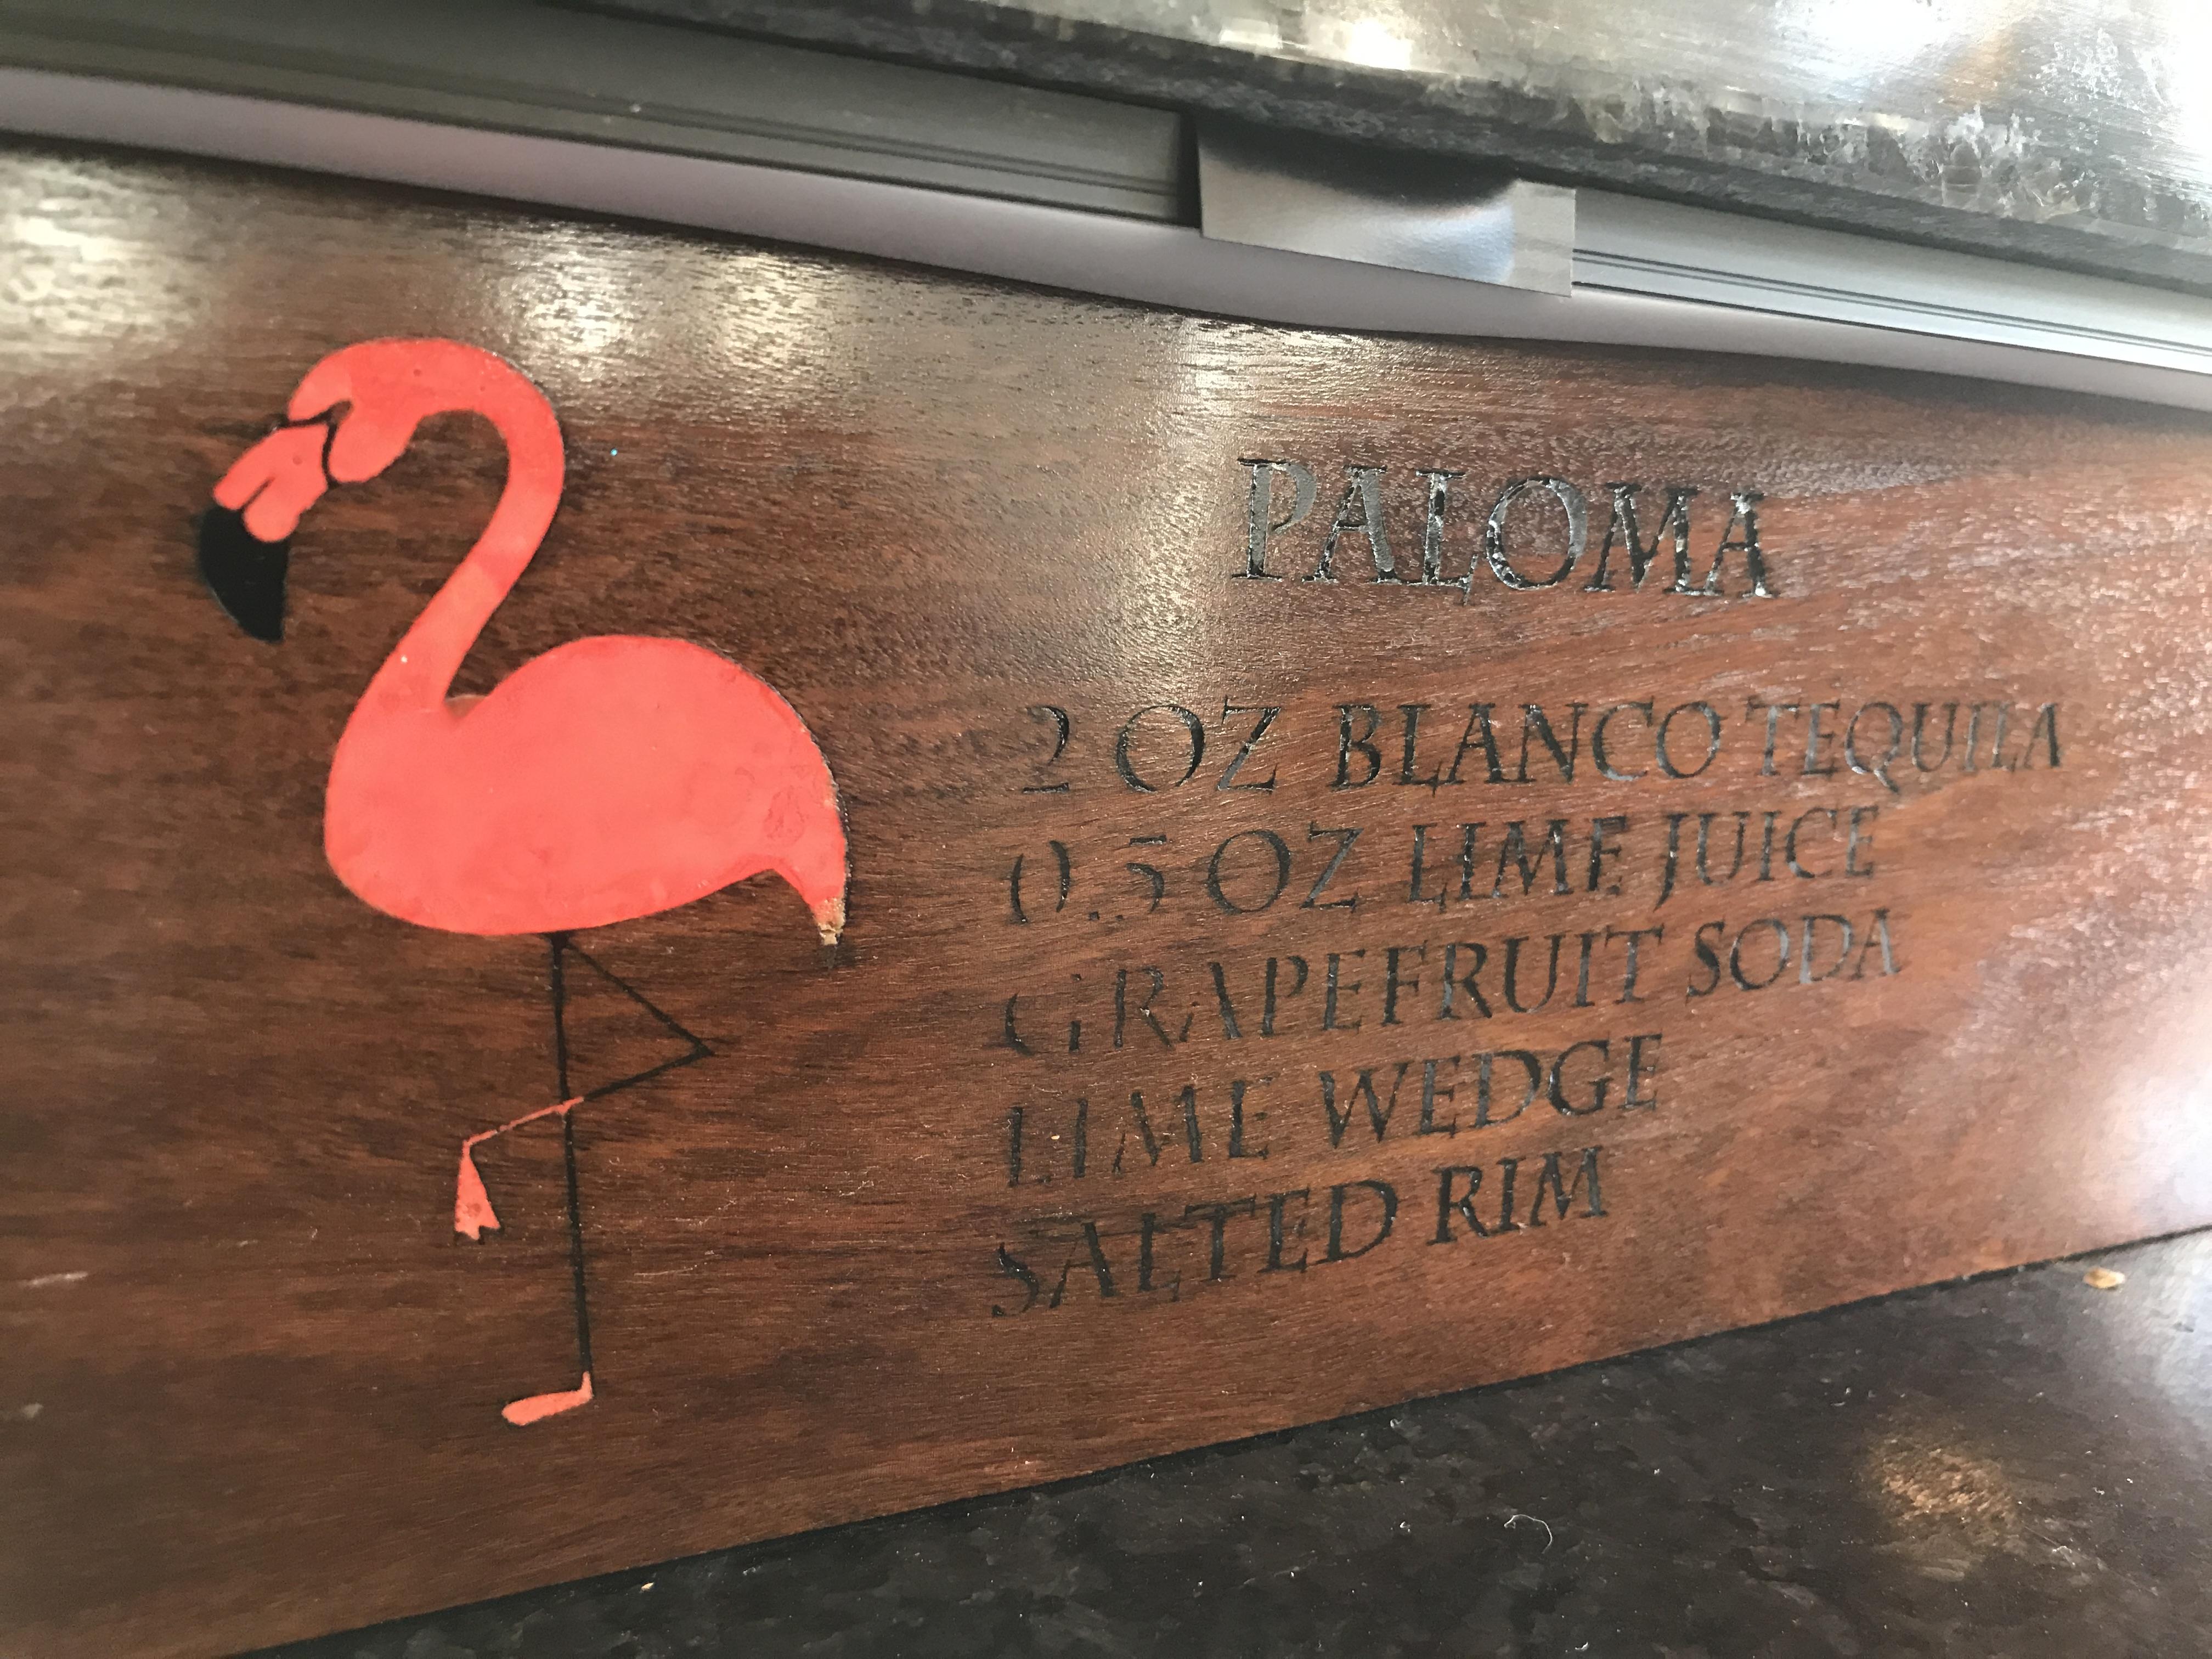
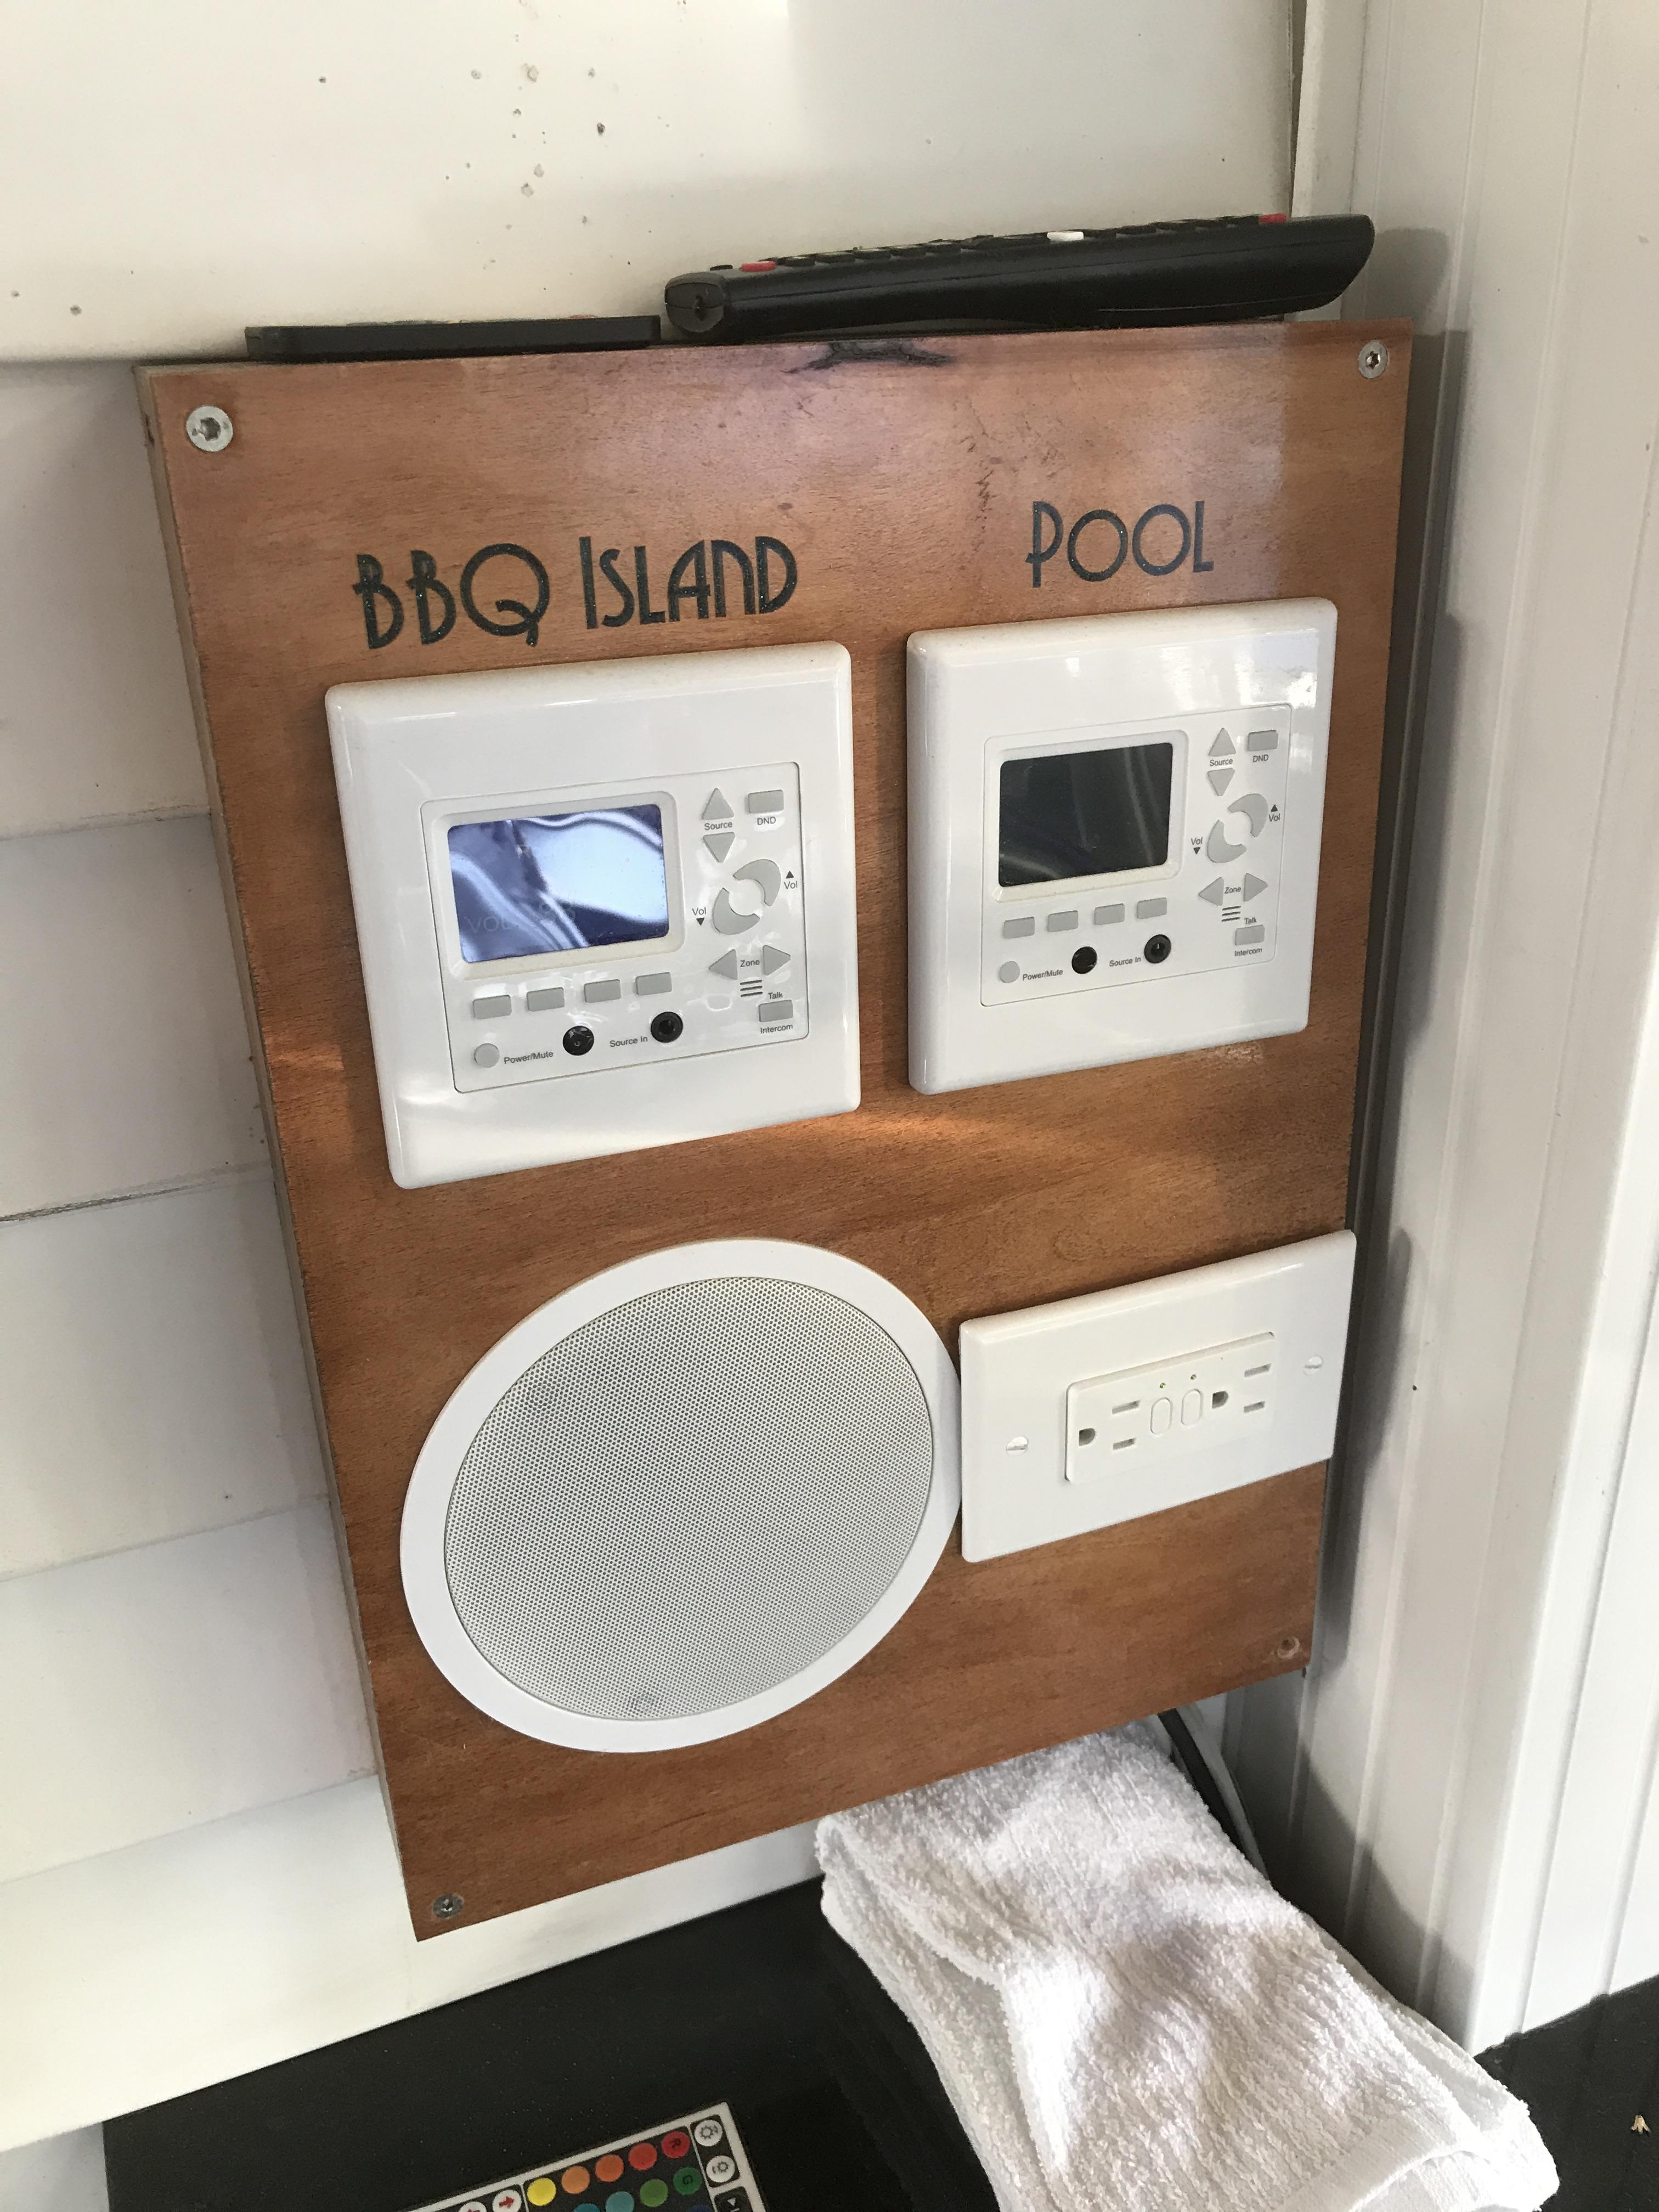
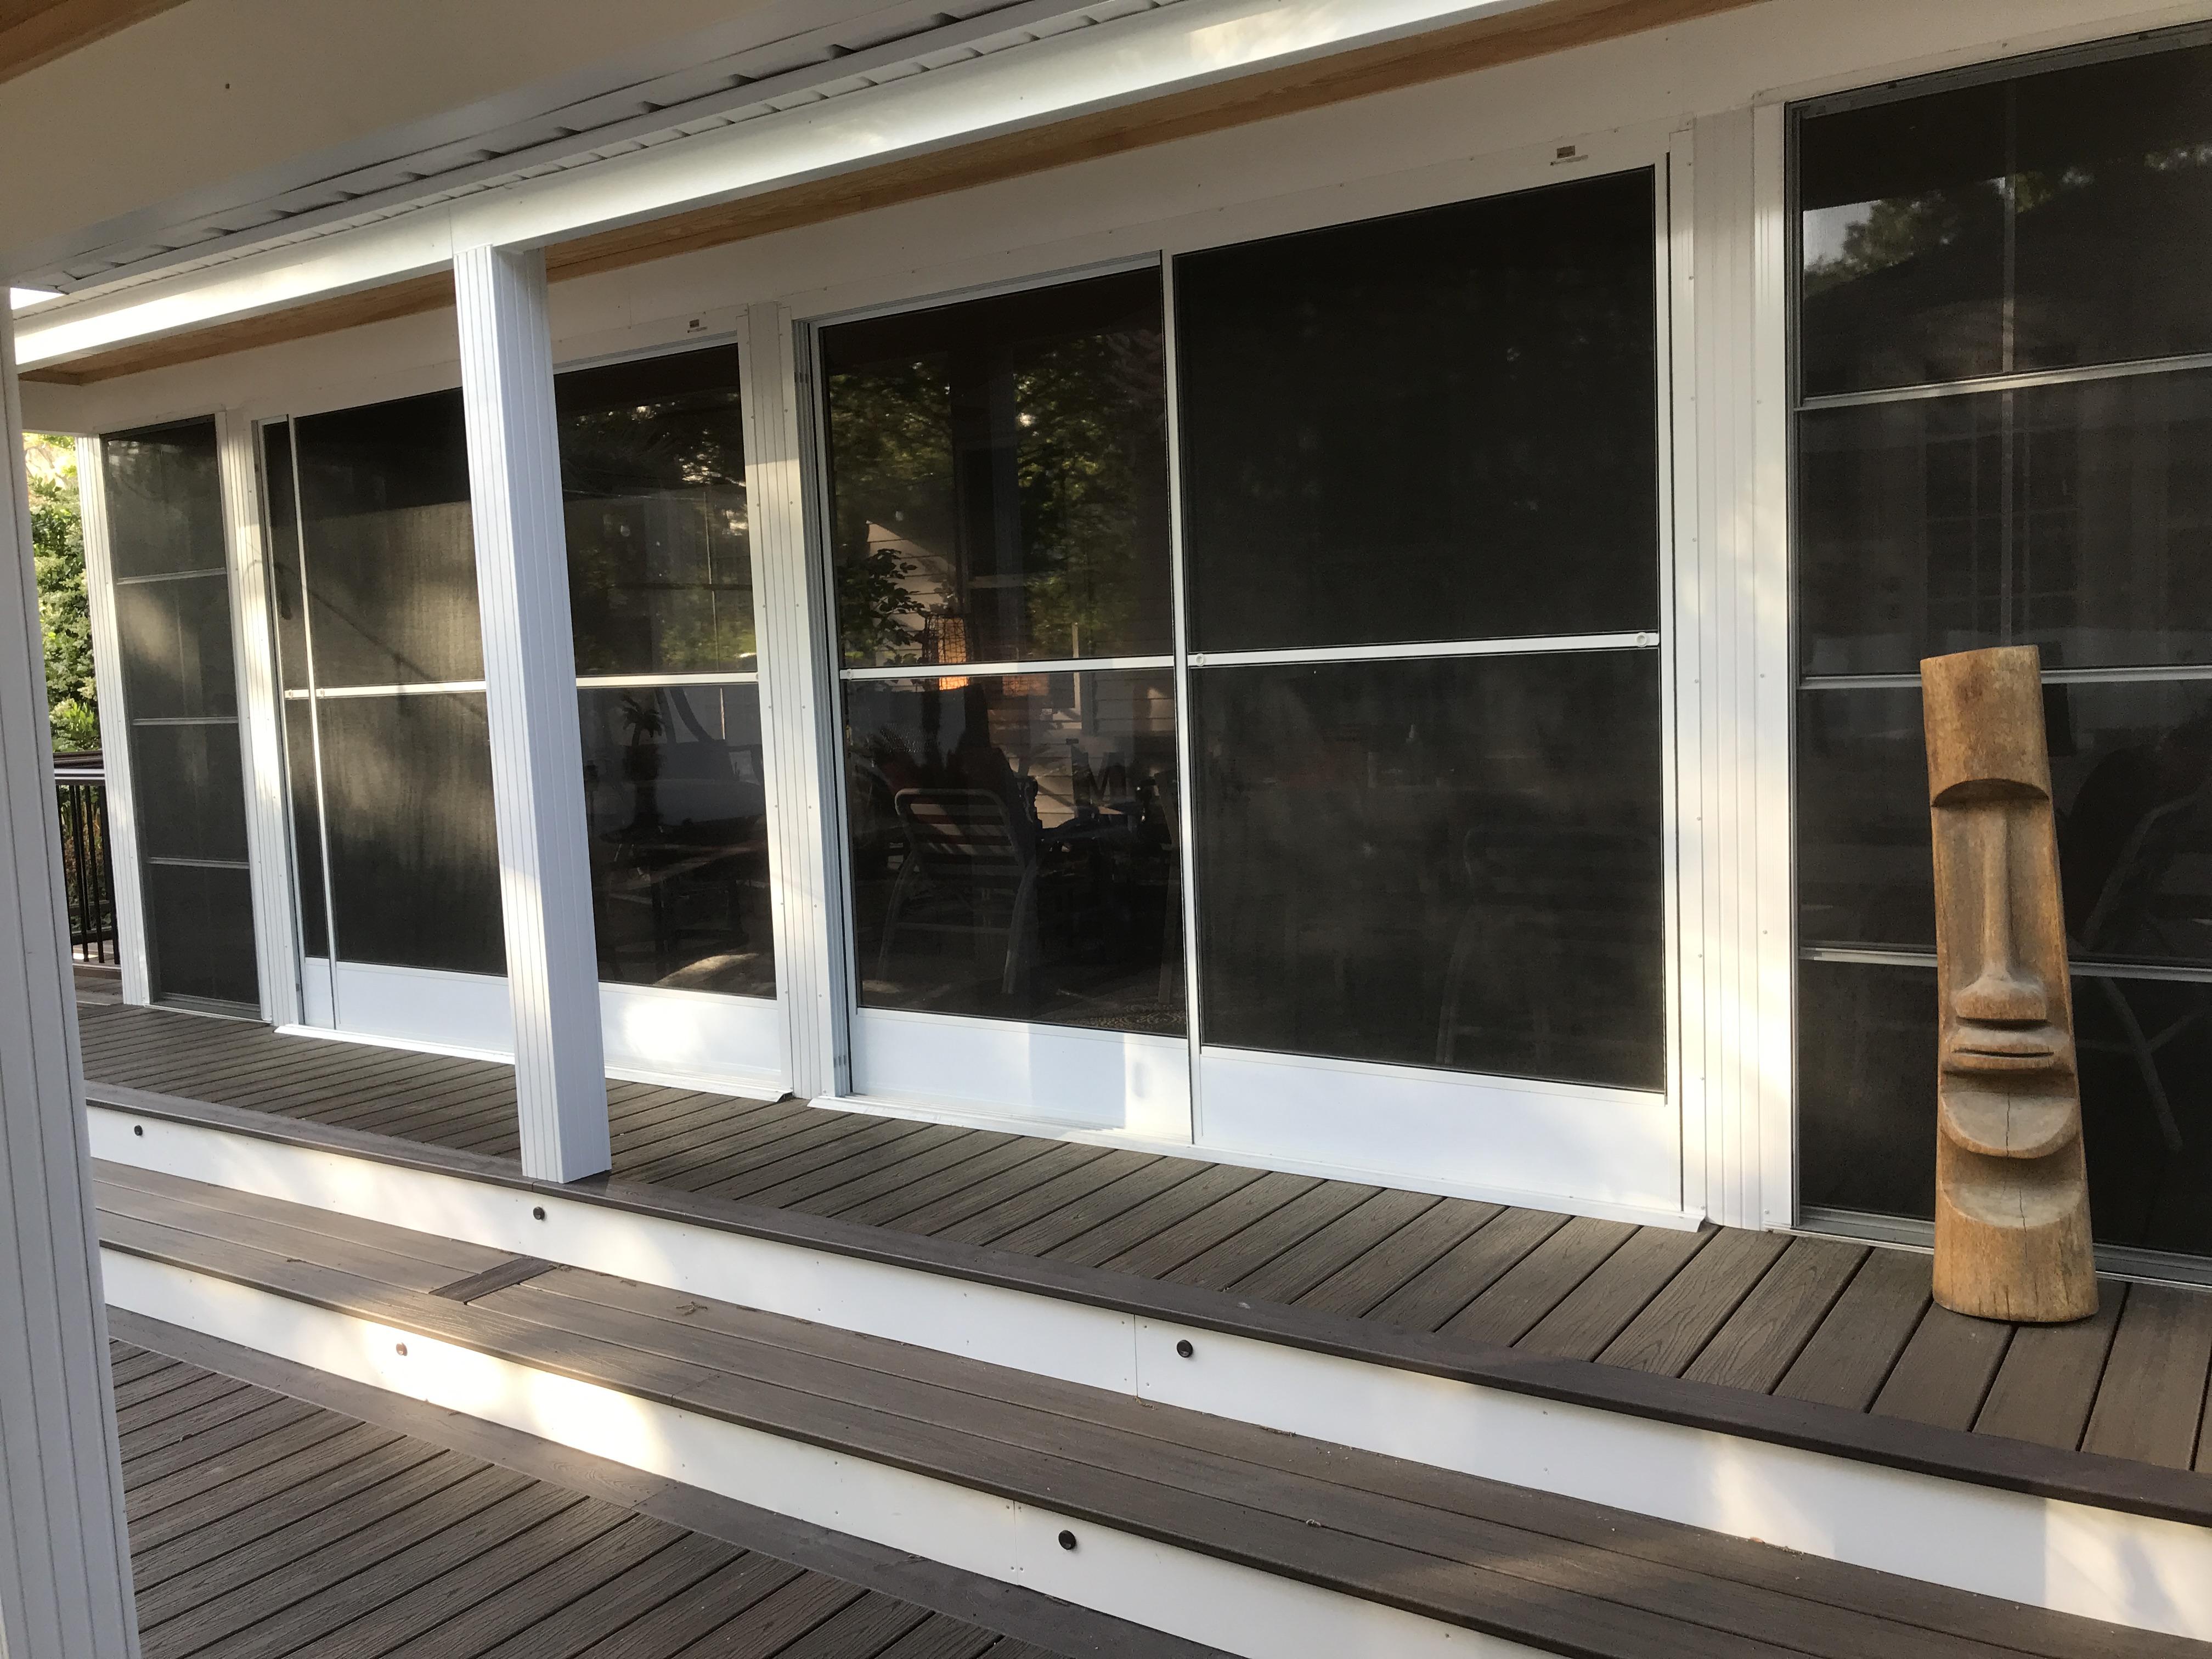
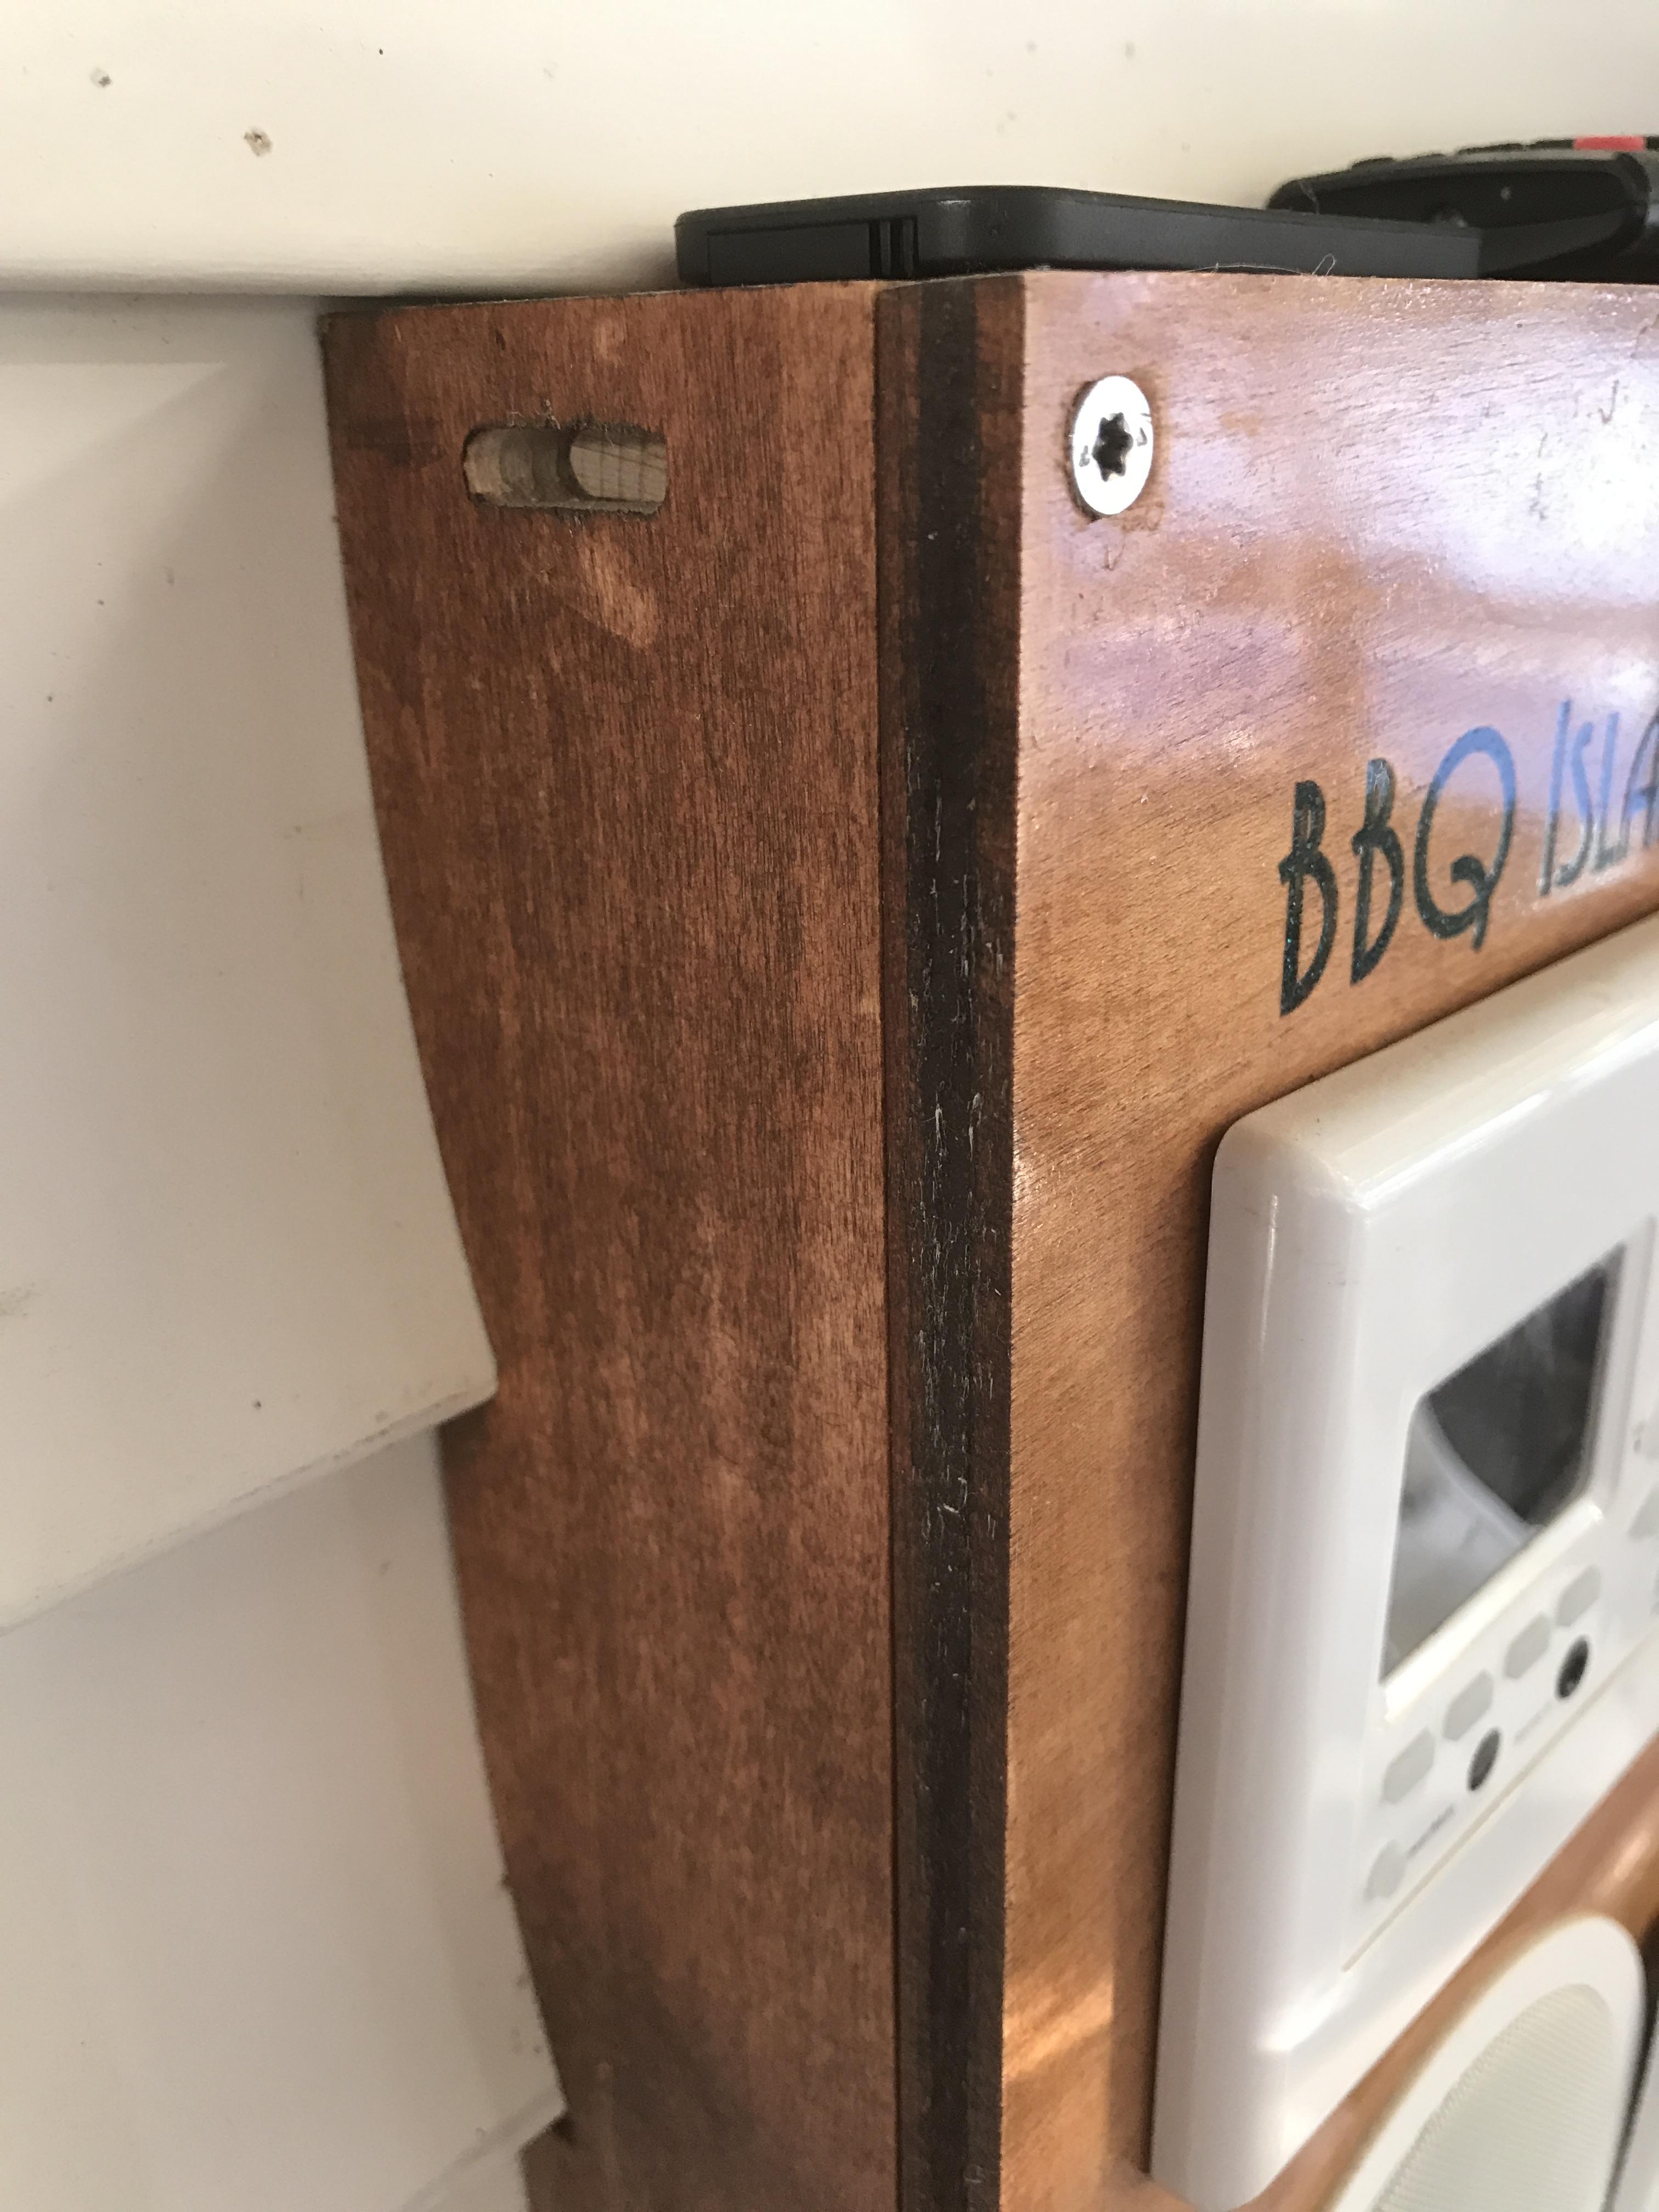
So nearly a year after I started the outdoor kitchen, I'm calling the construction done. I finished up the trim about a week ago and the electrician came today to finish the remaining outlets. This will be a pic heavy post! This is the sink and bar area. The sink is huge and large enough to soak a grill grate. Sliding the refrigerator in today was very satisfying. Here are some shots of the backsplash. One piece that runs the length of the bar with all inlaid features. I can't even remember how many individual steps were involved. Warming drawer and storage for the griddle supplies: Area behind the KK has nice copper tiles that no one will ever see: Also behind the KK - inlaid kk logo: More inlay near the drop in cooler Trash chute with a cutting board on top that is prett functional: Some good storage throughout including under the griddle for kk accessories And the first Mai Tai of the season

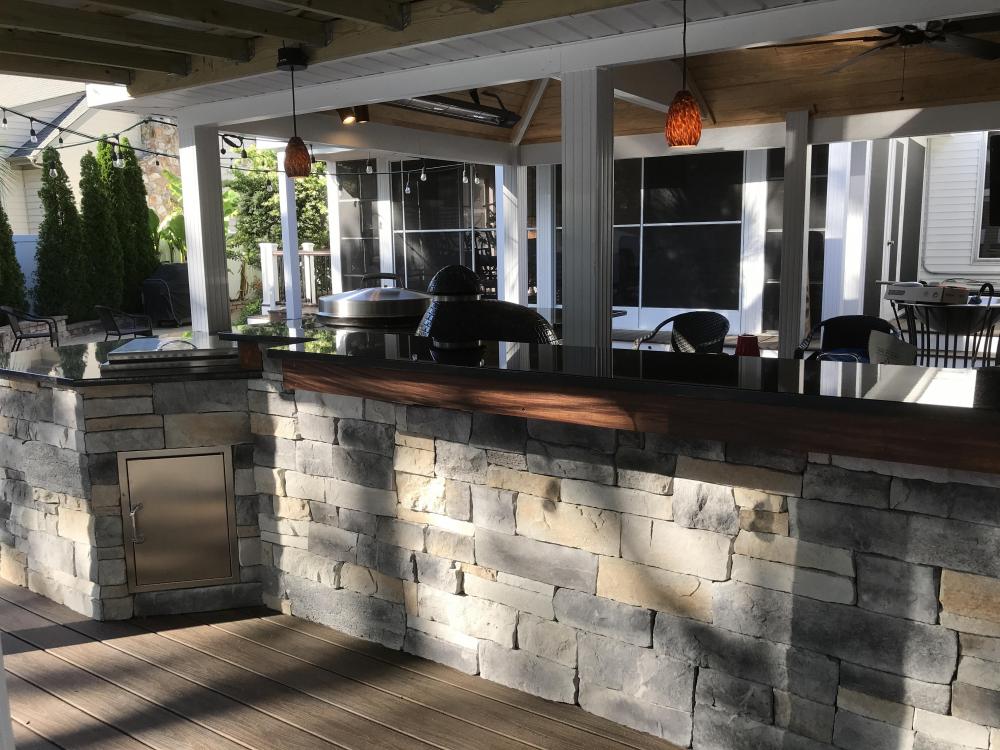


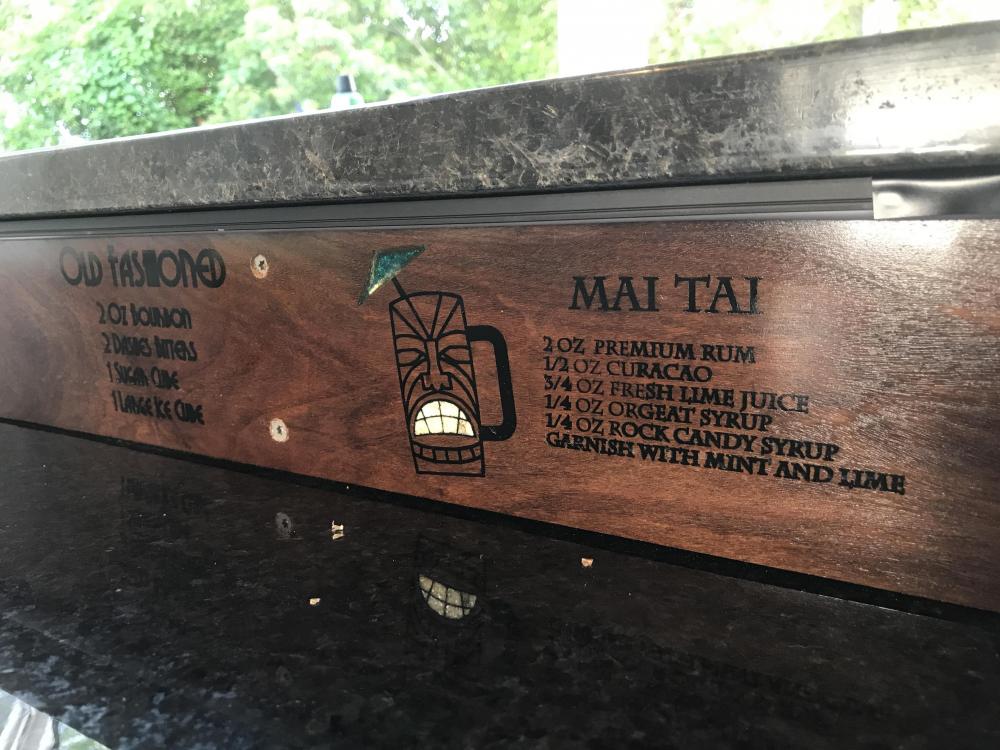
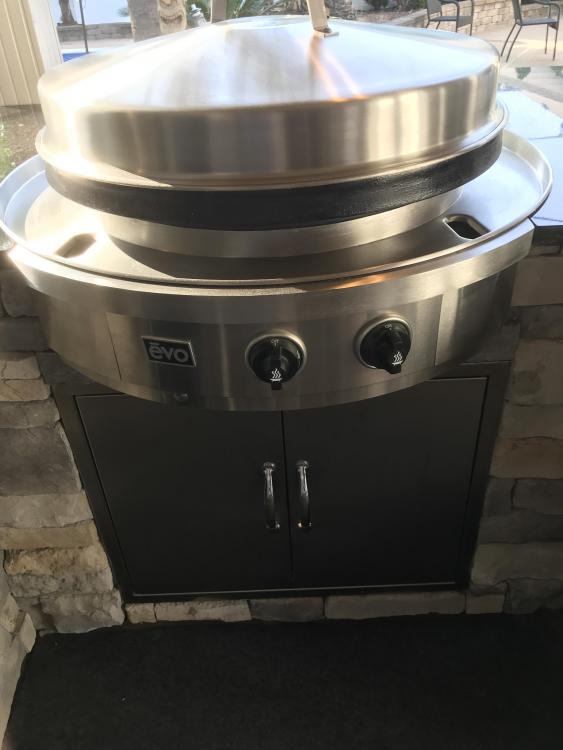


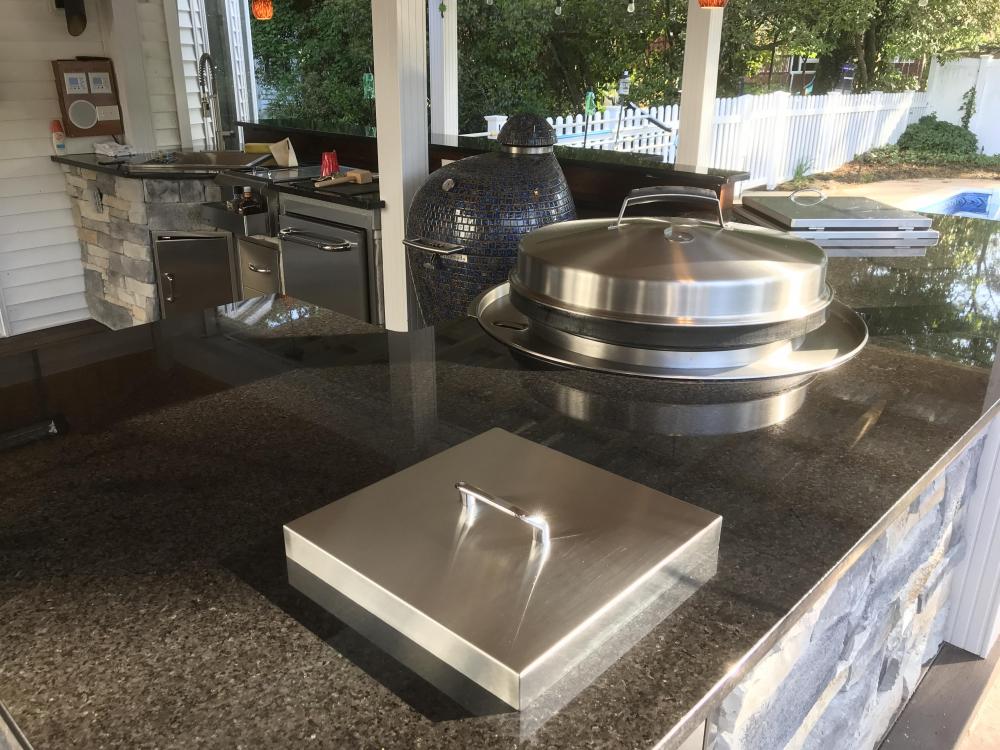
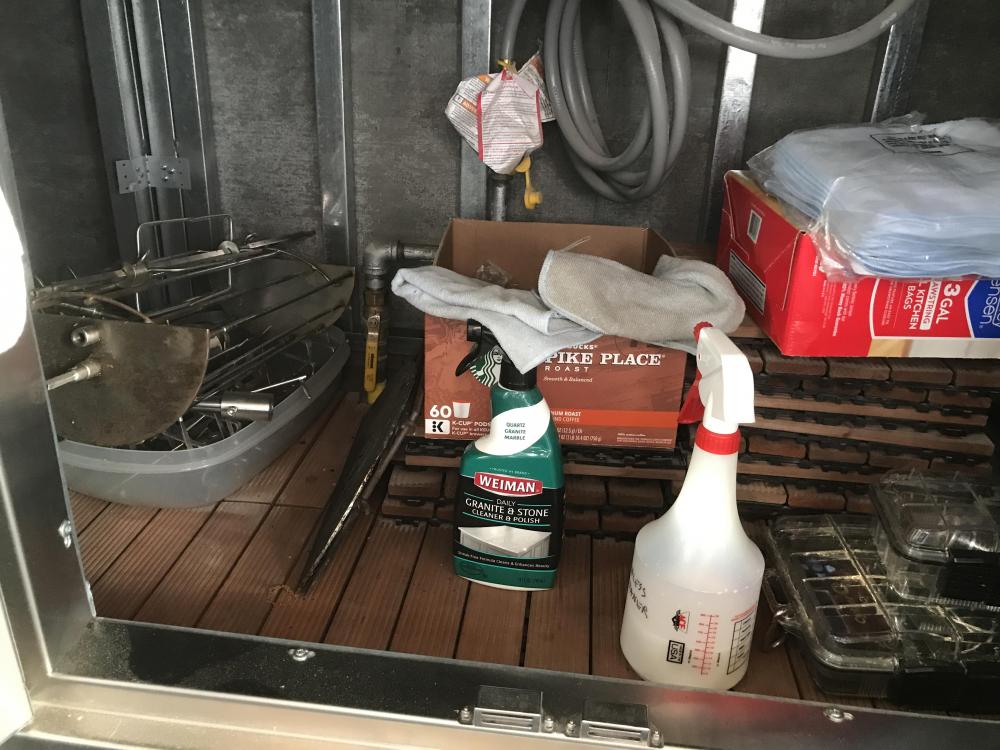
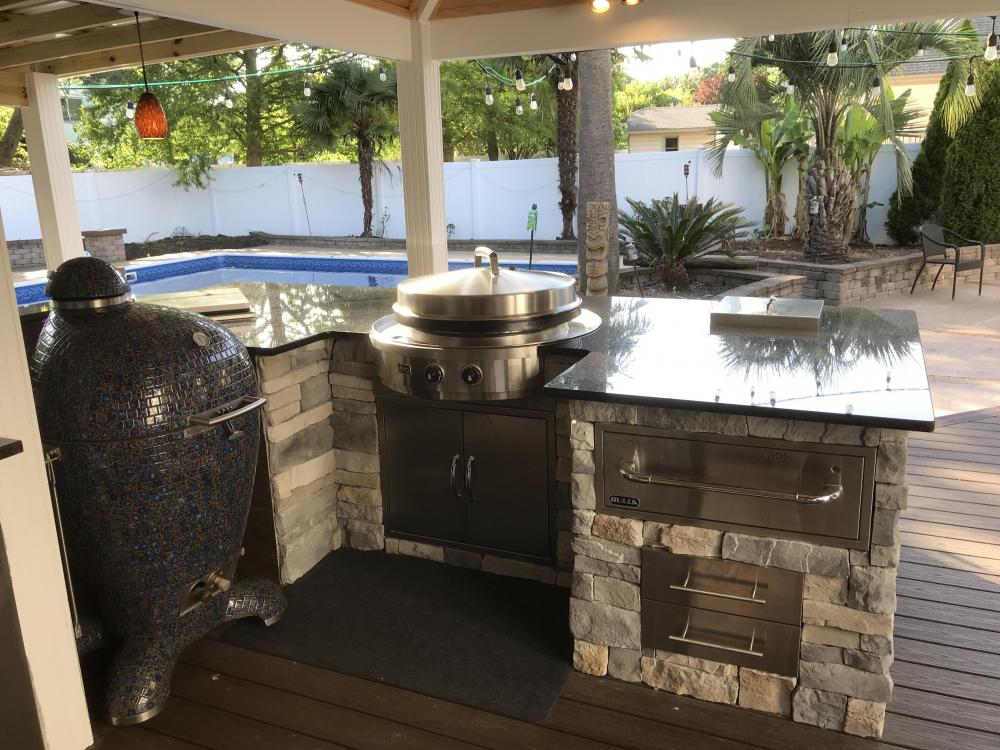
 3 points
 -
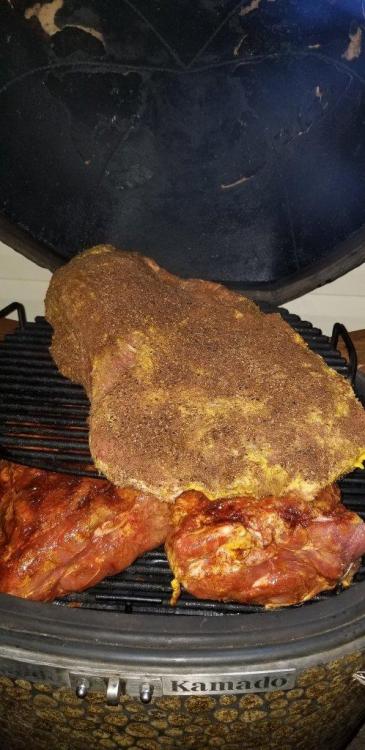
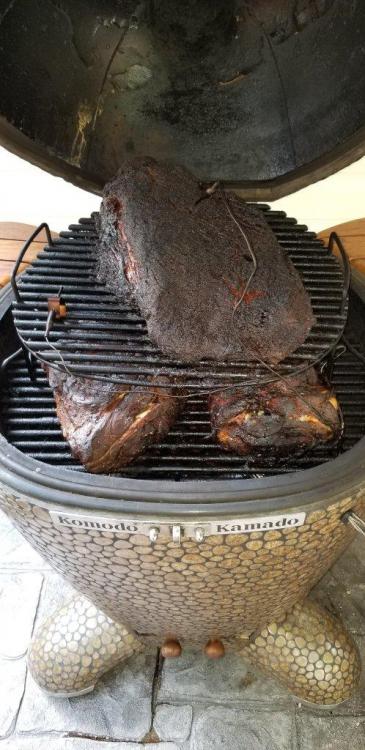
.And vacced it overnight. To let it all meld toghether. . Yesterday I took it out and patted it dry..gave it some more dizzy pig. . On it goes over some black cherry..gave it some Kakadu plum sauce..Ready to go..after a rest..And pulled..all that for this lol. Sent from my SM-T835 using Tapatalk2 points
-
Did two Costco rotisserie chickens in my 23" KK. Brined them overnite in Salt, Sugar & Soy Sauce. Took out of brine & dried them for 6 hours in refrigerator. Oiled them up & put some dry Chicken rub on them, then put into the rotisserie basket. 350º for 1.5 hours. After the first 30 min began basting them with a sauce of Hoisen, Soy Sauce, Brown Sugar, Saracha, Sesame Oil & 5 Spice Power. Added some smoke with Pecan wood. Between the smoke & Sauce, the flavor was wonderful & sooo moist. Nice Asian taste with a little spicy bite, just delicious. Mothers Day Rotisserie Chicken2 points
-
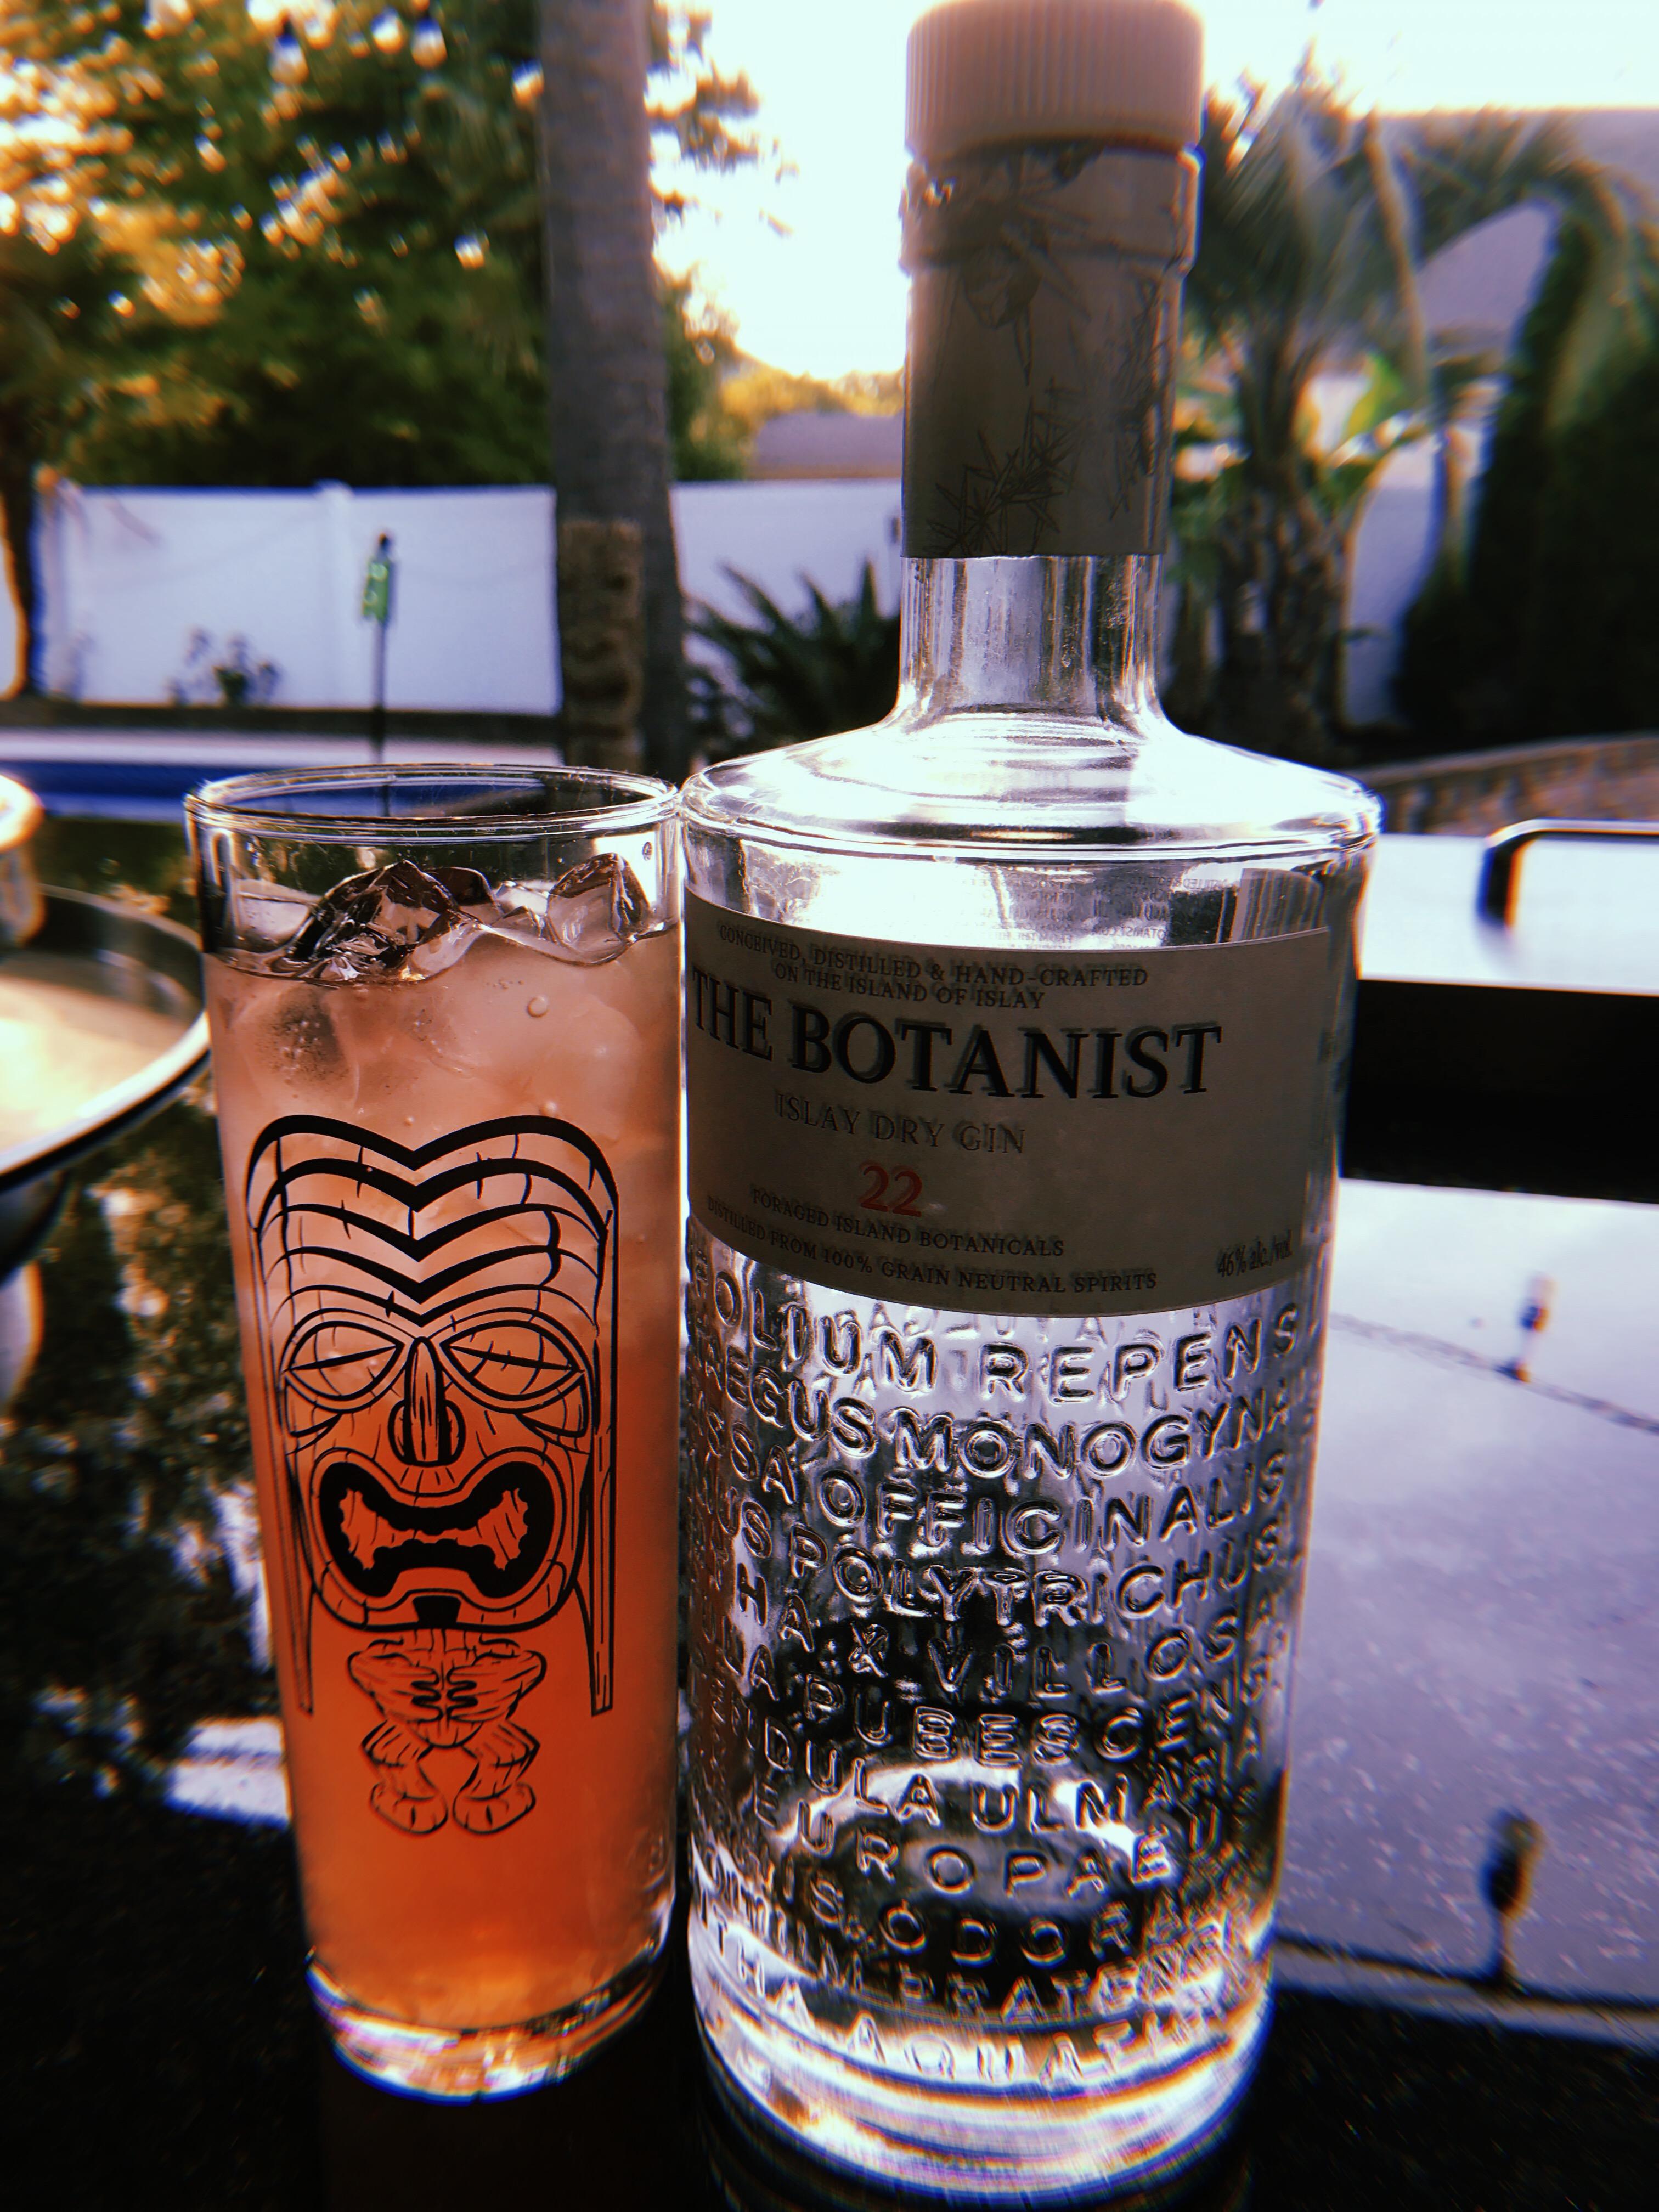
I'll check it out, as I do love a good Gin & Tonic on the deck. Just polished off a bottle of New Amsterdam (pretty good). Next bottle up is Costco brand (Kirkland), which gets good ratings, especially for the price! I've had their vodka and white tequila, and both are very good, so I have high expectations for the gin.2 points
-
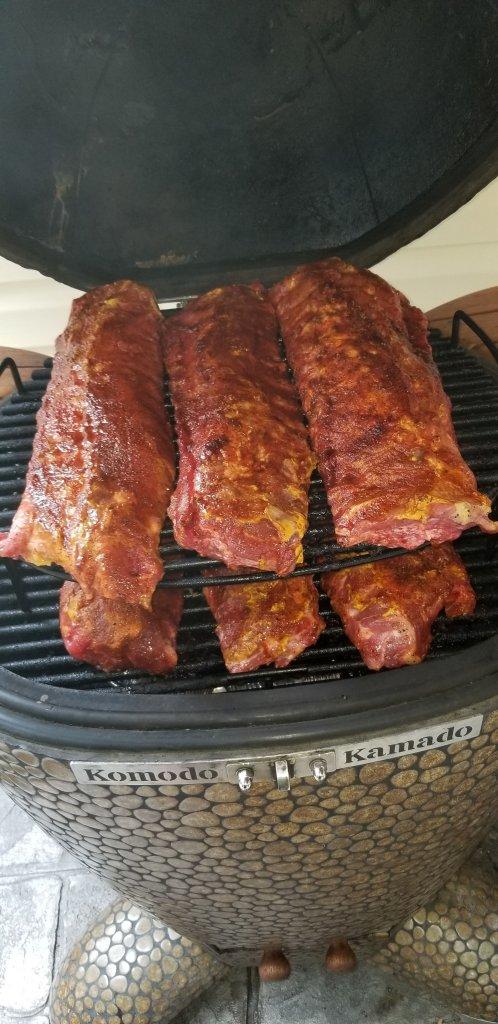
I never wrap. Always run naked at around 275 until they are done the way I like them. A 3lb rack of Costco St. Louis spares takes 4 hours (+/- 30 minutes).2 points
-
Sliced after resting
 2 points
 -
No your 21" Supreme is MUCH larger than a large BGE which is only 18.25" diameter.. 21" left to right and 20" front to rear.. Just saying!2 points
-
Thanks and right back atcha!
 2 points
 -
Spun a small beef roast over veg.made up a nice batch..gave the beef some rub...on it goes ..looking good..veggies are ready. .after a rest. . And carved.. Plated looks simple as but tasted 5 star. Sent from my SM-T835 using Tapatalk2 points
-
I order my Komodo Kamado yesterday just waiting on shipping updates. I’m super excited and I also sold my egg. I can’t wait to share pics and stories with everyone. I gonna miss my egg so I’m gonna get as much cooks on it before i sell it.
 1 point
 -
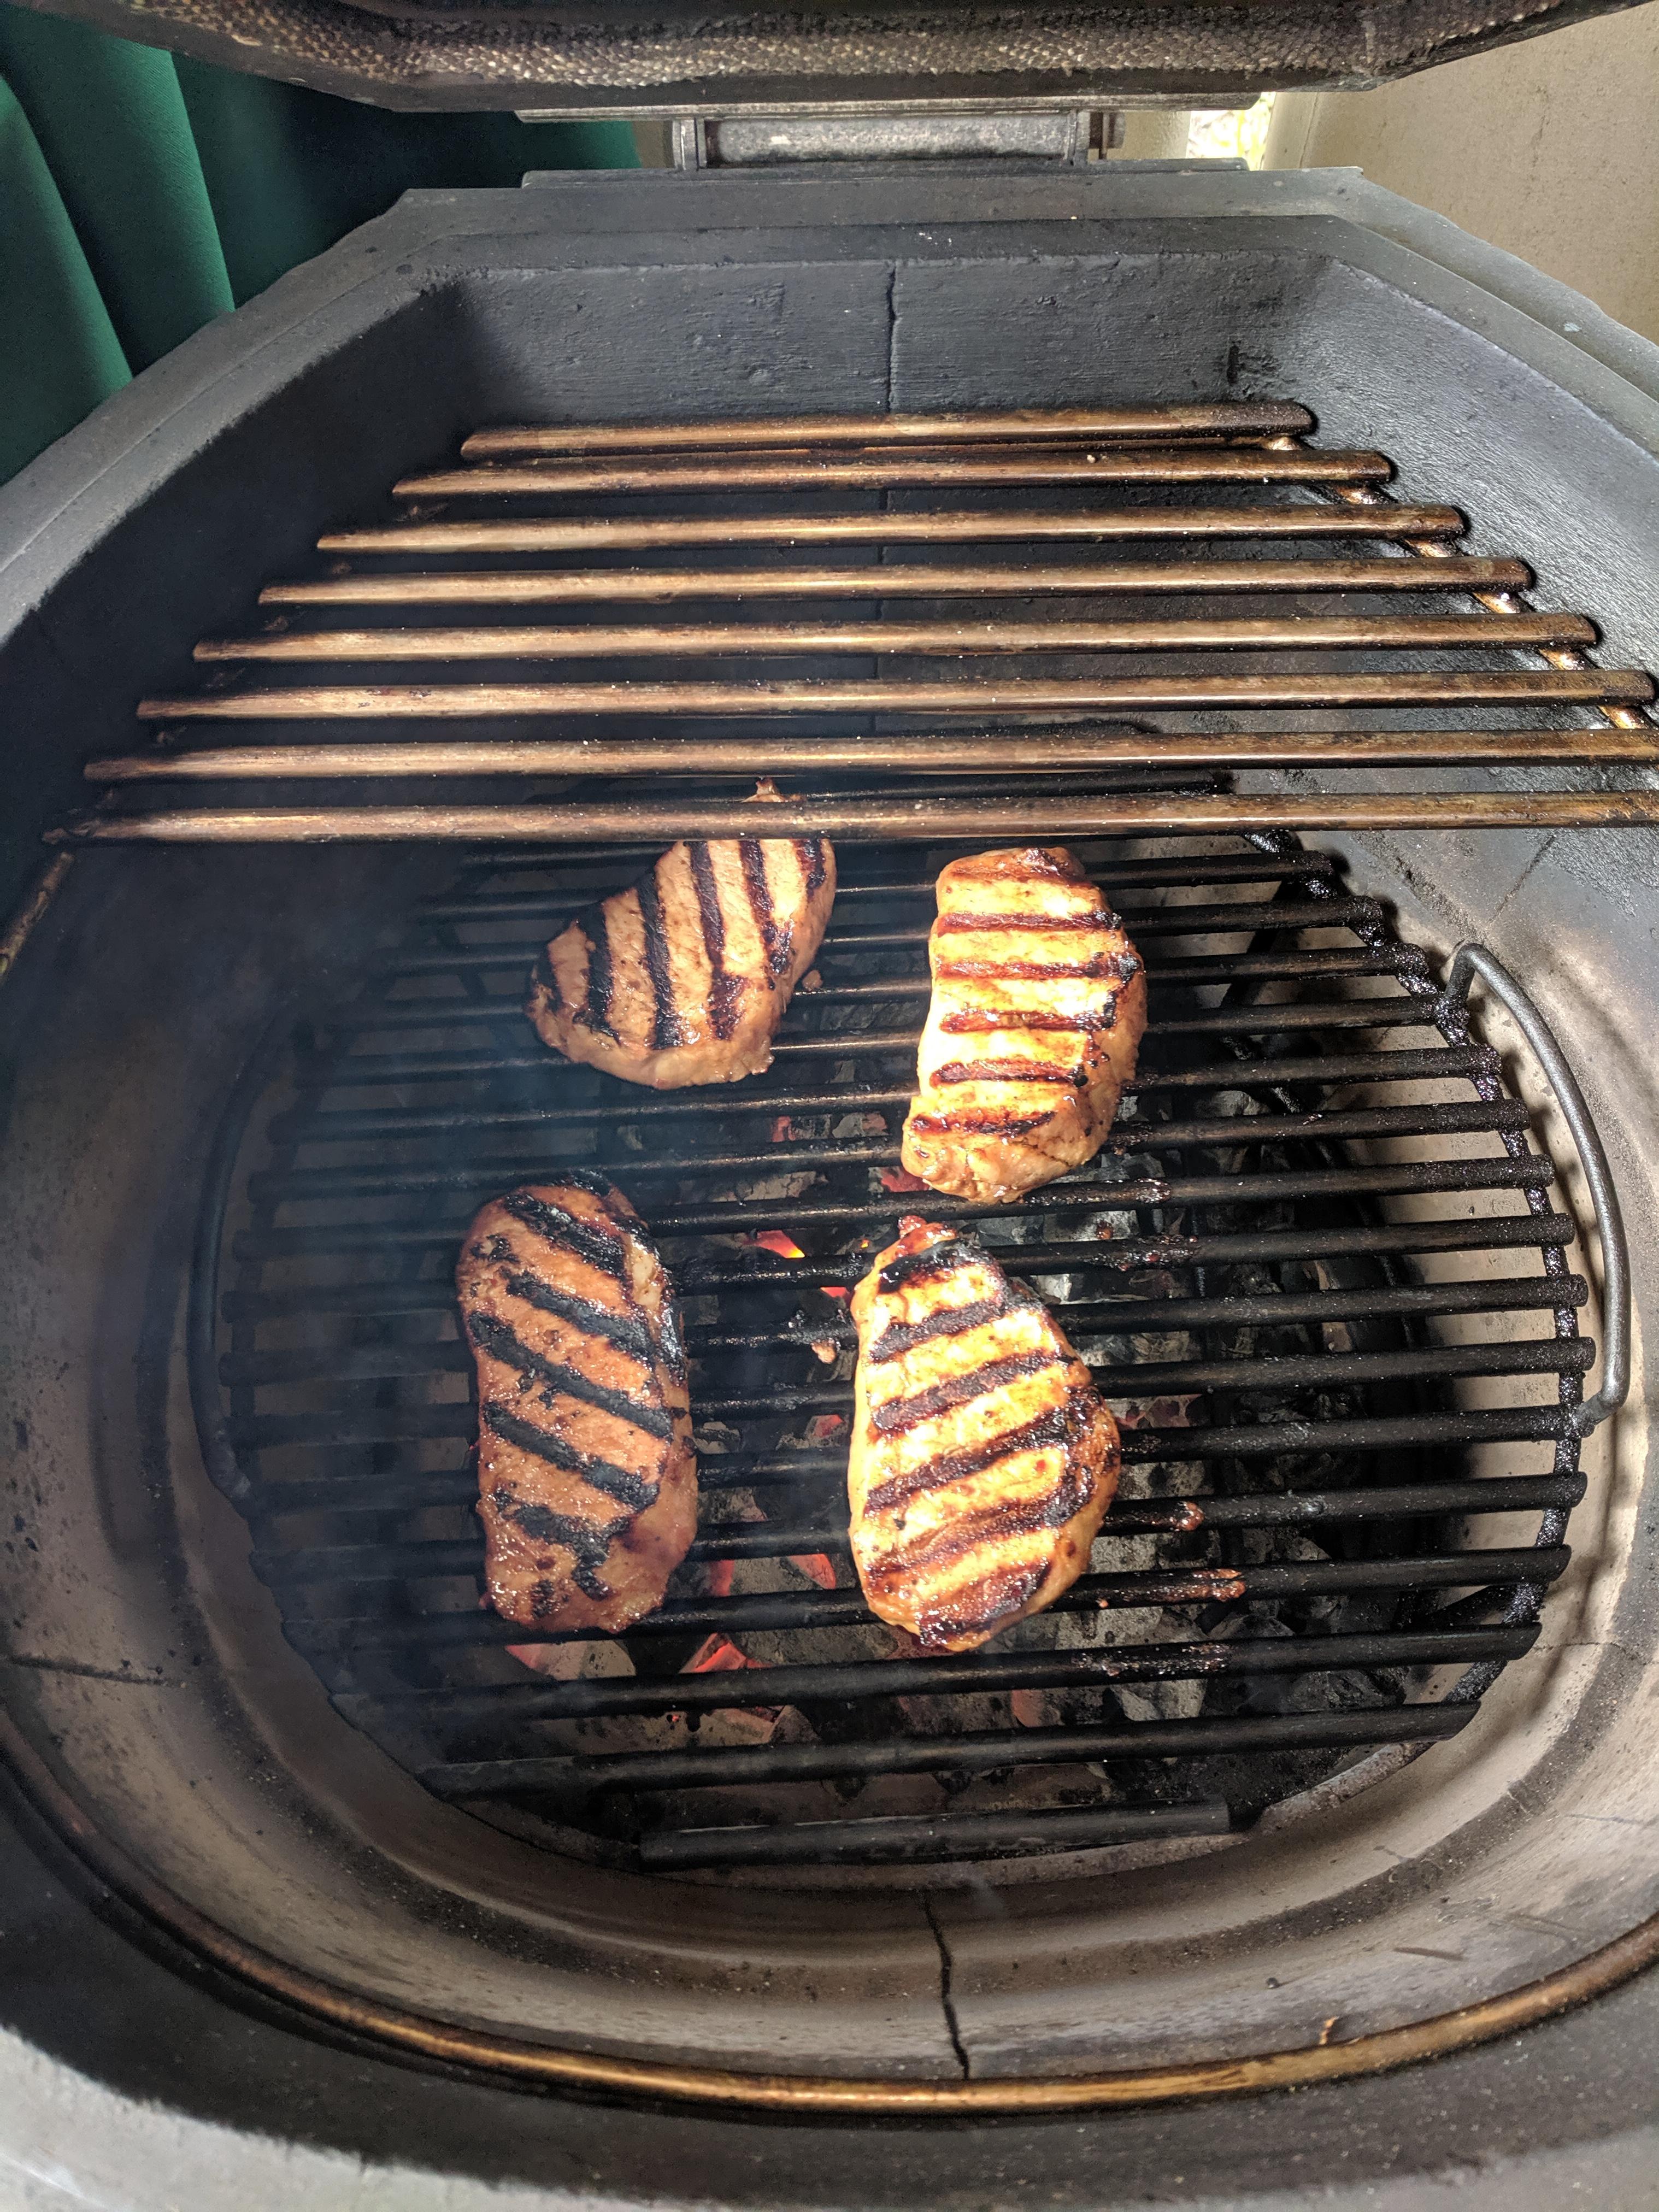
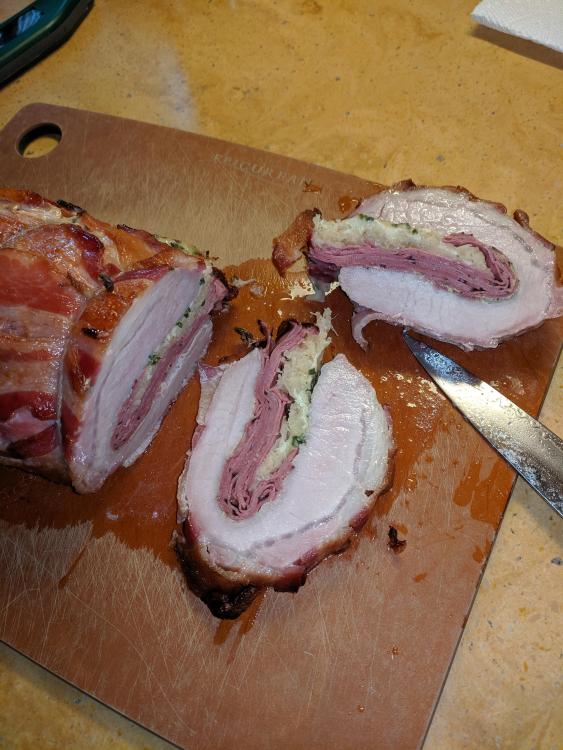
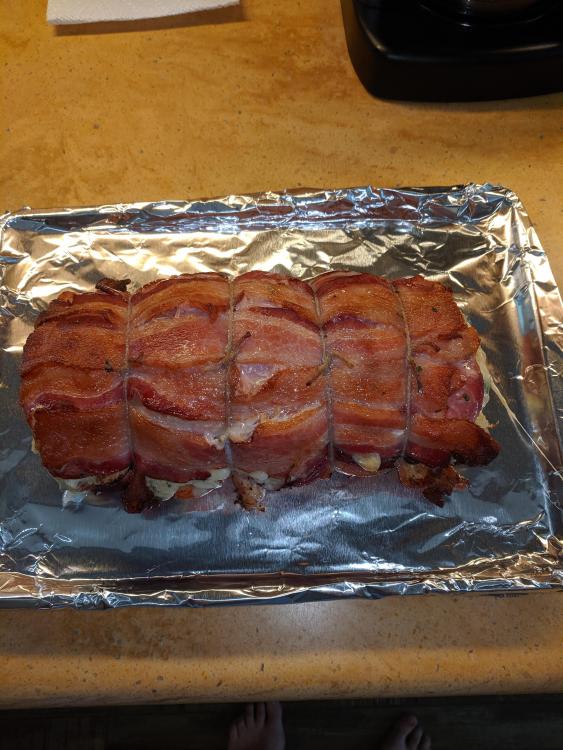
Did two pork cooks today. Pork Loin "Reuben" from Steven Raichlen's Project Fire book. Boneless pork chop w/ spicy Asian marinade. look good, have not tasted them yet.

 1 point
 -
Great job Steve, looks like years of enjoyment with friends and family.1 point
-
Steve it looks great.1 point
-
Yah, that sounds like a mix I'm partial too. I also have the 23 and are very pleased with everything that comes out it. That basket is easy, unlike the old roto's that were on the gas burners I found unreliable. Maybe next time you'll post a picture, would be nice to see only because this little computer couldn't open the download.1 point
-
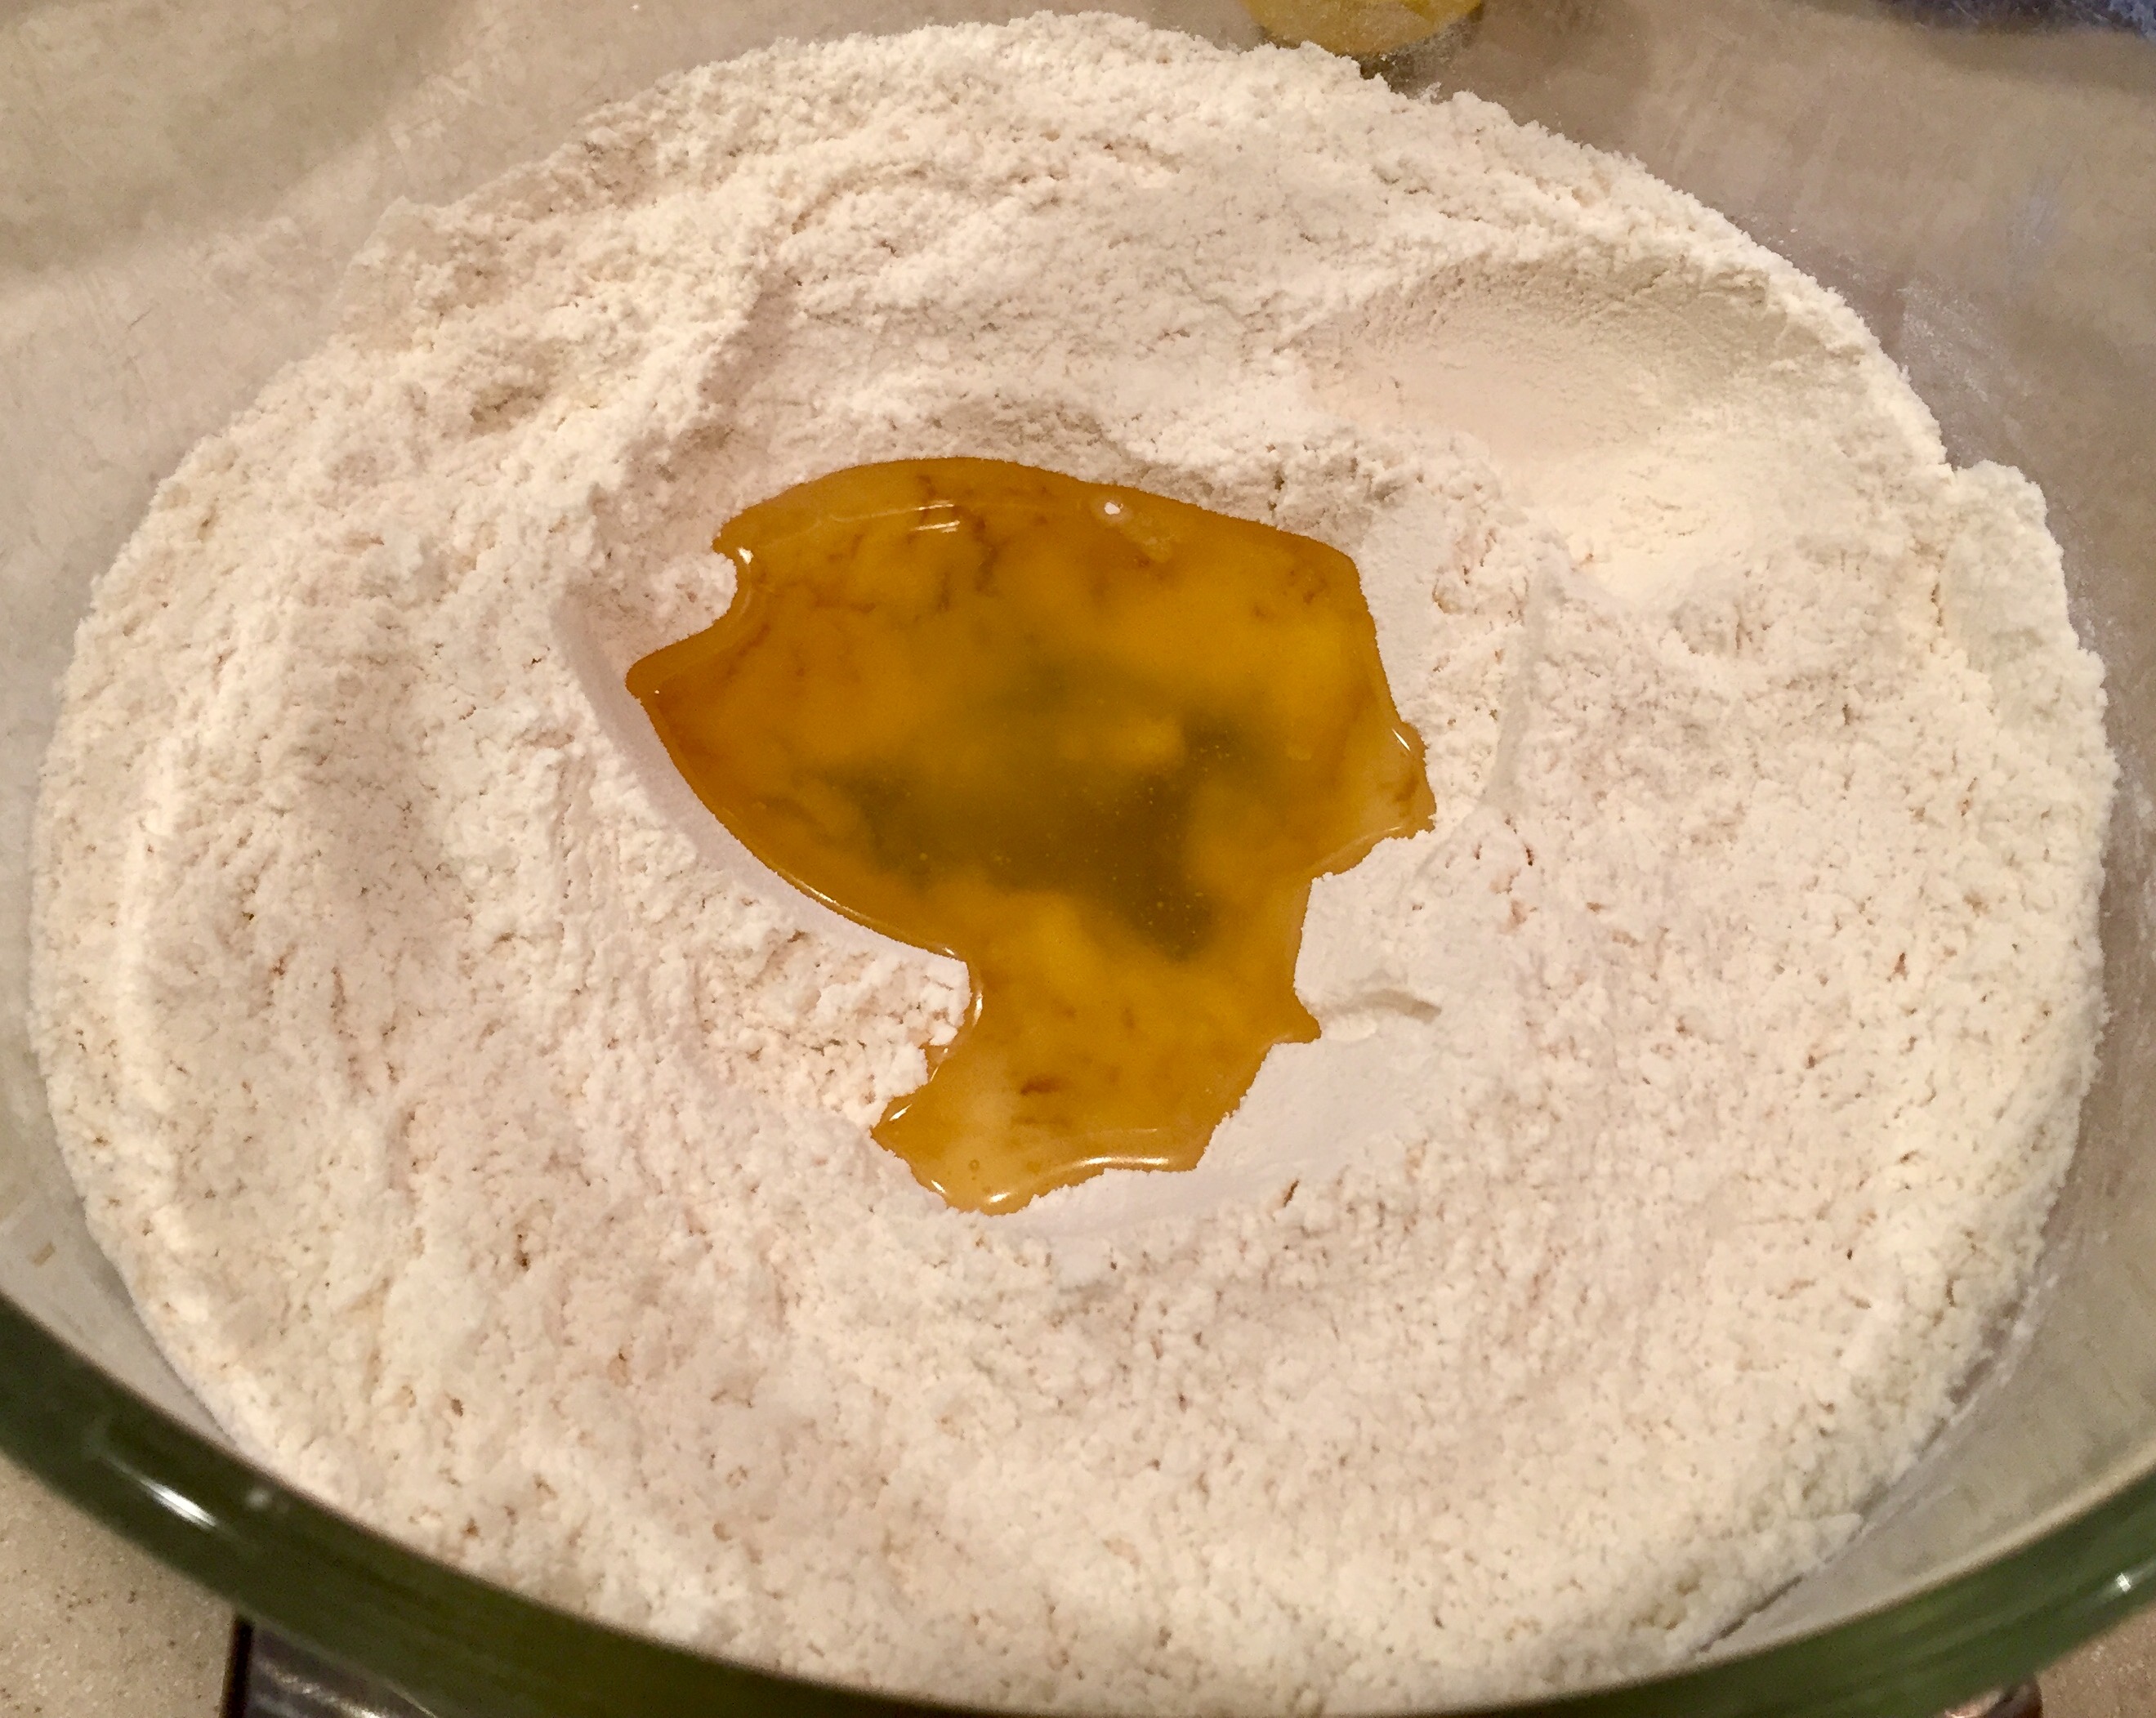
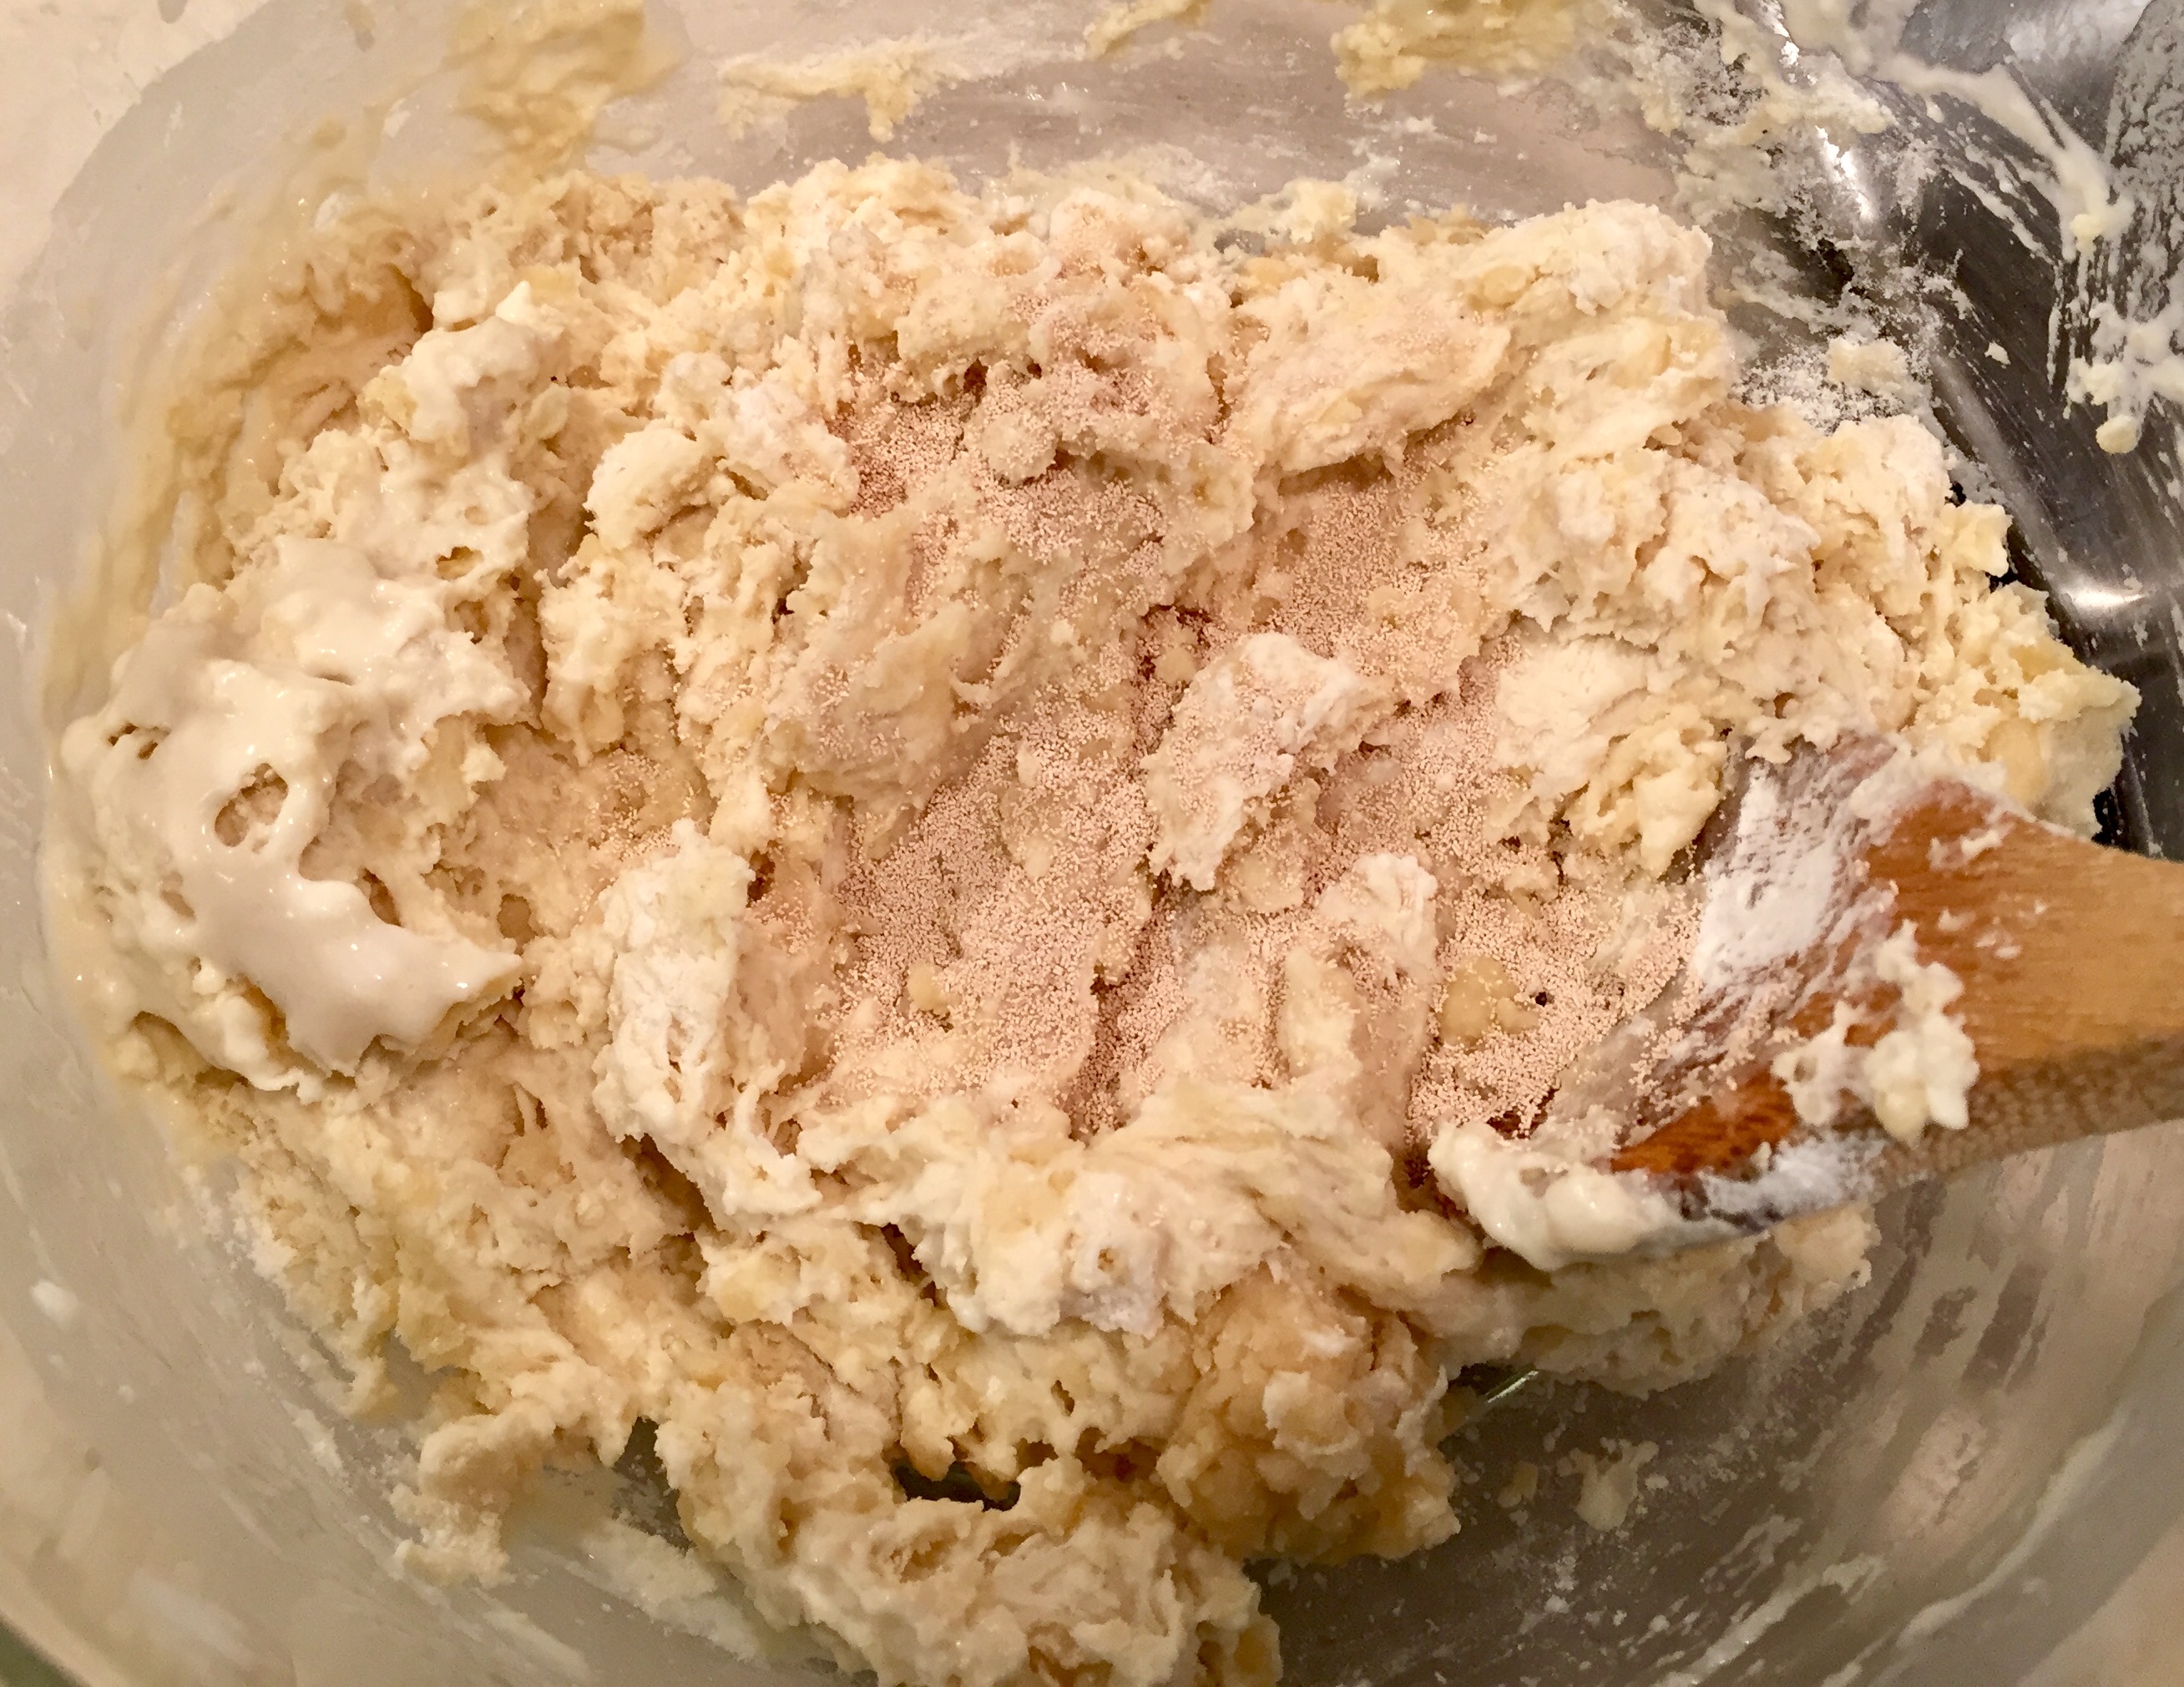
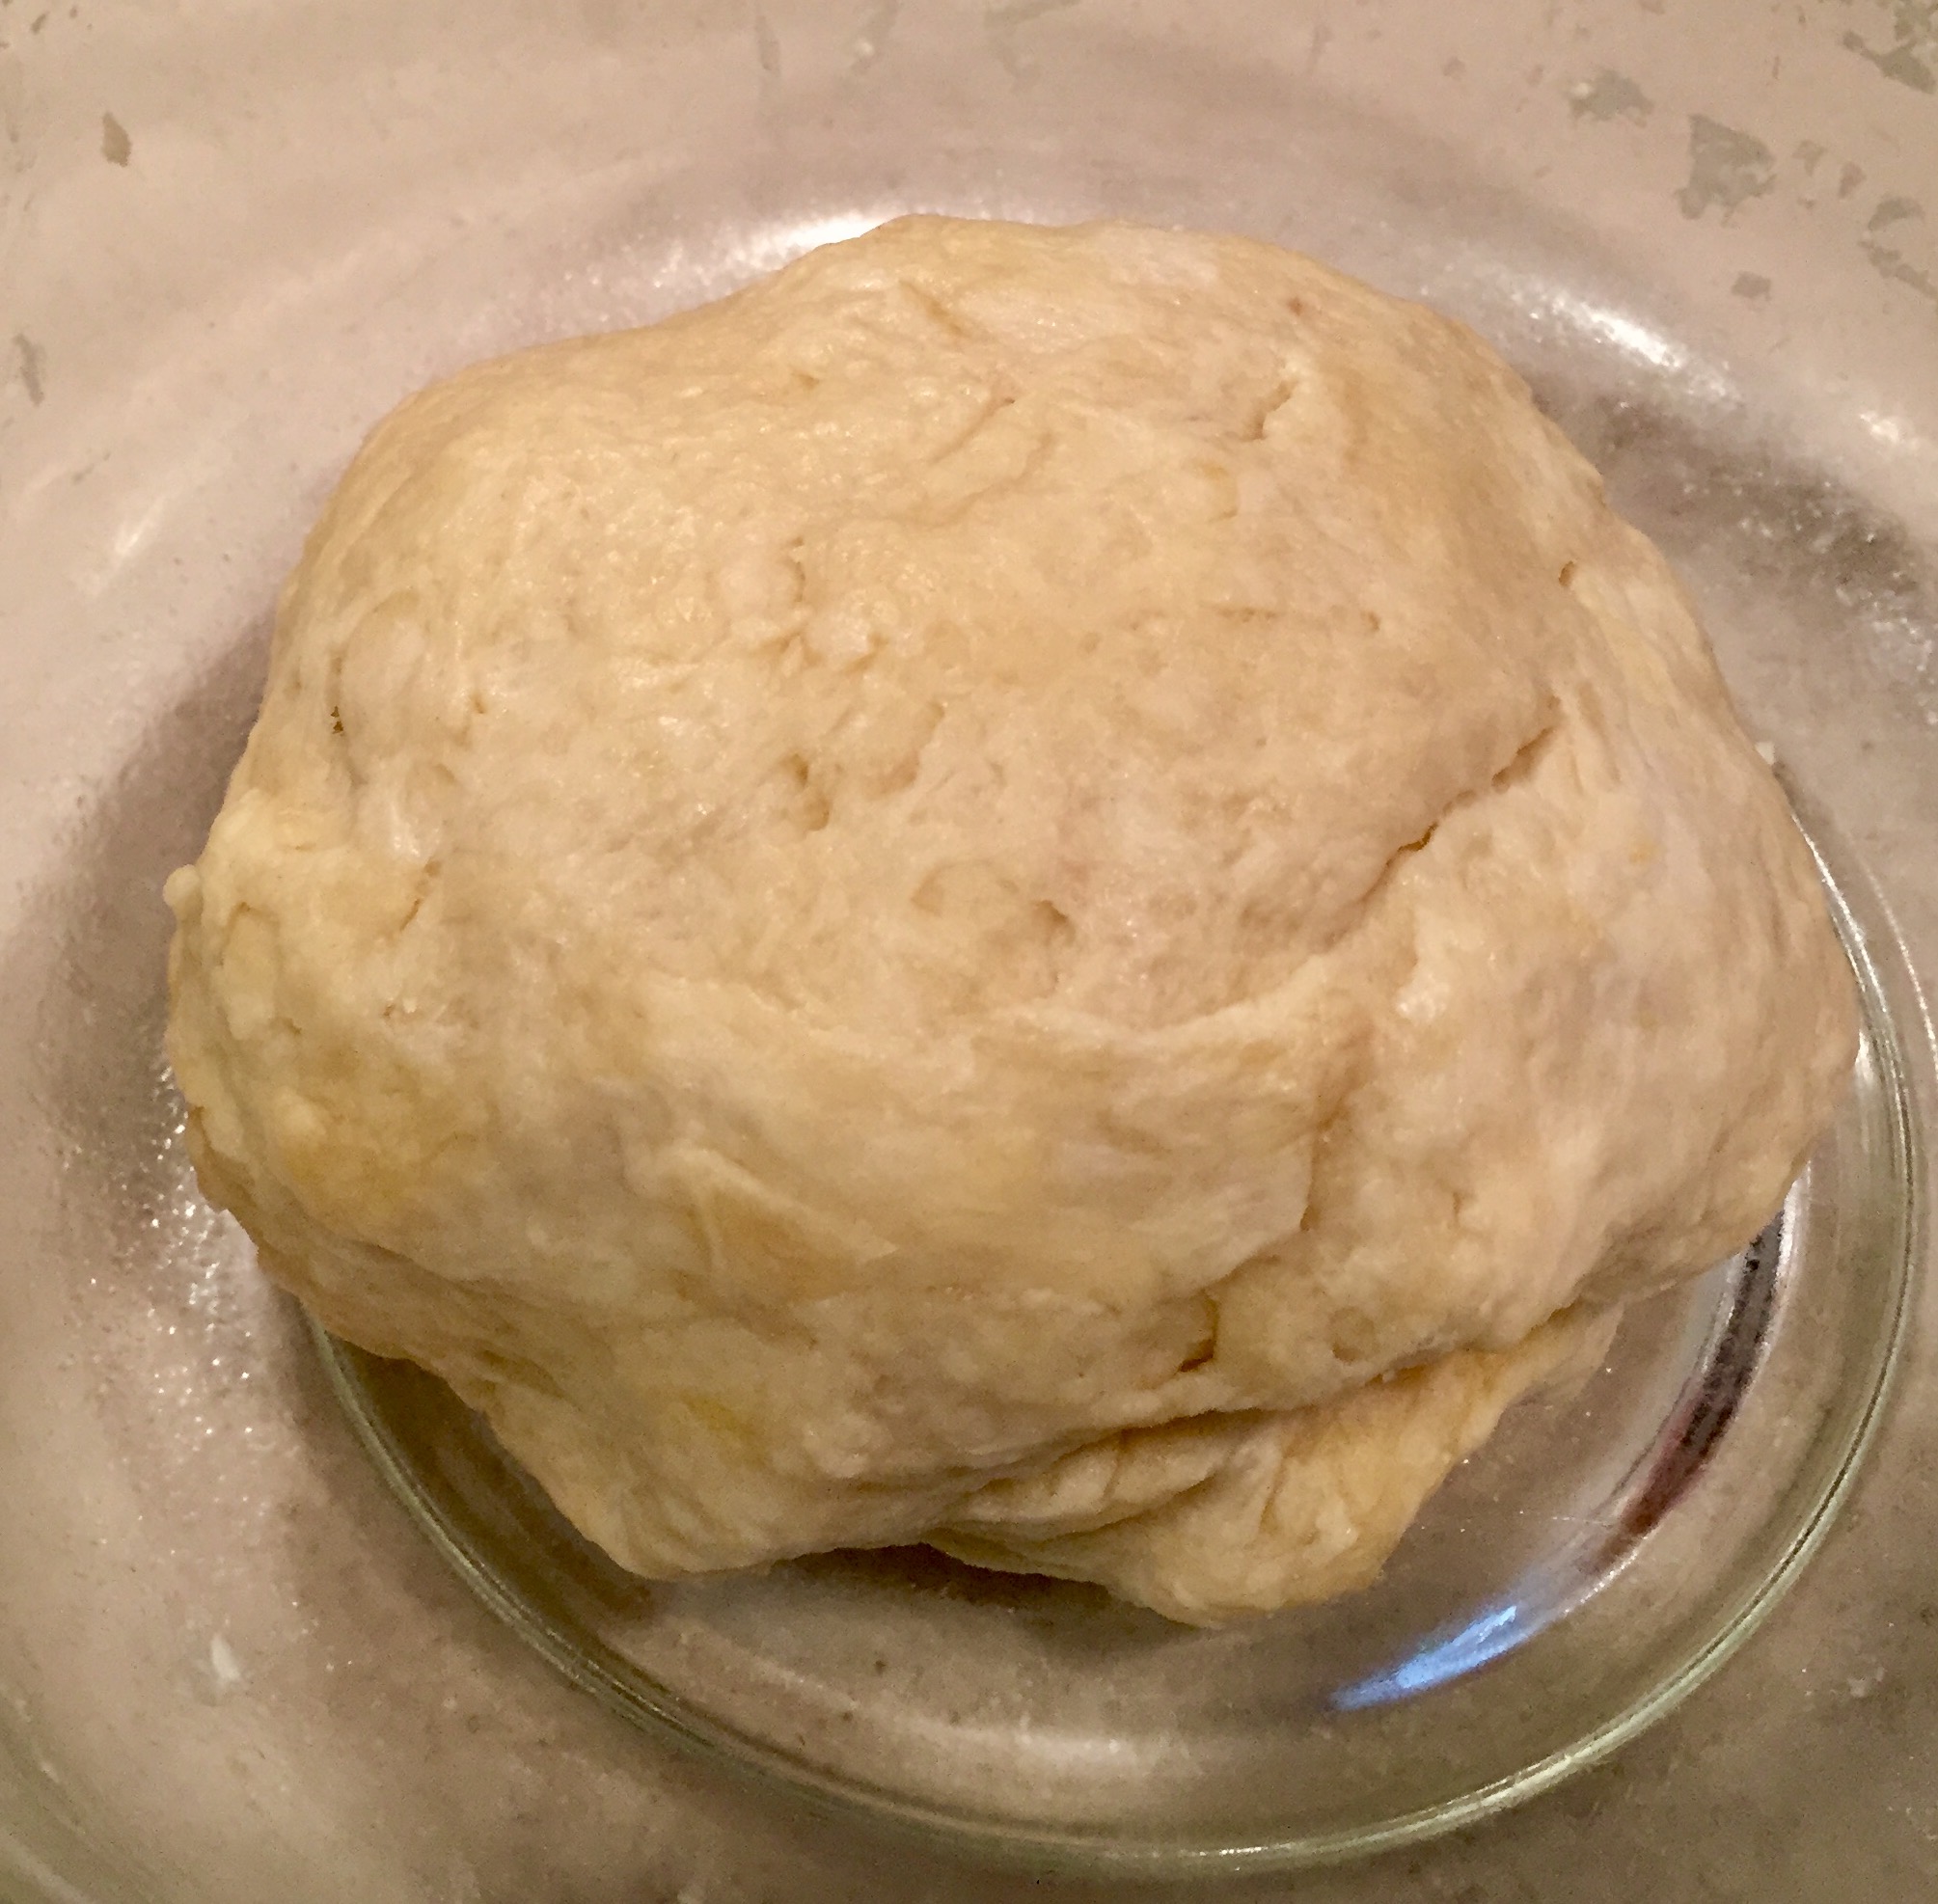
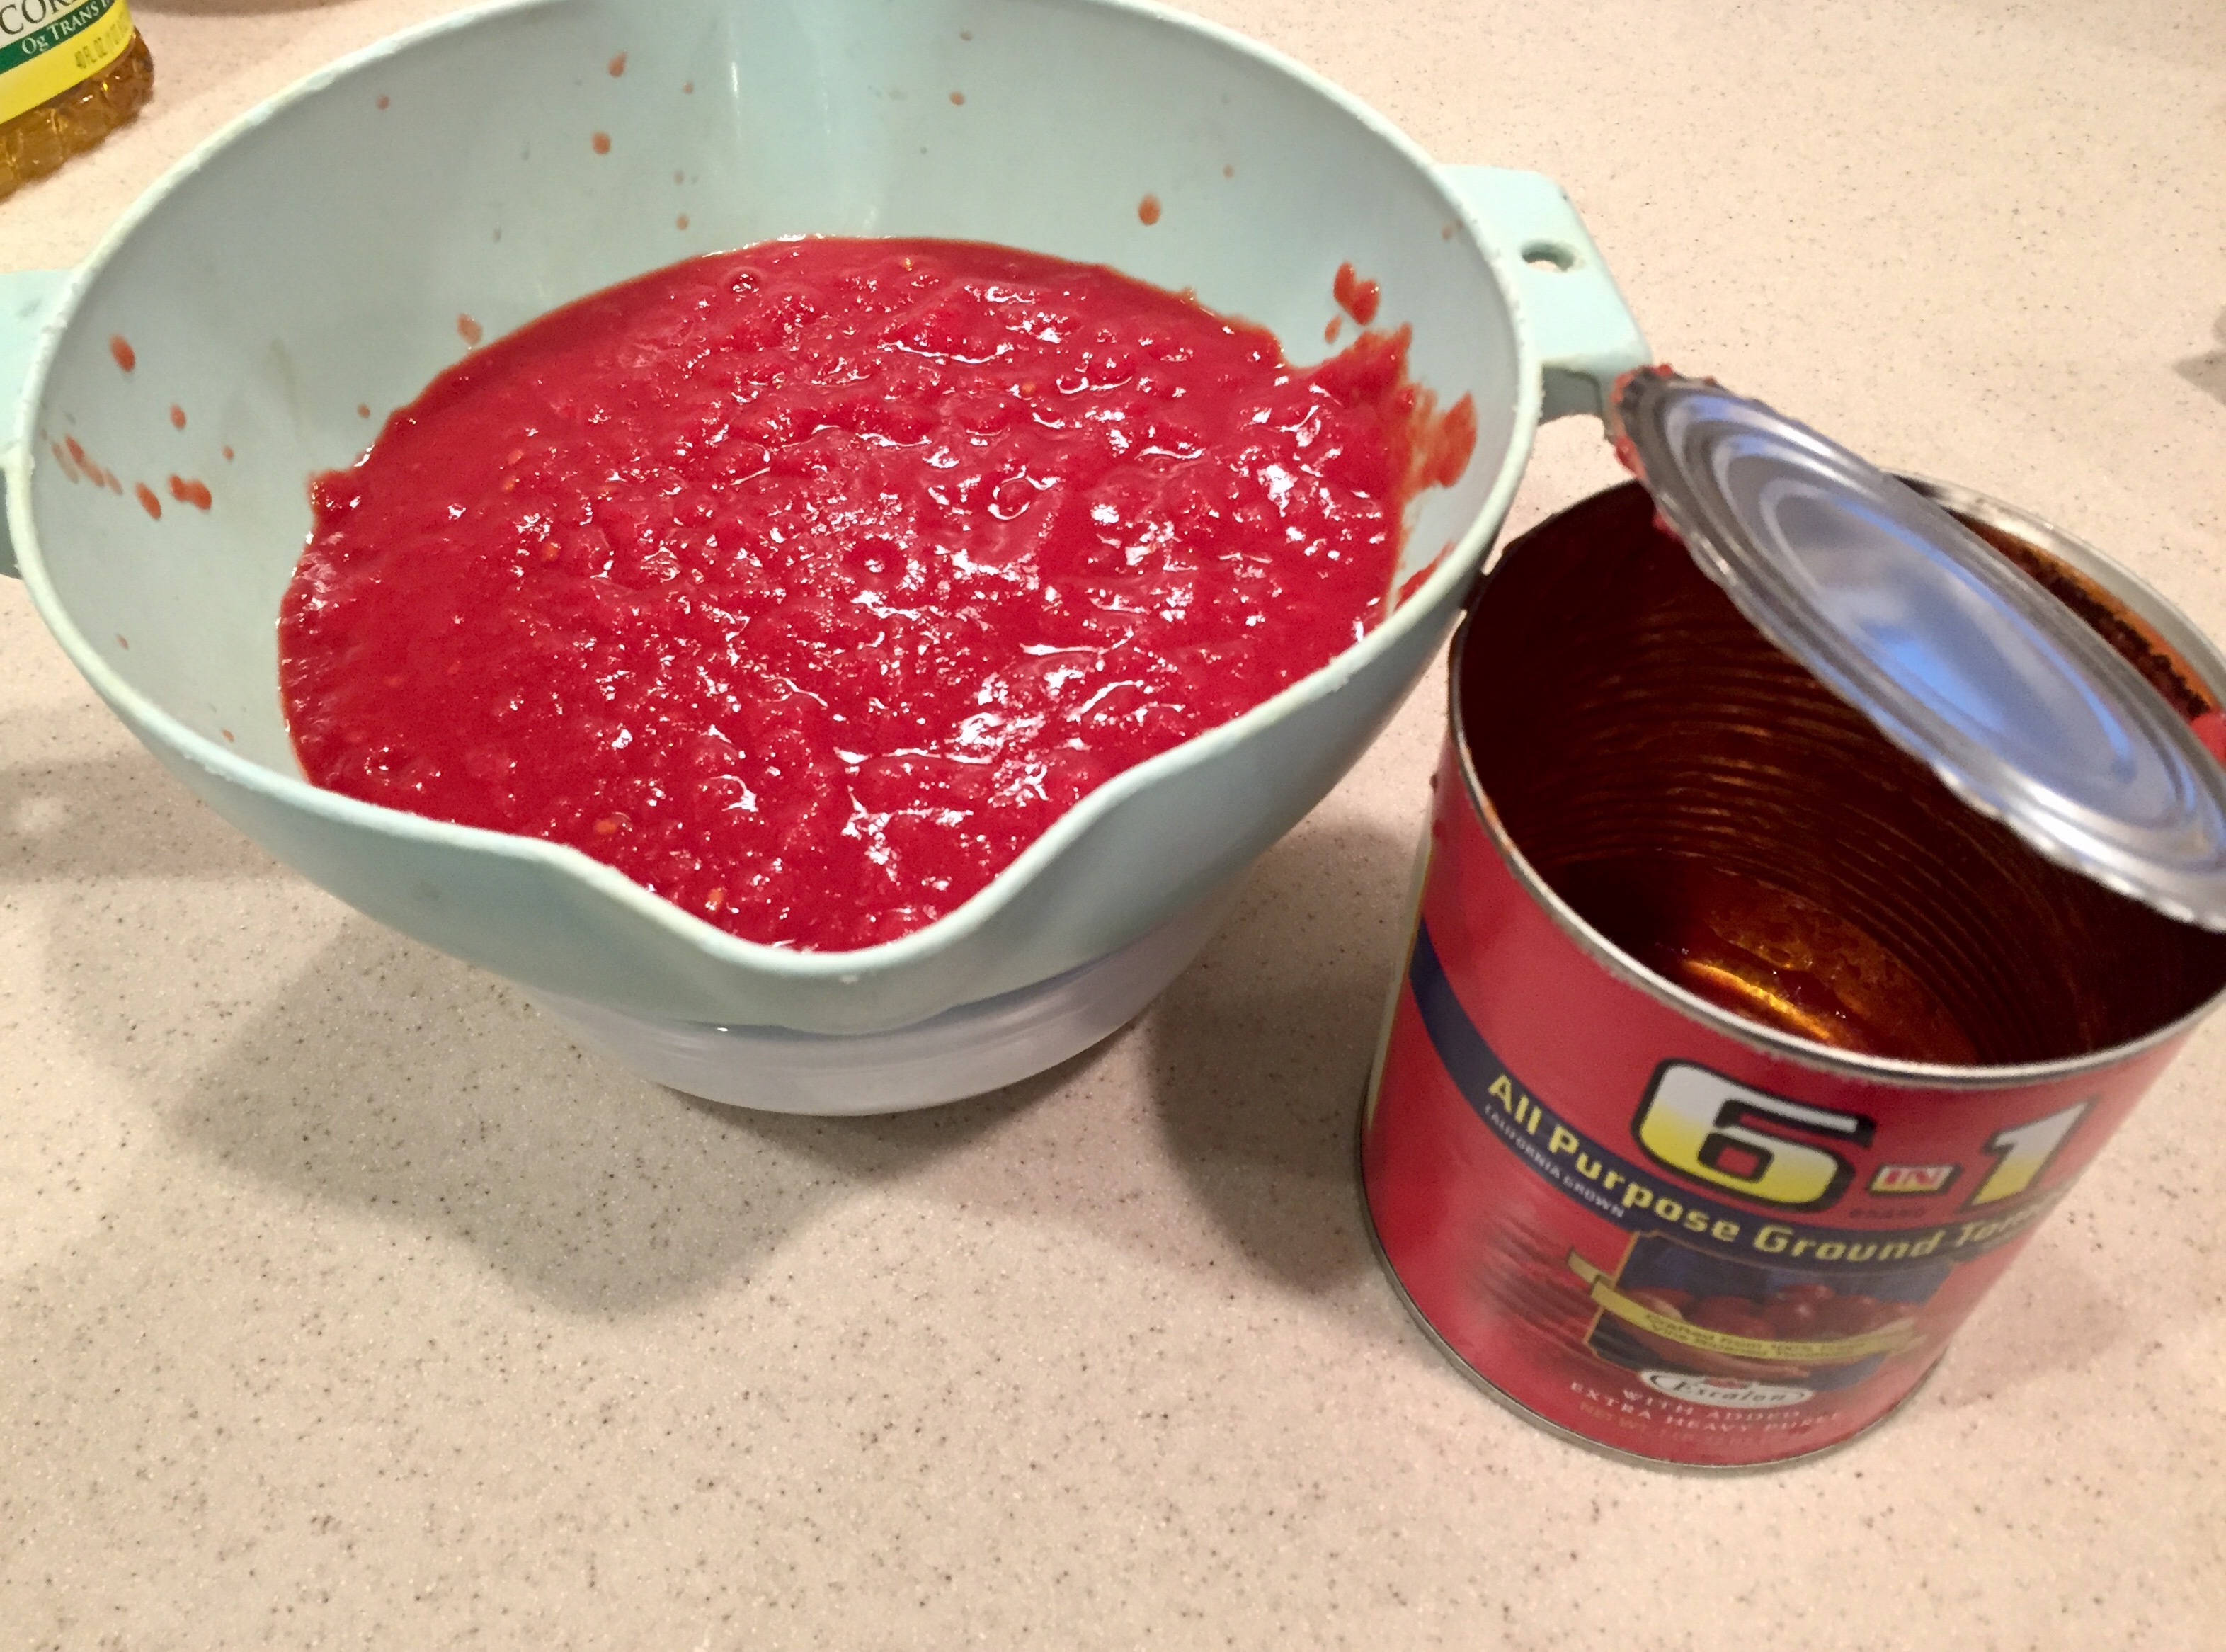
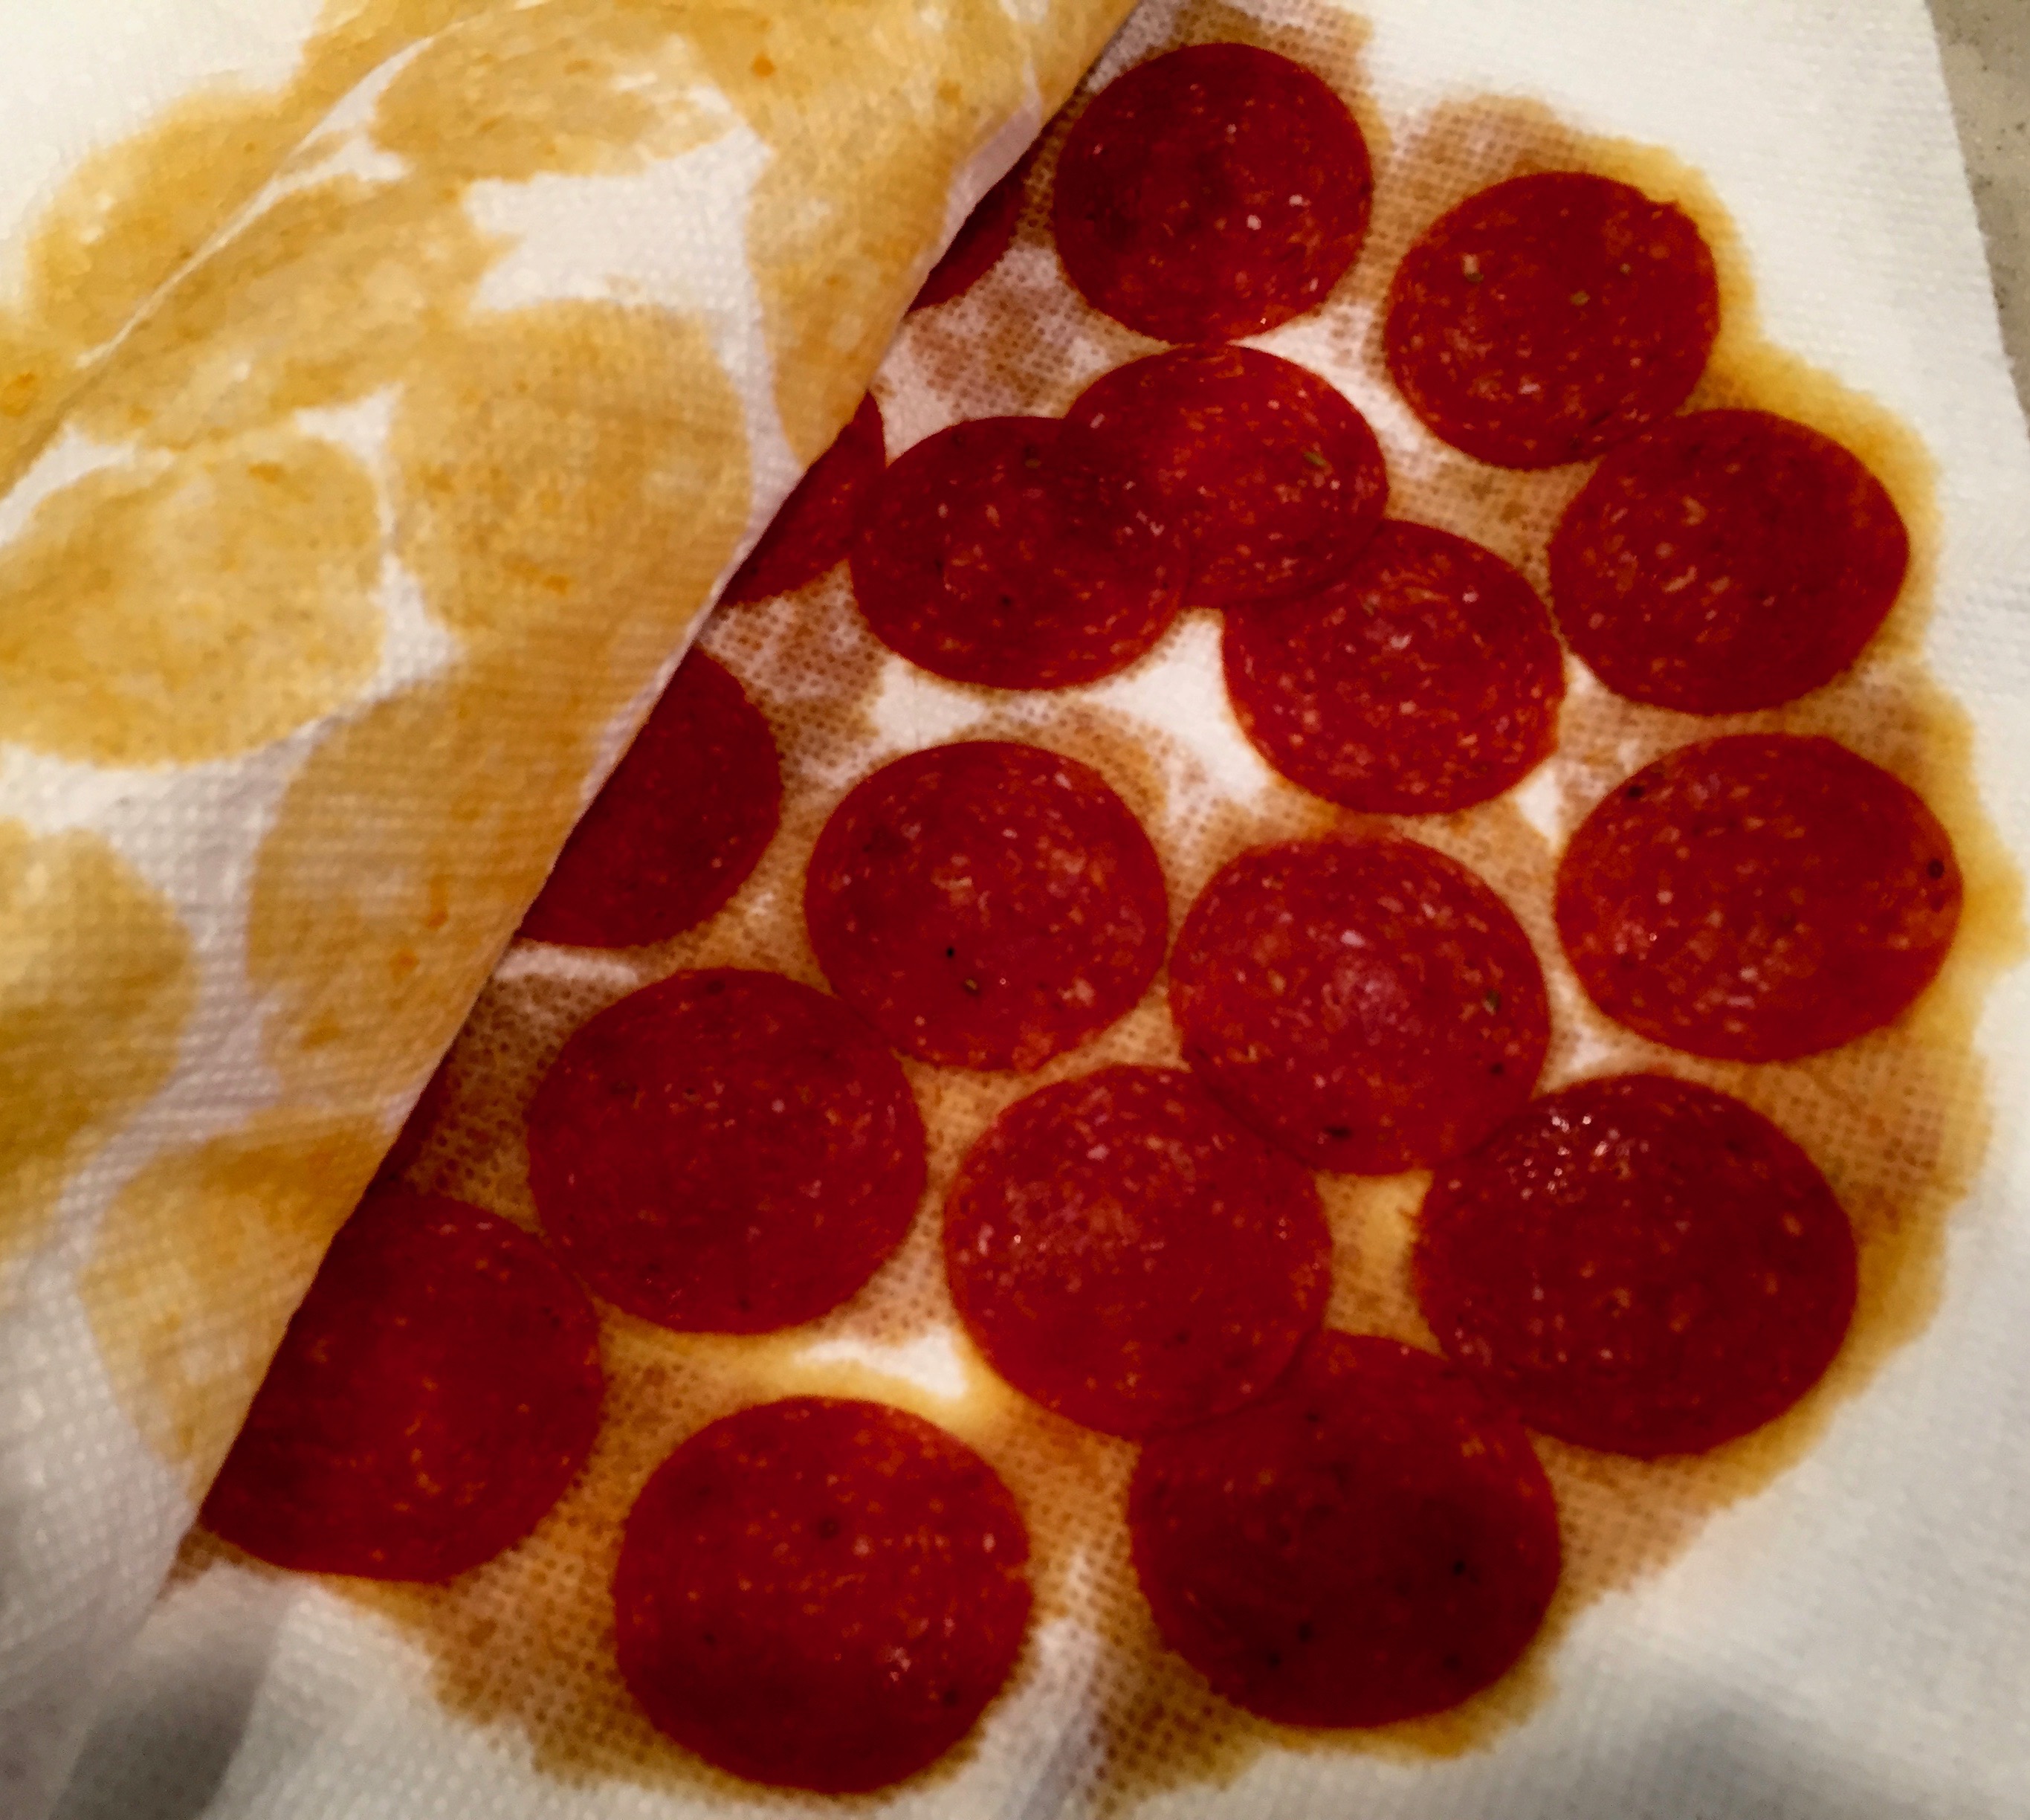
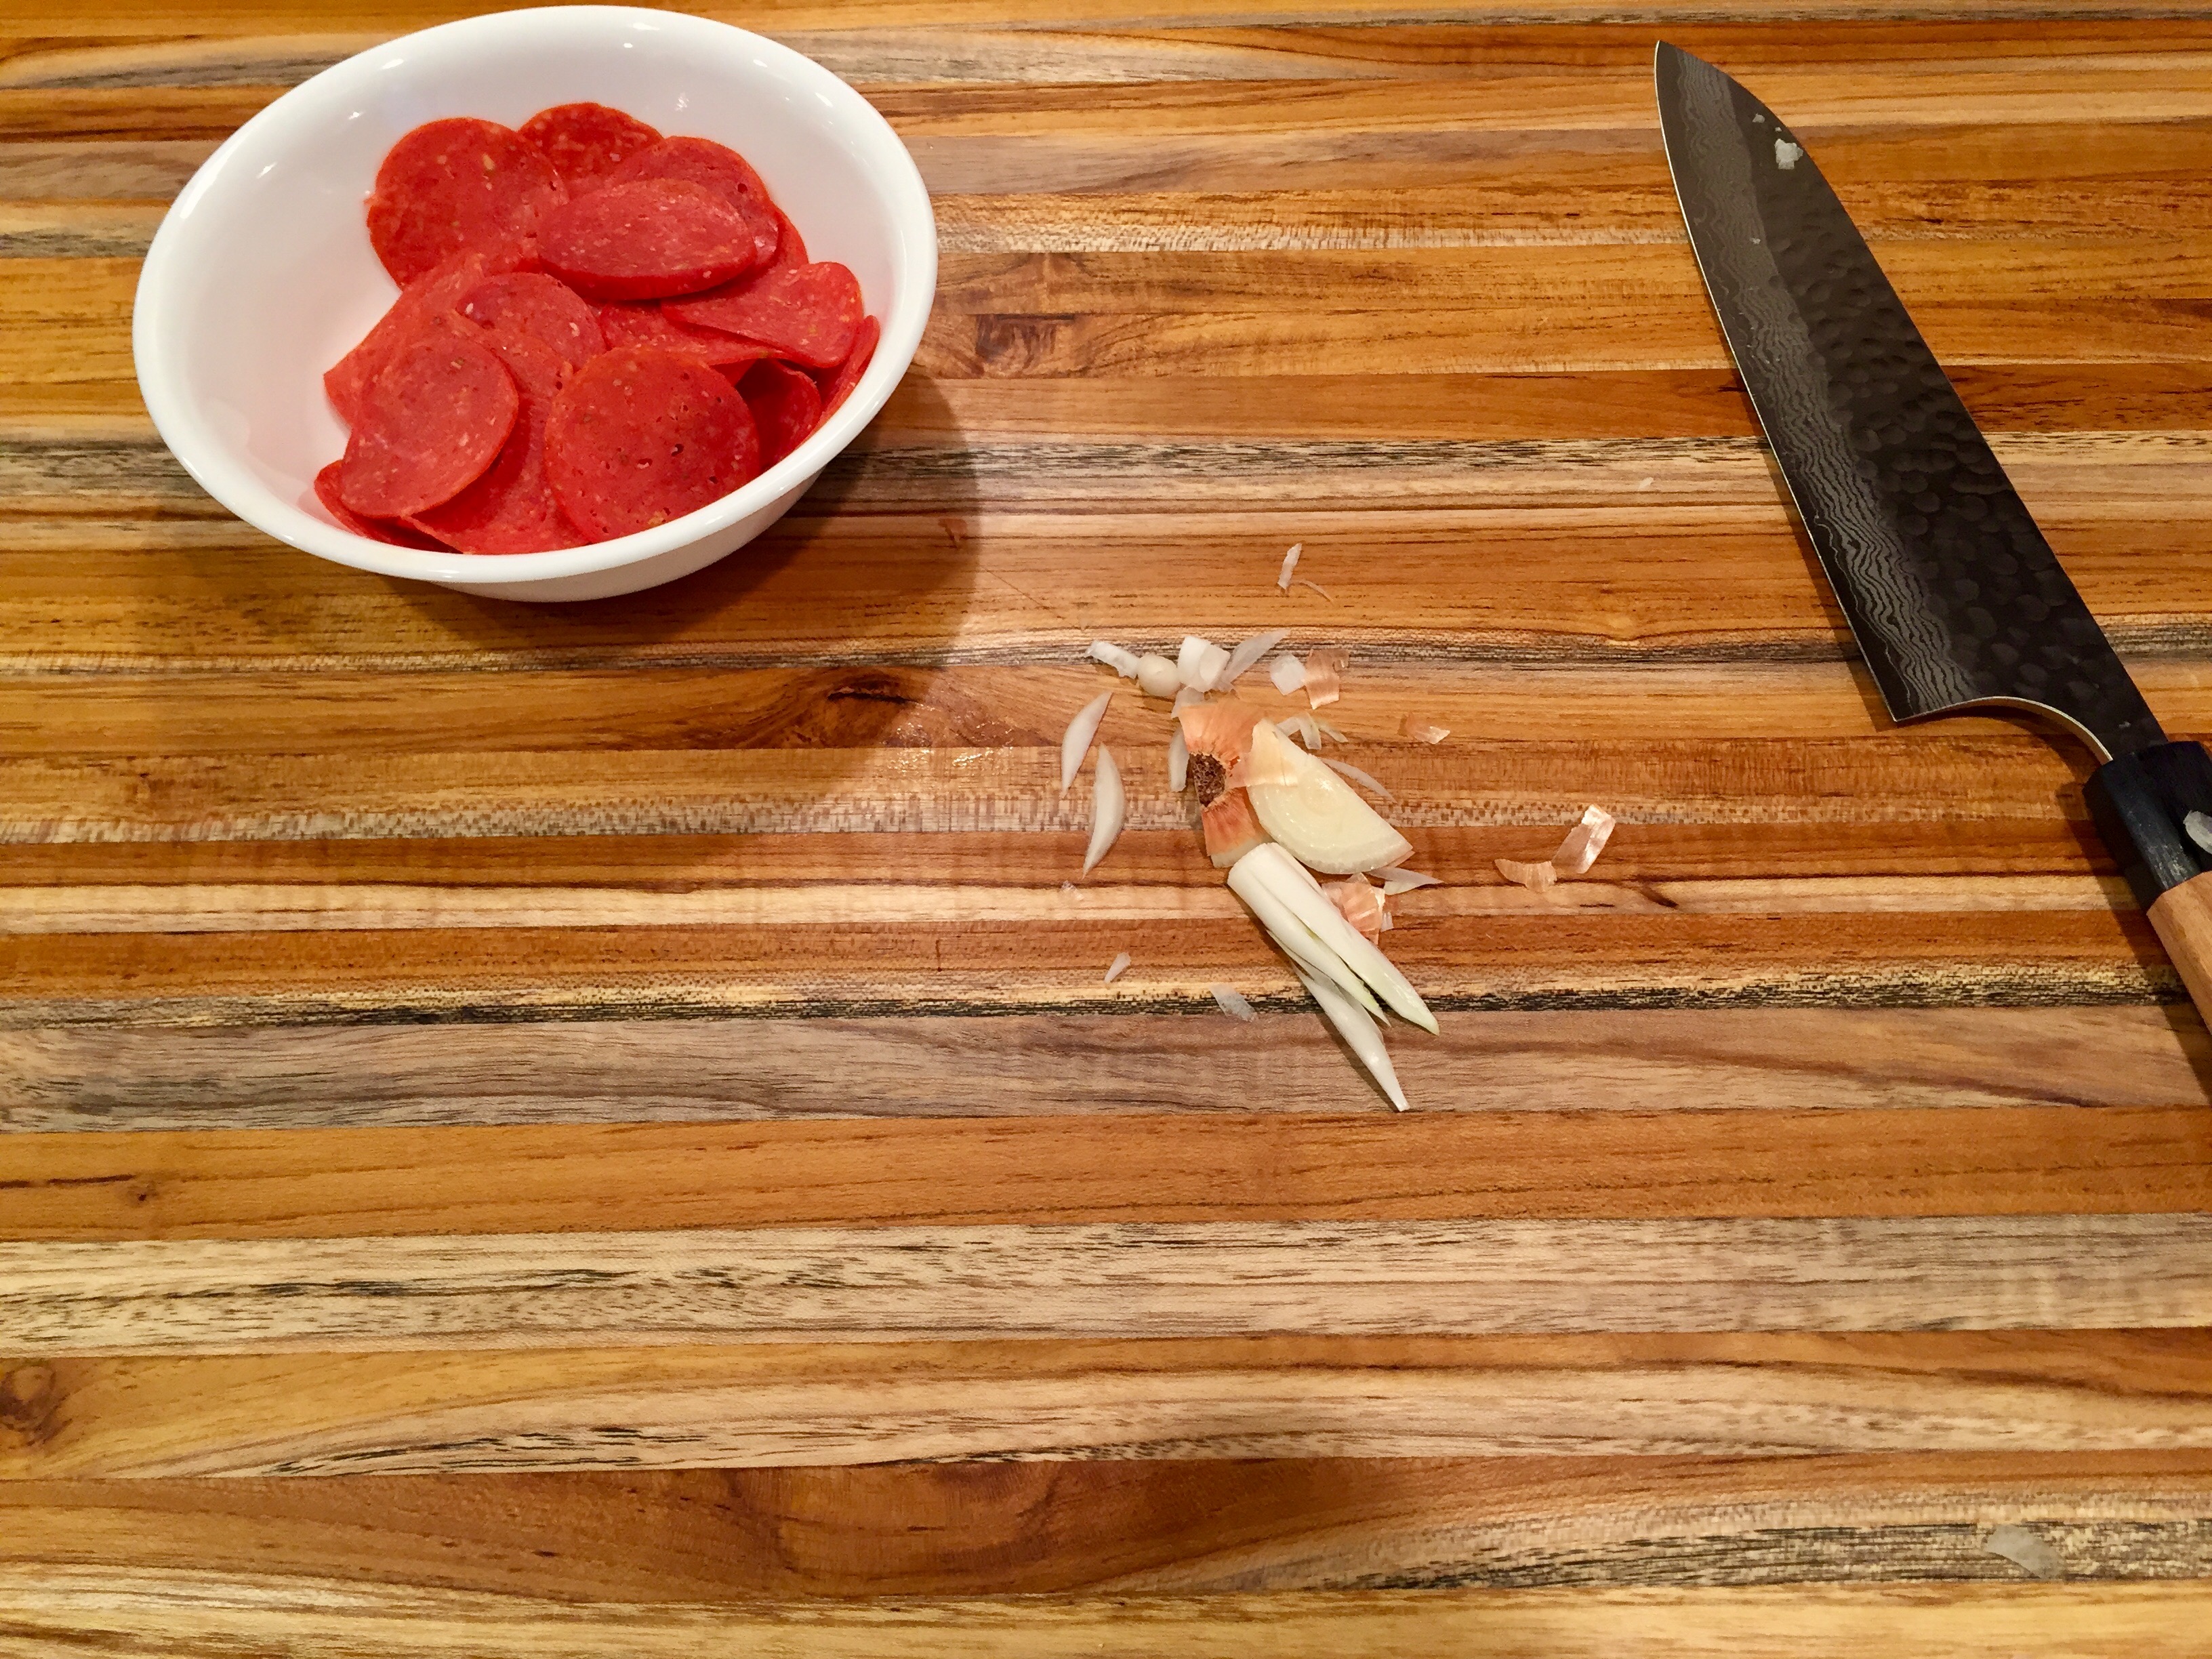
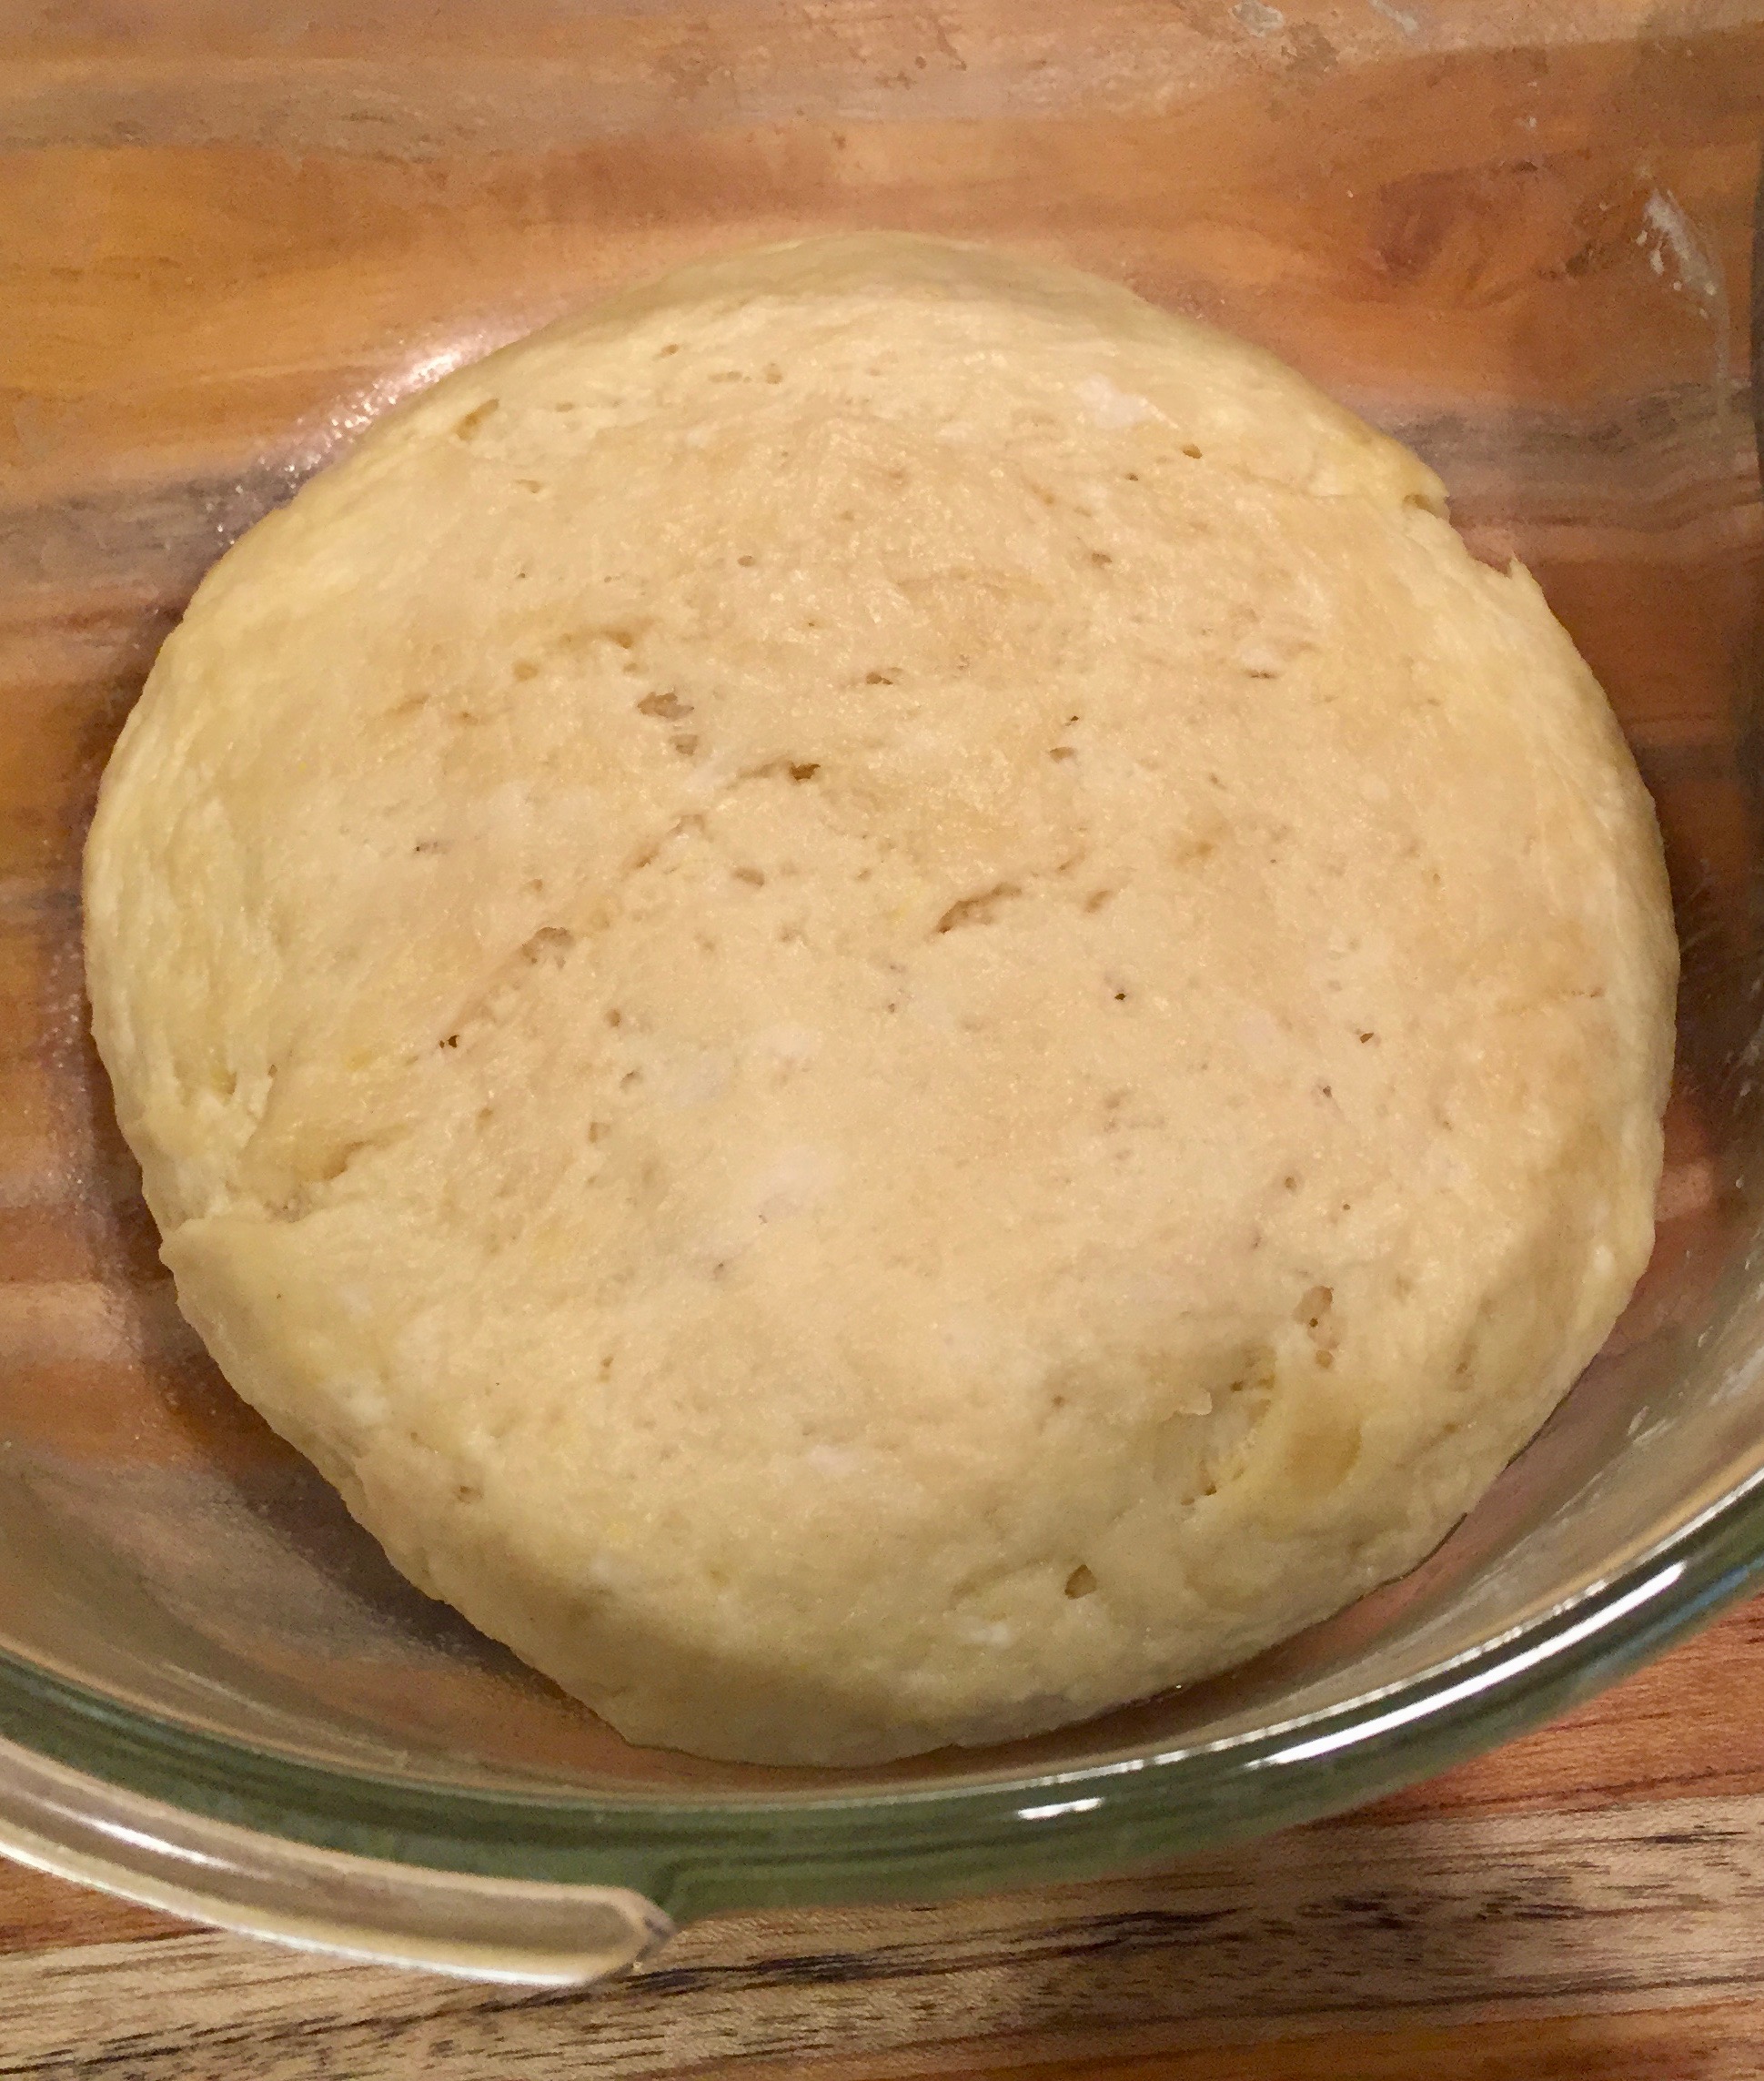
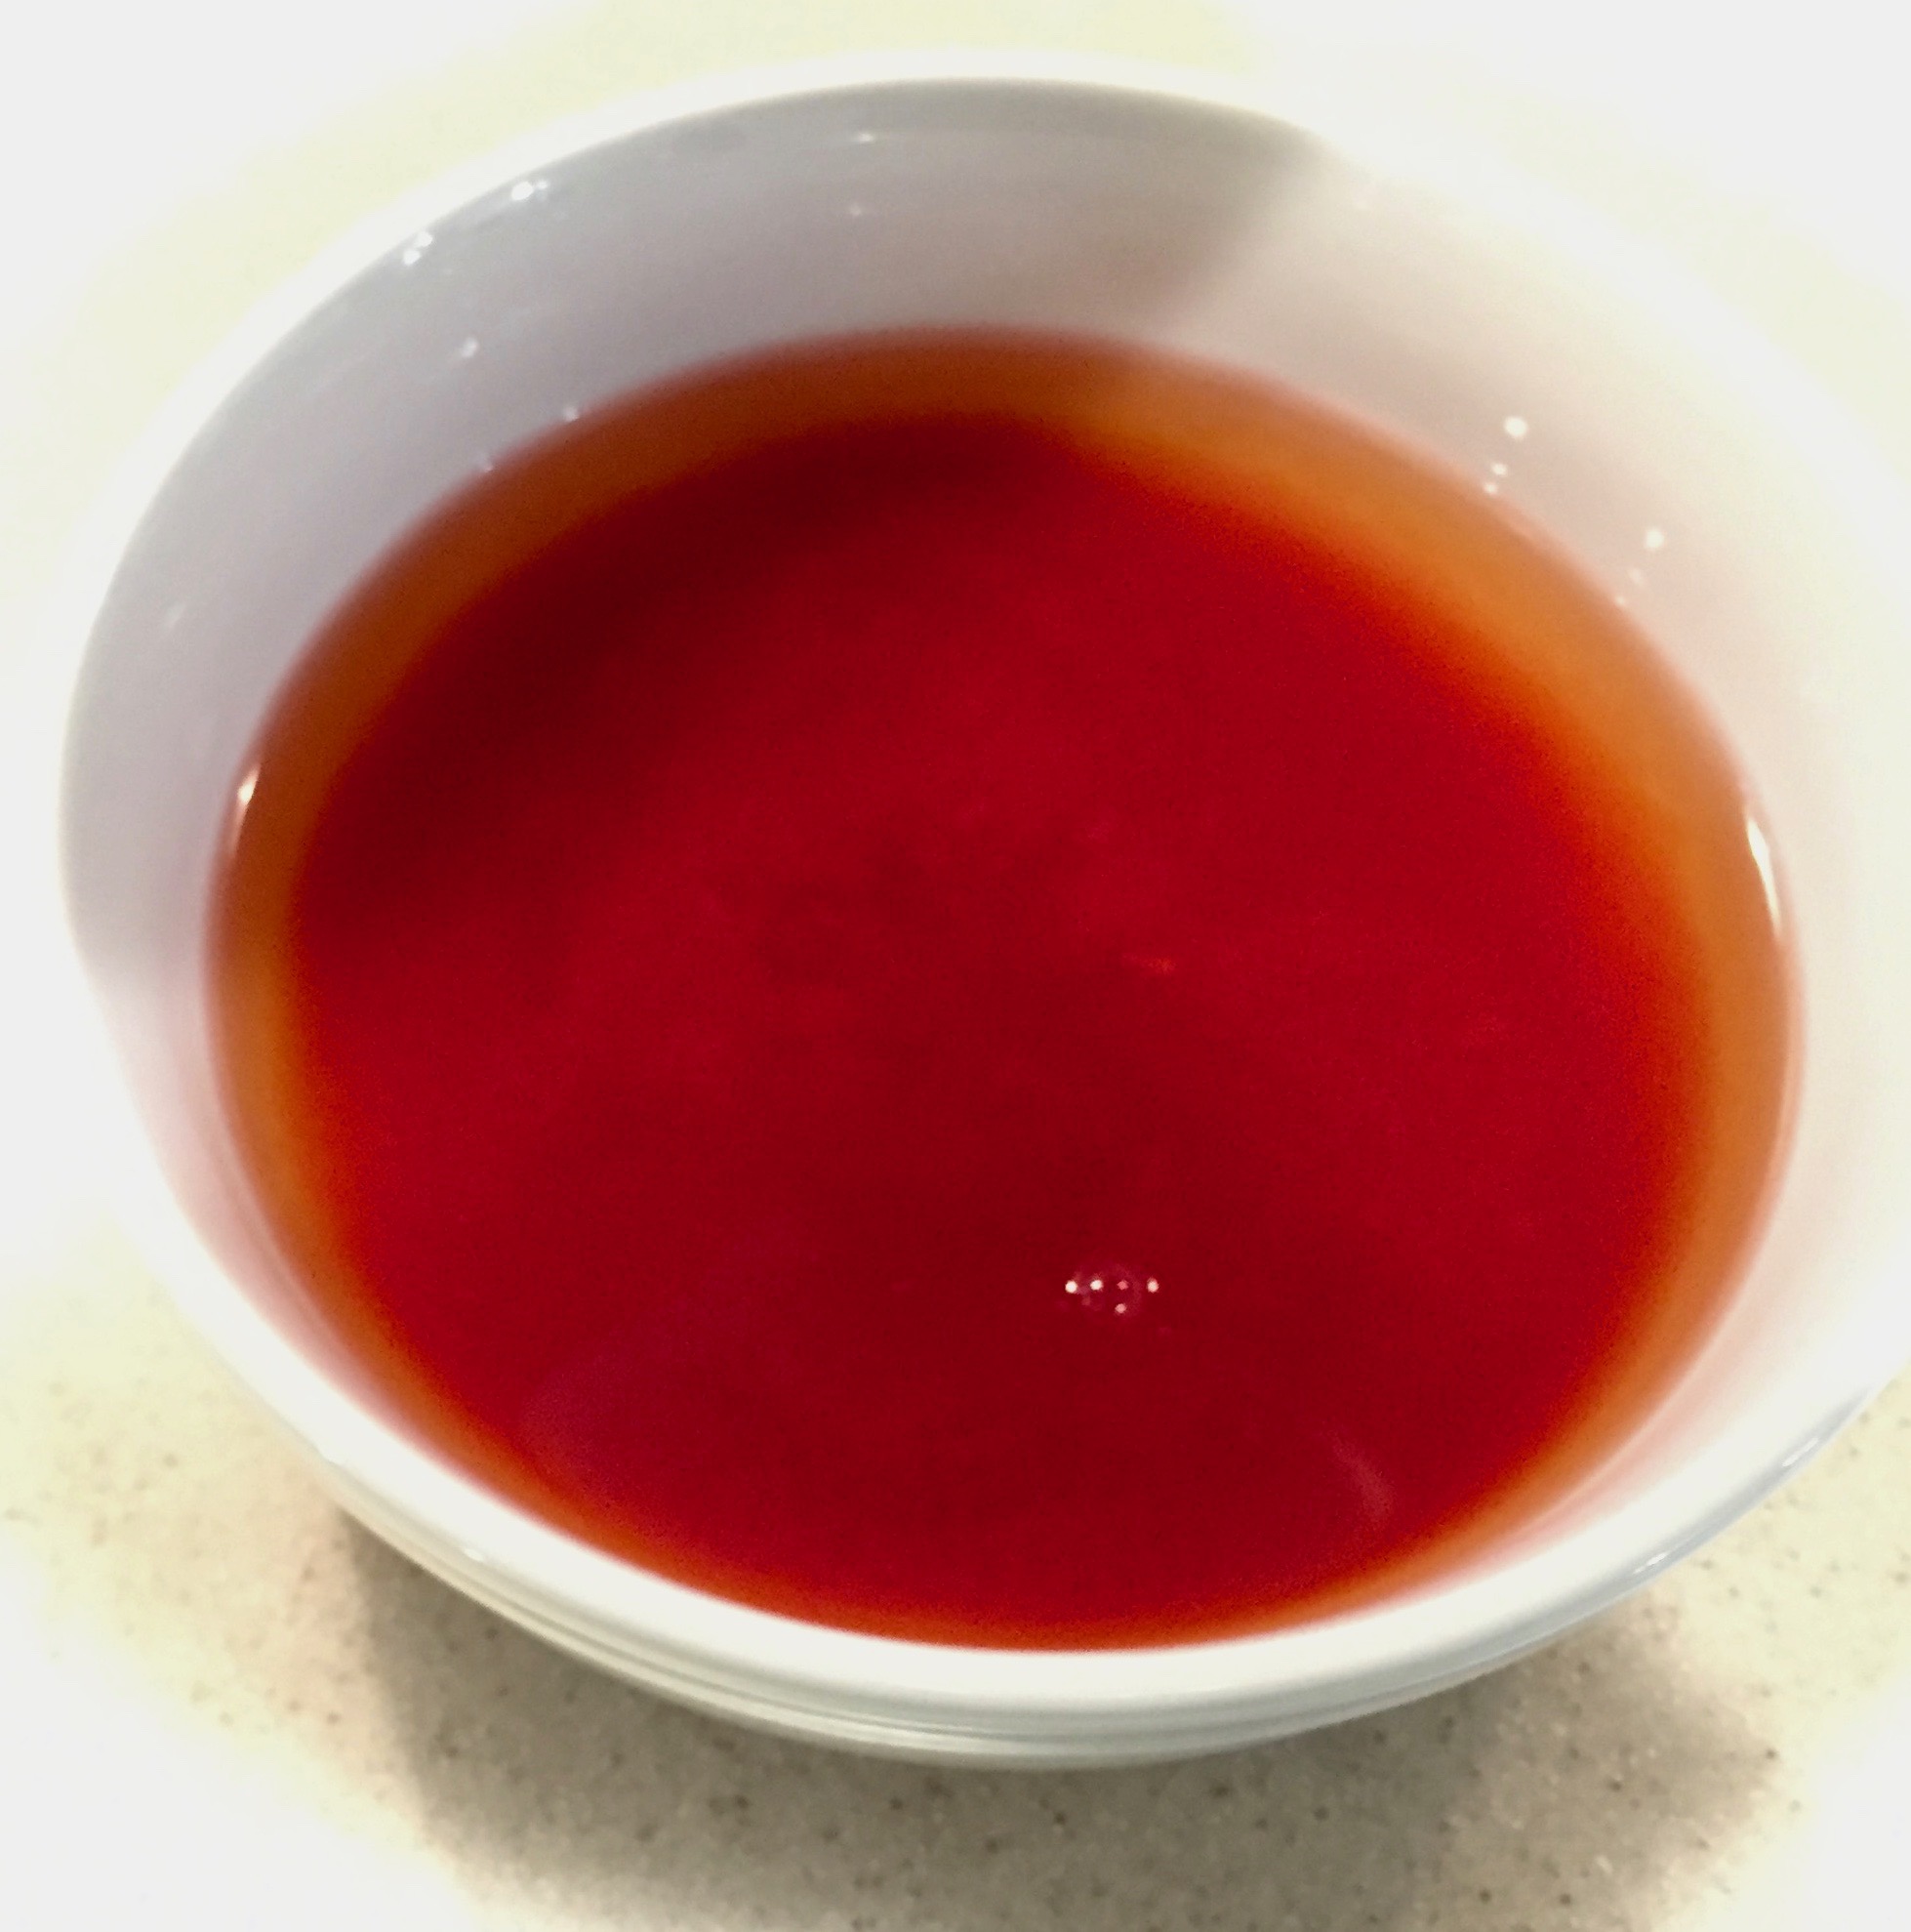
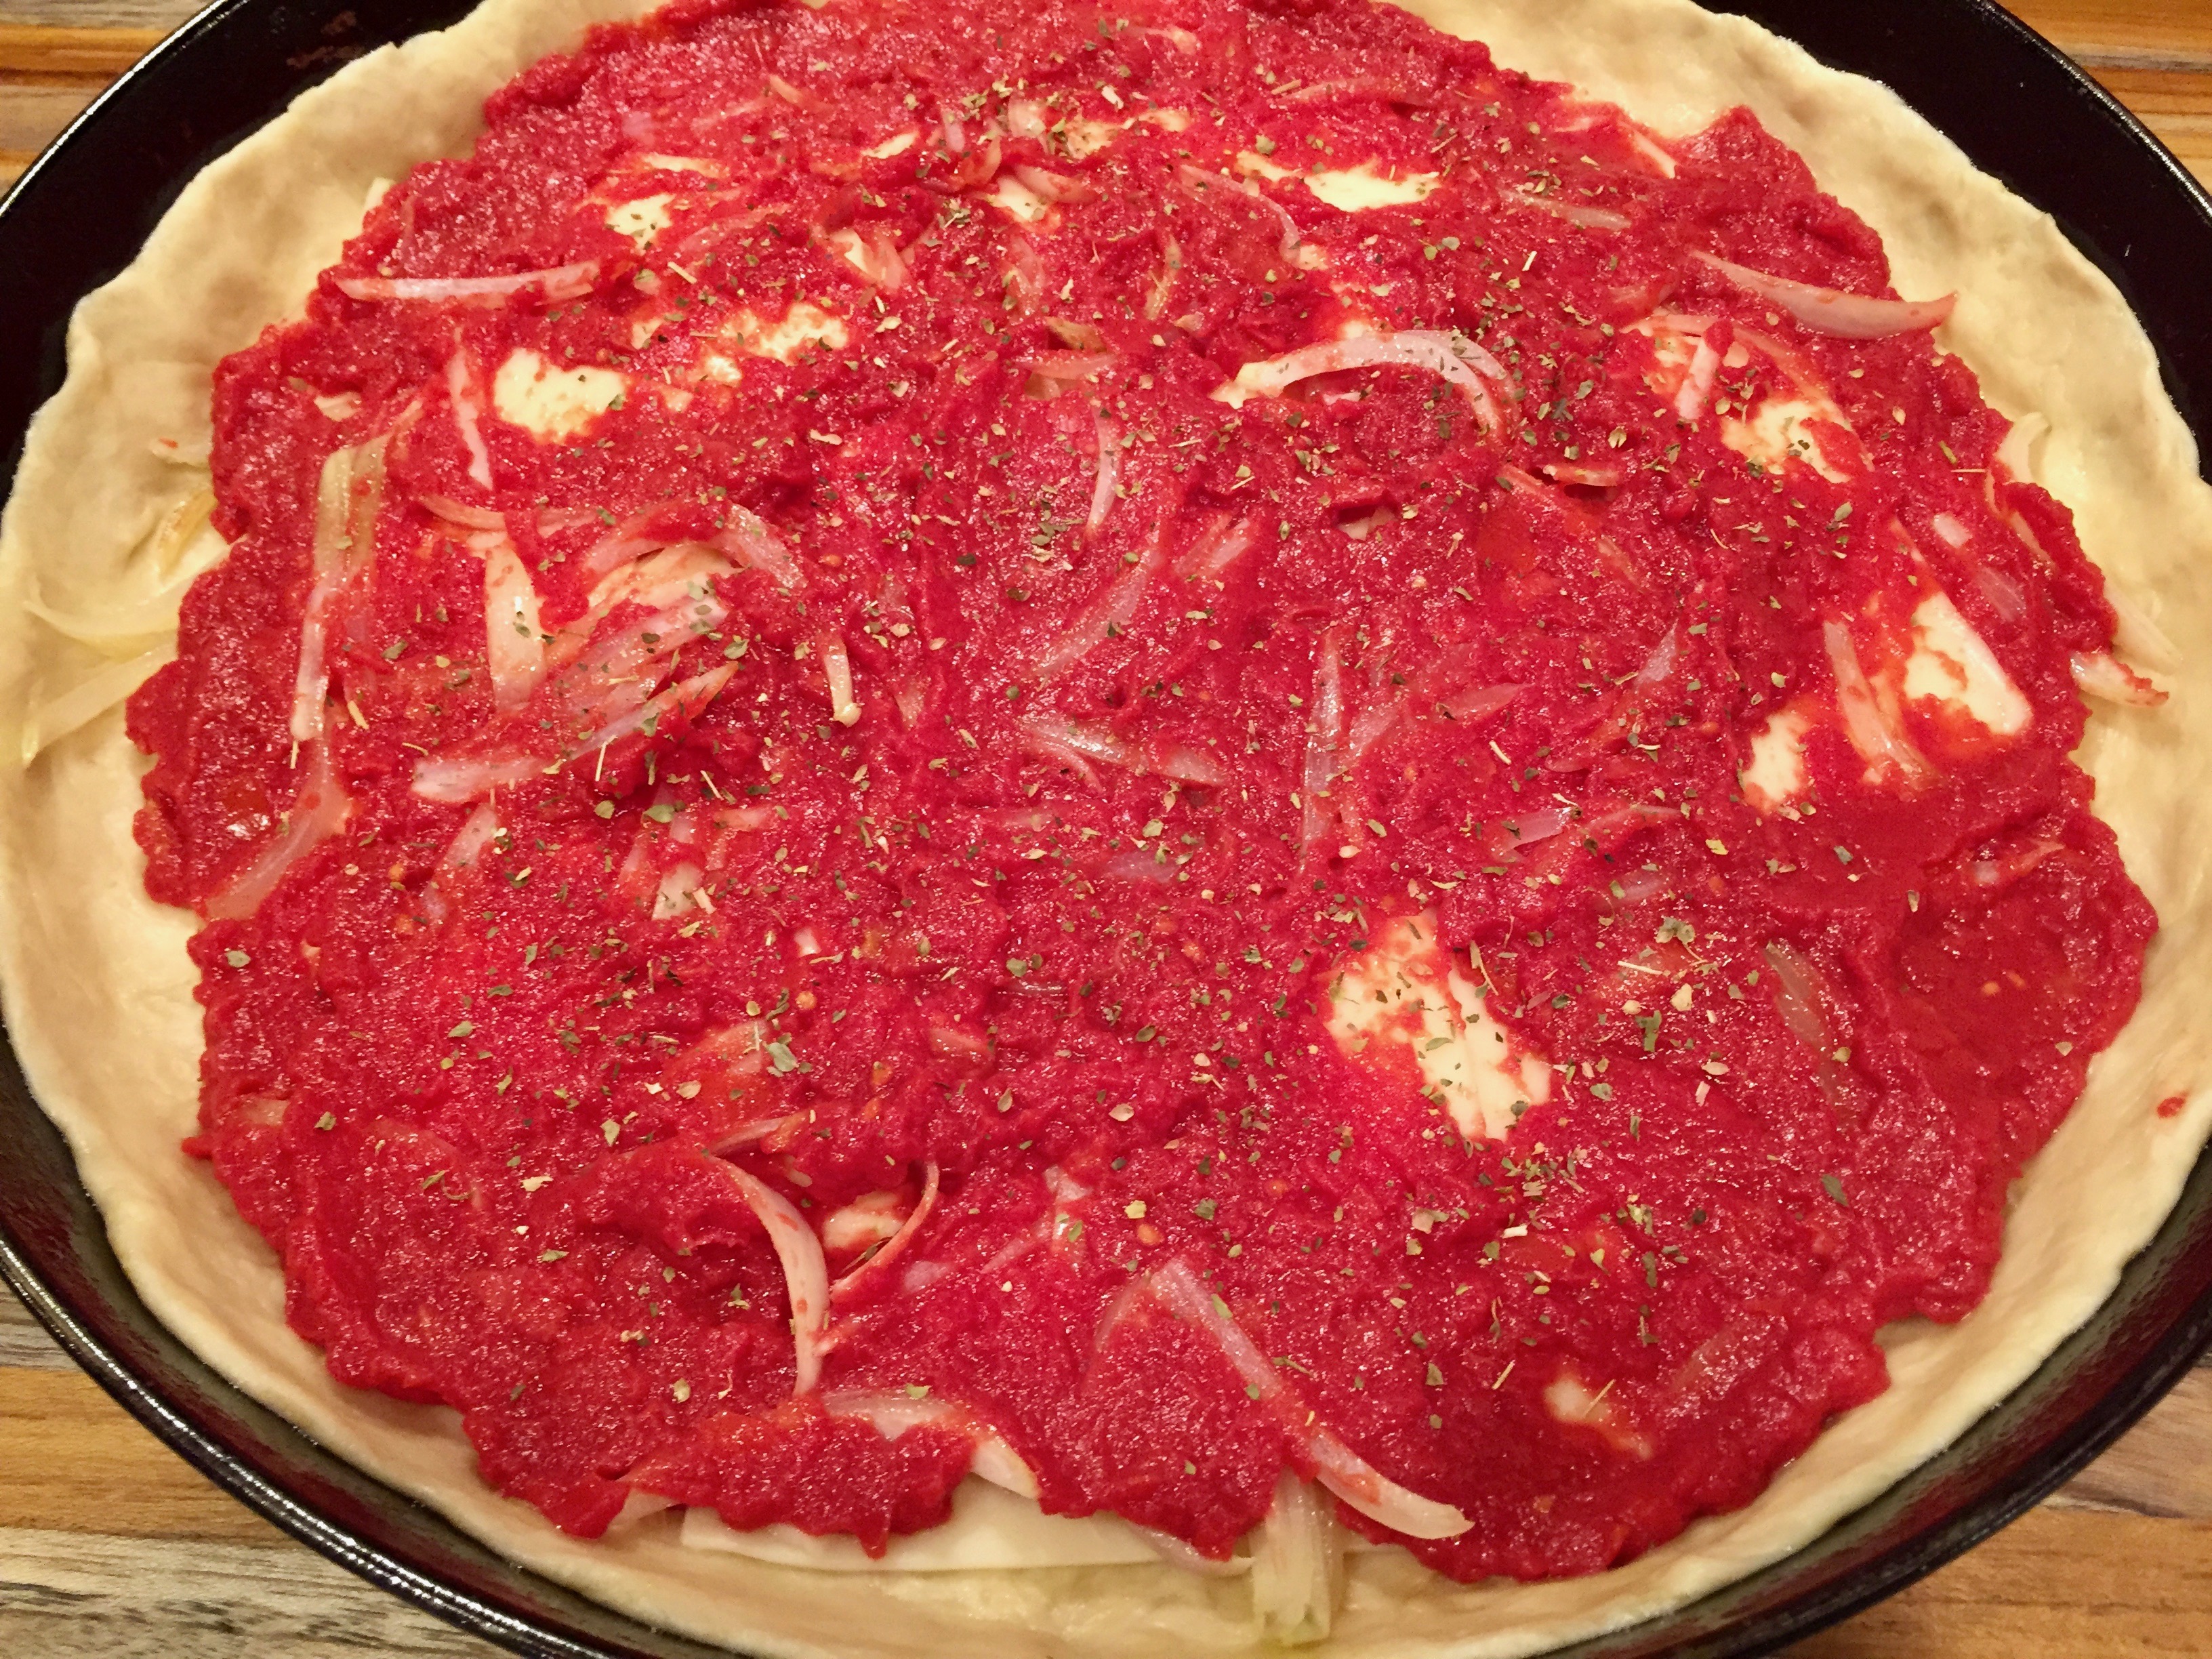
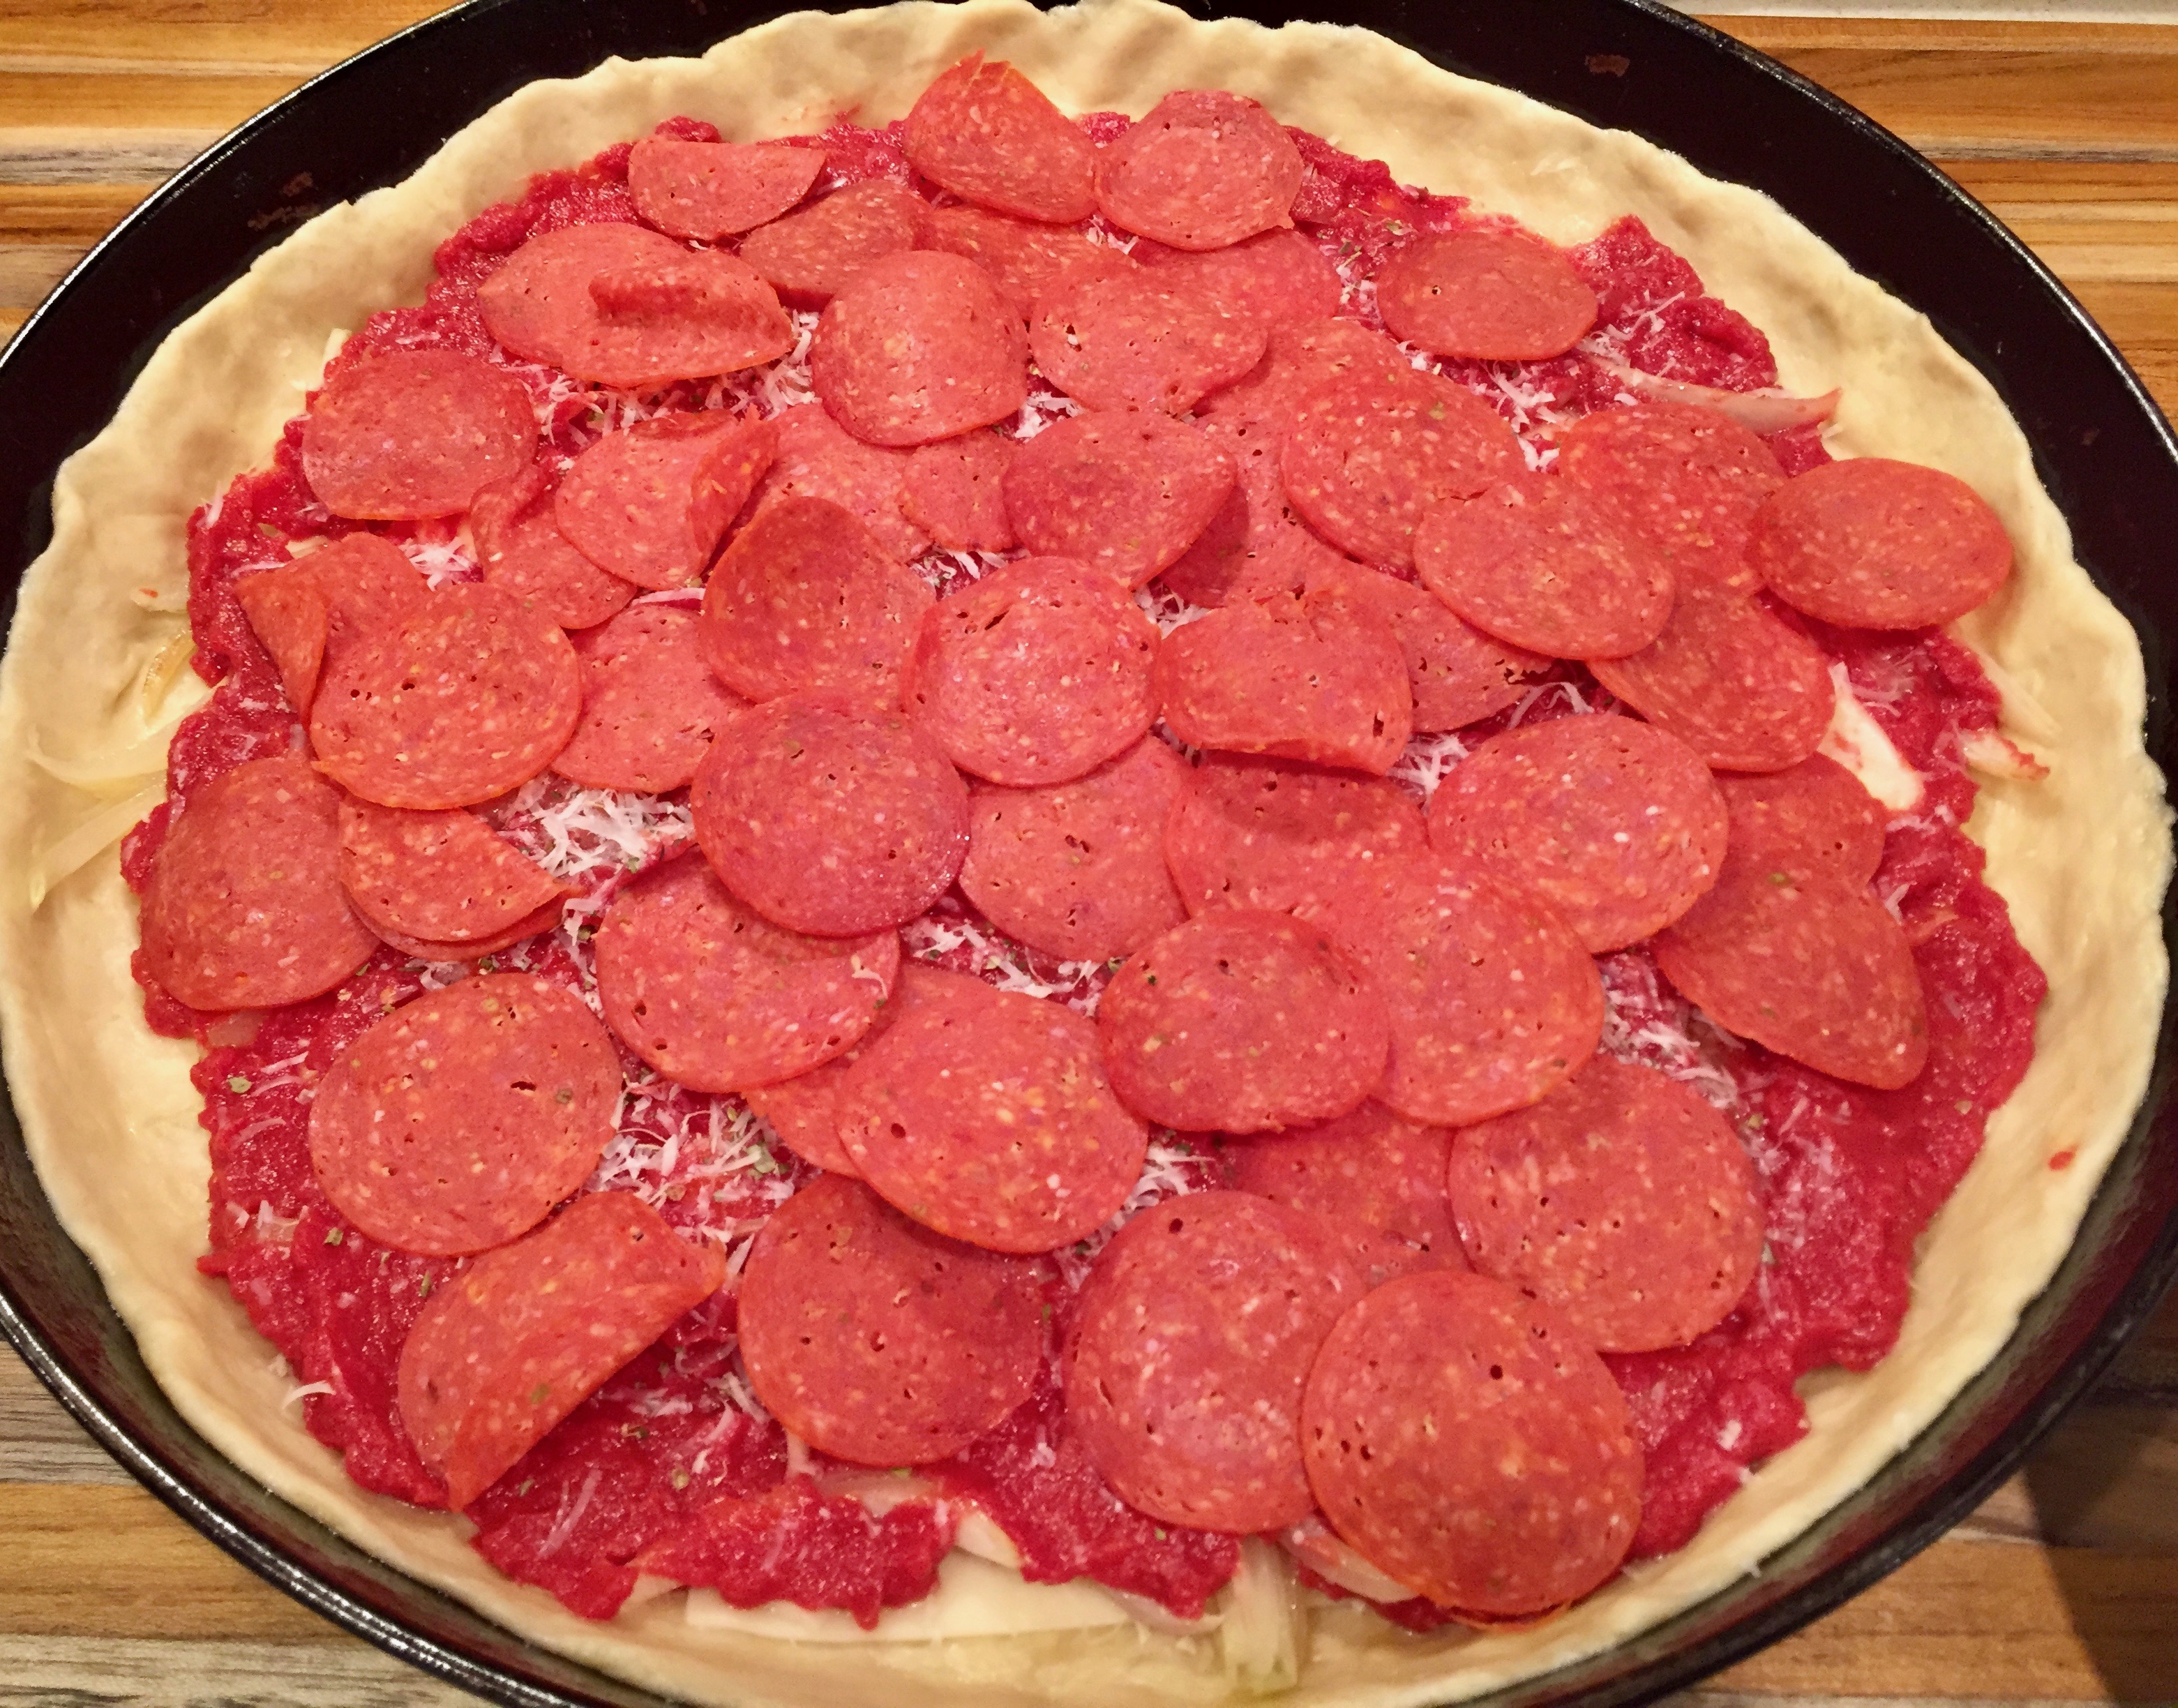
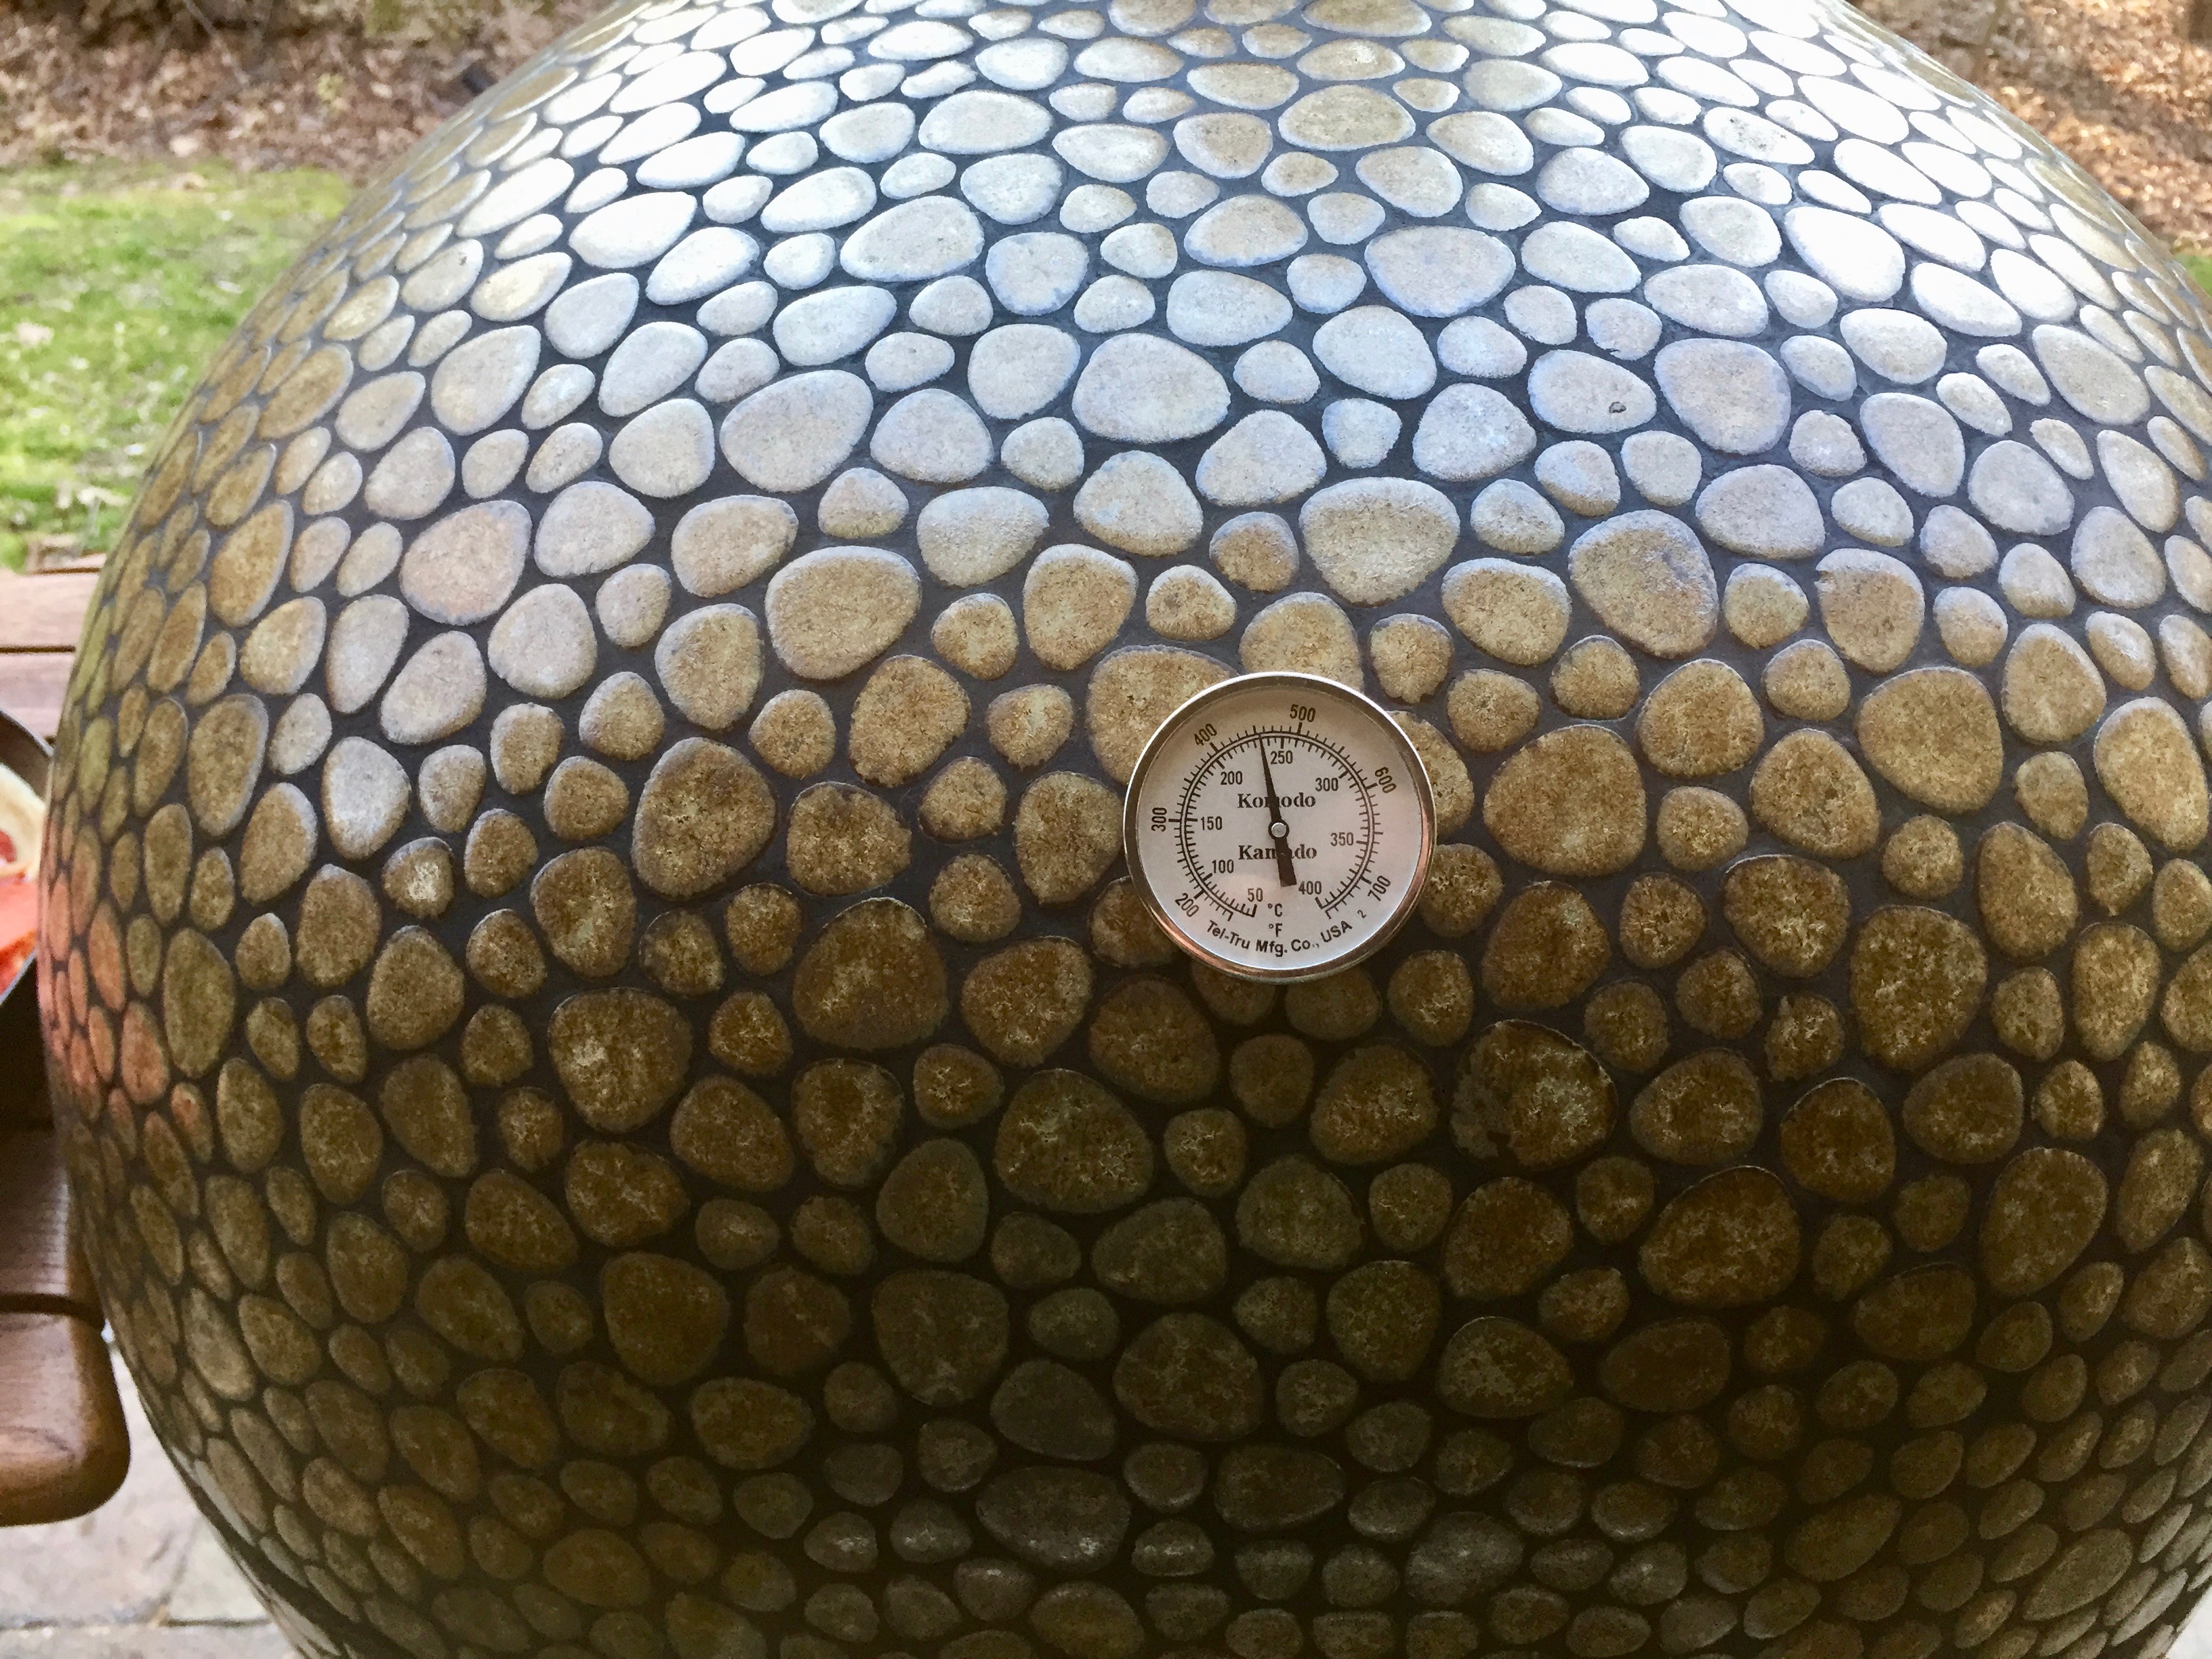
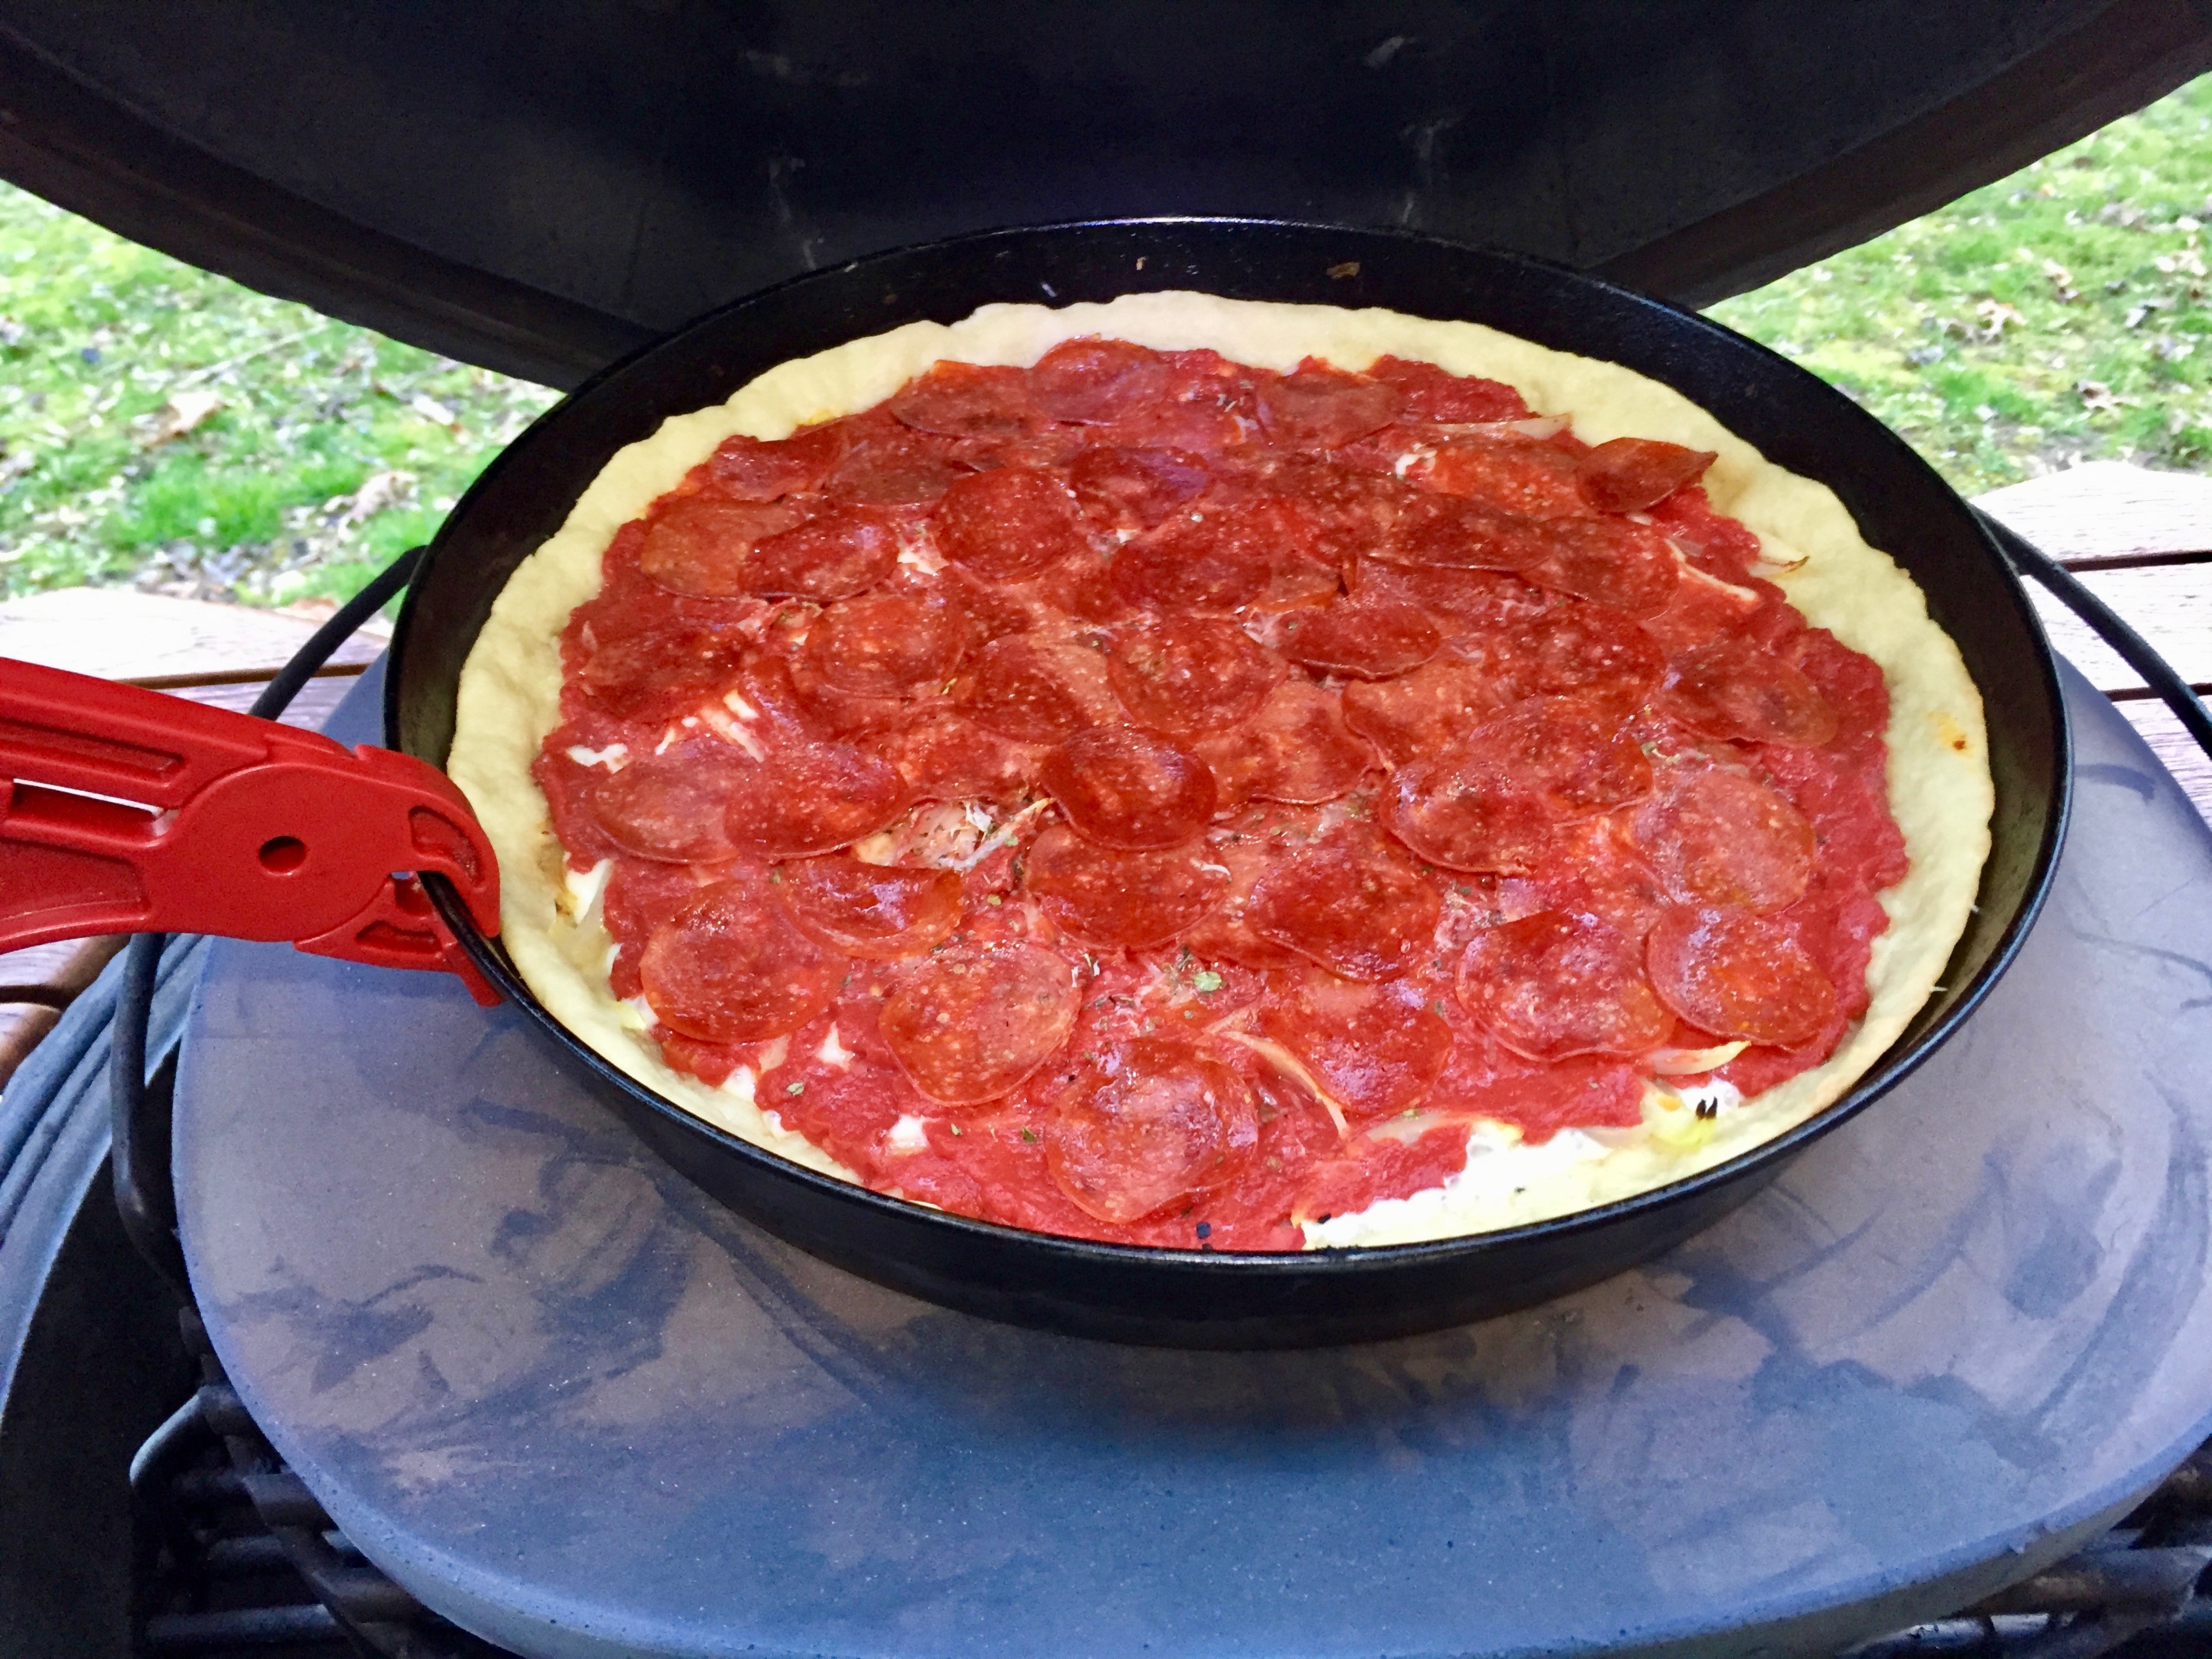
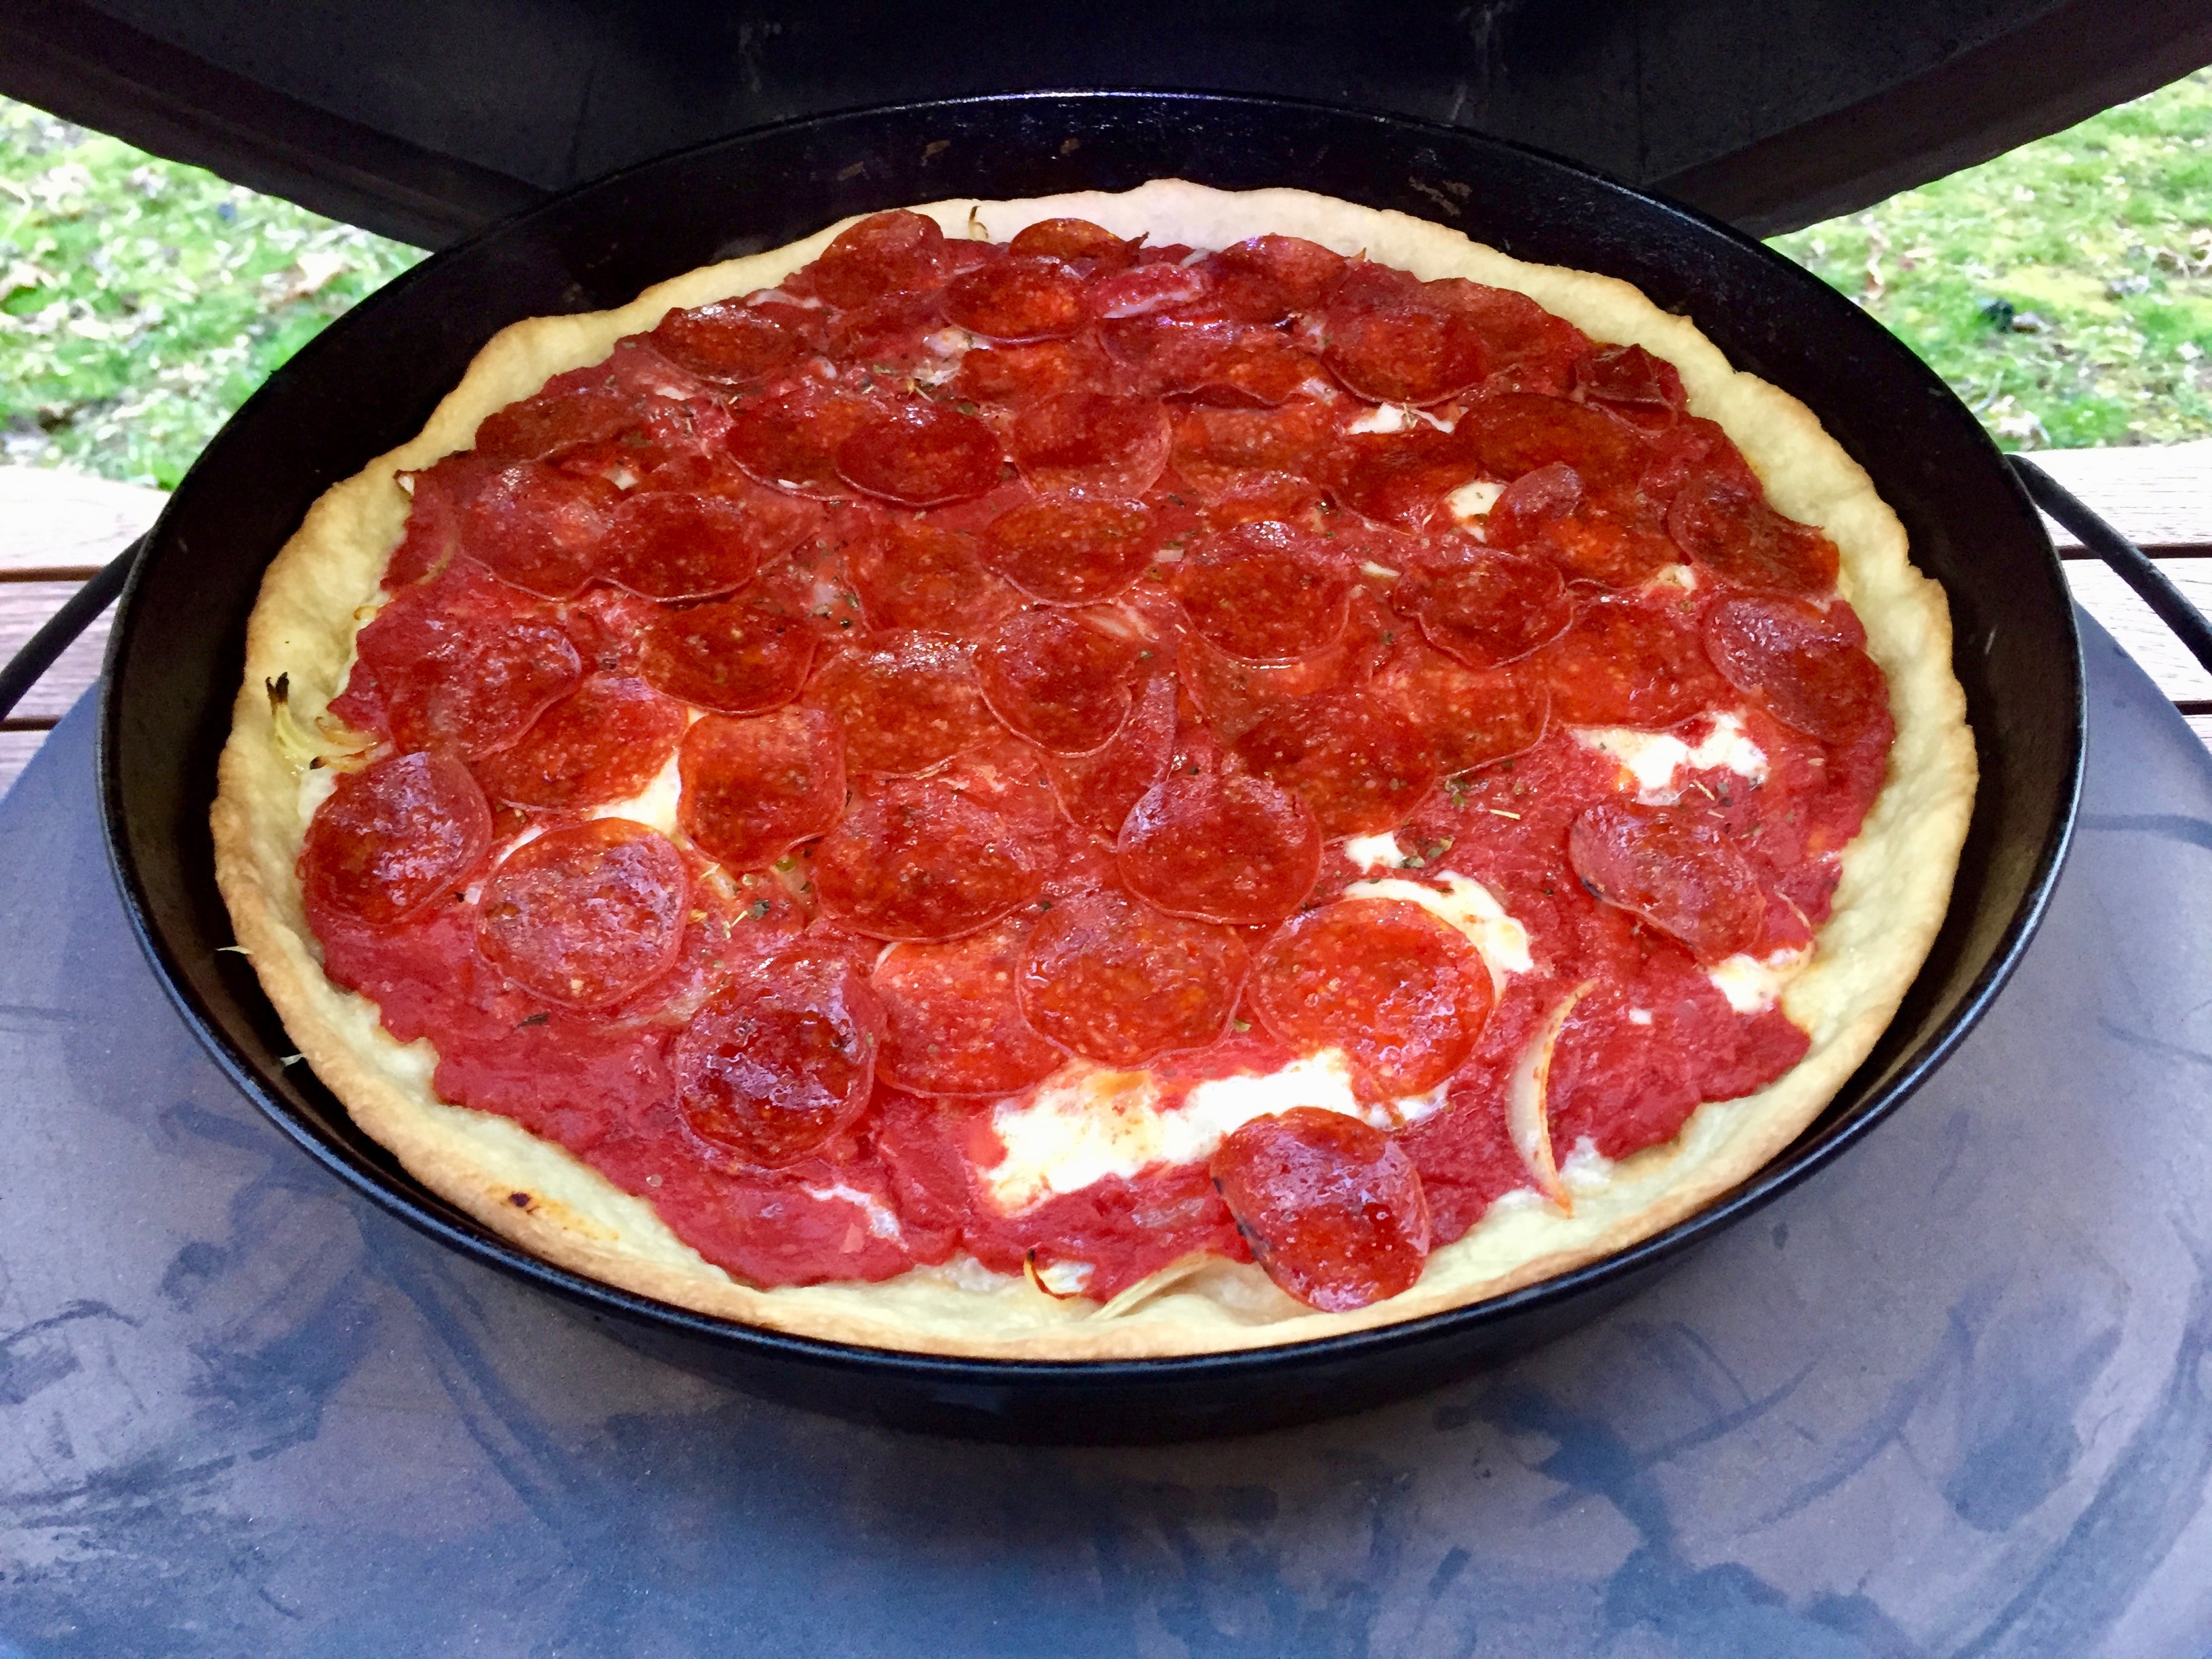
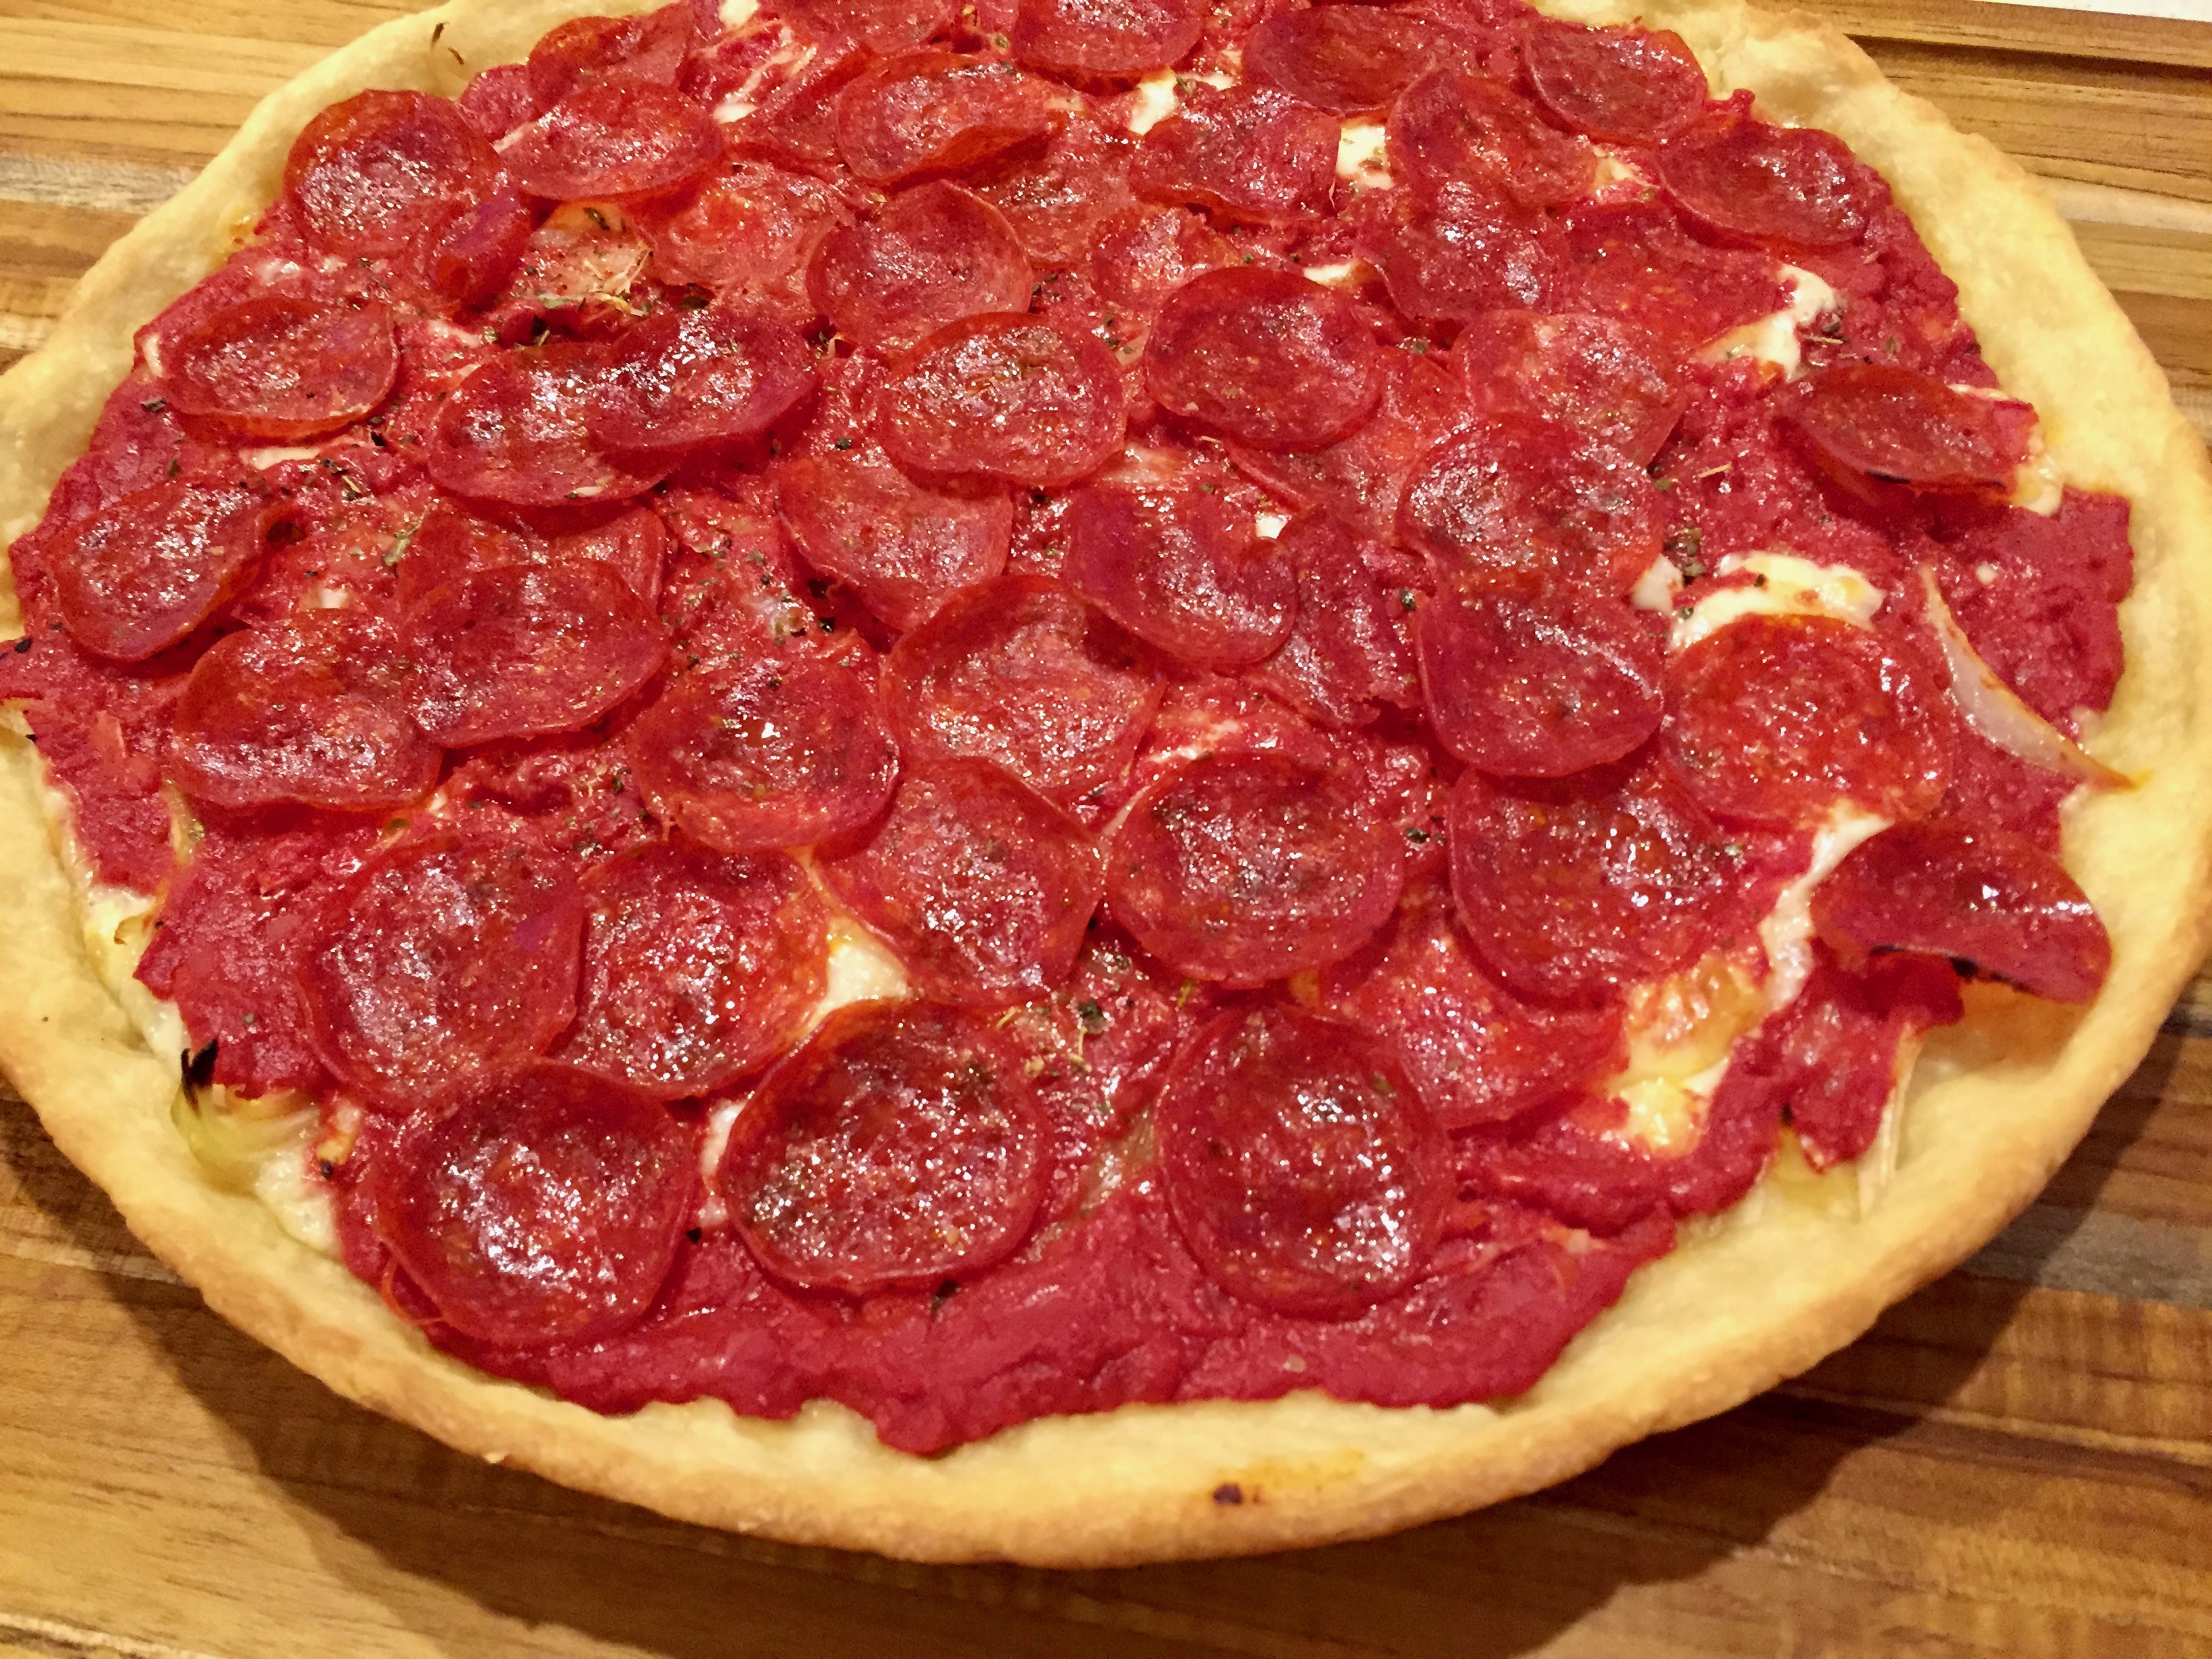
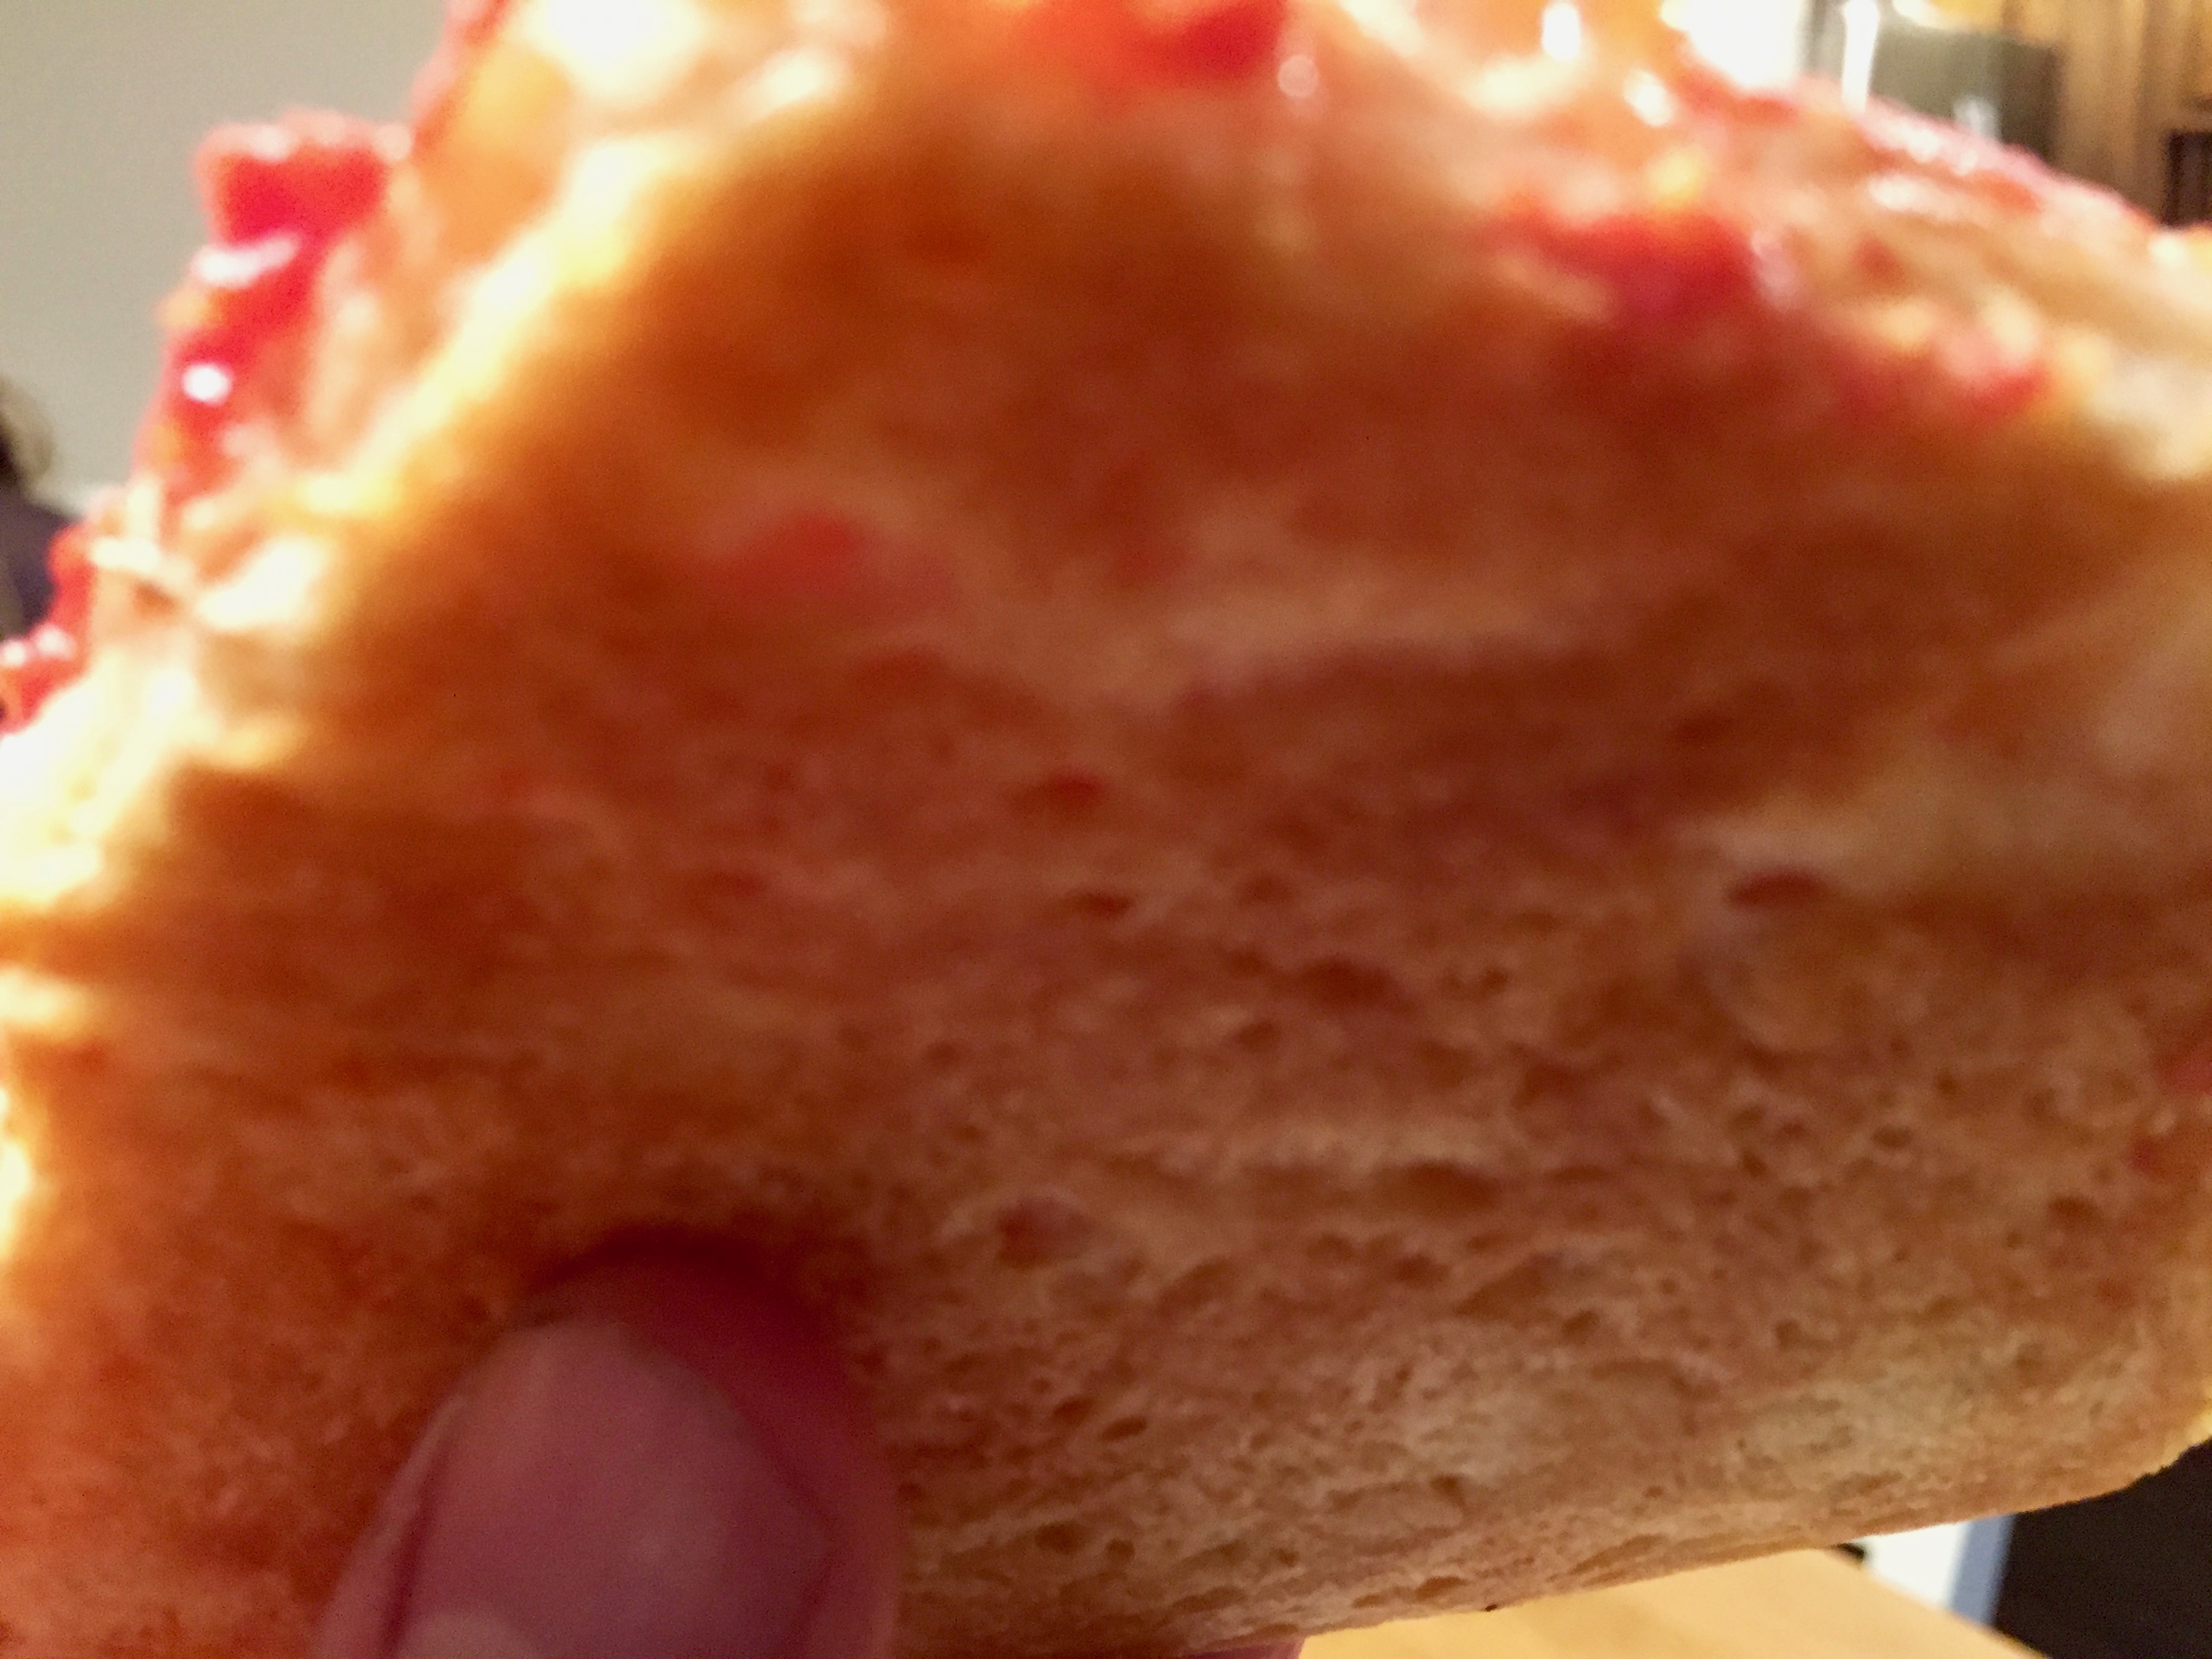
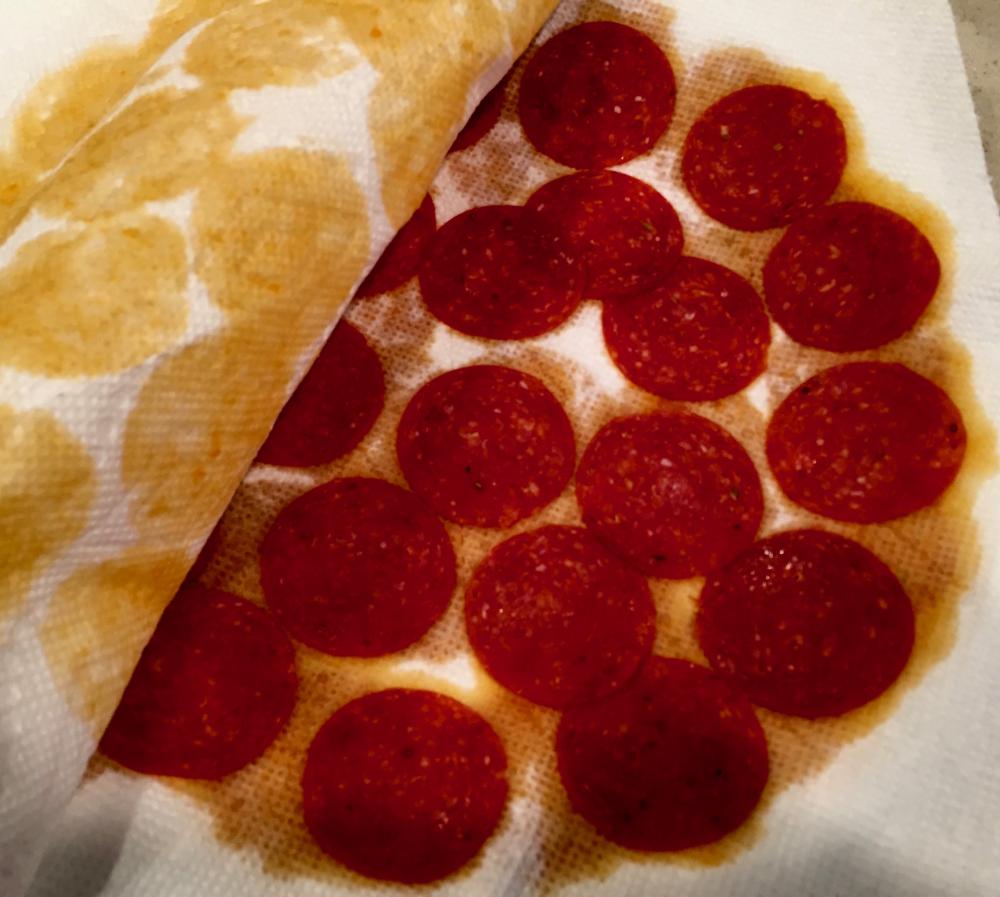
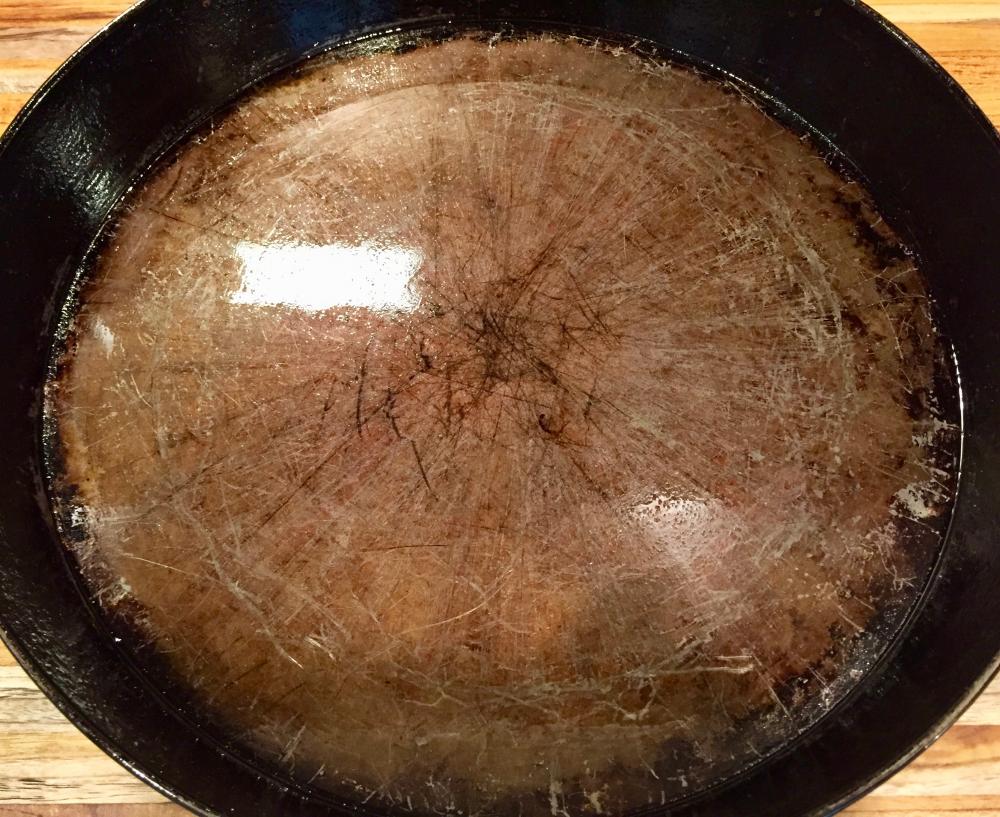
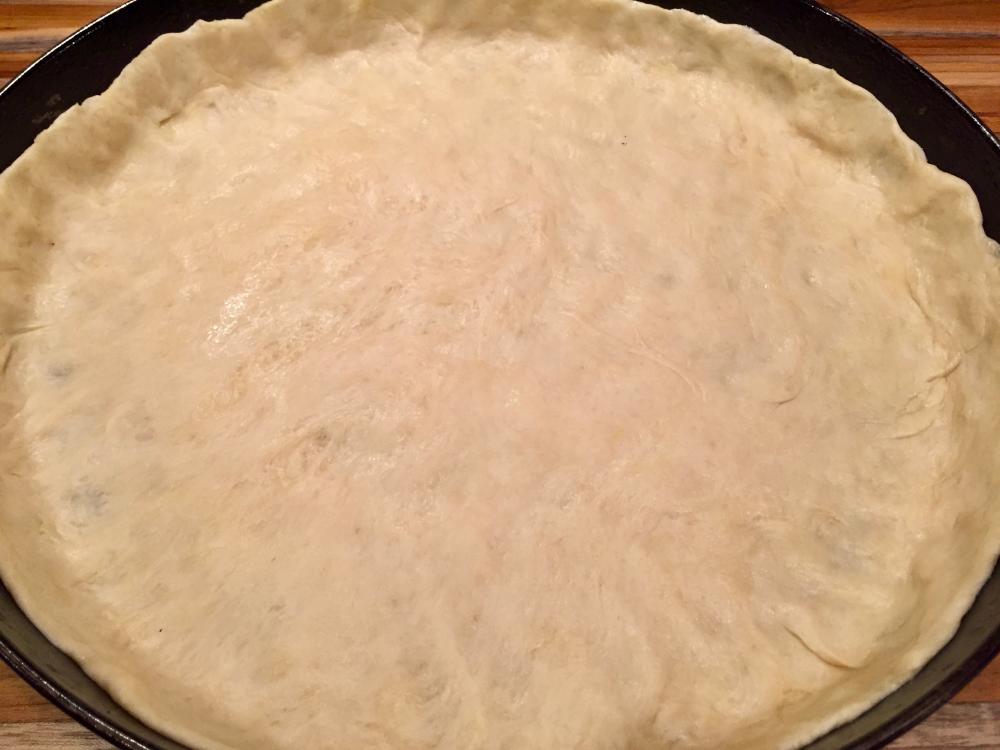
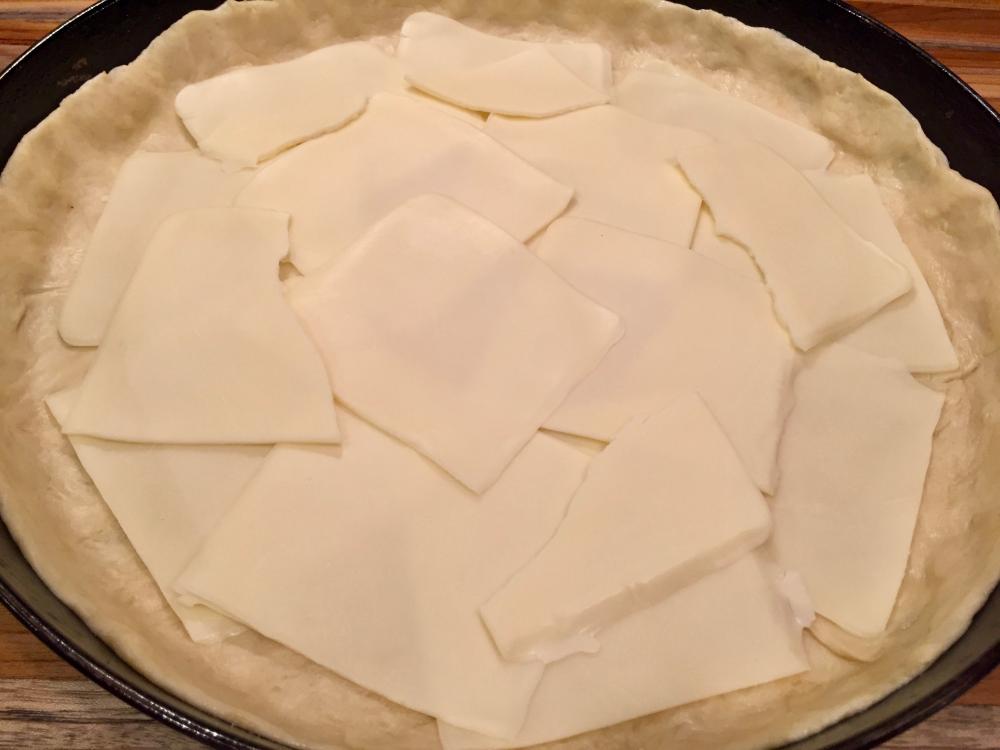
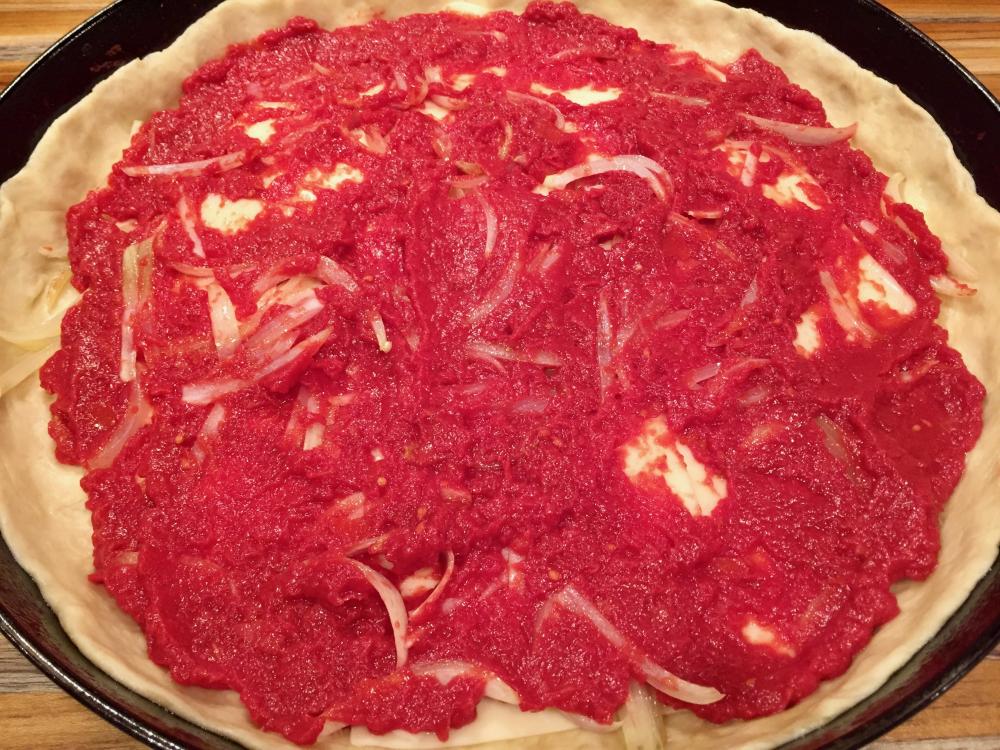
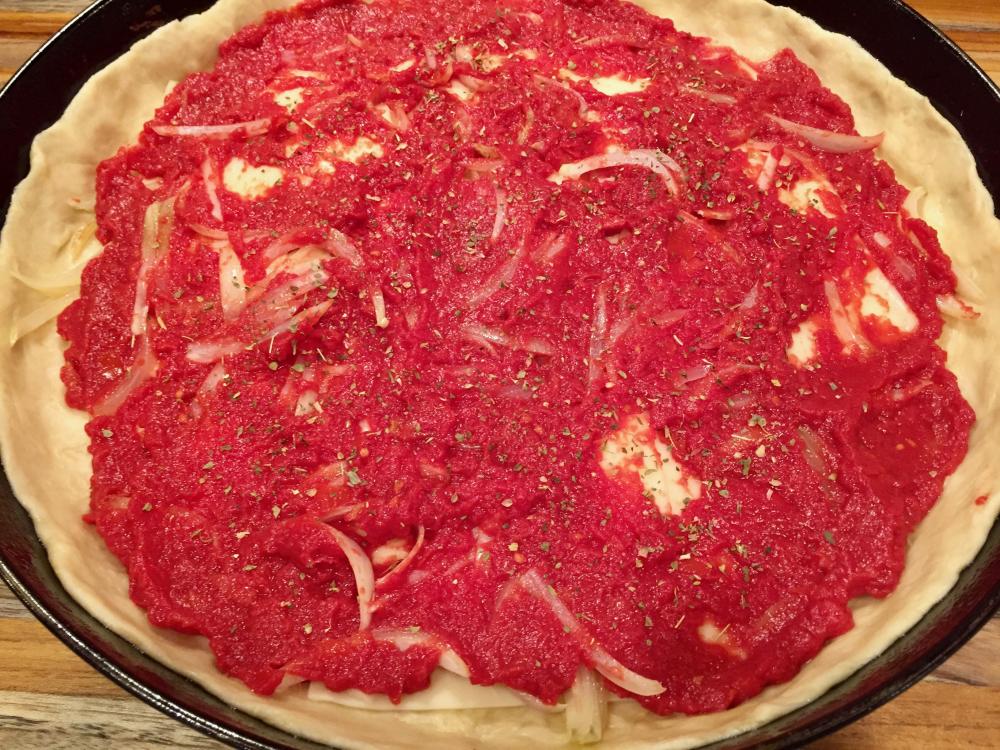
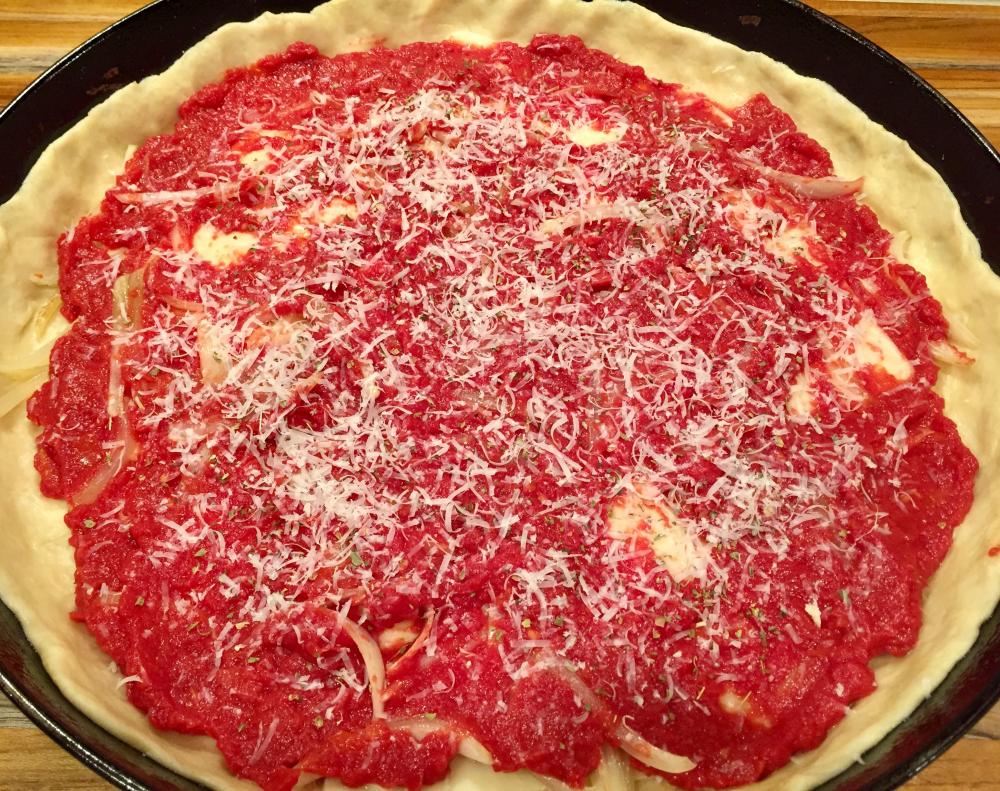
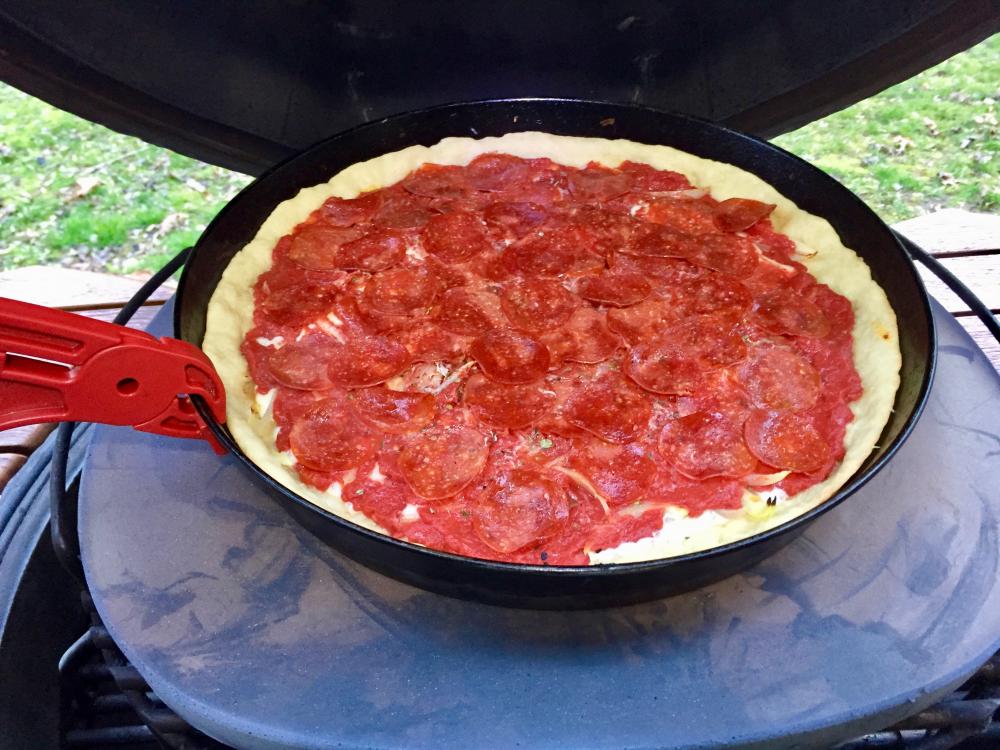
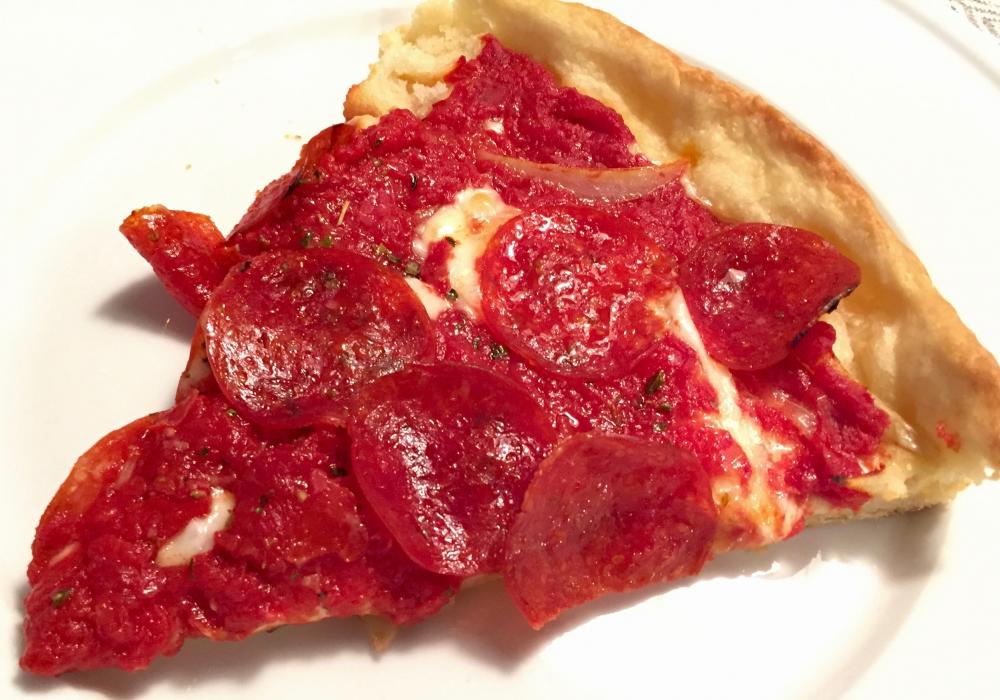
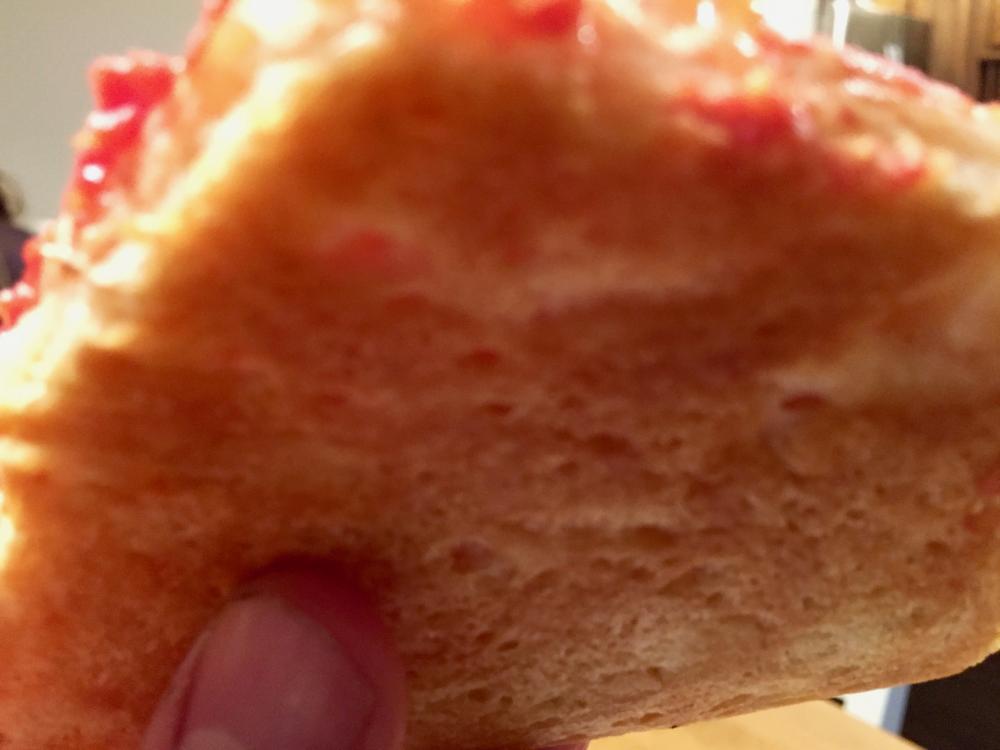
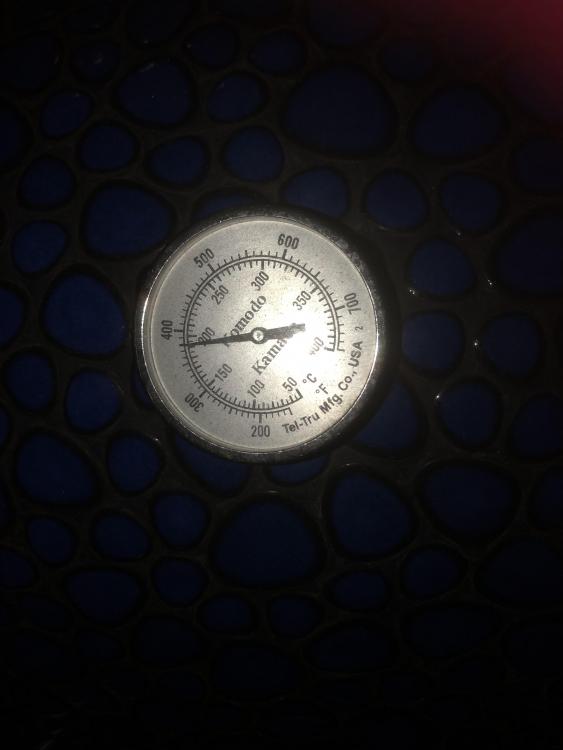
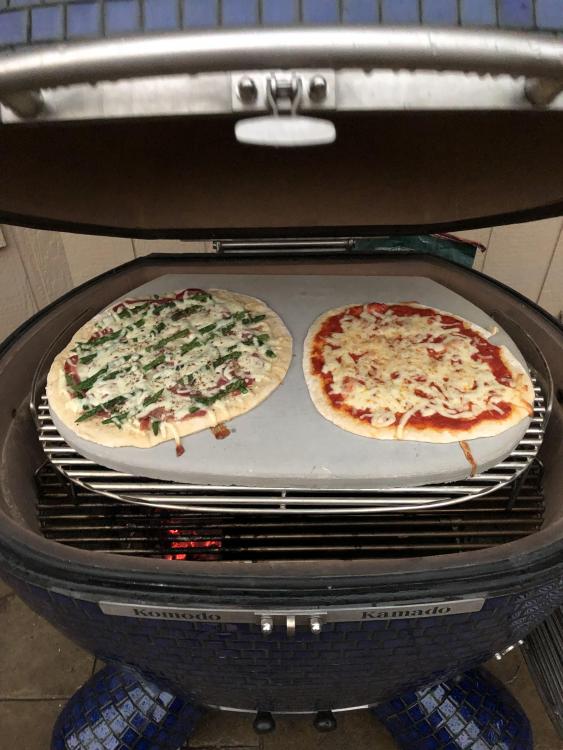
This thread is all about authentic Chicago Style Deep Dish, but cooked on the KK, of course. I did a thread similar to this on the Guru once. Put the entire site to sleep. If you caught that one, feel free to skip this one. Heck, skip it if you're not interested too. I won't be offended. Or you may find you need a nap in the middle. That's fine. We'll still be here when you wake up. First, let's parse the name. Most deep dish I see posted on the internet is NOT Chicago style, yet most people feel the need to insert that word "Chicago" in front of "Deep Dish", no matter how heretical it may be. Bottom line is there are a lot of deep dish pizzas out there, many quite good, but only some of these qualify as Chicago Style. Nothing wrong with making and enjoying those other pies, just don't offend a great city by calling it Chicago Style when it's not. So what makes it "Chicago Style"? To me, it comes down to two key things: The crust and the tomatoes. First, the crust. Many people think Chicago Style pizza crust is similar to a loaf of bread -- very doughy. Others think there is cornmeal in the crust. Don't get me going on that one. Let's just say I agree with this: http://www.realdeepdish.com/2009/05-06-pizza-rant-2-6-pat-bruno-im-calling-you-out/. Both of these are WRONG! The classic Chicago Style pizza crust, such as you'll find at Lou Malnati's, Pizzeria Uno, or Gino's East, has a biscuit-like texture. A bit crisp on the outside, giving way to a biscuity crumb on the inside. Again, if you like cornmeal in your dough or making pizza out of a loaf of bread, by all means keep doing it. Just don't call it Chicago Style or you'll be labeled either a heretic or a Cubs fan! Next, the tomatoes on a Chicago Style pizza have a distinctly bright flavor, and are usually a bit chunky as well. The closest I've come to replicating that flavor is with a particular brand: 6-in-1 All Purpose Ground Tomatoes. They aren't chunky enough, but the flavor is spot on and you can always add some high quality diced or hand crushed tomatoes for chunkiness. Let's start with the dough. Here's my favorite dough recipe for a 13" Deep Dish pizza. The recipe you'll find at http://www.realdeepdish.com is also excellent and I used to make one very similar to that, but I like this better: 350g AP Flour - 95% 20g Semolina - 5% 170g Water - 46% 64g Corn oil (17%) 14g Olive oil (4%) 1/4 tsp Salt - (.35%) 1/2 tsp Sugar - (.5%) 2g instant dry yeast - (.5%) First, mix all the dry ingredients except for the yeast, then pour in the oil. Remember, since we're not making bread, we're trying to *avoid* gluten formation, so we don't want to proof the yeast and we don't want to over-knead the dough. Partially mix in the oil, then add the water and partially mix that too. Then sprinkle the yeast on top. Stir that in until just barely combined, then knead the dough in the bowl with one hand for no more than two minutes. Now cover it with plastic and let it rise in the oven with only the oven light on for heat for up to five hours. It will rise, but not much. While that's going on, we also want to drain the tomatoes in a strainer over a cereal bowl. Some people like to spoon them right from the can. I prefer to let the water drain out so that the pizza isn't too wet. I also like to de-fat my pepperoni so that we don't get a grease slick on top. Put the pepperoni on a plate between paper towel sheets, then nuke for 30 seconds. Amazing how much grease is pulled out. Sliced and sautéed my onion for just a bit. No pics of that. Instead I give you my fancy new teak cutting board. Sweet, no? After five hours, the dough has risen, but gluten matrix is weak to non-existent. No way that dough would pass the windowpane test. Grease my decades old, highly seasoned steel deep dish pizza pan. I've been doing deep dish pizza much longer than I've been doing barbecue. Bought this one while I was still in college and realized the need to master this before leaving Illinois for good. Spread the dough, and pinch it half way up those two inch sides. You can use 8 to 16 ounces of mozzarella, depending on how cheesy you want it. This mozzarella is from a cow I own in the Shenandoah Valley, then delivered the whole, unpasteurized milk to an Italian Grandmother nearby to make the cheese for me. I lied. Safeway had this in stock. I'm using 12 ounces of the stuff. Then top the cheese with the sautéed onions. Now ready for the tomatoes. Here's what they look like after draining all afternoon. Look at all that water. Most, but not all of the drained tomatoes go on the pie. Now sprinkle with about 1 teaspoon each of dried basil and oregano. I prefer fresh basil, but none available today. Grate some parmesan directly on top. Then all of that de-fatted pepperoni. Onto the KK at 450. Turn it after about 15 minutes. Don't know if I really needed to do that in the KK, but always do it in the oven and it's a habit, And after about 15 minutes more, we're ready. Let it rest for five minutes. Remove it from the pan. Plated. Perfect. Here's the bottom.


 1 point
 -
No reason ghee wouldn't work as well. However, bread is generally considered cooked at around 190-200 degrees internal temp, and I'm guessing deep dish crust isn't far off that (similar to a butter pie crust). Smoke point of butter is 350, so shouldn't be approaching anywhere near that. Probably wouldn't grease my pan with butter, but as an ingredient shouldn't be an issue.1 point
-
Cheers mate Sent from my SM-T835 using Tapatalk1 point
-
1 point
-
@sfdrew28 great looking Chicago pie1 point
-
Amazing pork belly Mac, I can almost smell that from here! Sent from my iPhone using Tapatalk1 point
-
He told me to use them for stepping stones lol1 point
-
There is a VERY popular place here in Bali that pressure cooks them until you can pull the bones out.. then the grills them with a tamarind, honey, some acid and pork fat from the pressure cooker at high temps until it's blackened and super caramelized.. I'm not one for baby food but if you have to eat it this is tasty..1 point
-
I've learned it's easier to give people what they want than to educate them. I supply them because people coming from the glazed-pot Kamado world think they're very important. Glazed pot Kamados are basically un-insulated and when the ambient temperature changes/drops the temperature can crash. Having a heat deflector reflecting heat back into the firebox gives these grills thermal mass/ a heat sink to help stabilize temps during these ambient temperature swings. Because KK's are so well insulated, this is not a factor. In fact, the heat deflector requires you to burn more fuel, creating more airflow and more evaporation and less retained moisture in your meat. I suggest, preheating the grill empty and then putting foil on the lower grate the size and the area you want to be indirect. Put your drip pan on top of the foil, install the main grill and put your meat above the area with the foil. Put the upper grill on top of that and more meat. You're off to the races. The foil is much higher above the charcoal than where the heat deflectors sit and will not trap/reflect as much heat back into the firebox. That being said I have not use the heat deflector in one of my grills for probably 10 years.1 point
-
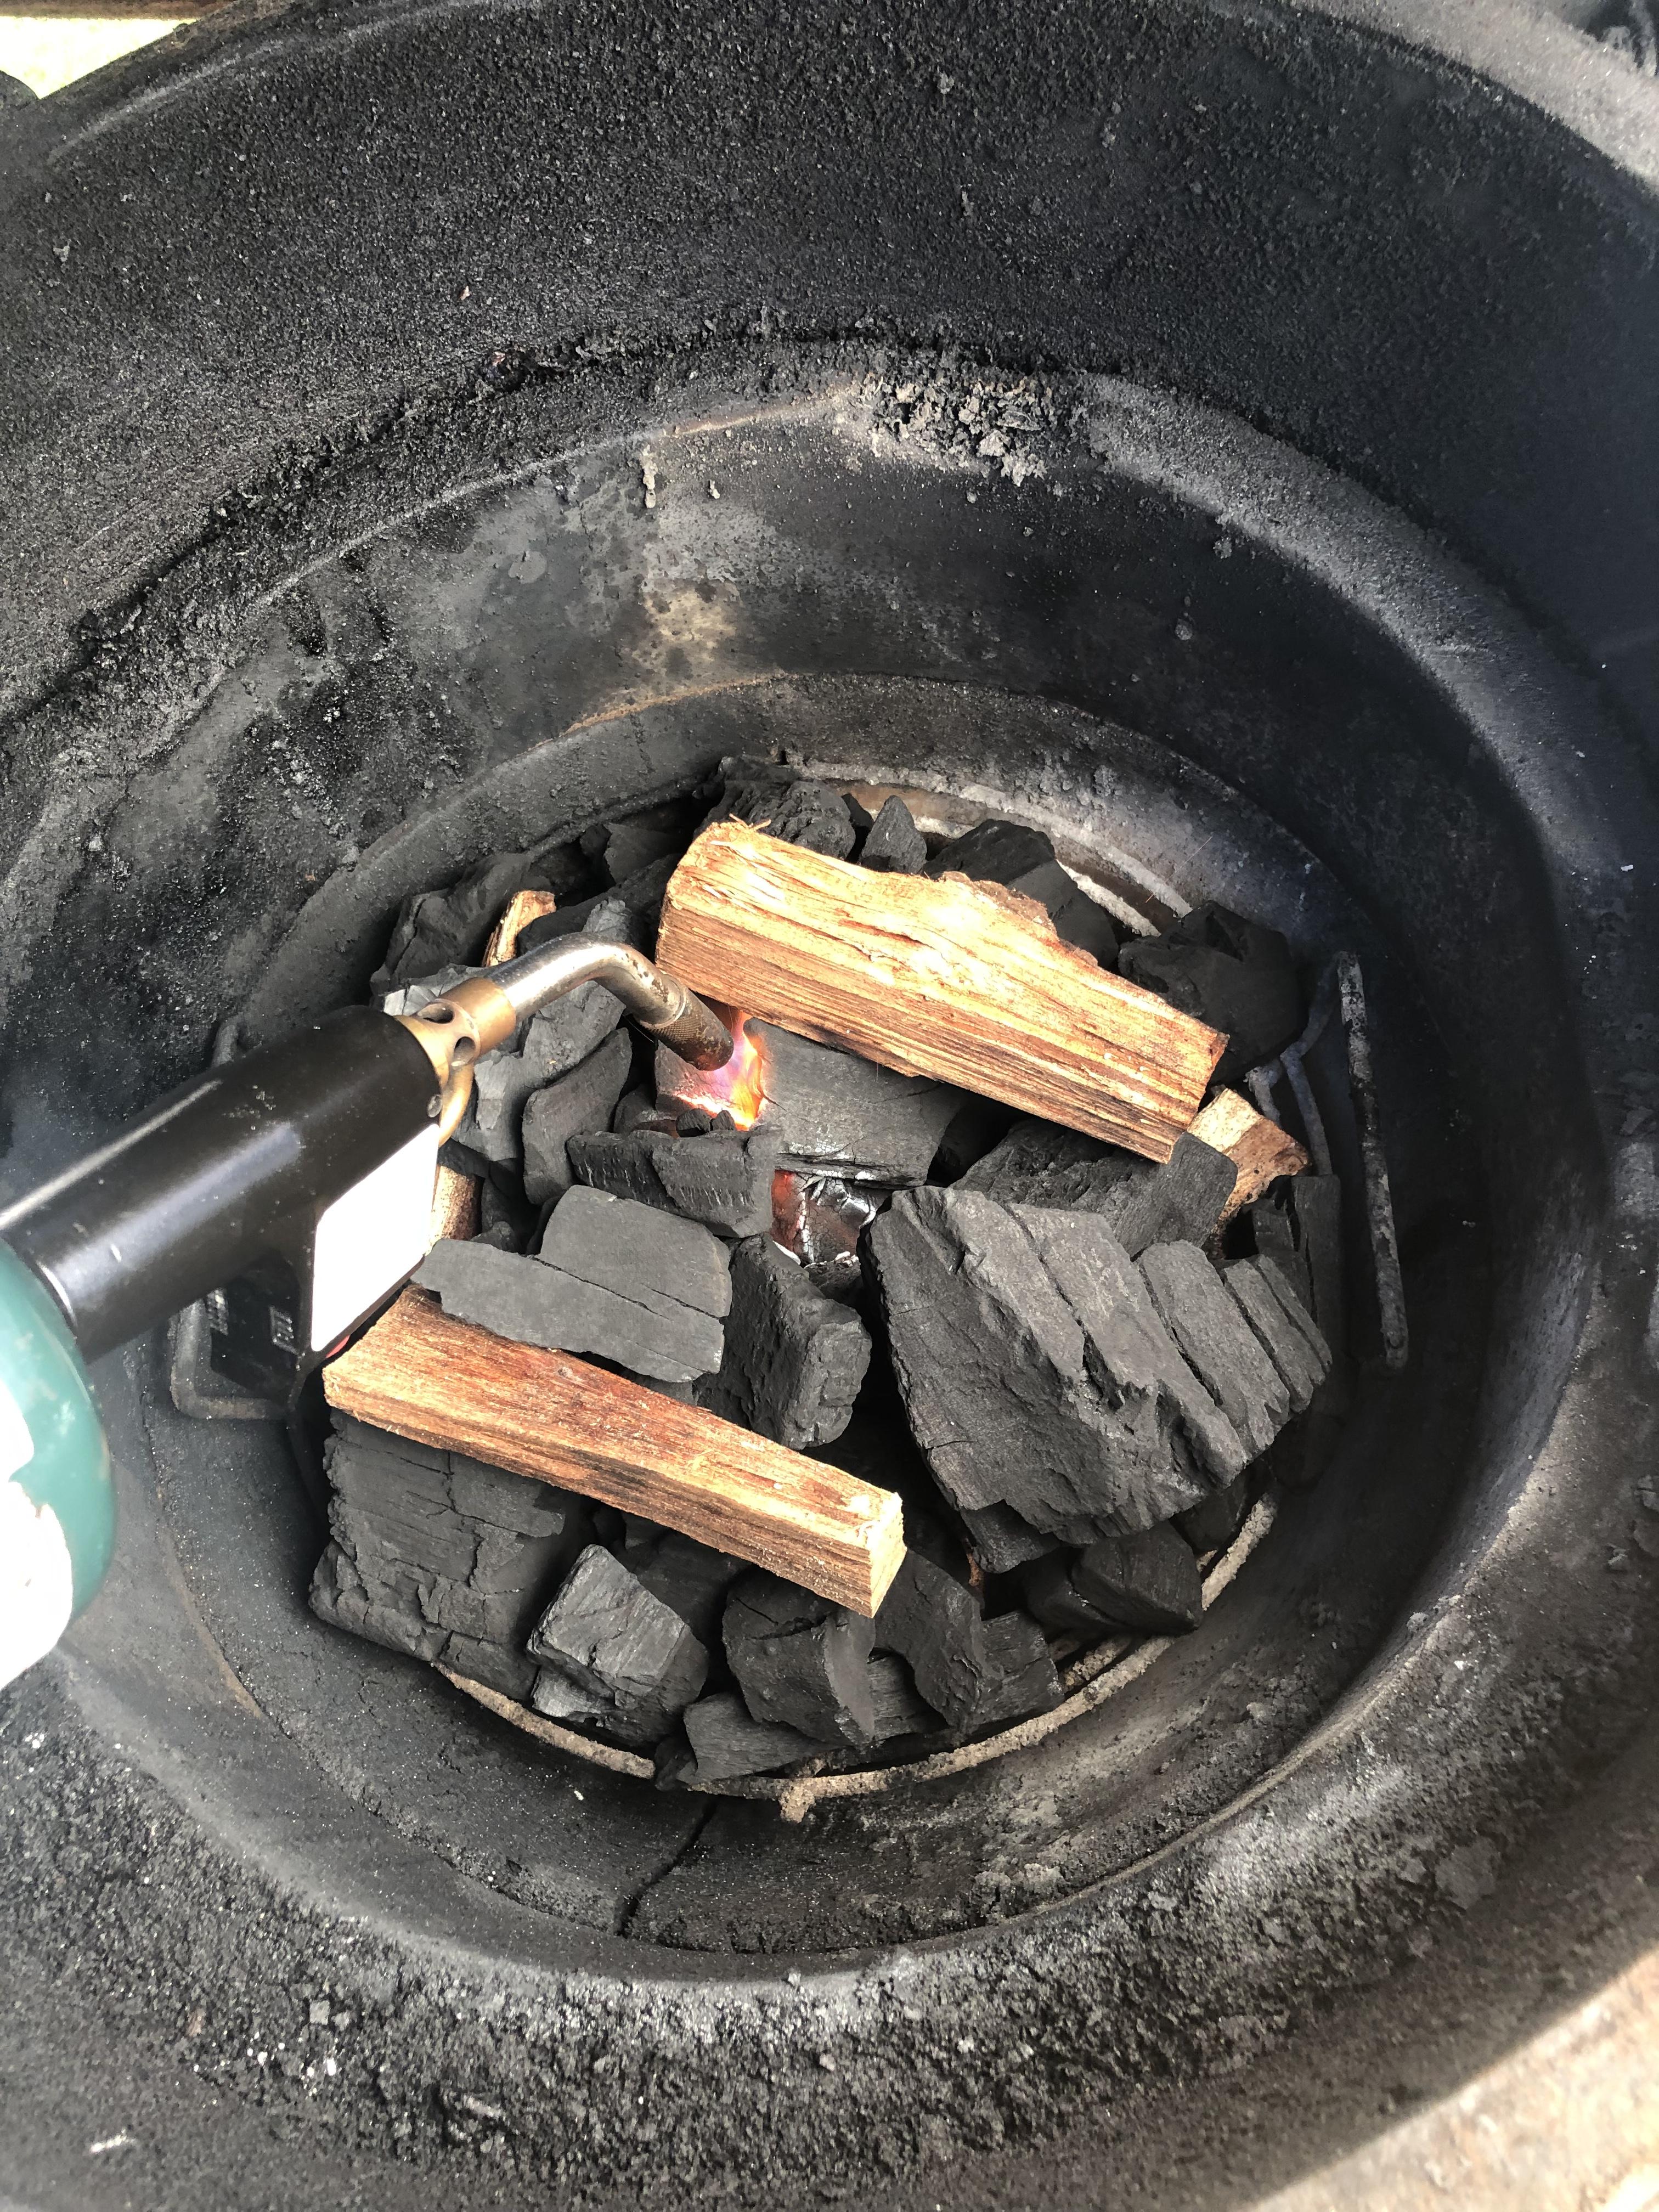
I use coco char for low and slow cooks where I want no flavor imparted by the charcoal, only the smoke wood. The coffee lump is good for everything.1 point
-
1 point
-
Employer just jumped onboard with our relocation w/remote work plans, so... To goat, or not to goat? That is the question...1 point
-
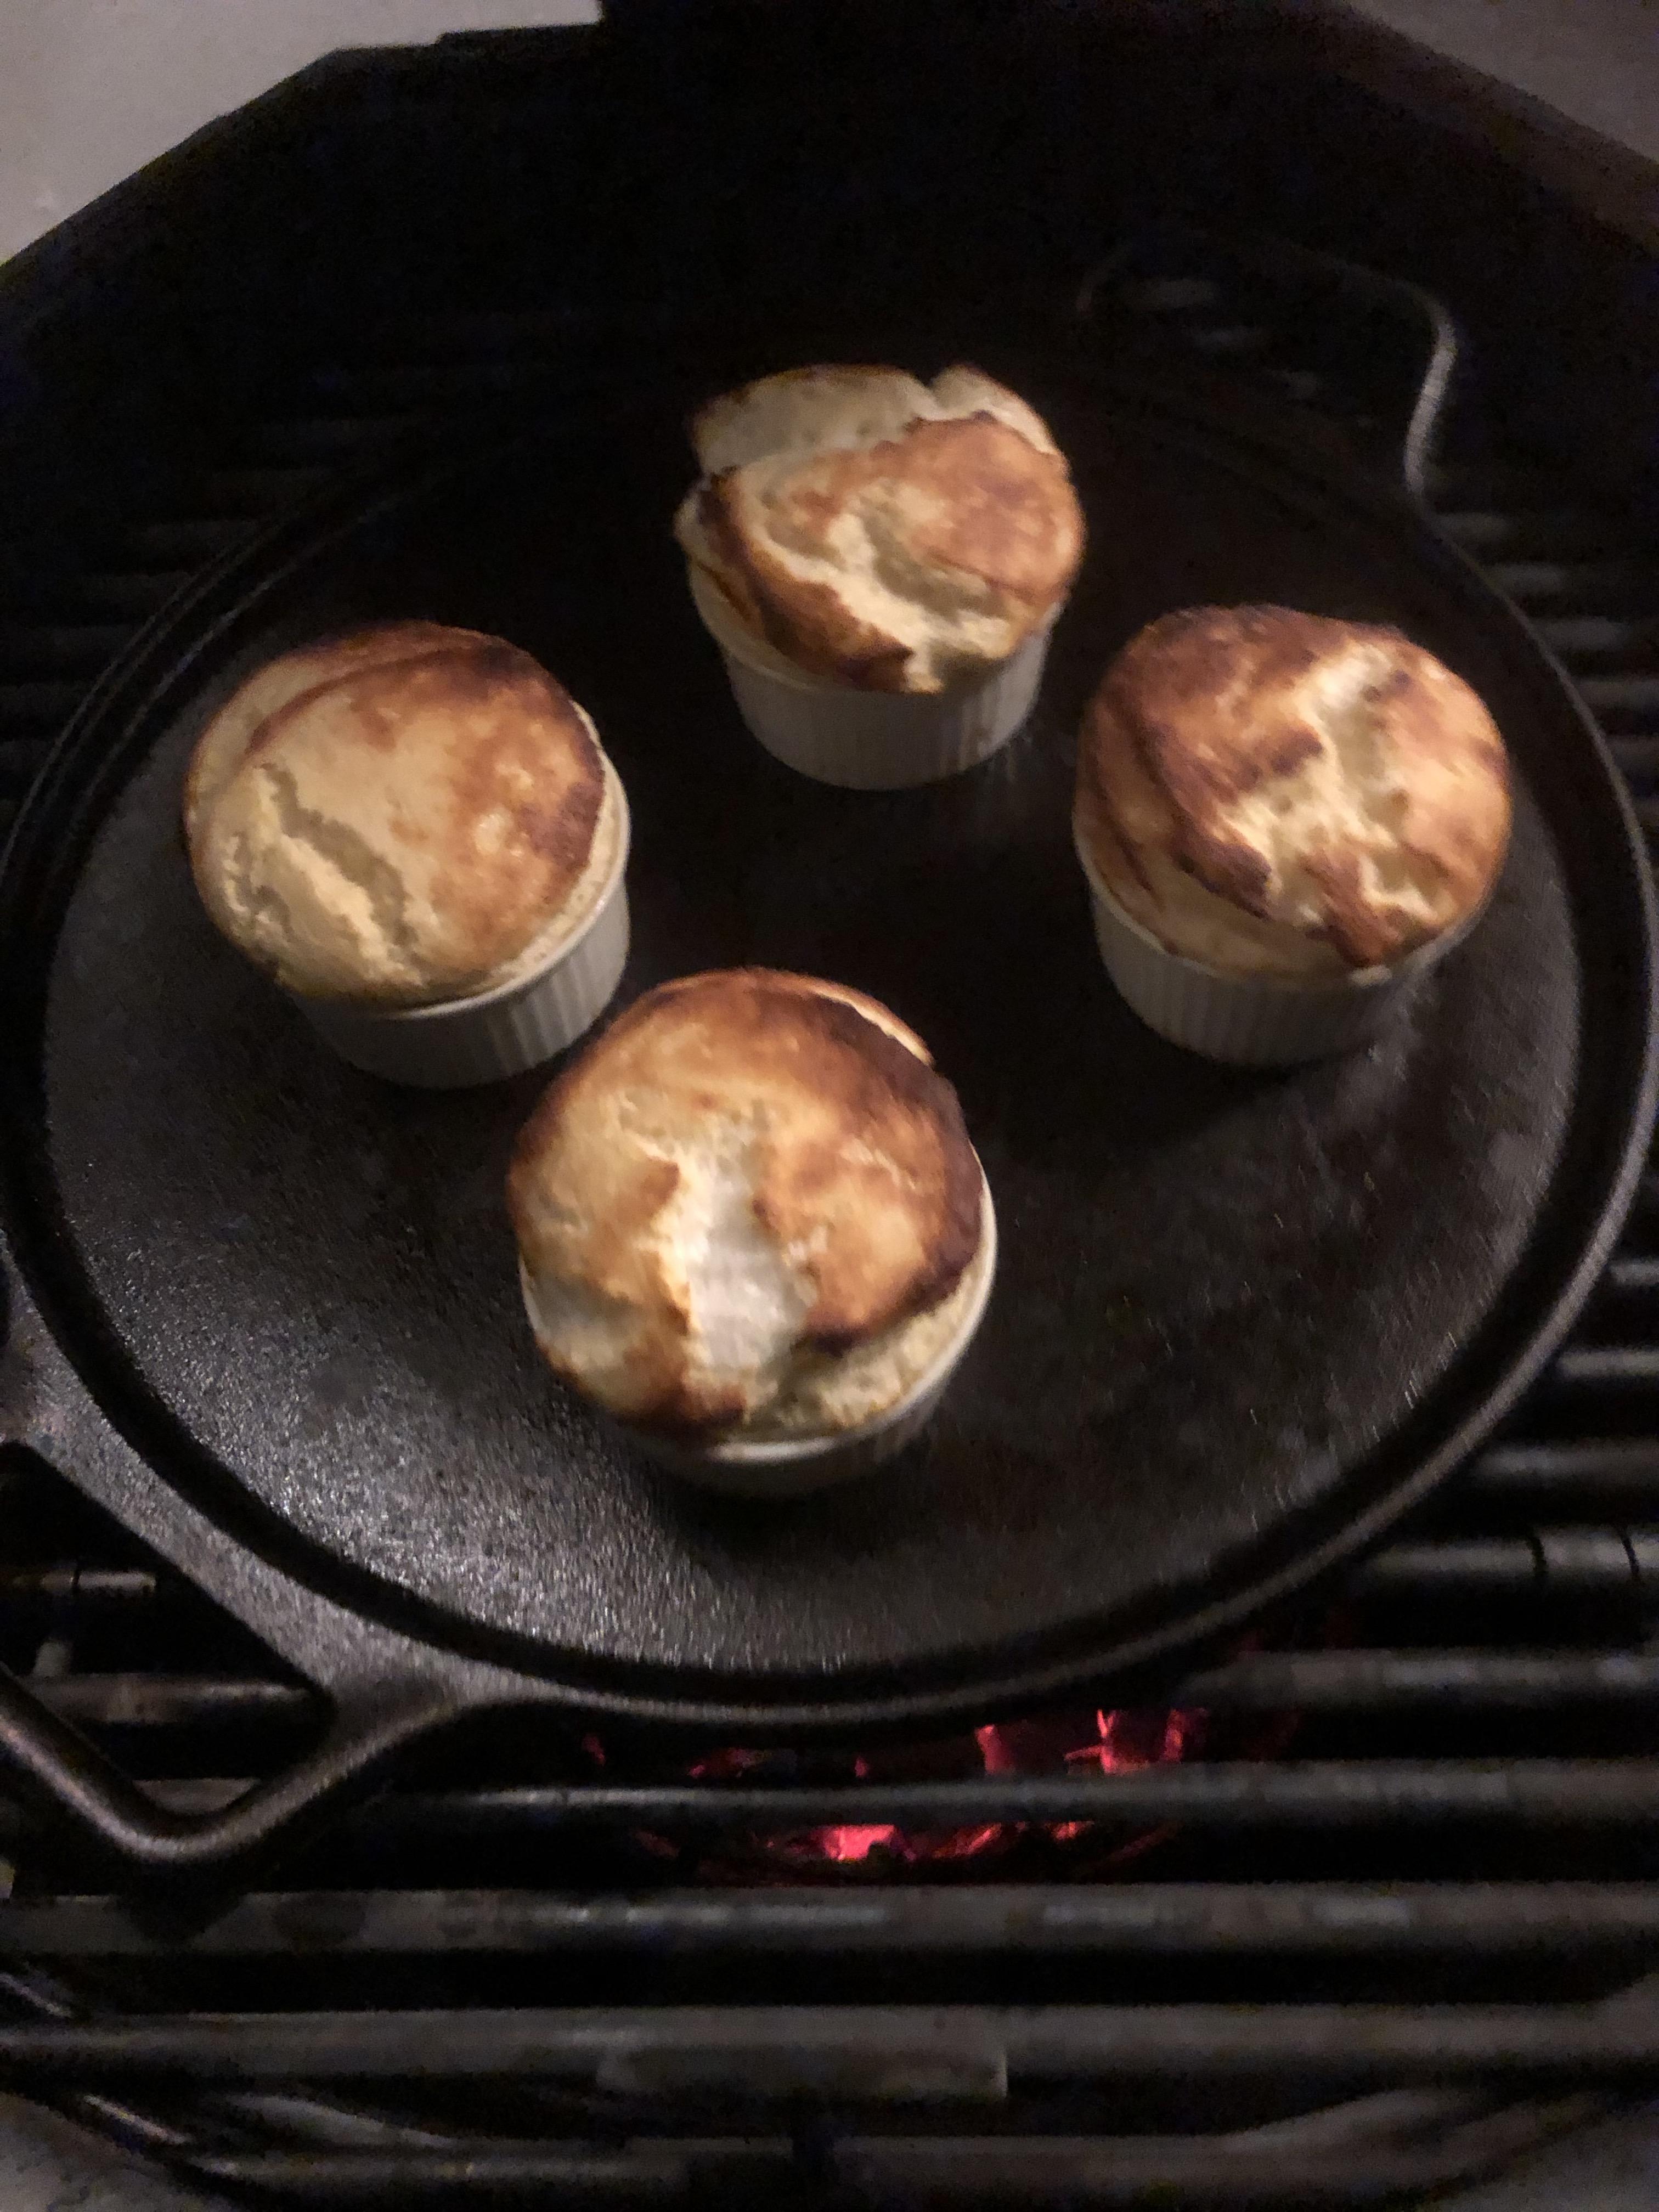
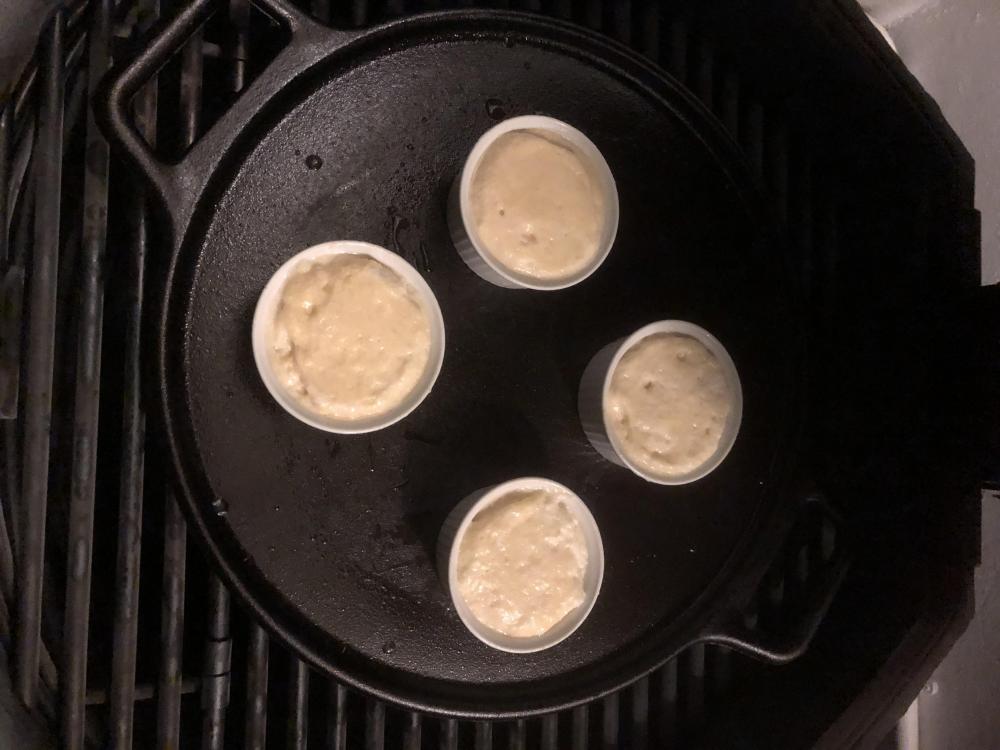
I thought I would try out soufflé on the KK and wondered how best to do it. As usual, if you look, someone, somewhere on the forum will have done what you are trying to do and will have documented it for your reading pleasure. Unusually, there was only one post. This one: @dstr8is an excellent reference and I don't have much to add. As I start with my soufflé experiments, it would be good to know if others have tried soufflé out in their KKs. Here is my first attempt. It was made with a sweet white miso base. I put them in the KK on a cold cast iron tray to avoid burning up the bottoms. They came out well after 13 minutes in the KK. I like how the reflected heat from the dome gave the soufflés a gently browned top. Might cook for slightly less time next time and I need to work at getting a more even rise. Will try running knife round the inside of each filled pot to see if that helps.
 1 point
 -
1 point
-
First pizzas on my new 32
 1 point
 -
I took delivery of my Kamado in January, but was finally able to place the BBQ this weekend. Now I just need the pool to be finished. I can't wait to fire it up.
 1 point
 -
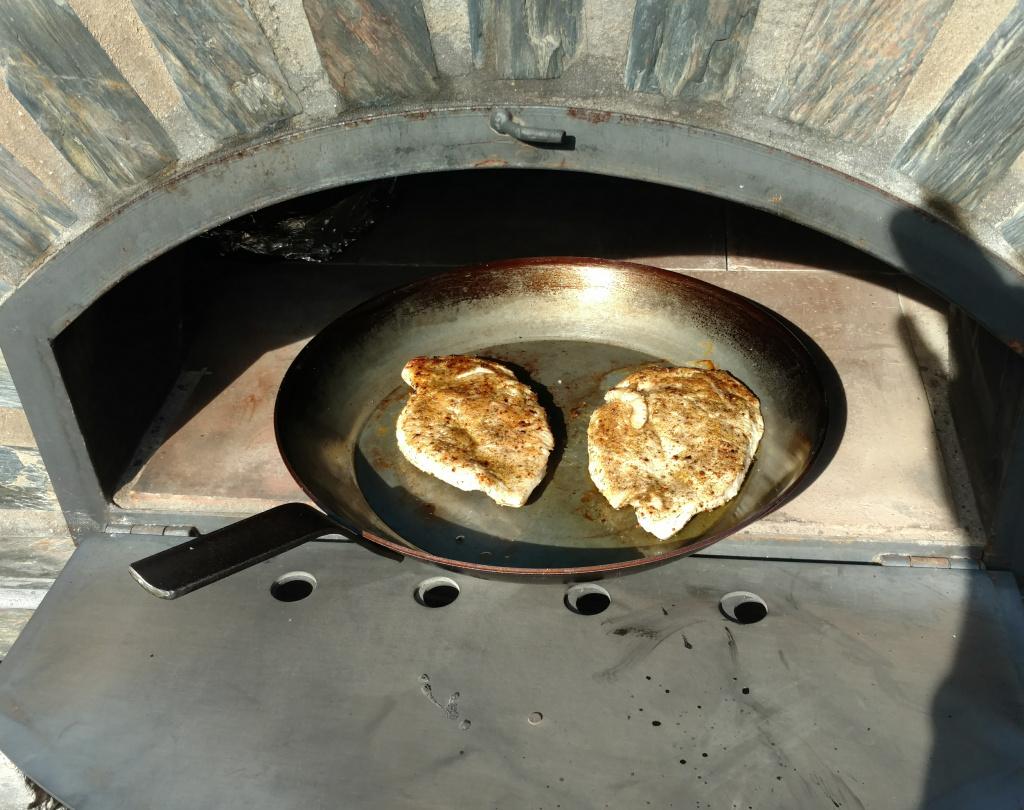
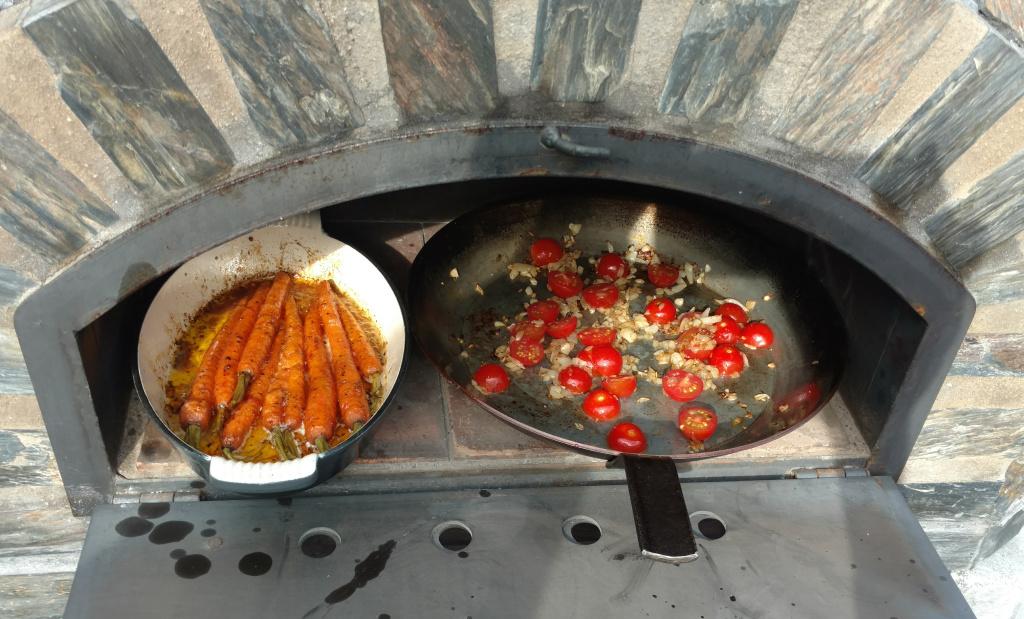
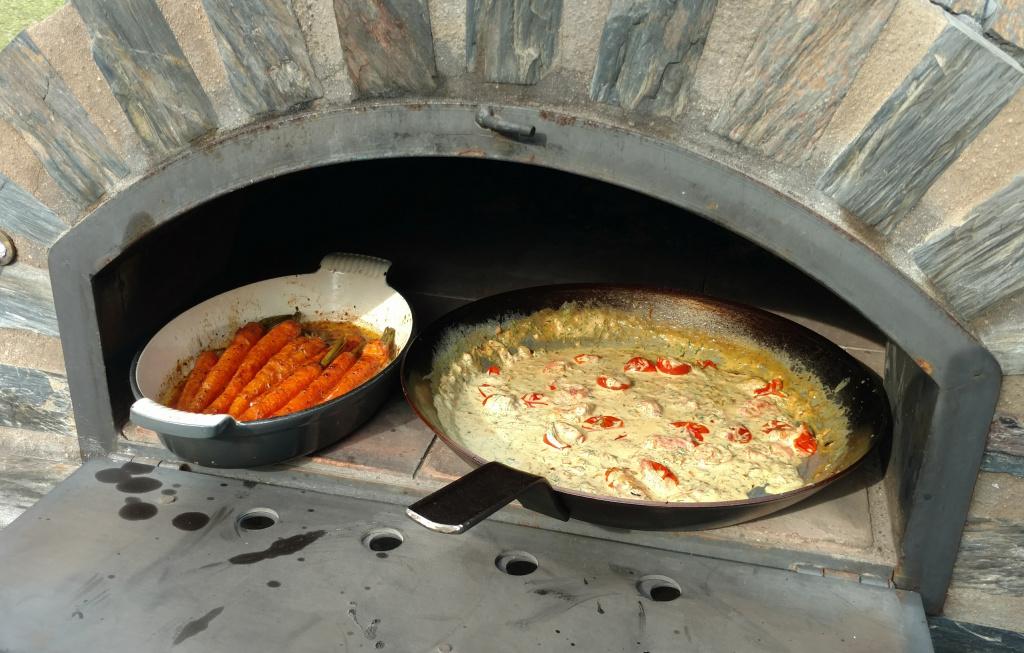
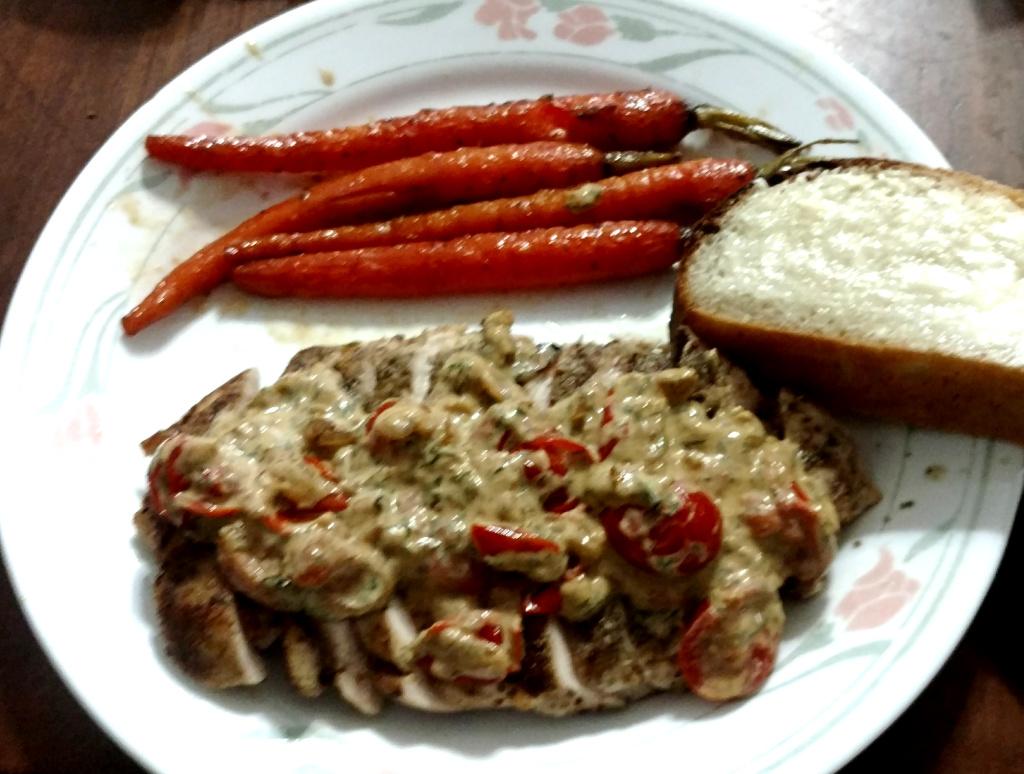
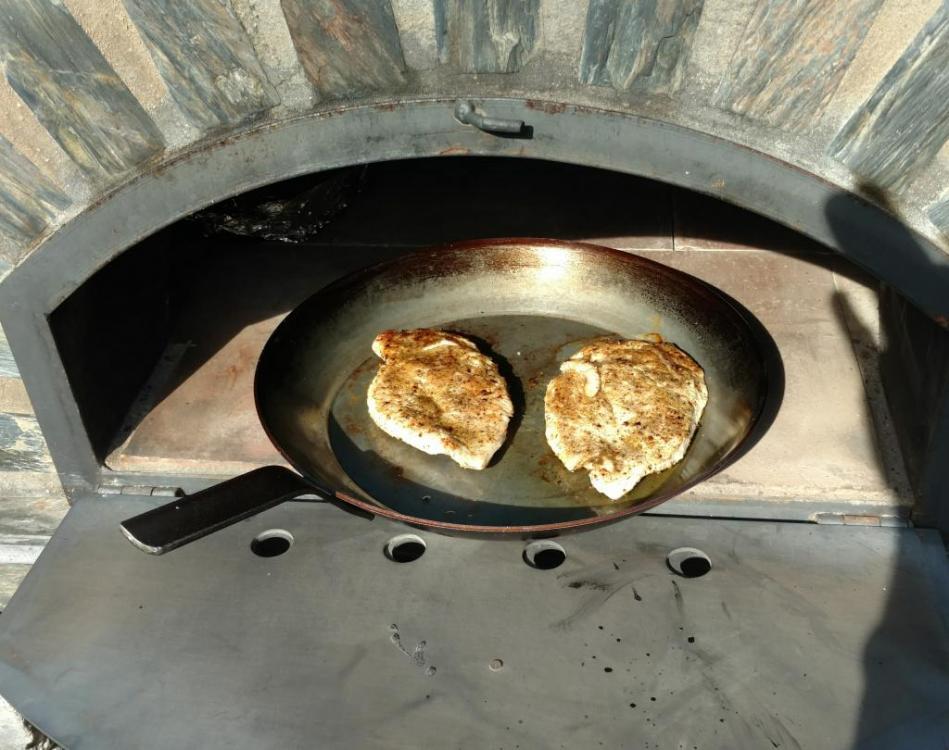
Creamy Dill Chicken. I decided to run the wood fired oven differently today. Normally I run the fire on the left side and cook on the right side. Today I ran the fire in the back and cooked in the front towards the door. For cooks like this it gives you a bit more temperature control. If you need more heat push the pan farther inside towards the fire. Less heat pull it out towards the front. I started with a loaf of bread. Not my best but not bad just the same. I pan seared 2 semi flattened chicken breasts in a carbon steel pan. You can just barely see the foiled carrots in there to the left. After I pulled the chicken I cooked down some onions and tomatoes. There is the new carrots now uncovered. Once the onions and tomatoes were ready I added the creamy Dill sauce and let it cook down a bit (at around 450* it didn't take long). A really crappy money shot (very disappointed with this picture), but it tasted awesome.


 1 point
 -
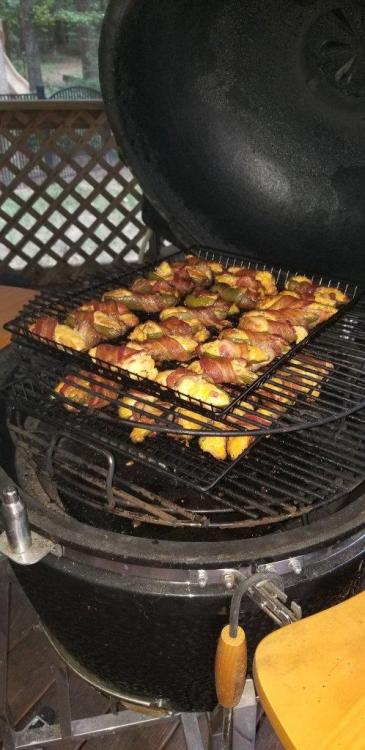
We hosted a cookout at our house this past Saturday with forty guests. The menu consisted of pulled pork, brisket, ribs, jalapeno poppers, smoked mac and cheese (no pics) and smoked baked beans. We smoked the mac and cheese and baked beans on Thursday and reheated them in the oven for the dinner. The three pork shoulders and 16lb brisket went on at 9:00pm on Friday. These were both done and pulled at 11:00am and six racks of ribs took their place. I used pecan pellets for the butts and brisket in the cold smoker and went with apple wood for the ribs. Everything turned out great! Pork butts are on. The brisket is added to the top grate. These are done and ready to come off. The ribs go on. We cooked fifty poppers in the vision grill while the ribs were finishing up. Unfortunately with the amount of work we had to do, I did not get any additional photos. The food was a huge hit and I now know the limits that my 22" can do at a given time.


 1 point
 -
Alohapiggy, I know what you mean they just throw it around. I think they just don't understand the damage they are doing.0 points
-
The sale ends on 5-15-19. I wish the workers at the stores took better care of the charcoal. Every time I pick a bag of charcoal it seems as if some worker did the Mexican hat dance all of the bags of charcoal.0 points


.thumb.GIF.006d23b9323146d2dd9055f4e195bc2a.GIF)