Leaderboard

.thumb.GIF.006d23b9323146d2dd9055f4e195bc2a.GIF)


Popular Content
Showing content with the highest reputation on 05/03/2020 in all areas
-
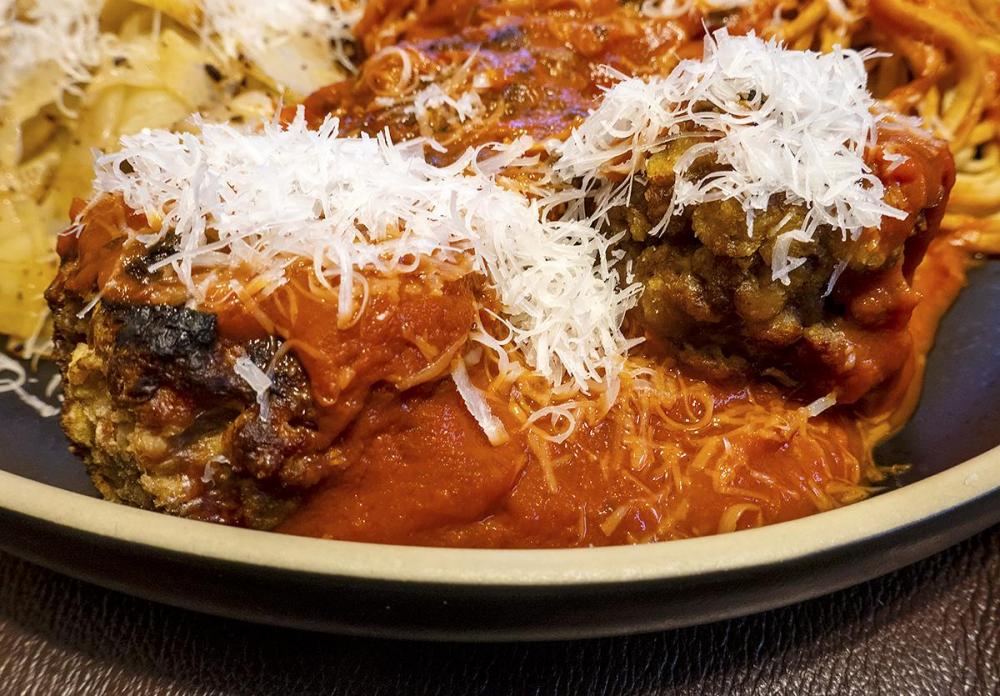
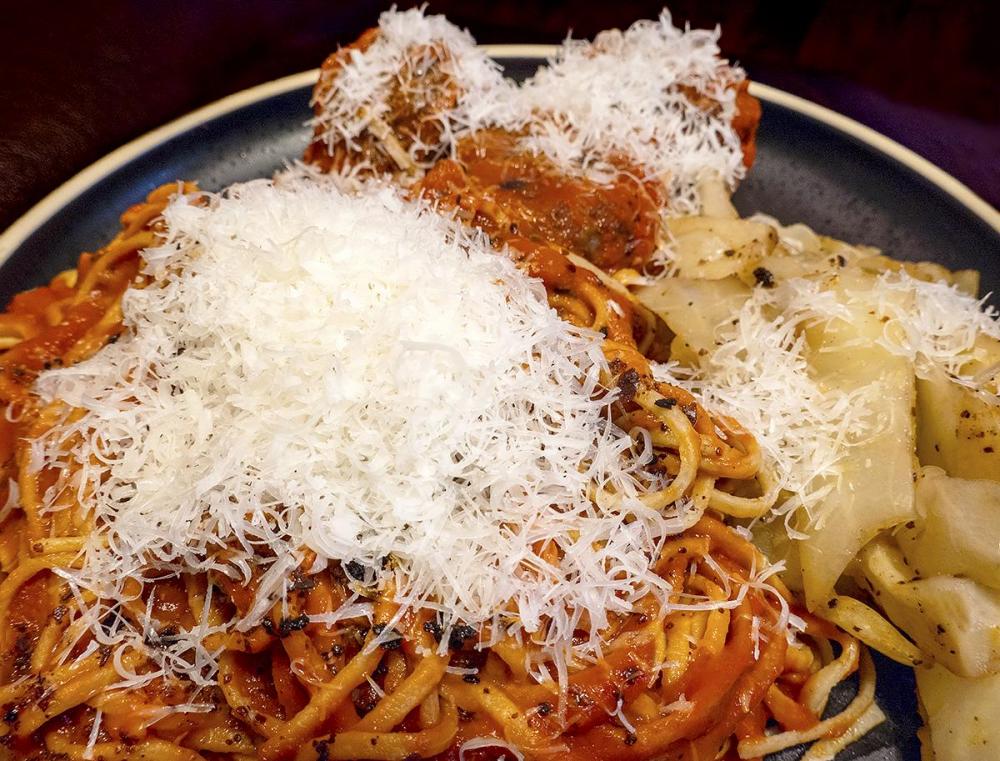
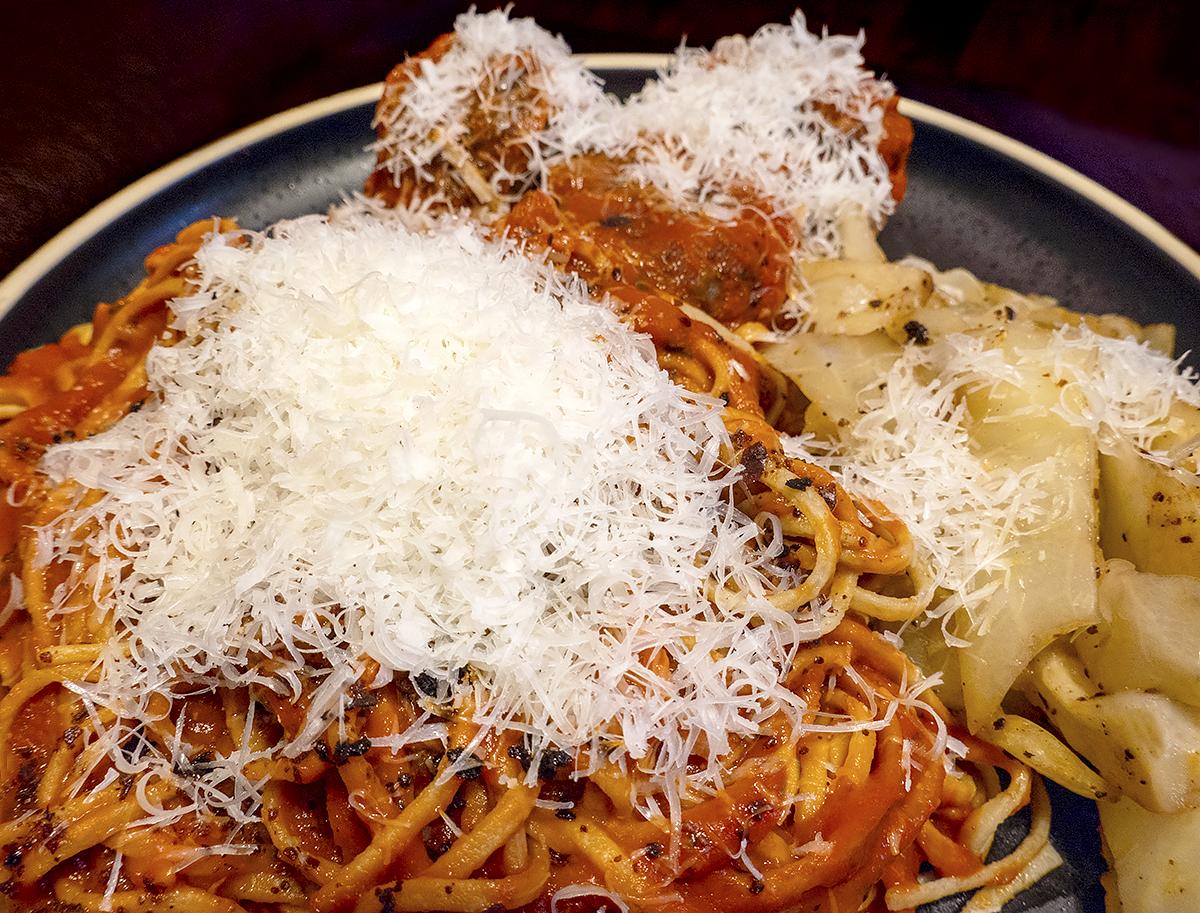
In these times anything goes for supper, tonight it was homemade spaghetti, sauce and meatballs with a side of steamed cabbage with butter and lots of pepper.
 7 points
 -
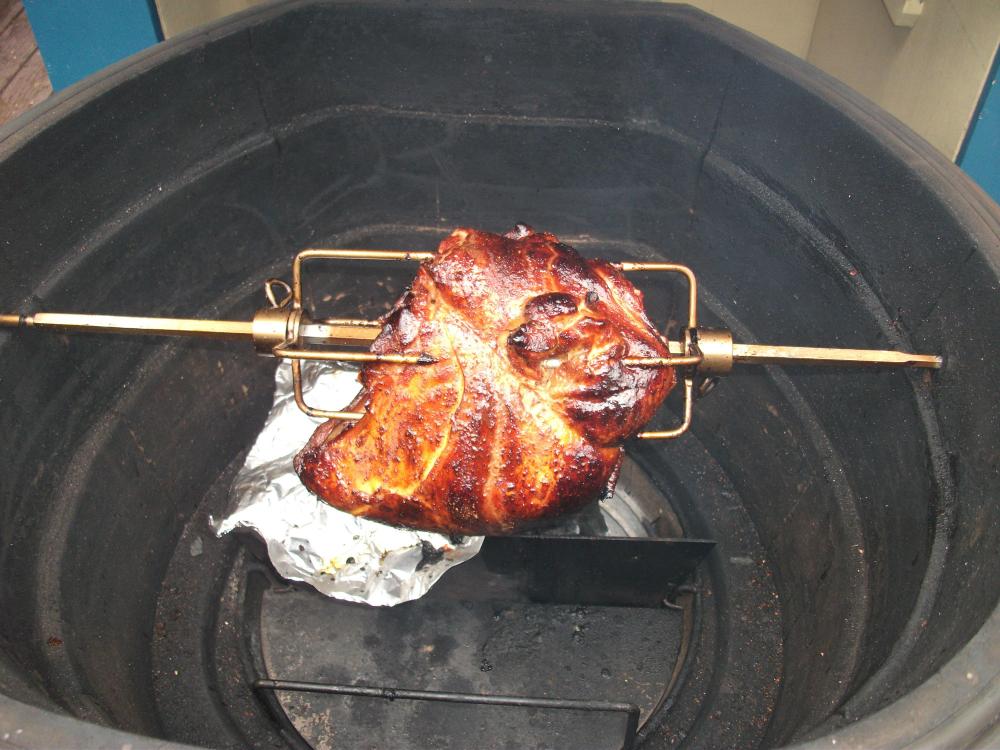
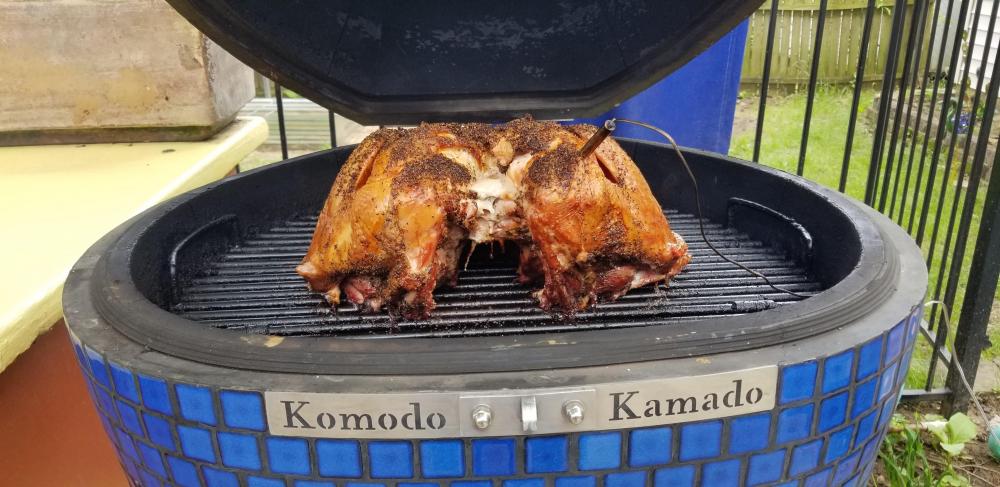
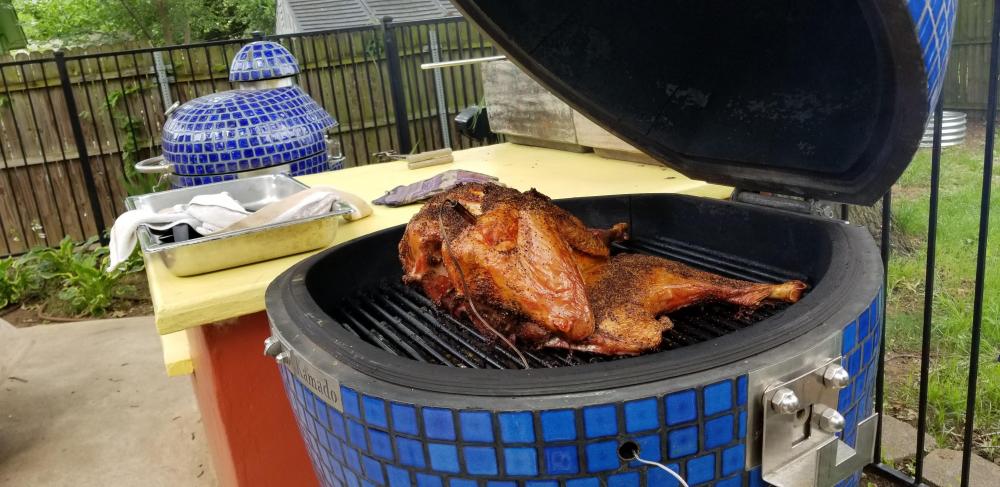
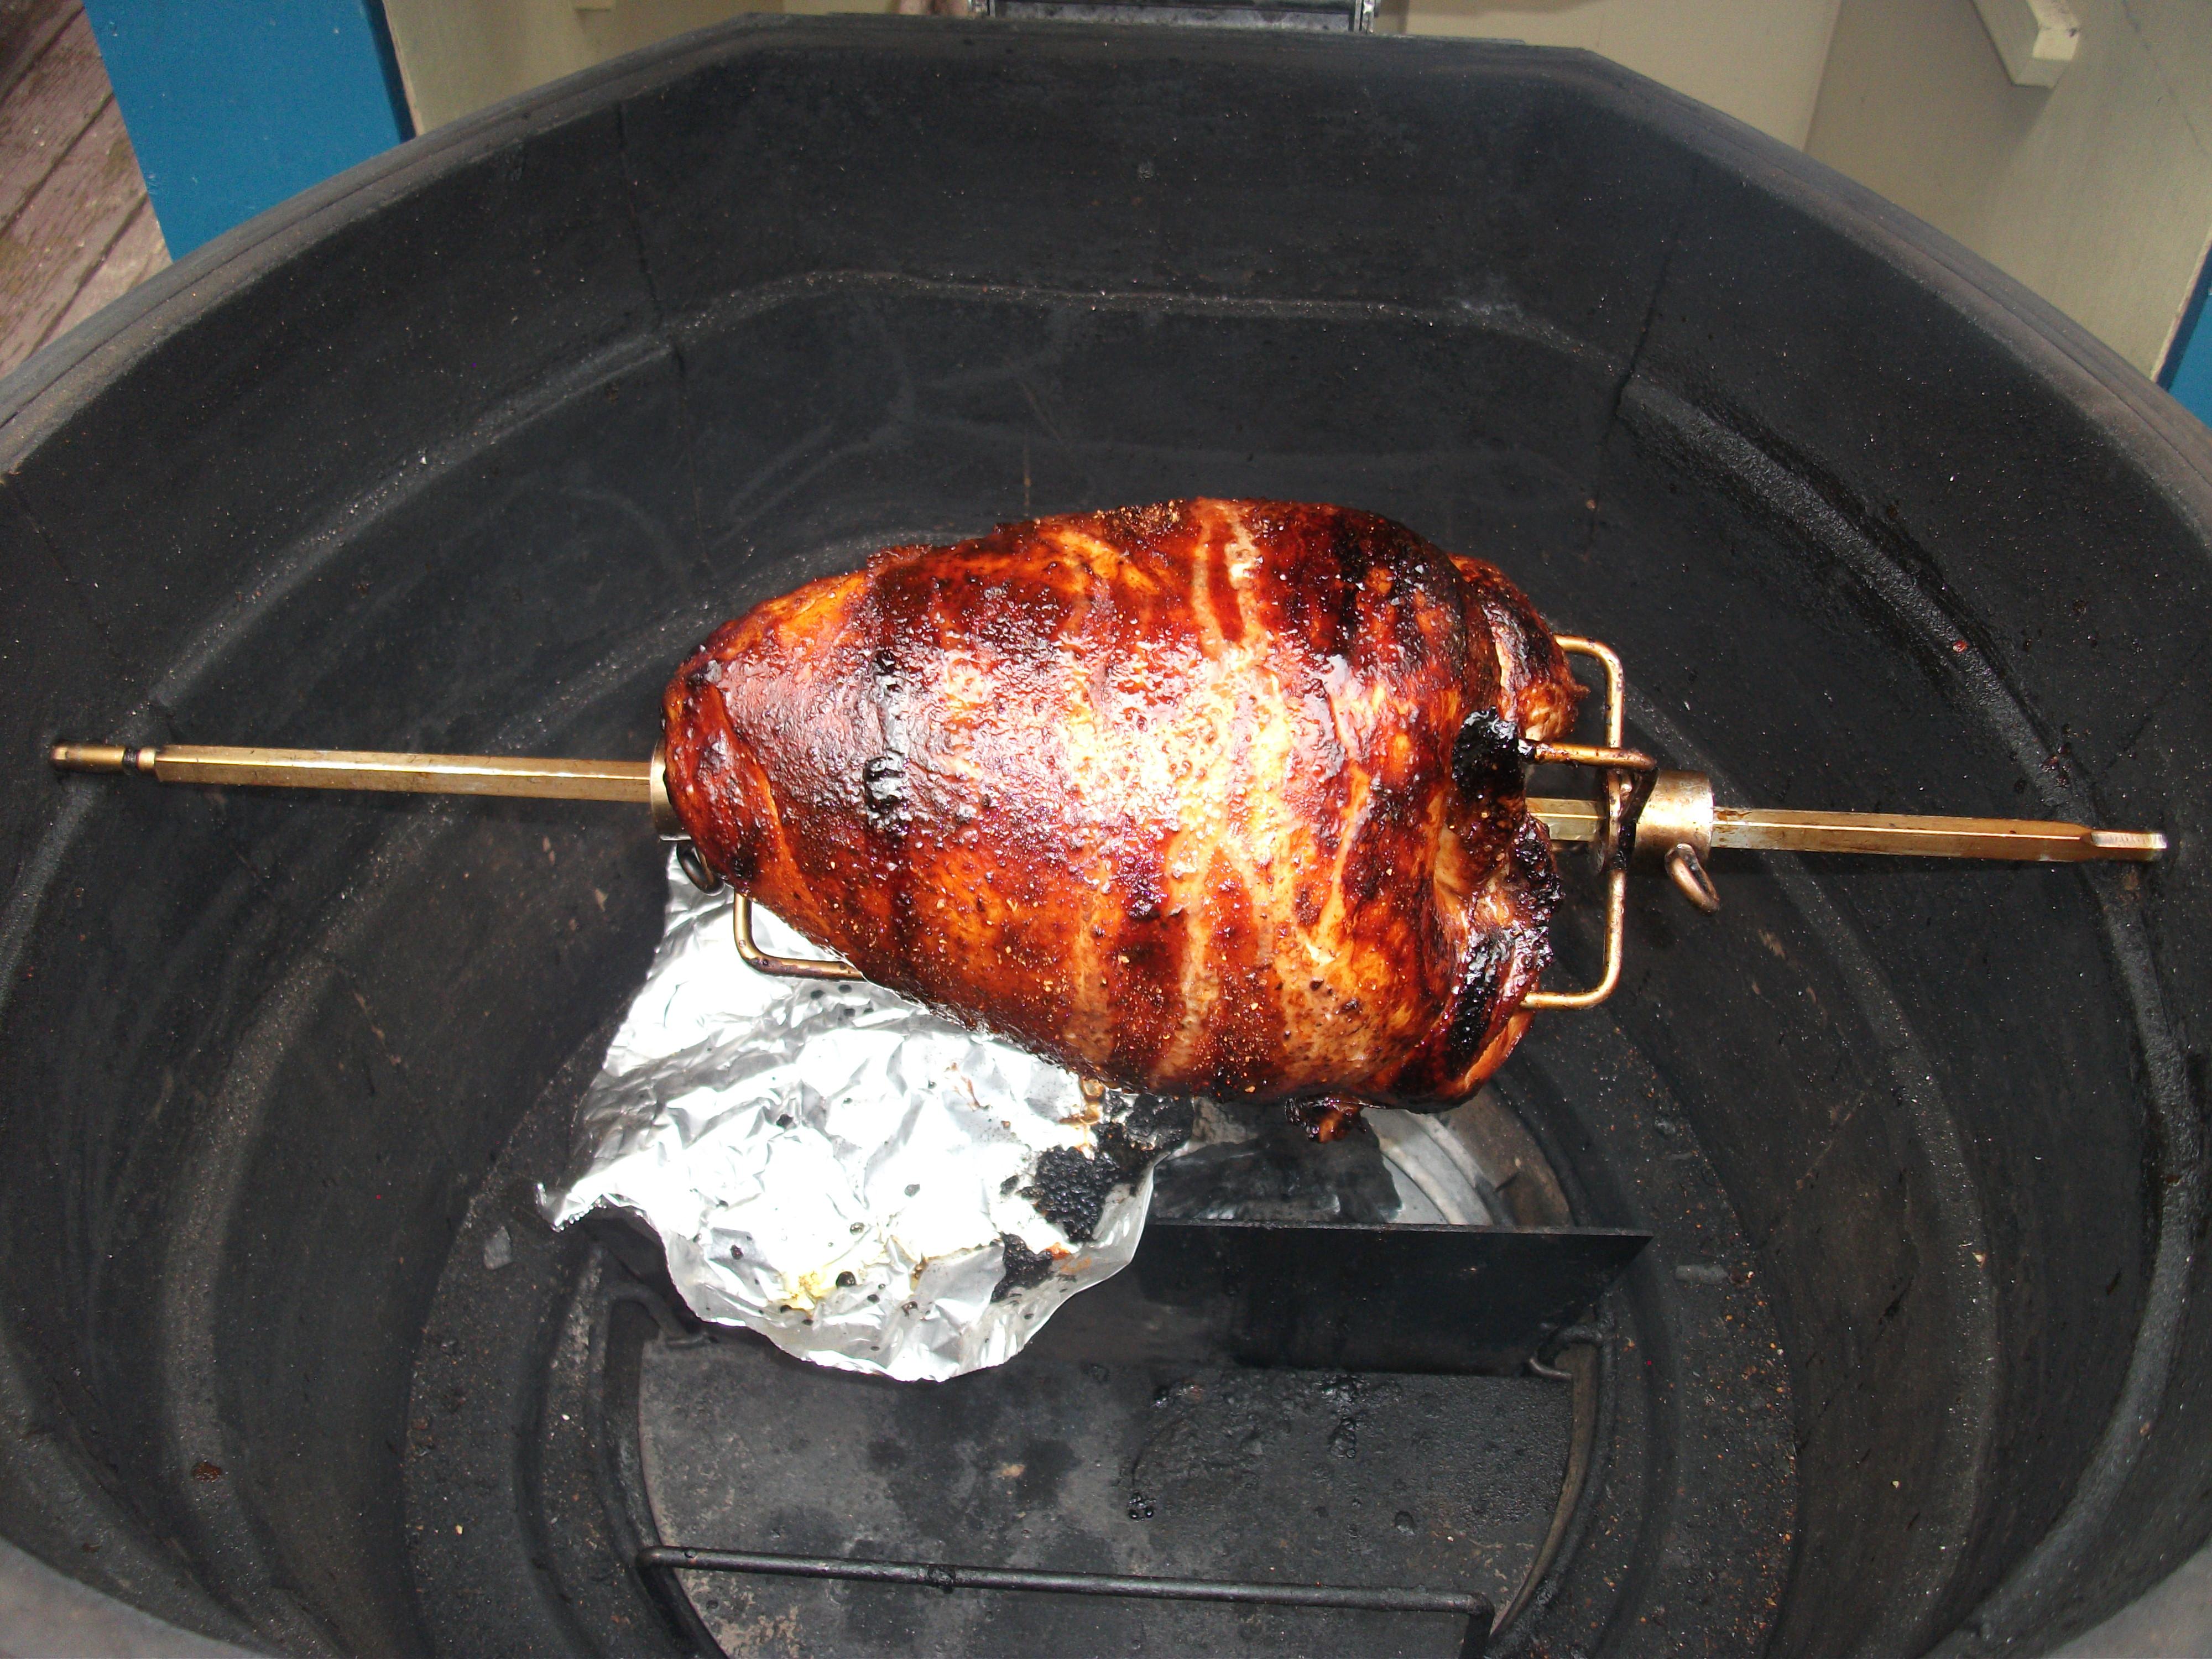
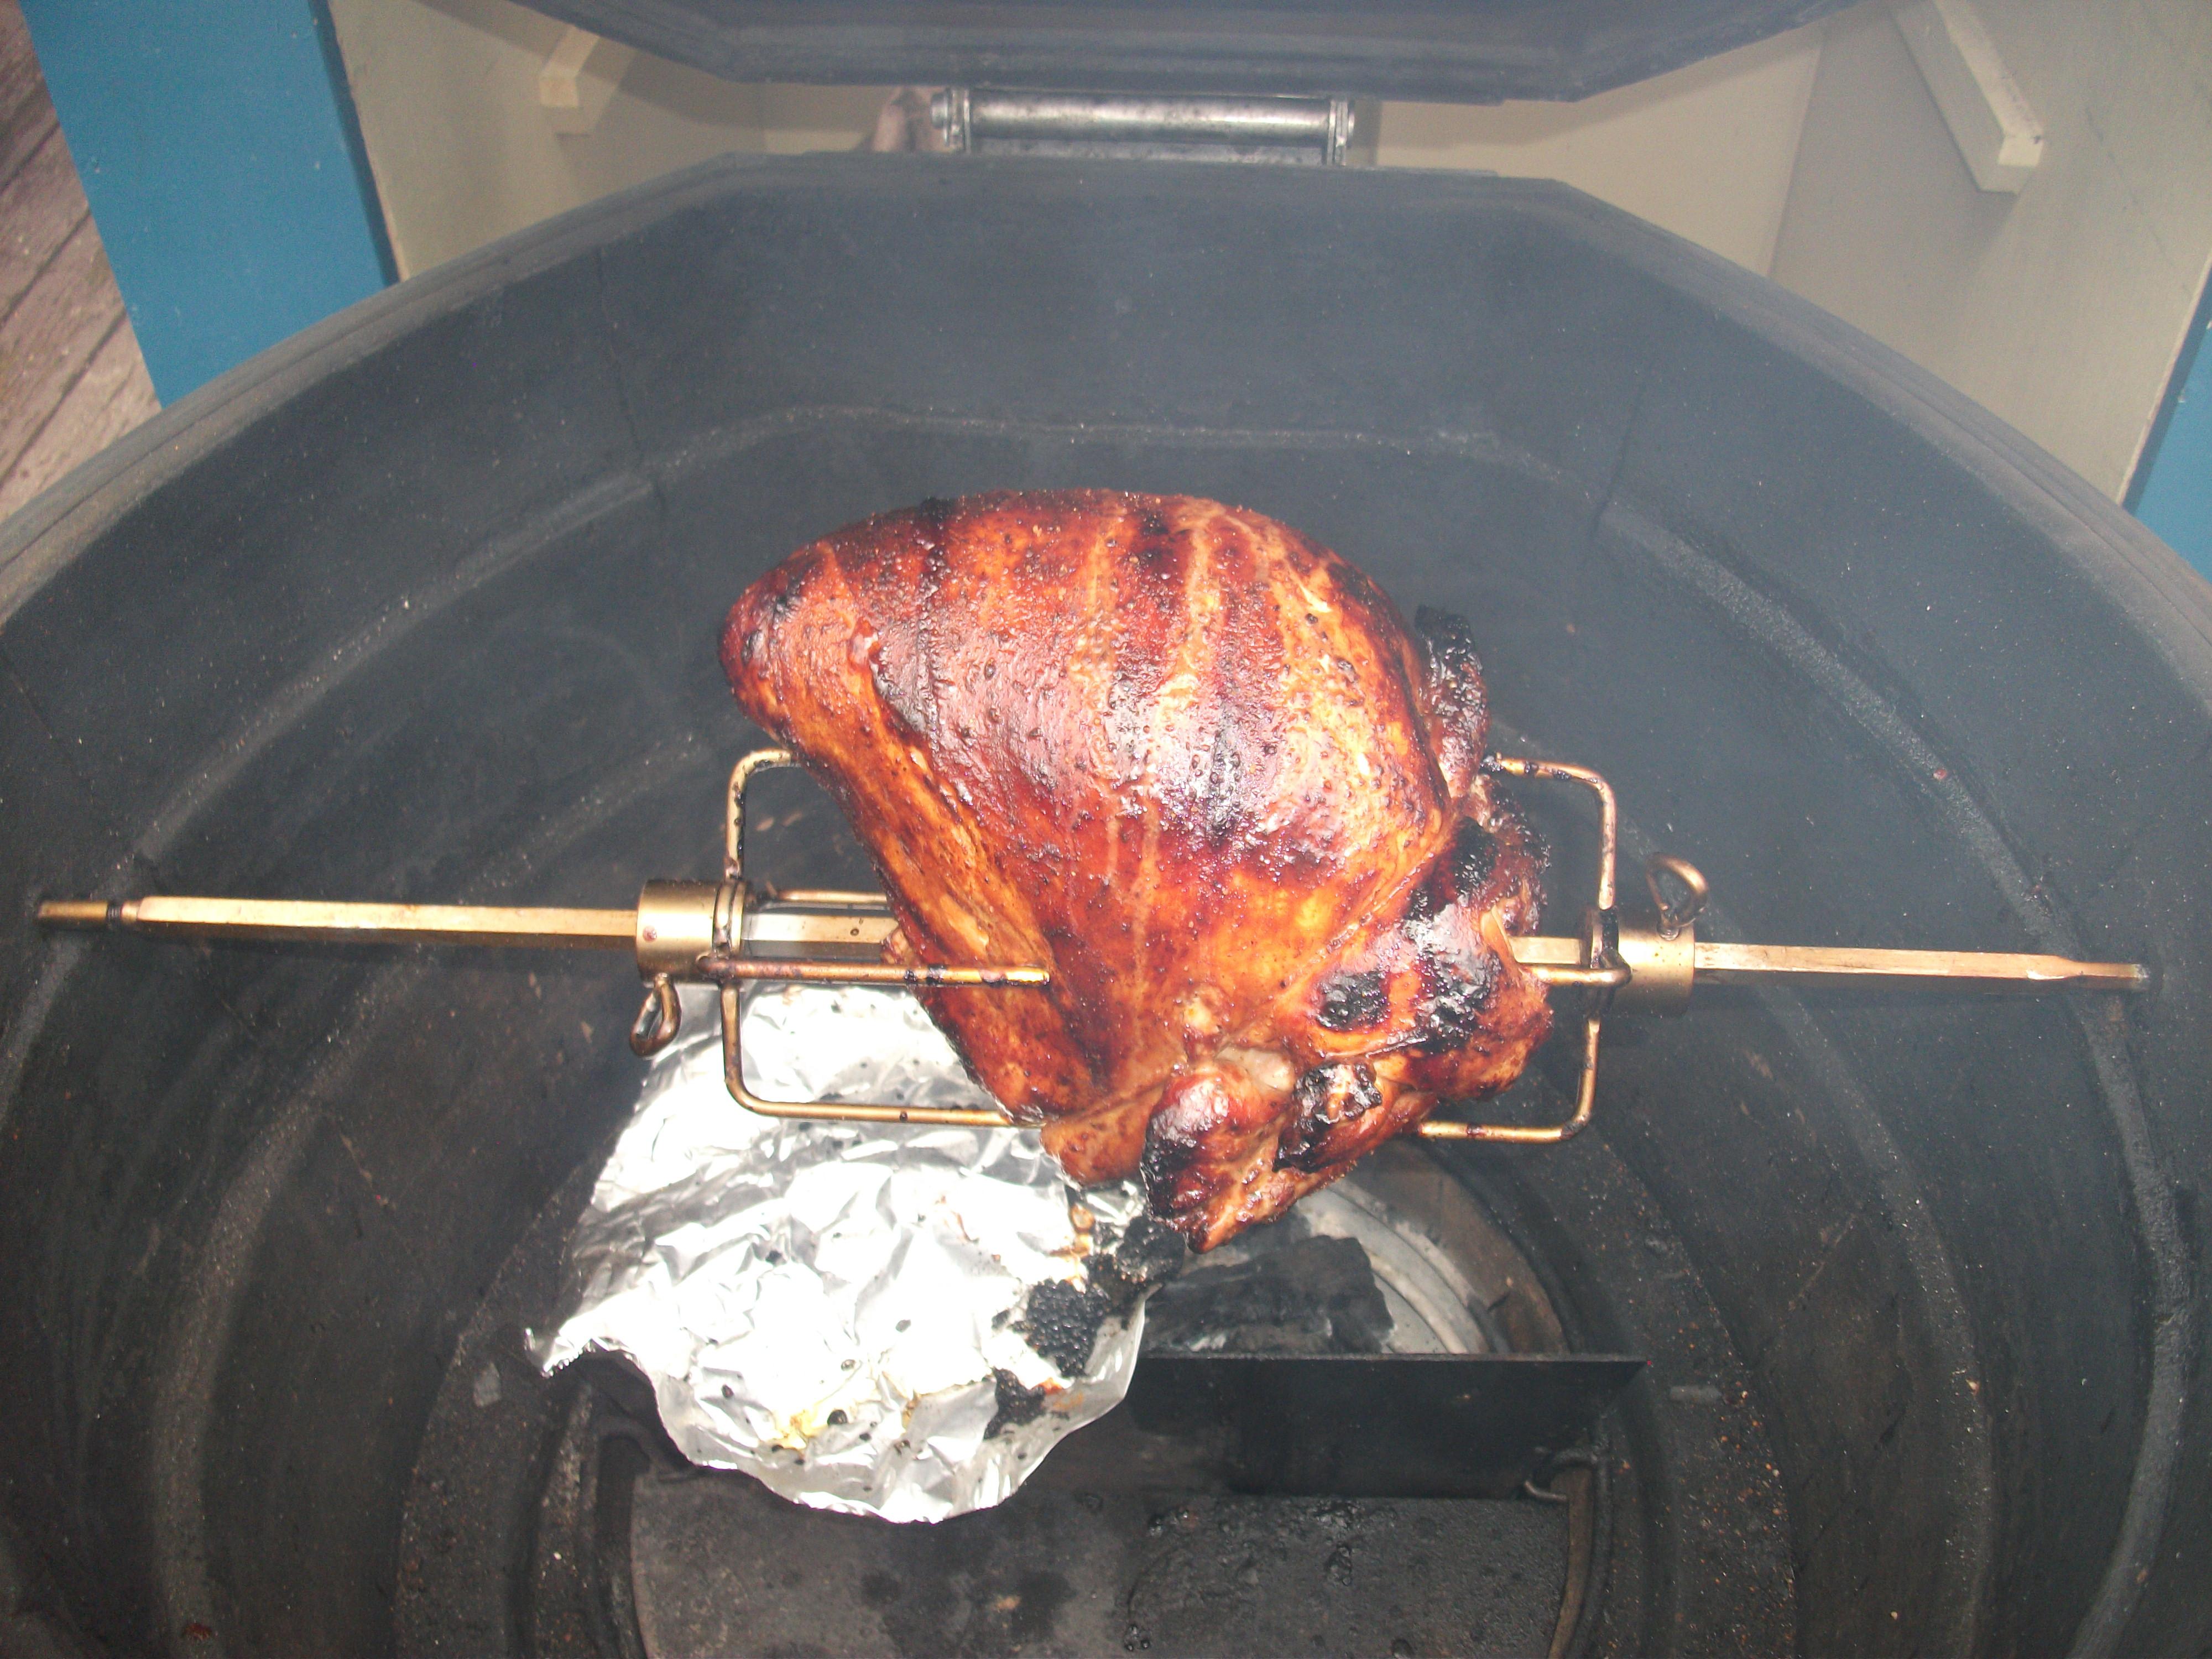
Hotel Turkey breast with no tell sauce. Foiled on the left too protect the thin and closer side running by the fire.


 6 points
 -
As a mechanical engineer (PE ret.), trust me on this one, Doc. It works well. Just wrap the aluminum foil around the grate rods on each end to hold it in place. You're not really trying to block airflow, but the infrared radiation coming directly off the hot coals.
 5 points
 -
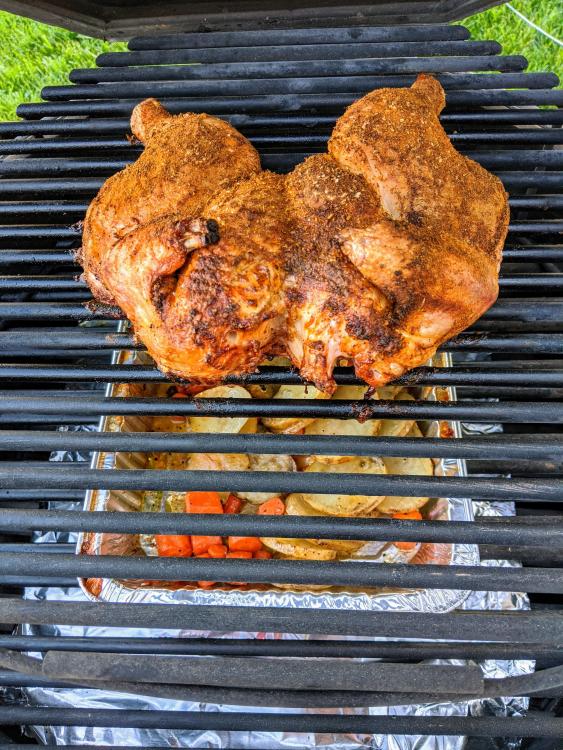
@Basher thanks for the tip I will have to try that next time. I did not read that prior to the cook. overall it went well however I had the right side of the coals burning much hotter and faster than the left which resulted in me needing to take off one bird earlier than the other. I need to work on a more even and consistent fire in the future, When I did remove one bird and moved the 2nd bird over in the cradle I didn’t secure it as tight as before so it moved around a bit and some of the skin got scraped but all good i was really amazed at the difference in taste between the rotisserie cook and traditional roasting method. Also the skin on the rotisserie chicken was nothing short of luxurious. IMG_2156.MOV
 5 points
 -
Troble, I have a set of pliers in my ODK for the sole purpose of tightening those rotisserie wing nuts or whatever they are called. BTW that is another of your mouth watering cooks. Now that I've seen the video, here is a suggestion for you to think about- what if you lit the centre only and put the two chickens with their legs facing each other in the centre. That way I think the breasts might be cooked at the same time the thighs are cooked and the breast would be protected from the hottest part of the fire.4 points
-
Cast iron rusts. For many years I used an unglazed 16" terra cotta plant saucer from a box store. I'd use it by itself as a heat deflector, lined with heavy duty foil to double as a drip pan. Each one would last a few years then crack, but they don't cost much. Still the inexpensive solution I'd recommend to anyone. I love my "official" double bottom heat deflector, drip pan, but one could buy decades of terra cotta plant saucers for the same money.4 points
-
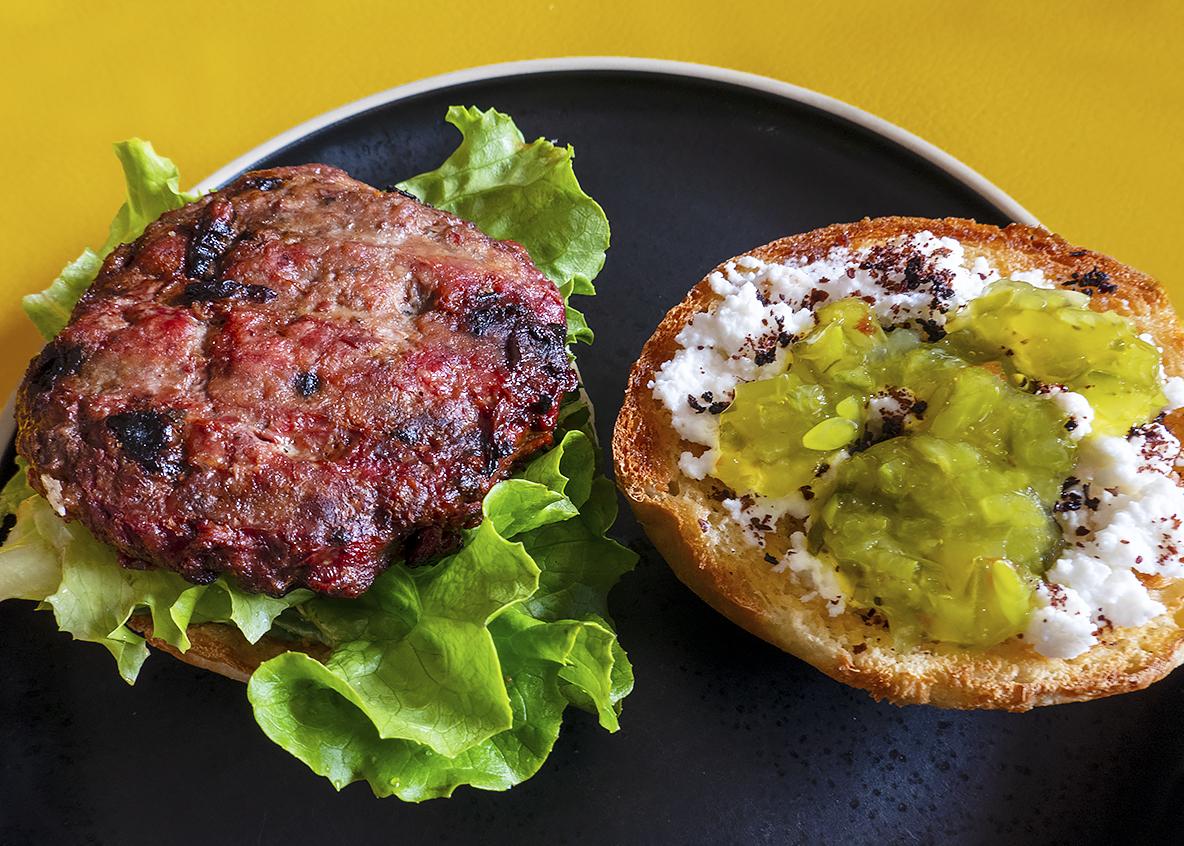
Burger lunch today.
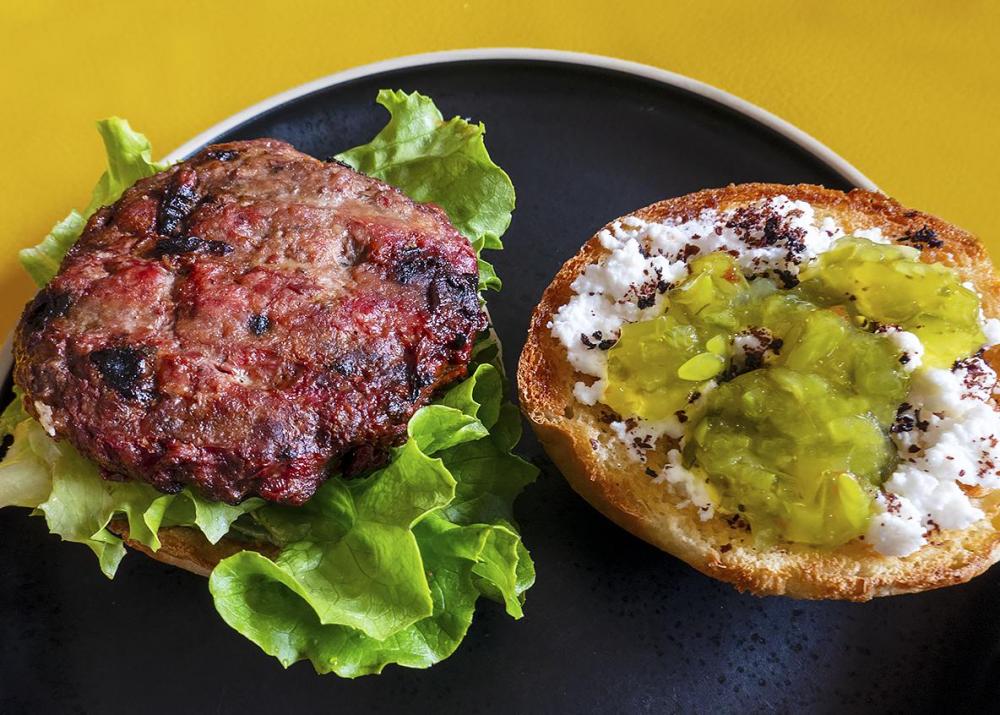
 3 points
 -
Sir Bruce Pearson, a knight of the round table. That tray was a calling. You know, we'll both be pushin daisies and that iron will still be rustin. I like rust, it's what they add to aloe to give you that wipe on suntan. All kidding aside.........can't beat the double pan, built like a tank.3 points
-
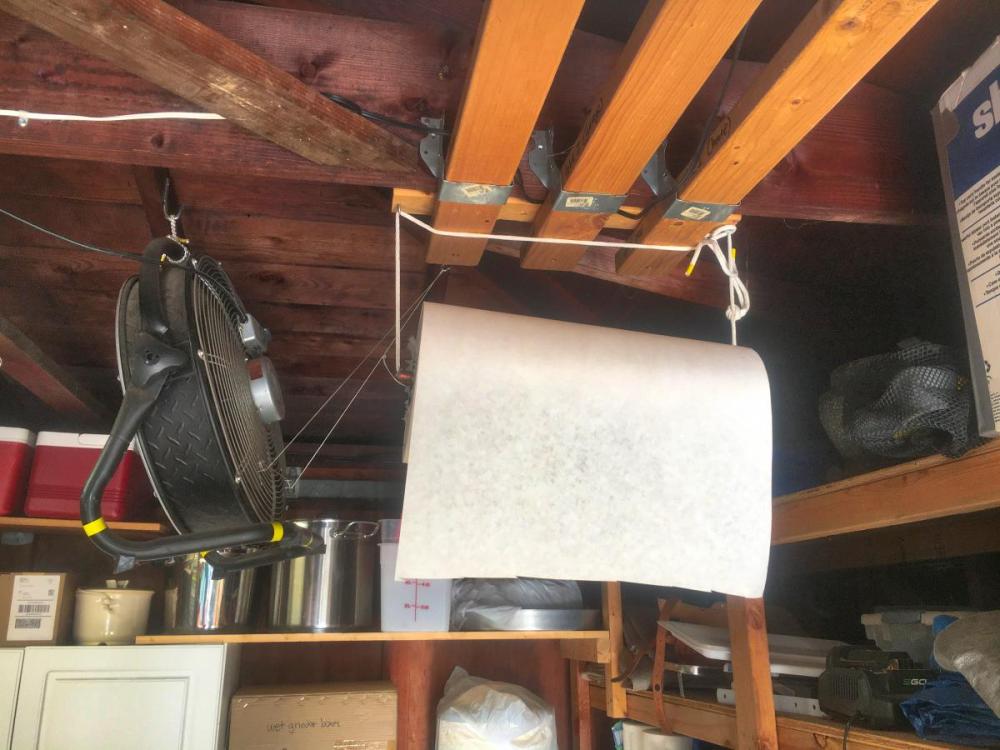
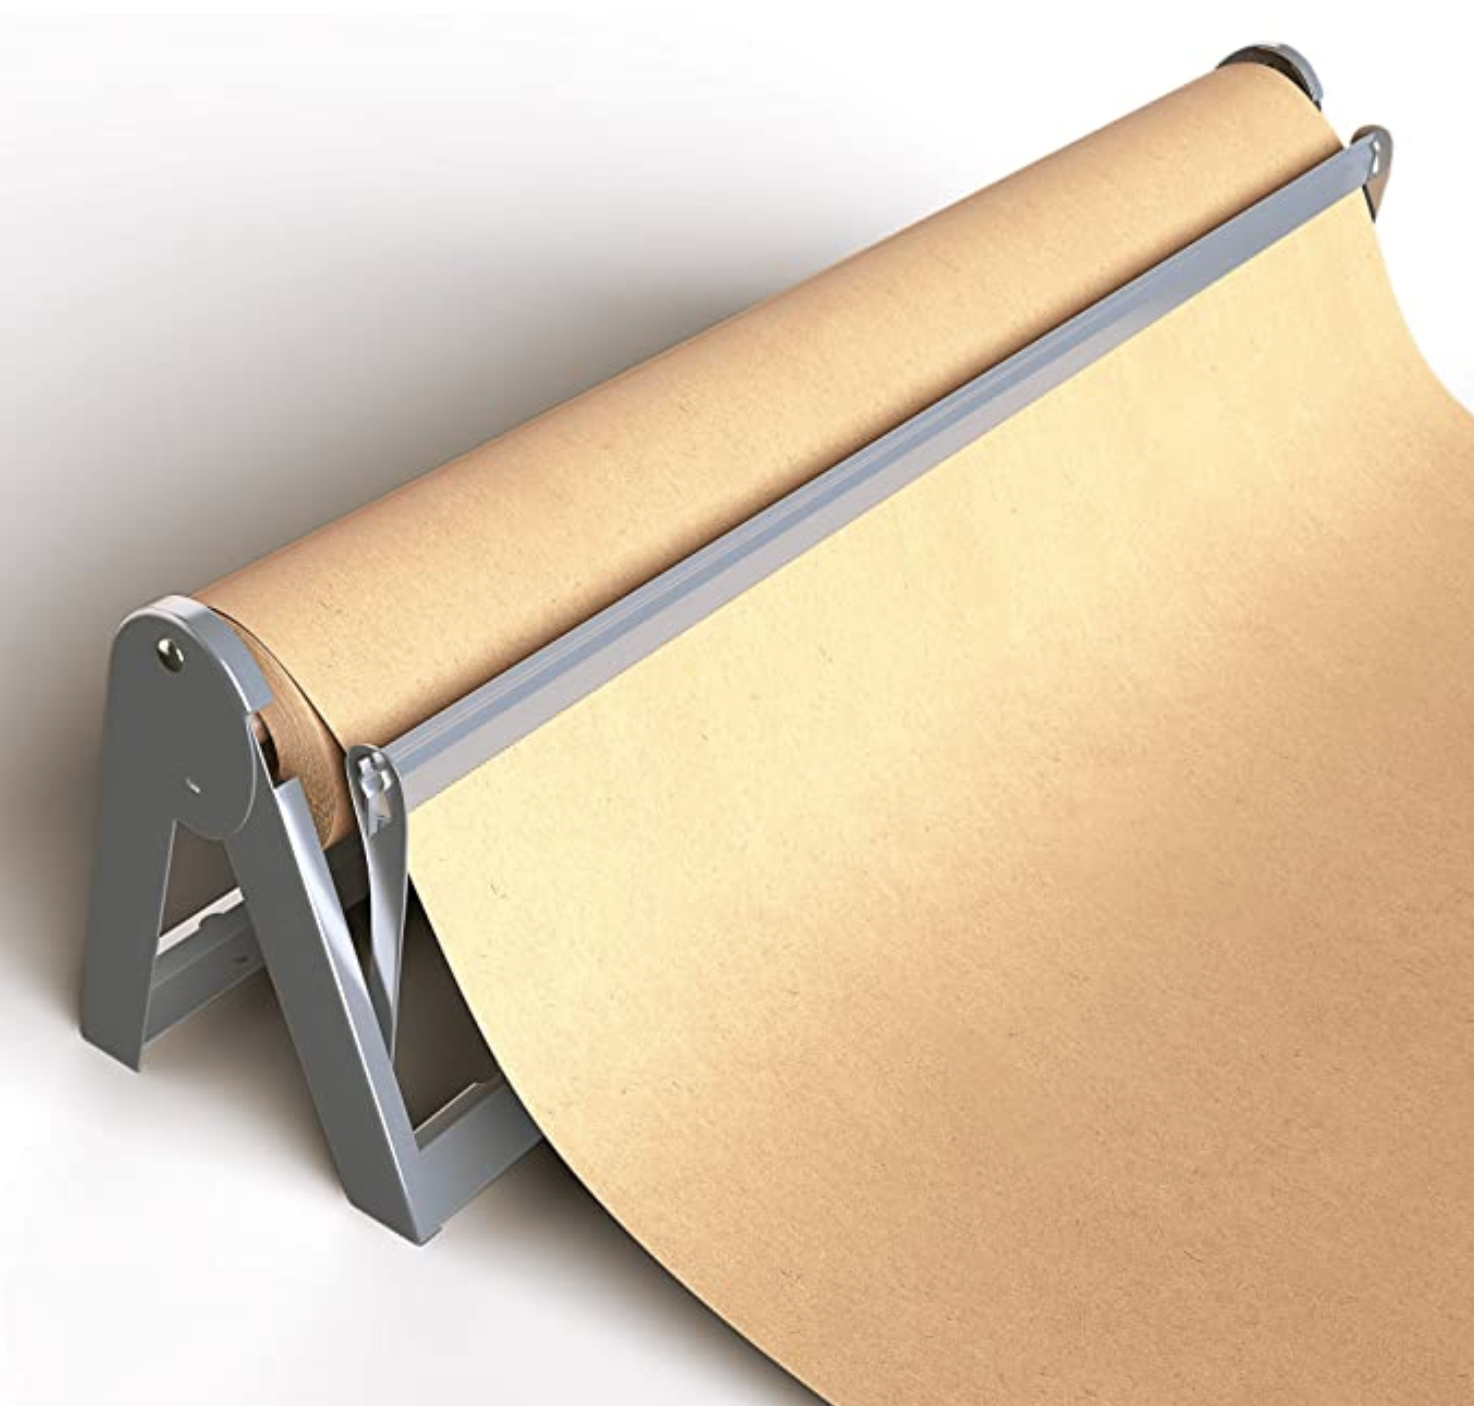
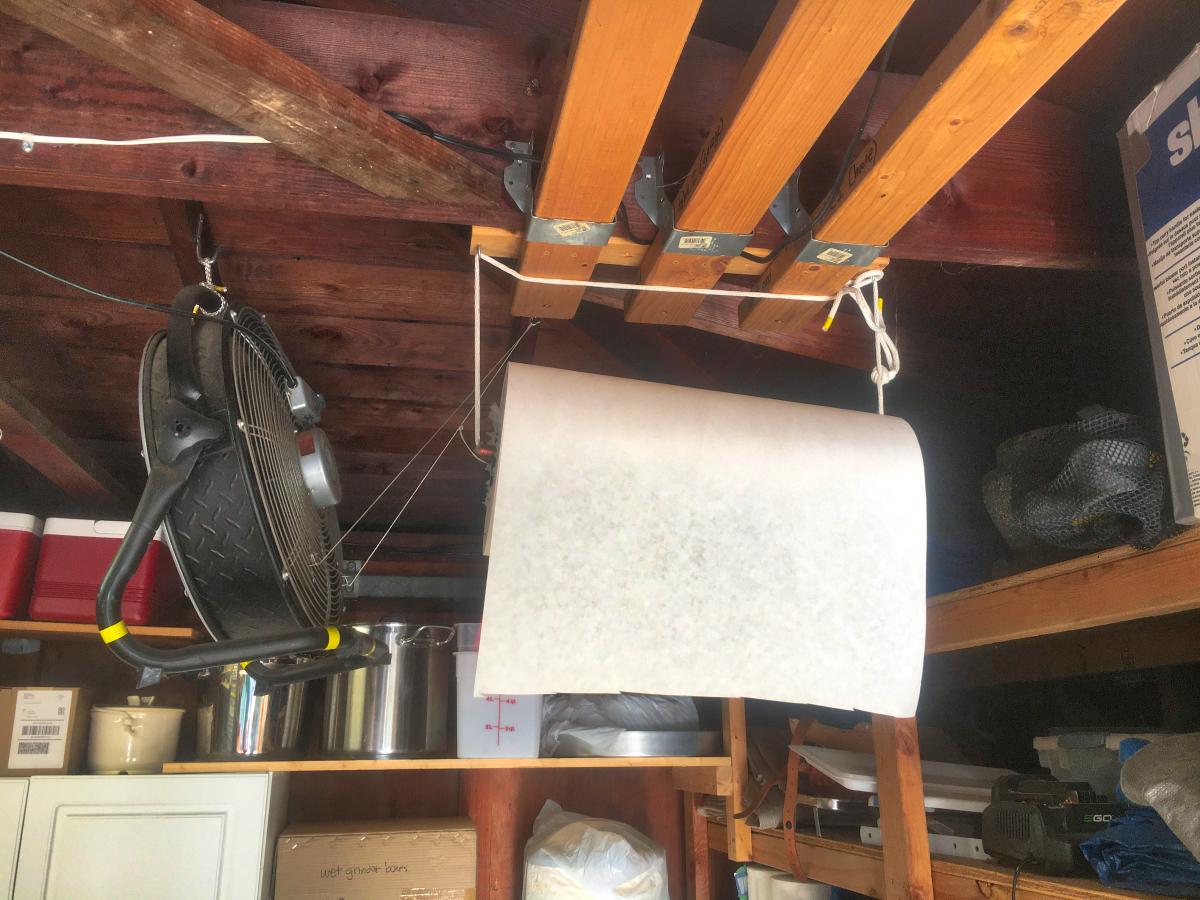
I first bought the wrong kind of butcher paper for BBQ: white, coated. One wants pink; the brown pictured on the commercial dispenser is probably also fine. I hung my white roll in the garage for general use. My "cutter" is a pair of shop shears. I measure by paying attention to the landscape as I pull down paper.

 3 points
 -
I use the broiler tray from my gas range in the house for a heat deflector, drip pan. I can put foil in it if I have a mind to, but I don’t have much of a mind so I usually forget. iIm with Mac on the fancy drip pan that came with my KK. I am using mine as a serving they. Awhile back I was walking by a dollar store and in the window was a huge tray that looks almost exactly like the one that came with the KK, but this is about 3 ft. across so I bought it. Duh, I don’t know why I bought It I guess because it matched the smaller one, good reason right? I guess I’ll use it as a humongous serving tray For large get togethers, or as shield for the zombie apocalypse! Seems like I’m rambling on here guess I’ve been sheltering at home too long. Everybody stay safe and sane3 points
-
And that's basically the cost of the electricity. We got out of the Great Depression through pork barrel projects like building dams everywhere we could, even though this generated far more electricity than we needed. Then came along World War II. We could build aluminum fighter planes faster than the Germans could shoot them down. Ohne Aluminium würden wir Deutsch sprechen.2 points
-
Been there, done that! It was so sought after, more precious than gold at the time. Napoleon had a set of flatware made of it to show off at his state dinners. https://www.theatlantic.com/technology/archive/2014/11/aluminum-was-once-one-of-the-most-expensive-metals-in-the-world/382447/2 points
-
Doc, I just copied your link and pasted it into this post. There's an option at the bottom of the screen that asks if you want to embed it or just post it as a link. The default is to embed, so I didn't change it.2 points
-
I have been given grief , and rightly so , for not posting pictures of cooks done on a custom soapstone made for my KK 23" Ultimate . To my personal shame I was reminded " No pictures , it didn't happen " . Finally here is evidence of the existence of the said stone and my some what limited cooking ability. I humbly request everyone's forgiveness . The Maillard reaction was fantastic.


 2 points
 -
Went to a local custom countertop company and they cut it off a piece of scrap. Cut to size edge and top ground smooth and polished two pieces for $50.2 points
-
https://youtu.be/tjxcMrUSpZ8 Anyone know how to get the video in the post, not just the link?2 points
-
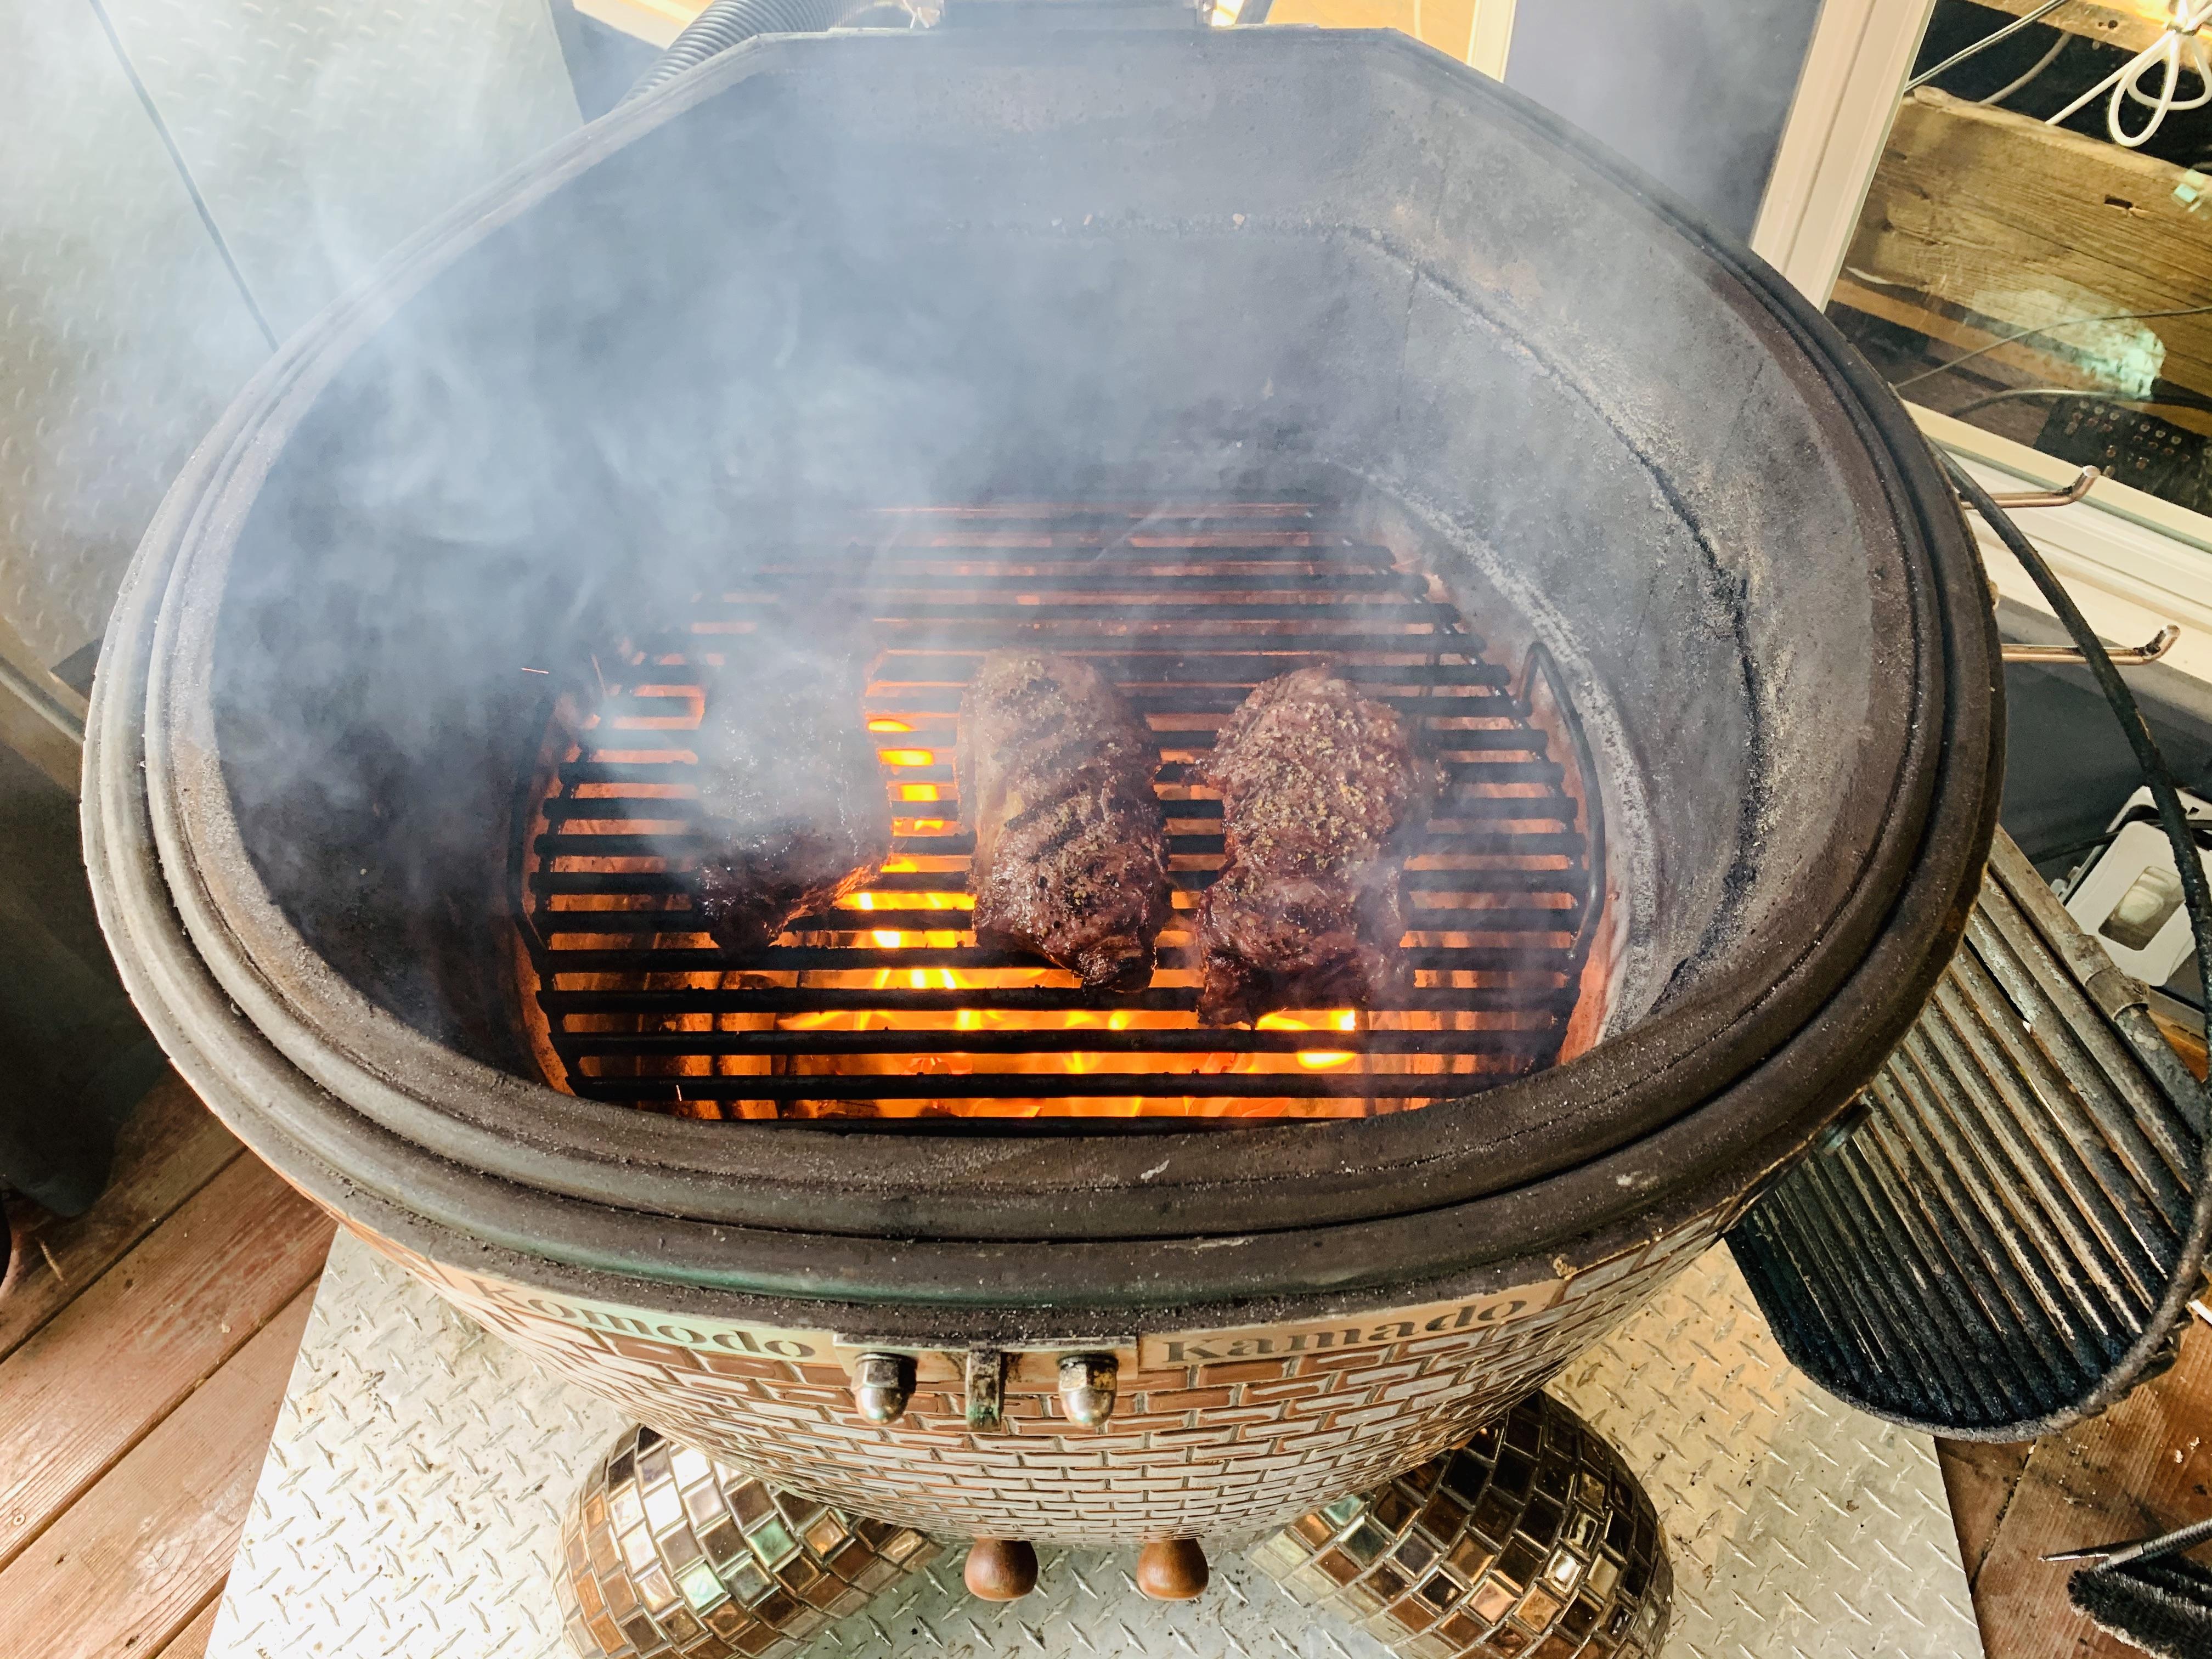
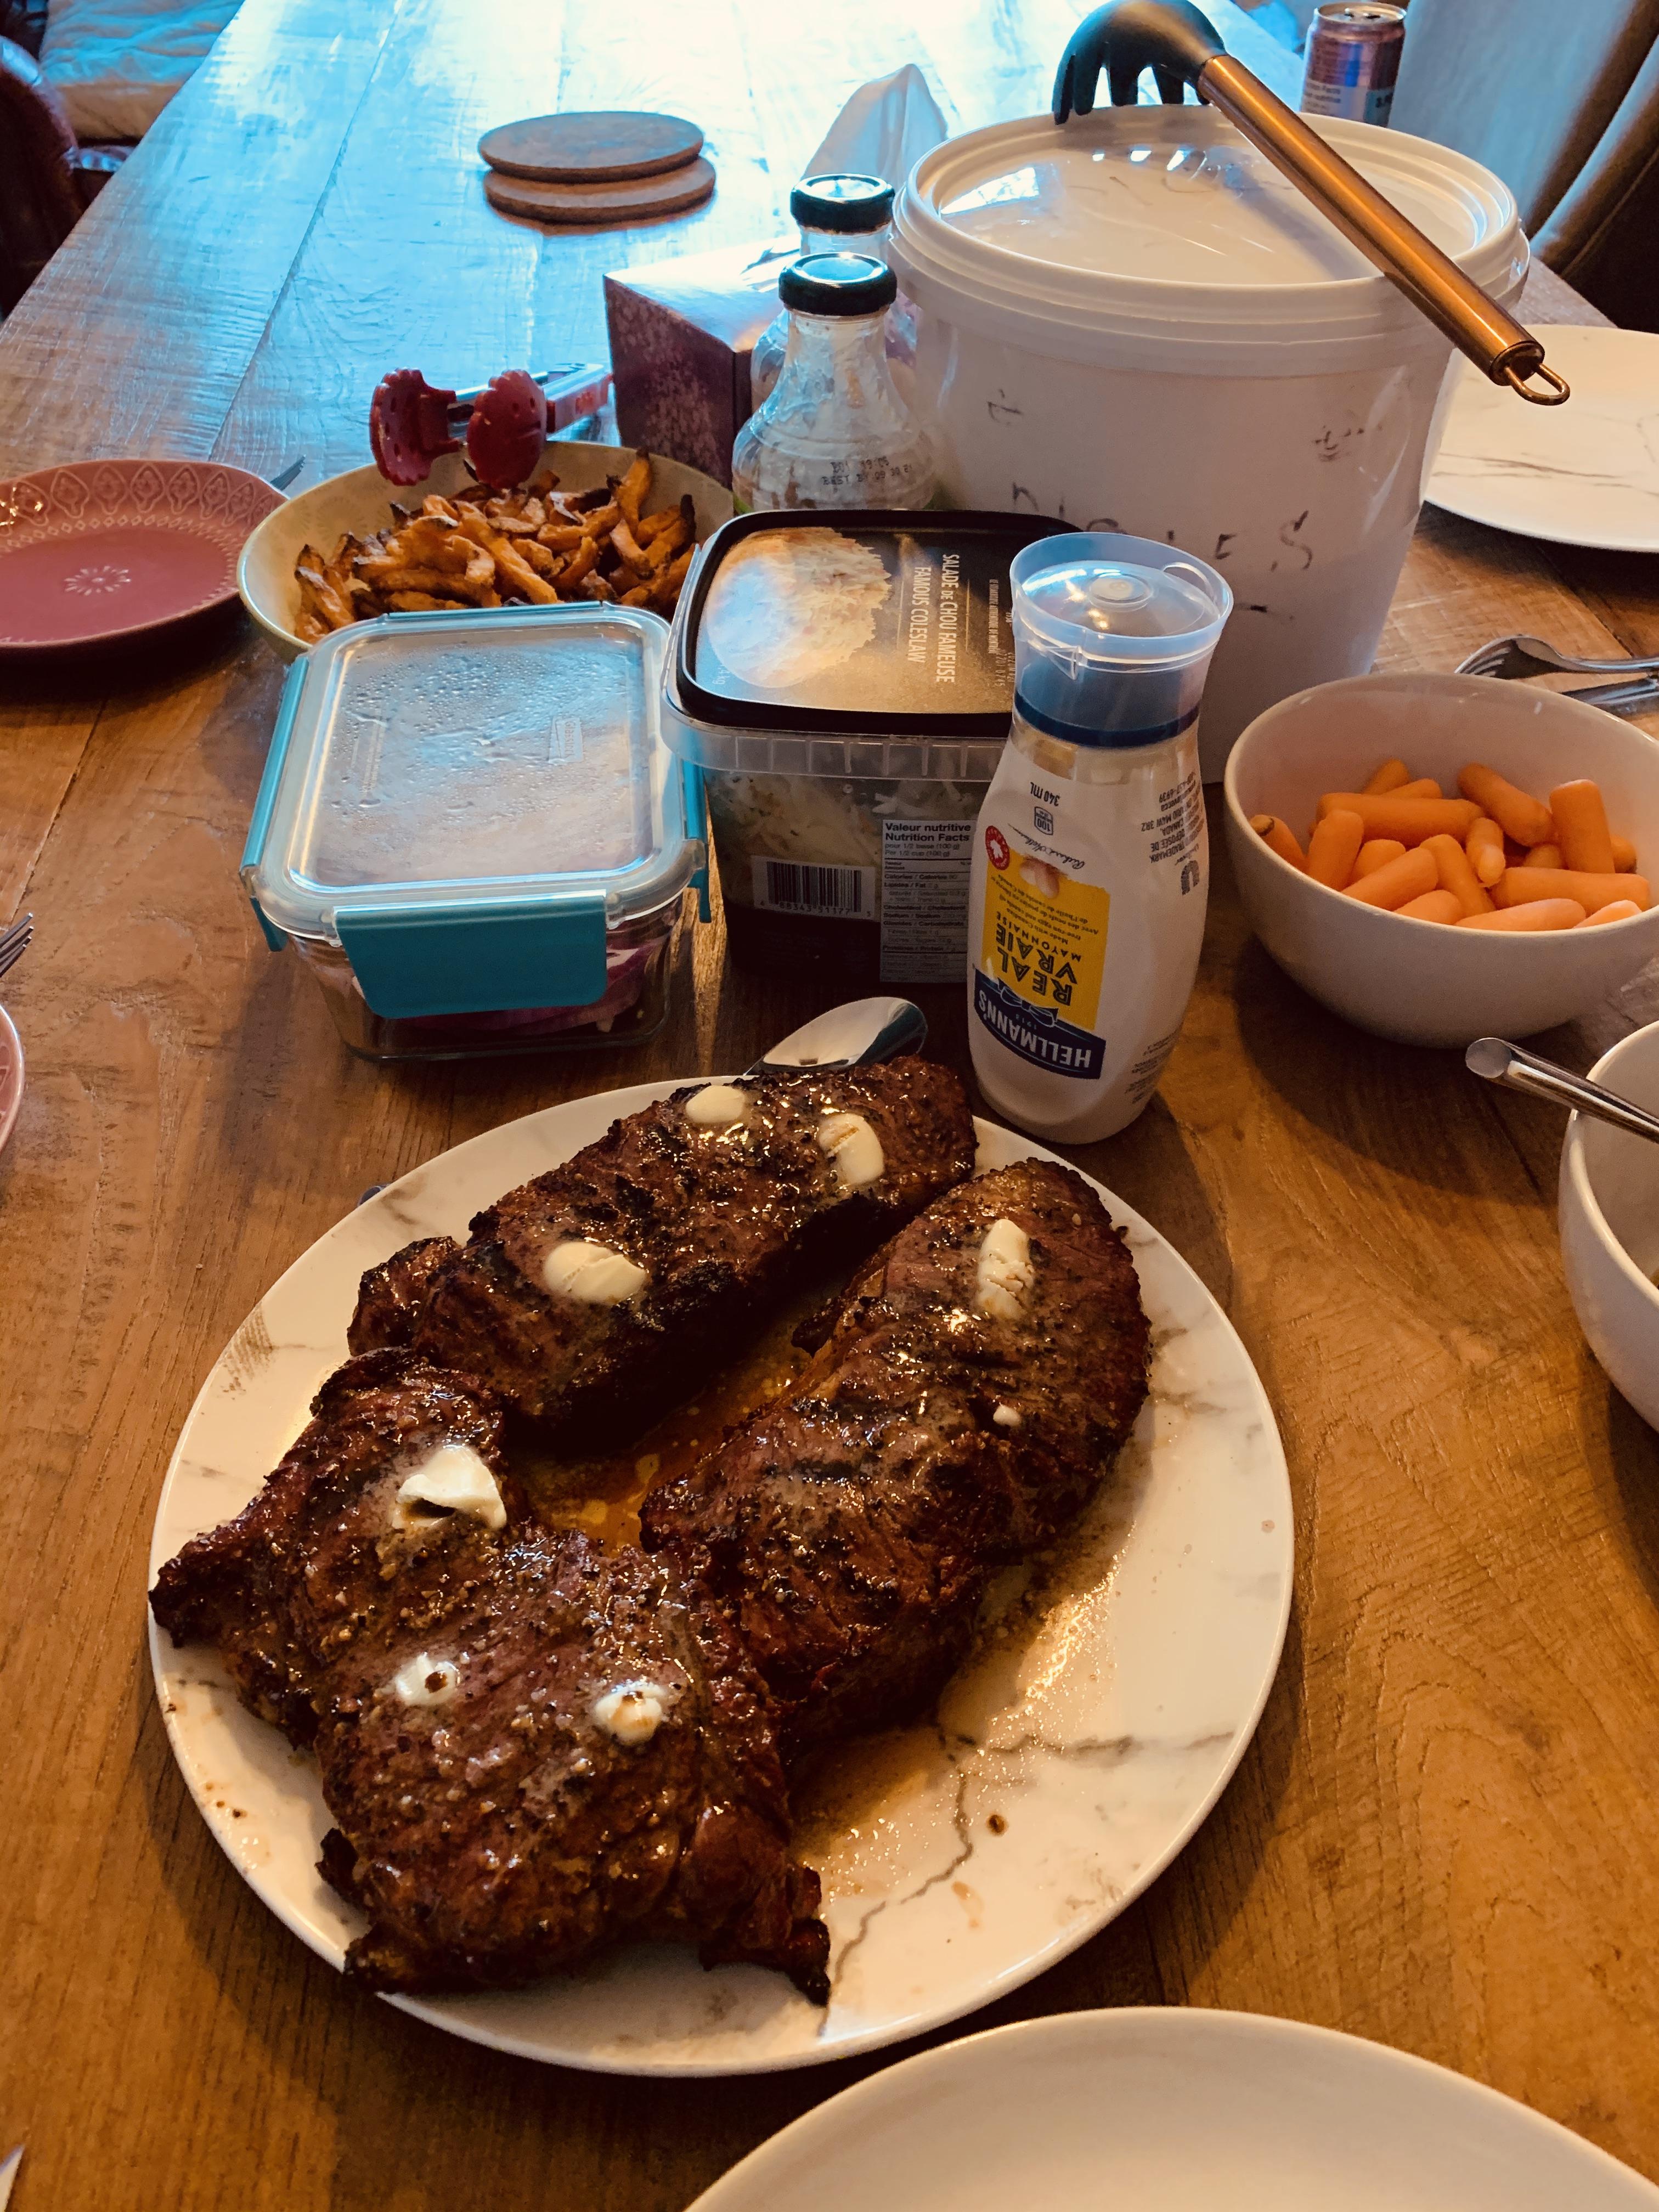
Toss me into this group also. I like mine rare enough to be on the endangered species list while she wants hers dead.2 points
-
Foil smoil. I'm looking around the corner for something different to try, repurposed, another approach. If you continue along the same path all you'll see is the same ol scenery but take a different direction and things change and who knows it might even look better. Foils good, the cast iron could be the trick, today I did 6 racks of ribs with the heat deflector full of holes, worked fine. It's not that I think what's there isn't any good, I'm trying to spin it and see what may work better,.. at least for me. Basher , I don't remember reading that book but that's exactly how I used to make my trays when nothing was around to use. In college when we ran out of papers foil could be fashioned into a good pipe. Would you believe at one time Aluminum sold for $1000 an ounce....along comes some guy called Reynolds and develops a process to produce it at .18 cents a lb. The Washington monument was capped in Aluminum once. Choices, there are a few...some choose differently. Stay safe, stay Covid free and above all keep the fire burning in your KK. Feed a friend2 points
-
Peach maple glazed swine tenderloin.
 2 points
 -
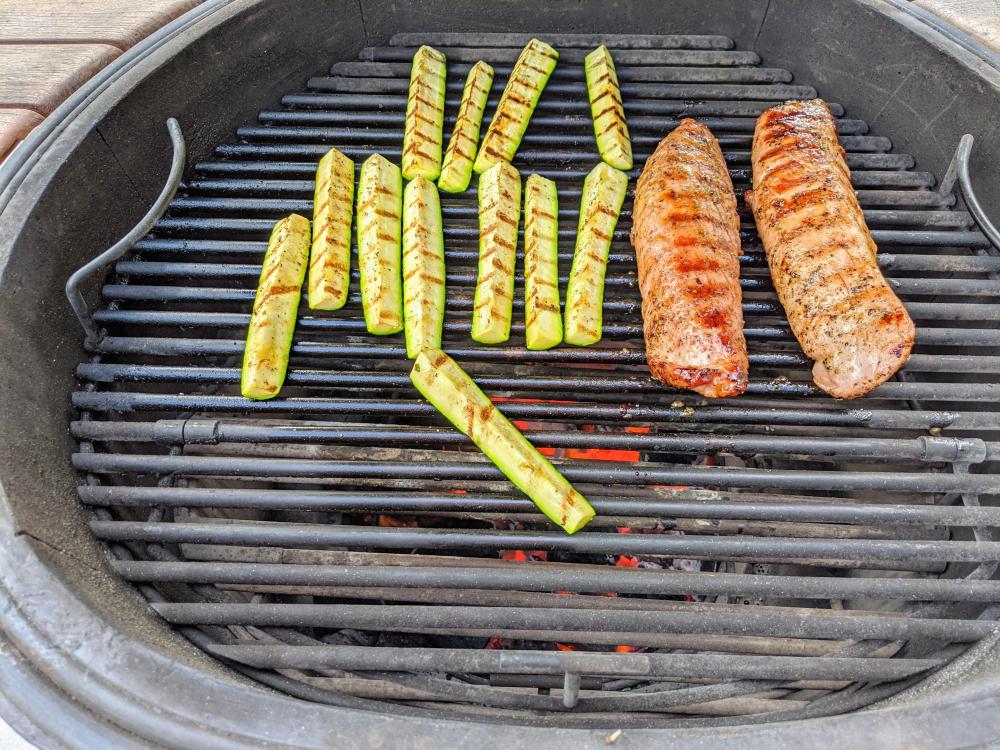
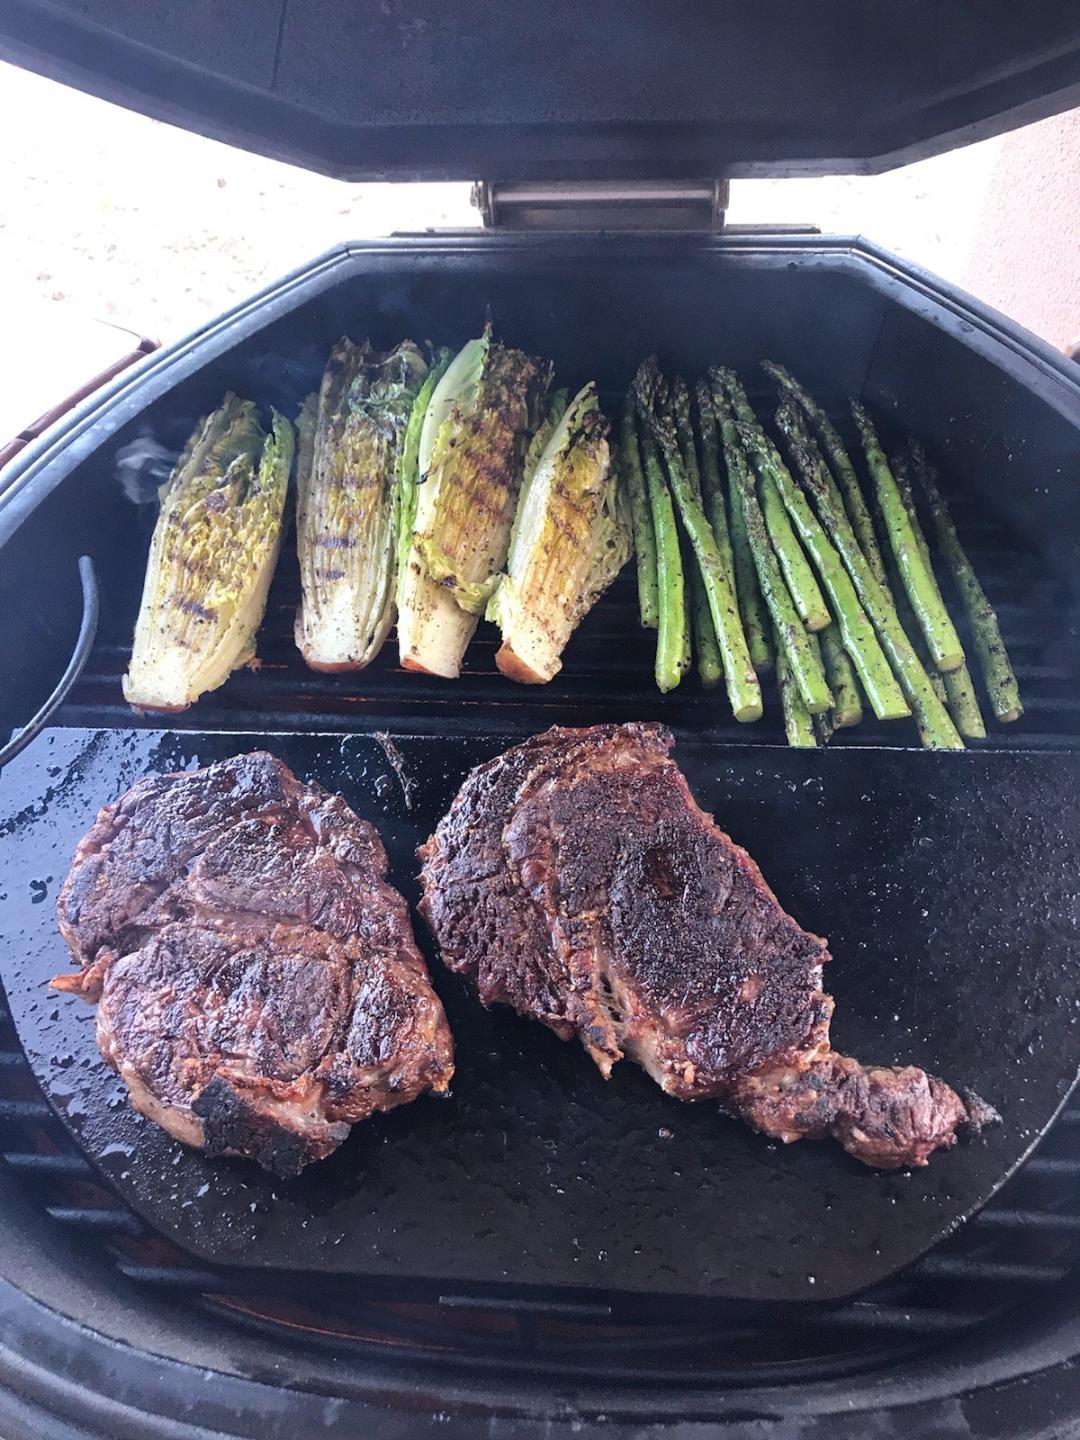
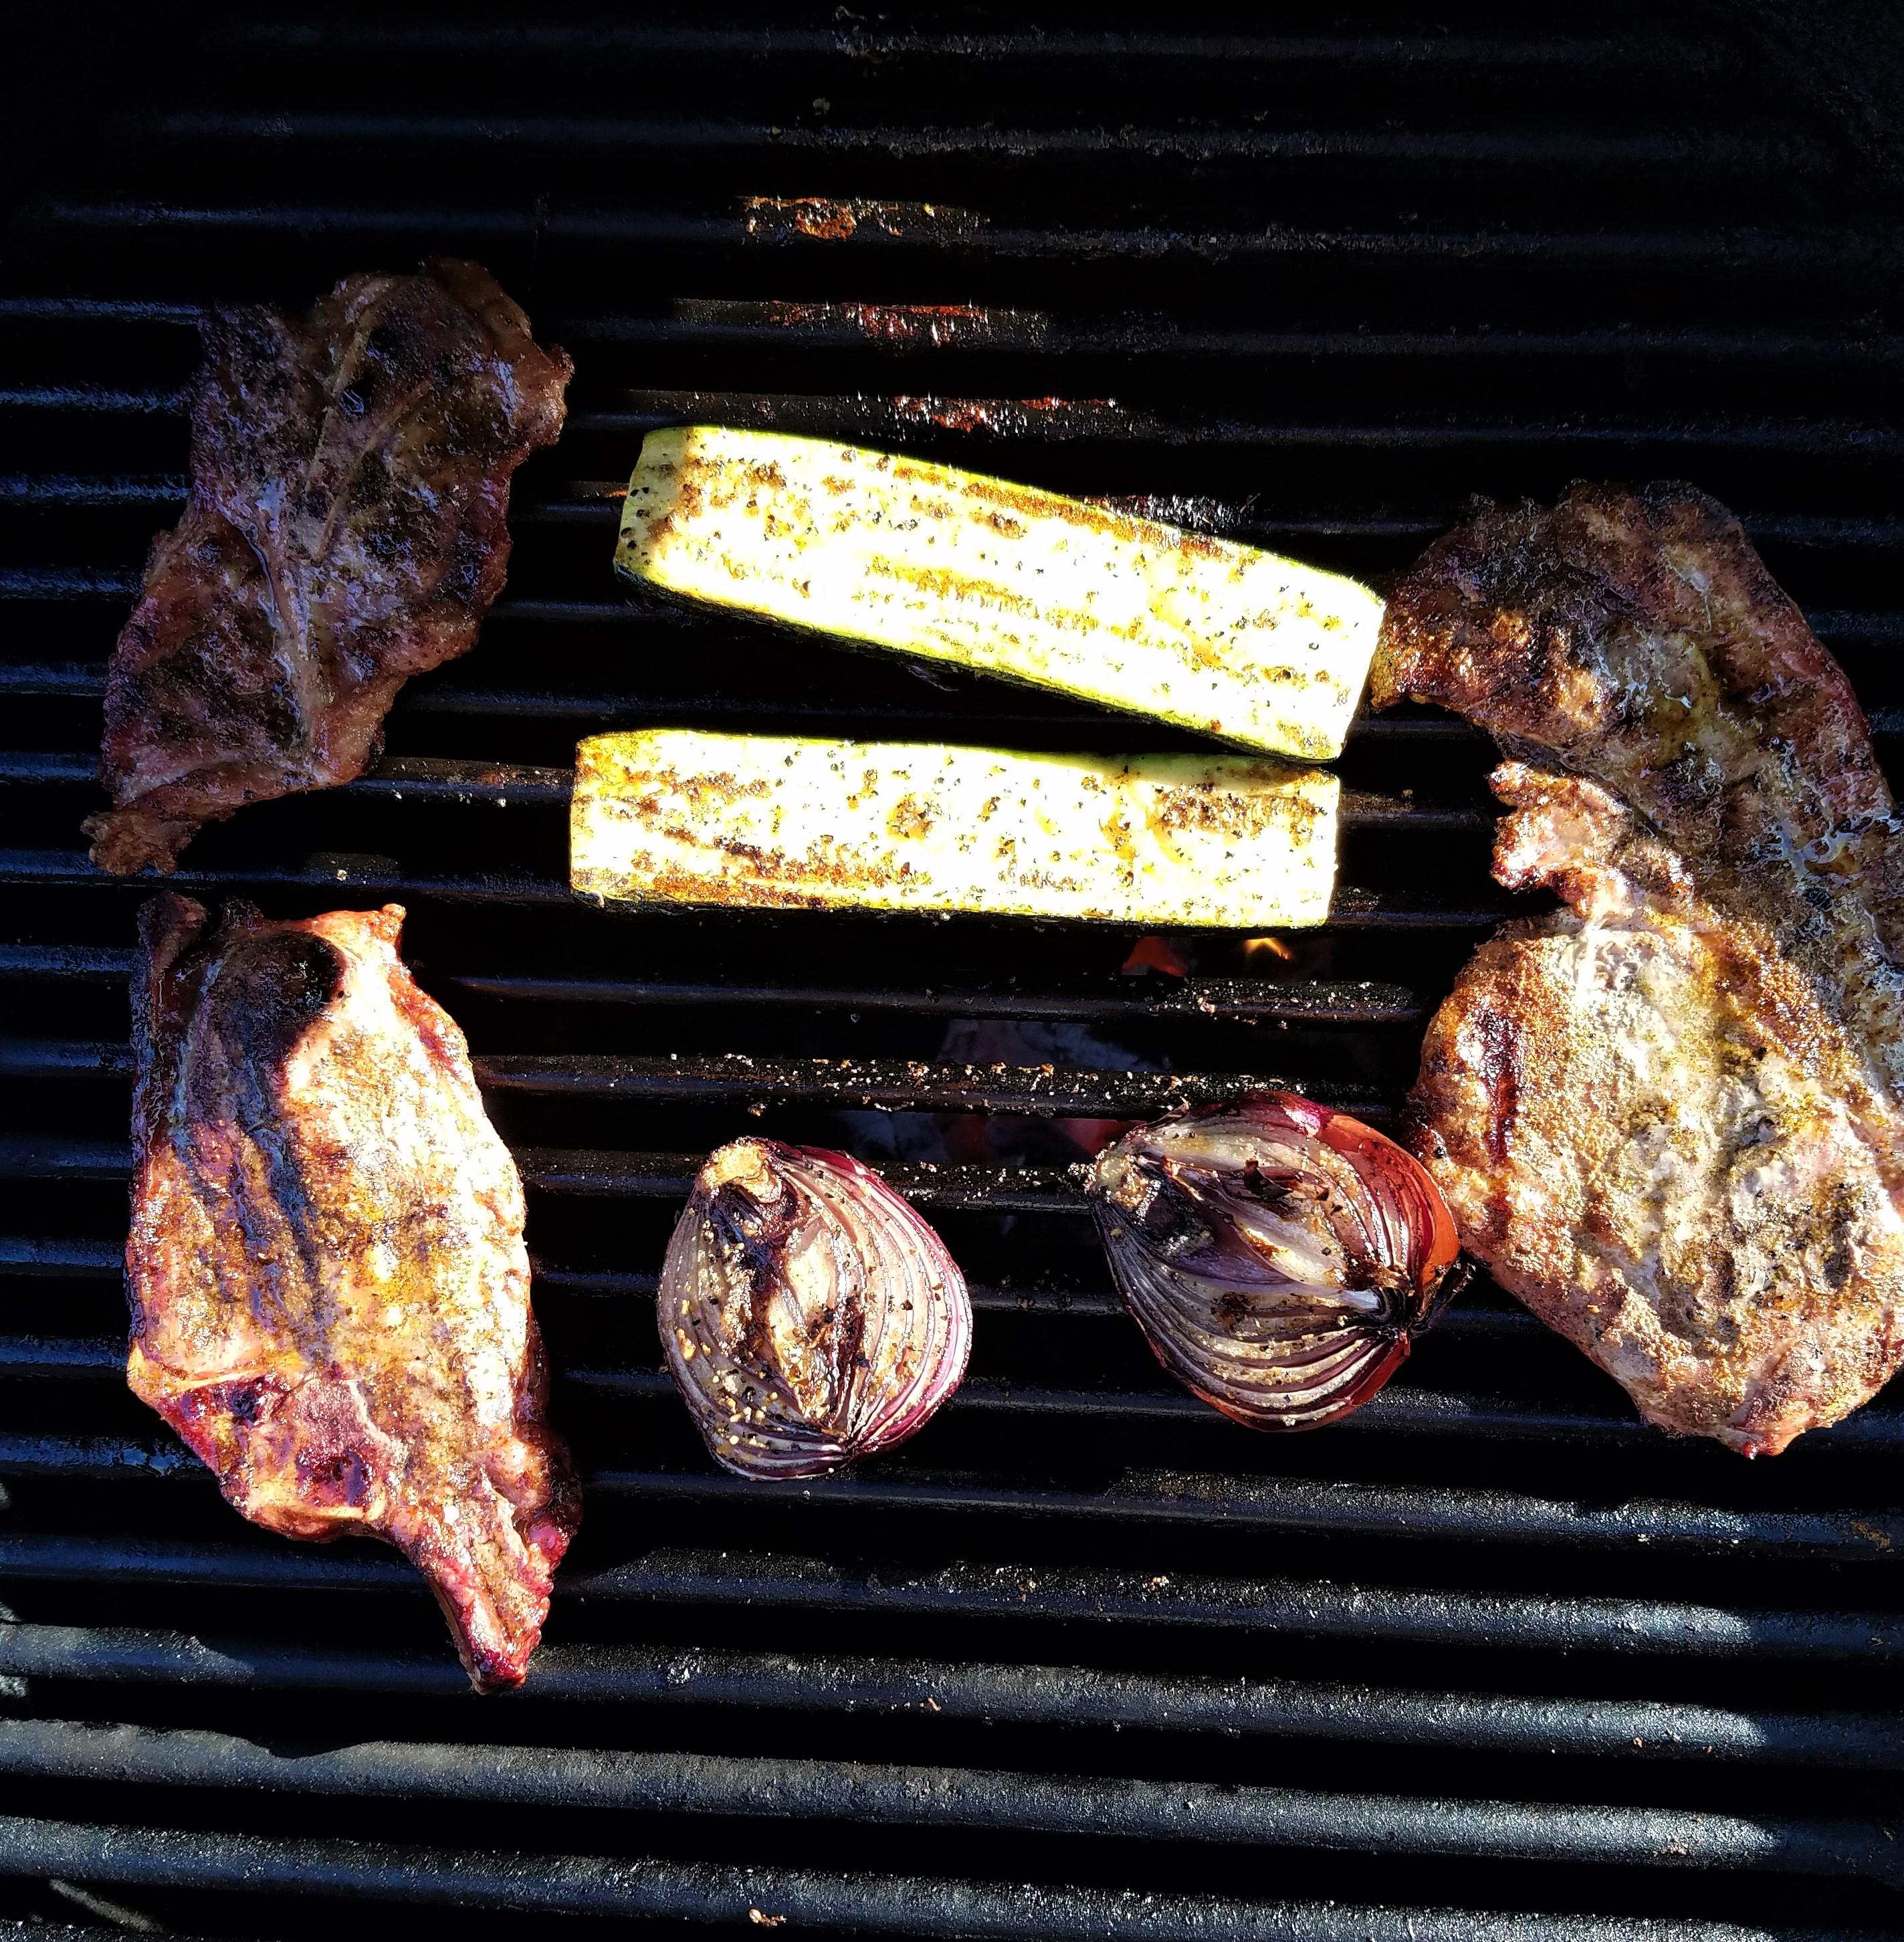
Shawarma pork steaks last night, with grilled red onion and zucchini. Roasted red potatoes in the indoor convection oven. Everything direct @ 325F, with apple wood chunks.

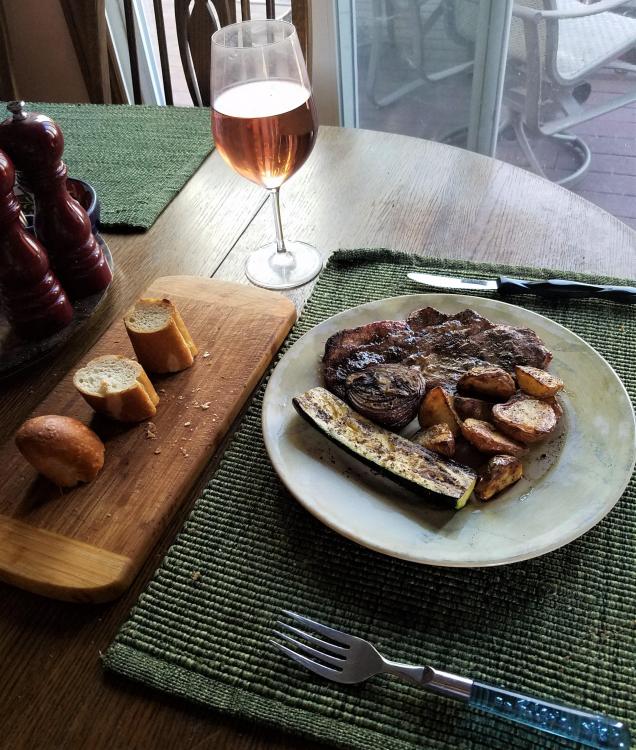
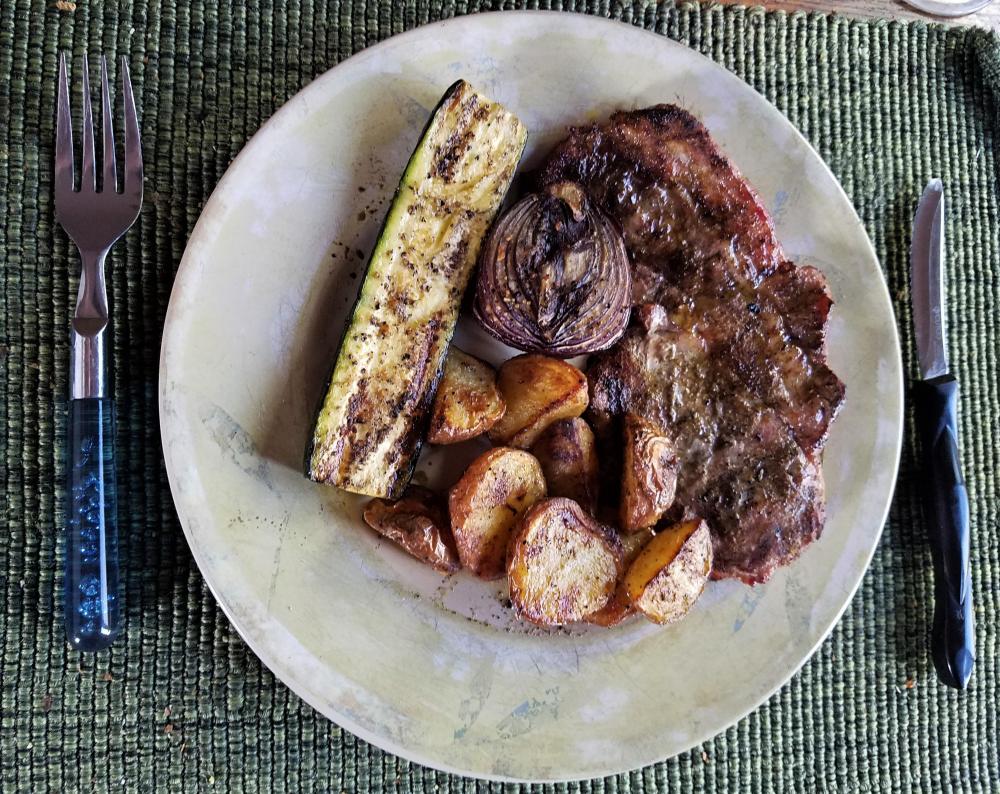 2 points
 -
This was a small bottom round, it's always a favorite. Sorry no plate shots, too many projects on another plate. You gotta love the roto, very dependable.
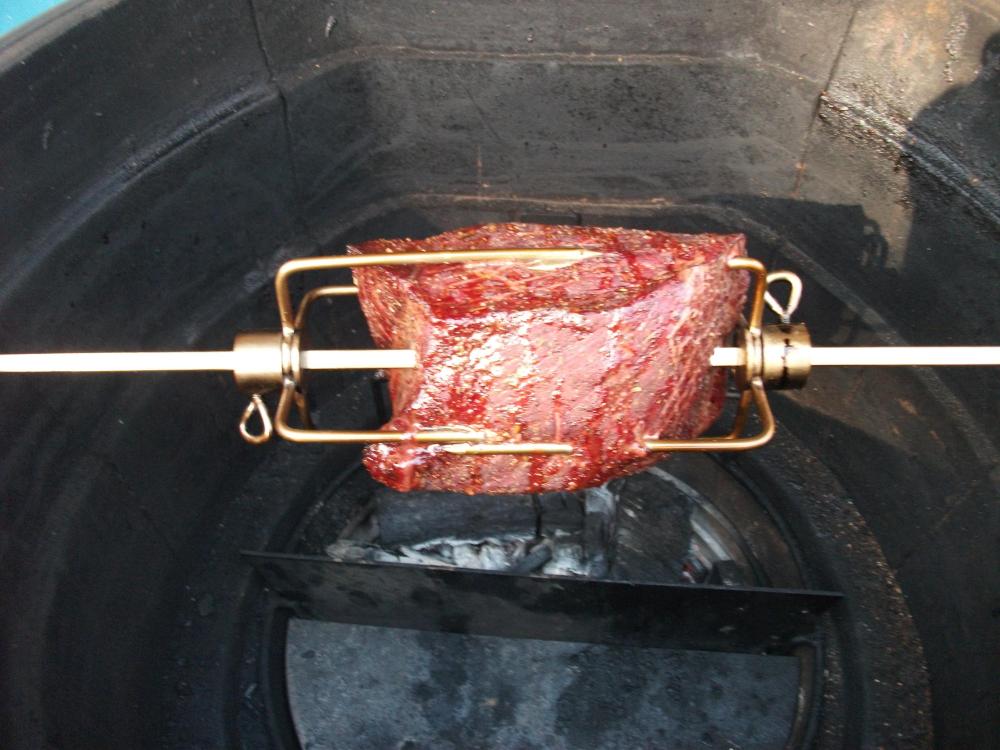
 1 point
 -
@MacKenzie thanks for the tip I’ll definitely try that. I lit in the center but as you can see from the video the right burnt much hotter and faster. I think I’ll try lighting the right and left side next time and see how that with as well as trying your and badgers tips. It’s a fun time to experiment!1 point
-
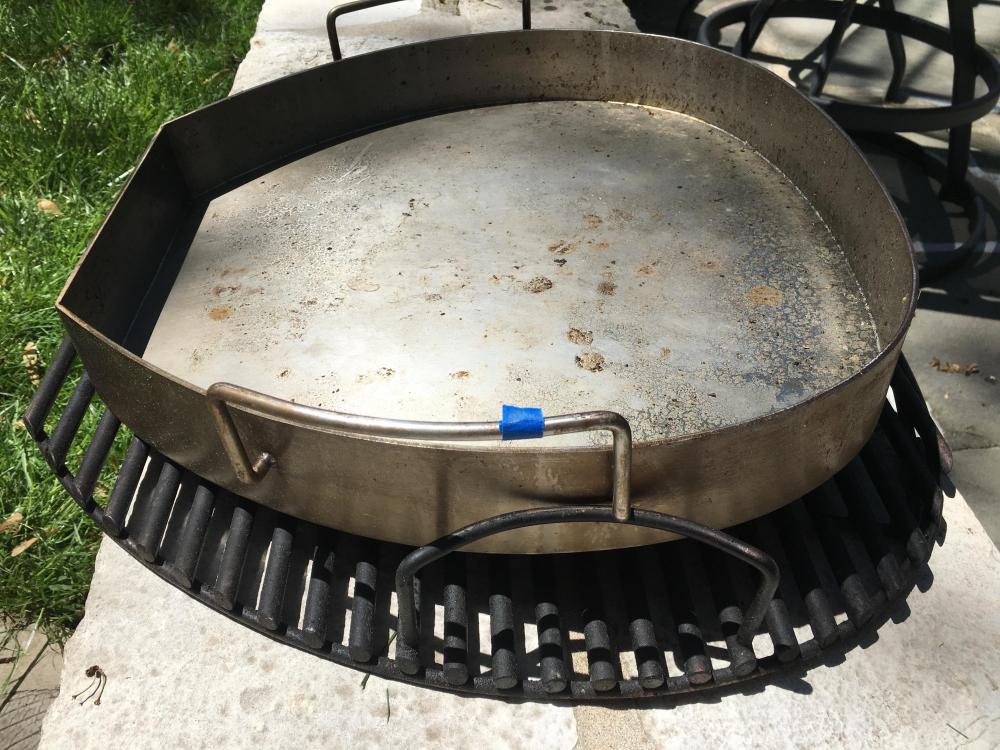
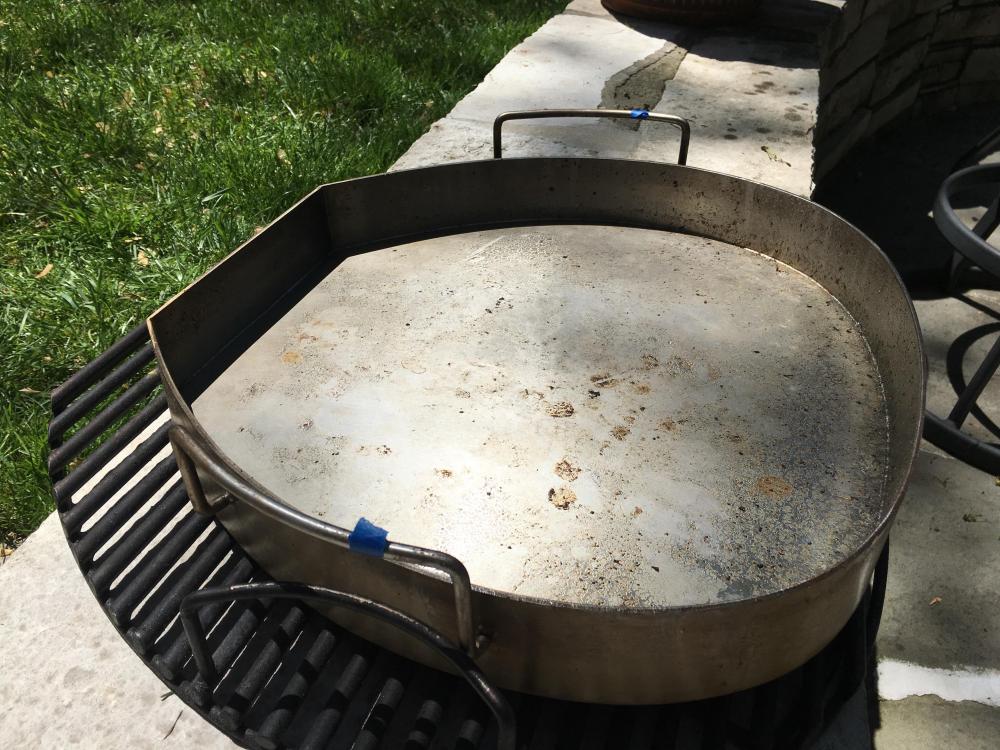
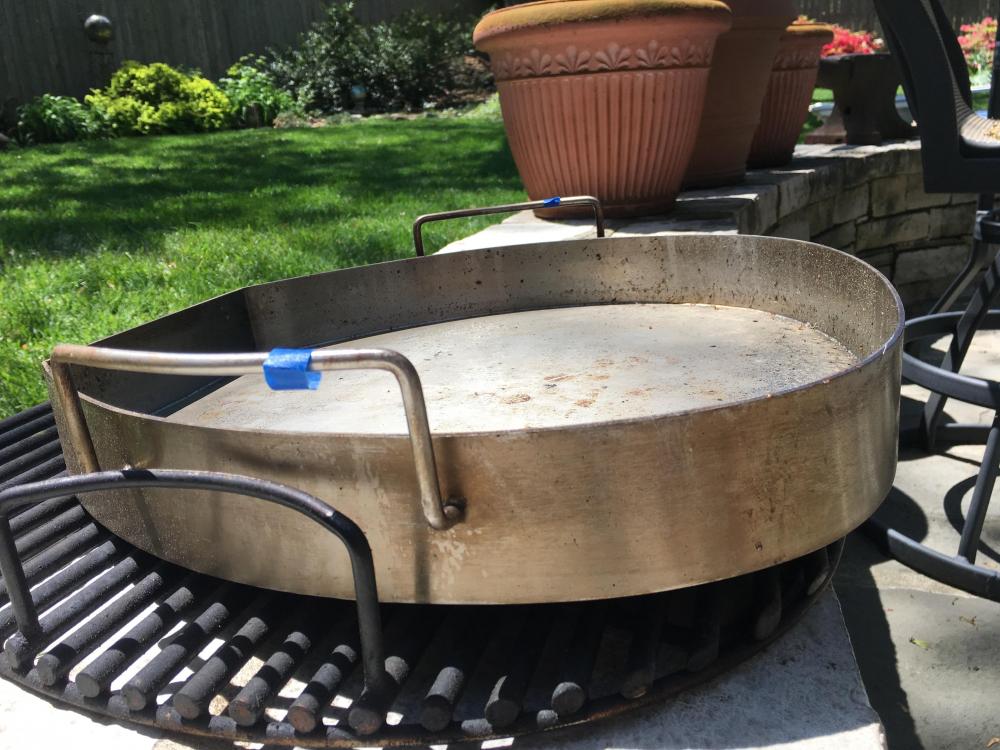
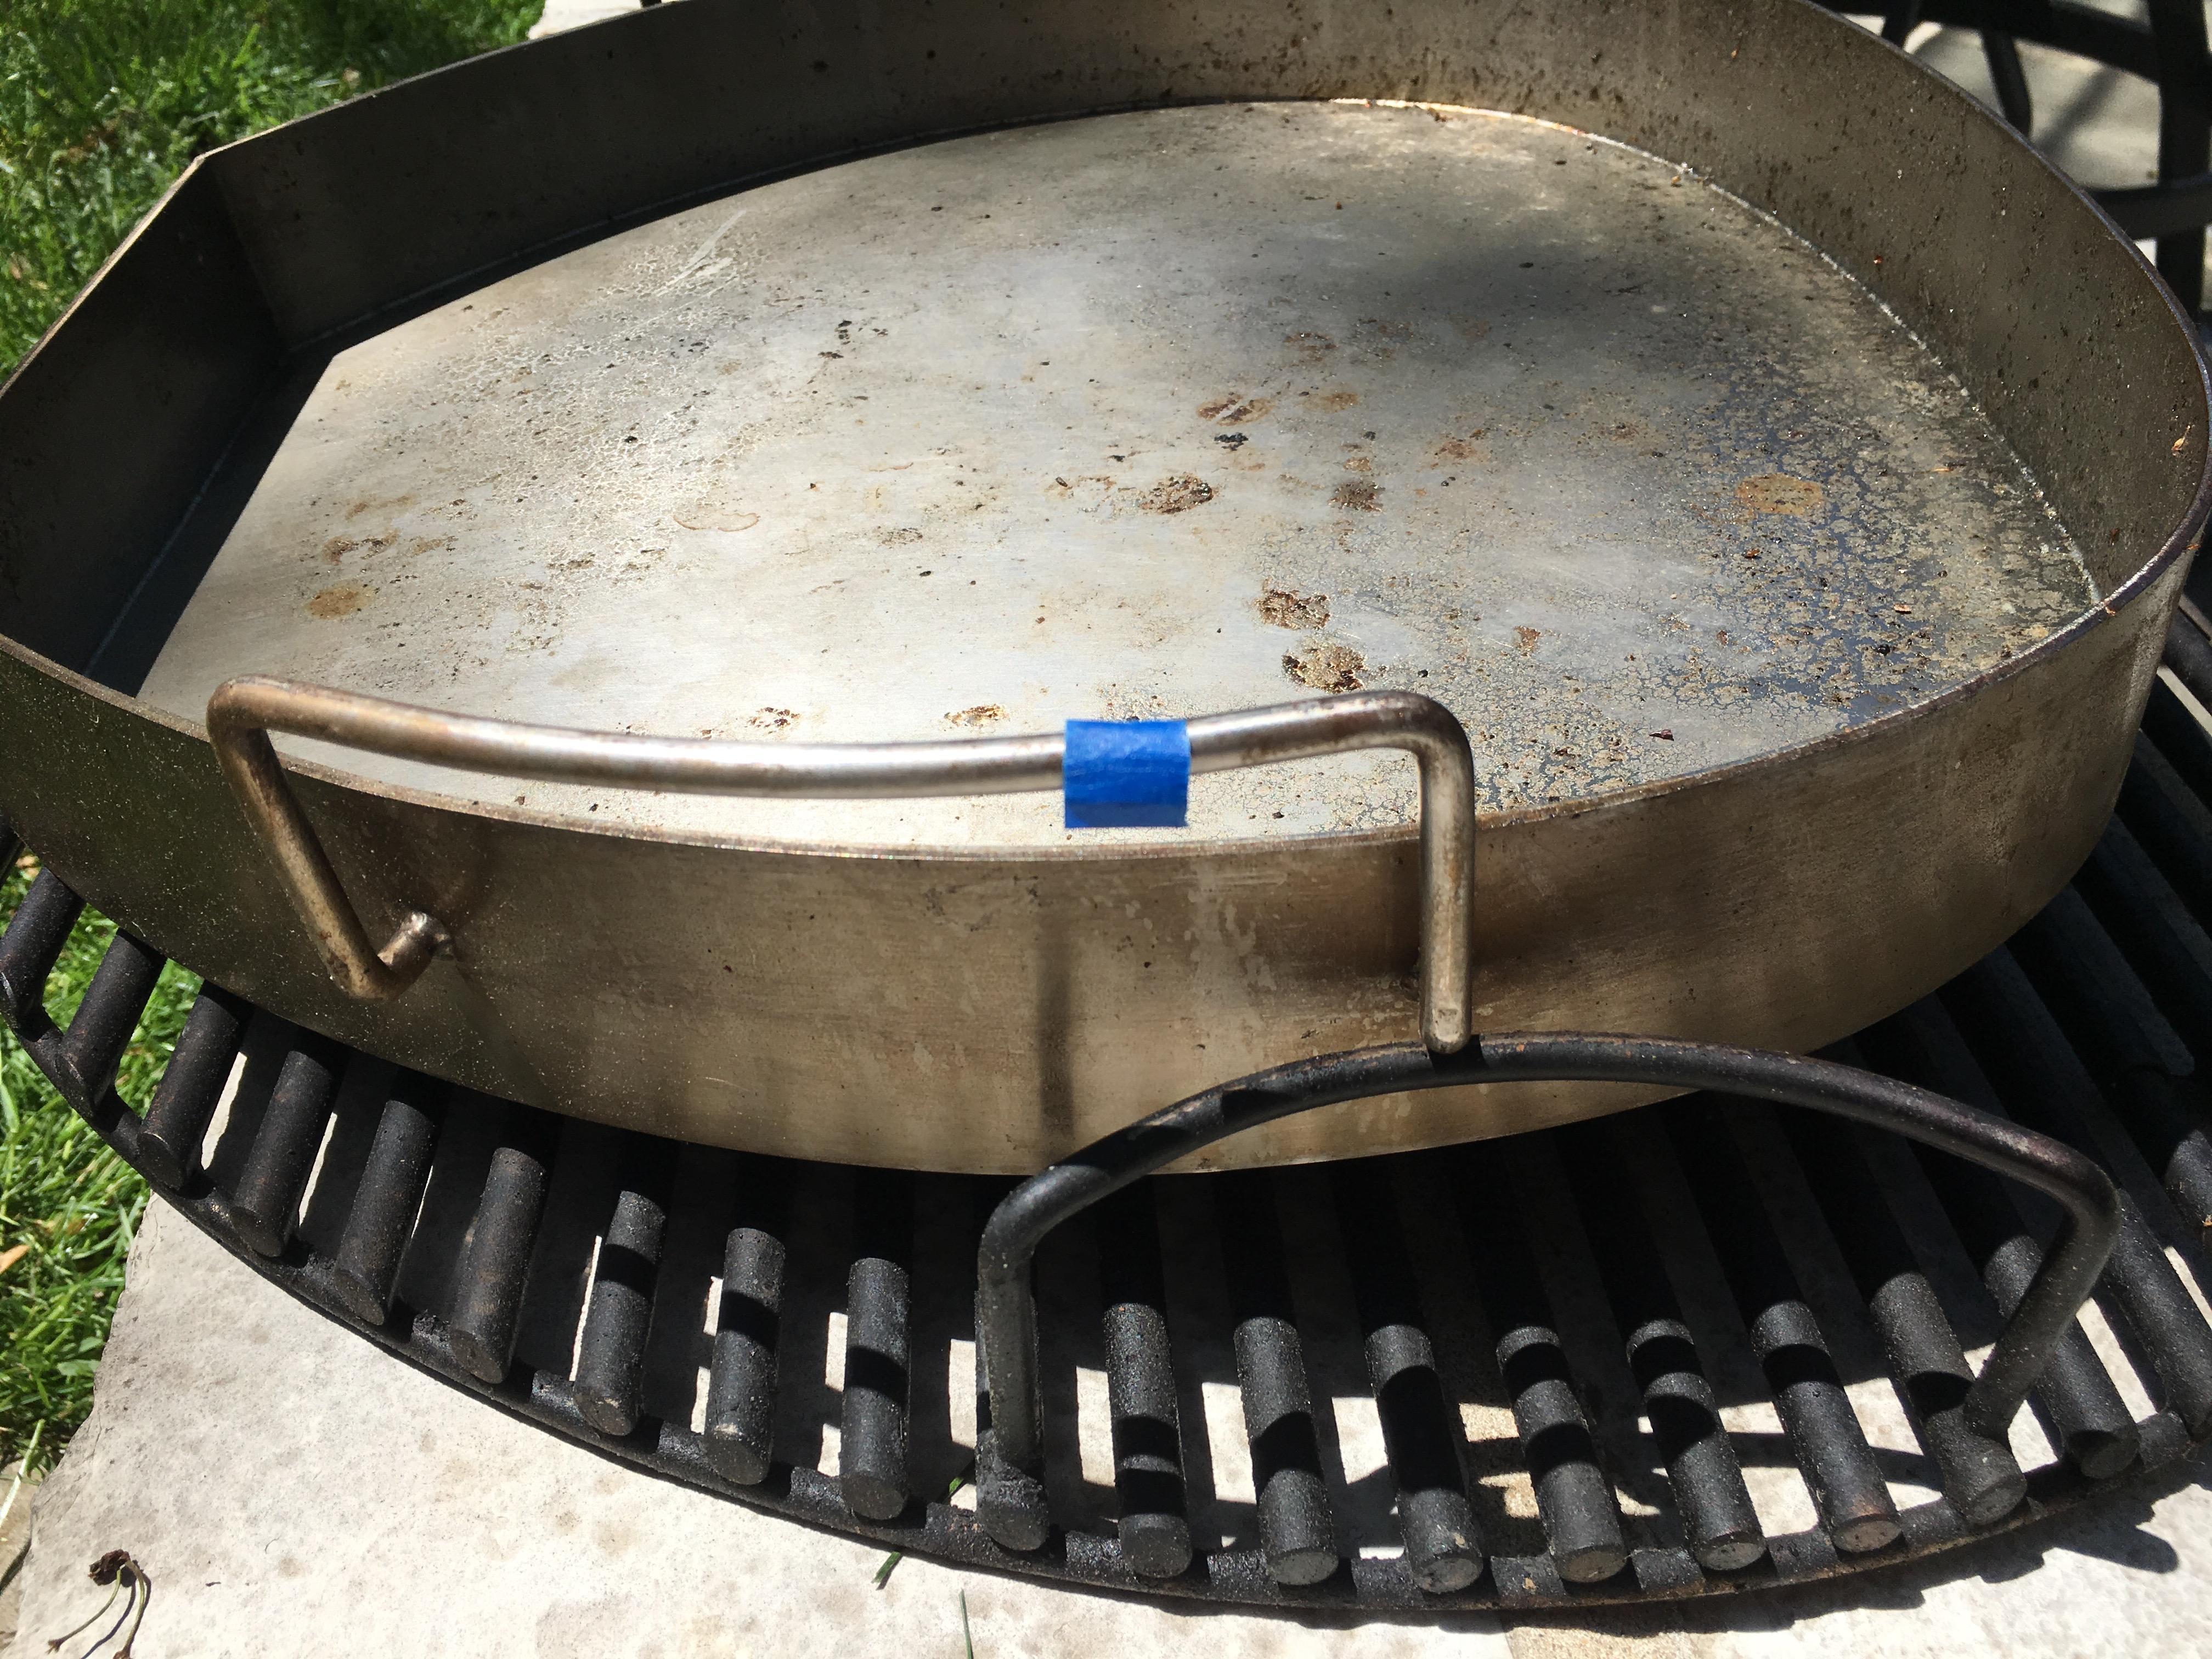
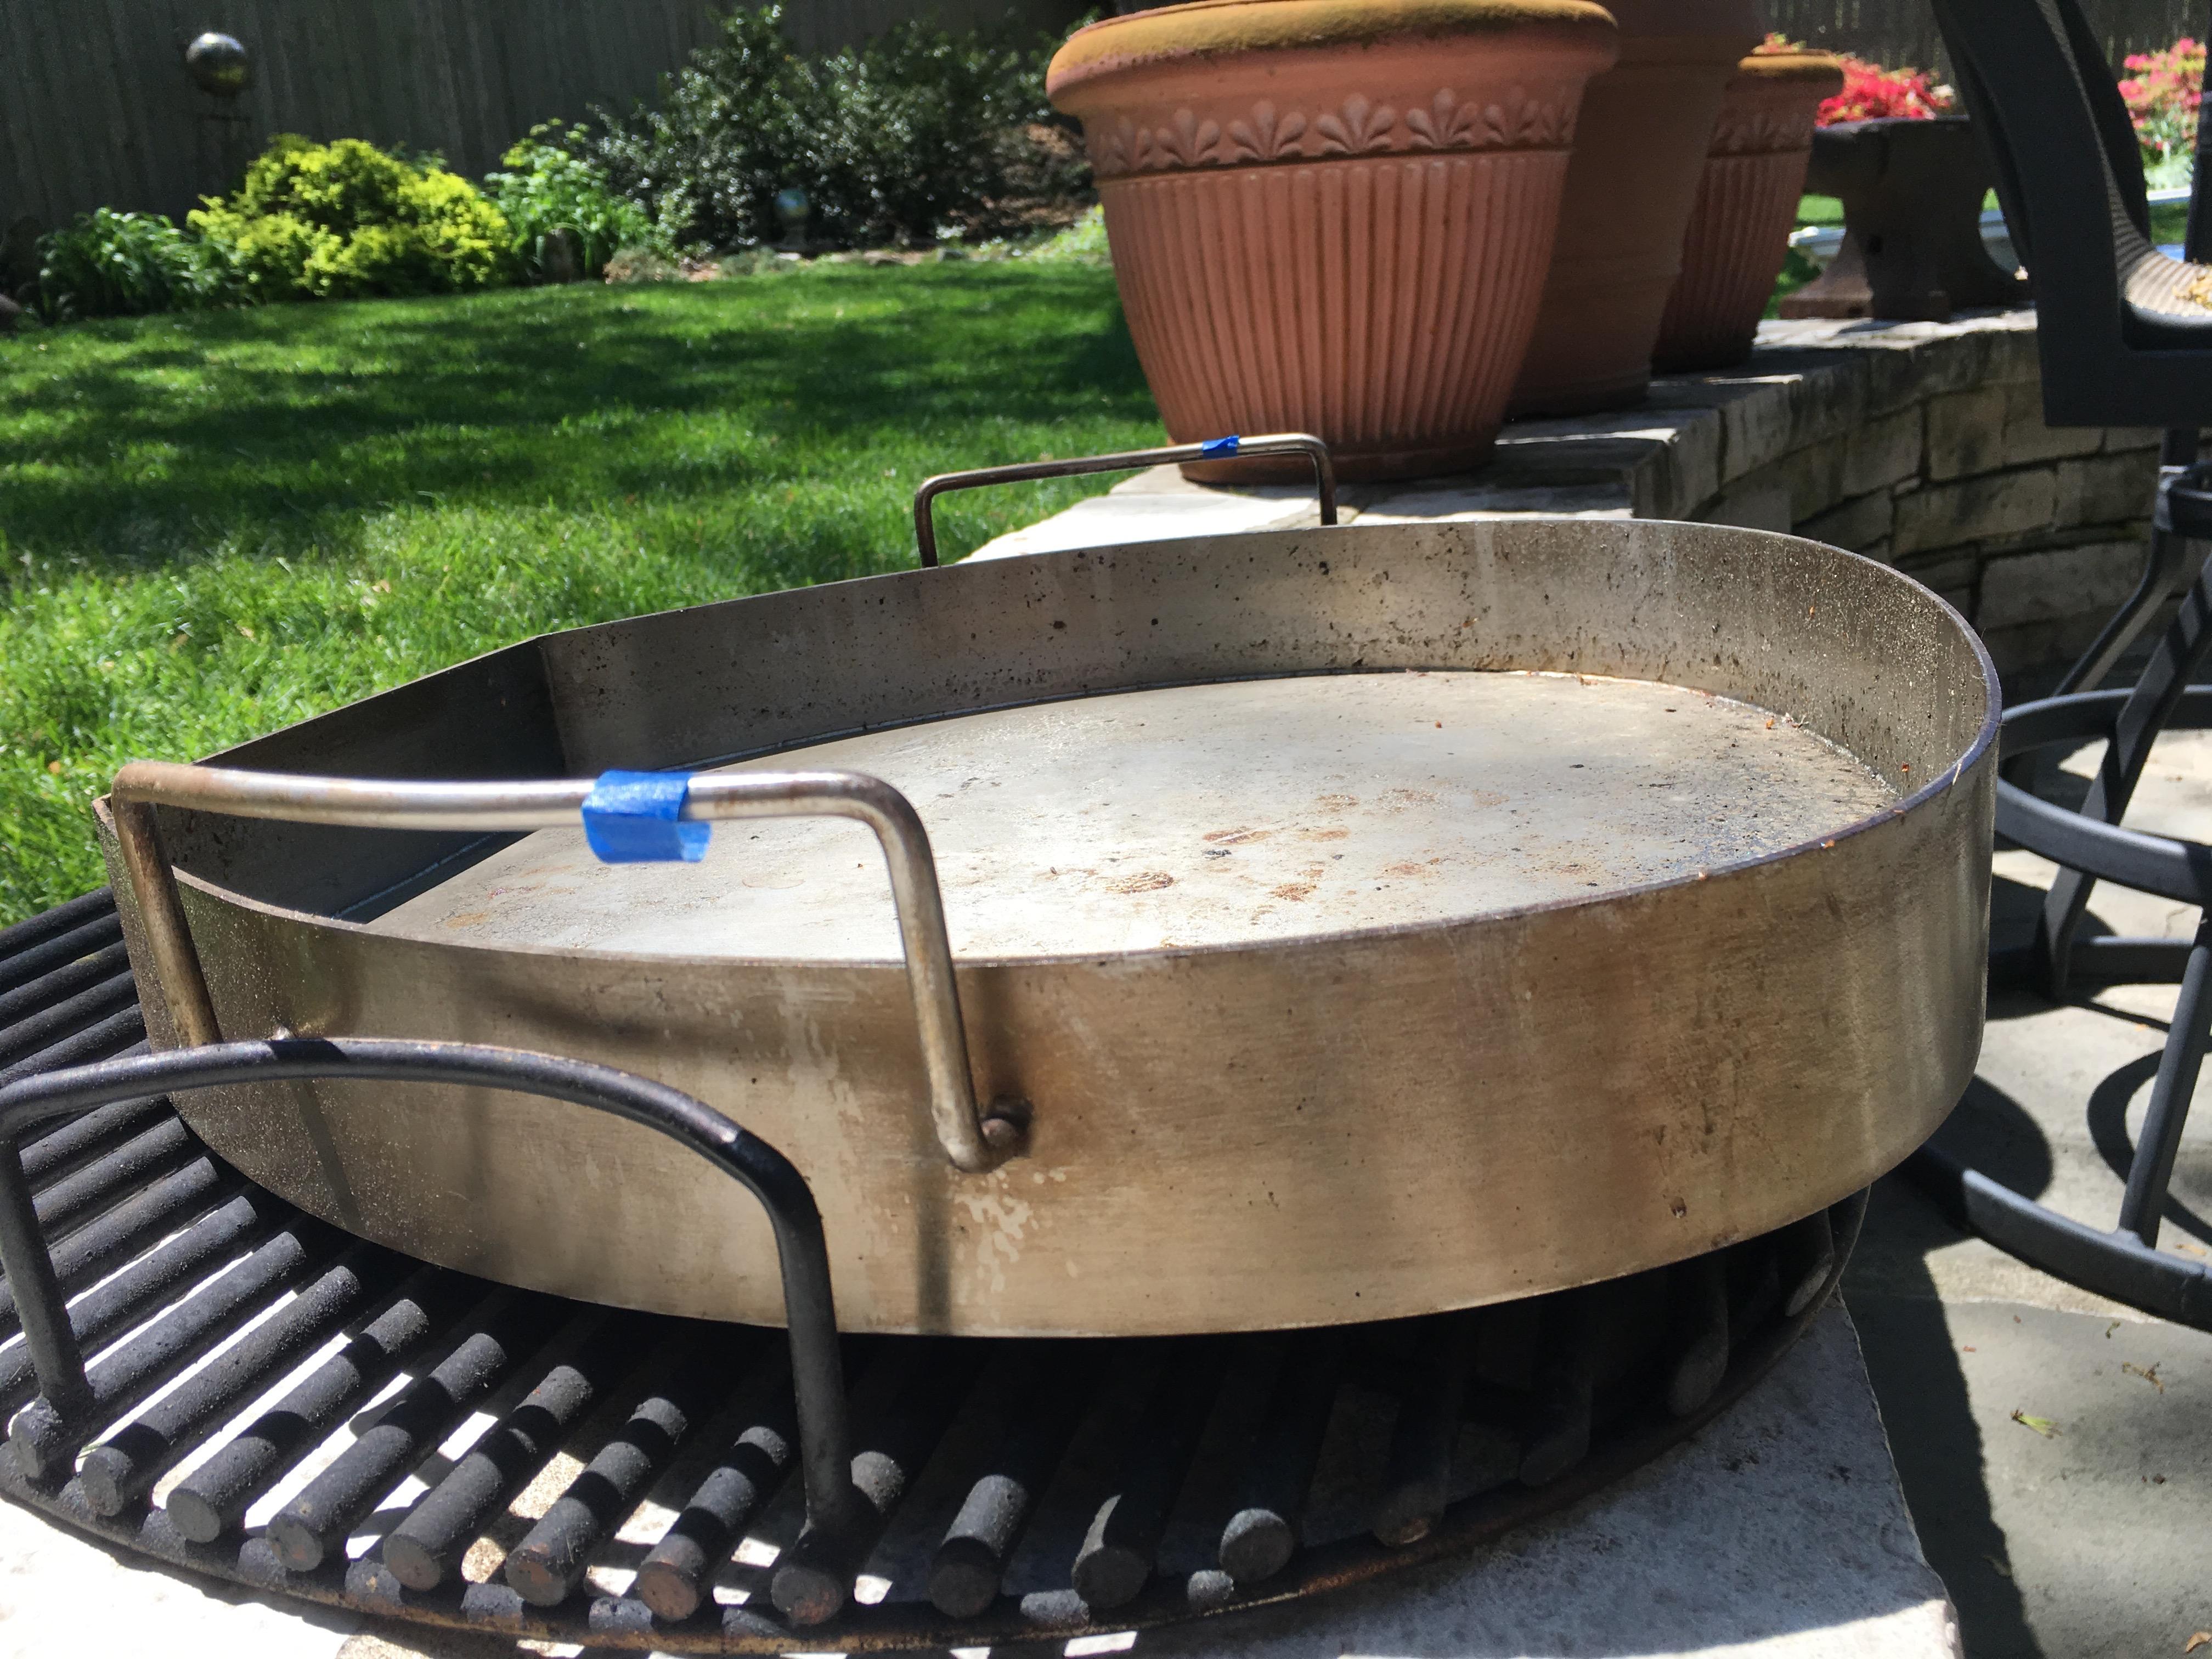
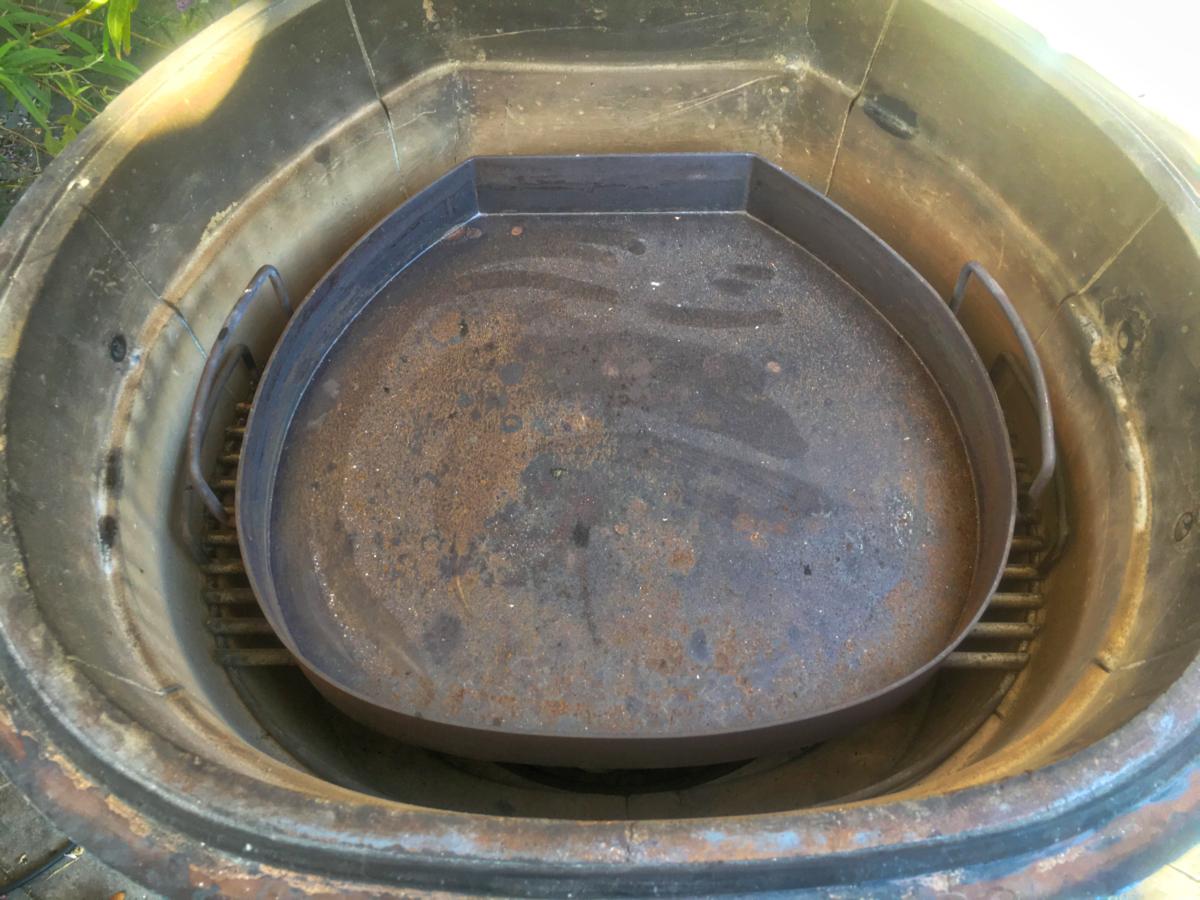
I have the same issue in my 2016 vintage KK23 and Double Bottom Drip (DBD) Pan. I thought until today (seeing Syzygies' fit) the interference was an issue with all the DBD pans. I also had the same issue Tony relates about the pizza stone and the upper grate, which I resolved as he mentions. This thread prompted me to look into it further. I don't use the DBD pan too often, mostly because it doesn't fit where I want it on the middle grate. After some checking this afternoon, I believe the actual issue is the handle location on the DBD Pan, not the bend or lack thereof of the middle grate handles. The actual balance point of the DBD pan is located in the forward 1/3 of the handles (as they are welded on the pan) noted with the blue tape on the photos below, instead of at the center of the handles. The handles could (should?) be welded to the DBD pan approximately about 1 1/2 - 2 inches (3.8 - 5 cm) forward of their current location (at least on mine), at which point they would clear the middle grate handles and actually provide better balance for the DBD pan at the center of its handles. Which would be helpful if the DBD pan was full of water, drippings or stainless steel chain... This would eliminate the need to bend the middle grate handles (and risk a broken thumb, as I can attest from experience as these do not bend easily, at least as it applies to the charcoal basket. But that is another story). Such a method would require a significant bend on mine to clear the DBD pan handles and also reduce the clearance between these handles and the KK body (which may be seen in Syzygies' photo). I assume the curve in my grate handles was done to provide better hand clearance when placing the grates into the KK (Thanks!). Changing the location of the handles on future DBD pans to their natural balance point would seem to be a more elegant and simpler solution. Some photos for context. DBD pan on middle grate in an appropriate location for cooking on the main grate, which would be located above in the actual KK, showing handle interference: Blue tape indicates the natural balance point of the DBD pan in the front 1/3 instead of the middle of its handles. Moving the pan forward on the middle grate still doesn't clear the grate handles and runs the DBD pan into the "T" handle of the hinged part of the middle grate: Moving the DBD pan forward to completely clear the handle interference between the DBD pan and middle grate handles results in the DBD pan too far forward to fit into the KK. Obviously, I have a lot of time on my hands given the U.S. and Kansas stay-at-home orders. My apologies for the length. As for my DBD pan, I will just continue to locate it on the charcoal basket handles rather than try to bend the middle grate handles. One broken thumb is enough. Just a friendly suggestion for future KK improvements... Jon

 1 point
 -
And not a beet in sight!1 point
-
I'm guessing it's just a tad small.. or either the pan or grate's handles are leaning a bit too much. Those welds should be plenty large to not have an issue if you tapped the handles with a 2x4 or something with a little heft..1 point
-
Once it's cooled, check the handles on your lower grate to see if they are vertical and not slightly bent toward the center. I had that problem with my upper grate and trying to get the pizza stone on it. Per Dennis, I just gently bent the handles outward until the interference was cleared.1 point
-
Nicely done! Fretting over the burn-in is a rite of passage as a KK owner! You, and your KK, are now broken it!1 point
-
I checked my order and I did purchase and receive the correct drip pan. Mine does not fit and rests on the grate handles. I'm in the middle of a brisket cook right now, but I will take some pictures and show everyone. Perhaps this drip pan is a little off and Dennis can help. Its equally possible I did something wrong and misplaced it. I'll verify and post pics when possible.1 point
-
Looks amazing Tyrus.1 point
-
Thank you all! I finished the burn-in. In typical fashion I watched it like a hawk and obsessed over it. I had three vent locations. I made the mistake of temperature hunting and the grill got to 650 according to the dome thermometer at one point. There was audible hissing from a section of lifted tiles. I got control of the temperature and brought it back down to 525 degrees, but I made the mistake of trying to push the tiles back in too soon (before the pressure subsided) and ended up tearing the grout in a couple of places. I could smell solvent for a very long time. I made the mistake of thinking it'd take 6 hours so I started at 1800 on Friday evening. I didn't go to sleep until 0630 the next morning. The dome cap was the last area of venting and it took forever for the pressure to subside. I began the task of repairing/patching the grout the next morning. I took the advice of another forum member and used my finger to apply the grout to the necessary areas. It didn't look good, but I followed Dennis' advice... "Less is more." I allowed it to cure for 9 hours and used the pink tile scrotch brite to abrade the areas and remove the grout from the tiles. I was amazed at the results. I'm a bit neurotic and OCD... Self-diagnosed on both accounts. I called my wife over and she could not differentiate between the areas I repaired, and the untouched areas of the cooker. I am so happy with the results. The patch kit and patching process seems to work as well as the cooker!
 1 point
 -
Spatters don't generally reach the walls, I keep it clean, and I regularly reach temperatures that Dennis would probably consider ill-advised.1 point
-
Here's a picture of my drip pan in position, on the lower grate.
 1 point
 -
@Basher will definitely try that next time going to do some more adventurous Peruvian sliced chicken this week and I’m also itching to try the leg of lamb. I dong coo a lot of lamb ex dog ground land for Shepard’s lie and every since you posted that rotisserie leg of lamb a few months ago it’s been on my brain1 point
-
The only damage I see done is a broken wing. [emoji23] That’s a marathon if you have to adjust through the cook with the rotisserie. Well done. Both birds look perfect. Let us know how you think the pan trick works by comparison. Sent from my iPhone using Tapatalk1 point
-
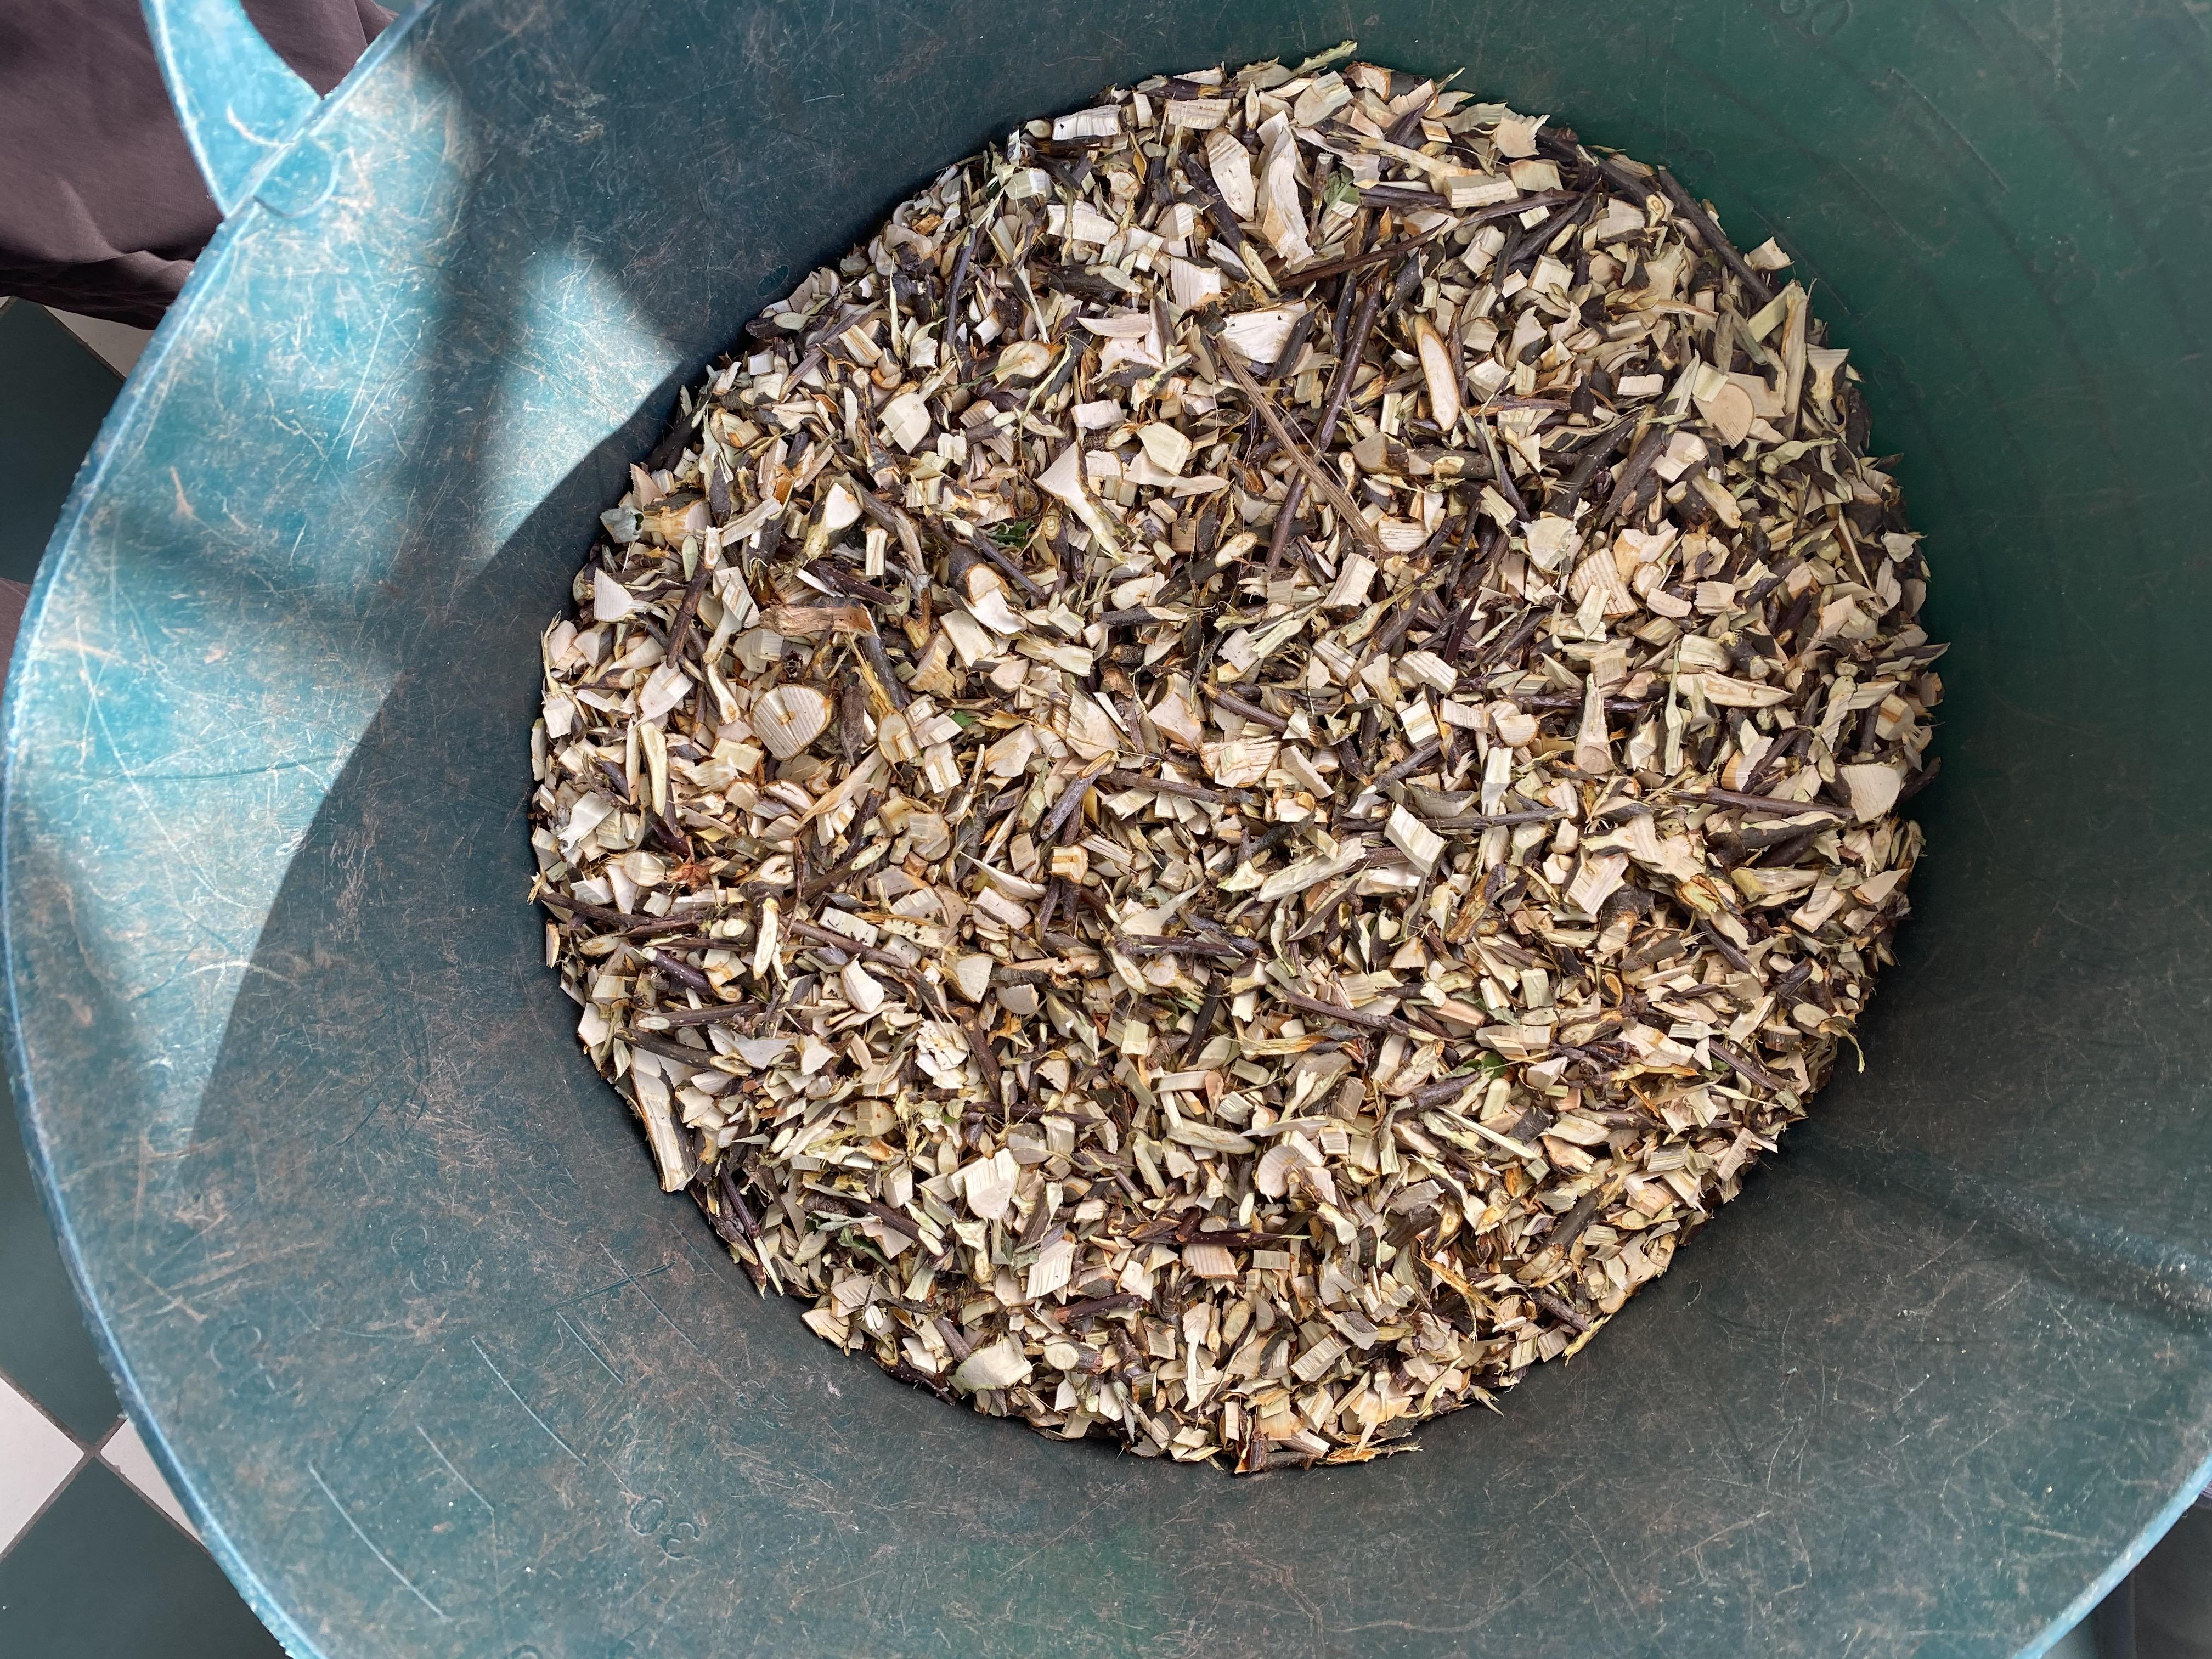
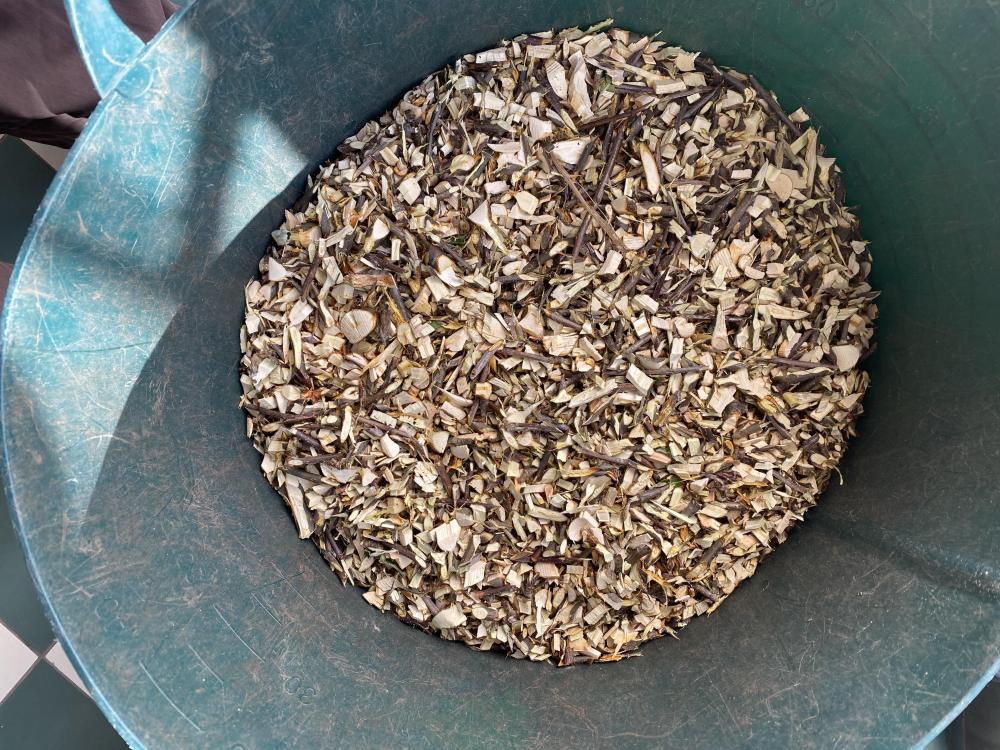
Thanks for reminding me that I had a free source of fruit wood that could be turned into smoking chips @Basher. So far so good, here are the chips from our apple tree trimmings. Will turn over periodically to help them dry out and, eventually, will see how they work in the smoke pot. Keen to see how @Adventureman82 gets on with making pellets.
 1 point
 -
Really good to see the soapstone performing so well for you @coolpapabill. I never thought that would be a "thing" but it turns out it's a very good thing.1 point
-
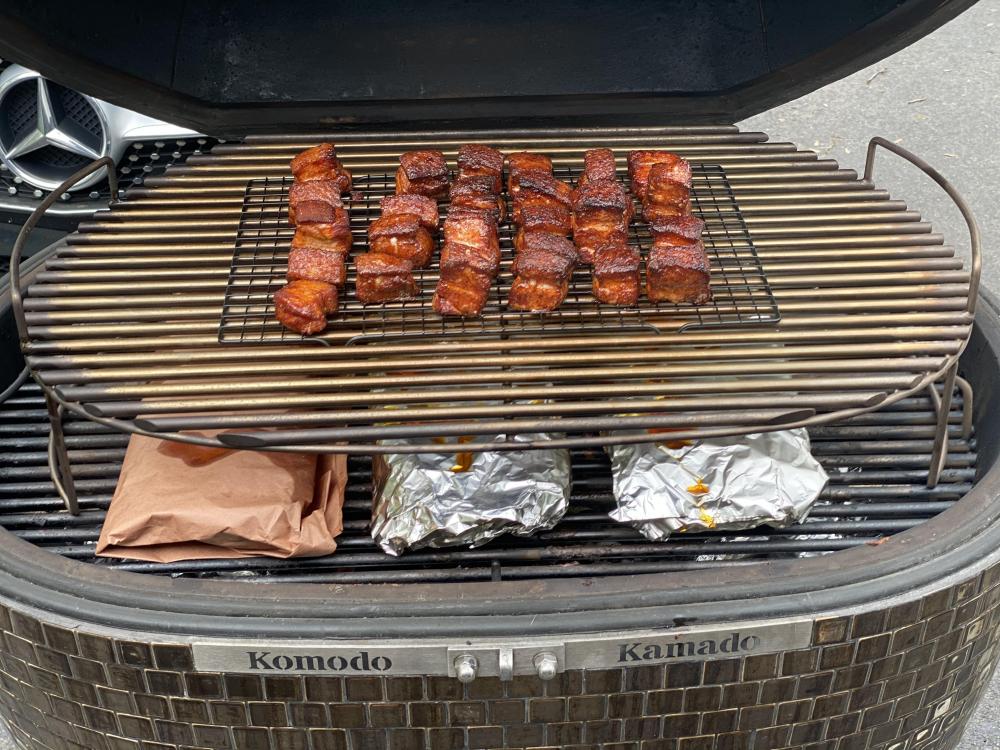
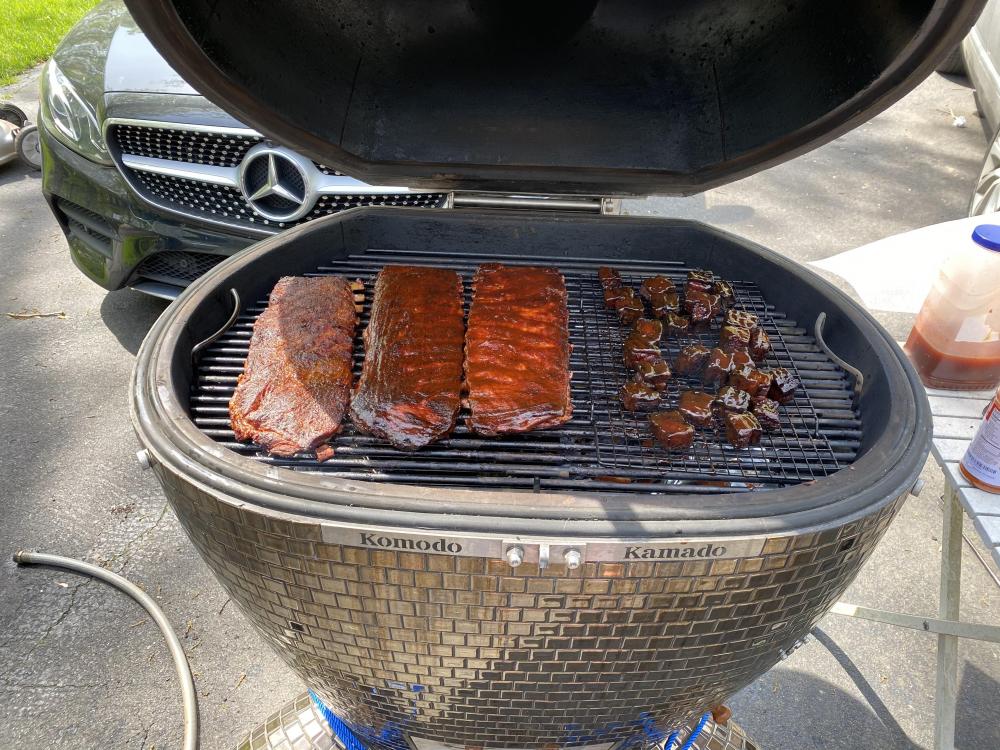
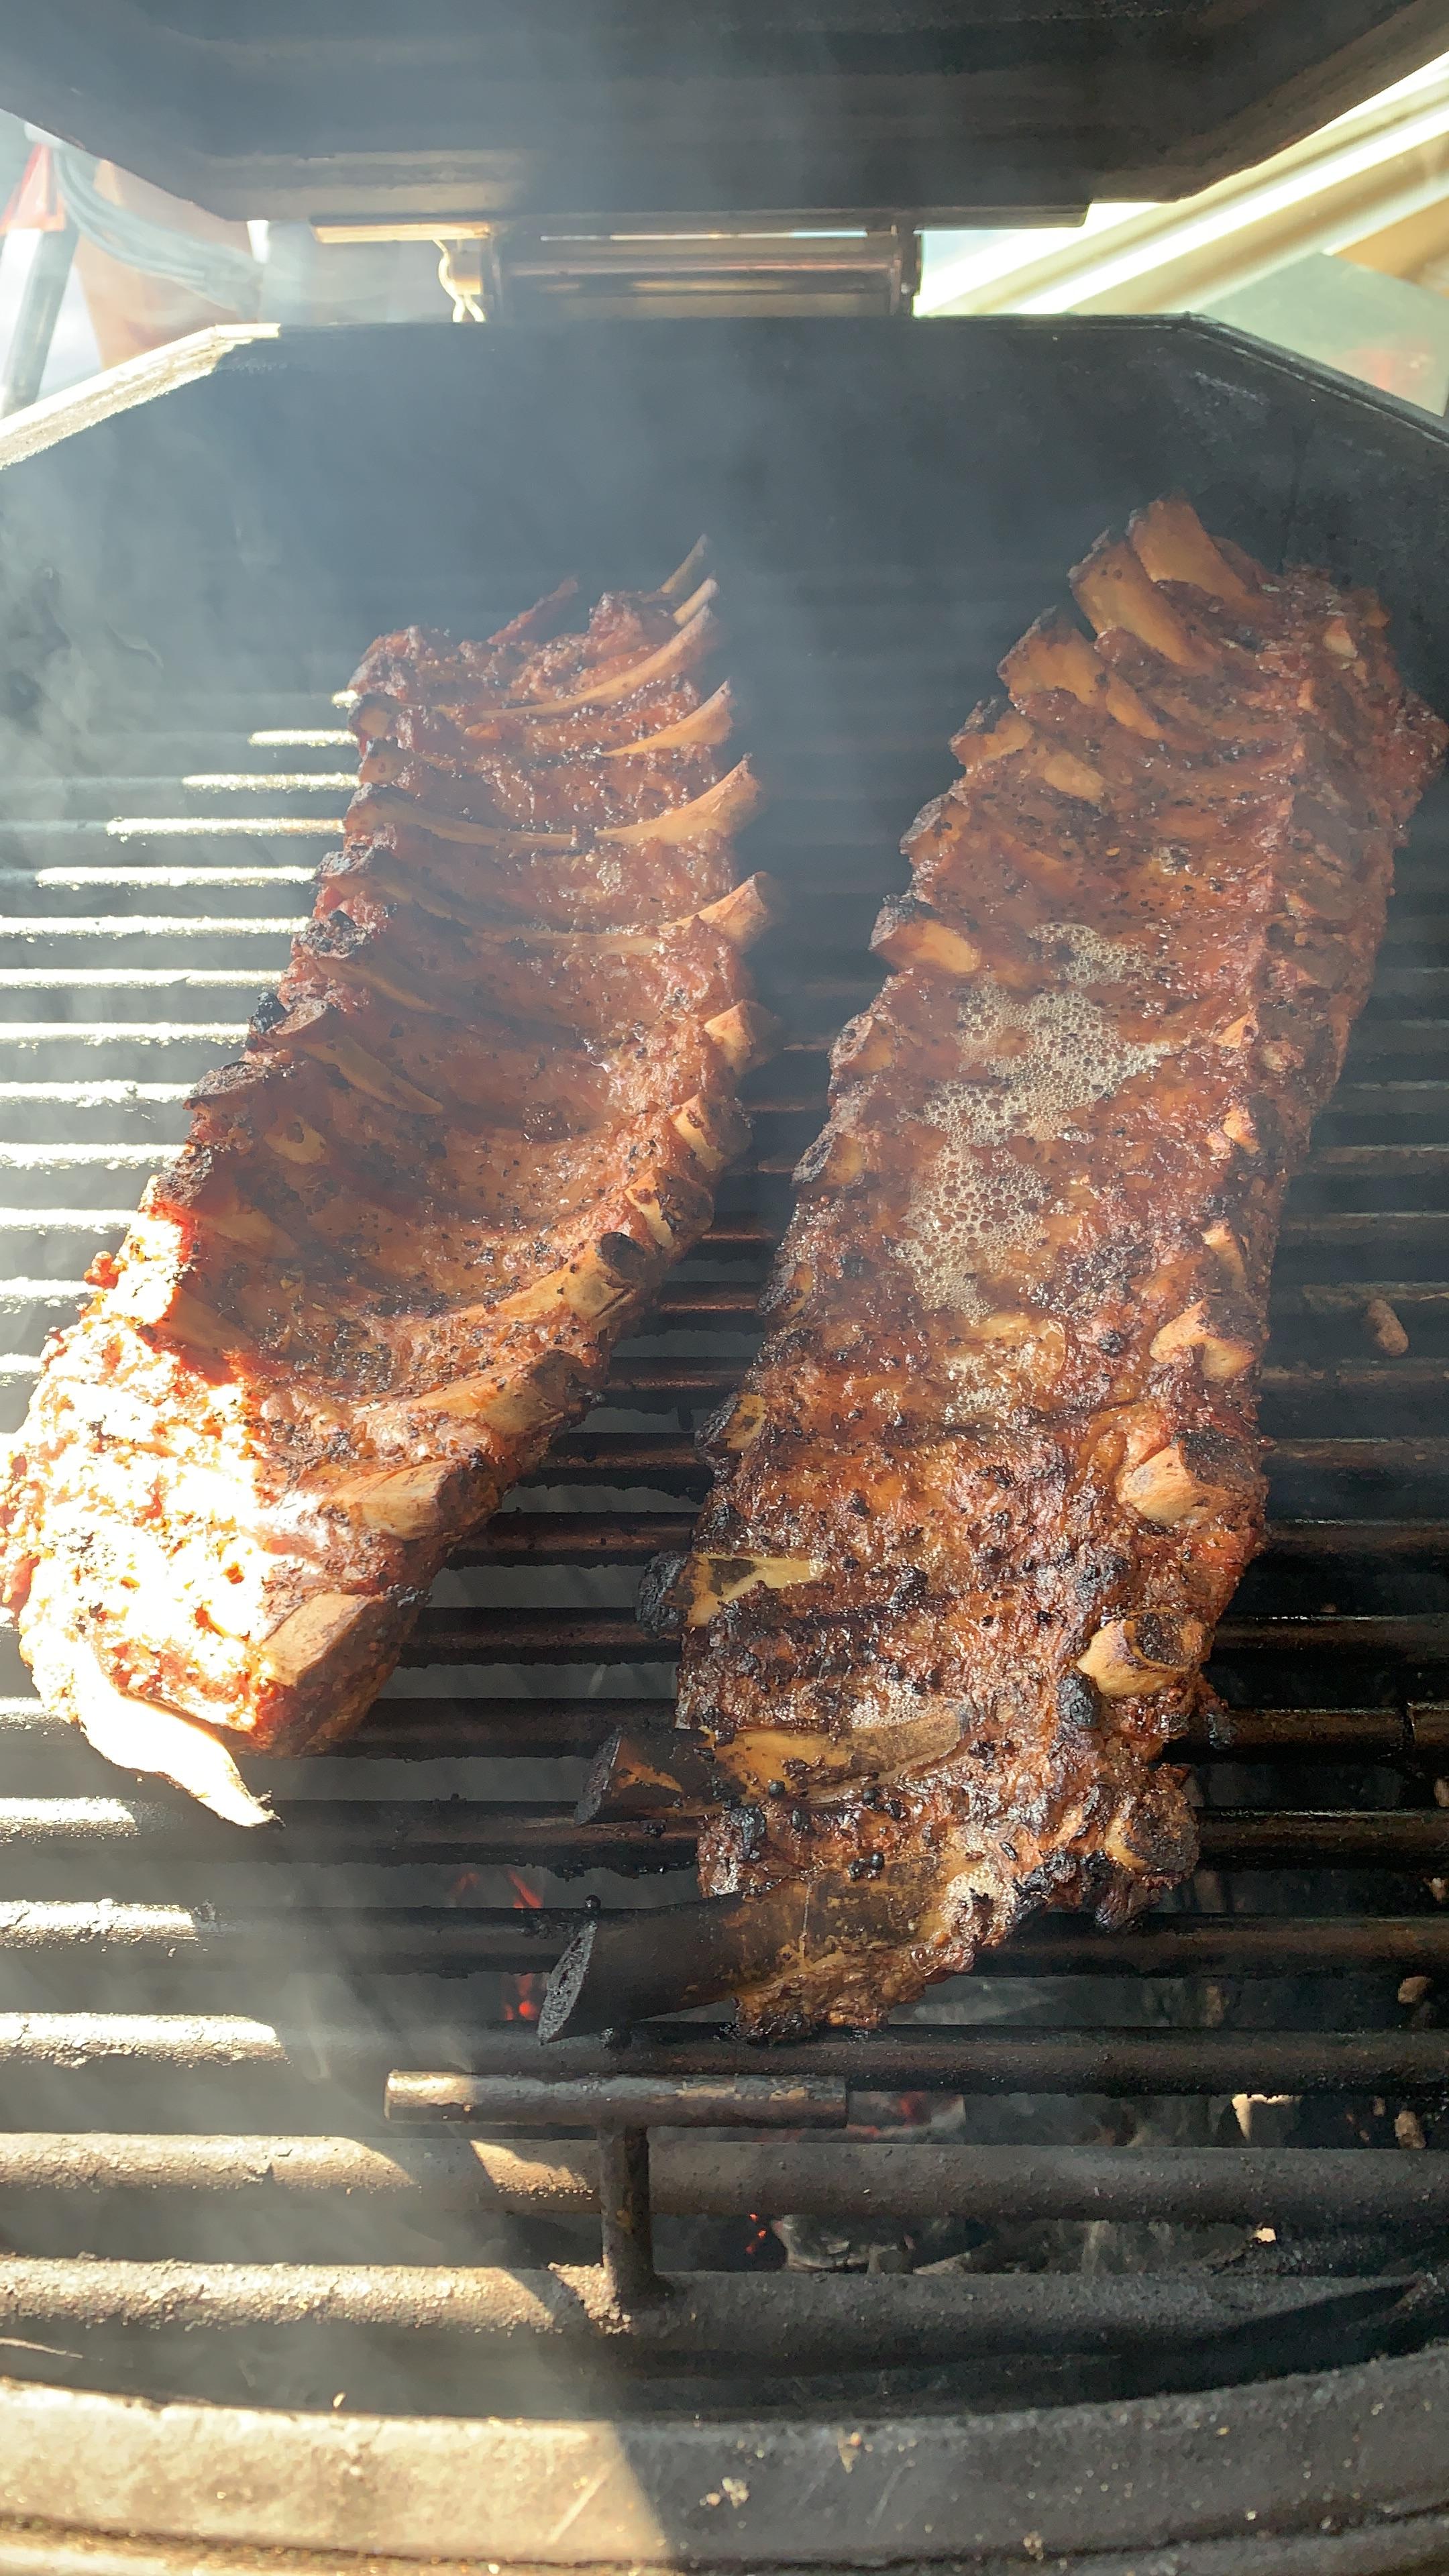
Did one rack dry, 2 wet. Turned out awesome. Burnt ends were especially tasty.
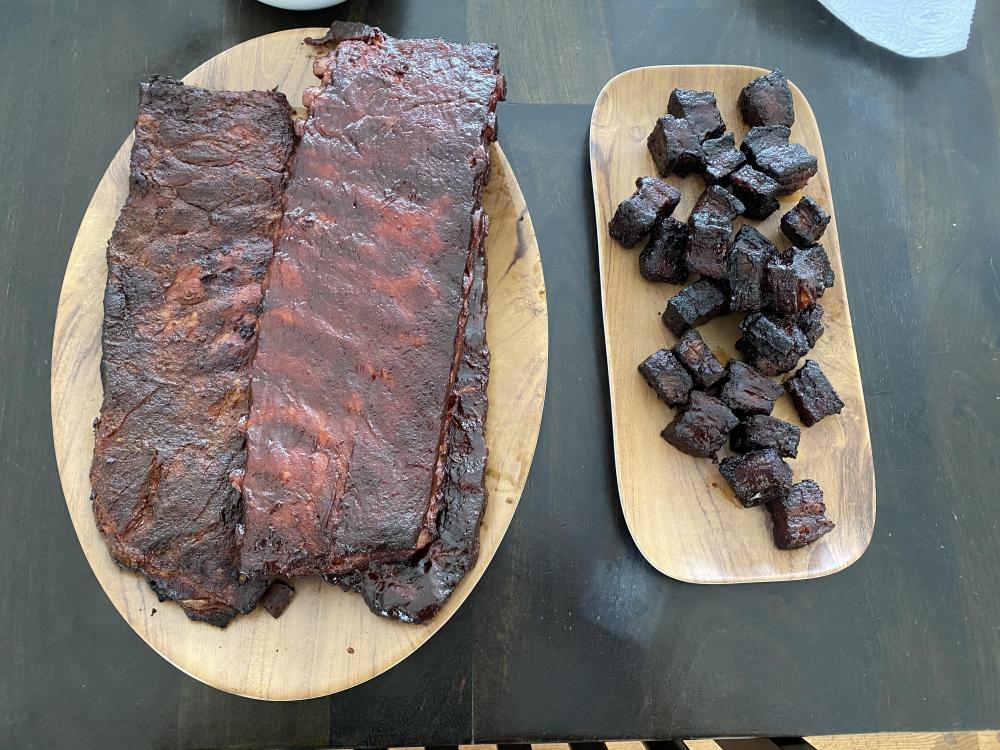 1 point
 -
I agree, it looks lovely. Congratulations!1 point
-
What are you rotating Troble? I love the rotisserie. Heres a tip, set the lower rack flipped over onto its higher setting above the coals. Build up your heat, When you start cooking, about 20- 30 minutes into the cook you will start to smell the meat and see a little more steam and smoke Coming out of the KK. When this happens, insert a tray onto the lower grill to stop the oils dropping into the fire. I’m sure you will work this out. Yum yum Sent from my iPhone using Tapatalk1 point
-
The movers were as careful as I would have been if I moved it myself. I was really appreciative of that. I am burning in now and I definitely smell it off-gassing. I've kept it between 500-550 or so... Mostly 525. I've noticed a couple of tiles that were raised on one side, or seemed a little springy. I'd go over the rest of the cooker and go back to those spots and they wouldn't be springy anymore, which tells me the venting is working and I've been careful to slowly bring the cooker to temp and have held it well. It's still burning in, so I'm going to obsess over inspecting it. One thing I've found already is this: I'll need to fill that tomorrow morning as I don't want to chance any water intrusion of any kind. I know the movers didn't hit anything because I was on them like white on rice. The adjacent tiles are untouched as is the hinge cover. I'll fill it, wait 8-10 hours, remove excess... Presto! Here's some other photos of it basically in its final resting place.

 1 point
 -
@Stile, I hope so.1 point
-
I think Mrs skreef would kill me at this point in time.1 point
-
Sent from my SM-T835 using Tapatalk1 point
-
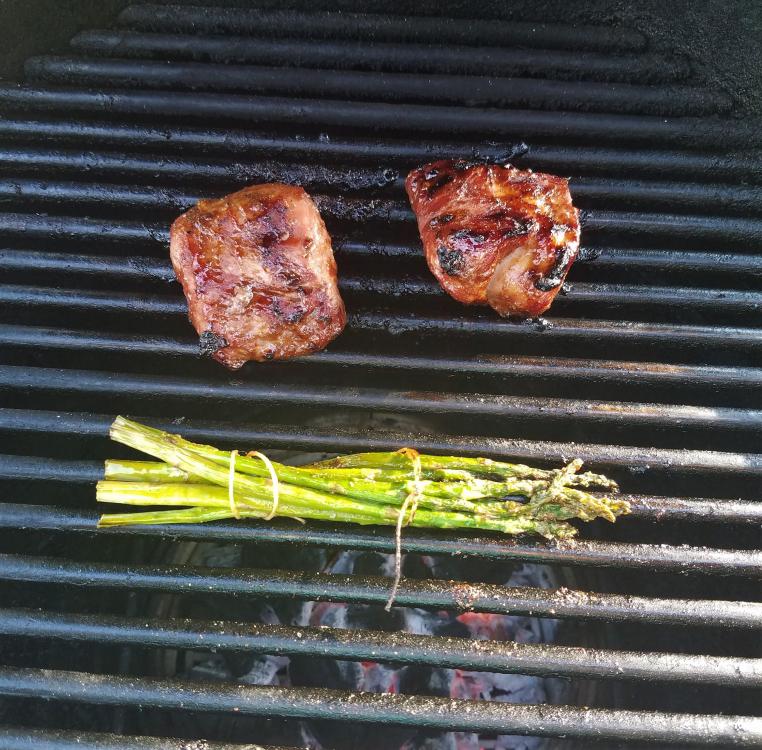
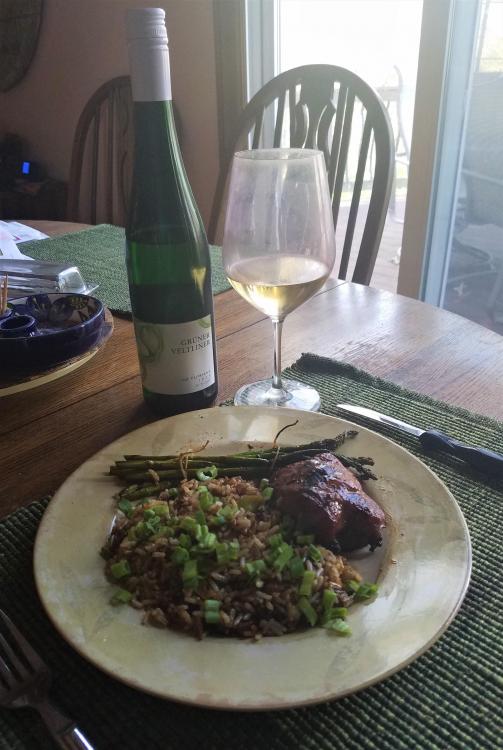
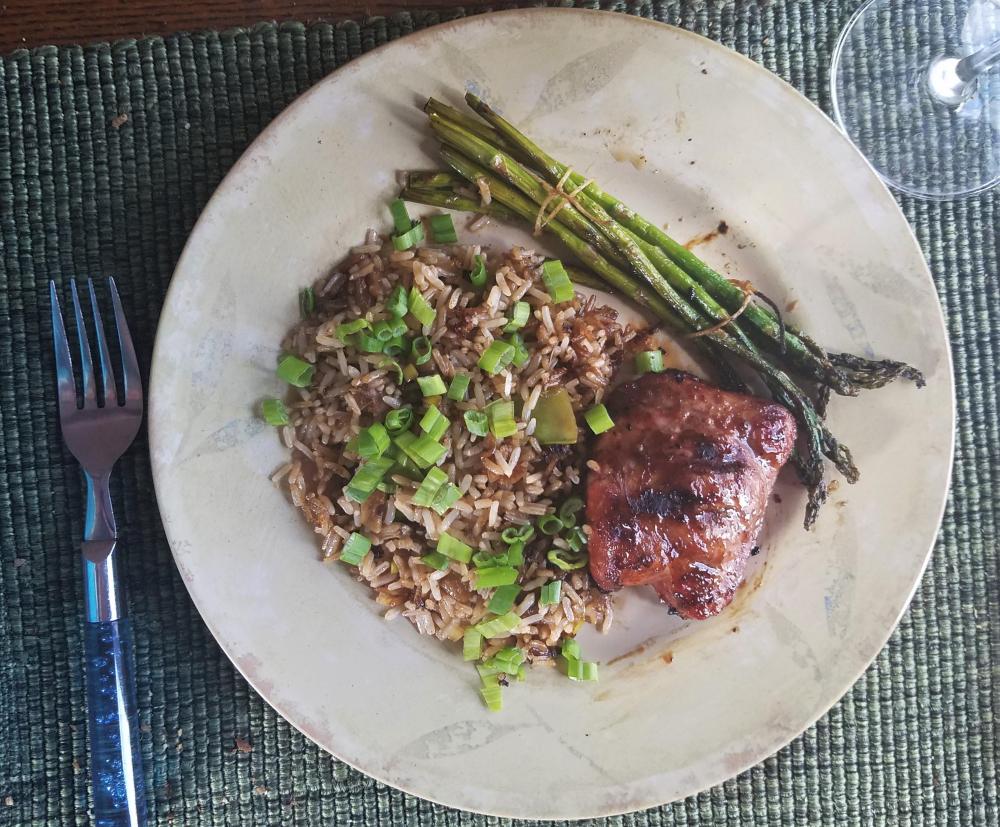
Korean Pork Tenderloins - direct, main grate @ 325F, with peach wood chunks. Marinade was Bulgogi with some pineapple hot sauce. Basted the tenderloins a couple of times during the cook. A bundle of asparagus for good measure. Plated with some pineapple fried rice (see the connection with the marinade hot sauce!) Did the fried rice in the paella pan to get a nice crust.
 1 point
 -
Roadkill over a pan of root veg on the 23.
 1 point
 -
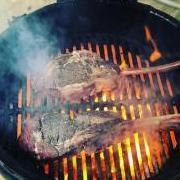
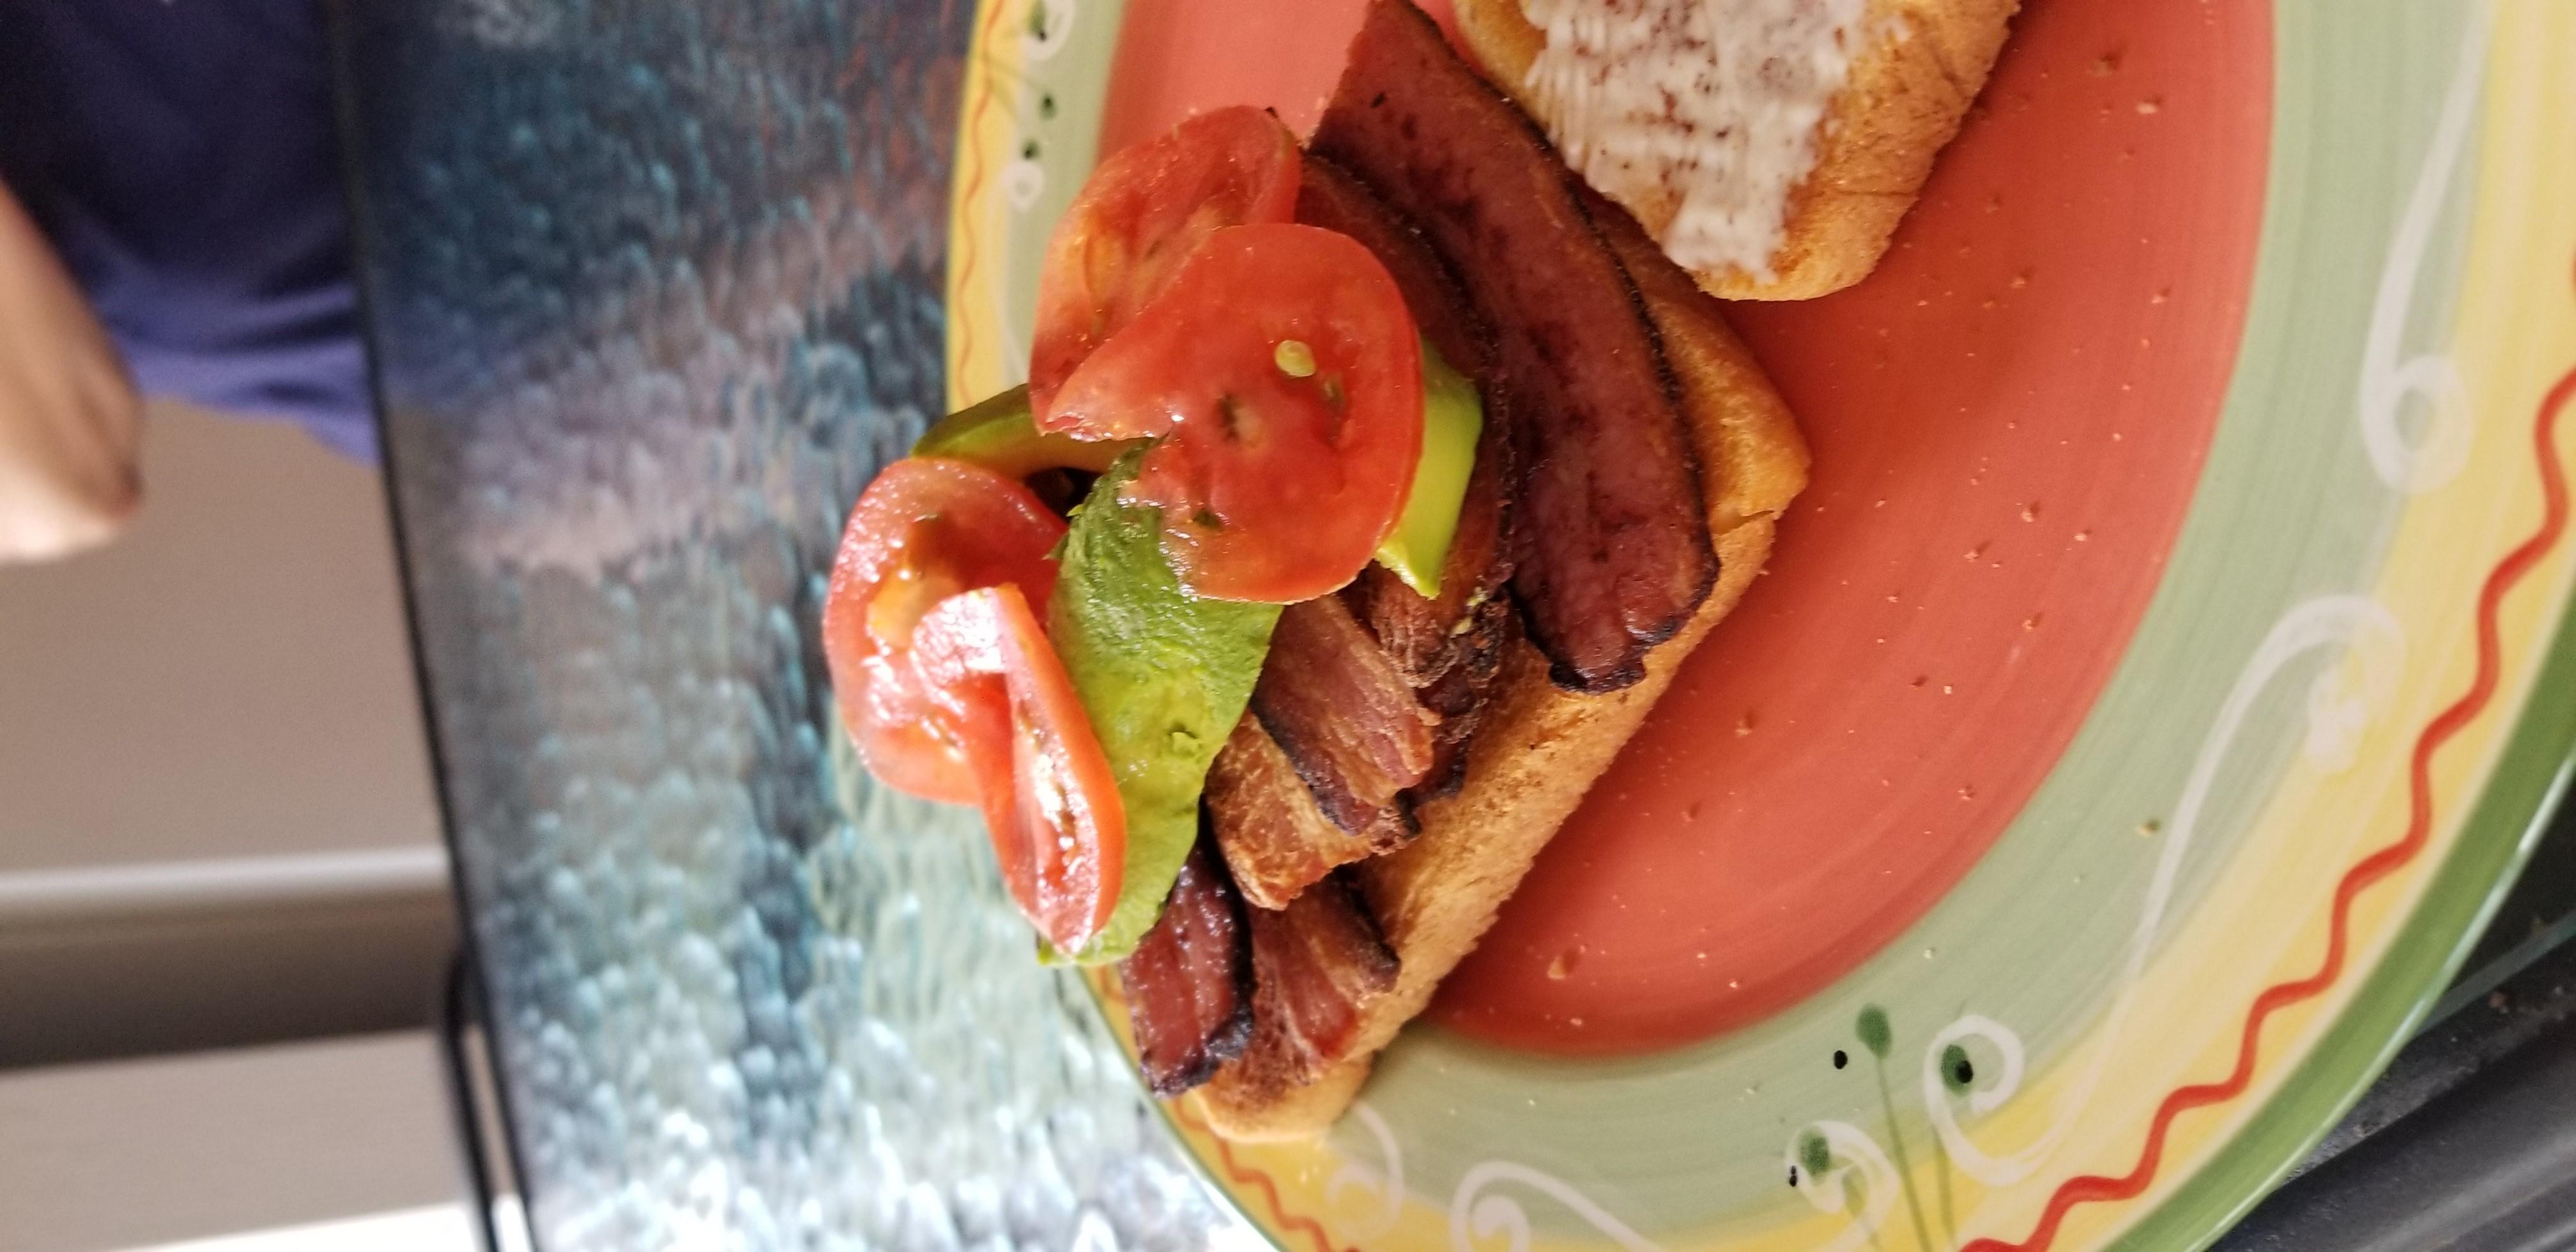
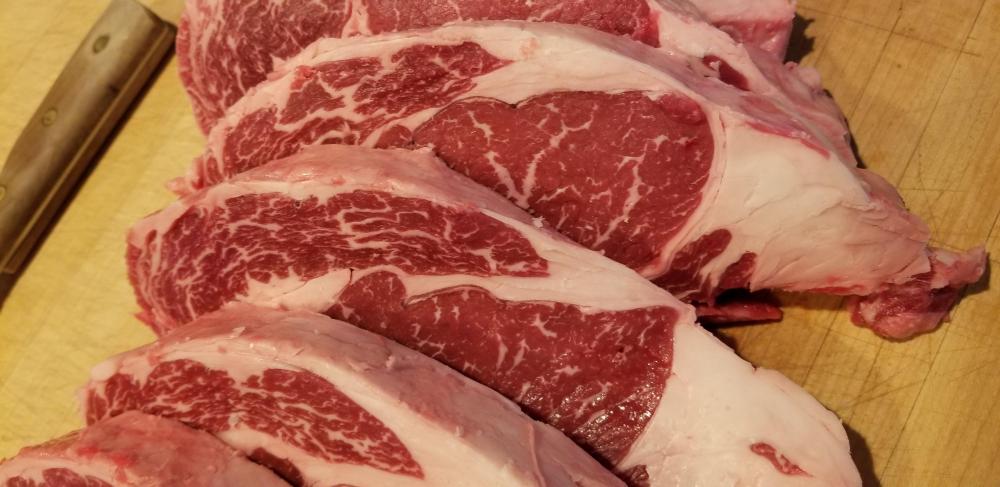
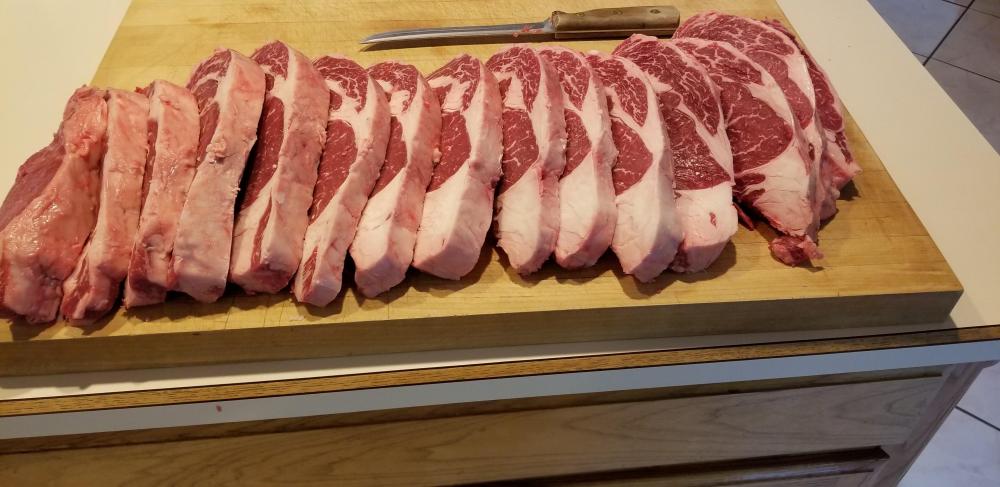
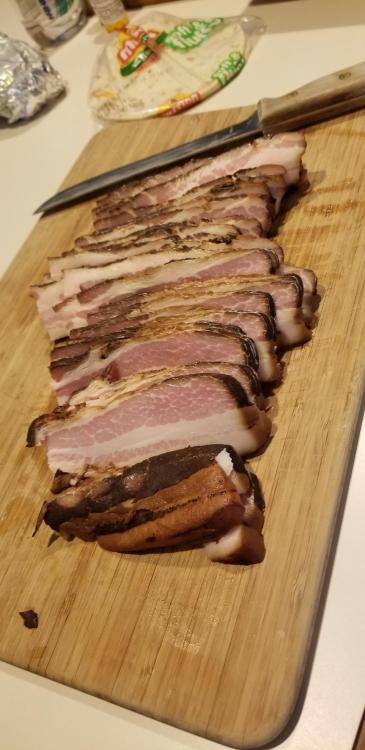
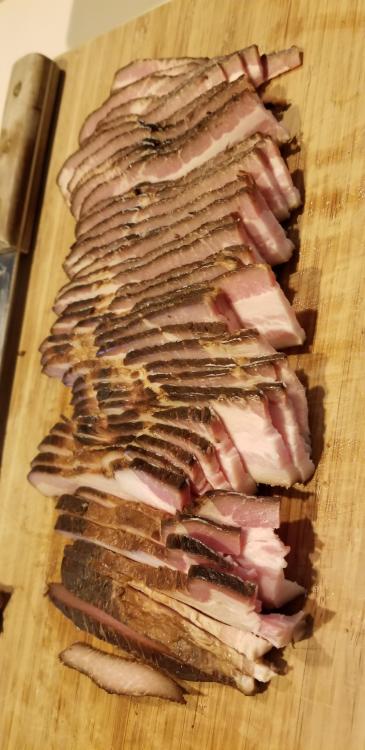
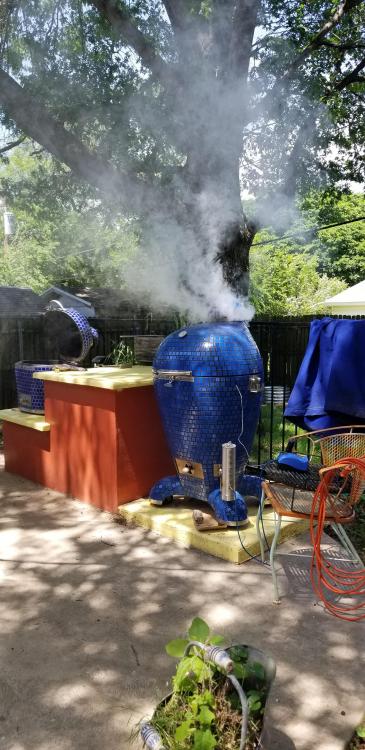
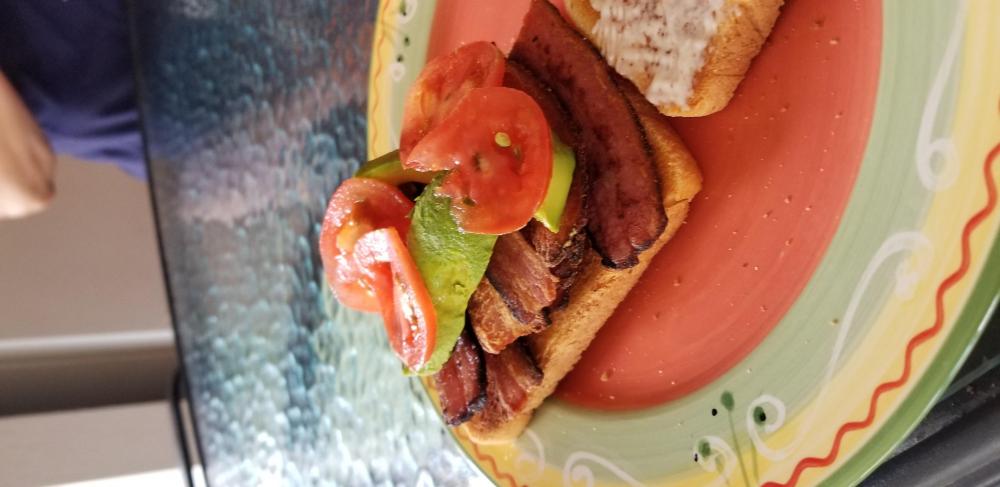
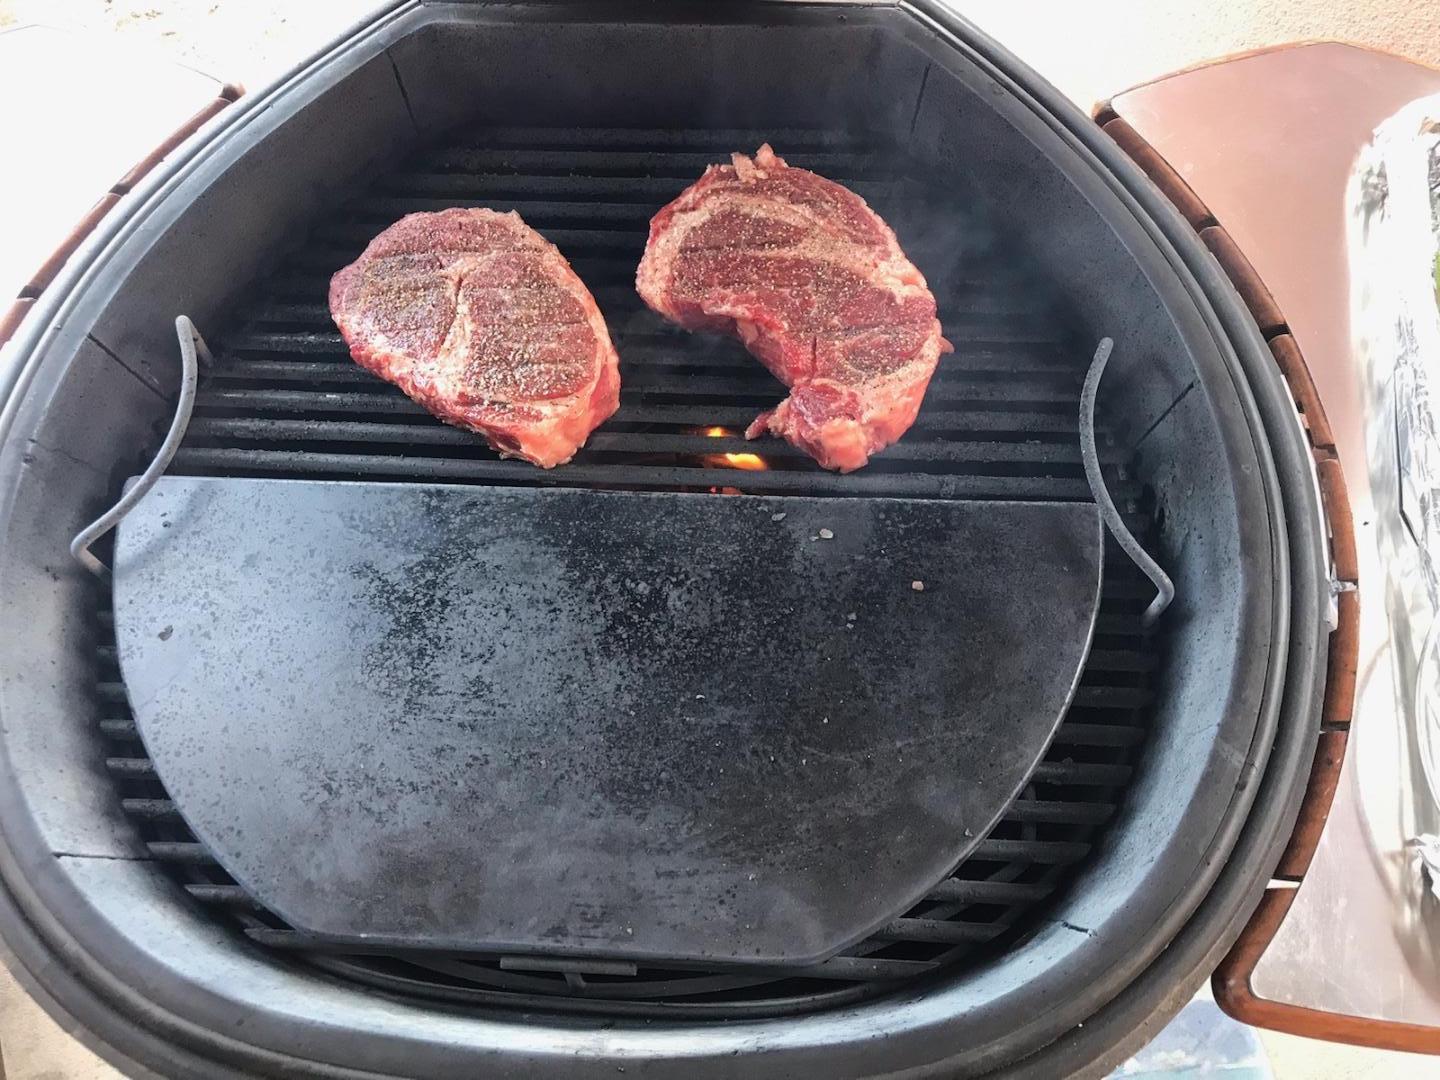
Went to the restaurant supply on Friday and picked up this 17 lb. choice angus ribeye. It is very delicious, I was hungry and forgot to take a pic of the finished steak. Saturday I had half a pork belly ready to smoke. Sliced the bacon yesterday, it turned out very nice. Cold smoked 3hrs, lit the grill to hot smoke to an IT of 130 This pic is a huge rookie mistake 🤪, make sure you have your drip pan/ foil under your meat! I had to pull the rack out of the grill to let the missed fat cook off. B.A.T. sandwich And todays roadkill turkey Kook on fellow KK'ers

 1 point
 -
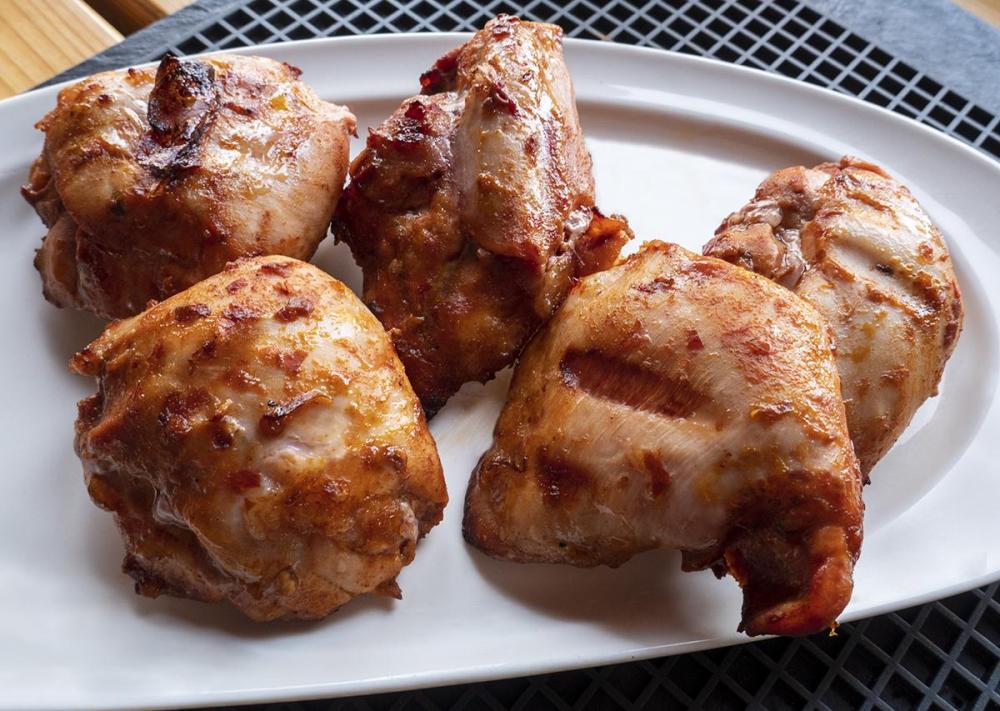
Chook turned out great..... Sent from my SM-T835 using Tapatalk1 point
-
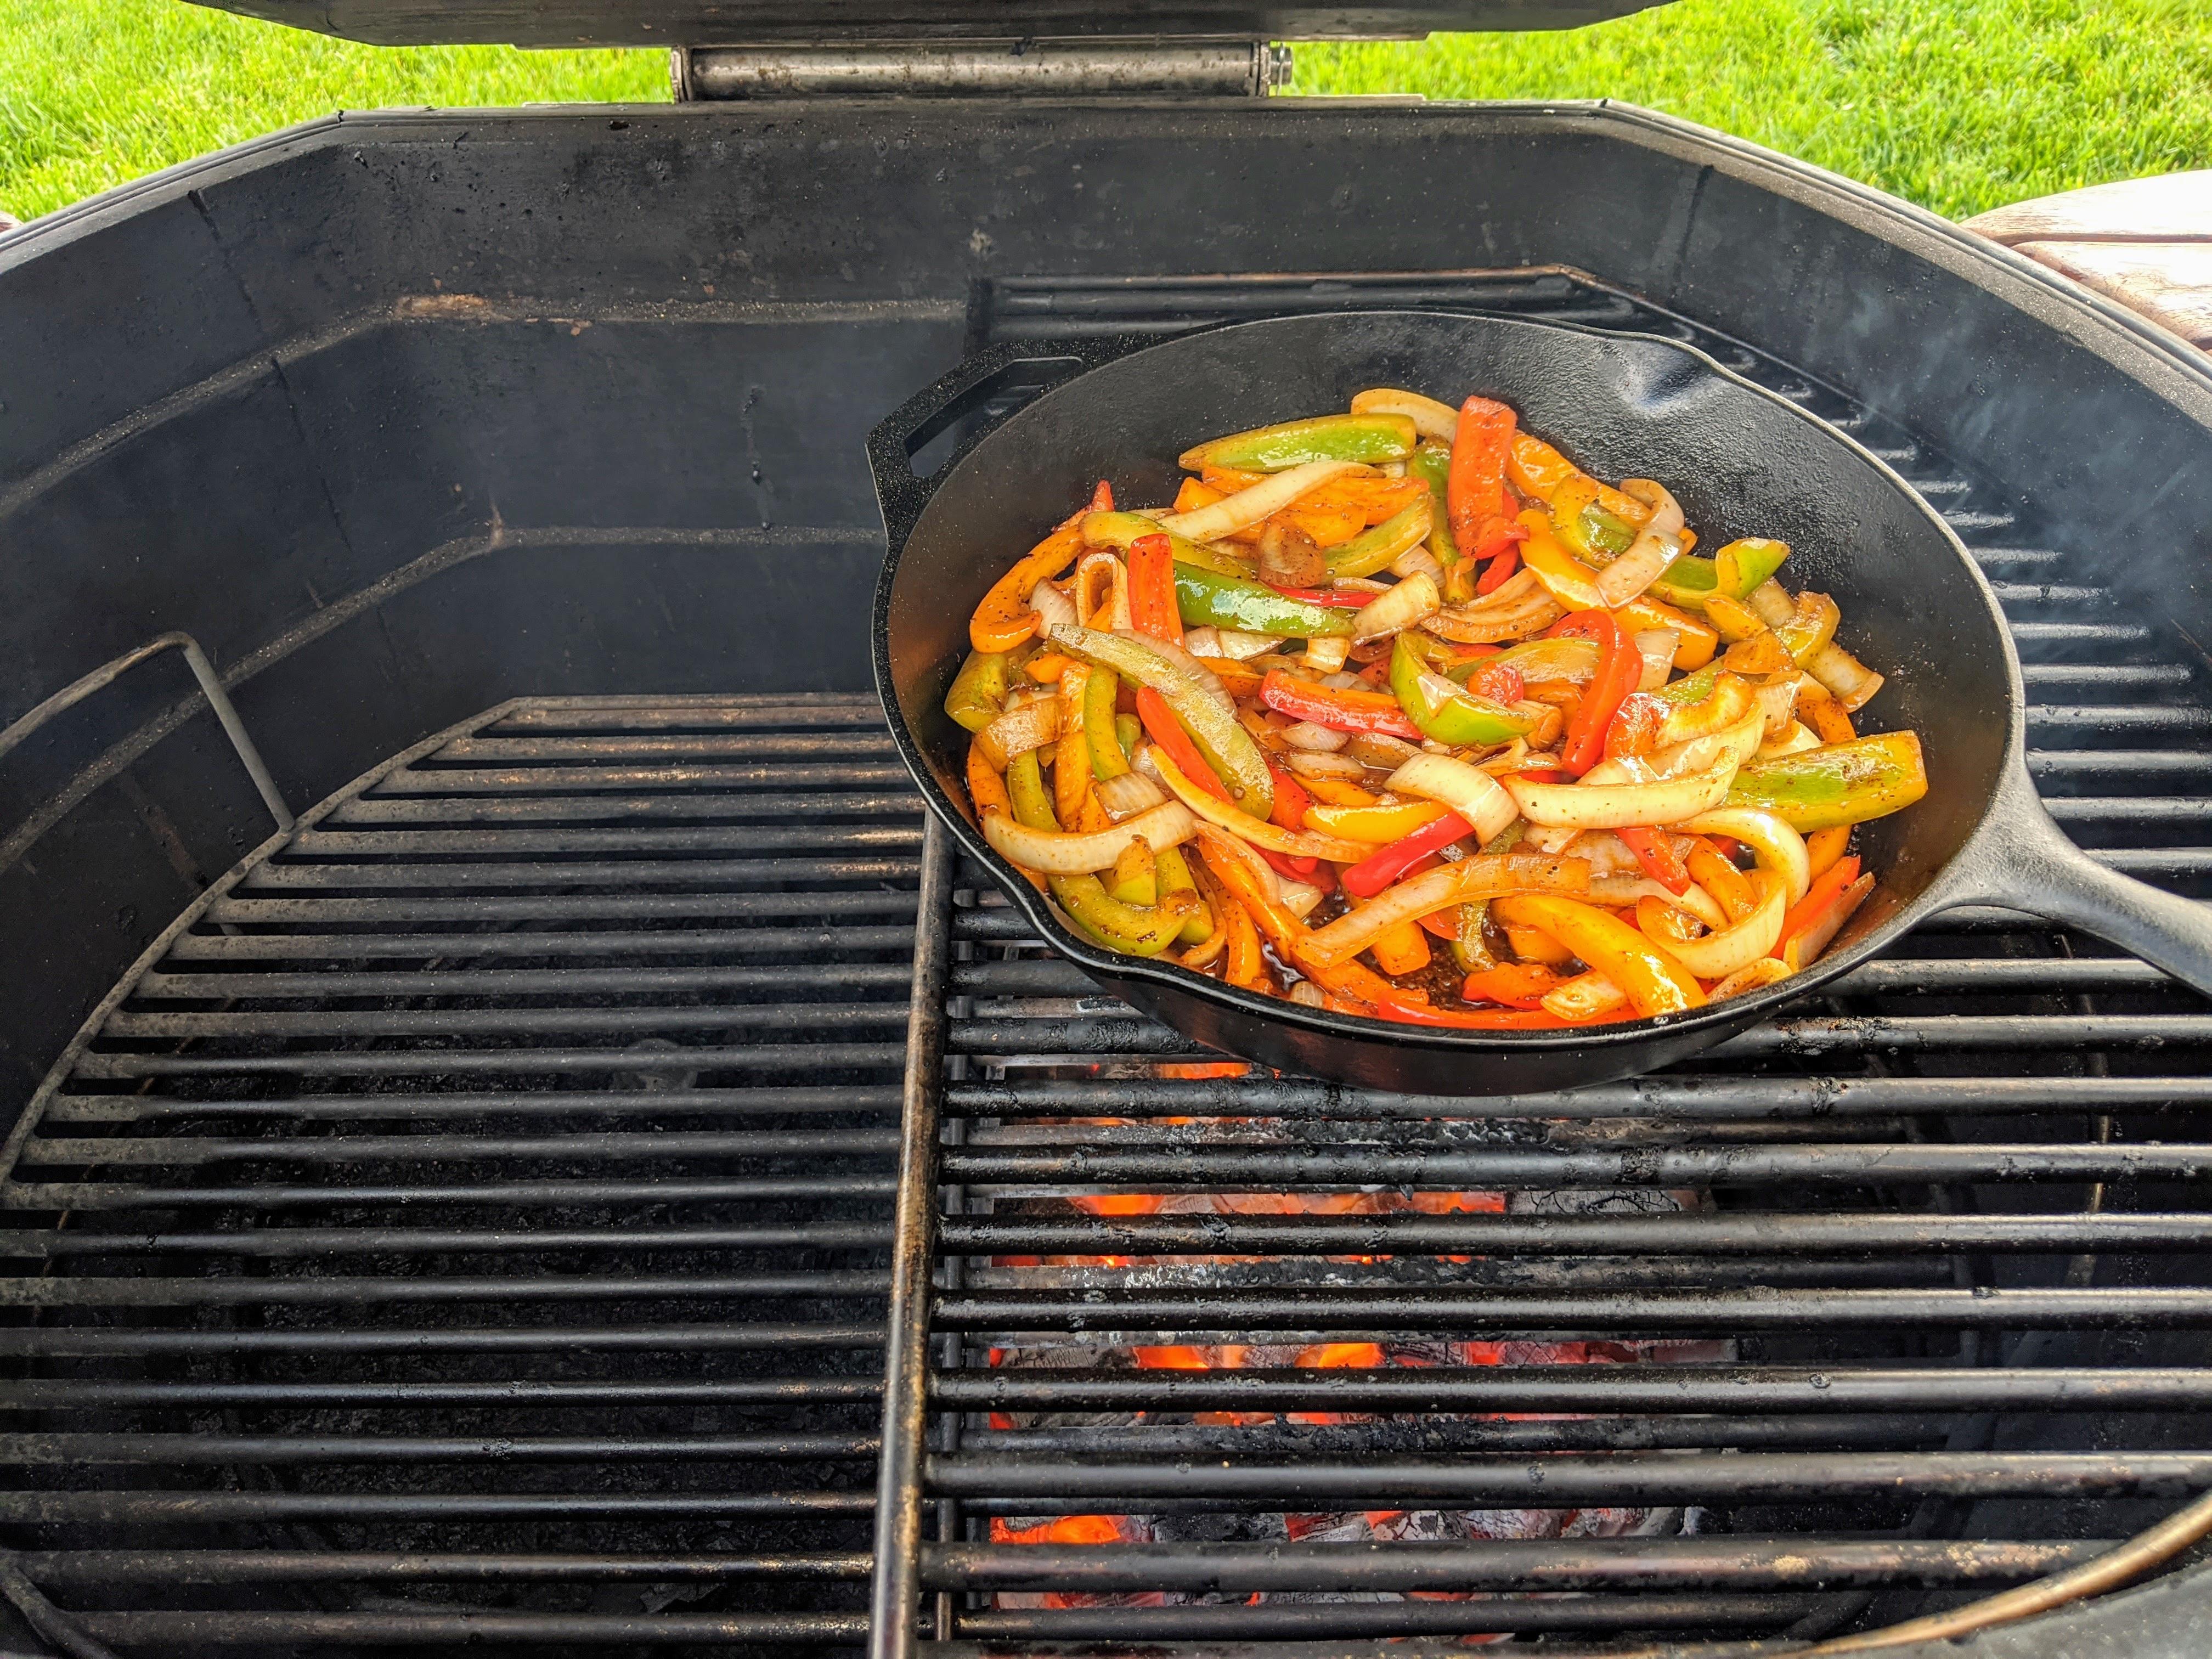
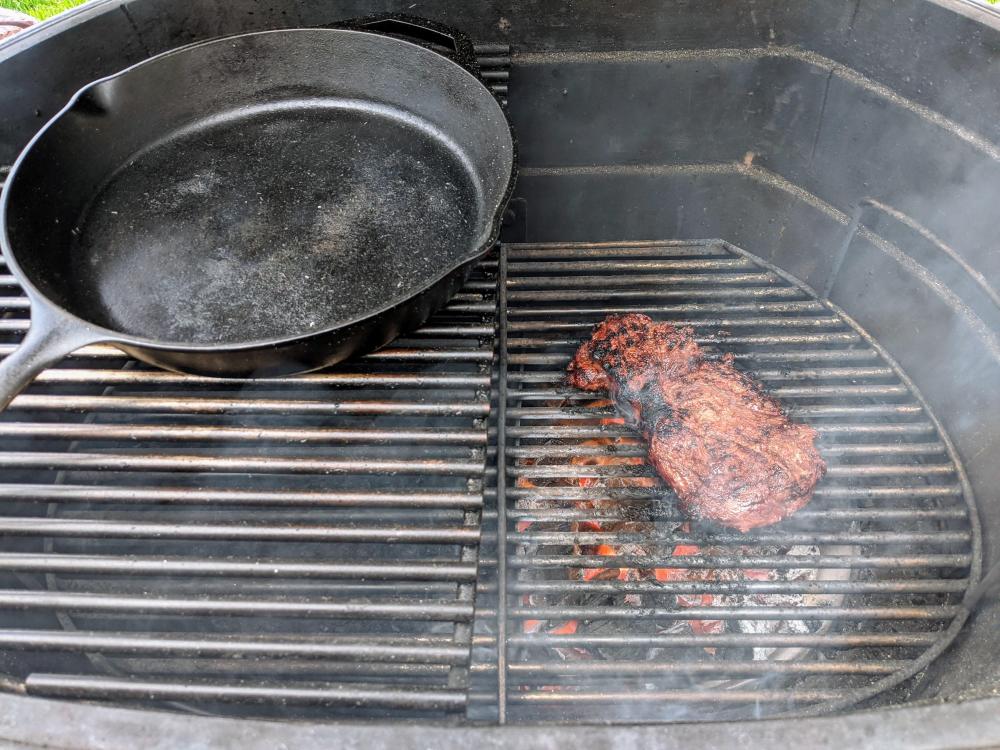
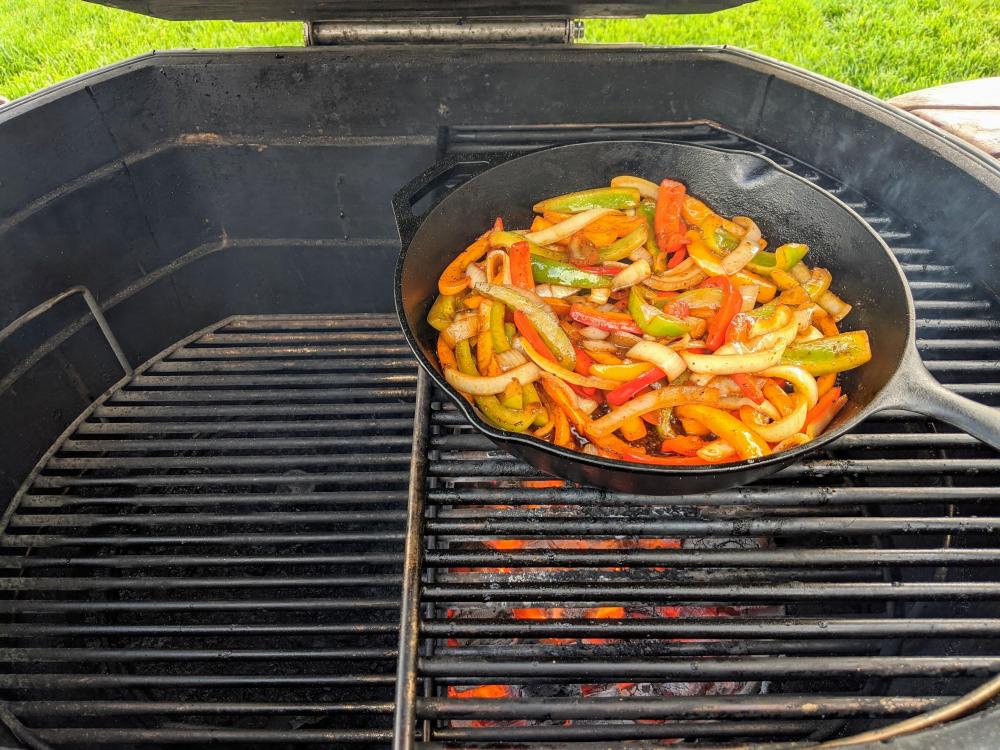
Fajita night. Tenderloin nose pounded flat and seared like skirt or flank. Cures what ails ya. Meat! Veg! Profile shot! Done!
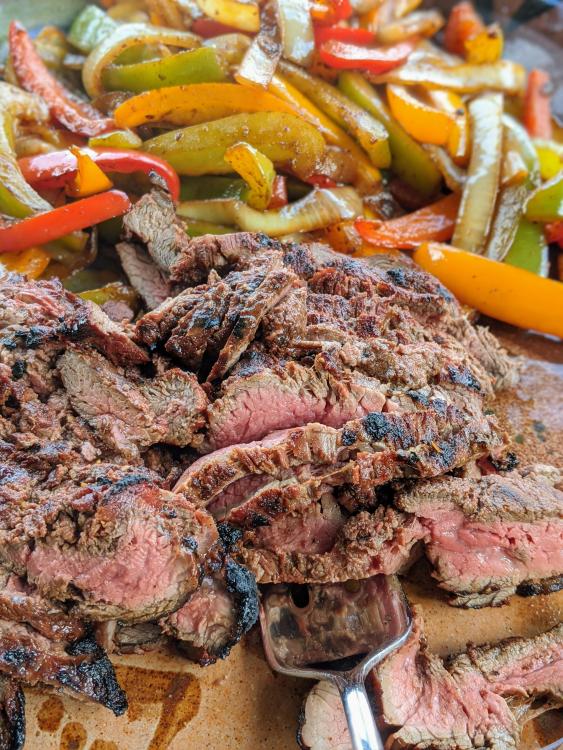 1 point
 -
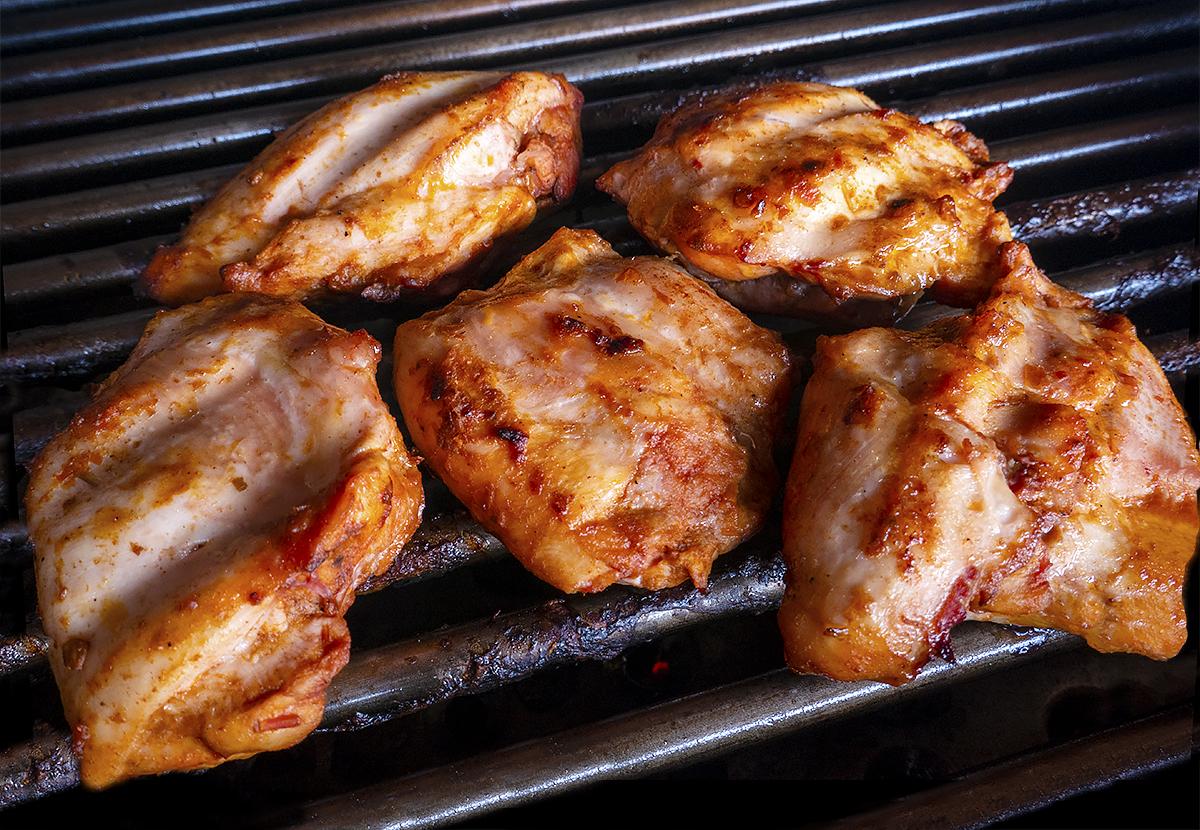
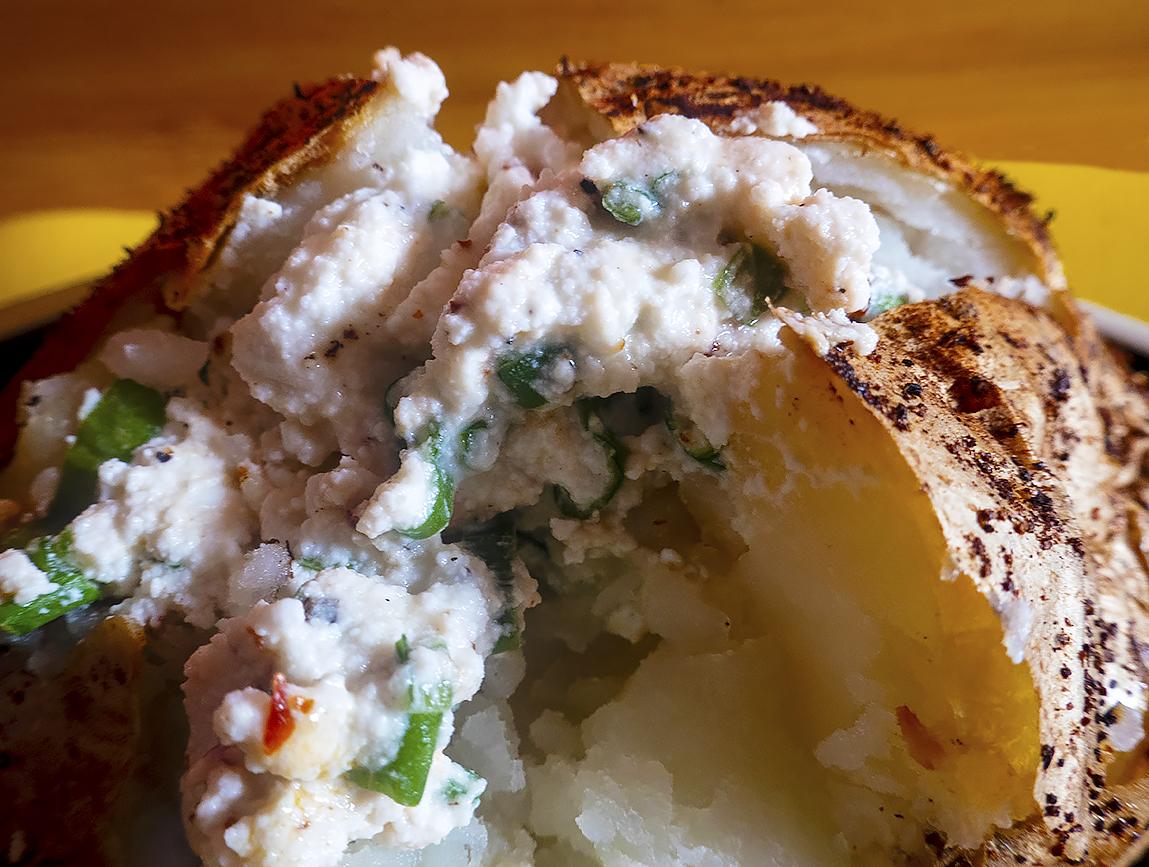
Boneless skinless chicken thighs on the grill baking potatoe being air fried and previously grilled cabbage for dinner today. Stuffed the potatoe with ricotta, onion greens, pepper, smoked paprika and a little Silk chili.

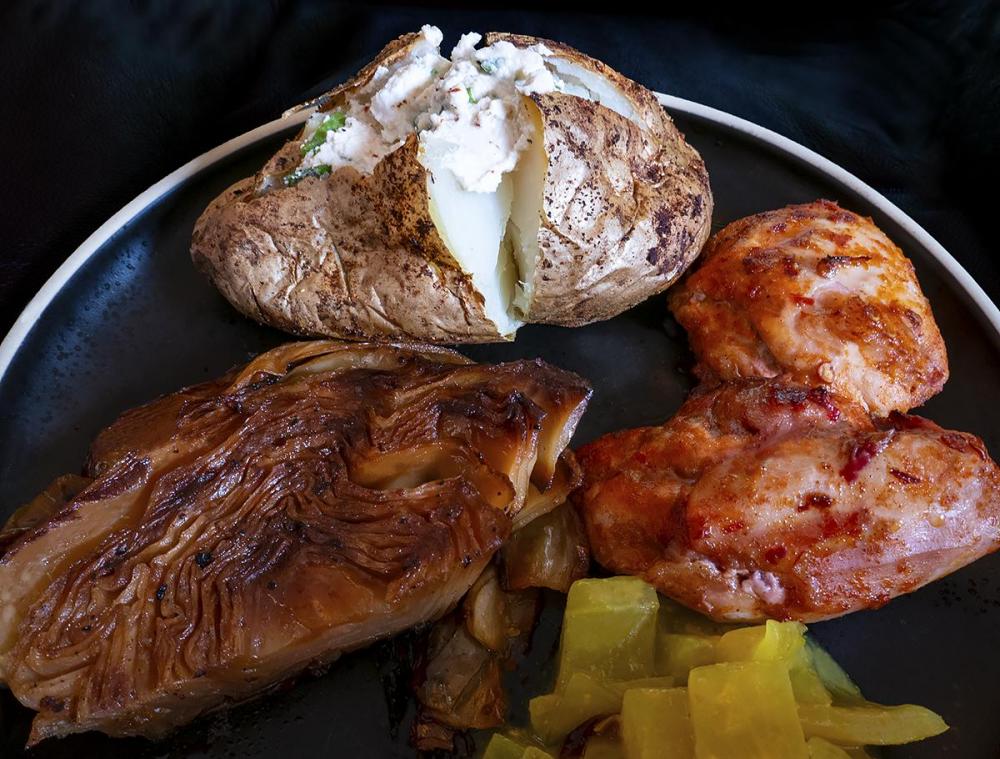
 1 point


Bull.thumb.jpg.50d347aabd71178c9d9a16b7663cfa1a.jpg)